If you’re looking for a dish that’s both comforting and effortlessly elegant, sauteed mushrooms with spinach will quickly become your go-to. Whether you need a quick weeknight side or a flavorful addition to your dinner spread, this recipe delivers rich, earthy flavors in every bite. Plus, it’s versatile enough to pair with almost anything—imagine it alongside a juicy steak or folded into creamy pasta. Best of all, you likely have most ingredients waiting in your kitchen already.
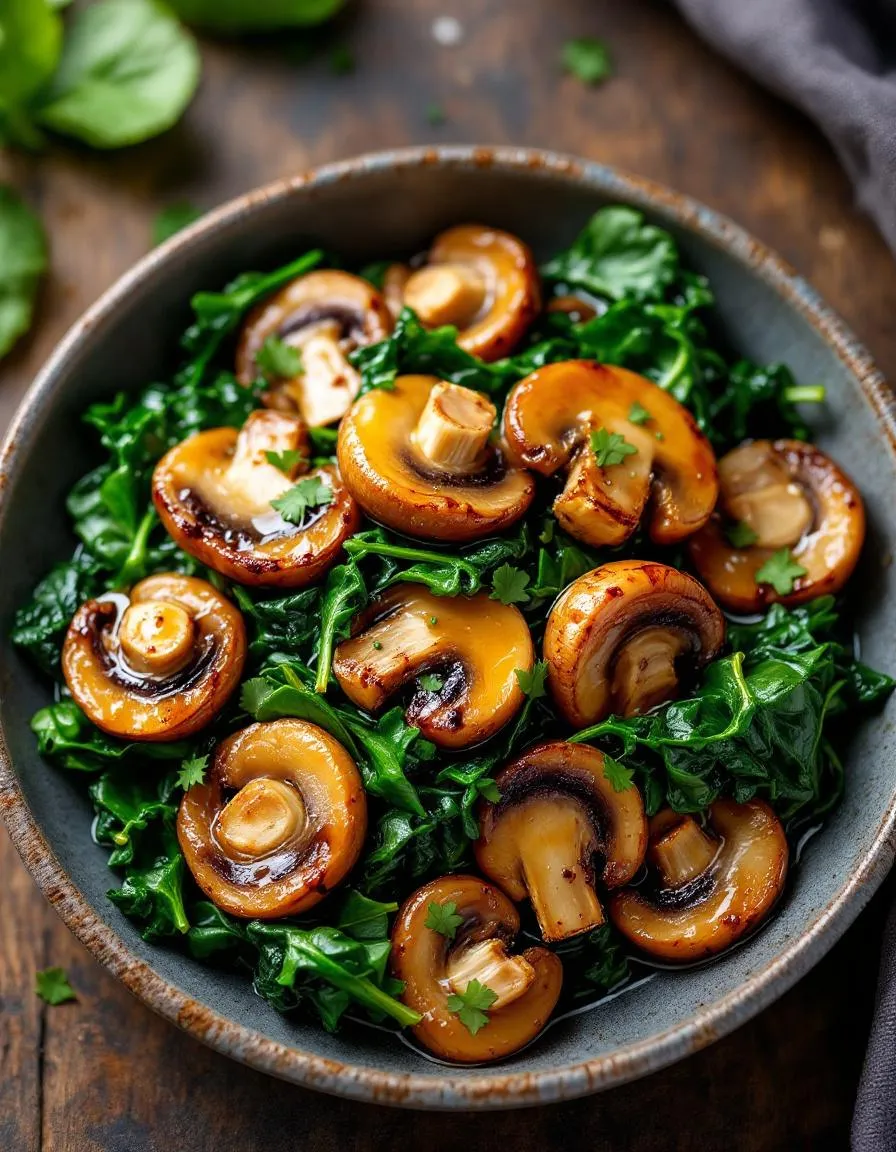
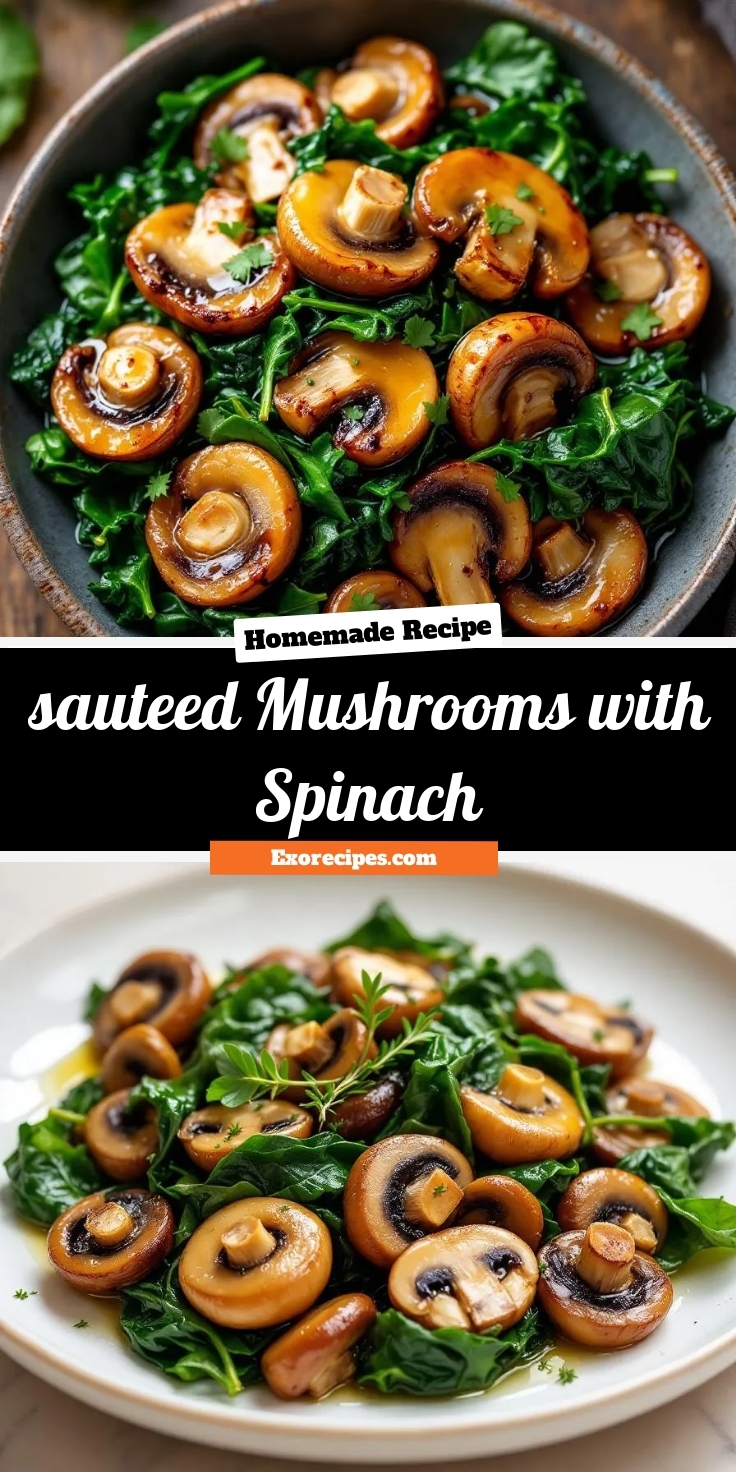
Sauteed mushrooms with spinach is a simple yet deeply satisfying dish that celebrates the natural flavors of its two star ingredients. The mushrooms caramelize into savory perfection, while the spinach adds a fresh, vibrant contrast. This combination isn’t just delicious—it’s also packed with nutrients, making it a guilt-free way to elevate any meal. On brekcakes.com, we believe food should be approachable and joyful, and this recipe embodies that philosophy. It’s quick enough for busy nights but impressive enough for gatherings. If you love easy, flavor-packed dishes, you’ll adore our garlic butter shrimp or roasted vegetable medley too.
Why I Love This Recipe
Sauteed mushrooms with spinach holds a special place in my heart because it reminds me of cozy family dinners growing up. My mom would whip it up as a side, and I’d always sneak extra helpings. Now, I love how it brings that same warmth to my own table—especially on hectic days when I need something nourishing and fast. The aroma alone takes me back to those cherished moments, and I hope it becomes a staple in your kitchen too.
Health and Nutrition
Why it’s good for your body
Sauteed Mushrooms with Spinach packs a powerful nutritional punch while tasting delicious. First, mushrooms provide a rich source of antioxidants like selenium, which helps protect your cells from damage. Additionally, spinach delivers a hefty dose of iron and vitamin K, supporting blood health and bone strength. Together, these ingredients create a dish that fuels your body with essential nutrients.
Moreover, sauteed Mushrooms with Spinach offers a low-calorie yet satisfying option. The fiber from spinach keeps you full longer, while mushrooms add a meaty texture without excess fat. As a result, this dish helps manage hunger and supports weight management. Transitioning to healthier meals becomes easier when flavors are this vibrant.
Finally, this combination boosts your immune system. Mushrooms contain beta-glucans, which enhance immunity, and spinach provides vitamin C for added defense. Whether you enjoy it as a side or main dish, sauteed Mushrooms with Spinach keeps your body strong and energized. Plus, the simple cooking method preserves most nutrients, making every bite count.
How it fits in a healthy lifestyle
Sauteed Mushrooms with Spinach fits seamlessly into various dietary goals. For gluten-free eaters, it’s a naturally safe choice that doesn’t sacrifice flavor. If you’re focusing on heart health, the dish’s low sodium and high potassium content help maintain healthy blood pressure. You can also pair it with lean proteins like grilled chicken for a balanced meal.
This recipe works well for meal prep too. Whip up a batch at the start of the week and add it to lunches or dinners. For more high-protein ideas, check out our guide on high-protein vegetarian meals. And if you’re exploring other nutrient-dense sides, our roasted vegetable combinations offer great variety. Sauteed Mushrooms with Spinach keeps eating healthy simple and delicious.
A simple and flavorful side dish featuring tender mushrooms and fresh spinach, sautéed with garlic and herbs.
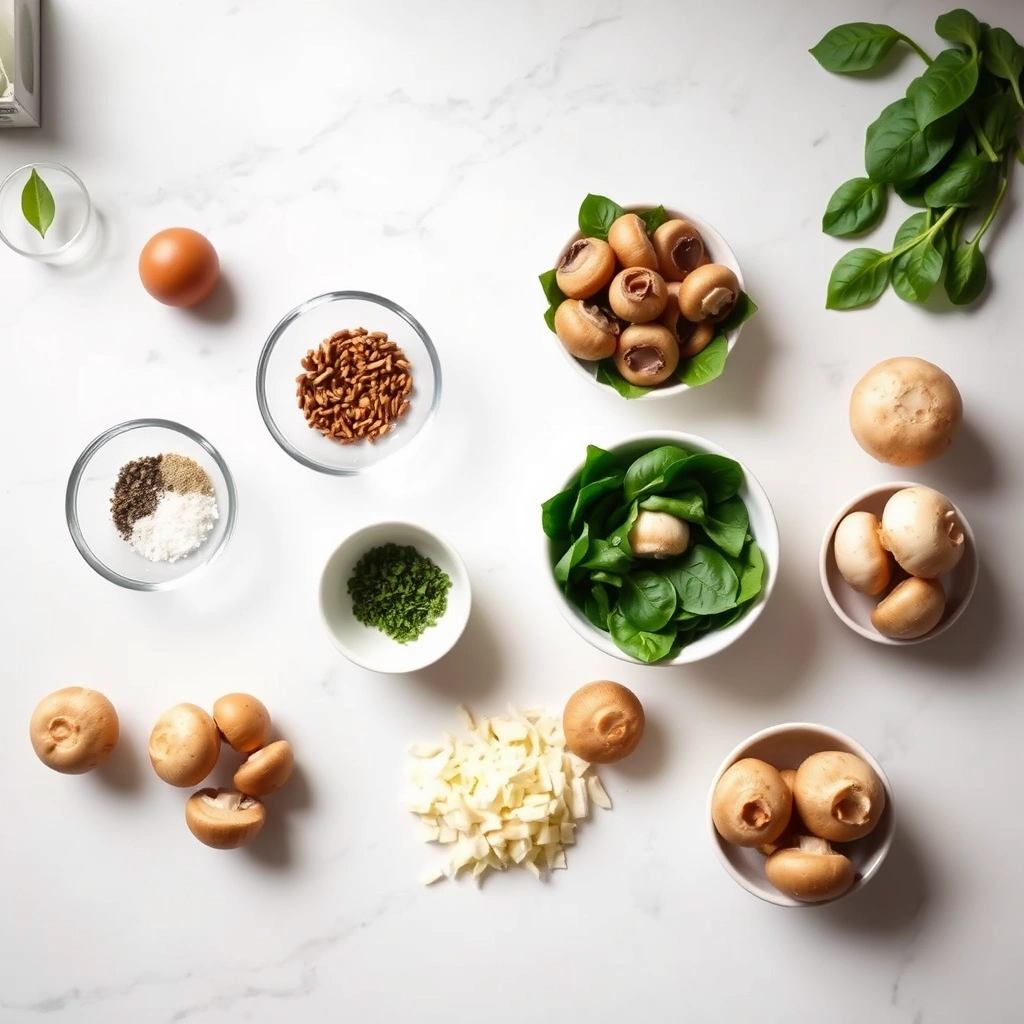
Ingredients
Scale
For the Crust:
2 cups sliced mushrooms
4 cups fresh spinach
2 cloves garlic, minced
2 tablespoons olive oil
1 teaspoon dried thyme
Salt and pepper to taste
1 tablespoon lemon juice
Instructions
1. Prepare the Crust:
Heat olive oil in a large skillet over medium heat.
Add mushrooms and sauté for 5-6 minutes until they start to brown.
Add minced garlic and thyme, stirring for 1 minute until fragrant.
Add spinach and cook until wilted, about 2-3 minutes.
Season with salt, pepper, and lemon juice. Stir well and serve.
Notes
You can customize the seasonings to taste.
How to Prepare This Dish
Steps and time-saving tips
Start by heating a large skillet over medium heat and drizzle in a tablespoon of olive oil. Once the oil shimmers, add sliced mushrooms in a single layer—don’t overcrowd the pan, or they’ll steam instead of brown. Let them cook undisturbed for 3-4 minutes until golden, then stir occasionally until tender. Meanwhile, mince garlic and set it aside to save time. Push the mushrooms to one side of the skillet, add another drizzle of oil, and toss in the garlic for just 30 seconds until fragrant. Quickly fold in fresh spinach and stir until it wilts, which takes about 2 minutes. For extra flavor, sprinkle in a pinch of red pepper flakes or a splash of lemon juice. If you’re short on time, pre-slice the mushrooms and wash the spinach the night before. Serve your sauteed mushrooms with spinach warm, topped with a sprinkle of parmesan or alongside crusty bread.
and-learned-from">Mistakes I’ve made and learned from
I used to overcrowd the skillet, thinking I could cook all the mushrooms at once—big mistake. They released too much moisture and turned soggy instead of caramelizing. Now I cook them in batches or use a wider pan. Another lesson? Adding garlic too early burns it fast, leaving a bitter taste. I wait until the mushrooms are nearly done before tossing it in. If you’ve struggled with timing, my guide on perfectly cooked vegetables has more fixes. Also, underseasoning was a common issue until I started tasting as I cooked. For more seasoning tricks, check out my flavor-balancing tips. Trust me, a little patience makes this dish foolproof.
Cultural Connection and Variations
Where this recipe comes from
Sauteed Mushrooms with Spinach has roots in many cultures, each adding its own twist to this simple yet flavorful dish. In Mediterranean kitchens, cooks often pair earthy mushrooms with vibrant spinach, garlic, and a splash of olive oil for a quick, nutritious side. Meanwhile, in Eastern Europe, you might find it simmered with sour cream or dill for a richer, heartier version. My grandmother, for instance, always added a pinch of smoked paprika, turning it into a smoky, comforting staple at family gatherings.
Across Asia, chefs migh
t stir-fry the duo with ginger and soy sauce, proving how versatile sauteed Mushrooms with Spinach can be. In Italy, it’s not uncommon to see them tossed with pasta or layered into lasagna. Even in my home, we tweak the recipe seasonally—adding cherry tomatoes in summer or walnuts in fall for extra crunch. No matter where you go, this dish adapts beautifully, reflecting local tastes and traditions.
How it fits in today’s cooking
Today, sauteed Mushrooms with Spinach remains a go-to for busy cooks and health-conscious eaters alike. It’s a star at holiday tables, often served alongside roasted meats or as a vegetarian main. Many modern kitchens, like those featured in our quick weeknight dinners collection, rely on it for its speed and versatility. Plus, with plant-based diets on the rise, it’s a flavorful way to pack in nutrients without sacrificing taste.
Some cooks even blend it into meal prep routines, storing batches for easy lunches. Others, inspired by our seasonal ingredient guide, swap in wild mushrooms or baby spinach for a gourmet touch. Whether you’re craving comfort or aiming for a light, fresh side, sauteed Mushrooms with Spinach fits seamlessly into today’s culinary landscape.
>Taste and Texture
What makes it delicious
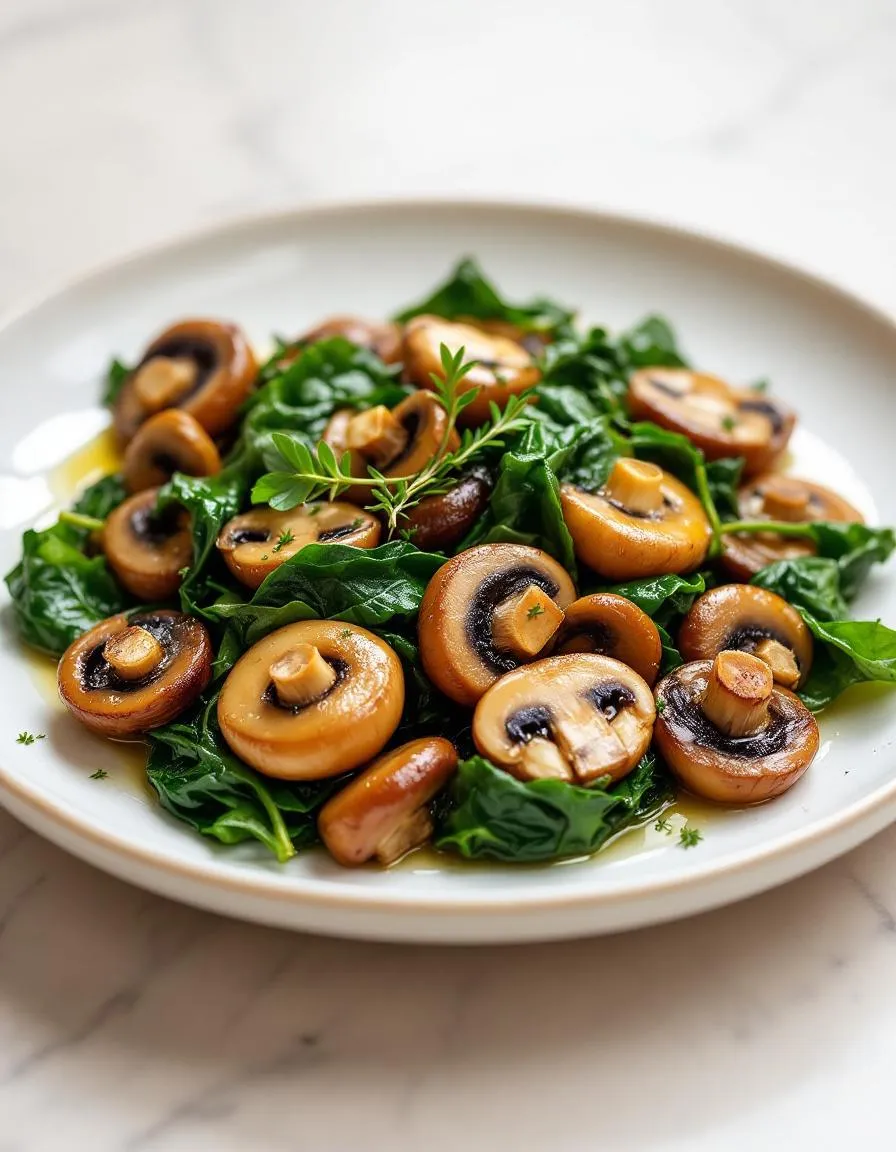
Sauteed mushrooms with spinach deliver a rich, earthy flavor that feels both hearty and wholesome. The mushrooms caramelize into tender, meaty bites, while the spinach wilts into a silky, vibrant green contrast. Garlic and butter infuse every forkful with a fragrant, savory depth, and a hint of lemon zest brightens the dish. Each bite of sauteed mushrooms with spinach offers a satisfying mix of textures—chewy mushrooms, melt-in-your-mouth spinach, and a subtle crispness from golden edges. Together, they create a comforting yet elegant balance.
Boosting the flavor
Elevate your sauteed mushrooms with spinach by stirring in a splash of white wine for a tangy, aromatic twist. Crumbled feta or grated Parmesan adds a salty, creamy finish, while toasted pine nuts bring crunch. For extra warmth, sprinkle smoked paprika or fresh thyme. Pair it with a drizzle of garlic herb sauce or serve alongside roasted garlic bread to soak up every flavorful bite. Small tweaks make this dish even more irresistible.
Tips for Success
Best practices for results
First, always slice your mushrooms evenly so they cook at the same rate. Next, preheat your pan properly to avoid steaming instead of sautéing. For the best flavor, use a mix of butter and olive oil when cooking your sautéed Mushrooms with Spinach. Additionally, add the spinach at the very end to keep it vibrant and tender. Finally, season with salt only after the mushrooms develop a golden-brown color to prevent excess moisture.
Mistakes to avoid
Avoid overcrowding the pan, as this causes mushrooms to release too much liquid and turn soggy. Instead, cook them in batches if needed. Also, don’t skip deglazing the pan with a splash of broth or wine—it lifts flavorful bits for a richer sautéed Mushrooms with Spinach dish. For more on perfecting veggie textures, check out our guide to cooking vegetables right. Lastly, remember that overcooking spinach makes it mushy; for timing tips, see our spinach recipes.
Serving and Pairing Suggestions
How to serve this dish
For a stunning presentation, serve sauteed mushrooms with spinach in a shallow bowl or on a rustic wooden platter. Top with a sprinkle of fresh parsley or microgreens to add color and freshness. Meanwhile, this dish shines as a cozy weeknight side or an elegant addition to holiday gatherings. If you want to impress guests, pair it with crusty bread or arrange it alongside roasted meats. The earthy flavors and vibrant greens make it a versatile choice for brunch, dinner, or even a hearty lunch.
h-it">What goes well with it
Sauteed mushrooms with spinach pair beautifully with a crisp white wine like Sauvignon Blanc, which cuts through the richness of the dish. Alternatively, try serving it with our creamy garlic mashed potatoes for a comforting meal. If you prefer something lighter, a simple arugula salad with lemon vinaigrette balances the earthy flavors perfectly. For more inspiration, check out our roasted garlic hummus or this lemon herb grilled chicken, both of which complement the dish wonderfully.
What’s the best way to sauté mushrooms and spinach together?
Start by sautéing sliced mushrooms in olive oil or butter over medium heat until golden brown. Add fresh spinach in the last 2–3 minutes, stirring until wilted. This keeps the spinach vibrant and prevents overcooking, making your sautéed mushrooms with spinach perfectly tender.
rank-math-faq-item">
Can I use frozen spinach for sautéed mushrooms with spinach?
Yes, but thaw and drain frozen spinach thoroughly to avoid excess moisture. Sauté the mushrooms first, then squeeze out the spinach and add it at the end. This ensures your sautéed mushrooms with spinach stay flavorful and not watery.
What seasonings go well with sautéed mushrooms and spinach?
Garlic, thyme, and a pinch of red pepper flakes add depth to sautéed mushrooms with spinach. Finish with a splash of lemon juice or balsamic vinegar for brightness. Salt and black pepper are essential for balancing the earthy flavors.
How long does sautéed mushrooms with spinach last in the fridge?
Store leftovers in an airtight container for up to 3–4 days. Reheat gently in a pan to revive the texture. Sautéed mushrooms with spinach taste best fresh but still work well for meal prep.
>
Best Garlic Butter Chicken – Juicy & Flavorful
Introduction
If you’re craving a dish that feels like a cozy hug, Garlic Butter Chicken will steal your heart. Picture tender, juicy chicken smothered in a rich, golden sauce that’s bursting with garlicky goodness and a hint of herbs. Whether you’re cooking for a busy weeknight or a special gathering, this recipe delivers comfort without compromise. Plus, it pairs perfectly with so many sides—just like my favorite garlic mashed potatoes or a crisp green salad.
Garlic Butter Chicken is more than just a meal—it’s a celebration of simplicity and flavor. The dish combines succulent chicken breasts or thighs with a velvety butter sauce infused with fresh garlic, parsley, and a splash of lemon for brightness. What makes it stand out? First, it’s incredibly versatile. You can serve it over pasta, rice, or even crusty bread to soak up every drop of that irresistible sauce. Second, it’s quick enough for weeknights but elegant enough for company. If you’ve ever struggled with dry chicken, this recipe solves that problem by locking in moisture with a quick sear and a buttery finish. For more tips on perfecting poultry, check out my guide on cooking chicken right every time. Trust me, once you try it, Garlic Butter Chicken will earn a permanent spot in your dinner rotation.
Why I Love This Recipe
Garlic Butter Chicken holds a special place in my kitchen because it reminds me of Sunday dinners with my family. My dad used to make a similar dish, and the smell of garlic sizzling in butter would bring everyone running to the table. Now, whenever I cook it, I feel that same joy—the kind that comes from sharing something delicious with the people you love. It’s a recipe that never fails to impress, yet it’s so approachable that even beginners can master it. That’s the magic of Garlic Butter Chicken: it turns ordinary moments into something unforgettable.
Health and Nutrition
Why it’s good for your body
Garlic Butter Chicken packs a flavorful punch while delivering impressive health benefits. First, garlic contains allicin, a compound known for boosting immunity and reducing inflammation. When you enjoy Garlic Butter Chicken, you get these perks alongside lean protein from chicken, which helps repair muscles and keeps you full longer. Additionally, the dish provides healthy fats from butter, supporting brain function and nutrient absorption.
Moreover, Garlic Butter Chicken offers a balanced mix of macronutrients. The chicken supplies high-quality protein, while garlic and butter contribute antioxidants and healthy fats. Together, these ingredients promote heart health by helping regulate cholesterol levels. Furthermore, garlic’s antimicrobial properties may aid digestion, making this dish as good for your gut as it is for your taste buds.
Finally, Garlic Butter Chicken fits seamlessly into varied diets. Whether you need a protein-rich meal or an immune-boosting dinner, this dish delivers. Its simple yet nutrient-dense ingredients make it a smart choice for anyone looking to eat well without sacrificing flavor.
How it fits in a healthy lifestyle
Garlic Butter Chicken easily aligns with balanced eating habits. For those focusing on high-protein diets, the chicken provides a lean source of fuel to support muscle growth and recovery. If you prefer gluten-free meals, this dish naturally fits the bill, especially when paired with roasted vegetables or a fresh salad.
Heart-healthy eaters will appreciate the benefits of garlic and moderate butter use, which can help maintain healthy cholesterol levels. For meal preppers, Garlic Butter Chicken stores well, making it a practical option for busy weeks. Pair it with our nutritious side dishes for a complete meal, or explore our meal prep guide to streamline your routine. With its versatility and nutrient profile, this dish proves that eating well can be both simple and delicious.
Start by seasoning your chicken breasts generously with salt, pepper, and a pinch of paprika for extra flavor. Meanwhile, preheat your skillet over medium-high heat and melt a tablespoon of butter. Once the butter sizzles, add the chicken and sear each side for about 5 minutes until golden brown. While the chicken cooks, whisk together minced garlic, melted butter, and a splash of lemon juice in a small bowl. Once the chicken is nearly done, drizzle the garlic butter mixture over the top and let it simmer for another 2 minutes to soak up all that rich flavor. For a time-saving hack, prep the garlic butter sauce ahead and store it in the fridge—just reheat gently before using. Serve your Garlic Butter Chicken over a bed of steamed veggies or fluffy rice, and garnish with fresh parsley for a vibrant finish. If you’re short on time, use pre-minced garlic or a garlic press to speed up prep without sacrificing taste.
Mistakes I’ve made and learned from
One mistake I used to make with Garlic Butter Chicken was overcrowding the skillet, which steamed the chicken instead of giving it that perfect sear. Now, I cook in batches or use a larger pan to ensure each piece gets crispy edges. Another lesson? Don’t skip resting the chicken after cooking—it keeps the juices locked in. I learned this the hard way after serving dry chicken one too many times. For more tips on avoiding common cooking pitfalls, check out my guide on how to sear chicken perfectly. Also, if your garlic butter sauce ever separates, a splash of chicken broth or a quick whisk over low heat can save it. For deeper troubleshooting, my post on fixing broken sauces has saved many dinners!
Garlic Butter Chicken feels like a dish that belongs everywhere and nowhere all at once. Its roots stretch across continents, blending French techniques with American comfort food flair. In France, cooks might prepare a similar dish with white wine and fresh herbs, while in the American South, you’ll find it smothered in Cajun spices or served alongside fluffy biscuits. Either way, Garlic Butter Chicken always delivers rich, savory flavors that feel like home.
My grandmother made her version with extra garlic—enough to ward off vampires, she’d joke—and a splash of lemon to brighten the butter. In Italy, cooks might swap chicken for shrimp or add a handful of sun-dried tomatoes. Meanwhile, in India, chefs often infuse the butter with garam masala for a fragrant twist. No matter where you go, Garlic Butter Chicken adapts, making it a global favorite with endless personality.
ays-cooking">How it fits in today’s cooking
Today, Garlic Butter Chicken holds its own as a weeknight hero and a special occasion star. Busy cooks love it for its quick prep time, while foodies appreciate its gourmet potential. Some modern twists include swapping butter for ghee or adding a kick of chili flakes for heat. It’s also a fantastic pairing for seasonal sides, like roasted Brussels sprouts in winter or a fresh summer salad when the weather warms up.
Families often serve Garlic Butter Chicken during holidays, especially alongside creamy mashed potatoes or buttery rolls. Others keep it simple, tossing it with pasta for a no-fuss dinner. However you make it, this dish fits seamlessly into today’s kitchens. For more inspiration, check out these quick dinner ideas to keep meals exciting. Whether you’re craving comfort or something new, Garlic Butter Chicken never goes out of style.
Taste and Texture
What makes it delicious
Garlic Butter Chicken delivers a rich, savory experience with every bite. The tender, juicy chicken absorbs the fragrant garlic butter sauce, creating a melt-in-your-mouth texture. Meanwhile, the golden sear adds a subtle crispness for contrast. Fresh herbs like parsley brighten the dish, while a squeeze of lemon cuts through the buttery richness. Every forkful of Garlic Butter Chicken bursts with umami depth, thanks to the caramelized garlic and velvety sauce coating each piece.
r">Boosting the flavor
For extra depth, try swapping butter for ghee—it adds a nutty richness without burning. A sprinkle of smoked paprika or red pepper flakes introduces warmth, while a drizzle of chimichurri brings herbaceous freshness. If you love creamy textures, stir in a spoonful of garlic herb yogurt sauce just before serving. Toasting the garlic lightly before blending it into the butter also intensifies its sweetness, making the Garlic Butter Chicken even more irresistible.
Tips for Success
Best practices for results
First, pat your chicken dry before seasoning to help the garlic butter coating stick better. Next, always use fresh minced garlic for the boldest flavor in your Garlic Butter Chicken. Additionally, cook the chicken over medium heat to prevent the butter from burning while ensuring juicy, tender meat. Finally, let the chicken rest for 5 minutes after cooking so the juices redistribute evenly.
>Mistakes to avoid
Avoid overcrowding the pan, as this steams the chicken instead of giving it a golden sear. Instead, cook in batches if needed for even browning. Also, don’t skip resting the Garlic Butter Chicken, or you’ll lose those flavorful juices when slicing. For more on perfecting chicken dishes, check out our guide on how to cook chicken breasts perfectly. Lastly, resist the urge to crank up the heat—low and slow ensures the garlic butter doesn’t turn bitter. Learn more about balancing flavors with our tips on garlic butter sauce secrets.
Serving and Pairing Suggestions
How to serve this dish
Garlic Butter Chicken shines when served fresh and piping hot, with the golden sauce drizzled generously over tender pieces. For a restaurant-worthy presentation, arrange the chicken on a warm platter and garnish with freshly chopped parsley or a sprinkle of red pepper flakes for a pop of color. Meanwhile, family-style serving works perfectly for casual dinners—just place the skillet right on the table for everyone to dig in. Whether you’re hosting a cozy weeknight meal or a festive gathering, this dish adapts beautifully. Try pairing it with crusty bread to soak up every last drop of that irresistible garlic butter sauce.
What goes well with it
For a complete meal, serve Garlic Butter Chicken with fluffy garlic mashed potatoes or a crisp green salad for contrast. The creamy potatoes balance the rich flavors, while a tangy salad cuts through the buttery goodness. If you’re craving something heartier, roasted asparagus or buttery dinner rolls make excellent additions. For drinks, a chilled glass of Sauvignon Blanc or sparkling water with lemon enhances the dish’s brightness. Don’t forget to check out our Garlic Parmesan Roasted Potatoes or Creamy Caesar Salad for perfectly matched sides that elevate every bite.
Garlic Butter Chicken pairs perfectly with roasted vegetables, mashed potatoes, or a fresh garden salad. For a lighter option, try serving it with quinoa or steamed asparagus to complement the rich flavors.
How do you keep Garlic Butter Chicken from drying out?
To prevent Garlic Butter Chicken from drying out, cook it over medium heat and avoid overcooking. Basting the chicken with the garlic butter sauce throughout the cooking process also helps lock in moisture.
rank-math-faq-item">
Can I use boneless chicken thighs for Garlic Butter Chicken?
Yes, boneless chicken thighs work great for Garlic Butter Chicken because they stay juicy and absorb the flavors well. Just adjust the cooking time slightly since thighs may take a bit longer than breasts.
What’s the best way to store leftover Garlic Butter Chicken?
Store leftover Garlic Butter Chicken in an airtight container in the fridge for up to 3 days. Reheat it gently in a skillet with a splash of broth to revive the garlic butter sauce.
Best Marry Me Salmon – Rich and Flavorful Dish
Introduction
If you’ve ever wanted to impress someone special—or simply treat yourself to a restaurant-worthy meal at home—then Marry Me Salmon is the dish for you. This recipe isn’t just delicious; it’s the kind of meal that makes people pause, savor each bite, and maybe even fall in love. Whether you’re cooking for a date night, a family gathering, or just because, this dish delivers flavor, elegance, and a whole lot of heart.
Marry Me Salmon is a creamy, garlicky, sun-dried tomato-infused masterpiece that earned its name for a reason. One bite, and you’ll understand why it’s so irresistible. The tender salmon fillets swim in a rich, velvety sauce that balances tangy, savory, and slightly sweet flavors. Plus, it’s surprisingly easy to make, which means you can enjoy gourmet results without stressing over complicated techniques. If you love dishes that feel indulgent yet approachable, like my Garlic Butter Shrimp Pasta, you’ll adore this recipe. It fits perfectly with the brekcakes.com philosophy of creating meals that are both comforting and unforgettable.
Why I Love This Recipe
Marry Me Salmon holds a special place in my kitchen—and my heart. The first time I made it, my husband joked that he’d marry me all over again just for this dish. Since then, it’s become our go-to celebration meal, whether we’re marking an anniversary or just turning an ordinary Tuesday into something memorable. Every time I prepare it, I’m reminded how food connects us, not just to flavors but to the people we cherish. If you’re looking for more romantic recipes, check out my Chocolate Covered Strawberries for the perfect sweet finish.
Health and Nutrition
Why it’s good for your body
Marry Me Salmon packs a powerful nutritional punch while tasting indulgent. First, salmon delivers high-quality protein to support muscle repair and keep you full longer. Additionally, it’s rich in omega-3 fatty acids, which promote heart health and reduce inflammation. Since Marry Me Salmon features a creamy yet light sauce, you get flavor without excessive calories.
Moreover, this dish includes garlic and herbs, which boost immunity and add antioxidants. The olive oil in the recipe provides healthy fats that aid nutrient absorption. Because Marry Me Salmon balances protein, fats, and subtle sweetness, it satisfies cravings without derailing wellness goals. Finally, salmon contains vitamin D, a nutrient many people lack, making this dish a smart choice for stronger bones and immunity.
How it fits in a healthy lifestyle
Marry Me Salmon fits seamlessly into balanced eating habits. For a heart-healthy meal, pair it with roasted vegetables or a quinoa salad. Since it’s naturally gluten-free, it works well for those avoiding wheat. If you’re focusing on high-protein diets, the salmon alone provides over 20 grams per serving.
You can also prep Marry Me Salmon ahead for busy weeknights, making healthy choices easier. For more gluten-free inspiration, check out our gluten-free dinner ideas. If you love meal prepping, explore our meal prep tips to save time without sacrificing nutrition. Whether you’re cooking for one or a family, this dish adapts to your lifestyle while keeping health in mind.
A delicious and romantic salmon dish with a creamy garlic parmesan sauce that’s sure to impress.
Ingredients
Scale
For the Crust:
4 salmon fillets
2 tbsp olive oil
1/2 tsp salt
1/2 tsp black pepper
1/2 tsp paprika
3 cloves garlic, minced
1 cup heavy cream
1/2 cup grated parmesan cheese
1 tsp Italian seasoning
1/2 cup cherry tomatoes, halved
2 cups fresh spinach
1 tbsp lemon juice
Instructions
1. Prepare the Crust:
Season salmon fillets with salt, pepper, and paprika.
Heat olive oil in a large skillet over medium-high heat. Add salmon and cook for 4-5 minutes per side, until golden and cooked through. Remove from skillet and set aside.
In the same skillet, add minced garlic and sauté for 30 seconds until fragrant.
Pour in heavy cream, parmesan cheese, and Italian seasoning. Stir until the sauce thickens slightly.
Add cherry tomatoes and spinach to the sauce, cooking until spinach wilts.
Return salmon to the skillet, spooning sauce over the fillets. Drizzle with lemon juice before serving.
Start by preheating your oven to 375°F so it’s ready when you finish prepping the Marry Me Salmon. While it heats, whisk together the creamy garlic parmesan sauce in a small bowl—combine mayonnaise, grated parmesan, minced garlic, lemon juice, and a pinch of red pepper flakes for a subtle kick. Pat the salmon fillets dry with paper towels to help the sauce adhere better, then place them skin-side down on a parchment-lined baking sheet. Generously spoon the sauce over each fillet, spreading it evenly with the back of a spoon. For extra flavor, sprinkle chopped fresh herbs like dill or parsley on top. Bake the Marry Me Salmon for 12-15 minutes until the edges turn golden and the fish flakes easily with a fork. If you’re short on time, use pre-minced garlic or jarred lemon juice, but fresh ingredients always elevate the dish. Serve immediately with a side of roasted vegetables or a crisp salad for a complete meal.
Mistakes I’ve made and learned from
I once rushed the prep and didn’t pat the salmon dry, which made the sauce slide right off—now I always take that extra minute to ensure the fillets are bone-dry. Another time, I overbaked the Marry Me Salmon, leaving it dry instead of tender. A reliable oven thermometer fixed that; I learned oven temps can vary wildly, just like with my favorite baking tips. If your sauce seems too thick, thin it with a splash of broth or milk, a trick I picked up from this handy sauce guide. Trust me, these small adjustments make all the difference between good and unforgettable salmon.
Marry Me Salmon earns its name for a reason. Legend says this dish has won over so many hearts that it’s sparked proposals. While its exact origins are hazy, many tie it to romantic home-cooked meals in the American South, where rich, flavorful dishes rule. However, you’ll find similar preparations worldwide. In Scandinavia, for example, they might swap the creamy sauce for dill and mustard, letting the salmon shine in a lighter way. Meanwhile, in Japan, miso-glazed salmon offers a savory-sweet twist.
In my family, Marry Me Salmon became a celebration staple. My aunt added a splash of bourbon to the sauce, claiming it made the dish “unforgettable.” She wasn’t wrong. Regional variations often reflect local tastes. Some cooks in the Mediterranean fold in sun-dried tomatoes and capers, while others in the Midwest keep it simple with a buttery pan sauce. No matter the version, the goal stays the same: to create something so delicious it feels like a special occasion.
ays-cooking">How it fits in today’s cooking
Marry Me Salmon isn’t just for proposals anymore. Today, it fits seamlessly into weeknight dinners and holiday spreads alike. Busy cooks love it because it’s quick but impressive, and ingredient swaps make it adaptable. For example, swapping heavy cream for coconut milk keeps it dairy-free without losing richness. Plus, it pairs perfectly with seasonal sides, like roasted asparagus in spring or a cozy sweet potato mash in fall.
Modern twists keep it fresh. Some home chefs air-fry the salmon for extra crispness, while others layer it over a bed of lemon garlic pasta for a heartier meal. If you’re looking for more ways to elevate your cooking, check out our guide to quick dinner ideas or explore how to balance flavors with our seasonal ingredients tips. Whether you’re cooking for two or a crowd, Marry Me Salmon proves that some classics only get better with time.
Taste and Texture
What makes it delicious
Marry Me Salmon delivers a luxurious bite with its buttery, melt-in-your-mouth texture and rich, savory-sweet flavor. The tender fillet flakes effortlessly, while the golden crust adds a subtle crispness. Garlic and sun-dried tomatoes infuse every bite with a fragrant, umami depth, and a hint of creaminess from the sauce ties it all together. Fresh herbs like basil or thyme brighten the dish, balancing the richness. Whether you serve it over pasta or with crusty bread, Marry Me Salmon promises a restaurant-worthy experience at home.
r">Boosting the flavor
For an extra flavor kick, try swapping the cream for coconut milk to add a tropical twist. A sprinkle of smoked paprika or a drizzle of homemade chili oil can introduce a smoky or spicy note. If you love crunch, top the salmon with toasted pine nuts or crispy fried shallots. Pair it with a tangy side like lemon herb quinoa to cut through the richness. Small tweaks can elevate Marry Me Salmon from delicious to unforgettable.
Tips for Success
Best practices for results
Always pat the Marry Me Salmon dry before seasoning to help the crust crisp perfectly. Use fresh garlic and herbs for the most vibrant flavor, and don’t skip the butter—it adds richness to the dish. Meanwhile, preheat your skillet properly to ensure an even sear without sticking. For extra insurance, check the salmon’s internal temperature with a thermometer; it should reach 145°F for ideal doneness. Finally, let the Marry Me Salmon rest for a few minutes before serving to lock in the juices.
>Mistakes to avoid
Avoid overcrowding the pan when cooking Marry Me Salmon, as this can steam the fish instead of searing it. If you’re unsure about portion sizes, check our guide on how to measure ingredients for accuracy. Another common mistake is overcooking the salmon, which dries it out. Instead, follow our perfect protein timing tips to nail the texture every time. Remember, the salmon will continue cooking slightly after you remove it from heat, so pull it off just before it reaches your desired doneness.
Serving and Pairing Suggestions
How to serve this dish
Marry Me Salmon deserves a show-stopping presentation to match its rich flavors. For a romantic dinner, plate it over creamy mashed potatoes and drizzle the pan sauce generously. Alternatively, serve it alongside a crisp green salad for a lighter yet elegant meal. Garnish with fresh herbs like dill or parsley to add a pop of color and freshness. If you’re hosting a brunch, pair it with fluffy scrambled eggs and toasted artisan bread. No matter the occasion, Marry Me Salmon always impresses with its bold taste and beautiful appearance.
What goes well with it
Elevate your Marry Me Salmon with a refreshing glass of chilled white wine, such as Sauvignon Blanc, which balances the dish’s creamy richness. For sides, try roasted asparagus or garlic butter green beans—their crisp texture contrasts perfectly with the tender salmon. If you love dipping sauces, our creamy dill sauce adds a tangy twist. For a heartier meal, serve it with our Parmesan risotto, which soaks up every drop of the delicious sauce. Each pairing enhances the dish’s luxurious flavors while keeping the meal balanced.
Marry Me Salmon is a creamy, flavorful dish featuring pan-seared salmon in a rich sauce made with sun-dried tomatoes, garlic, and Parmesan. The name comes from its irresistible taste—so good it might inspire a proposal! This dish is perfect for date nights or special occasions.
Why is it called Marry Me Salmon?
The name “Marry Me Salmon” reflects how delicious and impressive the dish is—it’s said to be so good that someone might propose after tasting it. The creamy, savory sauce and perfectly cooked salmon make it a standout meal worthy of special moments.
rank-math-faq-item">
What sides go well with Marry Me Salmon?
Marry Me Salmon pairs beautifully with light, fresh sides like roasted asparagus, garlic mashed potatoes, or a crisp green salad. For a heartier meal, serve it with crusty bread to soak up the delicious sauce.
Can I use frozen salmon for Marry Me Salmon?
Yes, you can use frozen salmon—just thaw it completely and pat it dry before cooking to ensure the best texture. Marry Me Salmon turns out great with high-quality frozen fillets, though fresh salmon will give you the most flavorful results.
Easy Creamy Rotel Pasta with Ground Beef Recipe
Introduction
If you’re craving a dish that’s both comforting and packed with flavor, you’re in the right place. Creamy Rotel Pasta with Ground Beef is one of those meals that feels like a warm hug after a long day. Whether you’re cooking for a busy weeknight or a cozy family gathering, this recipe delivers rich, satisfying flavors with minimal effort. Plus, it’s versatile enough to tweak based on what you have in your pantry, making it a go-to favorite for any occasion.
Creamy Rotel Pasta with Ground Beef combines tender pasta, savory ground beef, and the zesty kick of Rotel tomatoes in a luscious, creamy sauce. This dish matters because it solves the eternal question of what to make when you want something hearty but don’t have hours to spend in the kitchen. It’s a perfect fit for brekcakes.com, where we celebrate approachable, flavorful recipes that bring people together. If you love easy dinners with big flavor, you’ll also enjoy our One-Pot Cheesy Taco Pasta or our Creamy Garlic Parmesan Chicken. With simple ingredients and bold taste, this recipe embodies the kind of cooking that turns ordinary moments into something special.
Why I Love This Recipe
Creamy Rotel Pasta with Ground Beef holds a special place in my heart because it reminds me of lazy Sunday dinners with my family. My mom used to whip up a similar version when we needed a quick but satisfying meal, and now I love making it for my own kids. The creamy texture, the slight heat from the Rotel, and the hearty ground beef make it a dish everyone asks for again and again. It’s more than just food—it’s a memory maker, and that’s why I’m so excited to share it with you.
Health and Nutrition
Why it’s good for your body
Creamy Rotel Pasta with Ground Beef packs a nutritious punch while delivering bold flavors. First, the ground beef provides high-quality protein, which helps build muscle and keeps you full longer. Additionally, the tomatoes in Rotel add a dose of lycopene, an antioxidant linked to heart health. Meanwhile, the creamy sauce offers calcium for strong bones, especially if you use dairy-based ingredients.
Beyond macronutrients, this dish balances indulgence with wholesome ingredients. For example, you can easily swap regular pasta for whole-grain or gluten-free options to boost fiber content. Moreover, the spices and peppers in Rotel kickstart metabolism and add anti-inflammatory benefits. Creamy Rotel Pasta with Ground Beef also delivers iron from the beef, supporting energy levels and circulation.
Finally, this meal adapts to various dietary needs without sacrificing taste. Whether you choose lean beef or a plant-based alternative, you still get a satisfying, nutrient-rich dish. The combination of protein, veggies, and carbs makes Creamy Rotel Pasta with Ground Beef a well-rounded choice for any meal.
How it fits in a healthy lifestyle
Creamy Rotel Pasta with Ground Beef fits seamlessly into balanced eating habits. If you focus on high-protein diets, the ground beef and cheese provide ample fuel for workouts and recovery. For gluten-free lifestyles, simply opt for your favorite alternative pasta, like chickpea or rice noodles.
This dish also works well for meal prep, saving time while keeping nutrition on track. Pair it with a side salad or steamed veggies to round out your plate. If you love hearty meals but watch sodium intake, try low-sodium Rotel or fresh tomatoes instead. For more tips on balancing comfort food and nutrition, check out our guide to healthy comfort food swaps.
Planning family dinners? Creamy Rotel Pasta with Ground Beef pleases picky eaters while sneaking in nutrients. Explore our quick weeknight dinners for more ideas that marry convenience and health. With simple tweaks, this recipe supports everything from fitness goals to busy schedules.
A quick and comforting pasta dish with ground beef, creamy sauce, and a kick from Rotel tomatoes.
Ingredients
Scale
For the Crust:
8 oz pasta (such as penne or rotini)
1 lb ground beef
1 can (10 oz) Rotel diced tomatoes with green chilies
1/2 cup heavy cream
1/2 cup shredded cheddar cheese
1/2 tsp garlic powder
1/2 tsp onion powder
Salt and pepper to taste
1 tbsp olive oil
Instructions
1. Prepare the Crust:
Cook pasta according to package instructions. Drain and set aside.
In a large skillet, heat olive oil over medium heat. Add ground beef and cook until browned, breaking it into small pieces.
Drain excess fat from the beef, then stir in Rotel tomatoes, garlic powder, onion powder, salt, and pepper. Simmer for 5 minutes.
Reduce heat to low and stir in heavy cream and cheddar cheese until melted and smooth.
Add cooked pasta to the skillet and toss until well coated with the sauce. Serve hot.
Notes
You can customize the seasonings to taste.
How to Prepare This Dish
Steps and time-saving tips
Start by browning the ground beef in a large skillet over medium heat, breaking it into small crumbles as it cooks. Meanwhile, bring a pot of salted water to a boil for the pasta. Once the beef is fully cooked, drain any excess grease but leave a little for flavor. Next, stir in a can of Rotel tomatoes with green chilies and let the mixture simmer for a few minutes to blend the flavors. While that simmers, cook your pasta until al dente, then drain and set aside. For the creamy sauce, whisk together cream cheese, sour cream, and a splash of milk in a separate bowl until smooth. Combine the cooked pasta, beef mixture, and sauce in the skillet, folding everything gently to coat evenly. If the sauce feels too thick, drizzle in a bit of reserved pasta water to loosen it. Finally, sprinkle shredded cheddar cheese on top and cover the skillet until the cheese melts. Serve immediately for the best texture. To save time, prep your ingredients ahead or use pre-shredded cheese. For extra flavor, try adding a pinch of smoked paprika or garlic powder.
and-learned-from">Mistakes I’ve made and learned from
Early on, I rushed the sauce and ended up with lumps of cream cheese that wouldn’t blend smoothly. Now, I let the cream cheese soften at room temperature first or microwave it for 10 seconds to make whisking easier. Another mistake was overcooking the pasta, which turned mushy when mixed with the sauce. I’ve learned to undercook it slightly since it continues to absorb liquid later. If you’ve struggled with dry pasta dishes, check out my tips for perfect pasta texture. Also, skipping the step of reserving pasta water left me with a sauce that was too thick. Now, I always keep a cup handy, just like I do for my creamy sauce secrets. These small adjustments make a big difference in the final dish.
Cultural Connection and Variations
Where this recipe comes from
Creamy Rotel Pasta with Ground Beef feels like a love letter to Tex-Mex comfort food. While its exact origins are murky, the dish likely evolved from the fusion of Mexican flavors and American pantry staples. Rotel tomatoes, a Southern favorite, bring the tangy kick, while ground beef and creamy sauce make it hearty enough for weeknight dinners. In some households, they swap the beef for spicy chorizo or add a splash of lime for extra zing.
Families across the Sou
th often tweak the recipe to match their tastes. Some stir in black beans or corn for texture, while others top it with fresh cilantro or avocado. Interestingly, in parts of the Midwest, cooks might skip the Rotel altogether and use mild diced tomatoes instead. No matter the variation, Creamy Rotel Pasta with Ground Beef always delivers that cozy, crowd-pleasing vibe.
Seasonally, it shines as a game-day dish or a quick winter warmer. Yet, its flexibility means you can lighten it up with grilled chicken in summer or serve it as a creamy casserole during holidays. Whether it’s a family secret or a potluck star, this dish bridges cultures and kitchens with every bite.
How it fits in today’s cooking
Today, Creamy Rotel Pasta with Ground Beef holds its own as a versatile, budget-friendly meal. Busy parents love it for its one-pan simplicity, while meal preppers reheat it for lunches all week. Modern twists include using plant-based meat or gluten-free pasta, proving it adapts to nearly any diet. For a lighter take, some add spinach or swap heavy cream for Greek yogurt.
It’s also a star
at gatherings. Pair it with easy appetizers for crowds to round out a casual spread. Meanwhile, home cooks often serve it alongside quick salad recipes to balance the richness. Whether you’re craving comfort or feeding a hungry family, this dish fits seamlessly into today’s fast-paced, flavor-driven kitchens.
Taste and Texture
What makes it delicious
Creamy Rotel Pasta with Ground Beef delivers a bold, comforting experience from the first bite. The rich, velvety sauce coats every noodle, while the ground beef adds a hearty, savory depth. Tomatoes and green chilies from the Rotel bring a tangy, slightly spicy kick that balances the creaminess. Meanwhile, melted cheese weaves through the dish, creating pockets of gooey goodness. Each forkful offers a satisfying contrast—tender pasta, juicy beef, and a sauce that’s both silky and zesty. The aroma alone, fragrant with garlic and warm spices, will have everyone gathering around the table. Simply put, Creamy Rotel Pasta with Ground Beef is a flavor-packed meal that feels like a hug in a bowl.
Boosting the flavor
Want to take your Creamy Rotel Pasta with Ground Beef to the next level? Try stirring in a splash of heavy cream for extra richness or topping it with fresh cilantro for a bright finish. For heat lovers, a sprinkle of crushed red pepper flakes or a dash of hot sauce amps up the spice. If you’re craving more texture, crispy bacon bits or toasted breadcrumbs add a delightful crunch. Pair it with a simple garden salad to cut through the richness, or serve it alongside garlic butter rolls for the ultimate comfort meal. Small tweaks make a big difference, so don’t be afraid to get creative!
Always brown the ground beef thoroughly before adding other ingredients to develop rich flavor in your Creamy Rotel Pasta with Ground Beef. Meanwhile, cook the pasta al dente since it will soften further when mixed with the sauce. For extra creaminess, stir in the cheese gradually and let it melt completely. Additionally, drain excess grease from the beef to prevent a greasy final dish. Finally, taste and adjust seasoning just before serving for the best balance.
Mistakes to avoid
Avoid overcooking the pasta early on, as it turns mushy once combined with the sauce. Instead, check it a minute before the package instructions suggest. Also, don’t skip draining the Rotel tomatoes if you prefer a thicker sauce—this step prevents excess liquid. For more pasta-cooking tips, check out our guide on how to cook pasta perfectly. Lastly, resist using low-fat cheese, which can make the sauce grainy. If you’re unsure about cheese selection, our best cheeses for melting article explains ideal options.
g-suggestions">Serving and Pairing Suggestions
How to serve this dish
For a stunning presentation, serve Creamy Rotel Pasta with Ground Beef in a warm, shallow bowl to highlight its rich texture. Top it with fresh chopped parsley or cilantro for a pop of color and freshness. Alternatively, sprinkle shredded cheese or crushed tortilla chips for extra crunch. This dish shines at casual gatherings like game nights or potlucks, but it also makes a comforting weeknight dinner. To elevate it for special occasions, pair it with a crisp side salad or serve it in individual ramekins for a cozy, personalized touch.
What goes well with it
A chilled glass of citrusy white wine or a light beer balances the bold flavors of Creamy Rotel Pasta with Ground Beef perfectly. For non-alcoholic options, try sparkling water with lime or a tangy lemonade. If you want a hearty side, garlic bread or a warm cheesy jalapeño cornbread adds a delicious contrast. For something lighter, a fresh avocado cucumber salad cuts through the richness with its bright, creamy texture. Each pairing enhances the dish while keeping the meal balanced and satisfying.
math-faq-block">
What ingredients do I need for Creamy Rotel Pasta with Ground Beef?
You’ll need ground beef, Rotel diced tomatoes with green chilies, pasta (like penne or rotini), cream cheese, shredded cheddar, garlic, and basic seasonings. Creamy Rotel Pasta with Ground Beef comes together quickly with these simple ingredients for a flavorful, comforting dish.
Can I use a different protein instead of ground beef in Creamy Rotel Pasta?
Yes! Ground turkey, chicken, or even plant-based crumbles work well as substitutes. The creamy Rotel sauce pairs perfectly with any protein, though ground beef adds a rich flavor that complements the dish best.
How spicy is Creamy Rotel Pasta with Ground Beef?
The mild heat comes from the green chilies in Rotel tomatoes, but it’s not overly spicy. For a milder version, use original Rotel (without green chilies) or reduce the amount. Creamy Rotel Pasta with Ground Beef balances spice and creaminess perfectly.
rank-math-faq-item">
What sides go well with Creamy Rotel Pasta with Ground Beef?
Serve it with garlic bread, a simple green salad, or roasted vegetables for a complete meal. The bold flavors of Creamy Rotel Pasta with Ground Beef pair well with lighter, fresh sides to balance the dish.
Best Creamy Crack Chicken Gnocchi Recipe
Introduction
There’s something truly special about a dish that wraps you in comfort while still feeling indulgent. That’s exactly what you’ll find with this Creamy Crac Chicken Gnocchi—a recipe that balances rich flavors with cozy familiarity. Whether you’re cooking for a weeknight dinner or impressing guests, this dish delivers every time. Plus, it’s incredibly versatile, so you can tweak it to match your cravings or pantry staples. Trust me, once you try it, you’ll understand why it’s become a staple in my home.
Creamy Crac Chicken Gnocchi is a decadent yet approachable dish that combines tender chicken, pillowy gnocchi, and a velvety sauce infused with herbs and a hint of spice. What sets it apart is its perfect harmony of textures and flavors, making it a standout meal for any occasion. Unlike heavy restaurant versions, this recipe keeps things light enough for regular enjoyment while still feeling luxurious. It’s also a fantastic way to repurpose leftover chicken, aligning with my philosophy of minimizing food waste. If you’re a fan of comforting pasta dishes like my Garlic Butter Shrimp Pasta, you’ll adore this twist. And for those busy nights, it pairs beautifully with a simple 5-minute salad to round out the meal.
Why I Love This Recipe
This Creamy Crac Chicken Gnocchi holds a special place in my heart because it reminds me of Sunday dinners with my family. My grandma used to make a similar dish, and recreating it with my own spin feels like carrying forward a delicious tradition. The aroma alone takes me back to her kitchen, where laughter and good food always went hand in hand. Now, it’s the recipe my kids request most—proof that some flavors truly stand the test of time.
Health and Nutrition
Why it’s good for your body
Creamy Crac Chicken Gnocchi packs a nutritious punch while delivering rich, comforting flavors. First, the dish features lean chicken, a high-quality protein that supports muscle repair and keeps you full longer. Additionally, the gnocchi provides energizing carbohydrates, which fuel your body for daily activities. Meanwhile, the creamy sauce often incorporates ingredients like Greek yogurt or light cream, adding calcium and healthy fats without excessive calories.
Moreover, Creamy Crac Chicken Gnocchi includes a variety of vegetables, such as spinach or mushrooms, boosting its fiber and vitamin content. Fiber aids digestion, while vitamins like iron and potassium support overall wellness. Furthermore, the dish balances indulgence with nutrition, making it a smart choice for satisfying cravings without derailing health goals. Finally, herbs and spices like garlic or thyme not only enhance flavor but also offer anti-inflammatory benefits.
Because Creamy Crac Chicken Gnocchi combines protein, carbs, and veggies, it delivers a well-rounded meal. Whether you need post-workout recovery or a cozy dinner, this dish nourishes your body while pleasing your taste buds. With its balanced macros and micronutrients, it’s a meal you can enjoy guilt-free.
How it fits in a healthy lifestyle
Creamy Crac Chicken Gnocchi fits seamlessly into a balanced diet. If you’re watching portions, pair it with a light salad or steamed greens for extra volume without excess calories. For those focusing on protein intake, the chicken provides a lean source to support muscle maintenance. You can even tweak the recipe by using whole-wheat or gluten-free gnocchi to match dietary needs.
This dish also works well for meal prep, saving time while keeping nutrition on track. If you love heart-healthy options, try swapping heavy cream for avocado or coconut milk. For more ideas on balancing comfort food with wellness, check out our guide to healthy meal prep. And if you’re exploring gluten-free alternatives, our gluten-free pasta guide offers great substitutions. Creamy Crac Chicken Gnocchi proves that delicious meals can align with your health goals.
A rich and comforting dish featuring tender gnocchi, creamy sauce, and flavorful crack chicken.
Ingredients
Scale
For the Crust:
1 lb gnocchi
2 cups cooked chicken, shredded
1/2 cup bacon, cooked and crumbled
1 cup heavy cream
1/2 cup chicken broth
1/2 cup shredded cheddar cheese
1/2 cup shredded mozzarella cheese
1 tsp garlic powder
1 tsp onion powder
1/2 tsp black pepper
1/4 tsp salt
2 tbsp fresh parsley, chopped
Instructions
1. Prepare the Crust:
Cook gnocchi according to package instructions. Drain and set aside.
In a large skillet, combine heavy cream, chicken broth, garlic powder, onion powder, black pepper, and salt. Bring to a simmer over medium heat.
Stir in shredded cheddar and mozzarella cheeses until melted and smooth.
Add cooked gnocchi, shredded chicken, and crumbled bacon to the skillet. Stir to coat evenly with the sauce.
Cook for 3-5 minutes until everything is heated through.
Garnish with fresh parsley before serving.
Notes
You can customize the seasonings to taste.
“`html
s-dish">How to Prepare This Dish
Steps and time-saving tips
Start by heating a large skillet over medium heat and adding a drizzle of olive oil. Once the oil shimmers, toss in diced chicken breast and cook until golden brown, about 5 minutes. Meanwhile, whisk together heavy cream, grated Parmesan, and a pinch of garlic powder in a bowl for the sauce. Stir the sauce occasionally to keep it smooth. Next, add store-bought gnocchi to the skillet with the chicken, letting them crisp slightly for extra texture. Pour the creamy mixture over everything and gently fold to coat evenly. Reduce the heat to low and let it simmer for 3 minutes, allowing the flavors to meld. For a time-saving twist, use pre-cooked chicken or frozen gnocchi—just adjust cooking times slightly. Finish with a sprinkle of fresh parsley and cracked black pepper for a vibrant touch. Serve immediately while the Creamy Crac Chicken Gnocchi is piping hot and irresistibly creamy.
Mistakes I’ve made and learned from
I once rushed the sauce and ended up with a grainy texture because I didn’t let the Parmesan melt properly. Now, I always whisk the cream and cheese over low heat until perfectly smooth. Another blunder? Overcrowding the skillet, which steamed the gnocchi instead of crisping them. Lesson learned: cook in batches if needed. For more sauce tips, check out my guide to flawless sauces. And if you’re new to working with gnocchi, my beginner’s tutorial breaks down the basics. Trust me, a little patience goes a long way with this dish!
Creamy Crac Chicken Gnocchi carries a rich history, blending Italian comfort food with hearty Eastern European influences. Originally, gnocchi hails from Northern Italy, where families hand-rolled these pillowy dumplings for generations. Meanwhile, the “Crac” in the name nods to the bold, spiced flavors of Krakow-style cooking, giving the dish its unique depth. Over time, immigrants fused these traditions, creating a creamy, satisfying meal that warms the soul.
Today, you’ll find regional twists on Creamy Crac Chicken Gnocchi everywhere. In Poland, cooks might swap chicken for smoked sausage or add a dash of paprika for extra warmth. Italian versions often keep it simple with fresh herbs and a light cream sauce. My grandmother, however, always added caramelized onions for sweetness, a trick she learned from her Hungarian neighbor. Whether served at festive gatherings or cozy weeknight dinners, this dish adapts beautifully to local tastes.
ays-cooking">How it fits in today’s cooking
Creamy Crac Chicken Gnocchi remains a staple in modern kitchens because it balances comfort and convenience. Busy home cooks love how it comes together in one pot, making it perfect for hectic weeknights. Meanwhile, food bloggers and chefs keep reinventing it—some add sun-dried tomatoes for brightness, while others toss in spinach for a nutrient boost. It’s also a hit during holidays, especially when paired with festive sides like holiday appetizers or seasonal desserts.
What makes it timeless? Its versatility. Whether you’re cooking for a crowd or meal-prepping for the week, Creamy Crac Chicken Gnocchi fits effortlessly into any routine. Plus, with gluten-free or vegan gnocchi now widely available, everyone can enjoy this comforting classic. No wonder it’s still a beloved favorite at dinner tables today.
Taste and Texture
What makes it delicious
Creamy Crac Chicken Gnocchi wraps your taste buds in a rich, velvety embrace. The tender gnocchi melts in your mouth, while the juicy chicken adds a satisfying bite. Garlic and herbs infuse every forkful with a fragrant warmth, and the creamy sauce coats everything in luxurious smoothness. Meanwhile, a hint of cracked pepper gives just the right kick to balance the dish. Whether you savor the first bite or the last, Creamy Crac Chicken Gnocchi delivers comfort and flavor in every spoonful.
r">Boosting the flavor
Elevate your Creamy Crac Chicken Gnocchi with a sprinkle of crispy bacon or toasted breadcrumbs for extra crunch. For a brighter twist, stir in a handful of sun-dried tomatoes or fresh spinach. If you love bold flavors, try a dash of smoked paprika or a squeeze of lemon. Pair it with a light garden salad to balance the richness, or drizzle with a garlic aioli for an extra punch. Small tweaks can transform this dish into something even more memorable.
Tips for Success
Best practices for results
For the best Creamy Crac Chicken Gnocchi, always sear the chicken first to lock in juices before adding it to the sauce. Meanwhile, cook the gnocchi just until it floats to avoid mushiness. Additionally, use full-fat cream for a richer texture, and stir in freshly grated Parmesan off the heat to prevent clumping. Finally, taste and adjust seasoning at the end, since flavors intensify as the dish rests.
>Mistakes to avoid
One common mistake is overcrowding the pan when browning the chicken, which steams instead of sears the meat. Instead, work in batches for even browning. Another error is boiling gnocchi too vigorously, which can break them apart—opt for a gentle simmer. For more on perfecting gnocchi texture, check out our guide to cooking gnocchi. Also, avoid adding cheese directly to high heat, as it can turn grainy. Learn how to incorporate dairy smoothly in our creamy sauces tutorial.
Serving and Pairing Suggestions
How to serve this dish
For a stunning presentation, serve Creamy Crac Chicken Gnocchi in wide, shallow bowls to showcase its rich sauce and tender gnocchi. Top it with a sprinkle of fresh parsley or grated Parmesan for a pop of color and extra flavor. Meanwhile, if you’re hosting a dinner party, consider pairing it with a crisp side salad to balance the dish’s creamy texture. Alternatively, serve it family-style in a large skillet for a cozy, rustic vibe. Whether it’s a weeknight dinner or a special occasion, Creamy Crac Chicken Gnocchi always feels indulgent.
What goes well with it
A light, citrusy white wine like Pinot Grigio cuts through the richness of Creamy Crac Chicken Gnocchi beautifully. If you prefer non-alcoholic options, try sparkling water with a twist of lemon for a refreshing contrast. For sides, roasted garlic green beans add a crisp texture, while a slice of crusty bread soaks up every bit of the creamy sauce. If you’re craving more Italian-inspired dishes, our Garlic Parmesan Risotto makes a fantastic companion. Or, for a fresh contrast, whip up our Mediterranean Cucumber Salad to brighten the meal.
Creamy Crac Chicken Gnocchi typically includes tender chicken, pillowy gnocchi, and a rich sauce made with heavy cream, Parmesan cheese, and garlic. Some versions add spinach or mushrooms for extra flavor, while the “Crac” twist often involves a crispy breadcrumb topping or a hint of Cajun seasoning.
How do you keep gnocchi from getting mushy in Creamy Crac Chicken Gnocchi?
To prevent mushy gnocchi, sauté store-bought gnocchi in butter or oil until lightly golden before adding them to the creamy sauce. For Creamy Crac Chicken Gnocchi, this step creates a slight crispness that holds up better against the rich sauce while maintaining the dish’s signature texture.
rank-math-faq-item">
Can I make Creamy Crac Chicken Gnocchi ahead of time?
Yes, you can prepare Creamy Crac Chicken Gnocchi 1-2 days ahead, but store the sauce and gnocchi separately to prevent sogginess. Reheat gently on the stove with a splash of cream to refresh the texture, and add any crispy toppings just before serving.
What wine pairs well with Creamy Crac Chicken Gnocchi?
A buttery Chardonnay or crisp Pinot Grigio complements the richness of Creamy Crac Chicken Gnocchi perfectly. For red wine lovers, a light-bodied Pinot Noir balances the dish’s creamy texture without overpowering the delicate flavors of the chicken and gnocchi.