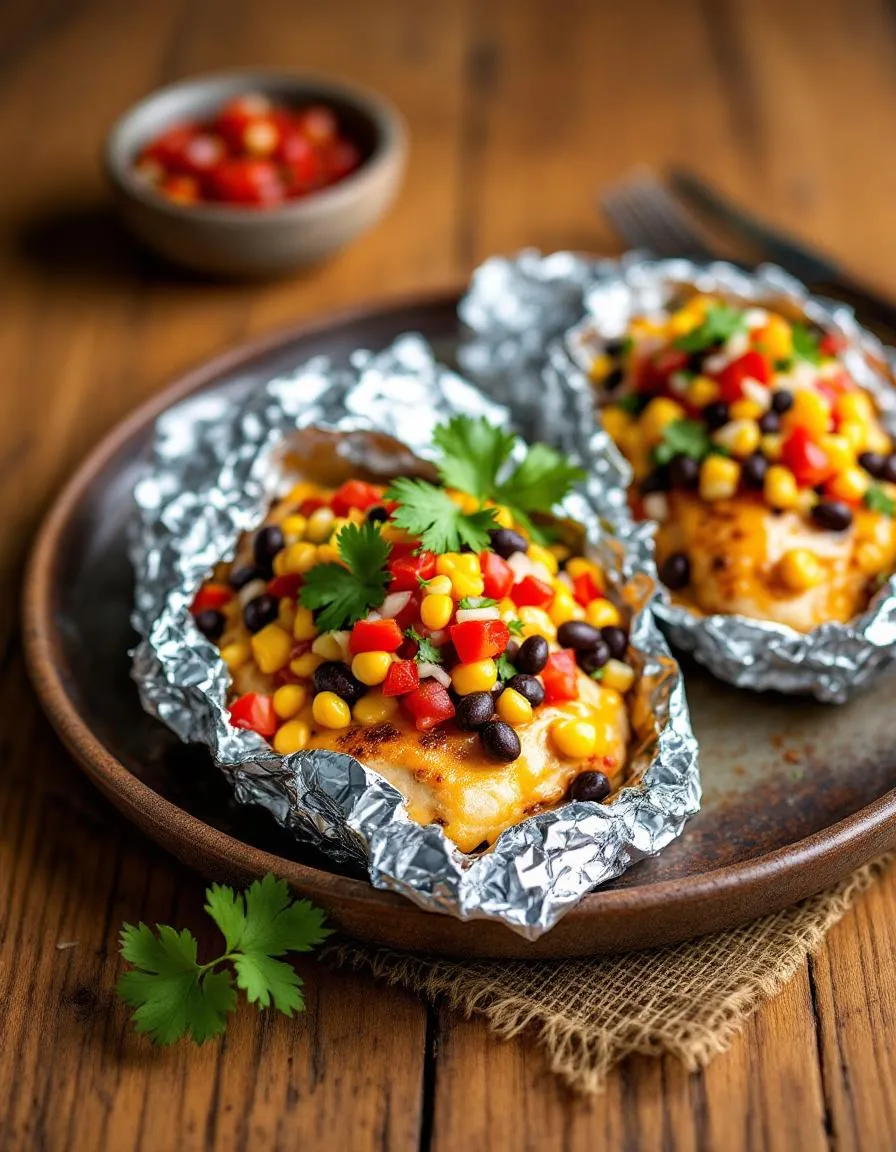
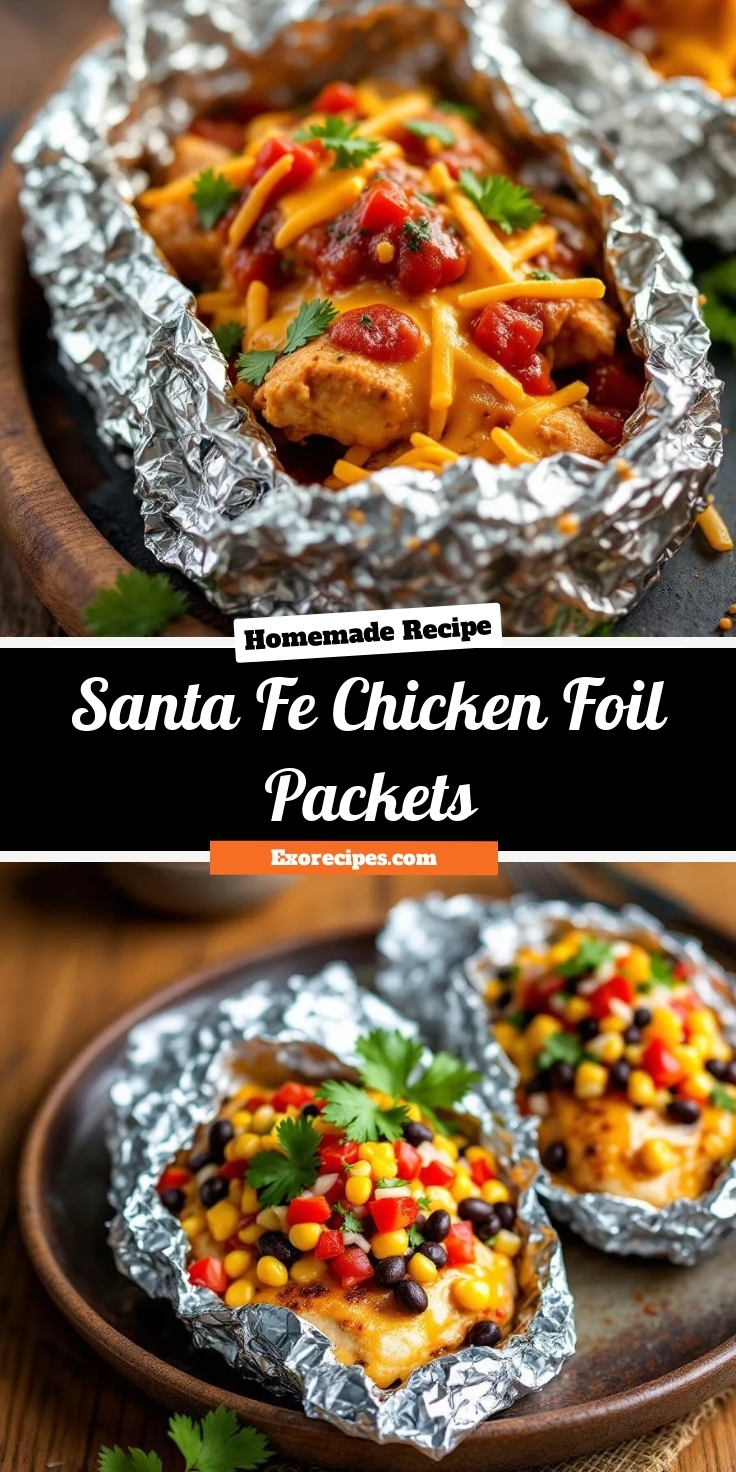
If you’re craving a meal that’s bursting with flavor yet easy to prepare, you’re in the right place. Santa Fe Chicken Foil Packets deliver a fiesta of smoky, zesty, and slightly spicy goodness with minimal cleanup. Whether you’re grilling outdoors or baking indoors, this recipe brings the vibrant tastes of the Southwest to your table effortlessly. Plus, it’s perfect for busy weeknights or laid-back gatherings—because great food should never feel like a chore.
Santa Fe Chicken Foil Packets combine tender chicken, black beans, corn, and bell peppers with a bold blend of spices, all wrapped in foil for a mess-free cooking experience. The magic happens as the ingredients steam together, locking in moisture and melding flavors into every bite. What makes this dish special is its versatility. You can customize the heat level, swap veggies, or even add cheese for extra indulgence. It’s a crowd-pleaser that fits my blog’s mission: approachable recipes with big flavor and heart. If you love fuss-free meals like my Honey Glazed Salmon, you’ll adore how these foil packets simplify dinner. And for more quick ideas, check out my 20-Minute Vegetable Stir Fry—because life’s too short for complicated cooking.
Why I Love This Recipe
Santa Fe Chicken Foil Packets remind me of summer evenings spent around the grill with friends, laughing as we unwrapped steaming foil bundles straight from the fire. There’s something nostalgic about tearing open a packet to reveal juicy, flavorful chicken and veggies—it feels like a little gift. Beyond the taste, I love how this recipe brings people together without keeping me stuck in the kitchen. It’s the kind of meal that lets you savor the moment, not just the food, and that’s what cooking is all about for me.
Health and Nutrition
Why it’s good for your body
Santa Fe Chicken Foil Packets deliver a powerhouse of nutrients in every bite. First, lean chicken breast provides high-quality protein to support muscle growth and repair. Meanwhile, the colorful mix of bell peppers, black beans, and corn packs fiber, vitamins, and antioxidants to boost digestion and immunity.
Additionally, Santa Fe Chicken Foil Packets keep sodium levels in check compared to restaurant meals. By cooking at home, you control the ingredients, skipping excess salt and unhealthy fats. The olive oil and spices add flavor without empty calories, making this dish both satisfying and nutritious.
Finally, the foil packet method locks in moisture and nutrients. Unlike frying or heavy sauces, this cooking style preserves the natural goodness of each ingredient. Whether you need a post-workout meal or a family-friendly dinner, Santa Fe Chicken Foil Packets offer balanced fuel for any day.
How it fits in a healthy lifestyle
Santa Fe Chicken Foil Packets fit seamlessly into a mindful eating routine. For gluten-free diets, the recipe naturally skips grains or flour, relying on wholesome veggies and protein. If you follow a heart-healthy plan, the lean chicken and fiber-rich beans support cholesterol levels and blood pressure.
Meal preppers love how easy it is to assemble these packets ahead of time. Just like our meal prep ideas, this recipe saves busy weeknights without sacrificing nutrition. Plus, the balanced macros make it ideal for fitness goals, pairing well with our high-protein sides for extra staying power.
Whether you’re counting macros or simply want a fuss-free dinner, Santa Fe Chicken Foil Packets adapt to your needs. They’re proof that healthy eating can be simple, flavorful, and fun.
Start by preheating your oven to 400°F so it’s ready when you finish assembling the Santa Fe Chicken Foil Packets. Meanwhile, whisk together olive oil, lime juice, and taco seasoning in a small bowl for a zesty marinade. Toss diced chicken breasts in the mixture until evenly coated, then set aside. Next, layer sheets of heavy-duty aluminum foil on your counter—this prevents leaks and makes cleanup effortless. Divide cooked rice, black beans, corn, and bell peppers evenly among the foil sheets, then top with the marinated chicken. Drizzle a spoonful of salsa over each packet for extra flavor. Fold the foil tightly into sealed packets, leaving room for steam to circulate. Bake for 25 minutes, or until the chicken reaches 165°F. For a time-saving hack, prep the veggies and marinade the night before. If you’re short on time, swap fresh ingredients for frozen corn or pre-cooked rice. Let the packets rest for 5 minutes before opening—this locks in moisture and prevents burns.
and-learned-from">Mistakes I’ve made and learned from
I once rushed the foil-folding step and ended up with a messy oven when the Santa Fe Chicken Foil Packets burst open. Now, I double-fold the edges and press firmly to seal. Another lesson? Overcrowding the packets. I piled in too many ingredients, and the chicken took forever to cook. Sticking to single-layer portions fixed that. For perfectly tender chicken every time, I follow the tips from my grilling mistakes post—yes, even for oven recipes! And if you’re new to foil packets, my meal prep basics guide breaks down portioning like a pro. Trust me, a little patience with assembly pays off in juicy, flavorful results.
“`
n-and-variations">Cultural Connection and Variations
Where this recipe comes from
Santa Fe Chicken Foil Packets bring the bold flavors of the Southwest straight to your table. Inspired by the vibrant cuisine of New Mexico, this dish combines smoky spices, tender chicken, and fresh veggies for a meal that feels like a fiesta. Traditionally, cooks in the region might grill the packets over an open flame, infusing the ingredients with a charred, earthy depth. Meanwhile, families in other parts of the world put their own spin on foil packet cooking. In Japan, for example, they might swap the chili powder for miso and add shiitake mushrooms.
In my own kitchen, Santa Fe Chicken Foil Packets became a summer staple during backyard barbecues. Friends would gather around the grill, each customizing their packet with extra jalapeños or a squeeze of lime. Some regions even skip the foil entirely, wrapping the ingredients in banana leaves for a steamier, more aromatic result. No matter how you prepare it, the dish always carries that same spirit of simplicity and bold flavor.
How it fits in today’s cooking
Today, Santa Fe Chicken Foil Packets fit perfectly into our fast-paced lives. They’re a go-to for busy weeknights, camping trips, or even meal prep Sundays. Modern cooks love how easily they adapt to dietary needs, like swapping chicken for tofu or loading up on extra veggies. Plus, the no-mess cleanup makes them a hit with anyone who dreads doing dishes.
You’ll often fin
d this dish at summer potlucks or cozy winter gatherings, proving its year-round appeal. For more easy dinner ideas, check out our quick weeknight meals collection. And if you’re craving something sweet after your savory foil packet, our decadent desserts roundup has you covered. Whether you’re feeding a crowd or just yourself, Santa Fe Chicken Foil Packets deliver flavor without the fuss.
Taste and Texture
What makes it delicious
Santa Fe Chicken Foil Packets deliver a bold, smoky-sweet flavor with every bite. Juicy chicken soaks up a vibrant mix of spices, while charred bell peppers and corn add a crisp, caramelized sweetness. Melted cheese blankets everything in creamy richness, and a squeeze of lime brightens the dish with a zesty punch. The aroma alone—a mix of sizzling garlic, cumin, and paprika—will make your mouth water. Plus, the tender black beans add a satisfying, hearty texture that contrasts perfectly with the crisp veggies. Whether you grill or bake them, Santa Fe Chicken Foil Packets always come out bursting with Southwest-inspired goodness.
Boosting the flavor
For an extra kick, swap Monterey Jack cheese with pepper jack or sprinkle in diced jalapeños. A drizzle of creamy chipotle sauce adds smoky depth, while fresh cilantro or avocado slices lend a cool, herbal finish. If you love heat, double the chili powder or serve with a side of roasted salsa verde. Experiment with different veggies like zucchini or poblano peppers to keep the flavors fresh and exciting. No matter how you customize it, Santa Fe Chicken Foil Packets stay irresistibly flavorful.
Always preheat your grill or oven before assembling Santa Fe Chicken Foil Packets to ensure even cooking. Meanwhile, slice your chicken and vegetables uniformly so everything cooks at the same rate. For extra flavor, marinate the chicken for at least 30 minutes before wrapping it in foil. Additionally, use heavy-duty foil to prevent tearing and seal the edges tightly to lock in moisture. Finally, let the packets rest for a few minutes after cooking to allow the juices to redistribute.
Mistakes to avoid
Avoid overfilling your Santa Fe Chicken Foil Packets, as this can lead to uneven cooking. Instead, leave some space for steam to circulate. Also, resist the urge to peek while cooking—opening the foil too early releases heat and slows down the process. For perfectly tender chicken, check out our guide on how to marinate chicken for optimal results. Another common mistake is skipping the resting time, which can make the dish dry. If you’re unsure about portion sizes, our meal prep basics article offers helpful guidance.
g-suggestions">Serving and Pairing Suggestions
How to serve this dish
Santa Fe Chicken Foil Packets make a vibrant and effortless meal straight from the grill or oven. For a stunning presentation, carefully open the foil at the table to release the aromatic steam, then garnish with fresh cilantro, lime wedges, or a dollop of cool sour cream. These packets shine at casual gatherings, whether you’re hosting a backyard barbecue or a cozy family dinner. Alternatively, prep them ahead for a stress-free weeknight meal—just unwrap and enjoy the bold flavors without the cleanup.
What goes well with it
Pair Santa Fe Chicken Foil Packets with a crisp, refreshing side like our Mango Avocado Salad to balance the smoky spices with a touch of sweetness. For heartier meals, serve them alongside warm, buttery Garlic Herb Roasted Potatoes, which soak up the delicious juices. Finally, a chilled glass of citrusy white wine or a tangy margarita elevates the Southwestern flair of this dish perfectly.
math-faq-block">
How long do you cook Santa Fe Chicken Foil Packets on the grill?
Santa Fe Chicken Foil Packets typically take 15–20 minutes on a preheated grill (medium-high heat). Flip them halfway through to ensure even cooking. The chicken is done when it reaches 165°F internally, and the veggies are tender.
Can you make Santa Fe Chicken Foil Packets ahead of time?
Yes! Assemble Santa Fe Chicken Foil Packets up to 24 hours in advance and refrigerate them until ready to cook. For best results, let them sit at room temperature for 15 minutes before grilling or baking.
What sides go well with Santa Fe Chicken Foil Packets?
Santa Fe Chicken Foil Packets pair perfectly with cilantro lime rice, avocado salad, or warm tortillas. For a lighter option, serve with a simple corn and black bean salsa or grilled vegetables.
rank-math-faq-item">
Can you bake Santa Fe Chicken Foil Packets instead of grilling?
Absolutely! Bake Santa Fe Chicken Foil Packets at 400°F for 25–30 minutes in a preheated oven. Check for doneness—the chicken should be juicy, and the peppers and onions softened.
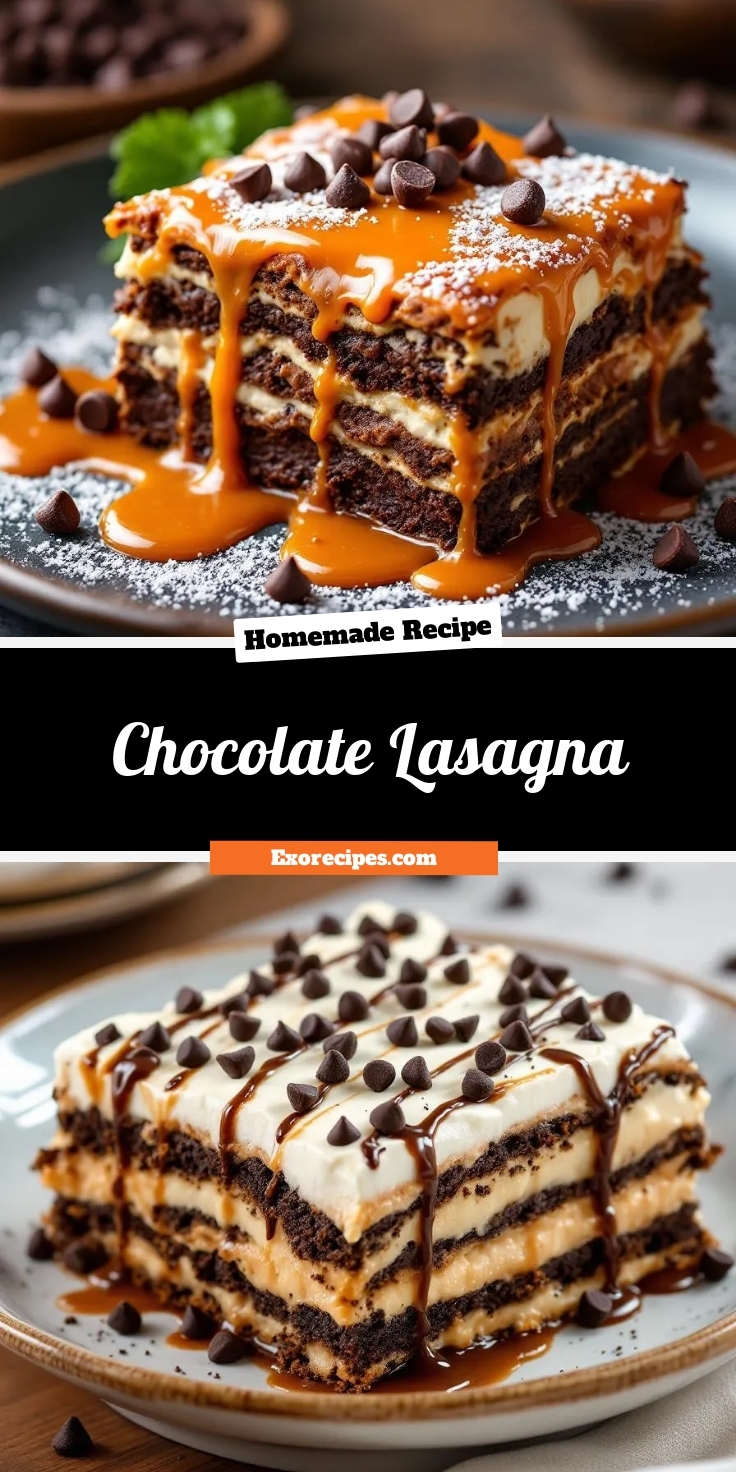
Easy Chocolate Lasagna – No-Bake Dessert Recipe
Introduction
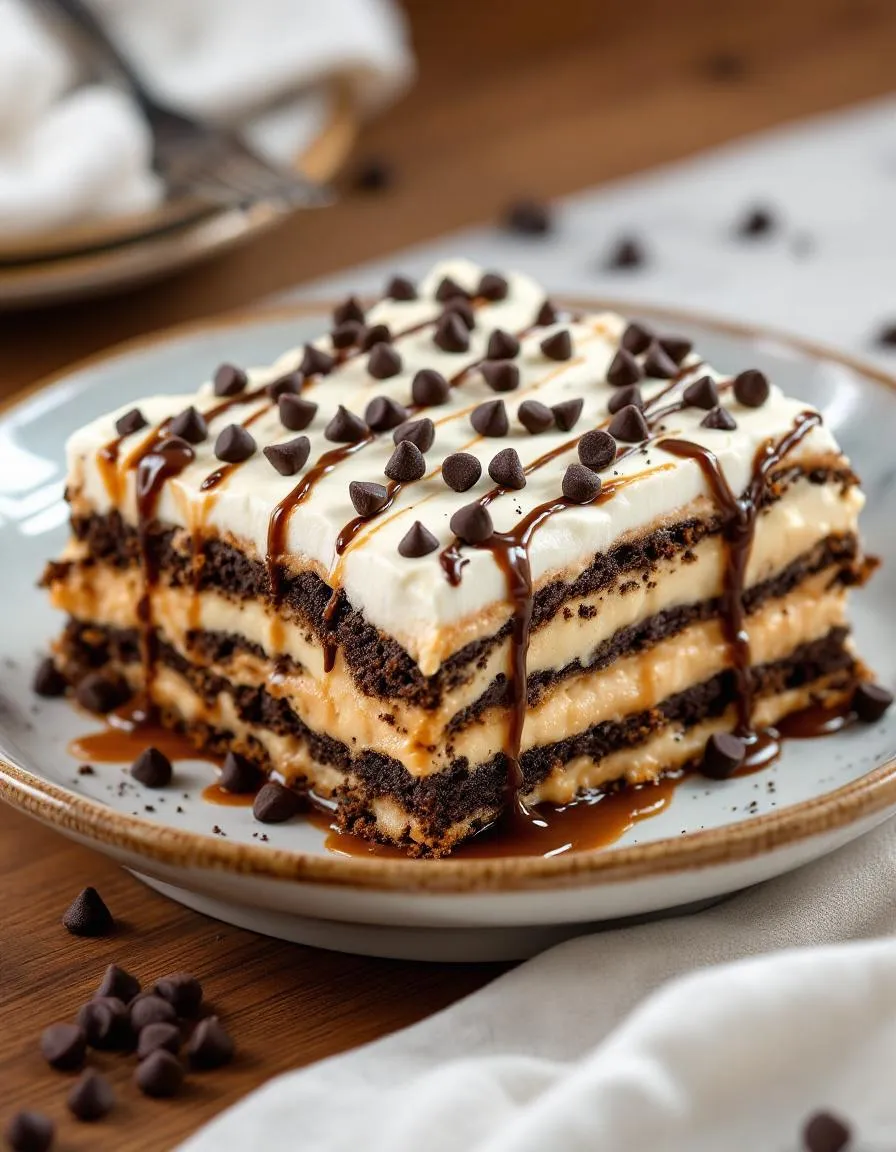
If you’ve ever craved a dessert that’s both indulgent and effortless, Chocolate Lasagna will steal your heart. Picture layers of creamy cheesecake, fluffy whipped topping, and rich chocolate pudding stacked atop a crunchy Oreo crust—no baking required! Whether you’re hosting a party or treating yourself after a long day, this no-bake masterpiece delivers comfort in every bite. Plus, it’s a crowd-pleaser that even beginner bakers can master with confidence.
Chocolate Lasagna isn’t just a dessert—it’s a celebration of simplicity and joy. Unlike traditional lasagna, this sweet twist swaps pasta for layers of decadence, making it perfect for potlucks, birthdays, or anytime you need a pick-me-up. The best part? You likely already have most ingredients in your pantry. Over the years, I’ve shared countless variations of this recipe, but the classic version remains a staple on brekcakes.com. If you love easy, no-fuss desserts like my No-Bake Cheesecake, you’ll adore this too. And for more chocolatey inspiration, check out my Homemade Chocolate Truffles—they’re another reader favorite!
Why I Love This Recipe
Chocolate Lasagna holds a special place in my heart because it reminds me of lazy summer afternoons with my grandma. She’d let me crush the Oreos while she whipped the filling, and we’d giggle as we “assembled” the layers like edible art. Now, whenever I make it, I feel that same childlike excitement. It’s more than a dessert—it’s a sweet tradition I’m thrilled to pass on to you.
Health and Nutrition
Why it’s good for your body
Chocolate Lasagna might sound indulgent, but it actually offers several surprising health benefits. First, dark chocolate layers provide antioxidants like flavonoids, which support heart health and reduce inflammation. Additionally, the cream cheese or yogurt layers often found in Chocolate Lasagna deliver probiotics for gut health. Meanwhile, the crushed nuts or oats in the crust add fiber and healthy fats to keep you satisfied.
Moreover, Chocolate Lasagna can be a smart way to satisfy cravings without overdoing sugar. By using high-quality cocoa and natural sweeteners, you boost nutrition while keeping flavors rich. The layers also create a balanced texture, so you enjoy every bite without feeling deprived. Furthermore, the protein from dairy or nut-based ingredients helps stabilize blood sugar levels.
Finally, Chocolate Lasagna encourages mindful eating. Its decadent layers slow you down, making it easier to savor portions. Whether you use almond flour for a gluten-free version or swap in Greek yogurt for extra protein, this dessert adapts to your needs. With each ingredient playing a role, Chocolate Lasagna proves treats can be both delicious and nourishing.
How it fits in a healthy lifestyle
Chocolate Lasagna fits perfectly into a balanced diet when enjoyed in moderation. For those watching sugar intake, try using monk fruit sweetener or dark chocolate with 70% cocoa or higher. If you need a gluten-free option, almond flour or oat crusts work beautifully. You can even layer in protein-rich ingredients like Greek yogurt or nut butter to make it more filling.
This dessert also pairs well with heart-healthy habits. For example, the antioxidants in dark chocolate support circulation, while nuts add omega-3s. If you’re looking for more ways to enjoy mindful treats, check out our guide on healthy dessert swaps. And if you love balancing indulgence with nutrition, explore our tips for meal-prepping sweets to stay on track.
Ultimately, Chocolate Lasagna shows that desserts can be part of a vibrant lifestyle. By choosing quality ingredients and controlling portions, you satisfy cravings without compromising health goals. It’s all about balance, and this layered treat delivers flavor and nourishment in every slice.
A decadent no-bake dessert lasagna with layers of chocolate, cream cheese, and whipped topping.
Ingredients
Scale
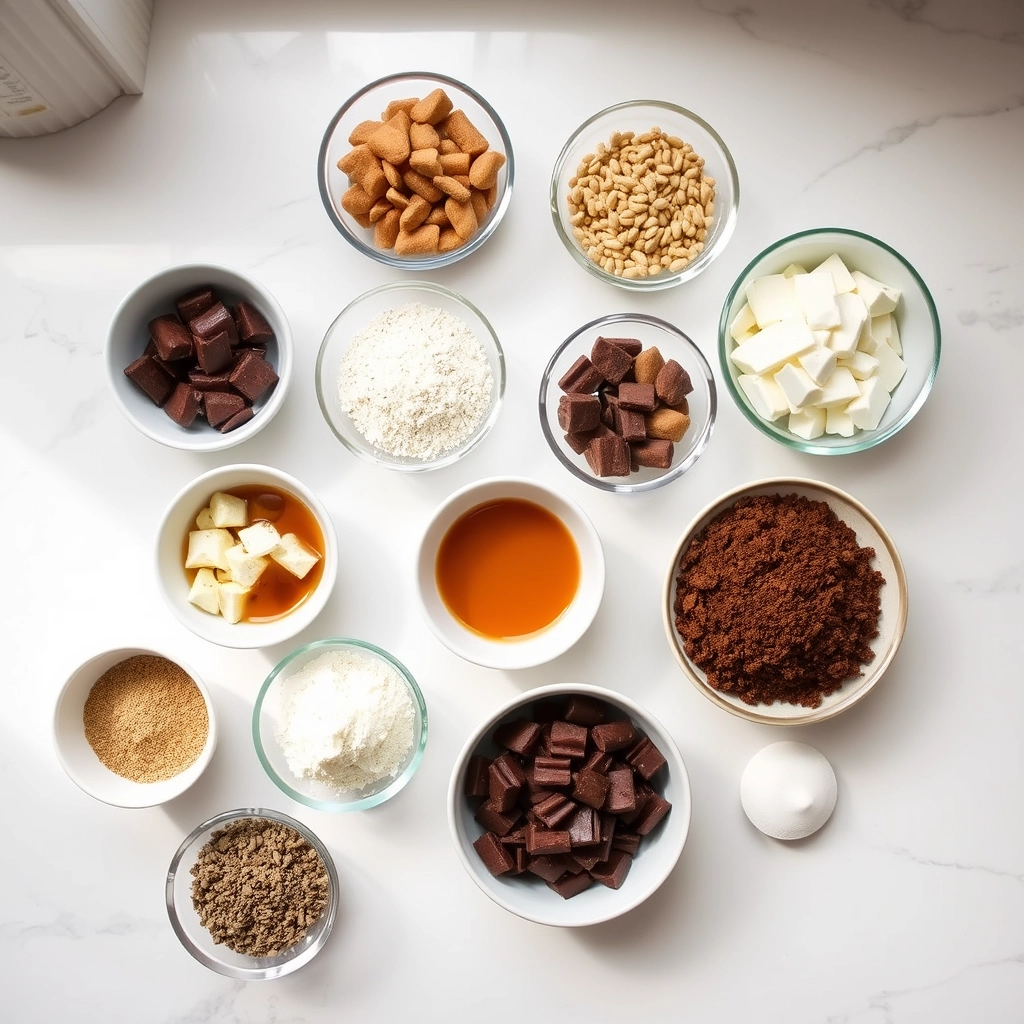
For the Crust:
36 chocolate sandwich cookies
6 tablespoons butter (melted)
1 (8 oz) package cream cheese (softened)
1/4 cup granulated sugar
2 tablespoons cold milk
1 (12 oz) tub whipped topping (divided)
2 (3.9 oz) packages instant chocolate pudding mix
3 1/4 cups cold milk
1 1/2 cups mini chocolate chips
Instructions
1. Prepare the Crust:
Crush cookies and mix with melted butter. Press into a 9×13 inch pan to form the crust.
Beat cream cheese, sugar, 2 tablespoons milk, and 1 1/4 cups whipped topping until smooth. Spread over crust.
Whisk pudding mixes with 3 1/4 cups milk for 2 minutes. Let stand 5 minutes. Spread over cream cheese layer.
Spread remaining whipped topping over pudding layer. Sprinkle with chocolate chips.
Refrigerate for at least 4 hours before serving.
Notes
You can customize the seasonings to taste.
How to Prepare This Dish
Steps and time-saving tips
First, crush the chocolate sandwich cookies into fine crumbs using a food processor or a rolling pin. Meanwhile, melt the butter and mix it with the crumbs until they hold together. Press this mixture firmly into the bottom of a 9×13-inch dish to form the crust. Next, beat the cream cheese until smooth, then whisk in the sugar and milk until fully combined. Gently fold in half of the whipped topping, then spread this creamy layer over the crust. Now, prepare the chocolate pudding by whisking the mix with cold milk until thick. Let it set for a few minutes before spreading it over the cream cheese layer. Finally, top the Chocolate Lasagna with the remaining whipped topping and sprinkle with mini chocolate chips or shaved chocolate. Chill for at least four hours, or overnight for best results. To save time, use pre-crushed cookie crumbs or store-bought whipped topping. If you’re in a hurry, freeze the dish for two hours instead of chilling.
and-learned-from">Mistakes I’ve made and learned from
When I first made Chocolate Lasagna, I rushed the chilling step and ended up with a messy, runny dessert. Now, I always plan ahead and let it set overnight. Another mistake? Overmixing the cream cheese layer, which made it too dense. A light hand keeps it fluffy. If you’re new to no-bake desserts, check out my guide to no-bake desserts for more troubleshooting tips. Also, I once skipped the butter in the crust, and it fell apart—lesson learned! For a sturdier base, follow my cookie crust secrets. Trust me, these small tweaks make all the difference.
Cultural Connection and Variations
Where this recipe comes from
Chocolate Lasagna might sound like a modern dessert mashup, but its roots stretch back to creative home cooks who loved layering flavors. While traditional Italian lasagna stacks pasta, cheese, and sauce, this sweet twist swaps in cookies, cream, and rich chocolate. Some say the dish gained popularity in the American Midwest, where potlucks and family gatherings demanded showstopping desserts. Others trace it to European no-bake cakes, where crushed biscuits and pudding create similar textures.
Around the world, baker
s adapt Chocolate Lasagna to local tastes. In Mexico, they might add a sprinkle of cinnamon or cayenne for warmth. In Australia, Vegemite fans (bravely!) experiment with savory-sweet versions. My grandma made hers with peppermint patties between the layers, turning it into a holiday favorite. Whether you use Oreos, graham crackers, or homemade wafers, the magic lies in those decadent layers—each bite tells a story.
How it fits in today’s cooking
Today, Chocolate Lasagna thrives as a versatile crowd-pleaser. Busy parents love it for birthday parties, while meal preppers stash slices in the freezer for sweet cravings. During holidays, it pairs perfectly with festive desserts, offering a no-fuss alternative to pies. Modern twists include vegan cream cheese, gluten-free cookies, or even a keto-friendly version with almond flour.
Social media fuels its comeback, with food bloggers showcasing rainbow layers or espresso-infused fillings. For a quick upgrade, try adding caramel drizzle or crushed candy bars—the same tips that elevate easy baking hacks. Whether you serve it at a summer BBQ or a cozy winter gathering, Chocolate Lasagna bridges nostalgia and novelty in every slice.
>Taste and Texture
What makes it delicious
Chocolate Lasagna delivers a decadent, multi-layered experience that delights every sense. The first bite reveals a velvety cream cheese layer, smooth and tangy, balanced by the rich, dark sweetness of chocolate pudding. Crushed Oreos add a satisfying crunch, while the whipped topping melts luxuriously on the tongue. Every forkful blends cool, creamy textures with the faintest hint of salt from the crust, creating a perfect harmony. The aroma alone—warm cocoa mingling with vanilla—will have you reaching for seconds. Chocolate Lasagna isn’t just a dessert; it’s a celebration of contrasts, where silky meets crisp and sweet meets subtly savory.
Boosting the flavor
Elevate your Chocolate Lasagna with a few clever tweaks. Swap the standard chocolate pudding for dark chocolate or even a salted caramel variation to deepen the flavor profile. A sprinkle of espresso powder amplifies the cocoa notes without overpowering the dish. For added texture, top it with toasted nuts or a drizzle of homemade chocolate sauce. If you love fruity contrasts, layer in fresh raspberries or a spoonful of berry compote between the pudding and whipped cream. These small changes make each bite unforgettable while keeping the dessert’s irresistible charm intact.
Tips for Success
Best practices for results
Always chill the crust layer for at least 15 minutes before adding the cream cheese filling—this prevents crumbling. Meanwhile, use room-temperature cream cheese for smoother blending, ensuring your Chocolate Lasagna has the perfect creamy texture. For even layers, spread each component gently with an offset spatula, and press down lightly between additions. Finally, freeze the dessert for at least 4 hours before slicing; this keeps the layers intact for clean cuts.
Mistakes to avoid
Avoid overmixing the crust, as it can make the base too dense. Instead, pulse the ingredients just until combined, like you would for a no-bake Oreo cheesecake. Another common misstep is skipping the parchment paper liner, which makes removing slices messy. For easier serving, line your pan as you would for peanut butter pie. Also, don’t rush the freezing step—soft layers won’t hold their shape when sliced.
Serving and Pairing Suggestions
How to serve this dish
Chocolate lasagna shines as a showstopping dessert for any occasion. For a festive touch, layer it in a glass trifle dish to showcase the rich stripes of chocolatey goodness. Alternatively, slice it into neat squares and plate them with a dusting of cocoa powder or a drizzle of melted chocolate. Meanwhile, fresh berries like raspberries or strawberries add a pop of color and freshness. Serve it chilled at summer gatherings, holiday parties, or even as a decadent treat for weekend brunch. Finally, top each serving with a dollop of whipped cream or a scoop of vanilla ice cream for extra indulgence.
h-it">What goes well with it
A warm cup of coffee balances the sweetness of chocolate lasagna perfectly, especially if you prefer a slightly bitter contrast. For a refreshing option, try pairing it with a glass of cold milk or a creamy milkshake. If you want to elevate the experience, serve it alongside our classic tiramisu for an Italian-inspired dessert spread. Additionally, our salted caramel brownies make a delightful companion, offering a chewy texture that complements the creamy layers. Whether you choose drinks or other desserts, these pairings enhance the rich flavors of chocolate lasagna.
What is Chocolate Lasagna made of?
Chocolate Lasagna typically consists of layers of crushed Oreo cookies, cream cheese filling, chocolate pudding, and whipped topping. This no-bake dessert mimics the layered look of traditional lasagna but swaps pasta for decadent chocolate flavors.
rank-math-faq-item">
How long does Chocolate Lasagna need to set?
For best results, refrigerate Chocolate Lasagna for at least 4 hours or overnight before serving. This allows the layers to firm up properly, making it easier to slice and serve neat portions of this rich dessert.
Can you freeze Chocolate Lasagna?
Yes! Chocolate Lasagna freezes well for up to 2 months when wrapped tightly in plastic. Thaw overnight in the refrigerator before serving to maintain the perfect creamy texture of this crowd-pleasing dessert.
What’s the difference between Chocolate Lasagna and tiramisu?
While both are layered desserts, Chocolate Lasagna uses Oreo crust and chocolate pudding, while tiramisu features ladyfingers soaked in coffee with mascarpone cream. Chocolate Lasagna is an easier, no-bake American dessert with bold chocolate flavors throughout every layer.
>
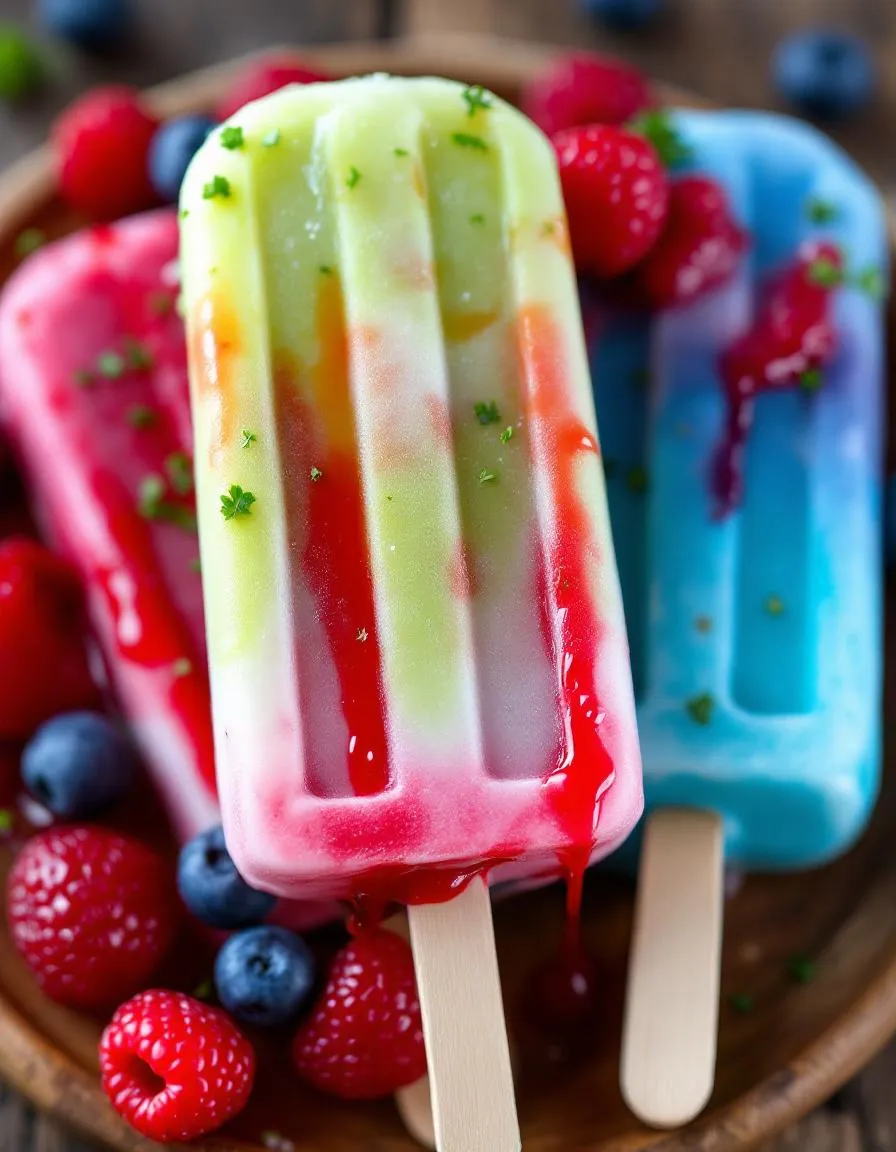
Best Homemade Bomb Pops – Easy 3-Ingredient Recipe
Introduction
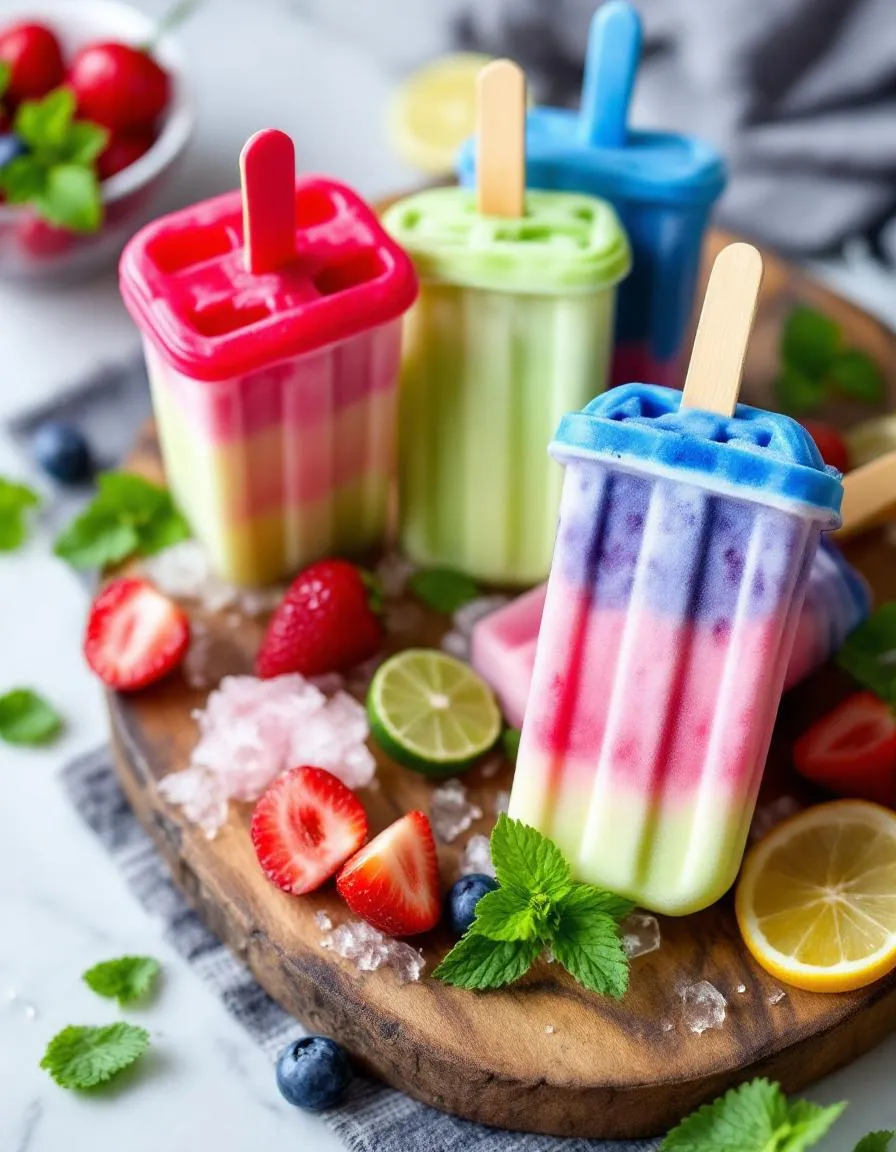
Nothing brings back childhood summer memories quite like the vibrant colors and fruity flavors of a classic frozen treat. That’s why I’m thrilled to share my take on Homemade Bomb Pops—a nostalgic yet easy-to-make delight that will transport you straight to those carefree days. Whether you’re hosting a backyard barbecue or simply craving a refreshing snack, these popsicles deliver a burst of joy in every bite. Plus, they’re a fun way to get the kids involved in the kitchen!
Homemade Bomb Pops are a playful twist on the iconic store-bought version, but with a fresher, more wholesome approach. Instead of artificial flavors and excessive sugar, we’re using real fruit juices and natural sweeteners to create layers of vibrant taste. These popsicles not only satisfy your sweet tooth but also let you control the ingredients, making them a healthier alternative for families. They perfectly align with brekcakes.com’s mission to celebrate simple, joyful cooking that brings people together. If you love creative desserts, you’ll also adore our Rainbow Cake or our Berry Smoothie Bowl for more colorful inspiration.
Why I Love This Recipe
Homemade Bomb Pops hold a special place in my heart because they remind me of summers spent with my grandparents. Every year, we’d make batches together, experimenting with different fruit combinations and laughing as the vibrant colors dripped down our hands. Now, I love recreating that same magic with my own family. There’s something incredibly rewarding about watching my kids’ faces light up when they see those red, white, and blue layers—just like mine did years ago. It’s more than a recipe; it’s a tradition filled with love and laughter.
Health and Nutrition
Why it’s good for your body
Homemade Bomb Pops pack a refreshing punch while offering surprising health perks. First, they deliver hydration, especially on hot days, thanks to their high water content. Additionally, when you make them at home, you control the ingredients, avoiding artificial dyes and excess sugar found in store-bought versions. For instance, using real fruit juice boosts vitamin C, which supports immunity and skin health.
Moreover, Homemade Bomb Pops can be a smart way to satisfy sweet cravings without derailing your nutrition. By blending yogurt or coconut milk into the layers, you add protein and healthy fats, keeping you fuller longer. Transitioning to natural sweeteners like honey or maple syrup also reduces blood sugar spikes compared to refined sugars. Plus, the vibrant colors from berries or citrus fruits mean you’re getting antioxidants, which fight inflammation.
Finally, these frozen treats encourage creativity with nutrient-dense mix-ins. Whether you swirl in spinach for iron or chia seeds for omega-3s, Homemade Bomb Pops adapt to your wellness goals. They’re a fun, guilt-free way to stay cool and nourished.
How it fits in a healthy lifestyle
Homemade Bomb Pops fit seamlessly into balanced eating habits. They work as a light dessert or snack, especially if you prioritize whole-food ingredients. For gluten-free or dairy-free diets, simply swap yogurt for almond milk or coconut cream. If heart health is a focus, opt for layers with potassium-rich bananas or antioxidant-packed blueberries.
Pairing these pops with protein-rich meals, like our high-protein breakfast options, ensures steady energy levels. They also complement active lifestyles—freeze them post-workout for a cool reward. For more ways to enjoy wholesome sweets, explore our guilt-free dessert recipes. With endless variations, Homemade Bomb Pops make healthy living deliciously simple.
Making Homemade Bomb Pops is easier than you think, and the results are worth every minute. First, gather your ingredients and three small bowls for mixing. Divide your fruit juices or flavored liquids evenly among the bowls. For a vibrant look, use contrasting colors like cherry, lemonade, and blue raspberry. Whisk each liquid with a bit of sugar or honey to sweeten, but don’t overdo it—these pops should taste refreshing, not overly sugary. Next, gently pour the first layer into your popsicle molds, filling them about one-third of the way. Freeze this layer for 30 minutes or until firm but not solid. Meanwhile, prep the next layer so it’s ready to go. Once the first layer sets, pour the second liquid and freeze again. Repeat for the final layer, then insert popsicle sticks and freeze for at least 4 hours. To save time, prep all three layers in advance and store them in the fridge until you’re ready to layer and freeze. If you’re short on time, use store-bought juices instead of fresh-squeezed—they’ll still taste great.
and-learned-from">Mistakes I’ve made and learned from
When I first tried making Homemade Bomb Pops, I rushed the freezing process and ended up with messy, blended layers. Patience is key—wait until each layer is firm before adding the next. Another mistake? Using flimsy popsicle sticks that snapped when I tried to unmold the pops. Now, I always use sturdy wooden sticks or reusable molds with built-in handles. If your pops won’t release, run the mold under warm water for a few seconds—just don’t overdo it, or they’ll melt. For more tips on perfecting frozen treats, check out my guide on avoiding common popsicle mistakes. And if you love experimenting with flavors, my creative popsicle combinations post has plenty of inspiration. Trust me, learning from these hiccups made my Homemade Bomb Pops way better—and yours will be too!
“`
n-and-variations">Cultural Connection and Variations
Where this recipe comes from
Homemade Bomb Pops bring back memories of sticky summer afternoons and neighborhood ice cream trucks. Originally inspired by the classic American rocket pops, these vibrant treats first gained popularity in the 1950s as a patriotic symbol with their red, white, and blue layers. However, families quickly made them their own by experimenting with flavors like tropical fruit or even swapping dairy for coconut milk in vegan versions.
Around the world, similar frozen treats take on local twists. In Mexico, paletas often feature fresh mango or chili-lime flavors, while Italian gelato pops might layer espresso and cream. Even within the U.S., regional variations pop up—some Southern cooks add a splash of sweet tea syrup, while others in the Midwest might blend in fresh berry purees. Homemade Bomb Pops, though, keep that nostalgic charm, whether you’re making them for a Fourth of July bash or just to beat the heat.
In my family, we turned them into a tradition by using grandma’s vintage popsicle molds and letting the kids mix their own color combinations. The best part? You can tailor them to any season—swap the berries for pumpkin spice in fall or peppermint in winter. No matter how you tweak them, Homemade Bomb Pops always deliver that same burst of joy.
ays-cooking">How it fits in today’s cooking
Today, Homemade Bomb Pops still shine as a crowd-pleaser, especially for those seeking easy, customizable desserts. Modern cooks love them because they’re freezer-friendly and perfect for meal prep, just like these no-bake desserts that save time without sacrificing flavor. They’re also a hit at birthday parties or as a refreshing post-workout snack.
With dietary trends evolving, many now make them sugar-free or packed with superfoods like açai. Others pair them with boozy adult versions for summer barbecues. And let’s be honest—after trying these healthy snacks, you’ll see why Homemade Bomb Pops fit right into today’s balanced lifestyles. Whether you stick to the classic or go wild with new flavors, they’re proof that some traditions only get better with time.
Taste and Texture
What makes it delicious
Homemade Bomb Pops deliver a burst of vibrant, fruity flavors with every lick. The first layer zings with tangy citrus, while the middle swells sweet and juicy, like ripe berries straight from the sun. Finally, the bottom layer cools your palate with smooth, creamy vanilla. Each bite melts into a refreshing, icy-crisp texture that’s light yet satisfying. Natural fruit purees and real vanilla extract make these pops taste brighter and richer than store-bought versions. Plus, the playful swirls of color make Homemade Bomb Pops as fun to look at as they are to eat.
r">Boosting the flavor
For an extra flavor kick, try swapping fruit juices for pureed mango or pineapple—their tropical sweetness pairs perfectly with the vanilla base. Alternatively, drizzle melted dark chocolate over the pops before freezing for a decadent twist. If you love bold contrasts, sprinkle a pinch of chili powder or Tajín on top for a spicy-sweet kick. For more inspiration, check out our guide to healthy summer desserts or explore creative DIY ice cream mix-ins to customize your pops even further.
Tips for Success
Best practices for results
Always use fresh, high-quality fruit juices to ensure your Homemade Bomb Pops have vibrant flavor and color. Meanwhile, chill the popsicle molds for at least 15 minutes before filling them to help the layers set faster. Additionally, pour each layer slowly and evenly to prevent mixing, and freeze for at least 30 minutes between layers for clean stripes. Finally, run warm water over the molds for just a few seconds to release the pops easily without breaking them.
>Mistakes to avoid
Avoid overfilling the molds, as the mixture will expand slightly while freezing and may cause messy spills. Instead, leave about 1/4 inch of space at the top for the best results. Also, don’t skip the layering freeze time—rushing this step will blend the colors of your Homemade Bomb Pops. For more troubleshooting tips, check out our guide on fixing common frozen treat mistakes. If your popsicles stick, try using silicone molds or lightly coating the insides with coconut oil, as explained in our popsicle perfection tutorial.
Serving and Pairing Suggestions
How to serve this dish
Serve Homemade Bomb Pops straight from the freezer for the perfect icy treat on a hot day. For a fun twist, arrange them in a colorful tray or stand them upright in a bed of crushed ice to keep them chilled. Meanwhile, if you’re hosting a summer party, layer them in a clear glass bowl with fresh berries for a vibrant centerpiece. These pops also make a delightful dessert for kids’ birthdays or Fourth of July celebrations. To elevate the presentation, drizzle them with a light honey glaze or sprinkle edible glitter for a festive touch.
What goes well with it
Pair Homemade Bomb Pops with a refreshing glass of homemade lemonade to balance their sweet-tart flavors. Alternatively, serve them alongside a scoop of vanilla bean ice cream for a creamy contrast. If you’re planning a full dessert spread, try pairing them with our Easy Strawberry Shortcake for a fruity combo. For a lighter option, enjoy them with a crisp, chilled Cucumber Mint Infused Water to cleanse the palate between bites.
You can make Homemade Bomb Pops using small paper cups or ice cube trays as alternatives to molds. Simply layer your fruit juices or purees, freeze each layer for 30 minutes before adding the next, and insert popsicle sticks halfway through freezing. Homemade Bomb Pops taste just as delicious with this simple hack!
What are the best flavors for Homemade Bomb Pops?
The classic Homemade Bomb Pop flavors are cherry, lime, and blue raspberry, but you can get creative with strawberry, lemonade, or even tropical flavors like mango and pineapple. Use natural fruit juices or purees for vibrant colors and fresh taste in your Homemade Bomb Pops.
rank-math-faq-item">
How long do Homemade Bomb Pops take to freeze?
Homemade Bomb Pops typically need 4-6 hours to freeze completely, depending on your freezer temperature. For best results, freeze each colorful layer for 30 minutes before adding the next to maintain distinct layers. Your Homemade Bomb Pops will be ready to enjoy the next day!
Can you make healthier Homemade Bomb Pops?
Absolutely! Make healthier Homemade Bomb Pops by using 100% fruit juice with no added sugar, blending fresh fruit with yogurt, or using natural sweeteners like honey. These alternatives create refreshing, guilt-free Homemade Bomb Pops that kids and adults will love.
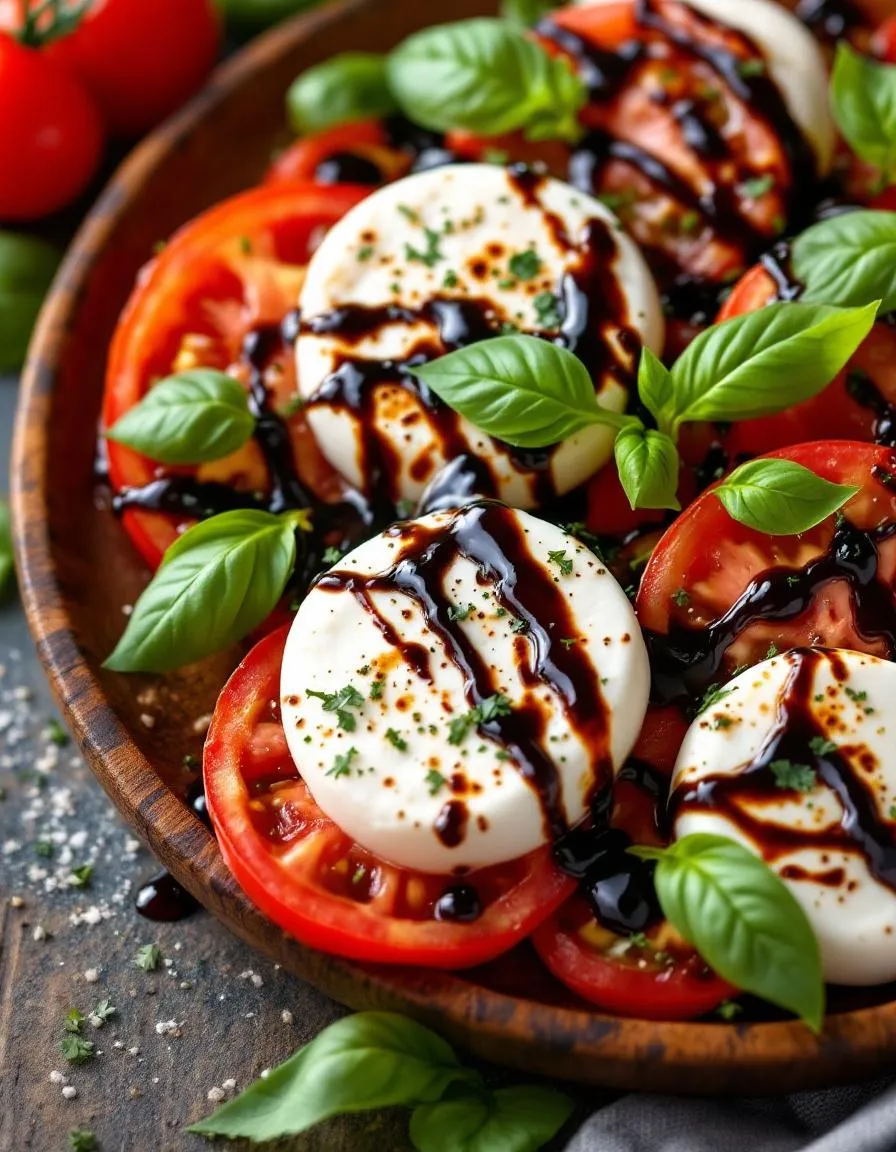
Classic Caprese Salad Recipe – Fresh and Easy
Introduction
There’s something undeniably special about a dish that feels both effortless and elegant. That’s exactly why I adore this Caprese Salad Recipe. Whether you’re hosting a summer gathering or simply craving a fresh, vibrant meal, this classic Italian dish delivers every time. With juicy tomatoes, creamy mozzarella, and fragrant basil, it’s a celebration of simplicity—and yet, it never fails to impress. Best of all, you can whip it up in minutes, making it perfect for busy weeknights or last-minute entertaining.
The Caprese Salad Recipe is more than just a dish—it’s a testament to how a few high-quality ingredients can create something extraordinary. Originating from the Isle of Capri, this salad embodies the essence of Italian cuisine: fresh, flavorful, and uncomplicated. What makes it truly special is its versatility. You can serve it as a light lunch, a stunning appetizer, or even a side dish alongside grilled meats. Plus, its vibrant colors make it as visually appealing as it is delicious. Here at brekcakes.com, we believe food should be both approachable and inspiring, and this recipe perfectly captures that balance. If you love fresh, seasonal dishes, you’ll also enjoy our herb-infused focaccia or our summer berry tart for a sweet finish.
Why I Love This Recipe
This Caprese Salad Recipe holds a special place in my heart because it reminds me of lazy summer afternoons spent with my grandmother. She taught me that the best meals don’t need complicated techniques—just quality ingredients and a little care. Every time I layer those ruby-red tomatoes with milky mozzarella and bright green basil, I feel connected to those cherished moments. It’s a dish that brings people together, and that’s what cooking is all about for me.
Health and Nutrition
Why it’s good for your body
Caprese Salad Recipe packs a powerful nutritional punch while keeping flavors fresh and simple. First, the juicy tomatoes deliver a hefty dose of vitamin C, which boosts immunity and supports healthy skin. Additionally, the creamy mozzarella provides high-quality protein and calcium, strengthening bones and muscles. Together, these ingredients create a dish that’s as nourishing as it is delicious.
Moreover, the fresh basil in Caprese Salad Recipe isn’t just for garnish. It contains antioxidants like flavonoids, which help combat inflammation in the body. Meanwhile, the olive oil drizzle adds heart-healthy monounsaturated fats, promoting better cholesterol levels. Because of this balanced mix, you get a meal that fuels your body without weighing you down.
Finally, Caprese Salad Recipe is naturally low in carbs, making it a great choice for those watching their sugar intake. The combination of fiber from tomatoes and healthy fats from olive oil also helps keep you full longer. Whether you enjoy it as a light lunch or a side dish, this salad supports overall wellness with every bite.
How it fits in a healthy lifestyle
Caprese Salad Recipe fits seamlessly into a balanced diet, whether you’re focusing on Mediterranean eating or simply want a quick, nutritious meal. Since it’s naturally gluten-free and vegetarian, it accommodates various dietary preferences without sacrificing flavor. For those aiming for heart-healthy choices, the olive oil and fresh ingredients align perfectly with Mediterranean diet principles.
If you’re meal prepping, Caprese Salad Recipe is a fantastic option because it comes together in minutes. Pair it with grilled chicken or a high-protein grain bowl for a more filling meal. Its simplicity and versatility make it easy to enjoy regularly, helping you stay on track with your health goals without feeling restricted.
Start by gathering fresh ingredients for your Caprese Salad Recipe—ripe tomatoes, creamy mozzarella, and fragrant basil leaves. Slice the tomatoes and mozzarella into even, medium-thick rounds so they layer beautifully. Arrange them alternately on a serving platter, tucking whole basil leaves between each slice. Drizzle extra virgin olive oil generously over the layers, then sprinkle with flaky sea salt and freshly ground black pepper. For a tangy finish, add a light balsamic glaze or reduction. If you’re short on time, use pre-sliced mozzarella or a store-bought balsamic glaze to speed things up. Chill the salad for 10 minutes before serving to let the flavors meld, but avoid over-chilling as it can dull the tomatoes. Serve with crusty bread to soak up the delicious juices.
Mistakes I’ve made and learned from
Early on, I made the mistake of using underripe tomatoes in my Caprese Salad Recipe, leaving it bland and disappointing. Now, I always check for firm-but-yielding tomatoes with a sweet aroma. Another blunder? Overloading the salad with too much balsamic glaze, which overpowered the delicate mozzarella. A light drizzle is all you need, as I learned from my salad dressing mistakes post. If your basil wilts too quickly, try placing it between the tomato and mozzarella right before serving—this trick saved me after one too many soggy salads. For more tips on balancing flavors, check out my guide on storing fresh herbs to keep your basil vibrant longer.
The Caprese Salad Recipe sings of summer in Italy, where it first appeared on the sunny island of Capri. Locals crafted this dish to celebrate the colors of the Italian flag—ripe red tomatoes, creamy white mozzarella, and vibrant green basil. Over time, it became a symbol of simplicity and freshness, embodying the Mediterranean way of life. Families often serve it at gatherings, letting the ingredients shine with just a drizzle of olive oil and a pinch of salt.
Meanwhile, variations of the Caprese Salad Recipe pop up worldwide. In some regions, chefs swap traditional mozzarella for burrata or add balsamic glaze for a touch of sweetness. Others layer the ingredients into skewers for easy serving at parties. Some home cooks even mix in avocado or peaches for a modern twist. No matter the version, the heart of the dish stays the same: fresh, high-quality ingredients that honor its Italian roots.
ays-cooking">How it fits in today’s cooking
Today, the Caprese Salad Recipe remains a go-to for quick, healthy meals. Busy cooks love how it comes together in minutes, making it perfect for weeknight dinners or last-minute entertaining. Plus, it’s a star at summer BBQs and holiday spreads, pairing beautifully with grilled dishes or flavorful marinades.
Modern kitchens also adapt the recipe to fit dietary needs, like using dairy-free cheese or heirloom tomatoes for extra depth. Some even turn it into a hearty avocado toast topping for breakfast. Whether served classic or reinvented, the Caprese Salad Recipe keeps winning hearts with its timeless appeal and versatility.
Taste and Texture
What makes it delicious
Every bite of Caprese Salad Recipe bursts with fresh, vibrant flavors. Juicy tomatoes offer a sweet-tart balance, while creamy mozzarella melts softly in your mouth. Fragrant basil leaves add a peppery, herbal kick that ties everything together. The drizzle of extra virgin olive oil enhances the richness, and a pinch of sea salt brightens each layer. Together, these ingredients create a Caprese Salad Recipe that feels light yet satisfying, with a perfect contrast between crisp tomatoes and velvety cheese.
r">Boosting the flavor
For a bolder twist, try swapping regular mozzarella for burrata—its luscious center adds even more creaminess. A splash of balsamic glaze or a sprinkle of crushed red pepper flakes can elevate the sweetness and heat. If you love fresh herbs, mix in some oregano or thyme alongside the basil. For more inspiration, explore our guide to fresh herb pairings or discover how to pick the best olive oil for salads. Small tweaks make this classic Caprese Salad Recipe endlessly customizable.
Tips for Success
Best practices for results
Always use fresh, ripe tomatoes for your Caprese Salad Recipe, as they provide the best flavor and texture. Similarly, choose high-quality mozzarella, preferably fresh or buffalo, for a creamy contrast. For the best presentation, slice the tomatoes and cheese evenly, about a quarter-inch thick. Drizzle extra virgin olive oil just before serving to keep the ingredients crisp. Finally, tear the basil leaves by hand instead of chopping them to prevent bruising and maintain their vibrant color.
>Mistakes to avoid
Avoid refrigerating the tomatoes before assembling your Caprese Salad Recipe, as cold temperatures dull their taste and make them mealy. Instead, store them at room temperature until ready to use. Another common mistake is overdressing the salad, which can overpower the delicate flavors. For more tips on balancing dressings, check out our guide on salad dressing ratios. Additionally, skipping the salt or using pre-shredded mozzarella can result in a bland dish. For ideas on enhancing simple recipes, explore our post on elevating basic recipes.
Serving and Pairing Suggestions
How to serve this dish
Showcase your Caprese Salad Recipe by arranging it on a large platter for a stunning centerpiece. Layer the tomatoes, mozzarella, and basil in a circular pattern for a vibrant, eye-catching display. Alternatively, serve individual portions on small plates with a drizzle of balsamic glaze for an elegant touch. This dish shines at summer gatherings, brunches, or as a light appetizer before Italian-inspired dinners. For extra flair, garnish with fresh basil sprigs or edible flowers to enhance its natural beauty.
What goes well with it
Pair your Caprese Salad Recipe with crusty garlic bread for a satisfying crunch that balances the creamy mozzarella. If you love refreshing drinks, try a crisp white wine or sparkling lemonade to complement the salad’s bright flavors. For a heartier meal, serve it alongside our Grilled Chicken Pesto Pasta or a light Roasted Vegetable Quinoa Bowl. Each pairing highlights the freshness of the dish while adding variety to your table.
What are the traditional ingredients in a Caprese Salad Recipe?
A classic Caprese Salad Recipe requires just 5 simple ingredients: fresh mozzarella, ripe tomatoes, fresh basil leaves, extra virgin olive oil, and a sprinkle of salt. The key is using high-quality, fresh components to let the flavors shine. This timeless Italian dish celebrates simplicity.
Can I make Caprese Salad ahead of time?
While you can prep ingredients separately, assemble your Caprese Salad Recipe just before serving to prevent sogginess. The tomatoes release juice over time, and basil wilts. For best results, slice components 1-2 hours ahead but layer them right before eating.
rank-math-faq-item">
What’s the best way to layer a Caprese Salad?
For perfect presentation in your Caprese Salad Recipe, alternate tomato and mozzarella slices in overlapping circles or rows. Tuck whole basil leaves between layers or chiffonade them for even distribution. Drizzle with olive oil and salt after arranging to maintain vibrant colors.
Can I add balsamic glaze to Caprese Salad?
While purists stick to olive oil, many modern Caprese Salad Recipes include balsamic glaze for extra flavor. Use it sparingly as a drizzle to complement without overpowering. The sweet-tart contrast enhances the fresh mozzarella and tomatoes beautifully.
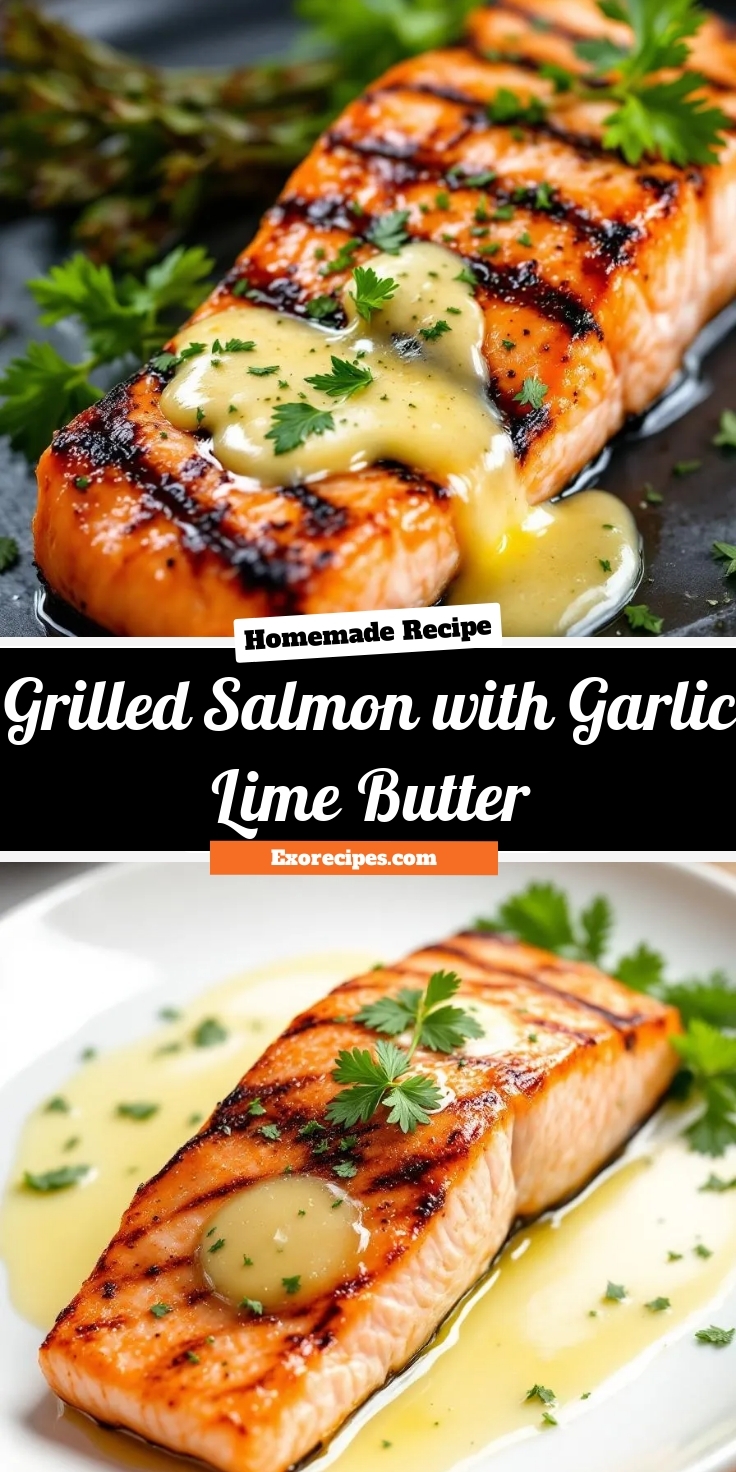
Best Grilled Salmon with Garlic Lime Butter Recipe
Introduction
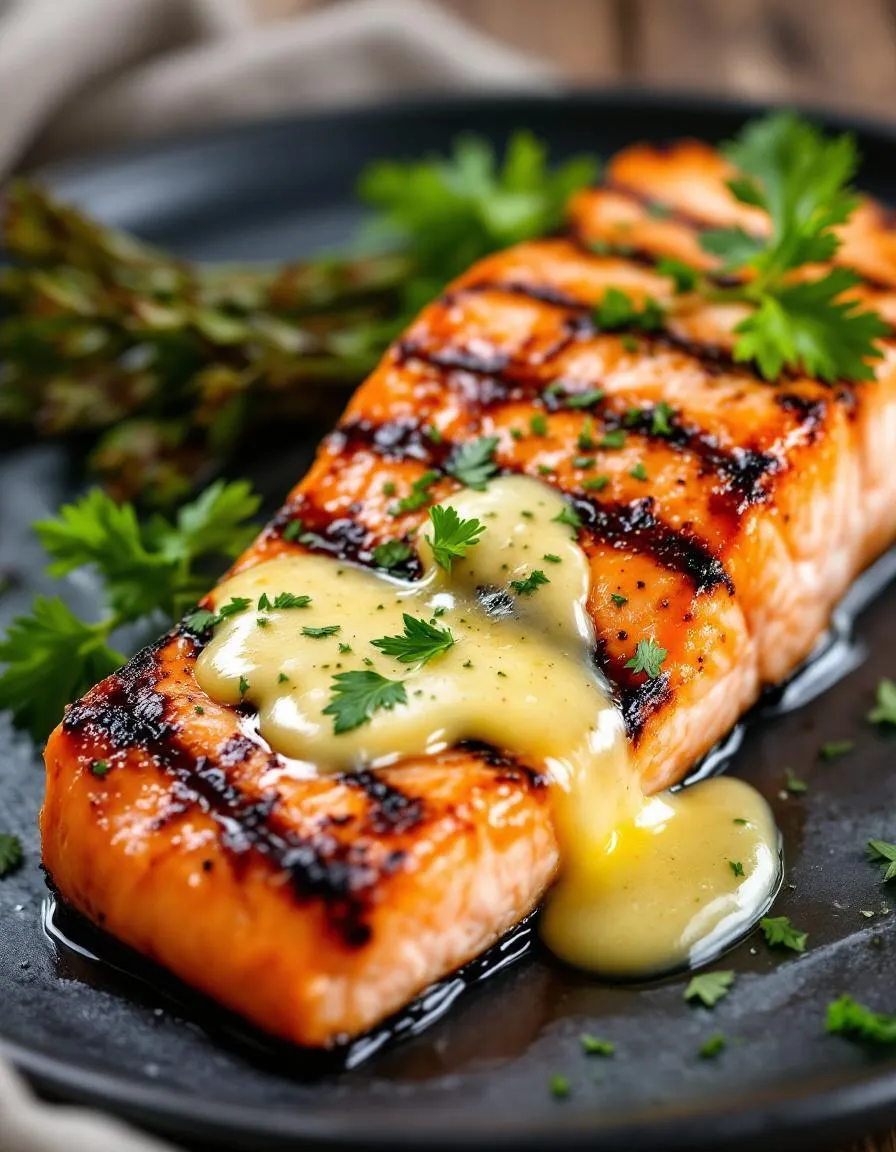
There’s something undeniably special about a dish that feels both luxurious and effortless. That’s exactly what you’ll find with this Grilled Salmon with Garlic Lime Butter. Whether you’re hosting a summer barbecue or simply craving a healthy weeknight dinner, this recipe delivers bold flavors without the fuss. Plus, the zesty garlic lime butter elevates the salmon to a whole new level, making it a meal you’ll want to savor again and again.
Grilled Salmon with Garlic Lime Butter is more than just a meal—it’s a celebration of simplicity and flavor. Perfectly charred on the outside, tender on the inside, and drizzled with a rich, tangy butter sauce, this dish strikes the ideal balance between indulgence and nourishment. For busy home cooks, it’s a lifesaver because it comes together in under 30 minutes. Meanwhile, food lovers appreciate how the bright citrus and savory garlic complement the natural richness of the salmon. If you’re looking for more quick and flavorful recipes, check out my Easy Weeknight Dinners collection. And if you’re new to grilling, don’t worry—this recipe is foolproof, just like my Grilling Tips for Beginners guide promises.
Why I Love This Recipe
This Grilled Salmon with Garlic Lime Butter holds a special place in my heart because it reminds me of lazy summer evenings with my family. My dad used to grill salmon every Sunday, and the smell of garlic and lime wafting through the backyard instantly takes me back. Now, I love recreating that same joy for my own family, watching their faces light up with the first bite. It’s a dish that feels like home, and I hope it becomes a favorite in your kitchen too.
Health and Nutrition
Why it’s good for your body
Grilled Salmon with Garlic Lime Butter packs a powerful nutritional punch while tasting delicious. First, salmon delivers high-quality protein, which helps build and repair muscles. Additionally, it’s rich in omega-3 fatty acids, which support heart health and reduce inflammation. The garlic lime butter not only enhances flavor but also adds antioxidants from garlic and vitamin C from lime.
Moreover, Grilled Salmon with Garlic Lime Butter provides essential nutrients like vitamin D and selenium. These boost immunity and protect cells from damage. Since salmon is low in saturated fat, it’s a heart-smart choice. The dish also keeps you full longer, thanks to its protein and healthy fats, making it great for weight management.
Finally, this meal fits into various diets, from keto to Mediterranean. The fresh ingredients ensure you avoid processed additives. Whether you’re fueling a workout or enjoying a family dinner, Grilled Salmon with Garlic Lime Butter nourishes your body without sacrificing taste.
How it fits in a healthy lifestyle
Grilled Salmon with Garlic Lime Butter effortlessly aligns with balanced eating habits. If you’re following a high-protein diet, this dish delivers lean protein to keep you energized. It’s also naturally gluten-free, making it a safe option for those with sensitivities. For heart-healthy eaters, the omega-3s in salmon promote cardiovascular wellness.
Pair this meal with a side of roasted vegetables or a quinoa salad for a complete, nutrient-dense plate. If you’re meal prepping, it stores well and reheats beautifully. For more gluten-free meal ideas, check out our gluten-free dinner options. If you love heart-healthy recipes, explore our heart-smart meals for additional inspiration.
Whether you’re cooking for one or feeding a family, Grilled Salmon with Garlic Lime Butter fits seamlessly into a healthy routine. It’s quick to prepare, satisfying, and loaded with benefits that support long-term wellness.
A flavorful and juicy grilled salmon topped with a zesty garlic lime butter sauce.
Ingredients
Scale
For the Crust:
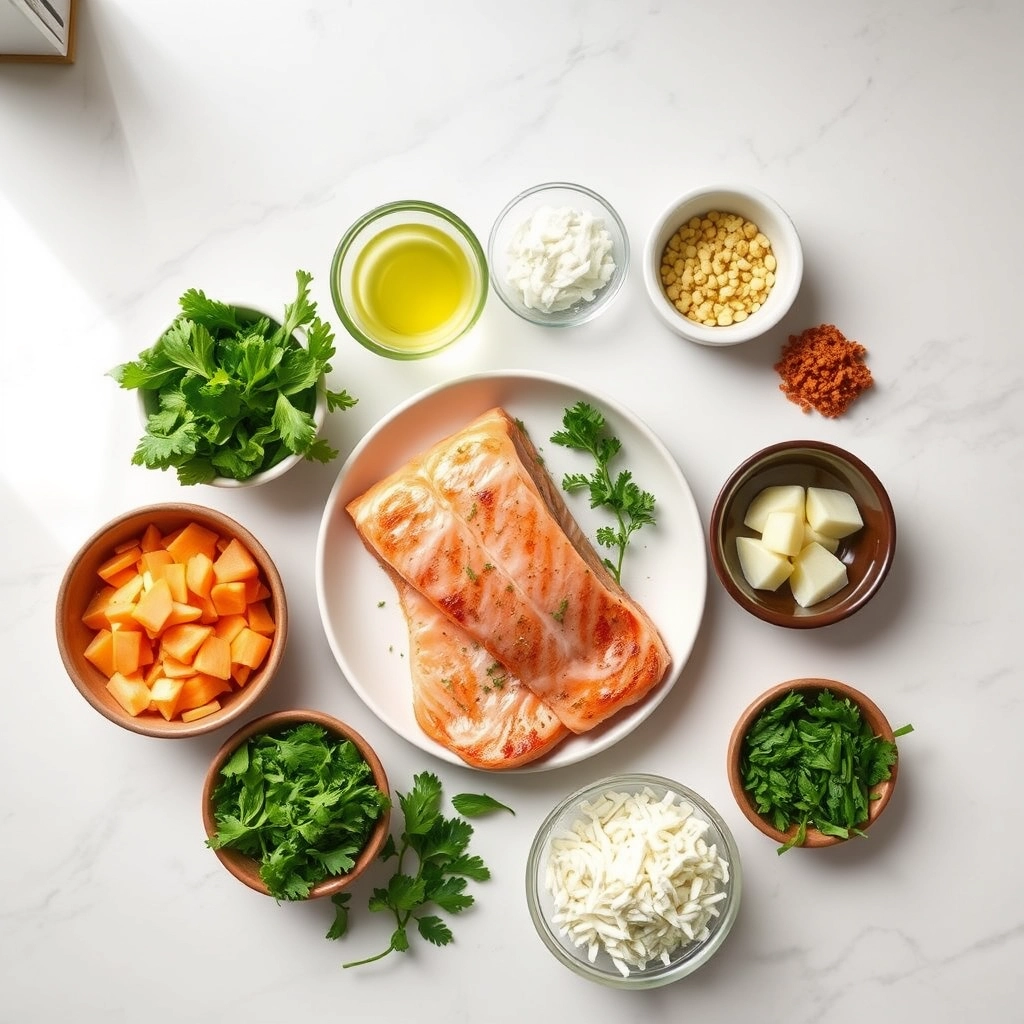
4 salmon fillets (6 oz each)
2 tablespoons olive oil
1 teaspoon salt
1/2 teaspoon black pepper
1/2 teaspoon paprika
4 tablespoons unsalted butter, melted
3 cloves garlic, minced
2 tablespoons fresh lime juice
1 tablespoon chopped fresh parsley
Instructions
1. Prepare the Crust:
Preheat grill to medium-high heat (about 375°F).
Brush salmon fillets with olive oil and season with salt, pepper, and paprika.
Grill salmon for 4-5 minutes per side, or until cooked through.
In a small bowl, mix melted butter, minced garlic, lime juice, and parsley.
Drizzle the garlic lime butter over the grilled salmon before serving.
Notes
You can customize the seasonings to taste.
How to Prepare This Dish
Steps and time-saving tips
Start by patting the salmon fillets dry with paper towels to ensure a crisp sear. Next, season both sides generously with salt and pepper, then drizzle a light coat of olive oil to help the spices stick. While the grill heats to medium-high, mix the garlic lime butter by whisking softened butter, minced garlic, lime zest, lime juice, and a pinch of salt in a small bowl. Once the grill is hot, place the salmon skin-side down and let it cook undisturbed for 4-5 minutes until the edges turn opaque. Carefully flip the fillets and grill for another 3-4 minutes, basting them with the garlic lime butter during the last minute. For a time-saving hack, prepare the butter mixture ahead and store it in the fridge—it hardens slightly, making it easier to slice and melt over the salmon. If you’re short on time, you can also use a grill pan indoors for the same smoky flavor without firing up the grill. Let the salmon rest for a few minutes before serving to lock in the juices.
and-learned-from">Mistakes I’ve made and learned from
I used to overcrowd the grill, thinking I could cook all the fillets at once, but they steamed instead of searing properly. Now I leave space between each piece for even heat distribution. Another blunder? Overcooking the salmon because I didn’t account for carryover heat. After pulling it off the grill, the internal temperature rises another 5 degrees—so I now remove it at 125°F for perfect medium-rare. If you’re new to grilling fish, my guide on grilling tips for beginners covers these pitfalls in detail. Also, I once skipped resting the salmon and lost half the juices when slicing. Letting it sit for 5 minutes makes all the difference, just like with perfectly cooked steak. Trust me, patience pays off!
Cultural Connection and Variations
Where this recipe comes from
Grilled Salmon with Garlic Lime Butter carries a rich heritage, blending coastal traditions with bold flavors. Originally inspired by Pacific Northwest cuisine, where salmon thrives in cold waters, this dish celebrates simplicity and freshness. Indigenous communities often grilled salmon over open flames, while modern adaptations like ours add zesty garlic lime butter for a tangy twist. In Scandinavia, they might swap lime for dill and lemon, while in Japan, miso glaze could take center stage. Either way, the heart of the recipe remains—a perfect balance of smoky, citrusy, and buttery notes.
My family puts its own
spin on Grilled Salmon with Garlic Lime Butter by tossing in a splash of tequila for a Mexican-inspired kick. Meanwhile, friends in the Mediterranean might top it with olives and oregano. No matter the variation, the dish always feels like a celebration of local ingredients and shared meals. Whether you’re by the beach or in a backyard, it’s a recipe that travels well—and tastes even better with stories attached.
How it fits in today’s cooking
Today, Grilled Salmon with Garlic Lime Butter fits seamlessly into healthy, fast-paced lifestyles. Busy cooks love it for weeknight dinners, while meal preppers rely on its versatility for easy meal prep ideas. The dish also shines during summer barbecues, pairing perfectly with grilled veggies or a fresh light salad. Plus, its high protein and omega-3s make it a favorite among fitness enthusiasts.
Modern twists keep it exciting—think air-fryer versions or gluten-free marinades. Yet, the classic recipe still holds its own at holiday gatherings, where it brings a touch of elegance without fuss. Whether you’re cooking for one or hosting a crowd, Grilled Salmon with Garlic Lime Butter adapts without losing its soul. It’s proof that some flavors never go out of style.
>Taste and Texture
What makes it delicious
Grilled Salmon with Garlic Lime Butter delivers a mouthwatering balance of rich, smoky, and tangy flavors. The salmon itself boasts a tender, buttery texture with crispy edges from the grill, while the garlic lime butter melts into every bite, adding a bright, zesty kick. Fresh lime juice cuts through the richness, and minced garlic infuses the dish with a warm, fragrant aroma. Each forkful combines juicy, flaky fish with a velvety, herb-infused sauce that lingers on the palate. Whether you love bold flavors or crave something light yet satisfying, Grilled Salmon with Garlic Lime Butter hits all the right notes.
Boosting the flavor
For an extra flavor boost, try swapping regular butter for homemade herb butter, which adds depth with fresh parsley or dill. A sprinkle of chili flakes or smoked paprika can introduce a subtle heat, while a drizzle of citrus honey glaze enhances the natural sweetness of the salmon. If you prefer crunch, top the dish with toasted almonds or panko breadcrumbs for contrast. Experimenting with these small tweaks keeps Grilled Salmon with Garlic Lime Butter exciting and tailored to your taste.
Tips for Success
Best practices for results
First, pat the salmon dry before grilling to ensure a crisp exterior. Next, preheat the grill to medium-high heat so the Grilled Salmon with Garlic Lime Butter cooks evenly without sticking. For the best flavor, brush the garlic lime butter generously over the salmon during the last few minutes of cooking. Additionally, let the salmon rest for 3-5 minutes after grilling to lock in juices. Finally, serve immediately for the freshest taste and texture.
Mistakes to avoid
Avoid overcooking the salmon by checking for doneness early—the fish should flake easily but remain moist. If you notice the grill is too hot, move the salmon to a cooler spot to prevent burning. Also, skip substituting dried herbs for fresh in the garlic lime butter, as they won’t deliver the same bright flavor. For more grilling tips, check out our guide on perfect grilling temperatures. And if you’re unsure about seasoning, our herb pairing guide will help you balance flavors like a pro.
Serving and Pairing Suggestions
How to serve this dish
Elevate your Grilled Salmon with Garlic Lime Butter by plating it on a bed of vibrant greens or a colorful quinoa salad. For a stunning presentation, drizzle extra garlic lime butter over the top and garnish with fresh cilantro or thinly sliced lime wheels. Meanwhile, this dish shines at summer barbecues, holiday gatherings, or even as an elegant weeknight dinner. To make it extra inviting, serve it alongside a bright, citrusy slaw or roasted vegetables for a pop of color and texture.
h-it">What goes well with it
Pair your Grilled Salmon with Garlic Lime Butter with a crisp white wine like Sauvignon Blanc, which enhances the zesty lime notes. For a non-alcoholic option, try a sparkling lemonade with a hint of mint. Additionally, a side of roasted asparagus with parmesan adds a savory crunch, while a light avocado mango salad brings a refreshing sweetness that balances the rich, buttery salmon perfectly.
How long should I grill salmon with garlic lime butter?
Grilled Salmon with Garlic Lime Butter typically takes 4-6 minutes per side on a medium-high grill, depending on thickness. The salmon is done when it flakes easily with a fork and reaches an internal temperature of 145°F. Baste with the garlic lime butter during the last 2 minutes for extra flavor.
rank-math-faq-item">
What sides go well with Grilled Salmon with Garlic Lime Butter?
Grilled Salmon with Garlic Lime Butter pairs perfectly with light, fresh sides like asparagus, roasted vegetables, or a citrusy quinoa salad. For heartier options, try garlic mashed potatoes or coconut rice. The bright flavors complement both simple and complex side dishes.
Can I use frozen salmon for Grilled Salmon with Garlic Lime Butter?
Yes, but thaw frozen salmon completely in the refrigerator first for best results. Pat it dry before grilling to ensure proper searing. Grilled Salmon with Garlic Lime Butter works well with fresh or properly thawed frozen fillets, though fresh salmon often has better texture.
How do I prevent salmon from sticking to the grill?
For perfect Grilled Salmon with Garlic Lime Butter, start with a clean, well-oiled grill grate heated to medium-high. Place the salmon skin-side down first and don’t move it for the first 4 minutes. The garlic lime butter also helps create a natural non-stick barrier as it melts.