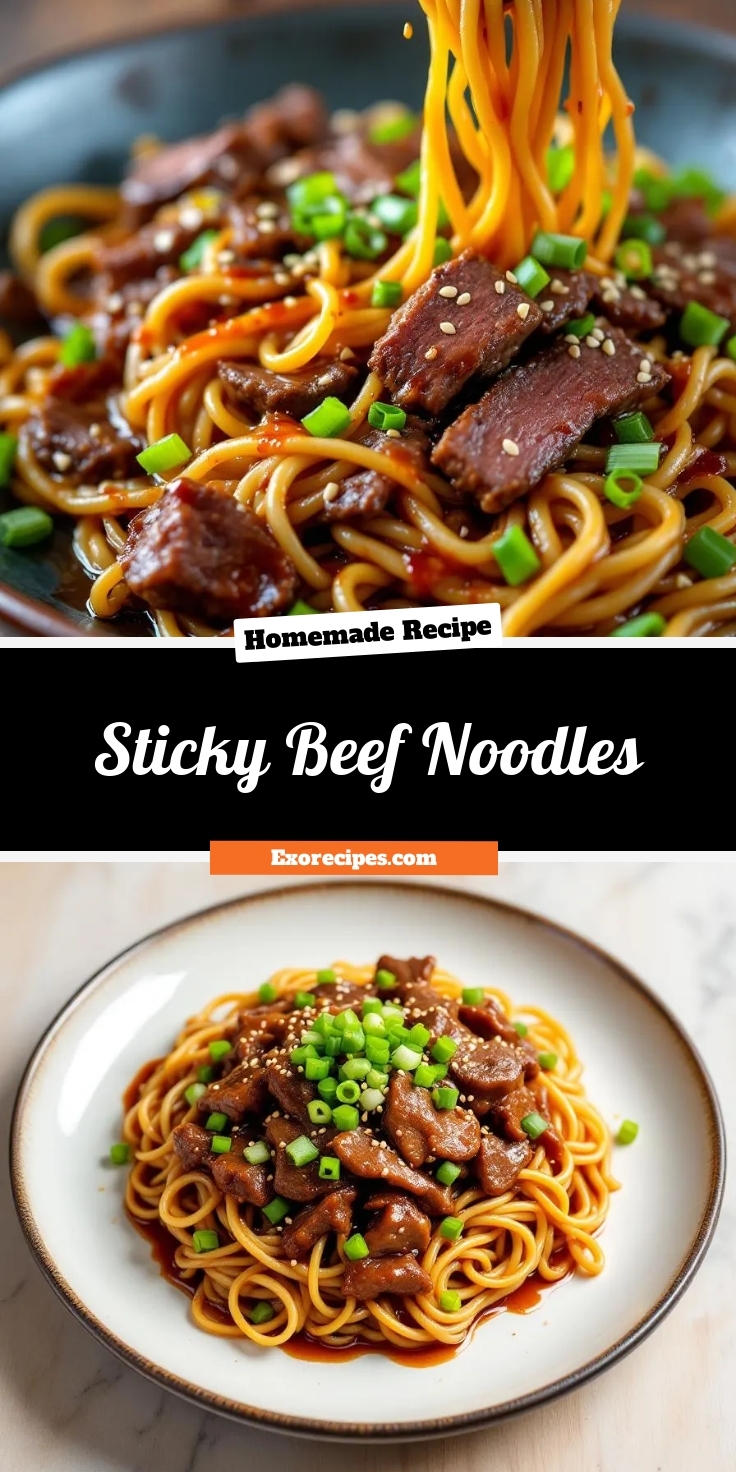
Best Sticky Beef Noodles – Quick & Flavorful Recipe
Introduction
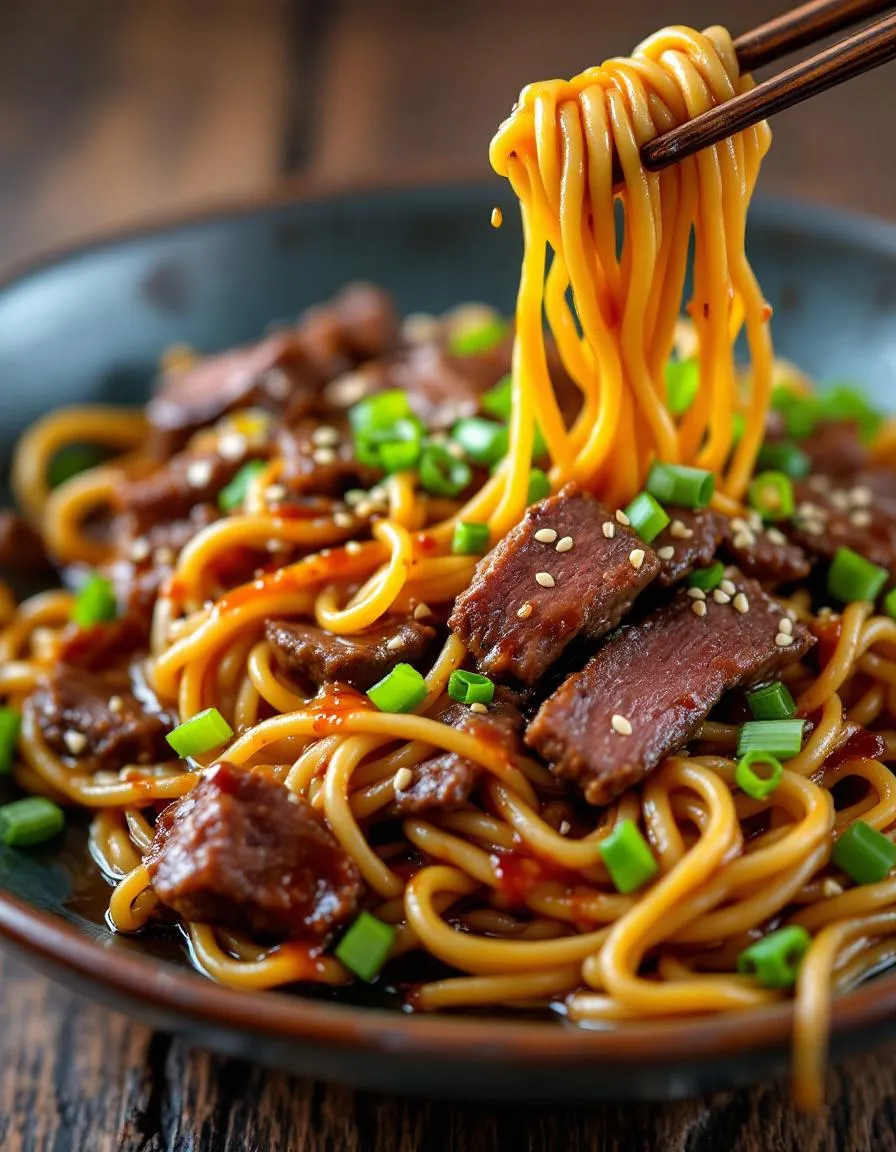
There’s something deeply comforting about a bowl of noodles that hugs your soul after a long day. That’s exactly what Sticky Beef Noodles do—they wrap you in rich, savory flavors with every bite. Whether you’re craving a quick weeknight dinner or a dish to impress guests, this recipe delivers. Plus, it’s packed with tender beef, glossy sauce, and just the right amount of chewiness to keep you coming back for more. Trust me, once you try it, you’ll understand why it’s a staple in my kitchen.
Sticky Beef Noodles combine the bold umami of soy-marinated beef with the satisfying texture of perfectly cooked noodles. The dish balances sweet and savory notes, thanks to a sticky glaze that clings to every strand. Unlike takeout versions, this homemade recipe lets you control the quality of ingredients, making it healthier without sacrificing flavor. It’s also incredibly versatile—swap in your favorite veggies or adjust the spice level to suit your taste. If you love dishes like my Garlic Butter Shrimp Pasta, you’ll adore how these noodles bring the same depth with a beefy twist. Best of all, it comes together in under 30 minutes, proving that delicious meals don’t need hours of effort. For more weeknight inspirations, check out my 15-Minute Meals collection.
Why I Love This Recipe
Sticky Beef Noodles remind me of rainy evenings when my mom would whip up something hearty to brighten the mood. The aroma of sizzling beef and garlic would fill the house, and by the time we sat down, all worries melted away. Now, I recreate that same warmth for my family, watching their faces light up with the first bite. It’s more than a recipe—it’s a little bowl of nostalgia I get to share with you.
Health and Nutrition
Why it’s good for your body
Sticky Beef Noodles pack a nutritious punch while delivering bold flavors. First, the lean beef provides high-quality protein, which helps build muscle and keeps you full longer. Additionally, the dish includes fresh vegetables like carrots and bell peppers, adding fiber and essential vitamins. Because of this balanced combination, Sticky Beef Noodles support both energy levels and digestion.
Moreover, the sauce in Sticky Beef Noodles often features ginger and garlic, both known for their anti-inflammatory properties. These ingredients not only enhance taste but also boost immunity. Meanwhile, the noodles offer carbohydrates for sustained energy, making this dish ideal for active lifestyles. As a result, you get a meal that satisfies cravings while nourishing your body.
Finally, Sticky Beef Noodles can be customized to fit dietary preferences. For instance, you can swap regular noodles for whole-grain or gluten-free options. By doing so, you increase the dish’s fiber content or accommodate food sensitivities. Whether you enjoy it as a weeknight dinner or a meal-prep staple, Sticky Beef Noodles deliver both flavor and nutrition.
How it fits in a healthy lifestyle
Sticky Beef Noodles easily adapt to various dietary goals without sacrificing taste. If you focus on high-protein meals, the lean beef and nutrient-dense veggies make it a smart choice. For those watching carbs, reducing the noodles or using spiralized vegetables keeps the dish light yet satisfying. Either way, you maintain balance without feeling restricted.
This dish also fits into heart-healthy eating patterns when prepared with minimal oil and low-sodium sauces. Pair it with a side of steamed greens, like our Garlic Sautéed Kale, for an extra nutrient boost. Plus, if you’re meal prepping, Sticky Beef Noodles store well, so you can enjoy a wholesome lunch without last-minute cooking. For more ideas on balancing flavors and nutrition, explore our guide to Healthy Meal Prep Tips. With simple tweaks, this recipe becomes a versatile part of your wellness routine.
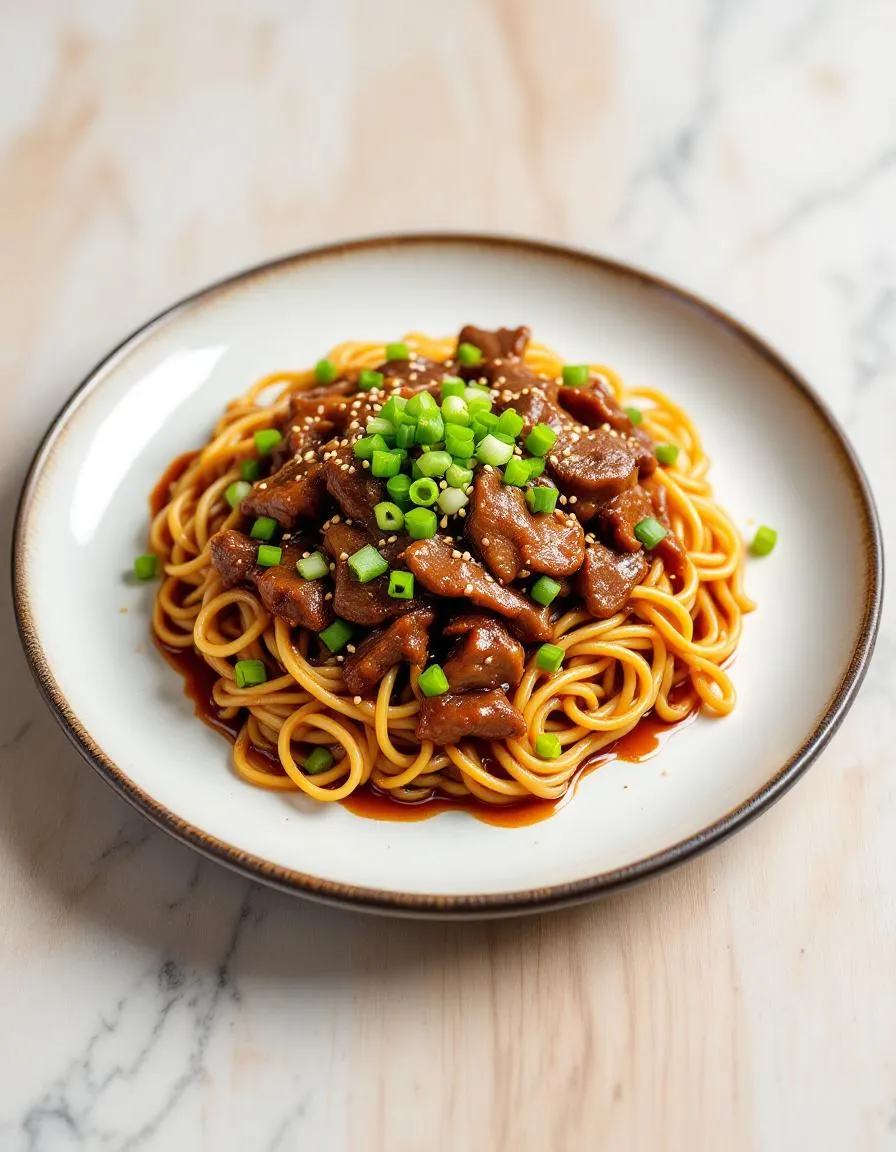
A delicious and savory dish featuring tender beef and noodles coated in a sticky, flavorful sauce.
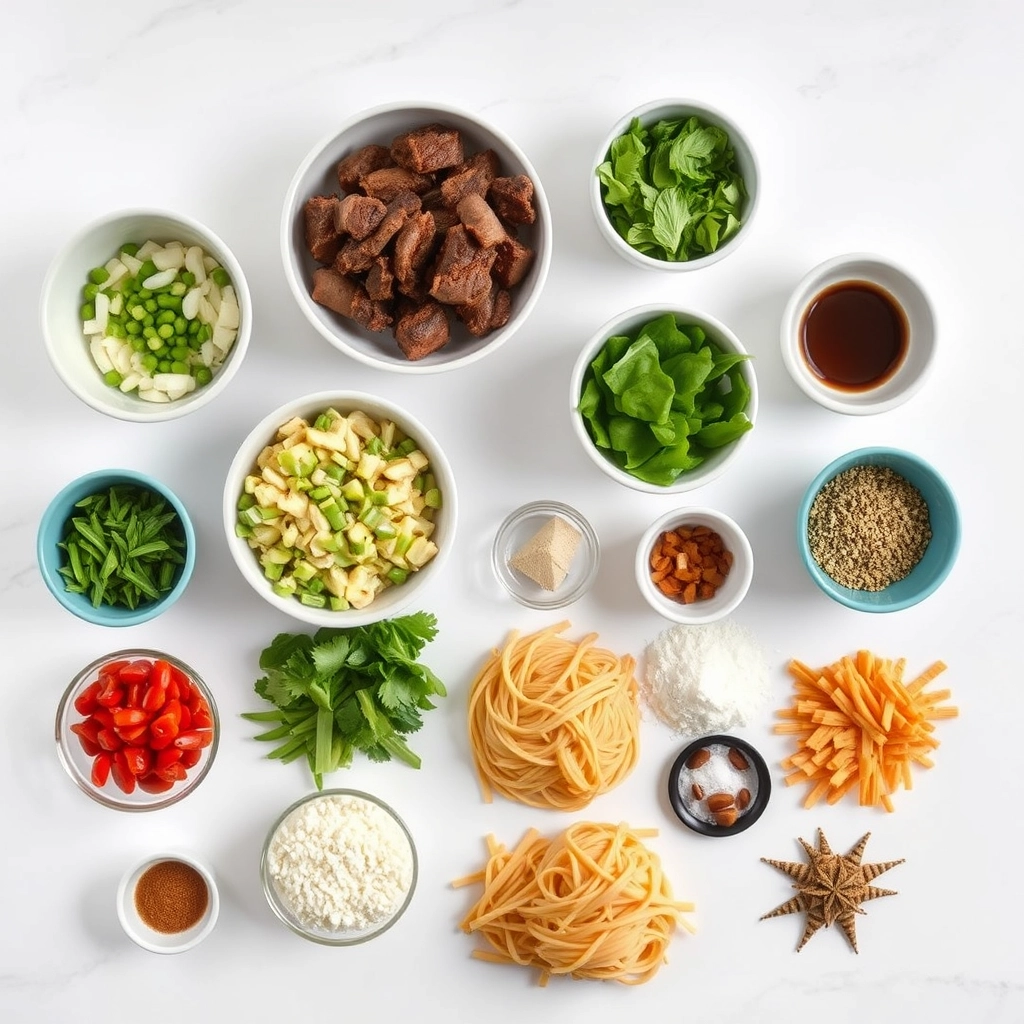
Ingredients
Scale
For the Crust:
8 oz beef sirloin, thinly sliced
8 oz udon noodles
2 tbsp soy sauce
1 tbsp oyster sauce
1 tbsp honey
1 tbsp rice vinegar
2 cloves garlic, minced
1 tsp ginger, grated
1 tbsp vegetable oil
2 green onions, sliced
1 tsp sesame seeds
Instructions
1. Prepare the Crust:
Cook the udon noodles according to package instructions, then drain and set aside.
In a small bowl, mix together soy sauce, oyster sauce, honey, and rice vinegar to make the sauce.
Heat vegetable oil in a large pan over medium-high heat. Add the beef slices and cook until browned, about 2-3 minutes per side.
Add minced garlic and grated ginger to the pan and sauté for 30 seconds until fragrant.
Pour the sauce over the beef and stir to coat. Let it simmer for 2 minutes until the sauce thickens slightly.
Add the cooked noodles to the pan and toss well to combine with the beef and sauce.
Garnish with sliced green onions and sesame seeds before serving.
Notes
You can customize the seasonings to taste.
How to Prepare This Dish
Steps and time-saving tips
Start by slicing the beef thinly against the grain to ensure tenderness. Meanwhile, whisk together the soy sauce, honey, garlic, and ginger in a bowl for the marinade. Toss the beef in the mixture and let it sit for at least 15 minutes—or up to an hour for deeper flavor. While the meat marinates, cook the noodles according to the package instructions, then drain and rinse them under cold water to prevent sticking. Heat a large skillet over medium-high and drizzle in a bit of oil. Once hot, add the beef in a single layer, working in batches if needed to avoid overcrowding. Sear for 2-3 minutes per side until caramelized. Remove the beef and set it aside. In the same skillet, stir-fry the bell peppers and onions until slightly softened, then toss in the noodles and beef. Pour the remaining marinade over everything and fold gently to coat. Let it simmer for another minute until the sauce thickens into a glossy glaze. Garnish with sesame seeds and green onions for a fresh finish. To save time, prep the veggies ahead or use pre-sliced stir-fry beef from the store.
and-learned-from">Mistakes I’ve made and learned from
Early on, I rushed the marinating step, leaving my Sticky Beef Noodles lacking depth. Now I know even 15 minutes makes a difference—but for the best results, I plan ahead. Another blunder? Overcrowding the skillet, which steamed the beef instead of searing it. Cooking in batches takes a few extra minutes, but it’s worth it for that perfect caramelized crust. If you’re new to stir-frying, check out my guide on mastering the wok for even heat distribution. And if your sauce turns out too thin, a sprinkle of cornstarch (like in this sauce-thickening hack) saves the day. Trust me, I’ve been there!
Cultural Connection and Variations
Where this recipe comes from
Sticky Beef Noodles trace their roots to the bustling street markets of East Asia, where vendors perfected the art of balancing sweet, savory, and umami flavors. Originally, cooks used whatever cuts of beef they had, slow-cooking them until tender and glossy with a caramelized sauce. Over time, the dish traveled, adapting to local tastes. In Thailand, for instance, you might find it with a kick of chili and a squeeze of lime, while in Japan, mirin and soy sauce give it a deeper, richer finish.
In my family, Sticky Be
ef Noodles became a weekend staple, often served with a heap of crisp vegetables for contrast. My grandmother swore by adding a splash of pineapple juice for extra sweetness, a trick she picked up from a Filipino friend. Meanwhile, in Sichuan, chefs might toss in numbing peppercorns for that signature tingle. No matter the variation, the heart of the dish remains the same: tender beef clinging to chewy noodles, drenched in a sauce that begs to be licked off the plate.
How it fits in today’s cooking
Today, Sticky Beef Noodles fit perfectly into our fast-paced lives. Busy cooks love how a slow cooker can transform tougher cuts into melt-in-your-mouth goodness, making it a weeknight hero. Plus, it’s a crowd-pleaser for gatherings, whether you’re hosting a casual dinner or prepping meal-prep ideas for the week. The dish also shines in seasonal rotations, offering warmth in winter and a lighter, veggie-packed version in summer.
Modern twists keep it fresh, too. Some swap traditional noodles for zucchini ribbons or toss in global pantry staples like gochujang for a Korean-inspired twist. Whether you stick to tradition or experiment, Sticky Beef Noodles prove that comfort food never goes out of style.
>Taste and Texture
What makes it delicious
Sticky Beef Noodles deliver a bold, savory-sweet punch with every bite. The tender beef caramelizes into a sticky, umami-rich glaze, while the chewy noodles soak up the deeply fragrant sauce. Garlic and ginger add a warm, aromatic kick, and a hint of chili brings just enough heat to balance the sweetness. Each forkful offers a satisfying contrast—soft noodles, slightly crisp veggies, and melt-in-your-mouth beef. The dish smells irresistible, with toasted sesame oil and scallions adding a nutty, fresh finish. Sticky Beef Noodles are the kind of meal that keeps you reaching for another bite.
Boosting the flavor
For extra depth, try marinating the beef in a splash of soy sauce and brown sugar before cooking. Crushed peanuts or toasted sesame seeds add crunch, while a drizzle of spicy honey glaze amps up the sweetness and heat. If you love freshness, toss in shredded carrots or cucumber ribbons for a cool contrast. A squeeze of lime brightens the rich flavors, and a sprinkle of cilantro ties everything together. For more sauce inspiration, check out this garlic sesame dressing—it pairs perfectly with Sticky Beef Noodles.
Tips for Success
Best practices for results
Always slice the beef against the grain for tender Sticky Beef Noodles, and marinate it for at least 30 minutes to lock in flavor. Meanwhile, cook your noodles al dente since they’ll soften further when tossed with the sauce. For the stickiest texture, reduce the sauce over medium heat until it coats the back of a spoon. Finally, garnish with fresh herbs right before serving to keep them vibrant.
Mistakes to avoid
Avoid overcrowding the pan when searing the beef, as this steams instead of browns the meat. Instead, work in batches for a perfect crust. Also, don’t skip toasting your spices—this step deepens the flavor of Sticky Beef Noodles significantly. If your sauce turns too thick, simply stir in a splash of broth or water. For more sauce tips, check out our guide to balancing flavors. And if your noodles clump, rinse them briefly under cold water after cooking, as explained in our noodle texture troubleshooting post.
Serving and Pairing Suggestions
How to serve this dish
For a stunning presentation, pile the Sticky Beef Noodles high in a shallow bowl and drizzle extra sauce over the top. Meanwhile, sprinkle toasted sesame seeds and fresh scallions for a pop of color and crunch. If you’re hosting a casual dinner, serve it family-style with chopsticks and let everyone dig in. Alternatively, pack it for a picnic by layering the noodles in a bento box with crisp veggies on the side. Whether it’s a weeknight meal or a festive gathering, Sticky Beef Noodles always steal the spotlight.
h-it">What goes well with it
Pair Sticky Beef Noodles with a tangy cucumber salad to balance the rich flavors. The cool crunch contrasts perfectly with the savory beef. For drinks, try a citrusy iced green tea or a light lager to cut through the dish’s boldness. If you love bold flavors, serve it alongside our Spicy Kimchi Fried Rice for a satisfying Asian-inspired feast. Finally, end the meal with something sweet like our Matcha Mochi Cake, which complements the umami notes beautifully.
What cut of beef is best for Sticky Beef Noodles?
Flank steak or skirt steak works best for Sticky Beef Noodles because they absorb marinades well and stay tender when cooked quickly. For extra richness, you can also use thinly sliced ribeye or sirloin. These cuts ensure your Sticky Beef Noodles have the perfect texture and flavor.
rank-math-faq-item">
How do you make the sauce stick to the noodles in Sticky Beef Noodles?
The key is to toss the cooked noodles in a cornstarch slurry or reduce the sauce slightly before mixing. This helps the sauce cling to both the beef and noodles, giving Sticky Beef Noodles their signature glossy, flavorful coating. Stir-frying on high heat also helps thicken the sauce naturally.
Can I make Sticky Beef Noodles gluten-free?
Yes! Swap regular soy sauce for tamari or coconut aminos and use rice noodles or gluten-free wheat alternatives. The sticky texture of Sticky Beef Noodles stays intact, and you won’t sacrifice flavor. Just double-check that your oyster sauce (if used) is gluten-free too.
What vegetables go well with Sticky Beef Noodles?
Bok choy, bell peppers, and snap peas add crunch and color to Sticky Beef Noodles without overpowering the dish. For a quicker version, toss in pre-shredded coleslaw mix. These veggies balance the rich, sticky sauce while keeping the focus on the tender beef.
>
Best Pull Apart Garlic Bread – Easy Homemade Recipe
Introduction
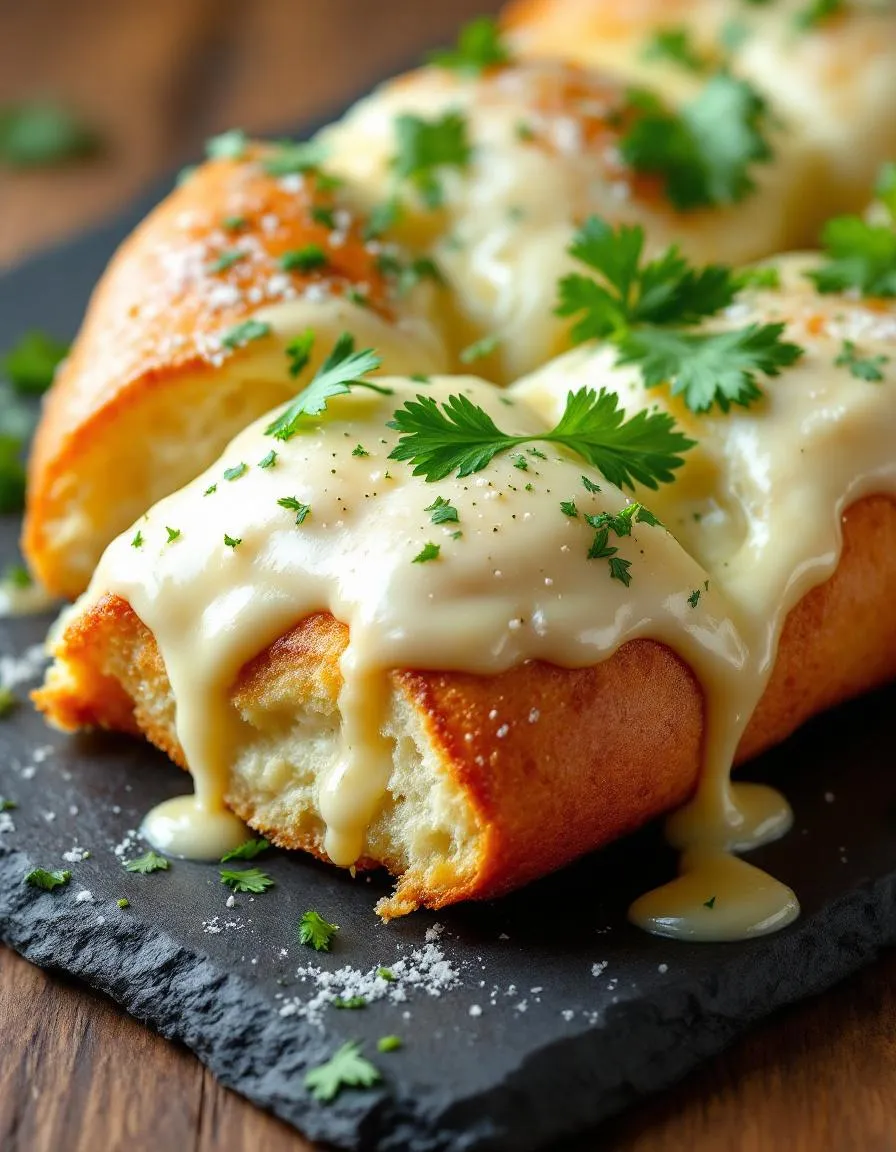
There’s something undeniably comforting about the aroma of freshly baked bread, especially when it’s infused with garlic and herbs. Whether you’re hosting a cozy dinner party or simply craving a savory treat, Pull Apart Garlic Bread delivers that perfect combination of crispy edges, soft centers, and irresistible flavor. Moreover, this recipe brings people together—because who can resist tearing off a warm, buttery piece and sharing it with loved ones?
Pull Apart Garlic Bread is more than just a side dish. It’s a crowd-pleasing centerpiece that transforms any meal into a memorable experience. Unlike traditional garlic bread, this version features tear-and-share pieces baked into a loaf, ensuring every bite is loaded with garlicky goodness. The recipe fits perfectly with brekcakes.com’s philosophy of approachable yet impressive cooking. After all, great food should feel achievable, even for beginners. If you love baking, you might also enjoy my Homemade Artisan Bread, which shares the same simplicity and satisfaction. And for those who adore garlic, my Garlic Herb Focaccia is another must-try.
Why I Love This Recipe
Pull Apart Garlic Bread holds a special place in my heart because it reminds me of Sunday dinners with my family. My mom used to make a similar version, and the moment it hit the table, everyone would dive in, laughing and reaching for their favorite piece. Now, whenever I bake it, that same joy fills my kitchen. It’s a recipe that never fails to bring smiles, and I hope it does the same for you.
Health and Nutrition
Why it’s good for your body
Pull Apart Garlic Bread packs more than just flavor—it delivers real nutritional benefits too. First, garlic, the star ingredient, contains allicin, a compound known for its immune-boosting and anti-inflammatory properties. Additionally, when you use whole-grain bread for your Pull Apart Garlic Bread, you add fiber, which supports digestion and keeps you fuller longer. Plus, olive oil, another key component, provides heart-healthy monounsaturated fats.
Moreover, Pull Apart Garlic Bread can be a great source of energy. The carbohydrates in the bread fuel your body, while the garlic and herbs add antioxidants. If you top it with a sprinkle of Parmesan, you even get a dose of protein and calcium. For those watching their sodium intake, you can easily adjust the salt without sacrificing taste.
Finally, Pull Apart Garlic Bread makes healthy eating enjoyable. Because it’s so flavorful, you won’t feel like you’re missing out. Whether you serve it as a side or a snack, it’s a delicious way to incorporate wholesome ingredients into your meals. Just remember, moderation is key to keeping it balanced.
How it fits in a healthy lifestyle
Pull Apart Garlic Bread can fit seamlessly into a balanced diet with a few smart tweaks. If you’re gluten-free, swap regular bread for a gluten-free loaf—many options work just as well. For a heart-healthy version, use extra-virgin olive oil and reduce butter. You can even add herbs like rosemary or thyme for extra antioxidants without extra calories.
Pairing Pull Apart Garlic Bread with protein-rich dishes, like our Grilled Lemon Herb Chicken, creates a well-rounded meal. It also works great alongside fiber-packed salads, such as our Avocado Quinoa Salad, for a satisfying lunch or dinner. By balancing indulgence with nutrient-dense sides, you can enjoy this comfort food without guilt.
Even on busy days, Pull Apart Garlic Bread is a practical choice. It’s quick to prepare, and leftovers store well for easy reheating. Just keep portions reasonable, and it becomes a tasty part of your everyday eating habits.
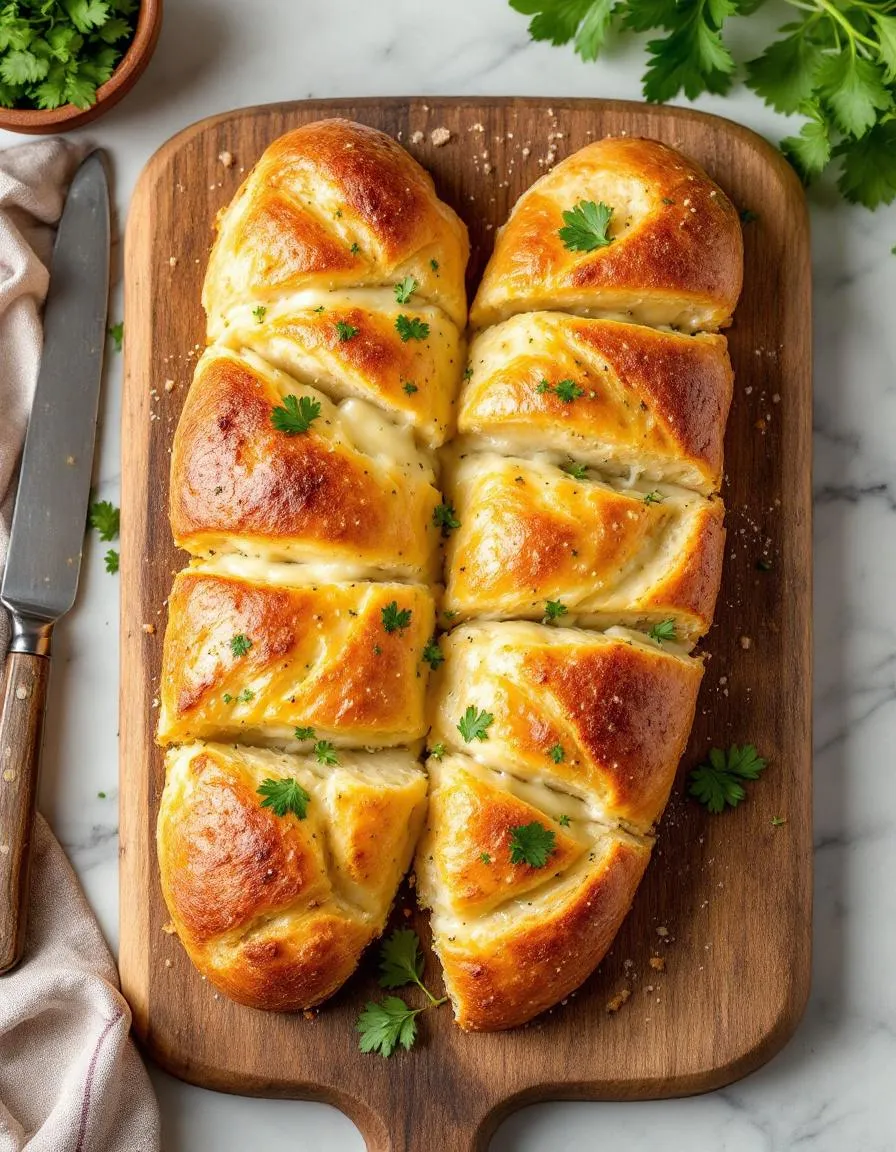
A delicious and shareable pull apart garlic bread loaded with buttery garlic flavor and fresh herbs.
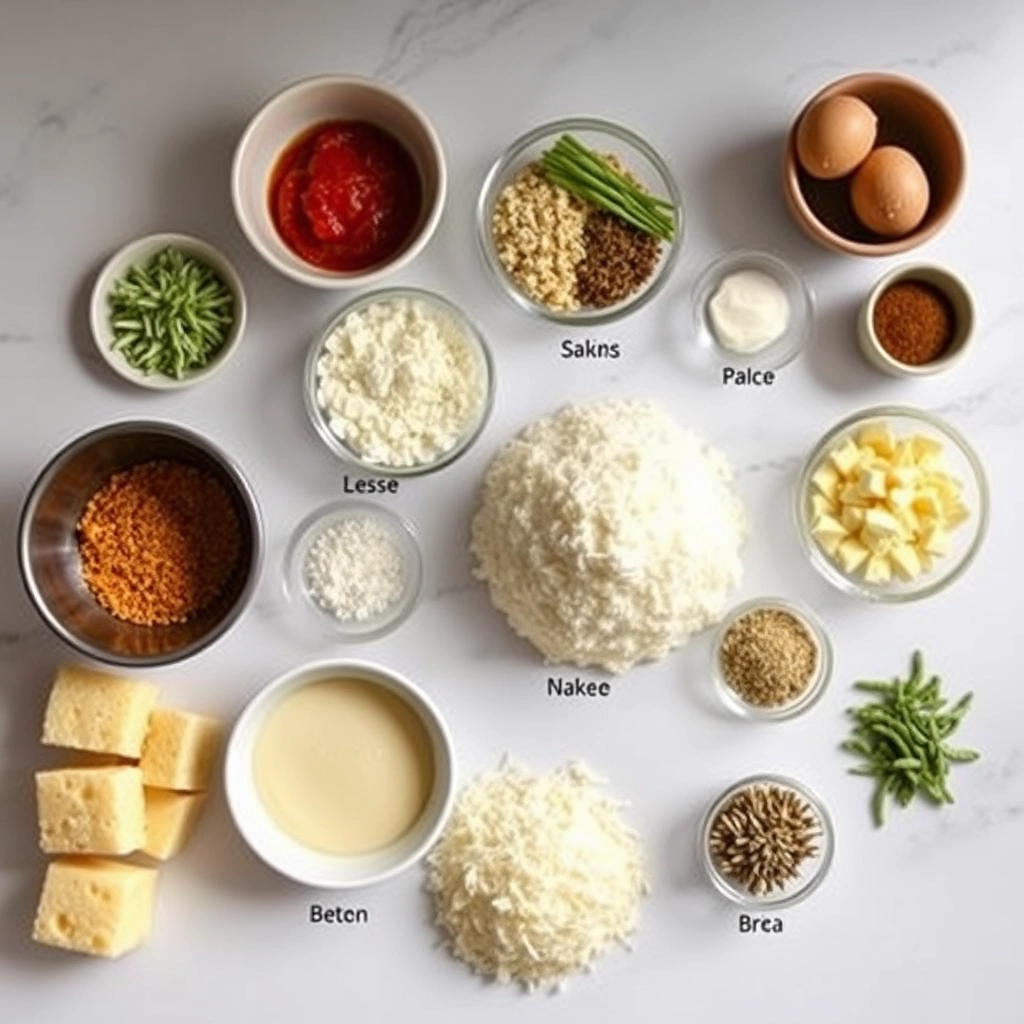
Ingredients
Scale
For the Crust:
1 loaf French bread
1/2 cup unsalted butter, melted
4 cloves garlic, minced
2 tbsp fresh parsley, chopped
1 tsp dried oregano
1/2 tsp salt
1/4 tsp black pepper
1/2 cup shredded mozzarella cheese
Instructions
1. Prepare the Crust:
Preheat oven to 375°F (190°C).
Cut the French bread into 1-inch slices without cutting all the way through the bottom crust.
In a bowl, mix melted butter, minced garlic, parsley, oregano, salt, and pepper.
Spread the garlic butter mixture between each slice of bread, ensuring even coverage.
Sprinkle shredded mozzarella cheese between the slices.
Wrap the loaf in foil and bake for 15 minutes. Unwrap and bake for an additional 5-10 minutes until cheese is melted and bread is crispy.
Notes
You can customize the seasonings to taste.
How to Prepare This Dish
Steps and time-saving tips
Start by preheating your oven to 375°F so it’s ready when you finish assembling the Pull Apart Garlic Bread. While it heats, melt butter in a small saucepan and whisk in minced garlic, parsley, and a pinch of salt for a fragrant, flavorful glaze. Grab a loaf of crusty French or sourdough bread and slice it into even cubes without cutting all the way through—this keeps the base intact for easy pulling later. Next, drizzle the garlic butter generously between every crevice, making sure each piece gets coated. For extra richness, sprinkle shredded mozzarella or Parmesan between the layers. Wrap the loaf in foil, bake for 15 minutes, then unwrap and broil for 2-3 minutes until golden and bubbly. To save time, prep the garlic butter a day ahead or use pre-minced garlic. If you’re doubling the recipe, bake two loaves side by side—just rotate the pans halfway for even browning.
and-learned-from">Mistakes I’ve made and learned from
I once rushed the slicing step and nearly cut my Pull Apart Garlic Bread into disconnected chunks—disaster! Now I use a wooden spoon handle as a guide to stop the knife at the base. Another fail: forgetting to tent the foil loosely, which trapped steam and turned the bread soggy. If your loaf feels damp after baking, pop it back in the oven uncovered for a few minutes. For more troubleshooting, check out my guide on fixing soggy bread textures. Also, don’t skip the broiling step like I did once; that crispy top is key. If you’re new to working with dough, my bread baking basics post covers foundational tips to avoid common pitfalls.
Cultural Connection and Variations
Where this recipe comes from
Pull Apart Garlic Bread feels like a love letter to comfort food, with roots that stretch across continents. While many associate it with Italian-American cuisine, its origins weave through multiple cultures. In Italy, they might serve a simpler version called “pane all’aglio,” often brushed with olive oil and fresh herbs. Meanwhile, in Brazil, they add cream cheese or catupiry for extra richness, turning it into a party favorite. Even in India, bakeries stuff garlic butter into fluffy dinner rolls, creating a spicy, aromatic twist.
My grandmother made her
Pull Apart Garlic Bread with a secret ingredient: a pinch of smoked paprika. She claimed it gave the bread a “hug from the oven.” Families everywhere put their spin on it—some use sourdough for tang, while others mix in grated Parmesan or fresh parsley. Whether it’s a holiday side or a weeknight treat, this dish adapts to every table. No wonder it’s a global star!
How it fits in today’s cooking
Pull Apart Garlic Bread isn’t just nostalgic—it’s a modern multitasker. Busy cooks love it because it pairs with everything, from quick pasta dinners to slow-simmered soups. During holidays, it steals the spotlight as a shareable centerpiece. Plus, today’s bakers experiment with gluten-free flour or vegan butter, proving this classic stays fresh in any era.
Social media fuels its comeback too. Food bloggers stuff it with mozzarella or swirl in pesto, making it Insta-worthy. And let’s be honest: nothing beats tearing into warm, buttery layers after a long day. For more cozy inspiration, check out these comfort food upgrades. Whether you’re feeding a crowd or just craving carbs, Pull Apart Garlic Bread always delivers.
>Taste and Texture
What makes it delicious
Pull Apart Garlic Bread delivers an irresistible combination of flavors and textures. Each fluffy, buttery piece soaks up a rich garlic-infused oil, creating a savory, slightly tangy bite. The golden crust crisps perfectly in the oven, while the interior stays soft and chewy. Fresh parsley adds a bright, herbal note, balancing the deep umami of roasted garlic. As you tear into the loaf, the warm, fragrant aroma of garlic and melted butter fills the air, making Pull Apart Garlic Bread impossible to resist.
Boosting the flavor
For an extra flavor kick, try mixing grated Parmesan into the garlic butter or sprinkling red pepper flakes for a subtle heat. A drizzle of homemade herb oil just before serving adds freshness, while a side of creamy tomato bisque turns this bread into a hearty meal. Experiment with smoked paprika or fresh rosemary for a unique twist. The possibilities are endless, so have fun and tailor it to your taste!
Tips for Success
Best practices for results
Always use fresh garlic for the best flavor in your Pull Apart Garlic Bread. Additionally, soften the butter before mixing to ensure even distribution. For a golden crust, brush the top with melted butter before baking. Meanwhile, let the dough rise in a warm spot to achieve a light, fluffy texture. Finally, serve the Pull Apart Garlic Bread warm for maximum enjoyment.
Mistakes to avoid
Avoid overmixing the dough, as this can make your Pull Apart Garlic Bread dense. Instead, gently fold the ingredients until just combined. Many bakers also skip the resting time, but patience ensures proper rising. For more dough tips, check out our guide on perfect dough consistency. Another common mistake is using too much flour when shaping, which dries out the bread. Lightly dust your hands and surface instead. If you struggle with sticky dough, our handling sticky dough tutorial can help.
Serving and Pairing Suggestions
How to serve this dish
Pull Apart Garlic Bread shines as a crowd-pleasing centerpiece, especially when you arrange it on a rustic wooden board or a warm serving platter. For a festive touch, sprinkle fresh parsley or grated Parmesan over the top just before serving. Meanwhile, this dish works perfectly for game-day gatherings, holiday feasts, or even a cozy family dinner. To make it extra inviting, serve it straight from the oven while the cheese stretches and the aroma fills the room.
h-it">What goes well with it
Pair Pull Apart Garlic Bread with a creamy tomato soup for a comforting combo—the rich flavors balance the bread’s garlicky goodness. Alternatively, try it alongside a fresh Caesar salad, as the crisp greens cut through the richness. For drinks, a chilled glass of white wine or a crisp lager enhances the experience. If you’re planning a full spread, consider serving it with our Creamy Garlic Chicken Pasta or a hearty Classic Beef Stew for a satisfying meal.
How do you make Pull Apart Garlic Bread from scratch?
To make Pull Apart Garlic Bread from scratch, start with a homemade or store-bought loaf of bread. Cut it into cubes without slicing all the way through, then brush melted butter mixed with minced garlic, parsley, and salt between the slices. Bake until golden and crispy for the perfect pull-apart texture.
rank-math-faq-item">
What’s the best bread to use for Pull Apart Garlic Bread?
The best bread for Pull Apart Garlic Bread is a soft, sturdy loaf like sourdough, French bread, or Italian bread. These types hold their shape while baking and create perfect pull-apart sections. Avoid overly dense or crumbly breads, as they won’t give the same satisfying texture.
Can you make Pull Apart Garlic Bread ahead of time?
Yes, you can prepare Pull Apart Garlic Bread ahead of time by assembling it and refrigerating for up to 24 hours before baking. For best results, add the butter and garlic mixture just before baking to prevent sogginess. Reheating leftovers in the oven will restore its crispiness.
What can I add to Pull Apart Garlic Bread for extra flavor?
For extra flavor in Pull Apart Garlic Bread, try adding grated Parmesan cheese, red pepper flakes, or fresh herbs like rosemary or thyme. You can also mix in cream cheese or mozzarella between the slices for a cheesy twist. These additions enhance the classic garlic bread experience.
>
Best Crack Chicken Penne – Creamy & Cheesy Pasta
Introduction
If you’ve ever craved a dish that’s creamy, comforting, and downright addictive, then Crack Chicken Penne is about to become your new obsession. Whether you’re cooking for a busy weeknight or a cozy family gathering, this recipe delivers rich flavors and effortless satisfaction. Plus, it’s the kind of meal that brings everyone to the table with smiles—because who can resist tender pasta smothered in cheesy, bacon-studded goodness?
Crack Chicken Penne combines the best of two worlds: the bold, savory flavors of crack chicken (think shredded chicken, crispy bacon, and ranch seasoning) with the hearty comfort of al dente penne pasta. The result is a creamy, cheesy masterpiece that’s as easy to make as it is delicious. What makes this dish special isn’t just its irresistible taste—it’s also how perfectly it fits into busy lives. With simple prep and crowd-pleasing appeal, it’s a go-to for potlucks, weeknight dinners, or even meal prep. If you love dishes like my Creamy Tuscan Chicken, you’ll adore this twist. And for more pasta inspiration, check out my Garlic Parmesan Pasta—it’s another reader favorite.
Why I Love This Recipe
Crack Chicken Penne holds a special place in my heart because it’s the dish I turn to when I need both comfort and convenience. I first made it during a hectic week when my family needed a pick-me-up, and the way their faces lit up after the first bite sealed the deal. Now, it’s my secret weapon for turning ordinary days into something memorable. Every time I make it, I’m reminded that the simplest recipes often create the happiest moments.
Health and Nutrition
Why it’s good for your body
Crack Chicken Penne packs a nutritious punch while delivering bold flavors. First, the dish combines lean chicken breast with whole-grain penne, offering a balanced mix of protein and complex carbs. These ingredients keep you full longer and stabilize energy levels. Additionally, the creamy sauce often includes Greek yogurt or light cream cheese, which adds probiotics and calcium for gut and bone health.
Moreover, Crack Chicken Penne includes garlic and herbs, which boost immunity and reduce inflammation. The dish also features bacon in moderation, providing savory depth without overloading on saturated fats. For extra nutrients, many versions toss in spinach or broccoli, upping the fiber and vitamin content. Together, these elements make Crack Chicken Penne a satisfying yet wholesome choice.
Finally, the recipe adapts easily to dietary needs. You can swap regular pasta for gluten-free or veggie noodles if preferred. Whether you crave comfort food or a nutrient-dense meal, Crack Chicken Penne delivers both taste and nourishment.
How it fits in a healthy lifestyle
Crack Chicken Penne fits seamlessly into a balanced diet. If you prioritize protein, the chicken and Greek yogurt base helps meet daily goals while keeping calories in check. For those watching carbs, substituting whole-grain or legume-based pasta maintains texture without spiking blood sugar.
This dish also aligns with meal prep strategies. You can make a big batch for easy weekday lunches or freeze portions for busy nights. Pair it with a side salad or roasted veggies to round out the meal. If you love hearty flavors but want lighter options, check out our healthy comfort food swaps for more inspiration.
Whether you’re fueling workouts or simply enjoying a family dinner, Crack Chicken Penne proves that tasty and nutritious can go hand in hand.
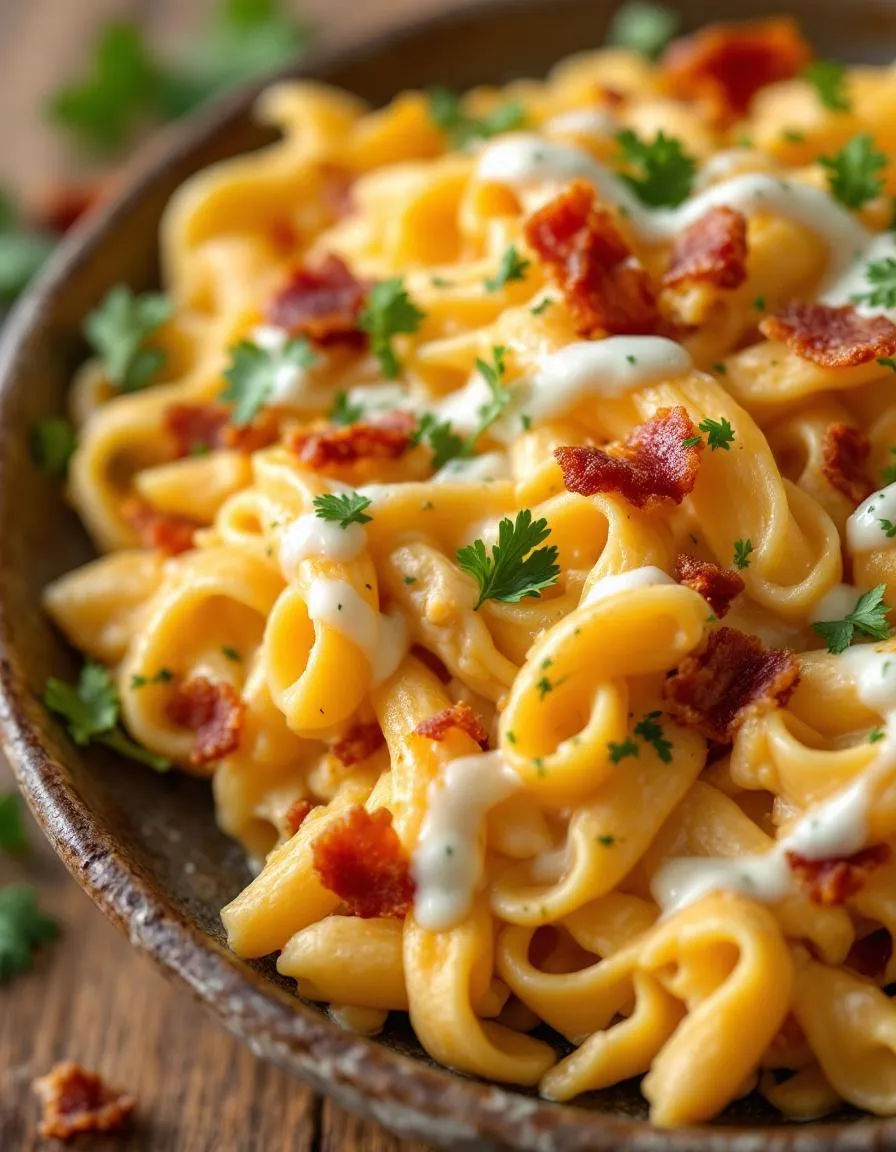
A creamy, cheesy pasta dish with tender chicken and bacon, flavored with ranch seasoning for an irresistible taste.
Ingredients
Scale
For the Crust:
8 oz penne pasta
2 boneless, skinless chicken breasts, cooked and shredded
6 slices bacon, cooked and crumbled
1 cup shredded cheddar cheese
1/2 cup cream cheese, softened
1/2 cup ranch dressing
1/2 cup chicken broth
1 tsp garlic powder
1 tsp onion powder
1/2 tsp black pepper
2 tbsp chopped fresh parsley (optional)
Instructions
1. Prepare the Crust:
Cook the penne pasta according to package instructions until al dente. Drain and set aside.
In a large skillet over medium heat, combine the shredded chicken, crumbled bacon, cream cheese, ranch dressing, chicken broth, garlic powder, onion powder, and black pepper. Stir until the cream cheese is melted and the mixture is smooth.
Add the cooked penne pasta to the skillet and toss to coat evenly with the sauce.
Sprinkle the shredded cheddar cheese over the top and cover the skillet for 1-2 minutes to allow the cheese to melt.
Garnish with chopped fresh parsley if desired and serve warm.
Start by cooking the penne pasta al dente according to the package instructions, then drain and set it aside. Meanwhile, heat a large skillet over medium heat and cook the bacon until crispy. Remove the bacon, but leave the drippings in the pan. Next, sauté the chicken in the same skillet until golden brown, seasoning it with salt, pepper, and a pinch of garlic powder for extra flavor. Once the chicken cooks through, transfer it to a plate and use the same skillet to soften the cream cheese, ranch seasoning, and shredded cheddar over low heat. Stir constantly to create a smooth, creamy sauce. Combine the cooked pasta, chicken, and sauce in the skillet, tossing everything together until well coated. Crumble the reserved bacon on top for a crunchy finish. If you’re short on time, use pre-cooked bacon or rotisserie chicken to speed up the process. For a creamier texture, add a splash of milk while mixing the sauce. Serve the Crack Chicken Penne hot, garnished with fresh parsley or green onions for a pop of color.
Mistakes I’ve made and learned from
One of my biggest mistakes was overcooking the pasta, which turned it mushy when mixed with the sauce. Now, I always set a timer and check for doneness a minute early. Another lesson came from skimping on the ranch seasoning—the dish lacked depth until I measured it precisely. If you’re unsure about seasoning balance, my guide on perfecting pasta sauces has saved me more than once. I also learned the hard way that high heat can cause the cheese to separate, so keep the flame low when melting it. For more tips on avoiding common kitchen blunders, check out my kitchen fails and fixes post. Trust me, a little patience makes all the difference with this recipe.
Crack Chicken Penne feels like a dish that was born out of pure comfort food cravings. While its exact origins are a bit mysterious, many trace its roots to American home cooks who loved combining creamy, cheesy pasta with the irresistible flavors of ranch and bacon. Over time, it became a staple at potlucks and family gatherings, especially in the Midwest, where hearty, crowd-pleasing dishes always shine.
Interestingly, you’ll find variations of Crack Chicken Penne across different regions. Some Southern cooks add a dash of hot sauce or swap in smoked gouda for extra depth. In Italy, a lighter version might skip the heavy cream in favor of a tangy tomato base. Even my grandma puts her own spin on it by tossing in roasted red peppers for a sweet, smoky twist. No matter where you go, though, the soul of the dish stays the same—creamy, savory, and downright addictive.
ays-cooking">How it fits in today’s cooking
Today, Crack Chicken Penne holds its own as a go-to weeknight dinner or a star at casual get-togethers. Busy cooks love it because it’s easy to customize—swap in grilled chicken for a leaner option or load it up with extra veggies for a one-pan meal. Plus, it’s a hit with kids and adults alike, making it a reliable choice for family dinners.
Modern twists keep it fresh, too. Some food bloggers pair it with a crisp side salad for balance, while others turn it into a cozy casserole for chilly nights. If you’re looking for more ways to adapt it, check out our guide to easy weeknight dinners or explore how to make it ahead for meal prep in our meal prep ideas. Whether you stick to the classic or put your own spin on it, Crack Chicken Penne proves that comfort food never goes out of style.
Taste and Texture
What makes it delicious
Crack Chicken Penne delivers a mouthwatering combination of rich, savory flavors and irresistible textures. The tender penne pasta soaks up the creamy, cheesy sauce, while the shredded chicken adds a satisfying bite. Each forkful bursts with smoky bacon, tangy ranch seasoning, and a hint of garlic—creating a bold, comforting taste. Meanwhile, the melted cheddar cheese pulls apart in gooey strands, making every bite indulgent. The aroma alone, fragrant with herbs and crispy bacon, will have everyone gathering around the table. Simply put, Crack Chicken Penne is a crave-worthy dish that balances creamy, salty, and savory in the best way.
r">Boosting the flavor
Want to take your Crack Chicken Penne to the next level? Try stirring in a spoonful of cream cheese for extra richness or topping it with fresh green onions for a bright crunch. If you love heat, a dash of cayenne pepper or diced jalapeños will add a spicy kick. For more inspiration, explore our guide on perfect pasta pairings or discover how to elevate your ranch seasoning for even deeper flavor. A squeeze of lemon juice or a sprinkle of parmesan can also brighten the dish. The possibilities are endless, so have fun experimenting!
Tips for Success
Best practices for results
For the best Crack Chicken Penne, always cook the pasta al dente so it holds up against the creamy sauce. Meanwhile, shred the chicken while it’s warm for easier handling. Additionally, stir the cream cheese and ranch dressing over low heat to prevent clumping. Finally, top with crispy bacon right before serving to maintain its crunch. These small steps guarantee a rich, flavorful dish every time.
>Mistakes to avoid
Avoid overcooking the pasta, as it turns mushy when mixed with the sauce. Instead, check it a minute early since it will continue cooking slightly off the heat. Also, don’t skip draining excess grease from the bacon—too much fat can make the Crack Chicken Penne overly heavy. For more creamy pasta tips, see our guide on perfecting pasta sauces. If your sauce seems too thick, gradually add reserved pasta water instead of milk, which can dilute the flavor. Learn more about balancing textures in our sauce consistency fixes post.
Serving and Pairing Suggestions
How to serve this dish
For a cozy family dinner, serve Crack Chicken Penne in a large, shallow bowl to showcase its creamy texture. Top it with extra shredded cheese, crispy bacon bits, and a sprinkle of fresh chives for a pop of color. Alternatively, layer it in individual ramekins for a stylish twist at potlucks. Since this dish is rich and comforting, it works perfectly for game-day gatherings or holiday feasts. To make it even more inviting, pair it with warm garlic bread right out of the oven.
What goes well with it
A crisp, tangy side salad balances the richness of Crack Chicken Penne beautifully. Try our Spinach Strawberry Salad for a refreshing contrast. For drinks, a chilled glass of iced tea or a light lager cuts through the creaminess. If you want something heartier, serve it with our Garlic Parmesan Roasted Broccoli for a satisfying veggie boost. Finally, a drizzle of hot sauce or ranch dressing adds extra flavor for those who love a kick.
Crack Chicken Penne typically includes penne pasta, shredded chicken, cream cheese, ranch seasoning, bacon, and cheddar cheese. The creamy, savory combination gives Crack Chicken Penne its addictive flavor. You can also customize it with ingredients like garlic or green onions.
Why is it called Crack Chicken Penne?
The name “Crack Chicken Penne” comes from its irresistibly creamy and cheesy flavor, making it so addictive you can’t stop eating it. The dish gets its signature taste from the ranch-seasoned cream cheese sauce. Like the original Crack Chicken, this pasta version is equally hard to resist.
rank-math-faq-item">
Can I make Crack Chicken Penne in a slow cooker?
Yes! You can prepare Crack Chicken Penne in a slow cooker by combining chicken, cream cheese, ranch seasoning, and broth, then shredding the chicken and mixing in cooked pasta later. This method makes the dish even easier for busy weeknights. Just be sure to cook the penne separately to avoid mushiness.
How do I store leftover Crack Chicken Penne?
Store leftover Crack Chicken Penne in an airtight container in the refrigerator for up to 3 days. Reheat it gently on the stove or in the microwave with a splash of milk to restore the creamy texture. For longer storage, freeze it for up to 2 months.
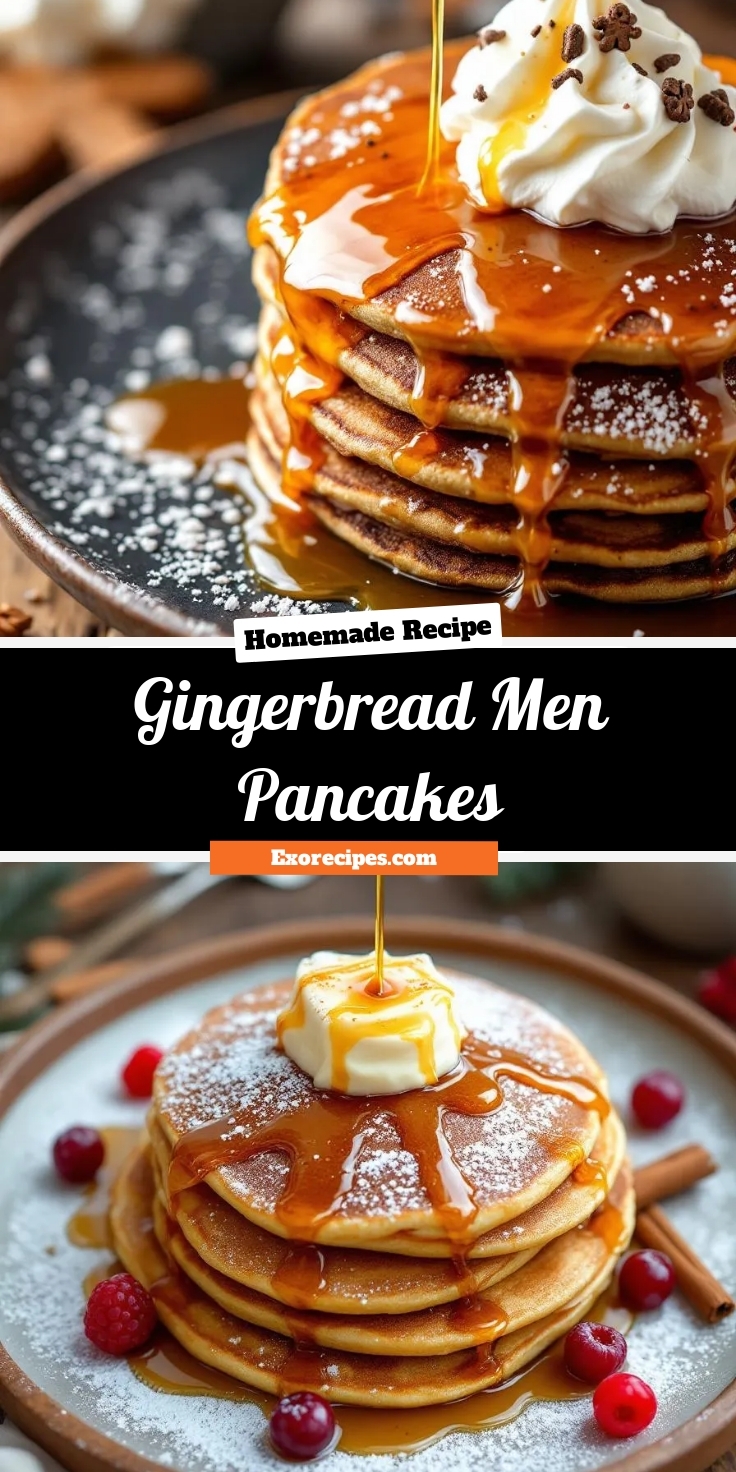
Best Gingerbread Men Pancakes – Easy Holiday Recipe
Introduction
There’s something undeniably special about waking up to the cozy aroma of warm spices filling the air. If you’re looking for a breakfast that feels like a hug, these Gingerbread Men Pancakes will steal your heart. Not only do they bring festive cheer to any morning, but they also let you savor the nostalgic flavors of the holidays year-round. Whether you’re baking with kids or treating yourself to a whimsical meal, this recipe promises joy in every bite.
Gingerbread Men Pancakes are a playful twist on classic pancakes, infused with molasses, cinnamon, and ginger to capture the essence of everyone’s favorite holiday cookie. What makes them stand out? They’re fun to make, even more fun to decorate, and deliver that perfect balance of sweetness and spice. Unlike traditional pancakes, these little guys come to life with simple toppings like icing eyes and candy buttons, making them a hit with both kids and adults. If you’ve ever tried my Fluffy Buttermilk Pancakes, you’ll love how this recipe builds on that same light, airy texture while adding a festive kick. Plus, they’re a fantastic way to introduce seasonal flavors without waiting for December—because who says gingerbread should be limited to Christmas? For more creative breakfast ideas, check out my Cinnamon Roll Pancakes, another family favorite that turns ordinary mornings into something extraordinary.
Why I Love This Recipe
Gingerbread Men Pancakes hold a special place in my heart because they remind me of baking with my grandma during the holidays. She taught me that food isn’t just about taste—it’s about creating memories. Now, whenever I make these pancakes, I feel that same childlike wonder, especially when I see the smiles they bring to my own family’s faces. They’re more than just a meal; they’re a little edible celebration of love and tradition.
Health and Nutrition
Why it’s good for your body
Gingerbread Men Pancakes pack a flavorful punch while offering surprising health perks. First, the warming spices like ginger and cinnamon boost digestion and reduce inflammation. Additionally, these spices add natural sweetness, so you can cut back on refined sugar without sacrificing taste. Moreover, the whole wheat or oat flour in many recipes provides fiber, which keeps you full longer and supports gut health.
Beyond spices, Gingerbread Men Pancakes often include nutrient-rich ingredients like molasses. This sticky sweetener delivers iron and calcium, which are essential for energy and bone strength. Meanwhile, eggs or plant-based alternatives in the batter contribute protein, helping to stabilize blood sugar levels. As a result, you get a satisfying breakfast that fuels your morning without a crash.
Finally, these pancakes are versatile. You can easily tweak them to fit dietary needs, like using almond flour for a gluten-free version. Whether you top them with Greek yogurt or fresh fruit, Gingerbread Men Pancakes turn a treat into a balanced meal. With every bite, you’re enjoying comfort food that loves you back.
How it fits in a healthy lifestyle
Gingerbread Men Pancakes fit seamlessly into a balanced diet when you pair them with smart choices. For a protein boost, try adding a dollop of nut butter or a side of scrambled eggs. If you’re watching sugar intake, skip the syrup and opt for mashed bananas or a drizzle of honey instead.
These pancakes also work well for meal prep. Make a batch ahead and freeze them for quick weekday breakfasts. For gluten-free eaters, swap regular flour with our favorite gluten-free pancake mix. If you’re focused on heart health, use heart-smart oils like avocado oil in the batter. For more ideas on balancing indulgences, check out our tips for healthy breakfast swaps.
Ultimately, Gingerbread Men Pancakes prove that nutritious eating doesn’t mean skipping fun flavors. With mindful tweaks, they become a guilt-free part of your routine.
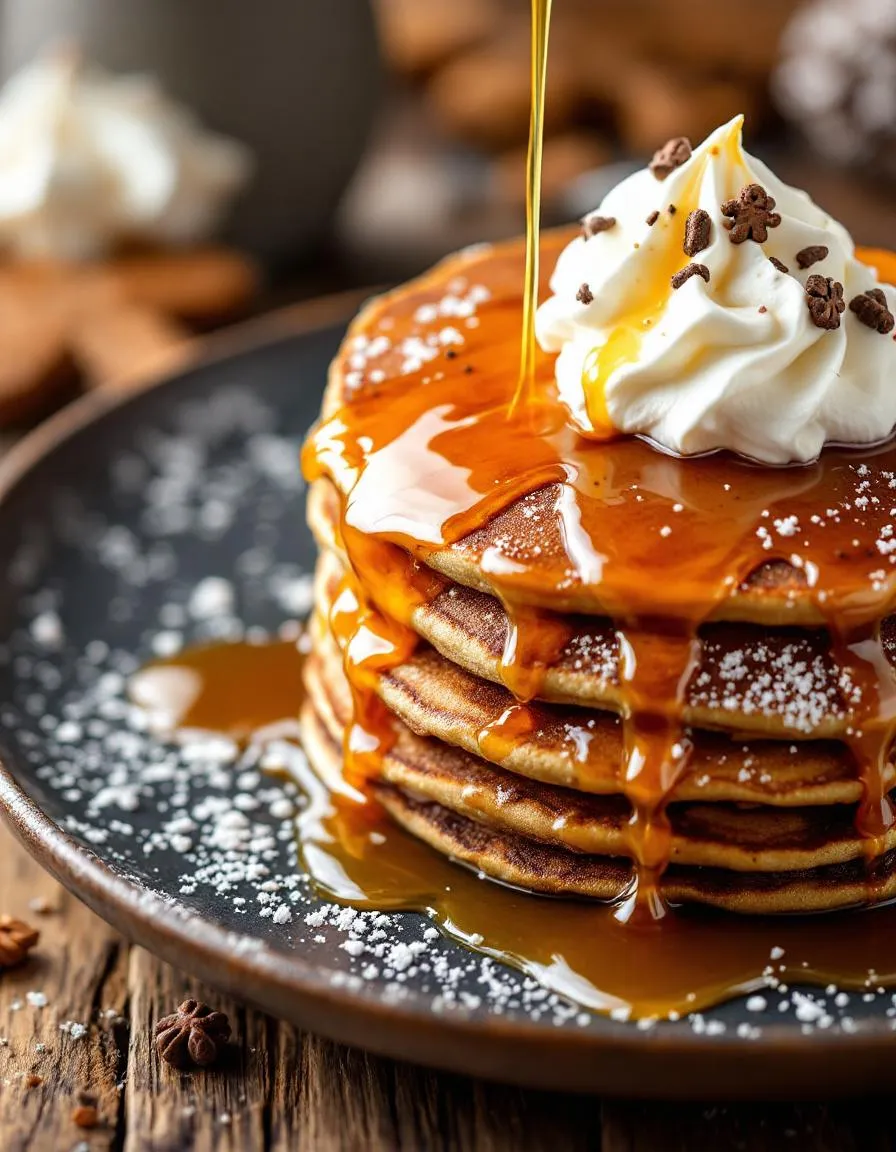
Festive and flavorful gingerbread men-shaped pancakes perfect for holiday breakfasts.
Ingredients
Scale
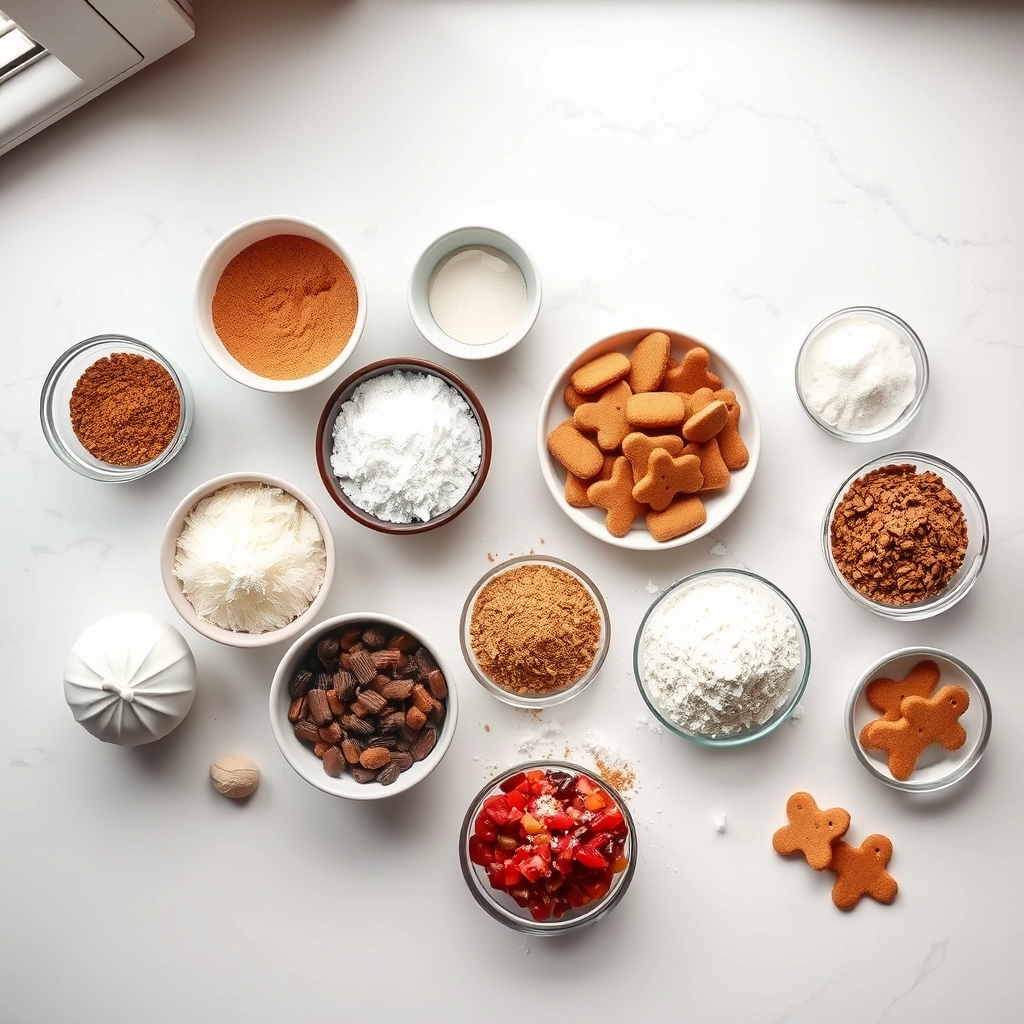
For the Crust:
1 1/2 cups all-purpose flour
1 tsp baking powder
1/2 tsp baking soda
1 tsp ground ginger
1 tsp ground cinnamon
1/4 tsp ground cloves
1/4 tsp salt
1 large egg
1/4 cup molasses
1 1/4 cups buttermilk
2 tbsp melted butter
1 tbsp brown sugar
Cooking spray or extra butter for greasing
Instructions
1. Prepare the Crust:
In a large bowl, whisk together flour, baking powder, baking soda, ginger, cinnamon, cloves, and salt.
In another bowl, beat the egg, then mix in molasses, buttermilk, melted butter, and brown sugar until smooth.
Pour the wet ingredients into the dry ingredients and stir until just combined. Let the batter rest for 5 minutes.
Heat a griddle or non-stick pan over medium heat. Lightly grease with cooking spray or butter.
Pour batter into a squeeze bottle or piping bag and pipe gingerbread men shapes onto the griddle.
Cook until bubbles form on the surface, then flip and cook the other side until golden brown.
Serve warm with maple syrup or whipped cream.
Notes
You can customize the seasonings to taste.
How to Prepare This Dish
Steps and time-saving tips
Start by whisking together the dry ingredients—flour, baking powder, ginger, cinnamon, and a pinch of salt—in a large bowl. Meanwhile, melt the butter and let it cool slightly before mixing it with milk, an egg, and molasses in a separate bowl. Pour the wet ingredients into the dry mixture and gently stir until just combined; overmixing will make your Gingerbread Men Pancakes tough. Heat a nonstick skillet or griddle over medium-low heat and lightly grease it with butter or oil. Pour small circles of batter to form the heads, then add elongated dollops for the arms and legs. Cook until bubbles form on the surface, then flip carefully with a spatula. For a time-saving trick, use a squeeze bottle to control the batter flow and perfect those gingerbread shapes. Keep finished pancakes warm in a low oven while you cook the rest. Serve with a drizzle of maple syrup or a dusting of powdered sugar for extra charm.
and-learned-from">Mistakes I’ve made and learned from
My first batch of Gingerbread Men Pancakes turned into lumpy blobs because I rushed the batter—turns out, letting it rest for 5 minutes helps the flour hydrate and prevents uneven cooking. Another time, I cranked the heat too high, scorching the edges before the centers cooked through. Now I swear by medium-low heat and patience, just like I use for my Fluffy Buttermilk Pancakes. And if your shapes go rogue? No stress! A cookie cutter can tidy them up post-cooking, or embrace the whimsy like I did with these Imperfect Pancake Art ideas. The key is to have fun and remember—even misshapen gingerbread tastes delicious.
Cultural Connection and Variations
Where this recipe comes from
Gingerbread Men Pancakes weave together the cozy charm of holiday traditions with the everyday joy of breakfast. Originating from European gingerbread customs, this playful twist transforms classic cookie shapes into fluffy, spiced pancakes. Families in Germany and Scandinavia often bake gingerbread during winter festivals, but flipping them into pancake form adds a whimsical breakfast twist. Meanwhile, in the U.S., creative home cooks love adapting the recipe—some add molasses for depth, while others swap cinnamon for cardamom to match their pantry staples.
Across cultures, Ginger
bread Men Pancakes take on unique personalities. In Sweden, cooks might top them with lingonberry jam for a tart contrast. Down South, a drizzle of bourbon-infused syrup turns them into a grown-up treat. My grandma, for instance, always sneaked orange zest into the batter, claiming it brightened the spices. Whether you stick to tradition or riff on flavors, these pancakes carry the warmth of shared stories—one bite at a time.
How it fits in today’s cooking
Today, Gingerbread Men Pancakes bridge nostalgia and modern convenience. Busy parents stack them as festive weekend treats, while food bloggers spotlight them as holiday breakfast showstoppers. Thanks to pre-mixed spice blends and pancake molds, even beginners can nail the recipe. Plus, health-conscious cooks tweak them with whole-grain flour or plant-based milk, proving tradition can adapt without losing soul.
Beyond December, these pancakes sneak into year-round rotations. Some serve them as comfort food classics during rainy mornings, while others miniaturize them for toddler-friendly brunches. However you enjoy them, Gingerbread Men Pancakes remind us that food connects—whether through heritage, creativity, or simply the joy of a syrup-drenched smile on a plate.
>Taste and Texture
What makes it delicious
Gingerbread Men Pancakes deliver a warm, spiced aroma that fills the kitchen with holiday nostalgia. Each bite combines fluffy, tender pancake layers with the rich, molasses-kissed flavor of gingerbread. The subtle heat from cinnamon and ginger lingers on your tongue, while a hint of brown sugar adds caramel-like sweetness. Meanwhile, the edges crisp up slightly, creating a delightful contrast to the soft, pillowy centers. Whether drizzled with syrup or enjoyed plain, Gingerbread Men Pancakes bring cozy comfort to every forkful.
Boosting the flavor
For an extra flavor boost, try folding minced crystallized ginger into the batter for a spicy, chewy surprise. A dollop of whipped cinnamon honey butter melts beautifully over the warm Gingerbread Men Pancakes, amplifying their warmth. If you love texture, sprinkle crushed pecans or candied walnuts on top for a nutty crunch. Pair them with a spiced maple syrup or our homemade caramel sauce for a decadent twist. For more pancake inspiration, explore our guide to fluffy pancake secrets to perfect your technique.
Tips for Success
Best practices for results
Always measure your dry ingredients precisely for Gingerbread Men Pancakes, as too much flour can make them dense. Meanwhile, heat your griddle or pan over medium-low heat to prevent burning before the batter cooks through. Additionally, let the batter rest for 5 minutes after mixing to activate the leavening agents for fluffier results. Finally, use a squeeze bottle or piping bag to shape your Gingerbread Men Pancakes neatly—this ensures crisp edges and even cooking.
Mistakes to avoid
Avoid overmixing the batter, as this develops gluten and leads to tough Gingerbread Men Pancakes. Instead, gently fold the wet and dry ingredients until just combined. Furthermore, don’t flip the pancakes too early—wait for bubbles to form on the surface, just like with classic fluffy pancakes. Also, skip the high heat; gingerbread batter browns faster than regular pancake batter, so keep the temperature moderate. For more troubleshooting, check our guide to perfect pancake texture every time.
Serving and Pairing Suggestions
How to serve this dish
Turn your Gingerbread Men Pancakes into a festive centerpiece by stacking them playfully on a large platter. Drizzle warm maple syrup over the top and sprinkle powdered sugar for a snowy effect. Meanwhile, for holiday brunches, arrange them around a bowl of whipped cream or yogurt for dipping. If you’re serving kids, add mini chocolate chips as buttons or eyes to make the pancakes even more fun. These charming Gingerbread Men Pancakes also shine at winter gatherings, especially when paired with seasonal decor like cinnamon sticks or fresh cranberries.
h-it">What goes well with it
Pair your Gingerbread Men Pancakes with a spiced chai latte for a cozy flavor match. The warm spices in both the pancakes and the drink create a harmonious winter treat. Alternatively, try them with a scoop of vanilla bean ice cream for a decadent twist. For a balanced brunch, serve them alongside crispy air fryer bacon or fresh fruit salad. If you love sweet and savory combos, our cinnamon roll pancakes make a delightful addition to the spread.
How do you make gingerbread men pancakes from scratch?
To make gingerbread men pancakes, mix flour, baking powder, ginger, cinnamon, and nutmeg in a bowl. Combine wet ingredients like molasses, milk, and egg, then stir into the dry mix. Cook the batter on a griddle in gingerbread man shapes for festive, spiced pancakes.
rank-math-faq-item">
Can you use cookie cutters for gingerbread men pancakes?
Yes! Place metal gingerbread man cookie cutters on a greased griddle, pour batter inside, and cook until bubbles form. Remove the cutter carefully before flipping. This method ensures perfect gingerbread men pancakes every time.
What toppings go well with gingerbread men pancakes?
Gingerbread men pancakes pair beautifully with whipped cream, maple syrup, or a dusting of powdered sugar. For extra flavor, add candied ginger, cinnamon butter, or a drizzle of caramel to enhance the spiced taste.
Are gingerbread men pancakes kid-friendly?
Absolutely! Kids love the fun shapes and warm spices in gingerbread men pancakes. They’re a hit for holiday breakfasts or themed parties, and you can even let little ones decorate them with edible markers or sprinkles.
>
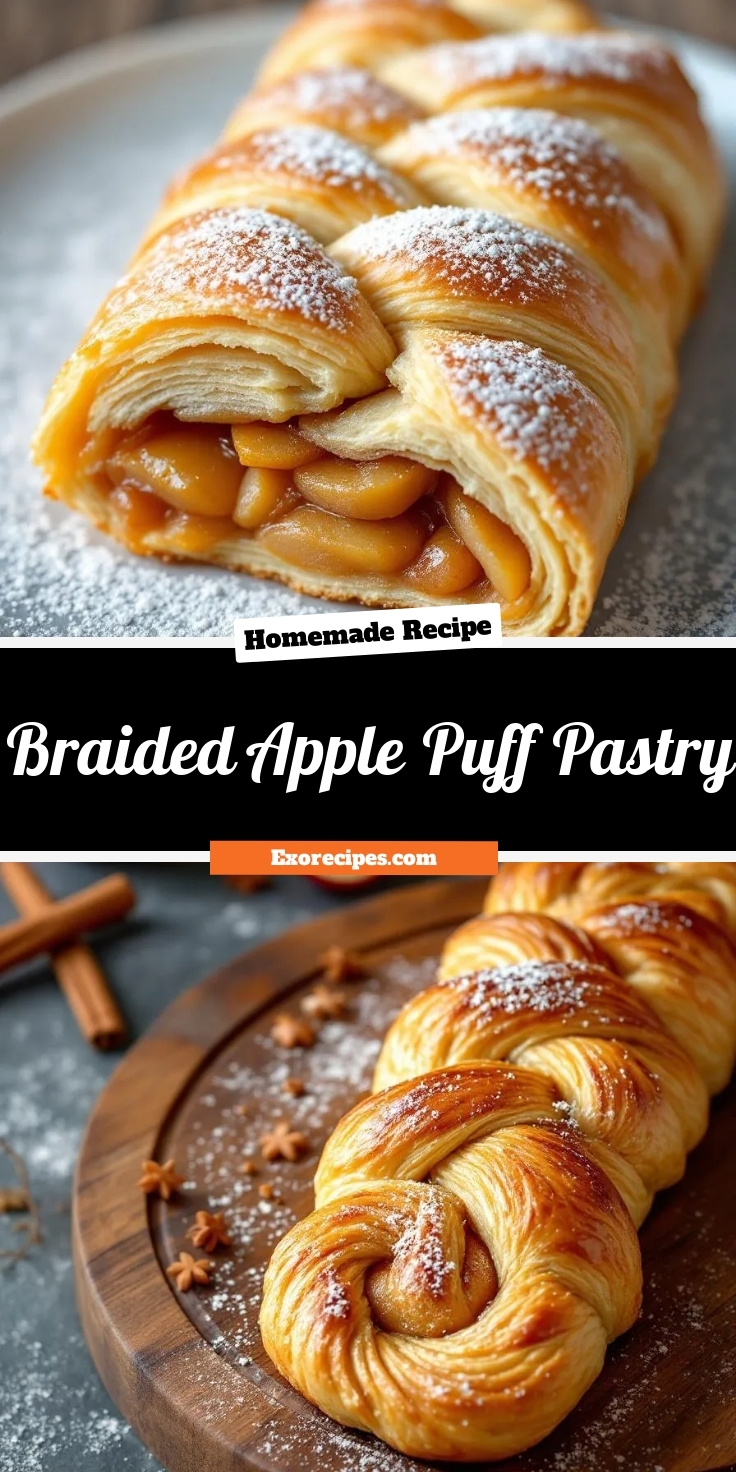
Easy Braided Apple Puff Pastry – Quick Dessert Recipe
Introduction
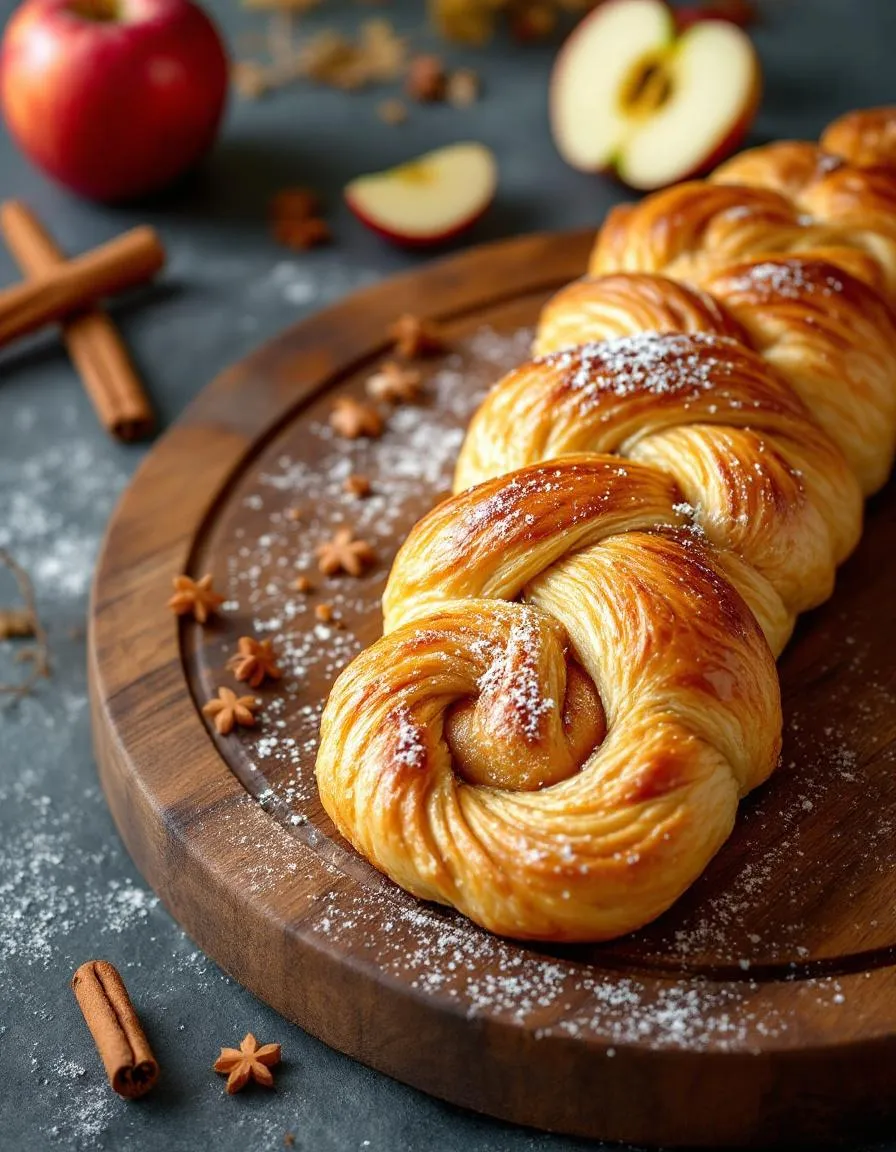
There’s something undeniably comforting about the aroma of baked apples and buttery pastry filling the air. Whether you’re hosting a cozy brunch or simply craving a sweet treat, this Braided Apple Puff Pastry delivers warmth and nostalgia in every bite. Moreover, it’s surprisingly easy to make, yet impressive enough to wow your guests. Trust me, once you try it, you’ll understand why this recipe holds a special place in my kitchen—and hopefully, in yours too.
Braided Apple Puff Pastry is a delightful twist on classic apple desserts, combining flaky, golden puff pastry with a spiced apple filling. Unlike traditional pies or tarts, this recipe weaves the pastry into a beautiful braid, creating a stunning centerpiece that’s as fun to make as it is to eat. Perfect for fall gatherings or even a lazy Sunday morning, it strikes the perfect balance between simplicity and elegance. If you love easy yet impressive desserts, you’ll adore this recipe just as much as my Cinnamon Roll Apple Pie or my Homemade Apple Fritters. The best part? You can customize it with your favorite spices or even a drizzle of caramel for extra indulgence.
Why I Love This Recipe
This Braided Apple Puff Pastry reminds me of crisp autumn mornings spent baking with my grandmother. She taught me that food isn’t just about taste—it’s about the memories we create while making it. Every time I prepare this recipe, I feel that same joy and connection. Plus, the way the pastry puffs up into golden layers never fails to amaze me. It’s a little piece of magic that always brings smiles to the table.
Health and Nutrition
Why it’s good for your body
Braided Apple Puff Pastry offers a delightful mix of flavor and nutrition. First, apples bring natural sweetness along with fiber, which supports digestion and keeps you feeling full longer. Additionally, the cinnamon often used in this recipe provides antioxidants that may help reduce inflammation.
Moreover, Braided Apple Puff Pastry can be a smarter indulgence compared to heavier desserts. By using puff pastry, you get a lighter texture without excessive heaviness. Meanwhile, the apples contribute vitamins like vitamin C, which boosts immunity, and potassium, which supports heart health.
Finally, this treat balances indulgence with wholesome ingredients. For example, you can easily adjust the sugar content to suit your preferences. Whether you enjoy it warm or at room temperature, Braided Apple Puff Pastry satisfies cravings while offering some nutritional perks.
How it fits in a healthy lifestyle
Braided Apple Puff Pastry fits well into a balanced diet when enjoyed mindfully. Pair it with a protein-rich breakfast like Greek yogurt to create a satisfying meal. If you’re watching sugar intake, try reducing the added sweetener or opting for naturally sweet apples like Honeycrisp.
For those with dietary preferences, you can explore gluten-free puff pastry options to make this recipe celiac-friendly. If heart health is a priority, consider using a butter alternative or checking out our guide on heart-healthy baking swaps. Craving more fruit-forward treats? Our easy fruit desserts roundup includes lighter options that complement this pastry perfectly.
Enjoy Braided Apple Puff Pastry as an occasional treat or share it with friends to keep portions reasonable. With simple tweaks, it can align with various health goals without sacrificing flavor.
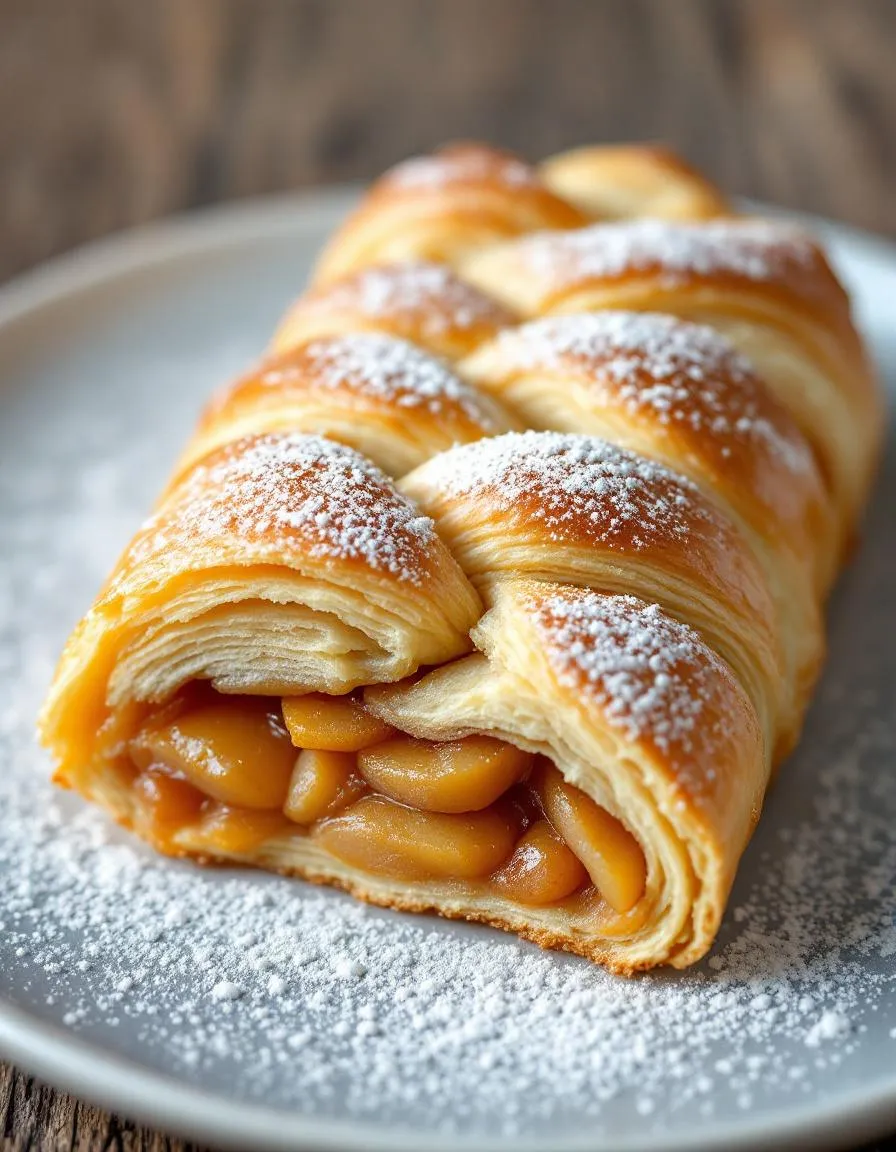
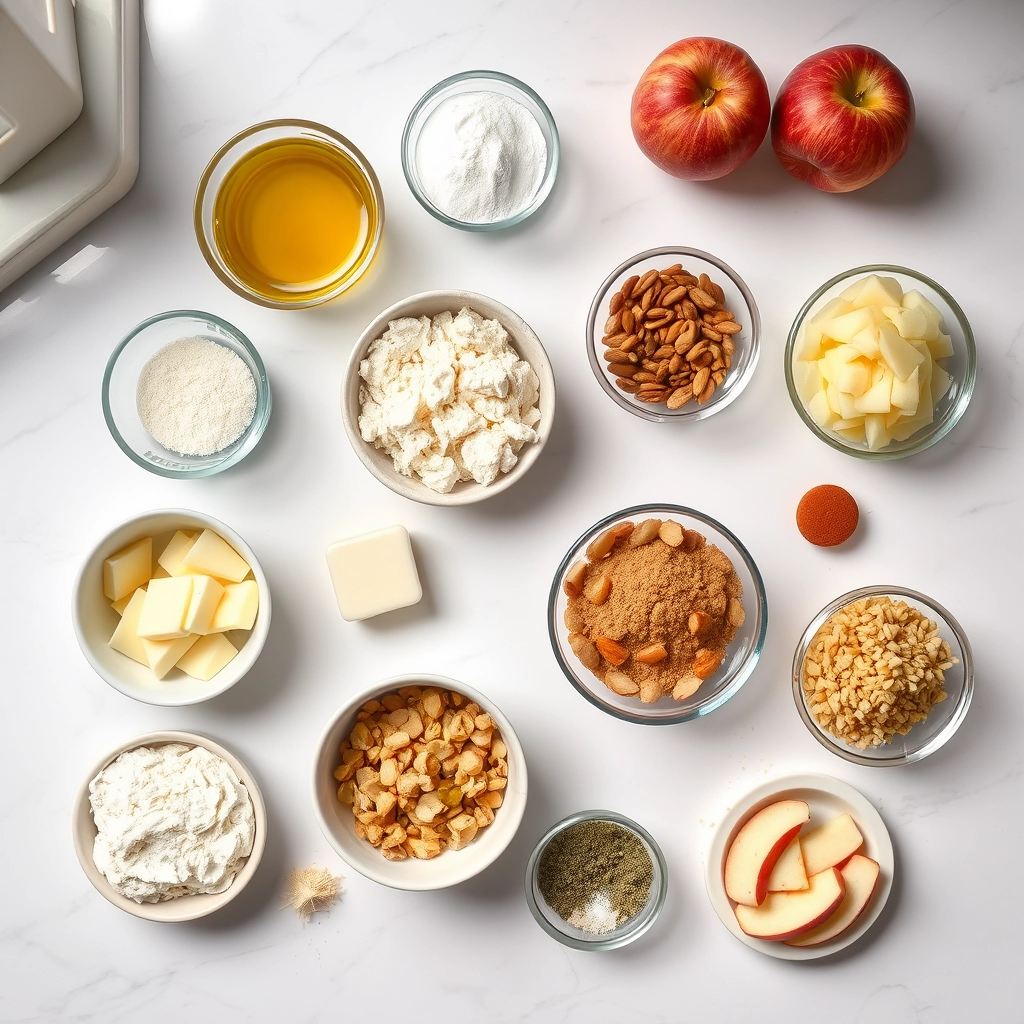
A delicious and flaky puff pastry filled with spiced apples, braided for a beautiful presentation.
Ingredients
Scale
For the Crust:
1 sheet puff pastry, thawed
2 medium apples, peeled and diced
2 tbsp brown sugar
1 tsp cinnamon
1/4 tsp nutmeg
1 tbsp lemon juice
1 egg, beaten (for egg wash)
1 tbsp powdered sugar (for dusting)
Instructions
1. Prepare the Crust:
Preheat oven to 375°F (190°C) and line a baking sheet with parchment paper.
In a bowl, mix diced apples, brown sugar, cinnamon, nutmeg, and lemon juice until well combined.
Roll out the puff pastry sheet on the prepared baking sheet. Spoon the apple mixture down the center of the pastry, leaving about 2 inches on each side.
Cut diagonal strips along the sides of the pastry, then fold them over the apple filling, alternating sides to create a braided effect.
Brush the pastry with beaten egg for a golden finish.
Bake for 25-30 minutes or until the pastry is puffed and golden brown.
Let cool slightly, then dust with powdered sugar before serving.
Notes
You can customize the seasonings to taste.
s-dish">How to Prepare This Dish
Steps and time-saving tips
Start by preheating your oven to 375°F so it’s ready when you finish assembling the Braided Apple Puff Pastry. While it heats, peel and thinly slice two medium apples, then toss them with cinnamon, sugar, and a squeeze of lemon juice to prevent browning. Next, roll out a sheet of thawed puff pastry on a lightly floured surface into a rectangle. Spoon the apple mixture down the center, leaving a 2-inch border on each side. Use a sharp knife to cut diagonal strips along the edges, then fold them over the apples in a crisscross pattern to create the braid. Brush the pastry with an egg wash for a golden finish, and if you’re short on time, skip the braiding and simply fold the pastry over the filling for a rustic turnover. Bake for 25-30 minutes until the Braided Apple Puff Pastry puffs and turns golden brown. Let it cool slightly before drizzling with a simple powdered sugar glaze for extra sweetness.
Mistakes I’ve made and learned from
I once rushed the thawing process for my puff pastry, which caused it to tear when I tried to roll it out. Now I let it sit at room temperature for exactly 40 minutes—no shortcuts! Another time, I overfilled the Braided Apple Puff Pastry, and the filling bubbled out during baking, making a sticky mess. A light hand with the apples keeps everything intact. If you’re new to working with puff pastry, check out my guide to handling puff pastry for more foolproof tricks. And if your glaze turns out too thick, thin it with a teaspoon of milk—a lesson I learned after serving a few overly sweet, lumpy batches. For more dessert troubleshooting, my common baking mistakes post covers these fixes in detail.
n-and-variations">Cultural Connection and Variations
Where this recipe comes from
Braided Apple Puff Pastry weaves together the warmth of European baking traditions with the simplicity of modern desserts. Originally inspired by Austrian and German strudels, this dish takes flaky puff pastry and fills it with spiced apples, creating a treat that feels both rustic and elegant. In some regions, bakers add raisins or nuts for extra texture, while others drizzle caramel for a sweeter finish. My grandmother, for instance, always sprinkled cinnamon sugar on top before baking, turning it into a golden, fragrant centerpiece at family gatherings.
Across Europe, you’ll find similar pastries with local twists. The French might layer theirs with almond cream, while Scandinavians often pair apples with cardamom. Even in the U.S., home cooks adapt Braided Apple Puff Pastry by using store-bought dough for convenience or swapping in pears for a seasonal twist. No matter the variation, the dish carries a sense of comfort—whether served at a cozy breakfast or as a showstopper at holiday feasts.
How it fits in today’s cooking
Today, Braided Apple Puff Pastry remains a favorite for its versatility. Busy bakers love how quickly it comes together, especially when using pre-made puff pastry. Meanwhile, food bloggers and home chefs elevate it with gourmet touches, like adding a scoop of vanilla ice cream or a drizzle of salted caramel. It’s also a star during fall and winter, when apples shine in seasonal baking.
Modern twists keep the
recipe fresh. Some cooks fold in cranberries for a tart contrast, while others serve it alongside spiced chai for a cozy afternoon treat. Whether you’re making it for a special occasion or a simple weekend indulgence, Braided Apple Puff Pastry bridges tradition and today’s kitchen effortlessly.
Taste and Texture
What makes it delicious
Braided Apple Puff Pastry delights the senses with its buttery, flaky layers and sweet-tart apple filling. Each bite offers a crisp, golden exterior that shatters to reveal tender, cinnamon-spiced apples inside. The warmth of baked vanilla and nutmeg fills the air, while a hint of lemon zest brightens the rich caramelized notes. Meanwhile, the pastry itself stays light yet indulgent, with a melt-in-your-mouth texture that contrasts perfectly with the juicy apple chunks. Whether served warm or at room temperature, Braided Apple Puff Pastry balances comfort and sophistication in every slice.
Boosting the flavor
Elevate your Braided Apple Puff Pastry by drizzling it with a glossy vanilla glaze or a spoonful of salted caramel for extra decadence. For a spiced twist, toss the apples with cardamom or a pinch of clove before baking. Alternatively, serve it alongside a scoop of cinnamon ice cream to amplify the cozy flavors. A sprinkle of toasted pecans or walnuts adds crunch, while a dusting of powdered sugar keeps it effortlessly elegant. With these tweaks, your pastry will shine even brighter.
Always thaw puff pastry in the fridge overnight for even texture, and keep it cold until ready to use. Roll the dough gently to avoid tearing, and use a sharp knife for clean cuts when shaping your Braided Apple Puff Pastry. For golden perfection, brush the pastry with an egg wash before baking, and space the braids evenly so they bake uniformly. Finally, let the pastry cool slightly before slicing to keep the layers crisp.
Mistakes to avoid
Overfilling the pastry with apples can cause leaks and soggy bottoms, so stick to a thin, even layer. Also, skip the urge to open the oven door too often, as temperature fluctuations prevent the Braided Apple Puff Pastry from rising properly. If your dough feels sticky, lightly dust the surface with flour, but avoid overworking it. For more troubleshooting, check our guide on fixing soggy pastry or tips for perfect puff pastry every time.
g-suggestions">Serving and Pairing Suggestions
How to serve this dish
For a stunning presentation, slice your Braided Apple Puff Pastry into thick portions and arrange them on a rustic wooden board. Meanwhile, dust each piece with powdered sugar just before serving to add a touch of elegance. If you want to impress guests, drizzle warm caramel sauce over the top and garnish with fresh mint leaves. This dish shines at brunch gatherings or holiday breakfasts, especially when paired with a cozy coffee station. Alternatively, serve it as a dessert with a scoop of vanilla ice cream for a delightful contrast of textures.
What goes well with it
Pair your Braided Apple Puff Pastry with a spiced chai latte to enhance its warm cinnamon notes. The creamy, aromatic drink balances the flaky pastry perfectly. For a refreshing contrast, try a scoop of homemade vanilla bean ice cream or a dollop of whipped cream. If you love fruity flavors, serve it alongside our berry chia jam for a tangy twist. Finally, for a brunch spread, complement it with our savory herb scones to balance sweet and savory tastes.
math-faq-block">
How do you make braided apple puff pastry from scratch?
To make Braided Apple Puff Pastry from scratch, start by rolling out store-bought or homemade puff pastry. Layer thinly sliced apples mixed with cinnamon and sugar down the center, then cut diagonal strips along the sides and braid them over the filling. Bake until golden brown for a flaky, delicious dessert.
Can you use canned apples for braided apple puff pastry?
Yes, you can use canned apples for Braided Apple Puff Pastry, but drain them well to avoid excess moisture. Fresh apples provide better texture, but canned apples work in a pinch—just adjust the sugar since they’re often pre-sweetened.
What’s the best type of apple for braided apple puff pastry?
Firm, slightly tart apples like Granny Smith or Honeycrisp work best for Braided Apple Puff Pastry. They hold their shape during baking and balance the sweetness of the pastry. Avoid overly soft varieties that turn mushy.
rank-math-faq-item">
How do you keep braided apple puff pastry from getting soggy?
To prevent soggy Braided Apple Puff Pastry, pat apple slices dry and sprinkle a thin layer of breadcrumbs or crushed amaretti cookies under the filling. Bake on a preheated sheet until the bottom is crisp, and serve warm.