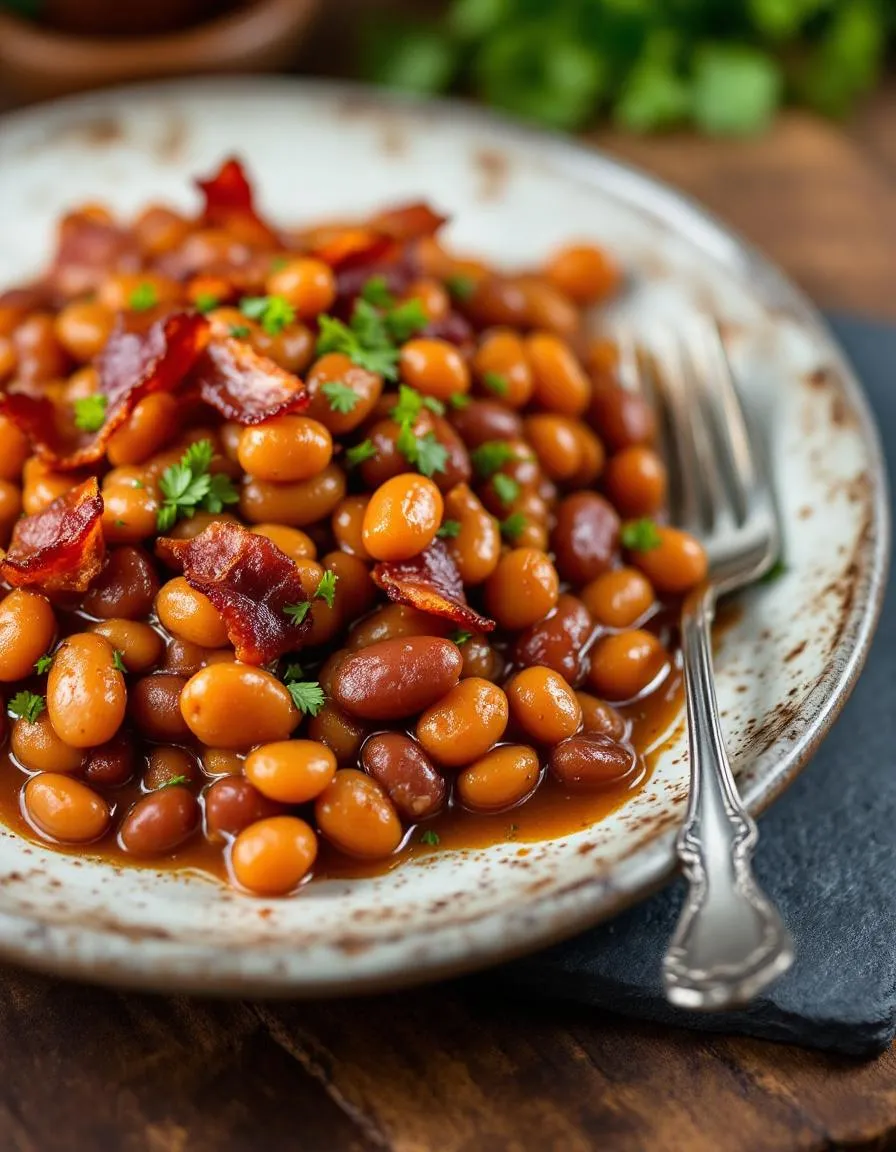
There’s something deeply comforting about a pot of Baked Beans simmering away in the oven, filling the house with a rich, smoky aroma. Whether you’re hosting a backyard barbecue or just craving a hearty side dish, this classic recipe never fails to bring people together. Plus, it’s incredibly versatile—pair it with fluffy cornbread or serve it alongside your favorite grilled meats. After years of tweaking my recipe, I’m thrilled to share my ultimate version with you today.
Baked Beans hold a special place in American cuisine, blending sweet, savory, and smoky flavors into one irresistible dish. Originating from Native American traditions and later adapted by early settlers, this humble staple has evolved into a beloved comfort food. What makes it so special? For starters, it’s budget-friendly, packed with protein, and easy to customize with ingredients like molasses, bacon, or even a splash of bourbon. At brekcakes.com, we celebrate recipes that balance nostalgia with practicality, and Baked Beans perfectly embody that spirit. If you’re new to cooking with dried beans, don’t worry—our guide to cooking beans breaks it down step by step. And if you’re looking for the perfect pairing, try our homemade cornbread for a match made in heaven.
Why I Love This Recipe
Baked Beans remind me of summer evenings spent with family, gathered around picnic tables with laughter and stories flowing as freely as the food. My grandma always insisted on making hers from scratch, and though I took shortcuts as a busy college student, I eventually circled back to her slow-simmered method. There’s no replacing the depth of flavor that comes from patience—and a little extra brown sugar. Every time I make this dish, it feels like a tribute to those cherished moments and the people who taught me that good food is about more than just taste.
Health and Nutrition
Why it’s good for your body
Baked beans pack a powerful nutritional punch while delivering rich, savory flavor. First, they offer an excellent plant-based protein source, which helps maintain muscle health and keeps you full longer. Additionally, their high fiber content supports digestion and stabilizes blood sugar levels. Because of this, baked beans make a smart choice for sustained energy throughout the day.
Moreover, baked beans contain essential vitamins and minerals like iron, magnesium, and folate. These nutrients contribute to better immune function, heart health, and even mood regulation. For instance, the iron in baked beans helps transport oxygen efficiently, while magnesium supports nerve and muscle function. As a result, incorporating baked beans into meals can boost overall wellness.
Finally, the tomato-based sauce often found in baked beans provides lycopene, an antioxidant linked to reduced inflammation. Pair this with the beans’ low-fat profile, and you have a dish that supports heart health without sacrificing taste. Whether you enjoy them as a side or main dish, baked beans deliver both nutrition and comfort in every bite.
How it fits in a healthy lifestyle
Baked beans fit seamlessly into a balanced diet, whether you’re aiming for high-protein meals or heart-healthy eating. Their versatility lets you pair them with whole grains like brown rice or serve them alongside a fresh salad for extra fiber. If you’re following a gluten-free lifestyle, baked beans naturally meet the criteria, making them a safe and satisfying option.
For those focused on plant-based nutrition, baked beans provide a protein boost without relying on meat. Try adding them to your weekly meal prep for quick, nourishing lunches. They also work well in hearty vegetarian dinners, proving that healthy eating doesn’t mean skipping flavor. With their balanced macros and minimal processing, baked beans help you stay on track without feeling restricted.
Start by preheating your oven to 350°F so it’s ready when you are. While it warms up, grab a large skillet and sauté diced onions in olive oil until they turn translucent. Next, stir in minced garlic for just 30 seconds to release its aroma without burning it. Drain and rinse your canned Baked Beans, then mix them into the skillet along with brown sugar, mustard, and a splash of apple cider vinegar. Let everything simmer for 5 minutes to blend the flavors. Meanwhile, whisk together a quick glaze of ketchup, molasses, and Worcestershire sauce in a small bowl. Pour the Baked Beans mixture into a baking dish, then drizzle the glaze evenly over the top. Cover with foil and bake for 30 minutes. Remove the foil and bake another 15 minutes until bubbly and caramelized. For a time-saving twist, prep the beans stovetop the night before and refrigerate—just pop them in the oven before serving.
Mistakes I’ve made and learned from
I once rushed the sauté step and ended up with crunchy onions in my Baked Beans—now I take an extra minute to soften them fully. Another time, I skipped draining the canned beans, and the dish turned out way too watery. Lesson learned: always drain and rinse for the perfect texture. If you’re new to balancing sweet and savory flavors, check out my guide on balancing flavors to avoid overdoing the sugar. And if you’re short on time, my meal prep hacks can help you streamline the process without sacrificing taste.
Baked Beans carry a rich history that stretches across continents and cultures. Originally rooted in Native American cuisine, early versions of this dish featured beans slow-cooked with bear fat and maple syrup. Colonists later adapted the recipe, swapping in molasses and pork, creating the sweet and savory flavor we love today. Meanwhile, in the UK, Baked Beans took a tangy turn with tomato sauce, becoming a breakfast staple. Every region adds its own twist, proving this humble dish can wear many hats.
In my family, Baked Beans always meant summer cookouts. My grandma simmered them for hours with bacon and brown sugar, filling the air with a smoky sweetness. Some New Englanders prefer a touch of mustard, while Southern cooks might add a splash of bourbon. Across the pond, the British serve them on toast, and in Australia, they often pair them with sausages. No matter where you go, Baked Beans adapt to local tastes while keeping their comforting soul.
ays-cooking">How it fits in today’s cooking
Today, Baked Beans still hold a special place in modern kitchens. They’re a go-to for backyard barbecues, potlucks, and even quick weeknight dinners. Busy cooks love shortcuts like canned beans, but many still swear by slow-cooked versions for that deep, homemade flavor. Some even toss them into vegetarian meal prep bowls for a protein-packed twist. Whether you’re firing up the grill or craving cozy comfort food, this dish fits right in.
Baked Beans also shine in seasonal traditions. Think Fourth of July picnics or fall tailgates, where they pair perfectly with easy cornbread. Health-conscious cooks lighten them up with turkey bacon or maple syrup, while others load them with extra spices for a kick. No matter how you tweak them, Baked Beans remain a timeless crowd-pleaser, bridging generations and cuisines with every bite.
Taste and Texture
What makes it delicious
Baked Beans deliver a rich, smoky-sweet flavor that comforts with every bite. The tender beans soak up a thick, tangy sauce, while hints of molasses and brown sugar add a caramelized depth. Meanwhile, crispy bacon or smoked paprika lends a savory punch, balancing the sweetness perfectly. As you scoop a spoonful, the creamy texture melts in your mouth, contrasted by the occasional bite of softened onion or bell pepper. The aroma alone—warm, hearty, and slightly spicy—will make your kitchen smell irresistible. Whether served as a side or a main, Baked Beans bring a satisfying harmony of flavors and textures to the table.
r">Boosting the flavor
Elevate your Baked Beans with a few creative tweaks. For a bolder kick, stir in a dash of chipotle powder or a splash of apple cider vinegar to brighten the sauce. Crumbled sausage or caramelized onions add extra layers of savory richness. If you love a touch of sweetness, drizzle in maple syrup or top with toasted pecans for crunch. Pair them with fluffy cornbread or a zesty coleslaw to round out the meal. For more inspiration, explore our guide to smoky spices or discover how to perfect homemade barbecue sauce to take your dish to the next level.
Tips for Success
Best practices for results
Always soak your beans overnight to ensure even cooking and a creamy texture in your Baked Beans. Additionally, use a heavy-bottomed pot to prevent scorching, and stir the mixture occasionally for consistent flavor. For deeper taste, caramelize the onions slowly before adding other ingredients. Finally, balance the sweetness with a touch of acidity, like apple cider vinegar, to elevate your Baked Beans.
>Mistakes to avoid
One common mistake is skipping the soaking step, which leads to unevenly cooked beans. Instead, plan ahead and soak them for at least 8 hours. Another error is overcooking the sauce, resulting in dry Baked Beans. To avoid this, check the consistency early and add broth if needed. For more troubleshooting tips, explore our guide on fixing dry beans. Also, resist the urge to oversweeten—stick to measured amounts of sugar or molasses, as detailed in our balancing flavors article.
Serving and Pairing Suggestions
How to serve this dish
Baked beans shine when served warm in a rustic ceramic bowl or a cast-iron skillet for a cozy, homey feel. For a casual gathering, layer them over toasted sourdough or crispy cornbread to soak up the rich sauce. Alternatively, elevate your presentation by topping them with fresh chopped parsley, crispy bacon bits, or a dollop of tangy sour cream. Whether you’re hosting a summer barbecue, a holiday brunch, or a weeknight dinner, baked beans add hearty comfort to any table. To make them extra inviting, serve alongside colorful slaws or pickled veggies for a vibrant contrast.
What goes well with it
Pair baked beans with smoky grilled meats like pulled pork or ribs for a classic barbecue combo. The sweetness of the beans balances the savory depth of the meat perfectly. For a lighter option, try them with a fresh summer vegetable salad, which adds a crisp, refreshing bite. If you’re serving brunch, fluffy buttermilk biscuits or our homemade cornbread make irresistible companions. Finally, a chilled glass of iced tea or a hoppy pale ale cuts through the richness and ties the meal together.
Baked beans can be a nutritious choice as they’re packed with protein, fiber, and essential vitamins. However, some canned varieties contain added sugar or sodium, so opt for low-sodium or homemade baked beans for a healthier option. Including baked beans in moderation adds flavor and nutrients to meals.
How to make baked beans from scratch?
To make baked beans from scratch, soak dried navy beans overnight, then simmer with onions, molasses, brown sugar, mustard, and tomato sauce. Slow-cook the mixture in the oven or a crockpot for several hours until tender. Homemade baked beans offer richer flavor and customizable sweetness compared to canned versions.
rank-math-faq-item">
Why are baked beans called “baked” if they’re cooked in a pot?
Baked beans get their name from traditional preparation methods where beans were slow-cooked in a ceramic pot inside a brick oven. Modern recipes often use stovetops or slow cookers for convenience, but the dish retains its original “baked” title. The long cooking time helps develop the signature sweet and smoky flavor of baked beans.
What to serve with baked beans?
Baked beans pair perfectly with grilled meats like hot dogs, burgers, or barbecue ribs for classic American cookouts. For vegetarian meals, try serving baked beans with cornbread, coleslaw, or roasted vegetables. The sweet-savory flavor of baked beans complements both casual and hearty dishes.
Best Spinach Lasagna with Ricotta Recipe
Introduction
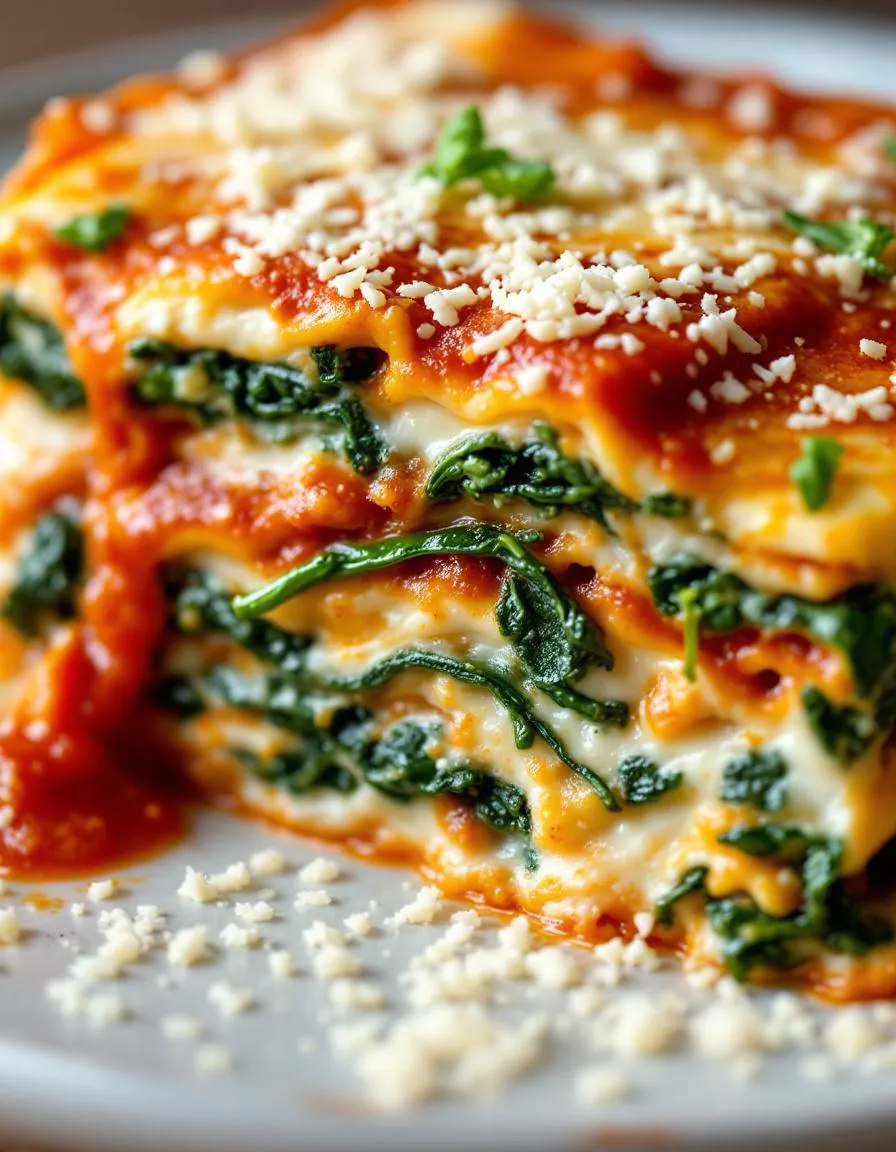
There’s something undeniably comforting about a homemade lasagna, especially when it’s packed with fresh spinach and creamy ricotta. Whether you’re cooking for a cozy family dinner or prepping a dish to impress guests, this Spinach Lasagna with Ricotta Recipe delivers layers of flavor and nostalgia. Plus, it’s a fantastic way to sneak in some greens without sacrificing richness. If you’ve ever craved a meal that feels like a warm hug, this recipe is your answer.
Spinach Lasagna with Ricotta Recipe is a classic Italian-inspired dish that balances hearty pasta, vibrant spinach, and velvety ricotta cheese. Unlike traditional meat-heavy versions, this vegetarian-friendly twist lets the freshness of the ingredients shine. The layers of tender lasagna noodles, garlicky spinach, and creamy ricotta create a harmony of textures and tastes. What makes it special? It’s versatile enough for weeknight dinners yet elegant enough for special occasions. If you love dishes that are both comforting and nourishing, like my Vegetarian Stuffed Peppers, you’ll appreciate how this lasagna brings everyone to the table. And if you’re new to lasagna-making, don’t worry—this recipe breaks it down into simple, foolproof steps. For more kitchen inspiration, check out my guide to Essential Kitchen Tools to make the process even smoother.
Why I Love This Recipe
This Spinach Lasagna with Ricotta Recipe holds a special place in my heart because it reminds me of Sunday dinners with my grandma. She taught me that great food doesn’t need to be complicated—just made with care. Every time I layer the noodles and sprinkle the cheese, I feel that same joy of creating something delicious from scratch. It’s a recipe that never fails to bring people together, and that’s what cooking is all about for me.
Health and Nutrition
Why it’s good for your body
Spinach Lasagna with Ricotta Recipe packs a powerful nutritional punch while delivering rich, comforting flavors. First, spinach provides a hefty dose of iron, which supports healthy blood flow and energy levels. Additionally, ricotta cheese offers high-quality protein and calcium to strengthen bones and muscles. Together, these ingredients make Spinach Lasagna with Ricotta Recipe a meal that fuels your body efficiently.
Moreover, this dish includes layers of whole-food ingredients like tomatoes, which are rich in antioxidants such as lycopene. These compounds help combat inflammation and promote heart health. Furthermore, the fiber from spinach and whole wheat pasta (if used) aids digestion and keeps you feeling full longer. Spinach Lasagna with Ricotta Recipe balances indulgence with nourishment, making it a smart choice for health-conscious eaters.
Finally, the recipe’s versatility allows for adjustments to boost its benefits. For instance, you can opt for low-fat ricotta or add extra veggies for more vitamins. Whether you enjoy it as a family dinner or meal-prep option, Spinach Lasagna with Ricotta Recipe delivers both taste and wellness in every bite.
How it fits in a healthy lifestyle
Spinach Lasagna with Ricotta Recipe fits seamlessly into a balanced diet, whether you’re focusing on protein intake, heart health, or simply eating more whole foods. The combination of spinach and ricotta provides a satisfying mix of plant-based nutrients and dairy-based protein, perfect for post-workout recovery or a hearty family meal. If you’re watching your gluten intake, swapping traditional pasta for gluten-free noodles keeps the dish just as delicious.
For those prioritizing heart-healthy meals, the recipe’s emphasis on vegetables and lean dairy aligns with dietary guidelines. Pair it with a light salad or roasted vegetables for a well-rounded plate. If you’re exploring more ways to incorporate nutritious meals into your routine, check out our guide on meal prep ideas or discover how to build a balanced diet without sacrificing flavor. Spinach Lasagna with Ricotta Recipe proves that comfort food can also be good for you.
Start by preheating your oven to 375°F so it’s ready when you finish assembling the Spinach Lasagna with Ricotta Recipe. While it heats, grab a large bowl and mix the ricotta, egg, grated Parmesan, and a pinch of salt until smooth. Fold in the thawed and drained spinach gently to keep the texture light. Next, spread a thin layer of marinara sauce on the bottom of a 9×13-inch baking dish to prevent sticking. Layer three lasagna noodles over the sauce, then spoon half the ricotta mixture evenly on top. Drizzle more marinara, sprinkle shredded mozzarella, and repeat the layers. Finish with a final noodle layer, extra sauce, and a generous handful of mozzarella. Cover the dish with foil and bake for 25 minutes, then uncover and bake another 15 minutes until bubbly and golden. Let it rest 10 minutes before slicing—this helps the layers set. For a time-saving hack, use no-boil lasagna noodles or prep the ricotta filling a day ahead.
Mistakes I’ve made and learned from
My first attempt at Spinach Lasagna with Ricotta Recipe was a soggy mess because I didn’t drain the spinach well enough. Now, I press it between paper towels or use a cheesecloth to remove every drop of moisture. Another blunder? Overloading the layers, which made slicing impossible. I learned to spread fillings thinly, like in my Perfect Lasagna Layering guide, and to let the lasagna rest—just like I do with my Resting Meat: Why It Matters tips. Trust me, patience pays off with neat, Instagram-worthy slices every time.
Spinach Lasagna with Ricotta Recipe has deep roots in Italian cuisine, where lasagna itself dates back to ancient Rome. However, the addition of spinach and ricotta gives it a distinctly Northern Italian flair, especially in regions like Emilia-Romagna. Families there often layer fresh pasta with locally grown spinach and creamy ricotta, creating a dish that feels both hearty and vibrant. Over time, immigrants brought their own twists to the recipe, blending traditions with new ingredients.
In my own kitchen, Spinach Lasagna with Ricotta Recipe became a Sunday staple after my grandmother shared her version. She insisted on hand-chopped spinach and a touch of nutmeg, a trick she learned from her mother. Meanwhile, in Greece, cooks might swap ricotta for feta, adding a tangy kick. Some American versions even mix in cottage cheese for extra lightness. No matter the variation, this dish always carries a sense of comfort and connection.
ays-cooking">How it fits in today’s cooking
Today, Spinach Lasagna with Ricotta Recipe remains a go-to for busy weeknights and festive gatherings alike. Its versatility shines when modern cooks tweak it—like using no-boil noodles or adding roasted garlic for depth. Many also pair it with a crisp salad, turning it into a balanced meal. For those meal prepping, it freezes beautifully, making it a practical choice.
During holidays, this lasagna often stars as a vegetarian centerpiece, especially alongside dishes like garlic butter dinner rolls. Others enjoy it as a cozy winter dish, layered with seasonal greens. And if you’re craving something sweet after, try serving it with chocolate avocado mousse for a delightful contrast. Whether classic or reinvented, this recipe keeps finding its way onto our tables.
Taste and Texture
What makes it delicious
This Spinach Lasagna with Ricotta Recipe delivers a rich, comforting experience with every bite. The creamy ricotta blends seamlessly with tender spinach, creating a luscious, velvety layer that melts in your mouth. Meanwhile, the tangy tomato sauce adds a bright, savory contrast, while gooey mozzarella stretches with each forkful. Fragrant garlic and herbs like basil and oregano infuse the dish with warmth, making the aroma irresistible. Whether you savor the soft pasta sheets or the slight crunch of golden cheese on top, this Spinach Lasagna with Ricotta Recipe balances textures and flavors perfectly.
r">Boosting the flavor
For an extra flavor kick, try mixing roasted garlic into the ricotta for a deeper, caramelized note. Alternatively, sprinkle red pepper flakes before baking to add a subtle heat. A drizzle of homemade pesto sauce right before serving introduces a fresh, herby brightness. If you love bold cheeses, swap mozzarella for smoked provolone or layer in creamy mushroom sauce between the pasta sheets. These small tweaks elevate the dish while keeping its cozy, familiar appeal.
Tips for Success
Best practices for results
Always squeeze excess moisture from the spinach before mixing it with the ricotta to prevent a soggy Spinach Lasagna with Ricotta Recipe. Additionally, layer the noodles evenly and avoid overcrowding the pan for consistent baking. For extra flavor, lightly toast the lasagna noodles before assembling, and don’t skip seasoning each layer with salt and pepper. Finally, let the lasagna rest for 10 minutes after baking so the slices hold their shape when served.
>Mistakes to avoid
One common mistake is using watery ricotta, which can make the lasagna layers loose. Instead, drain the ricotta in a fine-mesh strainer for 30 minutes beforehand. Another error is overcooking the noodles before assembling—they should be al dente since they’ll soften further in the oven. For more pasta tips, check out our guide on how to cook pasta perfectly. Also, avoid skimping on the cheese topping; a golden-brown crust adds texture, as explained in our cheese melting techniques post.
Serving and Pairing Suggestions
How to serve this dish
Spinach Lasagna with Ricotta Recipe shines as a centerpiece for cozy family dinners or festive gatherings. For a stunning presentation, slice it into neat squares and garnish with fresh basil leaves or a sprinkle of grated Parmesan. Meanwhile, serve it alongside a crisp green salad for a light contrast. If you’re hosting a brunch, pair it with a mimosa bar for a touch of elegance. Alternatively, bake it in individual ramekins for a charming twist at dinner parties.
What goes well with it
A crisp, chilled white wine like Pinot Grigio balances the creamy richness of Spinach Lasagna with Ricotta Recipe perfectly. For a non-alcoholic option, try sparkling water with a squeeze of lemon to refresh the palate. Additionally, garlic bread makes a classic side, offering a crunchy contrast to the lasagna’s layers. If you’re craving more greens, our Roasted Asparagus adds a vibrant, earthy flavor. Finally, cap off the meal with a light dessert like our Lemon Berry Tart for a sweet finish.
Can I use frozen spinach in spinach lasagna with ricotta?
Yes, frozen spinach works well in spinach lasagna with ricotta. Just thaw and squeeze out excess water to prevent a soggy dish. Fresh spinach can also be used, but frozen is often more convenient.
What’s the best way to layer spinach lasagna with ricotta?
Start with a thin layer of sauce, then alternate pasta sheets, ricotta-spinach mixture, and sauce. Repeat, finishing with sauce and cheese on top. This creates perfect layers in your spinach lasagna with ricotta.
rank-math-faq-item">
How long should I bake spinach lasagna with ricotta?
Bake spinach lasagna with ricotta covered at 375°F for 30 minutes, then uncover and bake 15-20 more minutes until bubbly. Let it rest 10 minutes before serving for cleaner slices.
Can I make spinach lasagna with ricotta ahead of time?
Absolutely! Assemble spinach lasagna with ricotta up to 24 hours ahead and refrigerate. Add 10-15 minutes to baking time if starting cold. You can also freeze it for up to 3 months.
If you’ve ever craved a dish that wraps you in layers of bold flavor and comforting spice, then you’re in the right place. Today, I’m sharing my Spicy Beef Rendang Recipe—a dish that’s close to my heart and guaranteed to transport your taste buds to new heights. Whether you’re a seasoned home cook or just starting your culinary journey, this recipe delivers rich, slow-cooked goodness with a kick that lingers in the best way possible.
The Spicy Beef Rendang Recipe is a celebration of Indonesian cuisine, where tender beef simmers in a fragrant blend of coconut milk, lemongrass, and fiery chilies until it melts in your mouth. What makes this dish special isn’t just its depth of flavor, but the way it brings people together around the table. Here at brekcakes.com, we believe food should tell a story, and this rendang does exactly that—with every bite, you’ll taste tradition, passion, and a little bit of adventure. If you love exploring global flavors, you’ll also enjoy our Thai Green Curry, another dish that balances heat and harmony. And for those who appreciate slow-cooked perfection, our Braised Short Ribs offer a similar comfort with a different twist.
Why I Love This Recipe
This Spicy Beef Rendang Recipe holds a special place in my kitchen because it reminds me of my first trip to Bali, where I fell in love with the vibrant street food scene. The aroma of simmering spices wafting through the air hooked me instantly, and I knew I had to recreate that magic at home. Over the years, I’ve tweaked this recipe to strike the perfect balance between heat and heartiness, making it a staple for cozy dinners and festive gatherings alike. Every time I make it, I’m reminded that great food isn’t just about taste—it’s about the memories we weave into every dish.
Health and Nutrition
Why it’s good for your body
Spicy Beef Rendang Recipe packs a powerful nutritional punch while delivering bold flavors. First, the dish features lean beef, which provides high-quality protein to support muscle growth and repair. Additionally, the coconut milk in Spicy Beef Rendang Recipe offers healthy fats that boost brain function and keep you satisfied longer.
Moreover, the blend of spices like turmeric, ginger, and chili peppers adds more than just heat. These ingredients contain anti-inflammatory properties that may help reduce oxidative stress. For instance, turmeric includes curcumin, a compound linked to improved heart health. Meanwhile, the chilies in Spicy Beef Rendang Recipe can kickstart your metabolism, aiding digestion.
Furthermore, this dish balances macronutrients effectively. The protein and fats work together to stabilize blood sugar levels, preventing energy crashes. Pair Spicy Beef Rendang Recipe with steamed vegetables or brown rice for a fiber-rich meal that supports gut health. Ultimately, this recipe nourishes your body while satisfying your taste buds.
How it fits in a healthy lifestyle
Spicy Beef Rendang Recipe fits seamlessly into a balanced diet, especially if you prioritize protein-rich meals. The lean beef makes it ideal for fitness enthusiasts or anyone focusing on muscle maintenance. For a gluten-free option, simply serve it with cauliflower rice instead of traditional grains.
If you follow a heart-healthy eating plan, the moderate use of coconut milk provides beneficial fats without overloading on saturated options. Pairing this dish with fiber-packed sides, like our Roasted Brussels Sprouts, enhances its nutritional profile. You can also explore our Meal Prep Guide to incorporate Spicy Beef Rendang Recipe into weekly planning for effortless healthy eating.
Finally, the bold flavors mean you won’t feel deprived while eating nutritiously. Whether you’re fueling workouts or simply enjoying a hearty dinner, this dish keeps your goals on track without sacrificing taste.
A rich and flavorful Indonesian beef stew with a spicy kick, slow-cooked until tender.
Ingredients
Scale
For the Crust:
1.5 lbs beef chuck, cut into cubes
1 can (14 oz) coconut milk
3 tbsp rendang paste
1 lemongrass stalk, bruised
4 kaffir lime leaves
1 tsp tamarind paste
1 tbsp palm sugar
1 tsp salt
2 tbsp vegetable oil
1 cup water
Instructions
1. Prepare the Crust:
Heat oil in a large pot over medium heat. Add rendang paste and sauté until fragrant.
Add beef cubes and cook until browned on all sides.
Pour in coconut milk, water, lemongrass, kaffir lime leaves, tamarind paste, palm sugar, and salt. Stir well.
Bring to a boil, then reduce heat to low. Simmer uncovered for 2-3 hours, stirring occasionally, until the beef is tender and the sauce thickens.
Remove lemongrass and kaffir lime leaves before serving.
Notes
You can customize the seasonings to taste.
s-dish">How to Prepare This Dish
Steps and time-saving tips
Start by marinating the beef for your Spicy Beef Rendang Recipe to lock in flavor. Mix the cubed beef with ground turmeric, coriander, and a pinch of salt in a large bowl. Let it sit for at least 30 minutes, or overnight if you have time. Meanwhile, blend the shallots, garlic, ginger, and chilies into a smooth paste for the base. Heat oil in a heavy pot over medium heat, then sauté the paste until fragrant, stirring constantly to avoid burning. Add the marinated beef and sear until browned, which builds depth in your Spicy Beef Rendang Recipe.
Pour in coconut milk and stir well, scraping the bottom to incorporate any caramelized bits. Toss in lemongrass, galangal, and kaffir lime leaves for aroma. Simmer on low heat, stirring occasionally, until the beef becomes tender and the sauce thickens. This can take up to 3 hours, but you can save time by using a pressure cooker for 45 minutes. Finally, toast grated coconut in a dry pan until golden and fold it into the rendang for texture. Adjust salt and spice to taste, then let it rest so the flavors meld.
Mistakes I’ve made and learned from
I once rushed the cooking process for my Spicy Beef Rendang Recipe, and the beef turned out tough. Patience is key—low and slow wins the race. Now, I always check for tenderness before removing it from heat. Another mistake? Skipping the toasting step for the grated coconut. It seemed optional, but it adds a nutty richness that elevates the dish. If you’re new to balancing spices, check out my guide on mastering spices to avoid overpowering the rendang. And if you’re short on time, my quick marinades post shows how to maximize flavor in minutes. Trust me, these small tweaks make all the difference.
The Spicy Beef Rendang Recipe carries deep roots in Indonesian culture, particularly from the Minangkabau people of West Sumatra. Originally, families prepared this dish for special occasions like weddings or religious festivals, simmering it for hours to let the rich coconut milk and spices meld into tender beef. Over time, the Spicy Beef Rendang Recipe traveled across borders, adapting to local tastes in Malaysia, Singapore, and even Thailand.
In some regions, cooks swap beef for chicken or even jackfruit for a vegetarian twist. Others adjust the heat level, balancing fiery chilies with sweeter spices like cinnamon or star anise. My own family adds a splash of tamarind for extra tang, a trick passed down from my grandmother. Whether served with steamed rice or flaky rotis, this dish always feels like a celebration.
ays-cooking">How it fits in today’s cooking
Today, the Spicy Beef Rendang Recipe thrives as both a comfort food and a showstopper for gatherings. Busy home cooks often use slow cookers to replicate the traditional low-and-slow method, while others simplify the spice paste with pre-ground blends. It’s also a star during Ramadan, where its bold flavors break the fast with satisfaction.
Modern twists include serving it over grain bowls or even stuffing it into sandwiches for a fusion kick. Yet, no matter how you adapt it, the soul of the dish remains—a hearty, spice-infused embrace that bridges generations and kitchens worldwide.
Taste and Texture
What makes it delicious
The Spicy Beef Rendang Recipe delivers a bold, unforgettable experience with every bite. First, the rich aroma of toasted coconut and lemongrass fills the air, hinting at the deep, savory flavors to come. Tender beef melts in your mouth, while the thick, caramelized sauce coats it with a luscious, slightly sticky texture. Meanwhile, fiery chilies and warming spices like ginger and galangal create a complex heat that lingers pleasantly. Every spoonful of this Spicy Beef Rendang Recipe balances sweet, spicy, and umami notes, thanks to ingredients like kaffir lime leaves and tamarind. Whether you savor it slowly or devour it eagerly, the dish feels hearty, fragrant, and utterly satisfying.
r">Boosting the flavor
Elevate your Spicy Beef Rendang Recipe with a few easy tweaks. For extra depth, swap regular coconut milk for homemade coconut milk, which adds a fresher, creamier finish. Alternatively, garnish with crispy fried shallots or a squeeze of lime for a bright contrast. If you love heat, stir in a spoonful of chili garlic paste while simmering the sauce. Pair the dish with steamed jasmine rice or a cooling cucumber salad to balance the spices. With these small touches, you’ll make an already incredible dish even more irresistible.
Tips for Success
Best practices for results
Always use fresh, high-quality beef for your Spicy Beef Rendang Recipe to ensure tender results. Simmer the coconut milk slowly until it thickens, stirring frequently to prevent burning. Additionally, toast the spices before blending them to deepen their flavor. For the best texture, cook the Spicy Beef Rendang Recipe on low heat until the meat easily shreds. Finally, let it rest for 10 minutes before serving to allow the flavors to meld.
>Mistakes to avoid
Avoid rushing the cooking process, as high heat can toughen the beef instead of tenderizing it. Many cooks also forget to skim excess oil during simmering, which can make the dish overly greasy. If your sauce splits, simply stir in a splash of warm coconut milk to bring it back together. For more troubleshooting tips, check out our guide on fixing broken sauces. Another common mistake is skipping the spice-toasting step, which weakens the dish’s depth—learn how to toast spices properly for maximum flavor.
Serving and Pairing Suggestions
How to serve this dish
For a stunning presentation, serve your Spicy Beef Rendang Recipe in a shallow bowl with steamed jasmine rice mounded at the center. Alternatively, spoon the rich, fragrant curry over a banana leaf for an authentic touch. Garnish with fresh cilantro or crispy fried shallots to add color and texture. This dish shines at gatherings, whether it’s a cozy family dinner or a festive holiday spread. To make it extra special, pair with a side of pickled vegetables for a bright contrast to the deep, spicy flavors.
What goes well with it
Balance the heat of your Spicy Beef Rendang Recipe with a cooling cucumber salad or a refreshing coconut-based drink like our Tropical Smoothie. For a heartier meal, serve it alongside fluffy coconut rice or buttery Garlic Naan, which soaks up the rich sauce perfectly. If you love bold flavors, try pairing it with a tangy tamarind chutney to enhance the dish’s complexity.
Authentic Spicy Beef Rendang requires slow cooking for 3–4 hours to tenderize the meat and develop rich flavors. The dish is ready when the sauce thickens and the beef easily shreds. Patience is key for this iconic Indonesian curry.
What cut of beef is best for Spicy Beef Rendang?
Chuck roast or brisket works best for Spicy Beef Rendang because these tougher cuts become melt-in-your-mouth tender during slow cooking. Avoid lean cuts as they may dry out. The marbling in these cuts helps absorb the rich coconut and spice flavors.
rank-math-faq-item">
Can I make Spicy Beef Rendang less spicy?
Yes! Reduce the number of chilies or remove the seeds to lower the heat in your Spicy Beef Rendang. You can balance the spice with extra coconut milk. Remember that traditional rendang is meant to be fiery, but adaptations are common.
What sides go well with Spicy Beef Rendang?
Spicy Beef Rendang pairs perfectly with steamed jasmine rice to soak up the flavorful sauce. Traditional accompaniments include cucumber slices, fried shallots, and krupuk (Indonesian crackers). The cool sides help balance the dish’s intense heat.
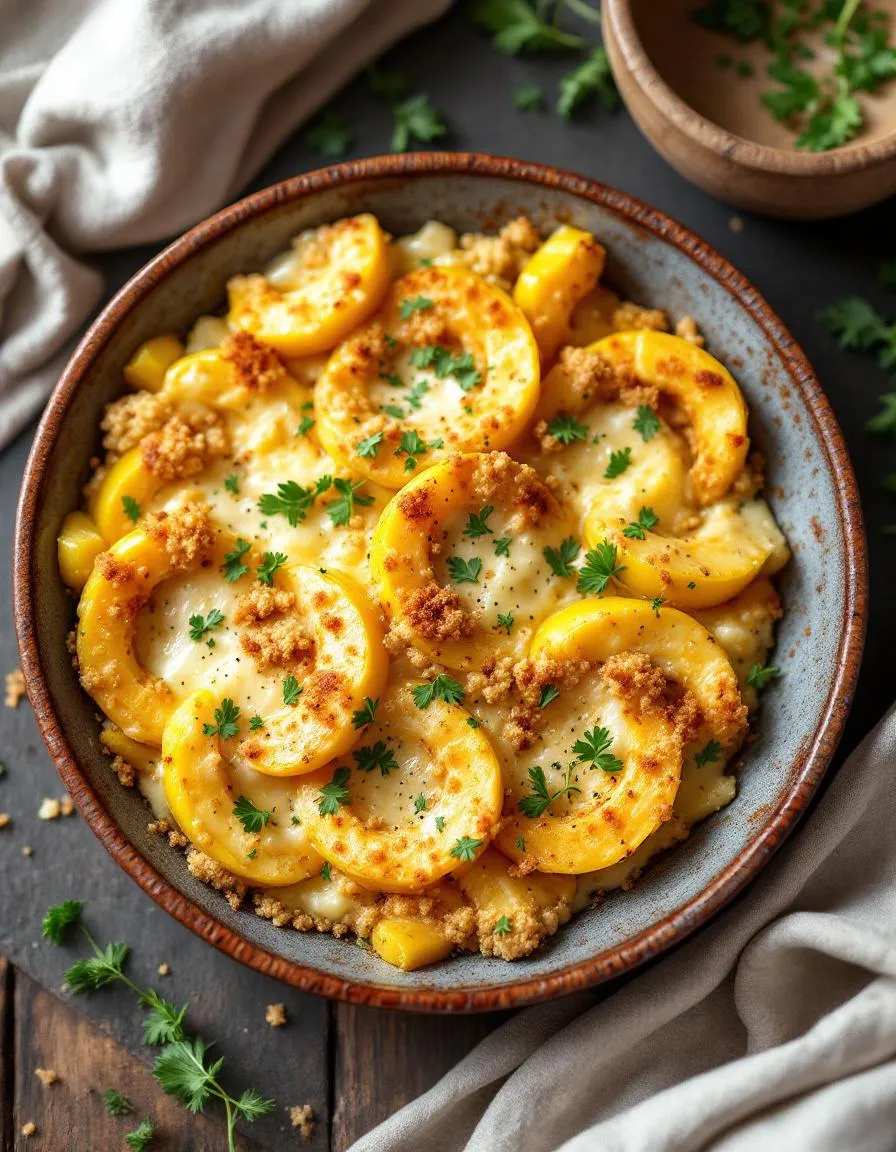
Best Cheesy Squash Casserole – Easy Comfort Food
Introduction
There’s something undeniably comforting about a dish that brings people together, and that’s exactly what this Cheesy Squash Casserole does. Whether you’re hosting a family gathering or simply craving a cozy weeknight meal, this recipe wraps you in warmth with every bite. Plus, it’s a fantastic way to use up summer squash when your garden overflows—or when you spot a great deal at the farmers market. Trust me, once you try this creamy, cheesy masterpiece, it’ll earn a permanent spot in your recipe rotation.
Cheesy Squash Casserole is a Southern-inspired dish that transforms humble yellow squash into a rich, flavorful bake. By layering tender squash with a creamy cheese sauce and a buttery cracker topping, you create a harmony of textures and flavors that feels both nostalgic and fresh. What makes it special is its versatility. You can serve it as a hearty side dish alongside Southern fried chicken or let it shine as the star of a vegetarian spread. It’s also incredibly forgiving, so whether you’re a seasoned cook or just starting out, you’ll find success with this recipe. Here at brekcakes.com, we celebrate food that’s approachable yet memorable, and this casserole perfectly embodies that spirit. For more crowd-pleasing ideas, check out our comfort food classics collection.
Why I Love This Recipe
This Cheesy Squash Casserole holds a special place in my heart because it reminds me of Sunday dinners at my grandma’s house. She’d pull it straight from the oven, golden and bubbling, and we’d all hover around the table, eager for the first scoop. Now, whenever I make it, the smell alone transports me back to those moments of laughter and shared stories. It’s more than just a dish—it’s a reminder that the simplest meals often carry the deepest memories.
Health and Nutrition
Why it’s good for your body
Cheesy Squash Casserole packs a nutritious punch while delivering comfort food flavors. First, yellow squash provides a hefty dose of vitamins A and C, which support immune health and glowing skin. Additionally, the fiber in squash aids digestion and helps you feel full longer. Meanwhile, the cheese adds protein and calcium, strengthening bones and muscles.
Moreover, Cheesy Squash Casserole balances indulgence with wholesome ingredients. Unlike heavy casseroles, this dish relies on fresh squash as its base, keeping calories in check. The cheese also offers healthy fats that promote brain function. Plus, when you use whole-grain breadcrumbs, you boost the fiber content even further.
Finally, this casserole delivers antioxidants like beta-carotene from the squash. These compounds fight inflammation and may lower chronic disease risk. Whether you serve it as a side or main dish, Cheesy Squash Casserole nourishes your body without sacrificing flavor.
How it fits in a healthy lifestyle
Cheesy Squash Casserole fits seamlessly into balanced eating habits. For gluten-free diets, simply swap traditional breadcrumbs for a gluten-free alternative to keep the dish celiac-friendly. If you’re watching your heart health, opt for reduced-fat cheese and olive oil instead of butter.
This recipe also pairs well with lean proteins like grilled chicken or fish, making it a versatile addition to any meal plan. For those focusing on plant-based eating, try adding vegan cheese to maintain the creamy texture without dairy. Whether you’re meal prepping or serving a family dinner, Cheesy Squash Casserole adapts to your nutritional goals without compromising taste.
A creamy and cheesy squash casserole that makes a perfect side dish for any meal.
Ingredients
Scale
For the Crust:
4 cups yellow squash, sliced
1 small onion, chopped
1 cup shredded cheddar cheese
1/2 cup sour cream
1/2 cup mayonnaise
1 large egg, beaten
1/2 cup breadcrumbs
2 tablespoons butter, melted
1 teaspoon salt
1/2 teaspoon black pepper
Instructions
1. Prepare the Crust:
Preheat oven to 350°F (175°C). Grease a 9×13-inch baking dish.
In a large skillet, cook the squash and onion over medium heat until tender, about 10 minutes. Drain any excess liquid.
In a large bowl, mix the cooked squash and onion with cheddar cheese, sour cream, mayonnaise, beaten egg, salt, and pepper.
Transfer the mixture to the prepared baking dish.
In a small bowl, combine breadcrumbs and melted butter. Sprinkle evenly over the squash mixture.
Bake for 25-30 minutes, or until the top is golden brown and the casserole is bubbly.
Notes
You can customize the seasonings to taste.
s-dish">How to Prepare This Dish
Steps and time-saving tips
Start by preheating your oven to 375°F so it’s ready when you finish prepping the Cheesy Squash Casserole. While the oven heats, slice fresh yellow squash into thin rounds—about ¼-inch thick—for even cooking. Next, sauté the squash in a large skillet with a drizzle of olive oil until it softens slightly, which takes about 5 minutes. Meanwhile, whisk together eggs, milk, and a pinch of salt in a bowl until smooth. Stir in shredded cheddar cheese, breadcrumbs, and a dash of garlic powder for extra flavor. Once the squash cools for a minute, gently fold it into the cheesy mixture. Then, transfer everything to a greased baking dish and sprinkle extra cheese on top for a golden crust. Bake for 25-30 minutes until bubbly and lightly browned. Let it rest for 5 minutes before serving so the layers set. To save time, prep the squash and cheese mixture the night before and refrigerate it. Just pop it in the oven when you’re ready!
Mistakes I’ve made and learned from
I once rushed the sautéing step and ended up with watery Cheesy Squash Casserole because the squash released too much liquid. Now I always cook it just until tender and drain any excess moisture. Another blunder? Overbaking! I left it in too long, and the cheese turned rubbery. A trusty oven thermometer saved me—check out my must-have kitchen tools for more game-changers. Also, skipping the rest time led to a messy slice. Patience pays off, just like with my casserole layering tips. Learn from my fails, and yours will turn out creamy, not soggy!
n-and-variations">Cultural Connection and Variations
Where this recipe comes from
Cheesy Squash Casserole has deep roots in Southern comfort food, where garden-fresh vegetables and creamy, indulgent cheeses come together in a dish that feels like home. Many families trace their versions back to summer harvests, when yellow squash overflowed in gardens and needed creative uses. Some cooks add a buttery cracker topping, while others swear by a breadcrumb crust. Meanwhile, in other parts of the world, similar dishes take shape. For example, in France, a gratin de courgettes layers zucchini with béchamel, and in Italy, baked squash might feature ricotta and herbs. But no matter the variation, Cheesy Squash Casserole always brings warmth to the table.
In my family, this dish became a staple at potlucks and holiday gatherings. My grandmother insisted on mixing sharp cheddar with a splash of hot sauce for extra kick. Over time, I’ve seen friends tweak it too—some add crispy bacon, while others fold in spinach for extra greens. Whether served as a side or a main, Cheesy Squash Casserole adapts to whatever the occasion calls for. It’s a reminder that simple ingredients can carry big flavors and even bigger memories.
How it fits in today’s cooking
Today, Cheesy Squash Casserole still shines as a versatile crowd-pleaser. Busy home cooks love it because they can prep it ahead, making it perfect for weeknight dinners or holiday feasts. Modern twists, like swapping in gluten-free breadcrumbs or using plant-based cheeses, keep it relevant for diverse diets. Plus, its creamy texture and veggie-packed base make it a comforting yet balanced choice, especially when paired with lighter mains like grilled chicken.
Seasonally, it transiti
ons effortlessly from summer picnics to cozy winter meals. Some families even bake it into their Thanksgiving traditions, alongside classics like green bean casserole. No matter how you serve it, Cheesy Squash Casserole proves that some dishes never go out of style—they just get better with time.
Taste and Texture
What makes it delicious
Cheesy Squash Casserole delivers a comforting blend of creamy, savory, and slightly sweet flavors. Tender squash melts into a rich, velvety cheese sauce, while buttery breadcrumbs add a satisfying crunch. Each bite bursts with the earthy sweetness of squash, balanced by sharp cheddar and a hint of garlic. The aroma alone—warm, cheesy, and herbaceous—will draw everyone to the table. Whether served as a side or main dish, Cheesy Squash Casserole wraps you in cozy, homestyle goodness.
Boosting the flavor
Elevate your Cheesy Squash Casserole with a sprinkle of smoked paprika or crispy bacon bits for a smoky depth. For extra freshness, stir in chopped parsley or chives just before serving. Pair it with a tangy creamy ranch dressing to cut through the richness, or try a dash of hot sauce for a spicy kick. If you love bold flavors, swap the cheddar for pepper jack cheese. For more cheesy inspiration, check out this three-cheese pasta bake—its blend of cheeses works beautifully here too!
Always slice your squash evenly so it cooks uniformly in the Cheesy Squash Casserole. For extra creaminess, mix the cheese sauce while it’s warm to prevent clumping. Additionally, lightly salt the squash before baking to draw out excess moisture and avoid a soggy dish. Finally, let the casserole rest for 10 minutes after baking—this helps the layers set for cleaner slices.
Mistakes to avoid
Overcrowding the baking dish is a common mistake that leads to uneven cooking in Cheesy Squash Casserole. Instead, use a deep dish to allow proper heat circulation. Another error is skipping the step of pre-cooking the squash, which can result in a watery texture. For more on avoiding soggy casseroles, check out our guide on fixing soggy casseroles. Also, resist overmixing the cheese sauce, as it can become grainy. For perfect sauce consistency, review our tips for creamy cheese sauce every time.
g-suggestions">Serving and Pairing Suggestions
How to serve this dish
Bring your Cheesy Squash Casserole to the table straight from the oven while it’s still bubbling for maximum appeal. For a rustic touch, serve it in the same cast-iron skillet or ceramic dish you baked it in. Sprinkle fresh parsley or chives on top to add a pop of color and freshness. This dish shines at holiday gatherings, especially Thanksgiving or potlucks, where its creamy texture and golden crust steal the show. Alternatively, pair it with a simple green salad for a cozy weeknight dinner that feels special.
What goes well with it
For a balanced meal, pair Cheesy Squash Casserole with grilled chicken or roasted turkey. The savory proteins contrast beautifully with the creamy, cheesy flavors. If you’re serving it as a side, try our Herb-Roasted Potatoes for a hearty combination. To refresh the palate, a crisp white wine like Sauvignon Blanc or a light sparkling water with lemon works wonders. For dessert, our Classic Apple Crisp adds a sweet finish without overpowering the meal.
math-faq-block">
What’s the best cheese for Cheesy Squash Casserole?
Sharp cheddar is the most popular choice for Cheesy Squash Casserole because it melts well and adds rich flavor. For extra creaminess, mix in Monterey Jack or a sprinkle of Parmesan. Avoid pre-shredded cheese, as it contains anti-caking agents that can make the texture grainy.
Can you make Cheesy Squash Casserole ahead of time?
Yes! Assemble the Cheesy Squash Casserole up to 24 hours in advance and refrigerate it covered. Let it sit at room temperature for 30 minutes before baking to ensure even cooking. This dish also freezes well for up to 3 months—just thaw overnight before reheating.
How do you keep squash from getting watery in a casserole?
Salt sliced squash and let it drain in a colander for 15–30 minutes to remove excess moisture before assembling your Cheesy Squash Casserole. Pat it dry with paper towels for even better results. Adding breadcrumbs or cracker crumbs also helps absorb extra liquid during baking.
rank-math-faq-item">
What protein goes well with Cheesy Squash Casserole?
Cheesy Squash Casserole pairs perfectly with grilled chicken, baked ham, or roasted turkey for a balanced meal. For a Southern-style dinner, serve it alongside fried chicken or smoked sausage. The creamy texture complements both lean and hearty proteins.
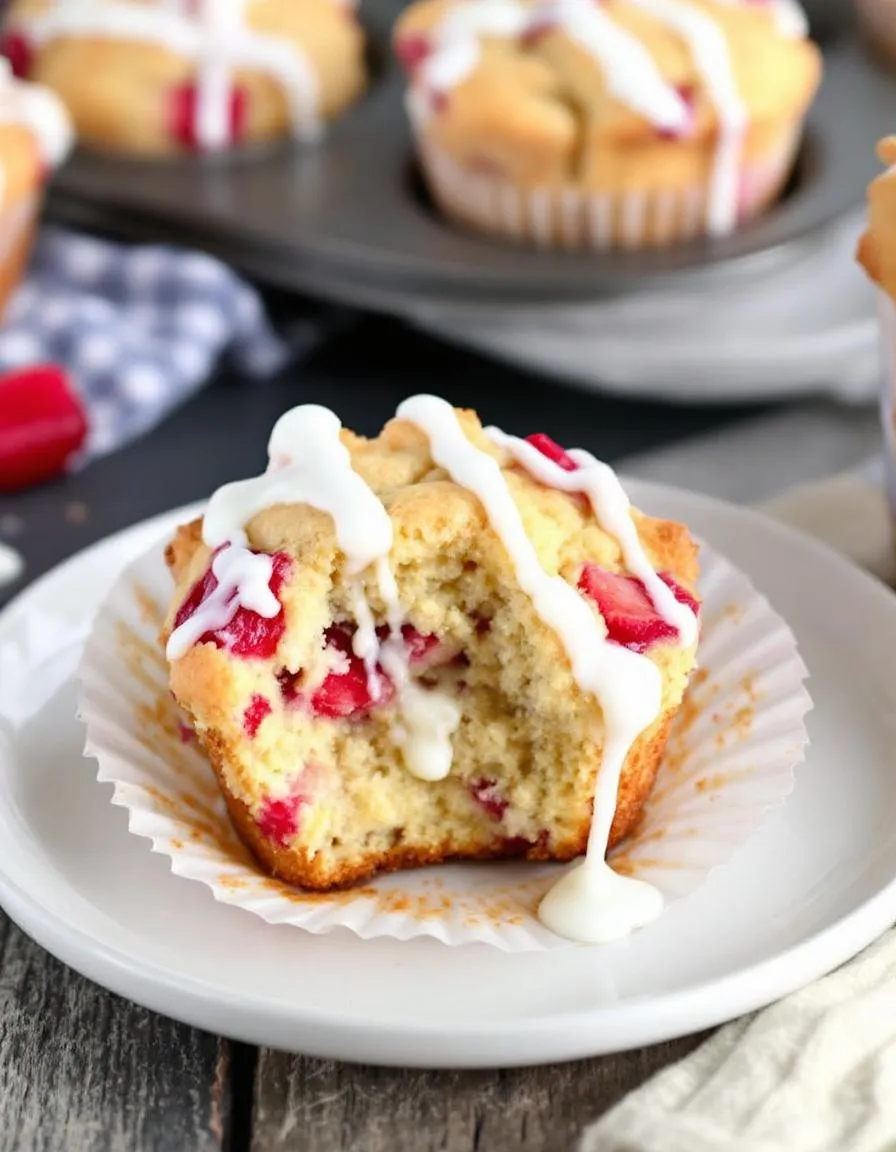
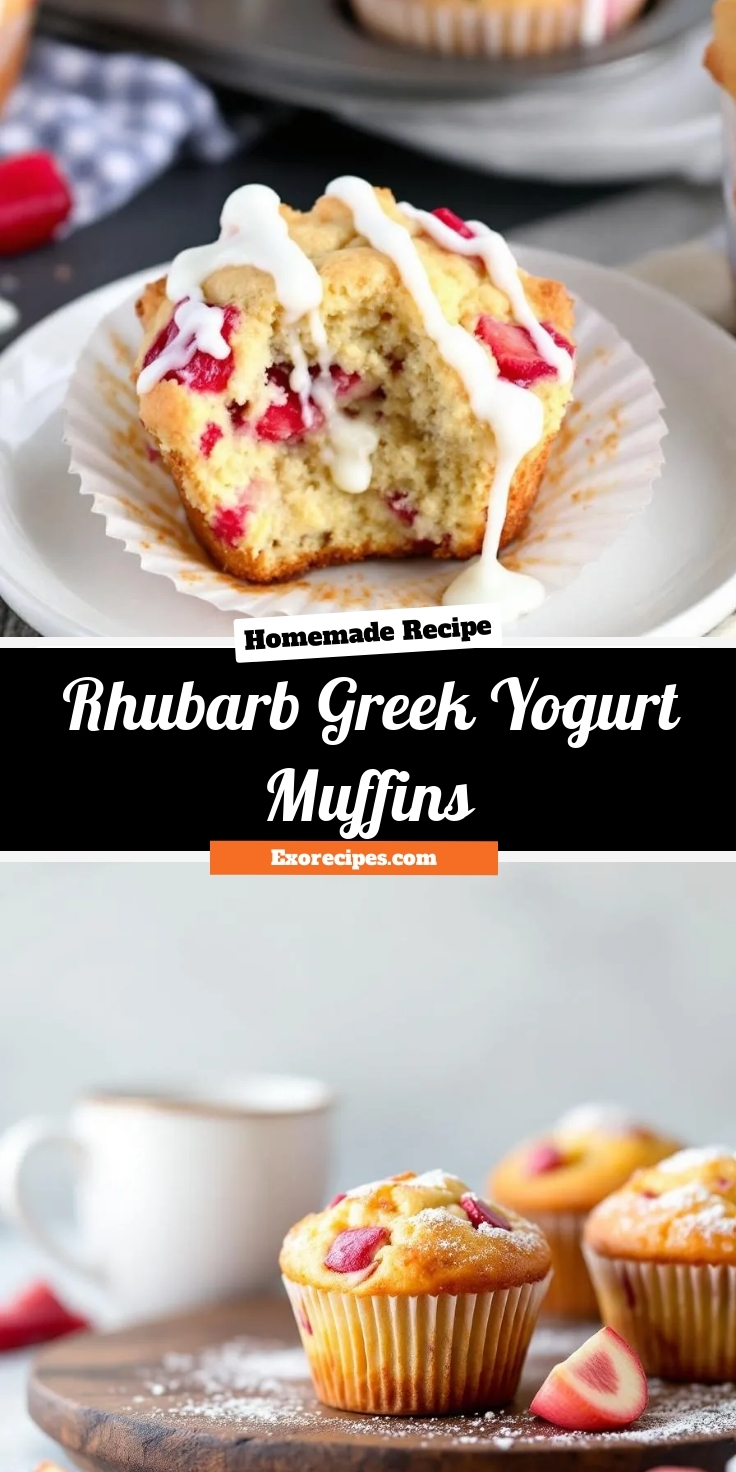
Best Rhubarb Greek Yogurt Muffins – Easy Recipe
Introduction
There’s something undeniably special about baking—especially when it brings together unexpected flavors in a way that feels both comforting and exciting. That’s exactly why I adore these Rhubarb Greek Yogurt Muffins. Whether you’re a seasoned baker or just starting out, this recipe delivers tender, tangy-sweet muffins that pair perfectly with your morning coffee or an afternoon pick-me-up. Plus, they’re a fantastic way to use seasonal rhubarb while adding a protein boost from Greek yogurt. Trust me, one bite and you’ll understand why these muffins have become a staple in my kitchen.
Rhubarb Greek Yogurt Muffins strike the ideal balance between wholesome and indulgent. The tartness of fresh rhubarb contrasts beautifully with the creamy richness of Greek yogurt, creating a moist, flavorful crumb that’s hard to resist. What makes this recipe stand out is its simplicity—no fancy techniques or hard-to-find ingredients required. Just like my Blueberry Lemon Scones, these muffins celebrate fresh produce while keeping the process approachable. They’re also incredibly versatile. Serve them warm for breakfast, pack them for a picnic, or enjoy them as a guilt-free dessert. If you’re looking for more ways to bake with yogurt, my Greek Yogurt Banana Bread is another must-try. Above all, these muffins embody the breezy, joyful spirit of brekcakes.com—recipes that feel like home but still surprise and delight.
Why I Love This Recipe
Rhubarb Greek Yogurt Muffins hold a special place in my heart because they remind me of my grandmother’s garden. She grew rhubarb every summer, and I loved watching her transform those vibrant stalks into pies, crisps, and yes—muffins. This recipe captures that nostalgia while adding my own twist with Greek yogurt for extra tenderness. Every time I bake them, the aroma fills my kitchen with memories, and sharing them with friends feels like passing down a little piece of my story. That’s the magic of baking: it’s never just about the food—it’s about the moments and connections we create along the way.
Health and Nutrition
Why it’s good for your body
Rhubarb Greek Yogurt Muffins pack a nutritious punch while satisfying your sweet cravings. First, rhubarb delivers a hefty dose of fiber, which supports digestion and keeps you feeling full longer. Additionally, it’s rich in vitamin K, promoting bone health and blood clotting. Meanwhile, Greek yogurt adds a protein boost, helping to stabilize energy levels and repair muscles.
Moreover, these muffins offer a smarter alternative to traditional baked goods. Unlike sugar-heavy treats, Rhubarb Greek Yogurt Muffins rely on natural tartness from rhubarb and the creamy tang of yogurt for flavor. This means fewer refined sugars and more wholesome ingredients. Plus, the combination of whole grains and yogurt provides a steady release of energy, preventing mid-morning crashes.
Finally, the antioxidants in rhubarb fight inflammation, while the probiotics in Greek yogurt support gut health. Whether you enjoy them for breakfast or as a snack, Rhubarb Greek Yogurt Muffins nourish your body without compromising taste. They’re proof that indulgence and nutrition can go hand in hand.
How it fits in a healthy lifestyle
Rhubarb Greek Yogurt Muffins fit seamlessly into a balanced diet, whether you’re aiming for heart health or simply mindful eating. Their high-protein content makes them a great post-workout snack, while the fiber keeps cravings in check. If you’re watching your gluten intake, try swapping regular flour for a gluten-free blend—these muffins adapt beautifully.
For those focused on heart health, the low saturated fat and cholesterol-free profile of these muffins align perfectly with heart-friendly eating. They also pair well with other nutrient-dense foods, like a handful of nuts or fresh berries. And if you’re meal prepping, bake a batch ahead of time for quick, portion-controlled snacks throughout the week.
Looking for more ways to balance treats with nutrition? Explore our guide to healthy baking swaps to keep your recipes light and satisfying. Rhubarb Greek Yogurt Muffins prove that smart choices don’t mean sacrificing flavor—just smarter ingredients.
Moist and tangy muffins with fresh rhubarb and Greek yogurt for a delightful breakfast or snack.
Ingredients
Scale
For the Crust:
1 1/2 cups all-purpose flour
1/2 cup granulated sugar
1 1/2 tsp baking powder
1/2 tsp baking soda
1/4 tsp salt
1 cup Greek yogurt
1/4 cup vegetable oil
1 large egg
1 tsp vanilla extract
1 cup diced rhubarb
Instructions
1. Prepare the Crust:
Preheat oven to 375°F (190°C) and line a muffin tin with paper liners.
In a large bowl, whisk together flour, sugar, baking powder, baking soda, and salt.
In another bowl, mix Greek yogurt, vegetable oil, egg, and vanilla extract until smooth.
Pour the wet ingredients into the dry ingredients and stir until just combined.
Gently fold in the diced rhubarb.
Divide the batter evenly among the muffin cups and bake for 20-25 minutes or until a toothpick comes out clean.
Let cool in the pan for 5 minutes, then transfer to a wire rack to cool completely.
Notes
You can customize the seasonings to taste.
How to Prepare This Dish
Steps and time-saving tips
Start by preheating your oven to 375°F and lining a muffin tin with paper liners. While the oven heats, whisk together the dry ingredients—flour, baking powder, and a pinch of salt—in a large bowl. In another bowl, mix the wet ingredients: Greek yogurt, melted butter, eggs, and vanilla extract until smooth. Fold the wet mixture into the dry ingredients gently, avoiding overmixing. Then, stir in the diced rhubarb for a tangy twist. Spoon the batter evenly into the muffin cups, filling each about two-thirds full. Bake for 18-20 minutes until golden and a toothpick comes out clean. For extra flavor, drizzle honey over the warm muffins or sprinkle with coarse sugar before serving. To save time, prep the dry and wet ingredients the night before and combine them just before baking. If you’re short on fresh rhubarb, frozen works too—just thaw and pat it dry first.
and-learned-from">Mistakes I’ve made and learned from
I once overmixed the batter, resulting in dense Rhubarb Greek Yogurt Muffins instead of light, fluffy ones. Now, I fold the ingredients just until combined, and the texture is perfect every time. Another mishap? Using watery yogurt—it made the muffins soggy. I learned to opt for thick, full-fat Greek yogurt, like the kind I use in my Greek Yogurt Pancakes, for the best consistency. If your rhubarb is too tart, toss it with a bit of sugar before adding it to the batter. For more tips on balancing flavors, check out my guide to Baking with Rhubarb. Trust me, these small tweaks make all the difference!
Cultural Connection and Variations
Where this recipe comes from
Rhubarb Greek Yogurt Muffins weave together two culinary traditions that might seem worlds apart at first glance. Rhubarb, with its tart punch, has deep roots in European and North American baking, often starring in pies and crumbles come spring. Meanwhile, Greek yogurt brings a creamy tang from the Mediterranean, where it’s been a staple for centuries. Somehow, these ingredients found each other, creating a muffin that’s both nostalgic and refreshingly modern.
In my family, Rhubarb G
reek Yogurt Muffins became a rite of spring. My grandmother would swap buttermilk for yogurt when her rhubarb patch overflowed, claiming it made the crumb extra tender. Across the Atlantic, British bakers might fold in custard powder for richness, while Scandinavians could sprinkle cardamom for warmth. Even in the U.S., regional twists pop up—some add lemon zest for brightness, while others toss in walnuts for crunch. No matter the variation, the magic lies in balancing rhubarb’s sharpness with yogurt’s mellow creaminess.
How it fits in today’s cooking
Today, Rhubarb Greek Yogurt Muffins fit perfectly into our love for breakfasts that feel indulgent yet wholesome. They’re a seasonal star at farmers’ market brunches and a smart way to use garden-fresh rhubarb. Plus, they align with modern tastes—Greek yogurt packs protein, and rhubarb’s fiber makes these muffins a guilt-free treat. For busy cooks, they’re freezer-friendly, just like these meal-prep breakfast ideas, so you can grab one on hectic mornings.
Adaptations keep them fresh, too. Some bakers go gluten-free with almond flour, while others drizzle honey instead of sugar. They’ve even become a sneaky way to introduce kids to tart flavors, especially paired with sweeter fruits like strawberries. Whether you’re baking them for a weekend treat or as part of your easy baking projects, Rhubarb Greek Yogurt Muffins prove that some recipes only get better with time.
>Taste and Texture
What makes it delicious
Rhubarb Greek Yogurt Muffins deliver a perfect balance of tangy and sweet, with a tender crumb that melts in your mouth. The tart rhubarb bursts with bright, fruity notes, while the Greek yogurt adds a subtle creaminess and slight tang. Meanwhile, a golden-brown top offers a delicate crispness, contrasting the soft, moist interior. Warm from the oven, these muffins fill the kitchen with a buttery, vanilla-kissed aroma that hints at their comforting flavor. Every bite of Rhubarb Greek Yogurt Muffins feels indulgent yet refreshing, thanks to the lively rhubarb and rich yogurt pairing.
Boosting the flavor
For an extra flavor boost, try folding in a handful of juicy strawberries or a sprinkle of cinnamon to complement the rhubarb’s sharpness. A drizzle of honey vanilla glaze adds a silky sweetness, while a dusting of powdered sugar keeps things light. If you love texture, toss in some chopped walnuts or pecans for a satisfying crunch. For more inspiration, check out these yogurt baking tips to make your muffins even fluffier. Whether you tweak the spices or experiment with toppings, Rhubarb Greek Yogurt Muffins adapt beautifully to your taste.
Tips for Success
Best practices for results
Always chop rhubarb into small, even pieces so they distribute well in your Rhubarb Greek Yogurt Muffins. Furthermore, use full-fat Greek yogurt for the best moisture and texture. Meanwhile, avoid overmixing the batter—just fold until combined to keep the muffins tender. Additionally, let the muffins cool in the pan for 5 minutes before transferring them to a rack. This prevents them from breaking apart while maintaining their perfect crumb.
Mistakes to avoid
One common mistake is using watery yogurt, which can make the batter too thin. Instead, opt for thick Greek yogurt as recommended in our Greek yogurt baking guide. Another error is skipping the step of tossing rhubarb in flour, which helps prevent sinking. For more tips on handling tricky ingredients, check out our baking with rhubarb guide. Finally, don’t overbake the muffins—test with a toothpick at the minimum bake time to avoid dryness.
Serving and Pairing Suggestions
How to serve this dish
Rhubarb Greek Yogurt Muffins shine when served warm, straight from the oven. For a cozy brunch, arrange them on a rustic wooden board with a dusting of powdered sugar and fresh rhubarb slices as garnish. Meanwhile, if you’re hosting a spring gathering, stack them on a tiered stand alongside floral teacups for an elegant touch. These muffins also make a delightful addition to holiday breakfast spreads, especially when paired with a dollop of whipped cream or a drizzle of honey. No matter the occasion, their tender crumb and tangy-sweet flavor will impress.
h-it">What goes well with it
A hot cup of Earl Grey tea enhances the bright rhubarb notes in Rhubarb Greek Yogurt Muffins, creating a balanced flavor experience. Alternatively, try serving them with a scoop of vanilla bean ice cream for a simple yet decadent dessert. If you’re planning a full brunch menu, pair them with our fluffy Lemon Ricotta Pancakes or a refreshing Mixed Berry Smoothie. The citrusy pancakes and fruity smoothie both complement the muffins’ tangy profile, making every bite even more enjoyable.
Can I use frozen rhubarb for Rhubarb Greek Yogurt Muffins?
Yes, frozen rhubarb works well in Rhubarb Greek Yogurt Muffins. Thaw and drain it thoroughly to remove excess moisture before folding it into the batter. This prevents soggy muffins while keeping the tangy flavor intact.
rank-math-faq-item">
How do Greek yogurt muffins stay moist?
Greek yogurt adds moisture and tenderness to Rhubarb Greek Yogurt Muffins due to its high protein and fat content. The acidity in yogurt also reacts with baking soda, creating a light texture. These muffins stay fresh longer than traditional recipes.
What’s the best sugar substitute for rhubarb muffins?
For Rhubarb Greek Yogurt Muffins, honey or maple syrup work well as natural substitutes, though you may need to reduce other liquids slightly. Monk fruit or erythritol blends also work for low-sugar versions, but rhubarb’s tartness benefits from some sweetness.
Can I make Rhubarb Greek Yogurt Muffins gluten-free?
Absolutely! Substitute all-purpose flour with a 1:1 gluten-free blend for Rhubarb Greek Yogurt Muffins. Adding ½ tsp xanthan gum improves texture. The yogurt helps bind the batter, ensuring your gluten-free muffins stay fluffy and delicious.