If you’re craving something vibrant, flavorful, and downright satisfying, you’ve come to the right place. Today, I’m sharing my take on the Street Corn Chicken Rice Bowl—a dish that brings together smoky grilled chicken, charred corn, and creamy cotija cheese in one irresistible bowl. Whether you’re meal prepping for the week or hosting a casual dinner, this recipe delivers big flavors with minimal fuss. Plus, it’s a fantastic way to use up leftover ingredients, just like my favorite one-pot meals.
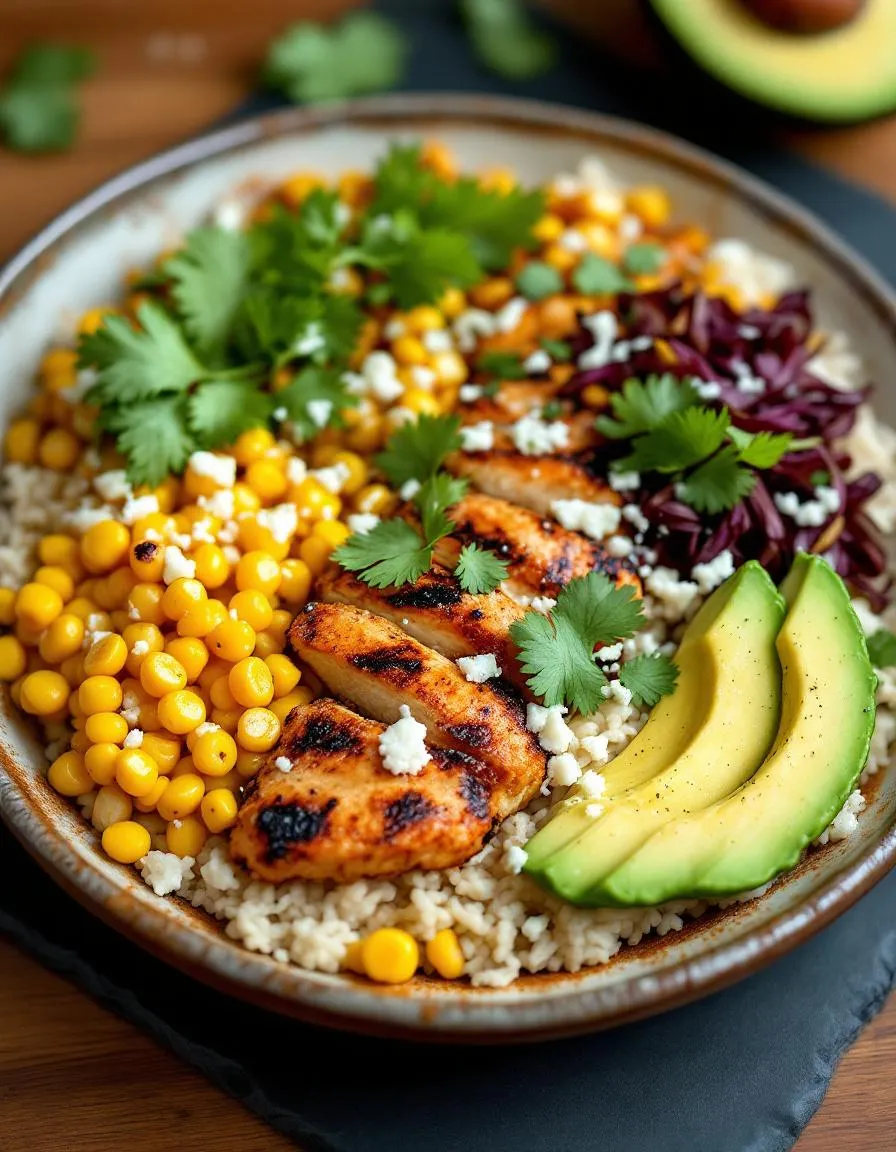
The Street Corn Chicken Rice Bowl is a celebration of textures and tastes. Imagine tender, spice-rubbed chicken nestled over fluffy rice, topped with charred corn, a drizzle of tangy lime crema, and a sprinkle of fresh cilantro. It’s a dish that takes inspiration from Mexican street food but feels entirely at home on your weeknight dinner table. What makes it special? It’s versatile, filling, and packed with bold flavors that everyone loves. If you enjoy dishes that balance simplicity with excitement, you’ll adore this recipe as much as my go-to quick dinners. Best of all, it’s customizable, so you can tweak it to suit your taste buds perfectly.
Why I Love This Recipe
This Street Corn Chicken Rice Bowl holds a special place in my heart because it reminds me of summer evenings spent at local food markets. The first time I tried it, the combination of smoky chicken and sweet corn instantly transported me back to those warm, bustling nights. Now, I make it whenever I need a quick pick-me-up or want to impress guests without spending hours in the kitchen. It’s the kind of dish that feels indulgent yet wholesome—a true win-win in my book.
Health and Nutrition
Why it’s good for your body
The Street Corn Chicken Rice Bowl packs a nutritious punch while delivering bold flavors. First, the grilled chicken provides lean protein to support muscle repair and keep you full longer. Meanwhile, the corn adds a sweet crunch along with fiber, which aids digestion and stabilizes blood sugar. Additionally, the dish includes lime juice and cilantro, both rich in antioxidants that help fight inflammation.
Moreover, the Street Corn Chicken Rice Bowl balances carbs, protein, and healthy fats for sustained energy. Brown rice, if used, offers whole grains for heart health and steady energy. The Greek yogurt or cotija cheese topping contributes calcium and probiotics for gut health. Together, these ingredients create a meal that fuels your body without weighing you down.
Finally, the spices and seasonings in the Street Corn Chicken Rice Bowl, like chili powder and garlic, boost metabolism and immunity. Turmeric or cumin, if included, add anti-inflammatory benefits. Whether you choose a spicy or mild version, this dish delivers both taste and wellness in every bite.
How it fits in a healthy lifestyle
The Street Corn Chicken Rice Bowl fits seamlessly into a balanced diet. For those focusing on high-protein meals, the grilled chicken and Greek yogurt make it a smart choice. If you prefer gluten-free options, simply ensure your seasonings and toppings meet dietary needs. The dish also works well for meal prep, saving time while keeping nutrition on track.
Pair it with a light salad or roasted veggies for extra fiber, or enjoy it solo for a satisfying lunch. If you love versatile recipes, explore our healthy meal prep ideas for more inspiration. For heart-healthy eaters, the dish’s lean protein and whole grains align perfectly with cholesterol-friendly eating. Check out our heart-smart dinners to discover similar nutrient-packed meals. With customizable ingredients, the Street Corn Chicken Rice Bowl adapts to your goals without sacrificing flavor.
A flavorful and easy-to-make rice bowl featuring grilled chicken, Mexican street corn, and fresh toppings.
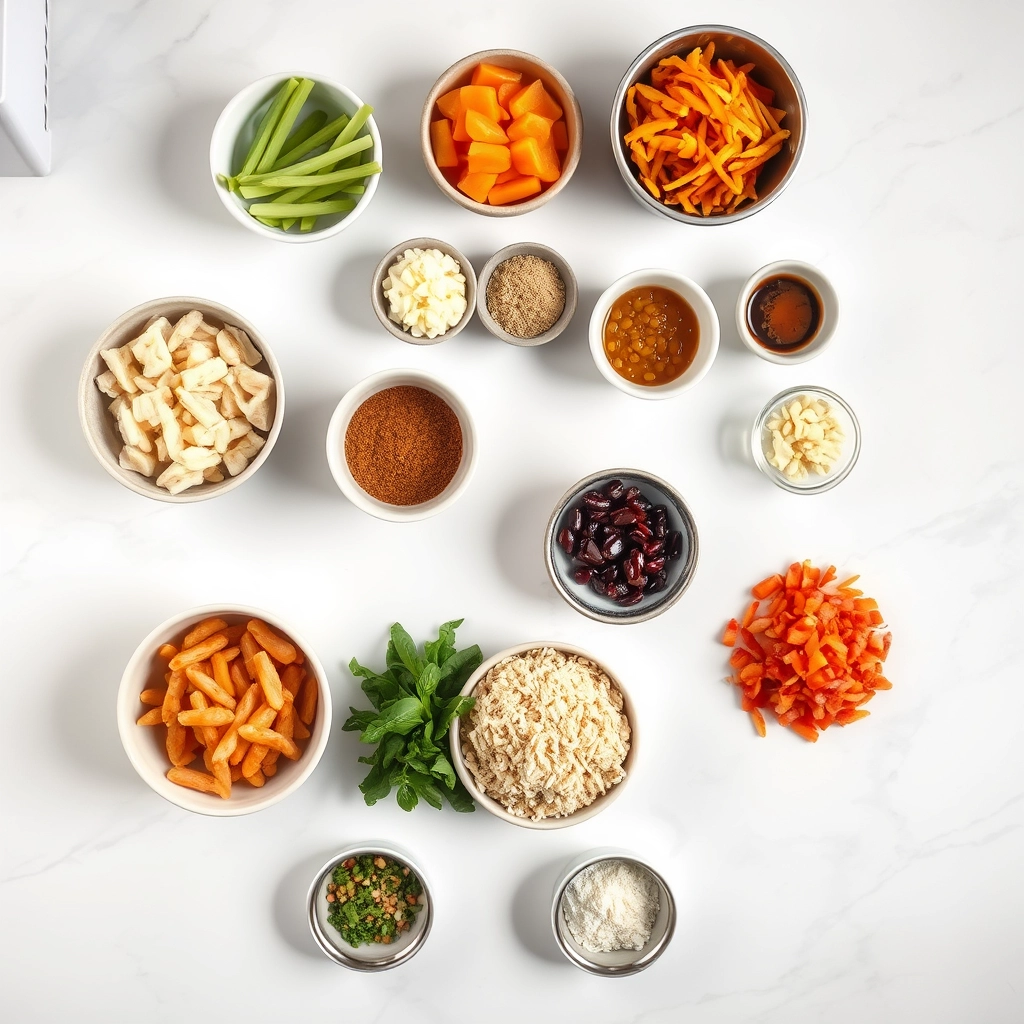
Ingredients
Scale
For the Crust:
1 cup cooked white rice
1 lb boneless, skinless chicken breasts
1 tbsp olive oil
1 tsp chili powder
1 tsp garlic powder
1/2 tsp cumin
Salt and pepper to taste
2 ears of corn, husked
1/4 cup mayonnaise
1/4 cup sour cream
1/2 cup crumbled cotija cheese
1 lime, juiced
1/4 cup chopped cilantro
1 avocado, sliced
Instructions
1. Prepare the Crust:
Season chicken breasts with chili powder, garlic powder, cumin, salt, and pepper. Heat olive oil in a skillet over medium-high heat and cook chicken for 6-7 minutes per side until fully cooked. Let rest, then slice.
Grill or roast corn until lightly charred. Cut kernels off the cob.
In a small bowl, mix mayonnaise, sour cream, lime juice, and half the cotija cheese to make the sauce.
Assemble bowls by dividing rice, sliced chicken, corn, and avocado among four bowls. Drizzle with the sauce and top with remaining cotija cheese and cilantro.
Notes
You can customize the seasonings to taste.
How to Prepare This Dish
Steps and time-saving tips
Start by marinating the chicken in a zesty blend of lime juice, chili powder, and garlic for at least 20 minutes—or overnight for deeper flavor. While the chicken soaks up those bold spices, cook your rice according to package instructions, but swap water for chicken broth to add richness. Meanwhile, heat a skillet over medium-high and sear the chicken until golden and cooked through, about 6 minutes per side. Let it rest before slicing into juicy strips. Next, char fresh corn kernels in the same skillet for a smoky touch, or use frozen corn for convenience—just pat it dry first to avoid sogginess. Whisk together mayo, sour cream, cilantro, and a pinch of cayenne for the creamy sauce. Now, layer fluffy rice in bowls, top with chicken, corn, crumbled cotija cheese, and a generous drizzle of sauce. Finish with lime wedges and extra cilantro. For a time-saving hack, prep components like rice and sauce ahead, then assemble just before serving.
and-learned-from">Mistakes I’ve made and learned from
Early on, I rushed marinating the chicken and ended up with bland bites—now I never skip the full 20 minutes, or better yet, let it sit overnight. Another blunder? Overcrowding the skillet, which steamed the chicken instead of giving it that perfect sear. I fixed it by cooking in batches, and the crispy edges were worth the extra time. If your sauce feels too thick, thin it with a splash of lime juice or water, a trick I picked up from my sauce-making experiments. And if you’re out of cotija, feta works in a pinch—just check my cheese substitutes guide for more swaps. Trust me, these small tweaks make all the difference.
Cultural Connection and Variations
Where this recipe comes from
The Street Corn Chicken Rice Bowl pulls inspiration from the vibrant flavors of Mexican street food, particularly elote, the beloved grilled corn slathered in creamy sauce and spices. However, this dish takes a modern twist by pairing smoky charred corn with tender chicken and fluffy rice, creating a hearty meal that bridges cultures. In Mexico, vendors often serve elote on a stick, but home cooks might toss the kernels into salads or tacos. Meanwhile, in the American Southwest, you’ll find similar flavors in bowls or burritos, proving how adaptable these ingredients are.
Families put their own
spin on the Street Corn Chicken Rice Bowl too. Some add extra heat with jalapeños or swap cotija cheese for feta. Others layer in avocado or black beans for a heartier version. During summer barbecues, my aunt grills the corn right beside the chicken, letting the smoky flavors meld before tossing everything with lime and cilantro. No matter the variation, the dish always feels like a celebration of fresh, bold flavors.
How it fits in today’s cooking
The Street Corn Chicken Rice Bowl fits perfectly into today’s fast-paced, flavor-driven kitchens. Busy cooks love it because they can prep the components ahead, like the marinated chicken, and assemble bowls in minutes. Plus, it’s a crowd-pleaser for weeknight dinners or casual gatherings, especially when paired with refreshing sides like citrusy slaws.
Seasonal eating also keeps this dish relevant. In summer, farmers’ market corn shines, while winter versions might use roasted frozen kernels. Health-conscious tweaks, like Greek yogurt instead of mayo, make it lighter without sacrificing taste. Whether you’re craving comfort food or a fresh twist on tradition, the Street Corn Chicken Rice Bowl delivers every time.
>Taste and Texture
What makes it delicious
The Street Corn Chicken Rice Bowl delivers a vibrant explosion of flavors and textures in every bite. First, the juicy, charred chicken mingles with the smoky sweetness of grilled corn, while the creamy cotija cheese adds a salty tang. Meanwhile, the fluffy rice soaks up the bright, zesty lime crema, creating a satisfying contrast to the crisp freshness of chopped cilantro and red onion. Each spoonful offers a perfect balance—rich yet light, savory with a hint of spice. The aroma alone, with its smoky grill notes and citrusy kick, will make your mouth water before you even take a bite. Whether you crave something hearty or refreshing, the Street Corn Chicken Rice Bowl hits all the right notes.
Boosting the flavor
Want to take your Street Corn Chicken Rice Bowl to the next level? Try swapping cotija for crumbled feta if you prefer a sharper bite, or add a drizzle of chipotle sauce for extra smokiness. For crunch, toss in toasted pepitas or crispy tortilla strips. If you love heat, a sprinkle of chili powder or a dash of hot sauce will kick things up. Don’t forget a squeeze of fresh lime—it brightens every layer. Craving more inspiration? Check out our grilled corn tips to perfect that charred sweetness. With a few tweaks, you can make this dish uniquely yours.
Tips for Success
Best practices for results
For the best Street Corn Chicken Rice Bowl, always marinate the chicken for at least 30 minutes to lock in flavor. Meanwhile, toast the rice lightly before cooking to add a nutty depth. Additionally, char the corn in a hot skillet for a smoky touch that elevates the dish. Finally, assemble the bowl while the ingredients are warm to ensure the flavors blend perfectly.
Mistakes to avoid
Avoid overcooking the chicken, as it can dry out and ruin the texture of your Street Corn Chicken Rice Bowl. Instead, use a meat thermometer to check for doneness at 165°F. Also, don’t skip the lime crema—it balances the dish’s richness. For more marinade tips, check out our chicken marinade guide. If your rice turns out sticky, try our foolproof rice method for fluffy grains every time.
Serving and Pairing Suggestions
How to serve this dish
Bring vibrant energy to your table by serving the Street Corn Chicken Rice Bowl in wide, shallow bowls that showcase its colorful layers. Top it with extra crumbled cotija cheese, a drizzle of creamy lime crema, and a sprinkle of fresh cilantro for a restaurant-worthy finish. Meanwhile, for casual gatherings, let guests build their own bowls with small bowls of toppings like diced avocado, pickled jalapeños, and crispy tortilla strips. Whether you’re hosting a summer BBQ or a cozy weeknight dinner, this dish adapts beautifully to any occasion.
h-it">What goes well with it
Pair your Street Corn Chicken Rice Bowl with a refreshing agua fresca or a chilled Mexican lager to balance its smoky, tangy flavors. For sides, try a light jicama slaw or a simple black bean salad to add crunch and freshness. If you love bold flavors, our spicy mango salsa adds a sweet-heat kick that elevates every bite. Finally, end the meal on a sweet note with our cinnamon churro bites, which offer a warm, spiced contrast to the dish’s zesty profile.
What is a Street Corn Chicken Rice Bowl?
A Street Corn Chicken Rice Bowl is a flavorful dish inspired by Mexican street corn (elote), featuring grilled chicken, rice, and a creamy sauce with cotija cheese, chili powder, and lime. It combines the smoky, tangy flavors of elote with the heartiness of a rice bowl for a satisfying meal. Perfect for a quick dinner or meal prep, this dish brings the taste of street food to your kitchen.
rank-math-faq-item">
How do you make the sauce for a Street Corn Chicken Rice Bowl?
The sauce for a Street Corn Chicken Rice Bowl typically includes mayonnaise, sour cream, lime juice, garlic, and spices like chili powder and cumin. Mix these ingredients until smooth, then drizzle over the bowl or toss with the corn and chicken. This creamy, zesty sauce ties the dish together and adds authentic street corn flavor.
Can I use frozen corn for a Street Corn Chicken Rice Bowl?
Yes, frozen corn works well for a Street Corn Chicken Rice Bowl—just thaw and pat it dry before charring in a skillet for that smoky flavor. Fresh or frozen corn both deliver great results, but grilling or pan-searing enhances the texture. The key is achieving a slight char to mimic traditional street corn.
What sides pair well with a Street Corn Chicken Rice Bowl?
A Street Corn Chicken Rice Bowl pairs well with fresh toppings like avocado slices, cilantro, or a simple side salad. For extra crunch, add tortilla chips or pickled jalapeños. The dish is already balanced, but these additions enhance the flavors and textures.
>
Best Lasagna Soup – Easy and Hearty Recipe
Introduction
If you crave the cozy comfort of lasagna but don’t want to spend hours layering noodles, let me introduce you to Lasagna Soup. This recipe captures all the rich, savory flavors of the classic dish in a bowlful of warmth. Whether you’re cooking for a busy weeknight or a lazy Sunday, this soup wraps you in the same nostalgia as my grandma’s kitchen. Plus, it’s a fantastic way to sneak extra veggies into your family’s meals—just like my veggie-packed meatloaf does!
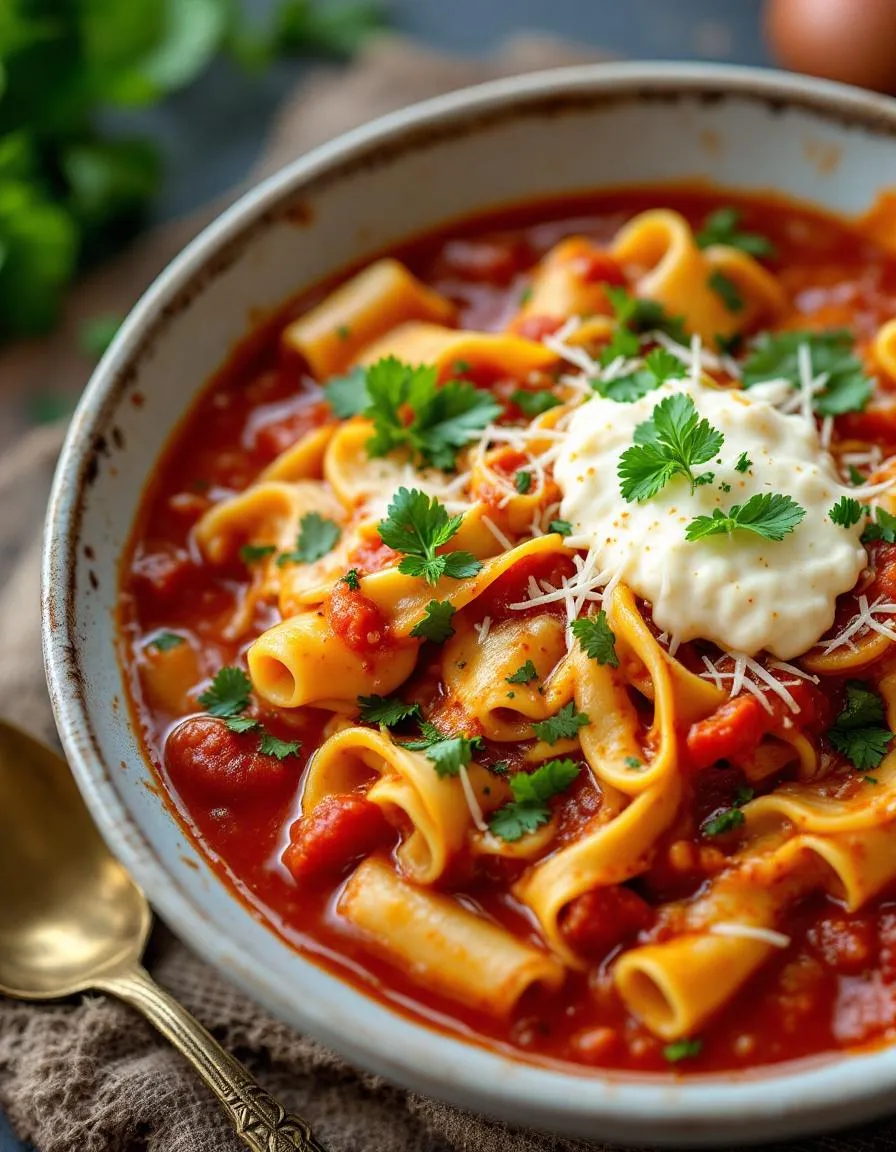
Lasagna Soup is a hearty, brothy twist on the Italian favorite, featuring tender pasta, savory ground meat, and melted cheese. Unlike traditional lasagna, it comes together in one pot, making cleanup a breeze. The magic lies in the layers of flavor—sweet tomatoes, aromatic herbs, and a touch of creaminess from ricotta. Perfect for chilly evenings or meal prep, this dish fits right into my blog’s mission: uncomplicated recipes with big flavor. If you love easy comfort food, you’ll adore my creamy tomato basil soup, another weeknight hero.
Why I Love This Recipe
Lasagna Soup holds a special place in my heart because it reminds me of snowy evenings with my family. My mom would improvise with whatever we had, turning leftovers into something magical. Now, I make it for my own kids, watching their faces light up at the first spoonful. It’s more than a meal—it’s a reminder that the simplest dishes often create the warmest memories.
Health and Nutrition
Why it’s good for your body
Lasagna Soup packs a nutritious punch while delivering the comforting flavors of classic lasagna. First, it combines lean proteins like ground turkey or beef with fiber-rich vegetables such as spinach, carrots, and tomatoes. These ingredients work together to keep you full longer and support digestion. Additionally, the tomatoes in Lasagna Soup provide lycopene, a powerful antioxidant linked to heart health.
Moreover, this soup offers a balanced macronutrient profile. The pasta adds complex carbs for energy, while the cheese and protein sources help maintain muscle health. Unlike heavy traditional lasagna, the broth-based version cuts calories without sacrificing taste. Plus, you can easily customize Lasagna Soup to boost its nutrition, like using whole-grain noodles or adding extra veggies.
Finally, Lasagna Soup delivers key vitamins and minerals. For instance, the garlic and onions strengthen immunity, while the herbs like oregano and basil offer anti-inflammatory benefits. Whether you choose a meaty or plant-based version, this dish fuels your body with essential nutrients. It’s a tasty way to eat well without feeling like you’re dieting.
How it fits in a healthy lifestyle
Lasagna Soup fits seamlessly into a balanced diet, whether you’re meal-prepping or cooking for a family. For protein-focused eaters, adding extra lean meat or legumes keeps it satisfying. If you prefer gluten-free options, swap regular pasta for chickpea or brown rice noodles. The versatility makes it easy to align with your dietary needs.
This soup also supports heart-healthy eating when you use low-sodium broth and load up on vegetables. Pair it with a crisp salad or whole-grain bread for a complete meal. If you’re looking for more high-protein ideas, check out our high-protein meal guide. For those tracking macros, Lasagna Soup’s customizable nature helps you stay on target without sacrificing flavor.
Busy weeknights? Lasagna Soup stores and reheats beautifully, making it a practical choice for healthy eating on the go. Explore our meal prep tips to simplify your routine. Whether you’re fueling workouts or just craving comfort food, this dish proves that nutritious eating can be delicious.
A comforting and hearty soup that captures all the flavors of classic lasagna in a bowl.
Ingredients
Scale
For the Crust:
1 lb ground beef
1 small onion, diced
3 cloves garlic, minced
1 tsp dried oregano
1 tsp dried basil
1/2 tsp red pepper flakes
1 (28 oz) can crushed tomatoes
6 cups chicken broth
8 lasagna noodles, broken into pieces
1/2 cup ricotta cheese
1/2 cup shredded mozzarella cheese
2 tbsp grated Parmesan cheese
Salt and pepper to taste
Instructions
1. Prepare the Crust:
In a large pot, brown the ground beef over medium heat. Drain excess fat.
Add onion, garlic, oregano, basil, and red pepper flakes. Cook until onions are soft.
Stir in crushed tomatoes and chicken broth. Bring to a boil.
Add broken lasagna noodles and cook until tender, about 10-12 minutes.
Season with salt and pepper to taste.
In a small bowl, mix ricotta, mozzarella, and Parmesan cheese.
Serve soup hot with a dollop of the cheese mixture on top.
Notes
You can customize the seasonings to taste.
“`html
s-dish">How to Prepare This Dish
Steps and time-saving tips
Start by heating a large pot over medium heat and browning the ground beef until it crumbles. Meanwhile, chop the onions and garlic to save time. Once the beef cooks through, drain any excess grease and stir in the onions and garlic. Let them soften for a few minutes while you sprinkle in Italian seasoning and a pinch of red pepper flakes for extra flavor. Pour in crushed tomatoes, tomato sauce, and broth, then bring the mixture to a gentle simmer. Break lasagna noodles into bite-sized pieces and drop them directly into the pot. Stir occasionally to prevent sticking, and cook until the noodles turn tender. While the soup simmers, mix ricotta, shredded mozzarella, and grated Parmesan in a bowl for the creamy topping. Ladle the hot Lasagna Soup into bowls, then dollop the cheese mixture on top. Finish with fresh basil or parsley for a bright touch. To save time, use pre-shredded cheese or no-boil lasagna noodles that cook faster in the broth.
Mistakes I’ve made and learned from
I once rushed the browning step and ended up with greasy Lasagna Soup—now I always drain the beef well and pat it dry if needed. Another time, I overcooked the noodles because I forgot they’d keep softening in the hot broth. Now I undercook them slightly or use sturdier pasta like farfalle if I’m not serving right away. The cheese topping can also turn grainy if you overmix it, so I gently fold the ingredients just until combined. For more foolproof tips, check out my guide on thickening soups without compromising texture. Trust me, these small tweaks make all the difference!
Lasagna Soup might sound like a modern twist, but its roots dig deep into Italian comfort food traditions. Imagine a chilly evening in Naples, where nonnas simmer rich tomato broth with layers of pasta, cheese, and herbs—essentially deconstructing the classic baked dish into a cozy, spoonable meal. Over time, Italian immigrants brought their love for lasagna to America, and creative home cooks reimagined it as a soup to save time without sacrificing flavor.
Today, you’ll find regional spins on Lasagna Soup everywhere. In the Midwest, cooks might add ground beef or sausage for heartiness, while coastal versions toss in seafood like shrimp or clams. Some families swear by a vegetarian take, loading up on mushrooms and spinach, while others keep it ultra-traditional with ricotta dollops and fresh basil. Even in Italy, variations exist—some towns prefer a brothy base, while others thicken it like a stew. No matter the version, Lasagna Soup always delivers that nostalgic, layered goodness in every bite.
ays-cooking">How it fits in today’s cooking
Lasagna Soup isn’t just a relic of the past—it’s a weeknight hero for busy cooks. Since it combines the comfort of lasagna with the ease of a one-pot meal, it’s perfect for modern routines. Many families now make it a staple during fall and winter, pairing it with crusty bread or a crisp salad for a balanced dinner. Others embrace it as a crowd-pleaser for game-day gatherings or holiday potlucks, where it rivals classics like Chicken Pot Pie Soup in popularity.
Thanks to its adaptability, Lasagna Soup also fits trendy diets like gluten-free or keto with simple swaps. Some cooks use zucchini noodles or lentil pasta, while others boost protein with turkey or plant-based crumbles. And let’s not forget the Instant Pot generation—they’ve streamlined the recipe even further. Whether you’re craving nostalgia or need a quick fix, this dish bridges the gap, much like Butternut Squash Soup does for seasonal comfort. It’s proof that some flavors never go out of style.
Taste and Texture
What makes it delicious
Lasagna Soup delivers all the cozy, hearty flavors of classic lasagna in a spoonable, brothy form. Each bite bursts with rich tomato tang, savory ground meat, and fragrant garlic, while tender pasta and melted cheese add a luscious, creamy texture. The broth soaks up the earthy sweetness of onions and herbs, creating a deeply satisfying aroma. Meanwhile, gooey mozzarella and ricotta dollops melt into the soup, offering pockets of velvety richness. Whether you crave comfort or bold Italian flavors, Lasagna Soup wraps you in warmth with every spoonful.
r">Boosting the flavor
For an extra flavor kick, try browning the meat with a pinch of fennel seeds or red pepper flakes to mimic Italian sausage. Stir in a splash of balsamic vinegar or a spoonful of tomato paste for deeper umami notes. Top your Lasagna Soup with crispy garlic breadcrumbs or fresh basil for contrasting texture and brightness. If you love cheesy twists, swap ricotta for herbed goat cheese or try our creamy pesto sauce as a drizzle. Pair it with a side of garlic Parmesan breadsticks to round out the meal. Small tweaks make this soup endlessly customizable!
Tips for Success
Best practices for results
Always brown the ground beef well before adding other ingredients to deepen the flavor of your Lasagna Soup. Use high-quality crushed tomatoes for a rich, balanced base, and simmer the soup gently to let the flavors meld. Stir the pasta frequently while cooking to prevent sticking, and taste for seasoning just before serving. For extra authenticity, top each bowl with a dollop of ricotta and a sprinkle of fresh basil.
>Mistakes to avoid
Avoid overcooking the pasta, as it will turn mushy in the soup. Instead, cook it al dente since it will soften slightly when served. Many home cooks also skip deglazing the pot after browning the meat, but scraping up those flavorful bits ensures a tastier broth. For more pasta-cooking tips, check out our guide to perfect pasta. Finally, don’t skimp on the cheese—melting it directly into the soup instead of garnishing can make the texture grainy. Learn how to balance creamy toppings in our cheese selection guide.
Serving and Pairing Suggestions
How to serve this dish
Lasagna Soup shines when you serve it in deep bowls to keep every spoonful warm and hearty. For a cozy family dinner, top it with a dollop of ricotta cheese, fresh basil, and a sprinkle of Parmesan for that classic lasagna feel. Alternatively, make it the star of your next game day spread by setting up a toppings bar with crispy garlic bread croutons, shredded mozzarella, and roasted red peppers. Whether you’re hosting a casual weeknight meal or a festive gathering, this soup adapts beautifully to any occasion.
What goes well with it
Pair your Lasagna Soup with a crisp Caesar salad for a refreshing contrast to its rich flavors. The crunchy romaine and tangy dressing balance the soup’s creamy texture perfectly. For a heartier meal, add a slice of warm garlic bread or try our Cheesy Pull-Apart Bread to soak up every last drop. If you’re serving a crowd, round out the menu with our Roasted Vegetable Antipasto for a colorful, veggie-packed side. Finally, a chilled glass of Chianti or sparkling water with lemon elevates the dining experience without overpowering the dish.
Lasagna soup combines classic lasagna ingredients like ground beef, tomatoes, ricotta, and pasta in a brothy base. It typically includes Italian seasonings, onions, garlic, and mozzarella for that familiar lasagna flavor. The soup version offers a quicker, lighter way to enjoy the comfort of lasagna.
How do you thicken lasagna soup?
To thicken lasagna soup, let it simmer uncovered to reduce the broth or add a cornstarch slurry. Another method is stirring in extra tomato paste or blending some of the soup before adding the pasta. The cheese topping also helps create a richer texture.
rank-math-faq-item">
Can you freeze lasagna soup?
Yes, lasagna soup freezes well for up to 3 months, though pasta may soften upon reheating. For best results, freeze without the noodles and add freshly cooked pasta when serving. Store in airtight containers, leaving room for expansion.
What to serve with lasagna soup?
Lasagna soup pairs perfectly with garlic bread, a crisp green salad, or roasted vegetables. For a heartier meal, add antipasto skewers or stuffed mushrooms. The soup stands alone well but benefits from crusty bread for dipping.
Classic Minestrone Soup – Easy Homemade Recipe
Introduction
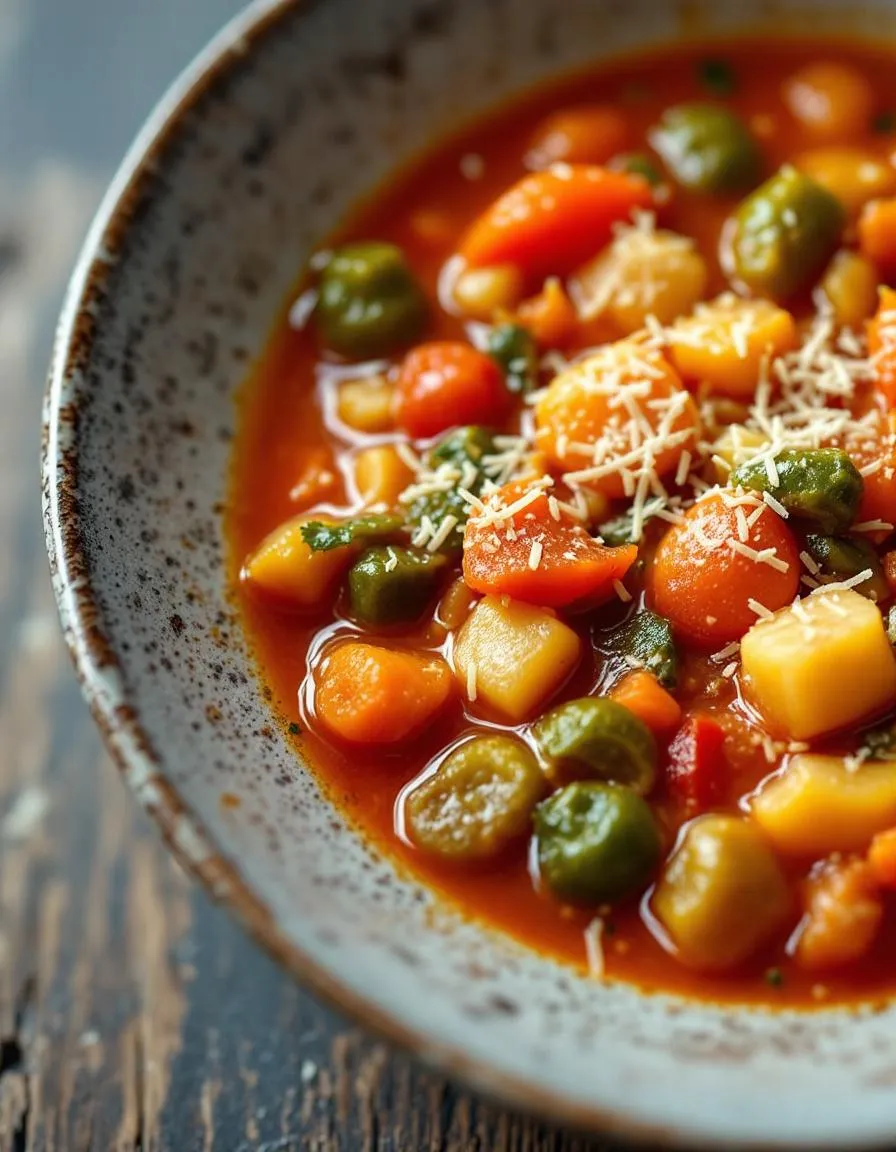
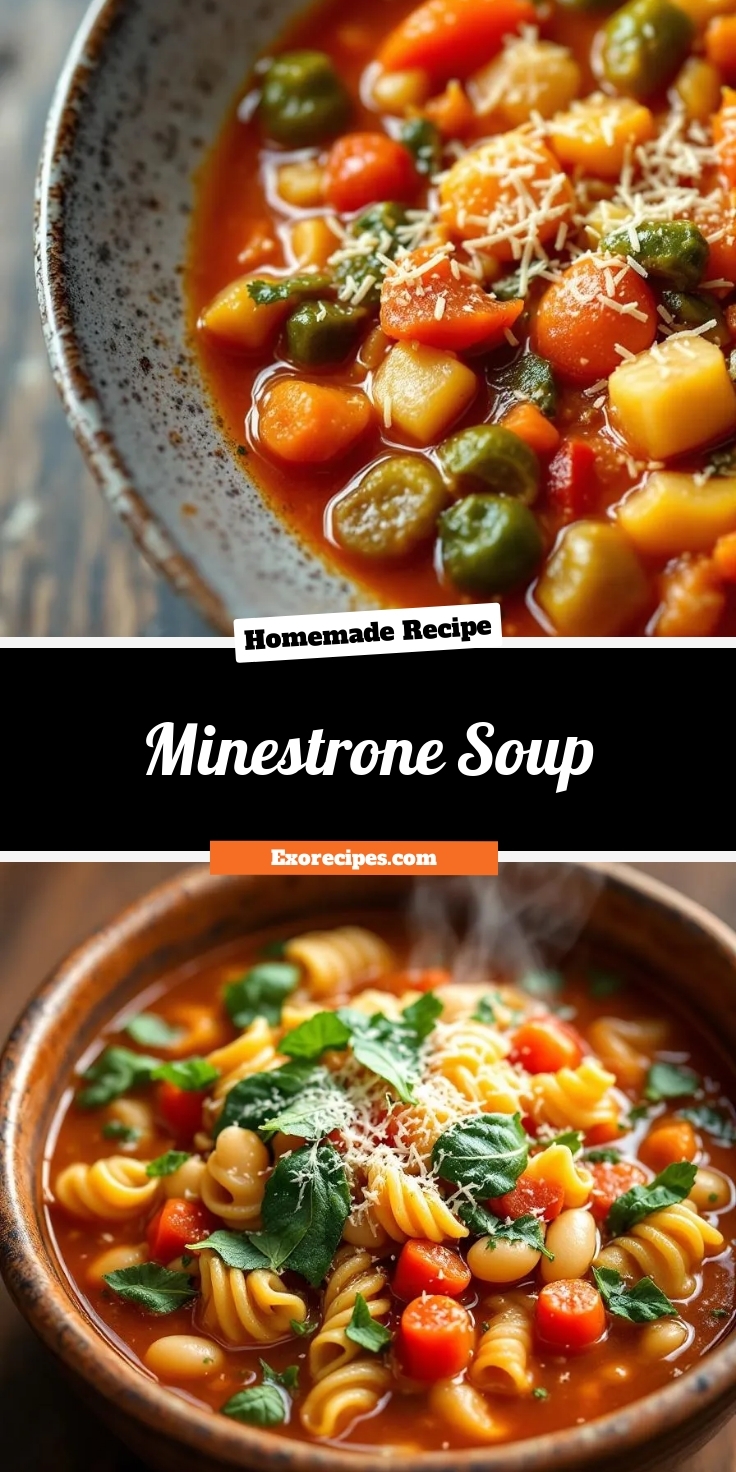
There’s something deeply comforting about a bowl of Minestrone Soup—the way it warms you from the inside out, the way it brings together simple, wholesome ingredients into something greater than the sum of its parts. Whether you’re craving a cozy meal on a chilly evening or a nourishing lunch that feels like a hug, this classic Italian dish never disappoints. Plus, it’s incredibly versatile, making it perfect for both weeknight dinners and special occasions.
Minestrone Soup is a hearty, vegetable-packed dish that originated in Italy but has won hearts worldwide. Traditionally, it features a mix of seasonal vegetables, beans, pasta or rice, and a rich tomato-based broth. What makes it truly special is its adaptability. You can swap ingredients based on what’s in your pantry or fridge, making it a fantastic way to reduce food waste. Beyond its practicality, Minestrone Soup embodies the essence of home cooking—simple, wholesome, and deeply satisfying. It fits perfectly with the brekcakes.com philosophy of creating meals that are both delicious and approachable. If you’re looking for more inspiration, check out our vegetable soup recipes or explore our guide to meal prep tips to make cooking even easier.
Why I Love This Recipe
Minestrone Soup holds a special place in my heart because it reminds me of Sunday dinners at my grandmother’s house. She’d simmer a big pot on the stove, filling the kitchen with the most incredible aromas. Every bite was a reminder of how food connects us to the people and memories we cherish. Now, whenever I make Minestrone Soup, I feel that same warmth and love—and I hope this recipe brings you just as much joy.
Health and Nutrition
Why it’s good for your body
Minestrone Soup packs a powerful nutritional punch, making it a standout choice for a wholesome meal. First, it’s loaded with fiber-rich vegetables like carrots, celery, and tomatoes, which support digestion and keep you feeling full longer. Additionally, the beans in Minestrone Soup provide plant-based protein, helping to maintain muscle health and energy levels.
Moreover, Minestrone Soup delivers a wealth of vitamins and minerals. For instance, the leafy greens and tomatoes offer vitamin C and antioxidants, which boost immunity and fight inflammation. Meanwhile, the broth base keeps the dish hydrating and low in calories, perfect for those mindful of their weight.
Beyond its nutrient density, Minestrone Soup also promotes heart health. The olive oil often used in its preparation contains healthy fats that support cholesterol balance. Furthermore, the absence of heavy creams or processed ingredients makes it a cleaner alternative to many comfort foods. Whether you’re seeking a nutrient boost or a satisfying meal, Minestrone Soup checks all the boxes.
How it fits in a healthy lifestyle
Minestrone Soup effortlessly fits into a balanced diet, whether you’re focusing on weight management, heart health, or plant-based eating. Its versatile ingredients allow you to customize it for gluten-free or low-carb needs by swapping pasta for quinoa or zucchini noodles. For those prioritizing protein, adding extra beans or lean turkey can elevate its nutritional profile.
This soup also aligns with meal prep strategies, as it stores well and tastes even better the next day. Pair it with a healthy side dish like a crisp salad for a complete meal. If you’re exploring more ways to incorporate nutritious soups into your routine, check out our guide to meal prep ideas for inspiration. Minestrone Soup proves that eating well doesn’t mean sacrificing flavor or convenience.
A moist and flavorful pineapple cake with a tropical twist, perfect for dessert or tea time.
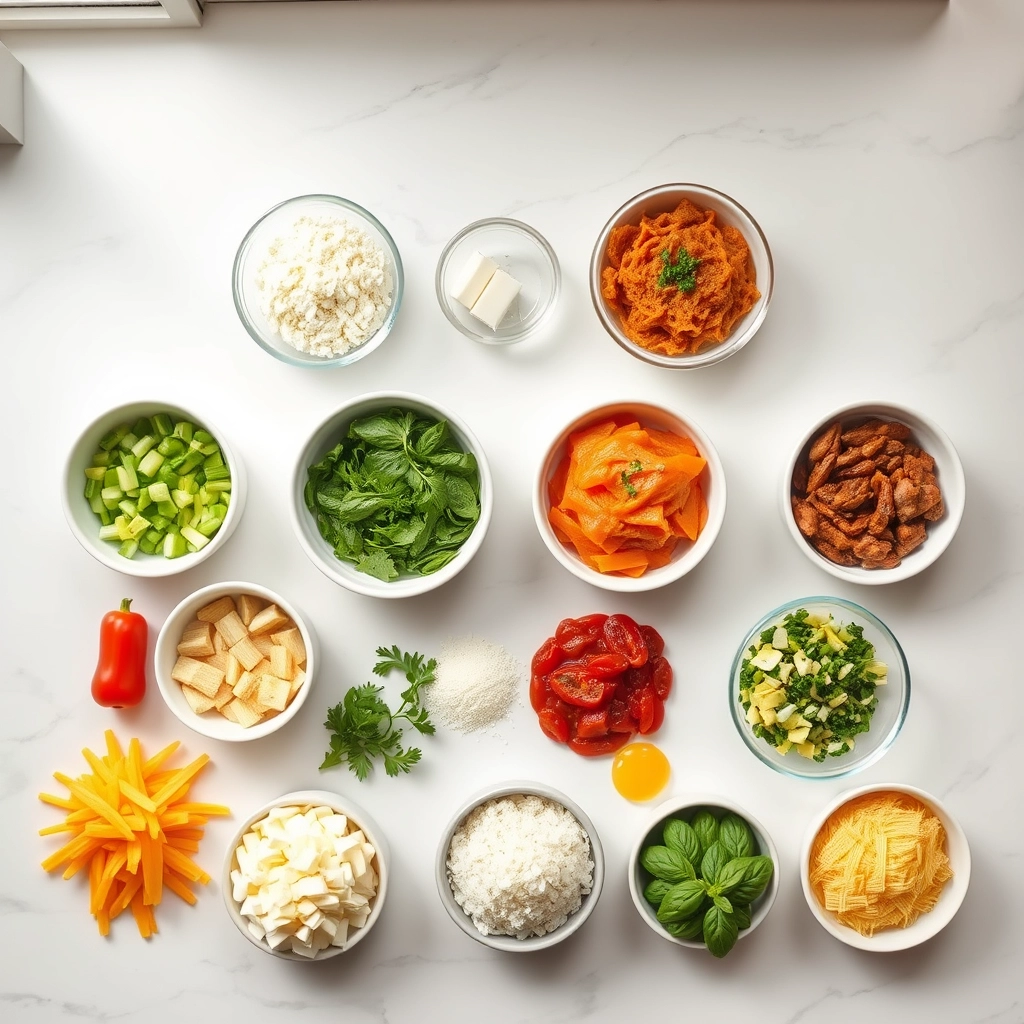
Ingredients
Scale
For the Crust:
2 cups all-purpose flour
1 cup granulated sugar
1 tsp baking powder
1/2 tsp baking soda
1/4 tsp salt
1/2 cup unsalted butter, softened
2 large eggs
1 cup crushed pineapple, drained
1/2 cup pineapple juice
1 tsp vanilla extract
Instructions
1. Prepare the Crust:
Preheat oven to 350°F (175°C). Grease and flour a 9-inch round cake pan.
In a large bowl, whisk together flour, sugar, baking powder, baking soda, and salt.
Add softened butter, eggs, crushed pineapple, pineapple juice, and vanilla extract. Mix until well combined.
Pour batter into the prepared cake pan and smooth the top.
Bake for 30-35 minutes or until a toothpick inserted in the center comes out clean.
Allow the cake to cool in the pan for 10 minutes before transferring to a wire rack to cool completely.
Notes
You can customize the seasonings to taste.
“`html
="how-to-prepare-this-dish">How to Prepare This Dish
Steps and time-saving tips
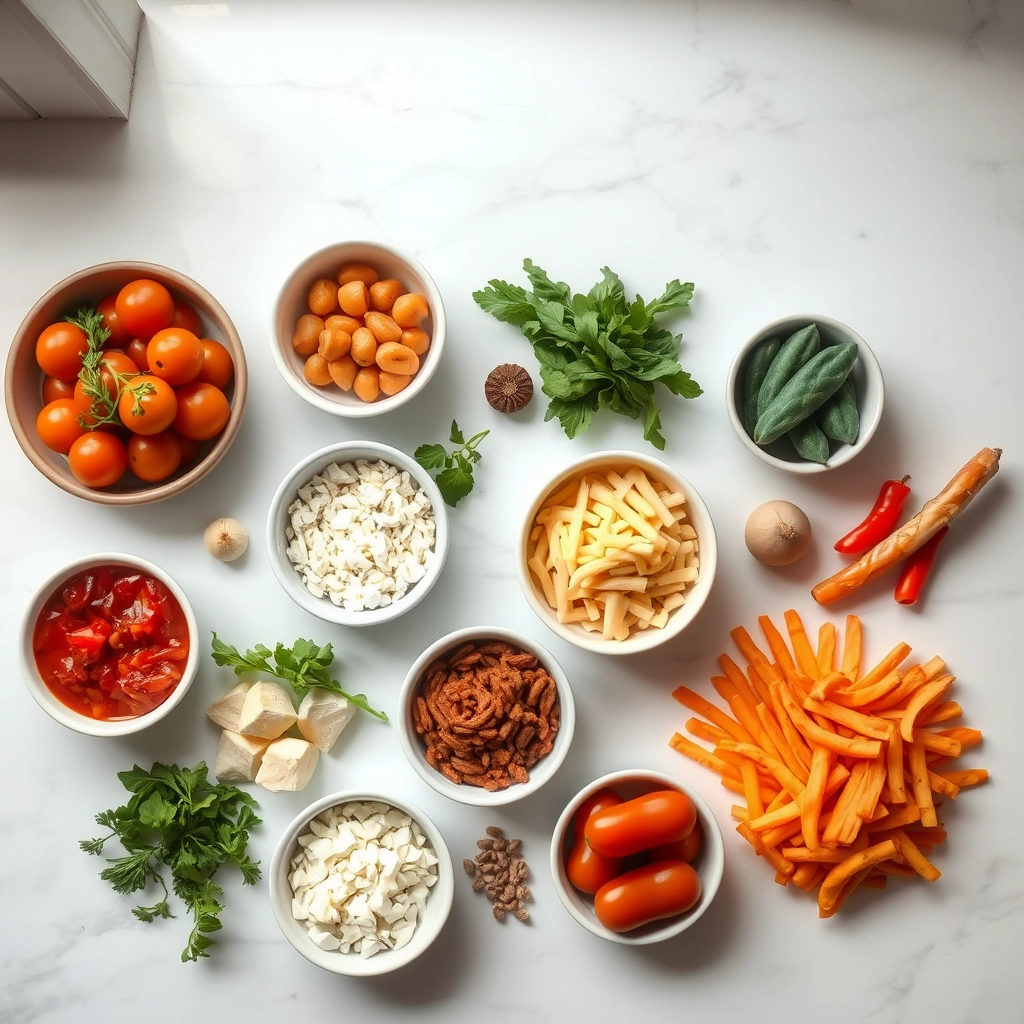
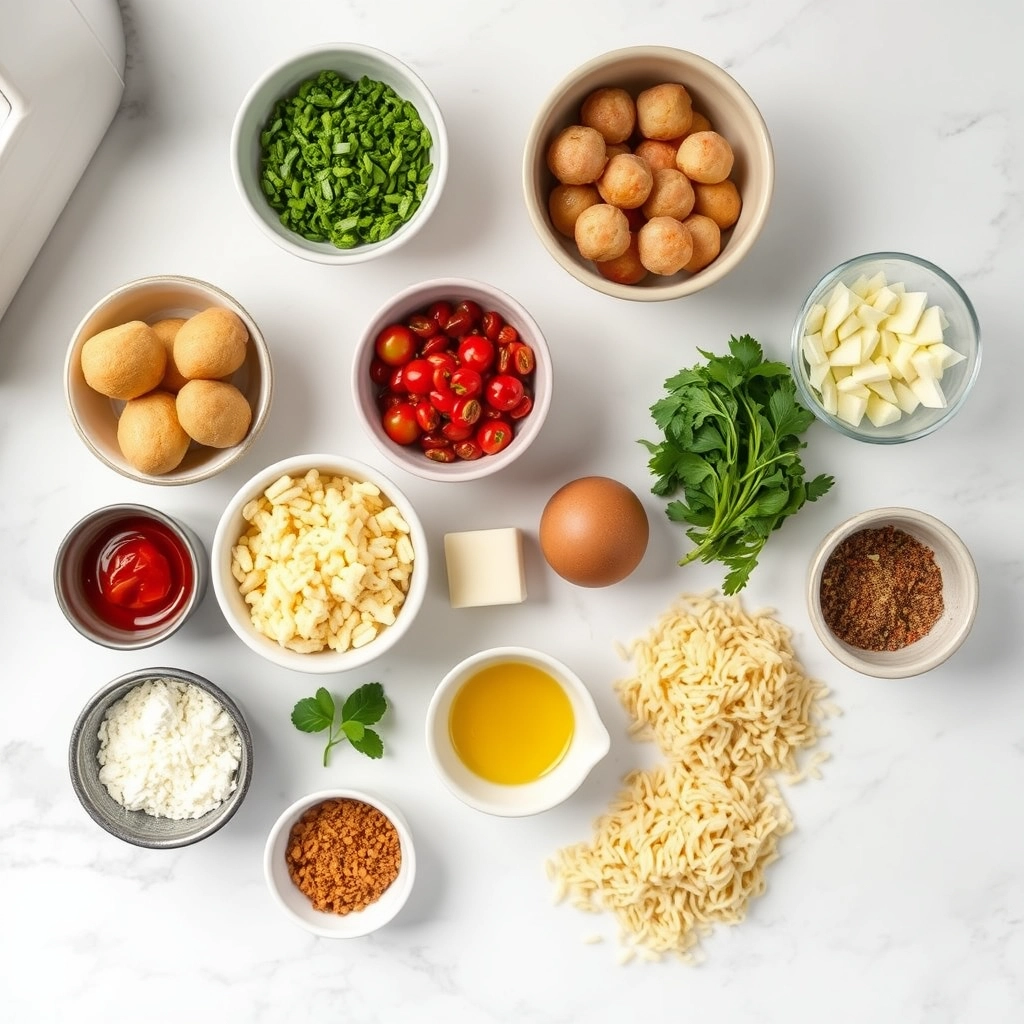
Start by heating olive oil in a large pot over medium heat. Add diced onions, carrots, and celery, then sauté until they soften. Stir in minced garlic for a fragrant base. Next, pour in vegetable broth and diced tomatoes, bringing the mixture to a gentle boil. Toss in chopped zucchini, green beans, and drained cannellini beans for texture. Sprinkle dried oregano and basil, then season with salt and pepper. Let the Minestrone Soup simmer for 20 minutes, stirring occasionally. Meanwhile, cook ditalini pasta separately to avoid mushiness. Add the pasta and fresh spinach just before serving. For a time-saving hack, use frozen mixed vegetables or pre-chopped mirepoix. If you’re short on time, swap dried herbs for Italian seasoning. Finally, drizzle with extra virgin olive oil and grate Parmesan on top for a rich finish.
Mistakes I’ve made and learned from
I once overcooked the pasta directly in the Minestrone Soup, turning it into a starchy mess. Now, I always cook pasta separately and add it later. Another blunder? Skipping the sauté step for the onions and garlic, which left the soup tasting bland. Taking those extra minutes to build flavor makes all the difference. If you’re new to soup-making, check out my guide on avoiding common soup mistakes. Also, don’t forget to taste as you go—undersalting happened to me too often until I followed my own advice from seasoning like a pro. Trust me, these small tweaks transform good Minestrone Soup into greatness.
Minestrone Soup has deep roots in Italian peasant cooking, where families tossed whatever vegetables they had into a pot to create a hearty, nourishing meal. Originally, this dish reflected the seasons—spring might bring fresh peas and asparagus, while winter versions leaned on beans, cabbage, and squash. Over time, Minestrone Soup became a symbol of resourcefulness, with every region in Italy adding its own twist. In Tuscany, they skip the pasta and use bread, while Ligurians might stir in pesto for a fragrant finish.
Beyond Italy, Minestron
e Soup traveled with immigrants, adapting to new kitchens. In Brazil, you might find it with coconut milk for extra richness, while Argentinian versions often include more meat. My grandmother made hers with extra garlic and a handful of Parmesan rinds, simmered until the broth turned golden. No matter the variation, the soul of Minestrone Soup stays the same—a celebration of simplicity and community, one spoonful at a time.
How it fits in today’s cooking
Today, Minestrone Soup fits perfectly into modern cooking because it’s flexible, healthy, and endlessly customizable. Busy home cooks love tossing in leftover veggies or swapping traditional beans for chickpeas. Meanwhile, meal preppers appreciate how well it freezes, making it a staple for easy weeknight dinners. Even plant-based eaters embrace it, since the recipe naturally leans vegetarian.
Seasonally, Minestrone Soup shines in fall and winter, but lightened-up summer versions with zucchini and fresh herbs also hit the spot. It’s a star at gatherings too, especially when paired with crusty bread or a crisp salad. For more cozy meal ideas, check out our guide to comfort food classics. Whether you stick to tradition or experiment, Minestrone Soup remains a timeless dish that bridges generations and kitchens.
>Taste and Texture
What makes it delicious
Minestrone Soup delights the senses with its rich, savory broth and hearty medley of textures. The first spoonful brings a burst of umami from slow-simmered tomatoes, while tender beans and al dente pasta add a satisfying chew. Fragrant garlic and fresh herbs like basil and oregano infuse every bite with warmth, and a splash of olive oil lends a silky finish. Meanwhile, crisp zucchini and carrots brighten the dish, balancing the deep flavors. Whether you enjoy it chunky or smooth, Minestrone Soup wraps you in comfort with its rustic, soul-warming appeal.
Boosting the flavor
Elevate your Minestrone Soup by stirring in a spoonful of homemade pesto for a herby, nutty kick. For extra depth, try topping it with grated Parmesan or a drizzle of garlic-infused olive oil. If you crave heat, a pinch of red pepper flakes or a dash of smoked paprika will add warmth without overpowering the soup’s natural sweetness. Finally, a squeeze of lemon just before serving brightens the flavors, making each bowl of Minestrone Soup even more irresistible.
Tips for Success
Best practices for results
Always sauté your onions, carrots, and celery first to build a rich flavor base for your Minestrone Soup. Additionally, use fresh herbs like basil or oregano to enhance the taste, and simmer the soup on low heat for at least 30 minutes to let the flavors meld. For the best texture, add pasta or beans toward the end of cooking so they don’t turn mushy. Finally, taste and adjust the seasoning just before serving to ensure a perfectly balanced bowl every time.
Mistakes to avoid
One common mistake is overcooking the vegetables, which can make your Minestrone Soup too soft. Instead, add heartier veggies like potatoes early and delicate ones like zucchini later. Another error is skipping the Parmesan rind, which adds depth—try tossing one in while simmering. For more on balancing flavors, check out our guide to soup seasoning secrets. Also, avoid using watery broth; opt for a high-quality stock or reduce it slightly, as explained in our broth vs stock breakdown.
Serving and Pairing Suggestions
How to serve this dish
Minestrone soup shines when served in a rustic bowl with a drizzle of extra virgin olive oil and a sprinkle of fresh parsley or basil. For a cozy family dinner, pair it with crusty bread or garlic knots right on the table. Meanwhile, if you’re hosting a casual gathering, serve it in small mugs as a comforting starter. To make it visually appealing, top each bowl with a handful of grated Parmesan or a swirl of pesto. Additionally, Minestrone soup works beautifully for meal prep—just store it in airtight containers for quick lunches all week.
h-it">What goes well with it
First, a crisp green salad like our Mediterranean Salad balances the heartiness of Minestrone soup with fresh, tangy flavors. Next, try pairing it with a slice of warm, buttery Rosemary Focaccia for the ultimate comfort meal. Finally, a glass of light white wine or sparkling water with lemon enhances the soup’s savory notes without overpowering it. Whether you choose sides or drinks, these pairings elevate every spoonful.
What is traditionally in minestrone soup?
Traditional minestrone soup includes vegetables like carrots, celery, onions, tomatoes, and beans, often with pasta or rice. Some versions also feature zucchini, spinach, or potatoes. Minestrone soup is known for its hearty, flexible recipe that adapts to seasonal ingredients.
rank-math-faq-item">
Is minestrone soup healthy?
Yes, minestrone soup is generally healthy because it’s packed with vegetables, fiber-rich beans, and often whole grains. It’s low in fat and calories while providing vitamins and protein. For a lighter version, use low-sodium broth and load up on fresh veggies.
Can you freeze minestrone soup?
Absolutely! Minestrone soup freezes well for up to 3 months. Let it cool completely before storing in airtight containers. If your soup contains pasta, cook it separately when reheating to avoid mushiness.
What’s the difference between minestrone and vegetable soup?
Minestrone soup is a specific Italian vegetable soup that always includes beans and often pasta or rice. While both are vegetable-based, minestrone has a thicker consistency and typically features Italian seasonings like basil and oregano.
>
Best Lemon Chicken Ricotta Meatballs with Garlic Orzo
Introduction
There’s something truly special about a meal that comforts you while still feeling fresh and vibrant. That’s exactly what you’ll find with these Lemon Chicken Ricotta Meatballs with Garlic Orzo. Whether you’re craving a cozy weeknight dinner or need a showstopping dish for guests, this recipe delivers. The bright citrus notes, creamy ricotta, and savory garlic orzo create a harmony of flavors that feels both indulgent and light. Plus, it’s one of those meals that somehow manages to be effortless yet impressive—exactly the kind of dish I love sharing here.
Lemon Chicken Ricotta Meatballs with Garlic Orzo is a modern twist on classic comfort food. The tender chicken meatballs, enriched with ricotta and zesty lemon, pair perfectly with the garlic-infused orzo, creating a meal that’s as satisfying as it is flavorful. What makes this dish stand out is its balance: the richness of the meatballs contrasts beautifully with the bright, herbaceous notes, while the orzo adds a comforting, pasta-like texture. This recipe fits brekcakes.com’s ethos of approachable yet elevated cooking—dishes that feel special without requiring hours in the kitchen. If you’re a fan of my Creamy Tuscan Chicken, you’ll adore this recipe for its similar blend of simplicity and sophistication. And if you’re looking for more ways to enjoy orzo, my Lemon Garlic Shrimp Orzo is another must-try.
Why I Love This Recipe
This dish holds a special place in my heart because it reminds me of Sunday dinners with my family. The first time I made Lemon Chicken Ricotta Meatballs with Garlic Orzo, my kids devoured it—and that’s saying something for picky eaters. There’s a joy in watching people savor every bite, and this recipe never fails to deliver that moment. It’s also incredibly versatile; I’ve served it at casual weeknight meals and fancy dinner parties alike. Every time I make it, I’m reminded why I fell in love with cooking: food has the power to bring people together, and this dish does just that.
Health and Nutrition
Why it’s good for your body
Lemon Chicken Ricotta Meatballs with Garlic Orzo packs a nutritious punch while delighting your taste buds. First, the lean chicken provides high-quality protein to support muscle repair and keep you full longer. Meanwhile, ricotta cheese adds a creamy texture while boosting calcium and vitamin B12 for strong bones and energy. The lemon zest brightens the dish and delivers a dose of immune-boosting vitamin C.
Additionally, garlic in the orzo not only enhances flavor but also offers anti-inflammatory benefits. Whole wheat orzo, if used, adds fiber to aid digestion and stabilize blood sugar. Olive oil ties everything together with heart-healthy monounsaturated fats. Together, these ingredients make Lemon Chicken Ricotta Meatballs with Garlic Orzo a balanced meal that nourishes your body without sacrificing flavor.
Finally, this dish avoids heavy creams or excessive salt, keeping it light yet satisfying. The herbs and citrus cut through richness, making it a refreshing choice any night of the week. Whether you need a post-workout meal or a family-friendly dinner, Lemon Chicken Ricotta Meatballs with Garlic Orzo delivers both nutrition and comfort in every bite.
How it fits in a healthy lifestyle
Lemon Chicken Ricotta Meatballs with Garlic Orzo fits seamlessly into a balanced diet. If you prioritize protein, the chicken and ricotta provide a lean yet flavorful combo to meet your goals. For gluten-free eaters, simply swap regular orzo for a gluten-free version—the dish stays just as delicious.
This recipe also aligns with heart-healthy eating thanks to olive oil and lean poultry. Pair it with a side of roasted vegetables or a crisp salad for extra fiber and vitamins. If you love meal prepping, the meatballs and orzo reheat beautifully for quick lunches. Check out our meal prep guide for more time-saving ideas.
Even on busy nights, Lemon Chicken Ricotta Meatballs with Garlic Orzo comes together quickly. It’s a smarter alternative to takeout, offering wholesome ingredients without the guilt. For more weeknight dinner inspiration, explore our healthy weeknight meals collection. With this dish, you can enjoy flavor and nutrition without compromise.
Juicy chicken meatballs with ricotta and lemon zest served over garlic-infused orzo pasta.
Ingredients
Scale
For the Crust:
1 lb ground chicken
1/2 cup ricotta cheese
1 egg
1/4 cup breadcrumbs
1 lemon (zested and juiced)
2 cloves garlic (minced)
1 tsp dried oregano
1/2 tsp salt
1/4 tsp black pepper
1 tbsp olive oil
1 cup orzo pasta
2 cups chicken broth
2 tbsp butter
2 tbsp chopped parsley
Instructions
1. Prepare the Crust:
In a bowl, mix ground chicken, ricotta, egg, breadcrumbs, lemon zest, half the minced garlic, oregano, salt, and pepper until combined.
Form into 1-inch meatballs and set aside.
Heat olive oil in a large skillet over medium heat. Cook meatballs until browned on all sides and cooked through (about 8-10 minutes). Remove and set aside.
In the same skillet, melt butter and sauté remaining garlic for 30 seconds. Add orzo and toast for 1 minute.
Pour in chicken broth and bring to a simmer. Cover and cook for 10 minutes or until orzo is tender.
Stir in lemon juice and parsley. Return meatballs to the skillet to warm through before serving.
Notes
You can customize the seasonings to taste.
How to Prepare This Dish
Steps and time-saving tips
Start by preheating your oven to 400°F and lining a baking sheet with parchment paper for easy cleanup. In a large bowl, combine ground chicken, ricotta, breadcrumbs, lemon zest, minced garlic, and a pinch of salt. Gently mix everything with your hands until just combined—overworking the meat will make the meatballs tough. Roll the mixture into 1-inch balls and place them on the baking sheet. Meanwhile, bring a pot of salted water to boil for the garlic orzo. While the meatballs bake for 18-20 minutes, sauté minced garlic in olive oil until fragrant, then stir in the orzo and toast it lightly. Pour in chicken broth and let the orzo simmer until tender. For a time-saving hack, use pre-minced garlic or a microplane for the lemon zest. Once the meatballs are golden and cooked through, drizzle them with fresh lemon juice and sprinkle chopped parsley over the garlic orzo before serving.
and-learned-from">Mistakes I’ve made and learned from
I once rushed the meatball mixture and ended up with dense, dry Lemon Chicken Ricotta Meatballs because I overmixed the ingredients. Now, I fold everything together gently and let the ricotta work its magic for tenderness. Another blunder? Underseasoning the garlic orzo—it’s easy to forget how much flavor the pasta absorbs. I fixed this by tasting and adjusting the broth before adding the orzo, just like I do with my perfectly seasoned pasta. Also, if your meatballs stick to the pan, don’t skip the parchment paper; it’s a game-changer, much like the baking sheet hacks I swear by. Learn from my missteps, and you’ll nail this dish every time.
Cultural Connection and Variations
Where this recipe comes from
Lemon Chicken Ricotta Meatballs with Garlic Orzo feels like a love letter to Mediterranean flavors with a cozy, modern twist. While meatballs appear in countless cultures—from Swedish köttbullar to Middle Eastern kofta—this version leans into Italian-American comfort food. The ricotta keeps the chicken tender, while lemon brightens every bite, a trick many coastal Italian cooks use to balance rich dishes.
In Greece, you might fi
nd similar meatballs served with avgolemono sauce, a lemony egg broth. Meanwhile, Sicilian cooks often add pine nuts or raisins for sweetness. My grandmother, however, swore by a splash of white wine in the orzo, a trick she learned from her neighbors in Naples. Whether you tweak the herbs or swap the citrus, Lemon Chicken Ricotta Meatballs with Garlic Orzo adapts beautifully to regional tastes.
How it fits in today’s cooking
Today, this dish shines as a weeknight hero or a star at casual gatherings. Busy cooks love how the orzo cooks faster than traditional pasta, and the meatballs freeze perfectly for meal prep. Plus, the lemony kick makes it ideal for spring dinners or summer potlucks. For a lighter take, some roast the meatballs instead of pan-frying them, or pair them with a crisp salad like this avocado cucumber salad.
It’s also a hit for hybrid traditions—maybe served alongside garlic butter shrimp at a coastal-inspired feast. Whether you stick to the classic or experiment with spices, Lemon Chicken Ricotta Meatballs with Garlic Orzo bridges nostalgia and modern ease. After all, good food evolves, but comfort stays timeless.
>Taste and Texture
What makes it delicious
Lemon Chicken Ricotta Meatballs with Garlic Orzo delivers a bright, comforting bite that balances richness and zest. The meatballs are tender and juicy, thanks to the ricotta, while fresh lemon zest cuts through with a tangy pop. Each forkful of garlicky orzo adds a buttery, slightly chewy contrast, soaking up the savory pan juices. Fragrant garlic and herbs like parsley or thyme deepen the aroma, making every mouthful irresistible. Whether you savor the creamy texture of the ricotta or the citrusy punch of lemon, this dish feels both light and satisfying at once. Lemon Chicken Ricotta Meatballs with Garlic Orzo truly shines as a meal that’s vibrant yet deeply flavorful.
Boosting the flavor
For an extra burst of flavor, try stirring a spoonful of homemade pesto into the orzo or drizzling it over the meatballs. The herby, nutty notes elevate the dish beautifully. Alternatively, a sprinkle of chili flakes or a dash of smoked paprika adds warmth without overpowering the lemon. If you love creamy textures, a dollop of whipped feta dip on the side introduces a salty, tangy contrast. Finally, a squeeze of extra lemon right before serving keeps the flavors bright and fresh. With these tweaks, your Lemon Chicken Ricotta Meatballs with Garlic Orzo will taste even more dynamic.
Tips for Success
Best practices for results
Always mix the ricotta and ground chicken gently to keep the meatballs tender. Meanwhile, preheat your skillet properly so the Lemon Chicken Ricotta Meatballs with Garlic Orzo sear evenly without sticking. For the orzo, toast it lightly in garlic-infused oil before adding liquid—this boosts flavor. Additionally, let the meatballs rest for 5 minutes after cooking so they hold their shape when served. Finally, taste the orzo for seasoning before plating, as it absorbs salt differently than pasta.
Mistakes to avoid
Overmixing the meatball mixture can make it dense, so fold the ingredients just until combined. Another common error is crowding the pan—cook the Lemon Chicken Ricotta Meatballs with Garlic Orzo in batches if needed for even browning. Also, avoid overcooking the orzo, since it turns mushy fast. For perfect doneness, check our guide on cooking pasta al dente. Lastly, don’t skip resting the meatballs; otherwise, they may crumble. For more on handling delicate proteins, see our tips for working with ground chicken.
Serving and Pairing Suggestions
How to serve this dish
For a stunning presentation, plate the Lemon Chicken Ricotta Meatballs with Garlic Orzo on a wide, shallow bowl to showcase the vibrant colors. Top with a sprinkle of fresh parsley or microgreens for a pop of green, and add lemon zest for extra brightness. Meanwhile, serve this dish family-style in a large serving dish for casual gatherings, letting guests help themselves. Whether you’re hosting a cozy dinner party or a festive holiday meal, these meatballs bring warmth and flavor to any occasion. Finally, pair with crusty bread to soak up the delicious garlic-infused orzo sauce.
h-it">What goes well with it
A crisp, citrusy white wine like Sauvignon Blanc perfectly complements the zesty flavors of Lemon Chicken Ricotta Meatballs with Garlic Orzo. Alternatively, try a light salad with a tangy vinaigrette to balance the richness of the dish. For a heartier meal, serve alongside roasted vegetables or our Garlic Herb Focaccia, which adds a savory crunch. If you love creamy dips, our Whipped Feta Dip makes a delightful starter while the meatballs finish cooking.
What makes Lemon Chicken Ricotta Meatballs with Garlic Orzo so flavorful?
The combination of lemon zest, fresh ricotta, and garlic infuses these meatballs with bright, creamy, and savory notes. Paired with garlic orzo, Lemon Chicken Ricotta Meatballs with Garlic Orzo delivers a balanced dish with layers of Mediterranean-inspired flavors.
rank-math-faq-item">
Can I substitute ground turkey for chicken in Lemon Chicken Ricotta Meatballs?
Yes, ground turkey works well as a leaner alternative while keeping the dish light. Just ensure the meatballs stay moist by not overcooking them—the ricotta helps maintain tenderness in Lemon Chicken Ricotta Meatballs with Garlic Orzo.
How do I prevent the meatballs from falling apart when cooking?
Chill the meatball mixture for 15–20 minutes before shaping to help them hold together. Also, avoid overmixing the ingredients—gentle handling ensures Lemon Chicken Ricotta Meatballs with Garlic Orzo stay intact while cooking.
What sides pair well with Lemon Chicken Ricotta Meatballs with Garlic Orzo?
A crisp green salad or roasted vegetables complements the dish’s richness. For a heartier meal, serve Lemon Chicken Ricotta Meatballs with Garlic Orzo alongside warm crusty bread to soak up the flavors.
>
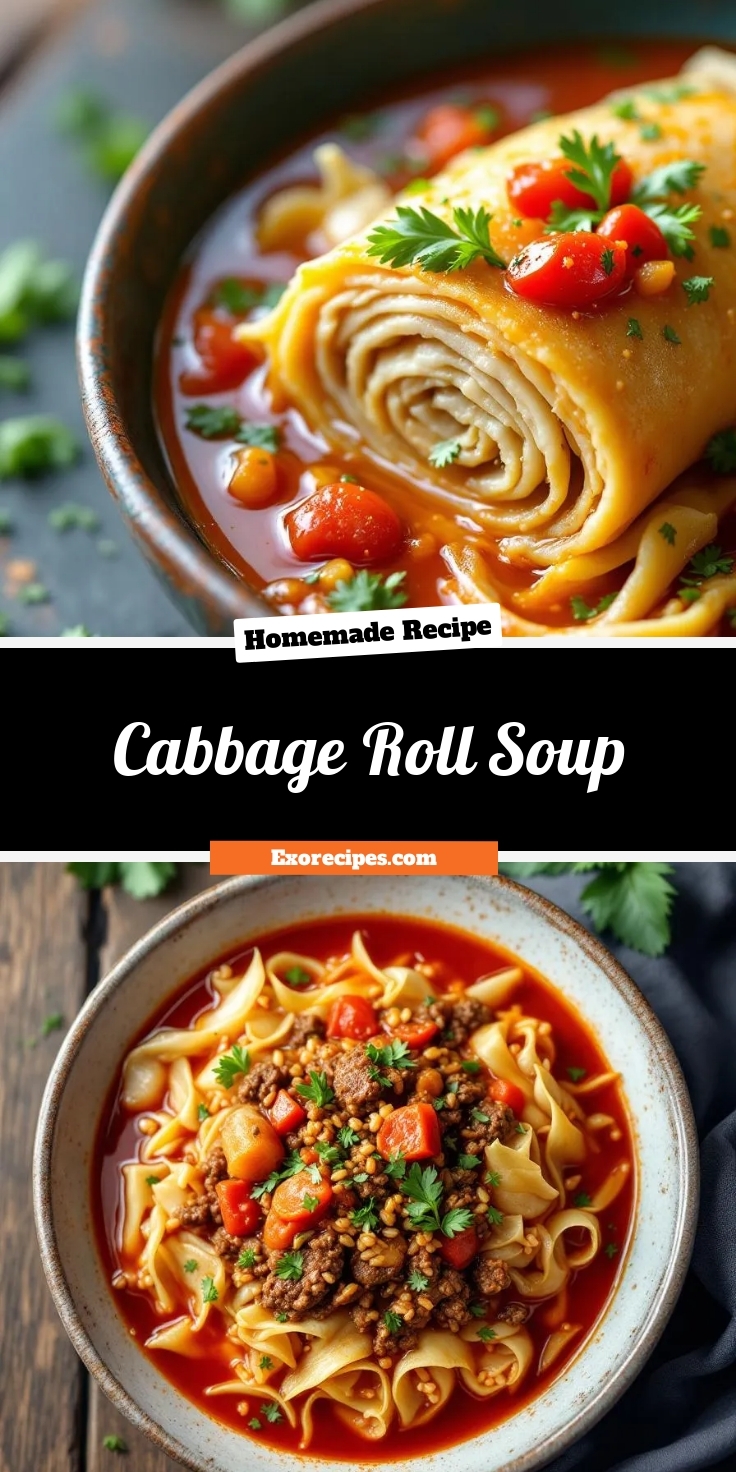
Best Cabbage Roll Soup – Easy Homemade Recipe
Introduction
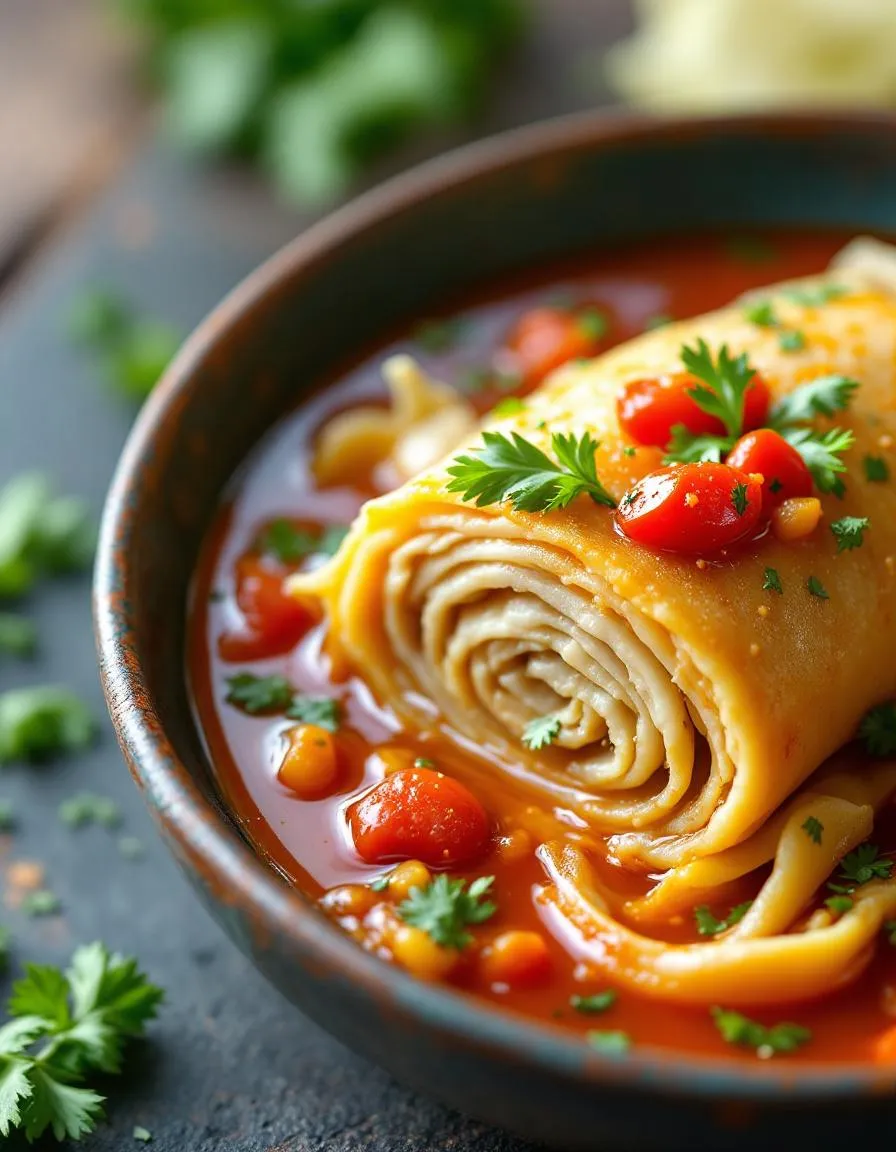
There’s something deeply comforting about a bowl of soup that tastes like home, especially when it captures the essence of a beloved classic. That’s exactly what you’ll find with this Cabbage Roll Soup—a cozy, flavorful twist on the traditional stuffed cabbage rolls we all adore. Whether you’re craving nostalgia or simply need a hearty meal to warm your soul, this recipe delivers. Plus, it’s quicker to make than the original, so you can enjoy that same rich taste without the extra effort.
Cabbage Roll Soup combines tender cabbage, savory ground beef, and aromatic spices in a rich tomato broth, creating a dish that’s both nourishing and deeply satisfying. Unlike the labor-intensive process of rolling individual cabbage leaves, this soup simplifies everything into one pot, making it perfect for busy weeknights. It’s a fantastic way to enjoy the flavors of a time-honored favorite while keeping things easy and approachable. If you love cozy, family-style meals, you’ll appreciate how this recipe brings everyone to the table. For more comforting ideas, check out my Comfort Food Classics collection or explore my tips for Meal Prep Magic to make weeknight cooking a breeze.
Why I Love This Recipe
This Cabbage Roll Soup holds a special place in my heart because it reminds me of my grandmother’s kitchen. She used to spend hours crafting her famous stuffed cabbage rolls, and while I adored them, I always wished for a quicker version that didn’t sacrifice flavor. When I finally perfected this soup, it felt like unlocking a little piece of her legacy—one that I could share with my own family on even the busiest days. Every spoonful feels like a hug, and that’s exactly what good food should do.
Health and Nutrition
Why it’s good for your body
Cabbage Roll Soup packs a nutritious punch while delivering rich, comforting flavors. First, cabbage, the star ingredient, boasts high levels of vitamin C and fiber, which support immune health and digestion. Additionally, the lean ground beef or turkey in this soup provides a solid dose of protein to keep you full and energized. Meanwhile, tomatoes contribute antioxidants like lycopene, which may promote heart health.
Beyond individual ingredients, Cabbage Roll Soup balances macros effortlessly. For instance, the broth keeps calories in check while the vegetables add volume without excess carbs. Moreover, the dish naturally includes gut-friendly ingredients like garlic and onions, which may reduce inflammation. Whether you enjoy it as a light lunch or a hearty dinner, this soup delivers nutrients without compromising taste.
Finally, Cabbage Roll Soup adapts well to dietary preferences. If you use brown rice instead of white, you’ll boost fiber even further. Likewise, swapping in plant-based protein makes it vegetarian-friendly. With every spoonful, you’re nourishing your body with vitamins, minerals, and wholesome ingredients.
How it fits in a healthy lifestyle
Cabbage Roll Soup fits seamlessly into balanced eating habits. For gluten-free diets, simply ensure your broth and seasonings meet dietary standards. If you’re focusing on heart health, the lean proteins and fiber-rich veggies align perfectly with recommendations. Plus, the soup’s high water content helps with hydration, a key factor in overall wellness.
Meal preppers love Cabbage Roll Soup because it stores well and reheats beautifully. Pair it with a crisp salad for extra greens or a slice of whole-grain bread for added fiber. If you’re exploring more ways to incorporate nutrient-dense meals, check out our guide to easy meal prep ideas. For those tracking macros, this soup offers flexibility—adjust proteins or carbs to match your goals. Craving more hearty, healthy recipes? Try our comfort food made nutritious roundup for inspiration.
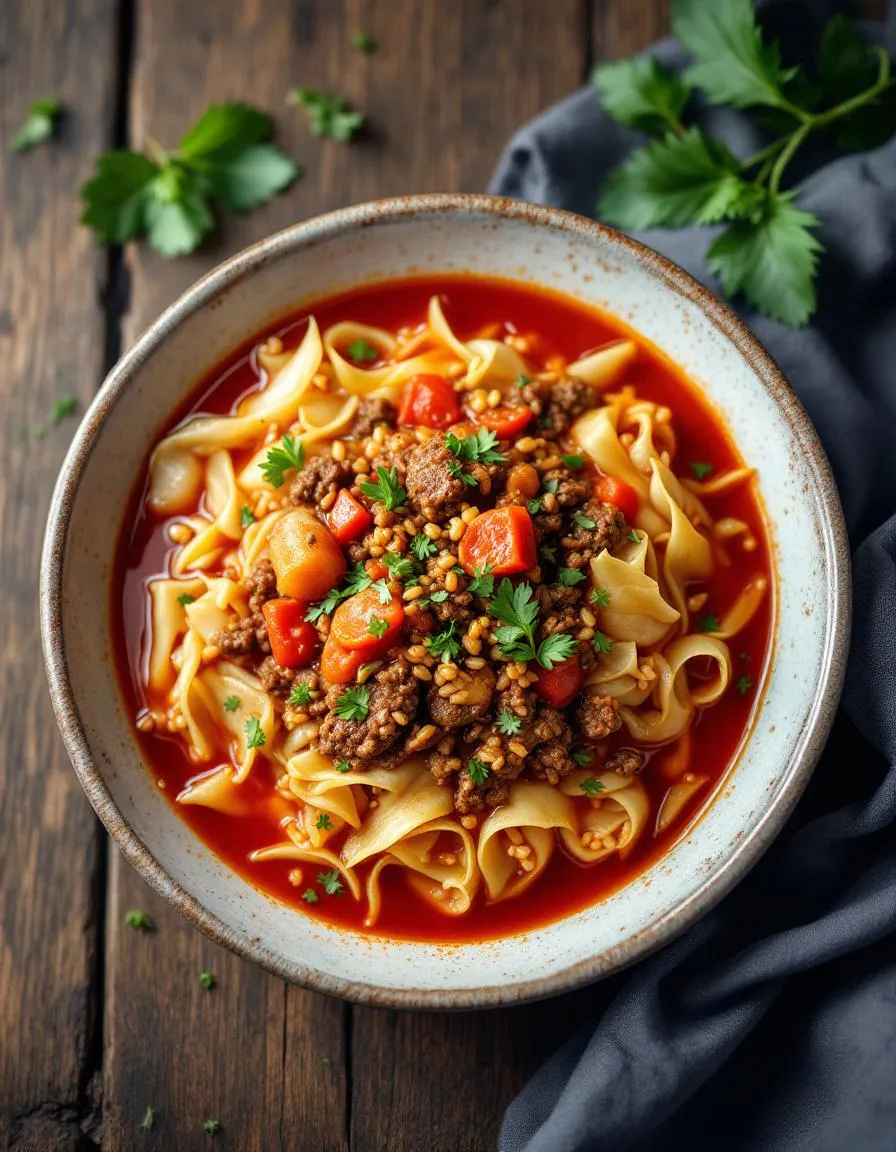
A hearty and comforting soup inspired by traditional cabbage rolls, packed with ground beef, rice, and tender cabbage in a rich tomato broth.
Ingredients
Scale
For the Crust:
1 lb ground beef
1 small onion, diced
3 cloves garlic, minced
1 small head cabbage, chopped
1 (14.5 oz) can diced tomatoes
1 (15 oz) can tomato sauce
4 cups beef broth
1/2 cup uncooked white rice
1 tsp paprika
1 tsp dried thyme
Salt and pepper to taste
2 tbsp olive oil
Instructions
1. Prepare the Crust:
Heat olive oil in a large pot over medium heat. Add ground beef and cook until browned, breaking it up as it cooks.
Add diced onion and minced garlic to the pot. Cook for 3-4 minutes until softened.
Stir in chopped cabbage and cook for another 5 minutes until slightly wilted.
Add diced tomatoes, tomato sauce, beef broth, rice, paprika, thyme, salt, and pepper. Stir well to combine.
Bring the soup to a boil, then reduce heat to low. Cover and simmer for 20-25 minutes, or until rice is tender.
Taste and adjust seasonings as needed. Serve hot.
Notes
You can customize the seasonings to taste.
How to Prepare This Dish
Steps and time-saving tips
Start by heating a large pot over medium heat and browning the ground beef until it’s fully cooked. Drain any excess fat, then toss in diced onions and minced garlic to sauté until fragrant. Stir in tomato paste, crushed tomatoes, and beef broth for a rich base. Next, shred the cabbage and add it to the pot along with uncooked rice—this saves time since everything cooks together. Season with salt, pepper, and a pinch of paprika for warmth. Let the Cabbage Roll Soup simmer for about 25 minutes, stirring occasionally, until the rice is tender and the flavors meld. If you’re short on time, use pre-shredded coleslaw mix instead of chopping a whole cabbage. For extra depth, drizzle a splash of Worcestershire sauce or sprinkle fresh parsley before serving. Keep the heat low toward the end to prevent the rice from sticking, and taste to adjust seasoning as needed.
and-learned-from">Mistakes I’ve made and learned from
Early on, I rushed the sautéing step and ended up with undercooked onions that made the Cabbage Roll Soup taste harsh. Now I take an extra minute to let them soften fully. Another blunder? Adding too much rice, which soaked up all the broth and turned the soup into a casserole. I’ve since measured carefully—about ½ cup is perfect. If you’re new to soups, check out my guide on avoiding common soup mistakes for more tips. Also, don’t skip tasting as you go; I once over-salted the broth and had to balance it with a squeeze of lemon. For foolproof seasoning, my seasoning hacks post breaks it down simply. Trust me, a little patience makes this dish foolproof!
Cultural Connection and Variations
Where this recipe comes from
Cabbage Roll Soup carries the heartwarming legacy of Eastern European comfort food, where stuffed cabbage rolls (or “golabki”) have long been a staple. Families in Poland, Ukraine, and Hungary traditionally slow-cook cabbage leaves stuffed with spiced meat and rice, simmered in tomato broth. Over time, this labor-intensive dish evolved into a simpler, soup-style version—Cabbage Roll Soup—that delivers all the cozy flavors without the fuss. In my own kitchen, my grandmother’s version always included a splash of vinegar for tang, while my neighbor’s Lithuanian take leaned heavy on smoked paprika. Meanwhile, in the American Midwest, you might find it loaded with ground beef and served with a side of crusty bread.
Across the globe, varia
tions pop up based on local tastes. Some cooks in Greece add lemon and dill, while others in Germany swap tomatoes for sauerkraut, giving the soup a pleasantly sour kick. Even the choice of meat changes—pork in some regions, turkey in health-conscious households, or lentils for a plant-based twist. No matter the adaptation, Cabbage Roll Soup remains a unifying dish, bridging generations and geographies with its humble, nourishing charm.
How it fits in today’s cooking
Today, Cabbage Roll Soup thrives as a weeknight hero, especially for busy cooks craving nostalgia without the hours of prep. Modern twists, like using Instant Pots or pre-shredded cabbage, make it a go-to for meal preppers and quick weeknight dinners. It’s also a star during fall and winter, when its hearty warmth pairs perfectly with seasonal cravings. Plus, its versatility shines—swap ingredients based on what’s in your fridge, or try a keto version with cauliflower rice.
Beyond convenience, this soup anchors holiday traditions for many families, especially in communities with Eastern European roots. Some serve it alongside comfort food classics during festive gatherings, while others enjoy it as a standalone bowl of coziness. Whether you’re honoring heritage or simply feeding a hungry crowd, Cabbage Roll Soup fits seamlessly into today’s kitchens—proof that some flavors never go out of style.
>Taste and Texture
What makes it delicious
Cabbage Roll Soup wraps you in warmth with its rich, savory broth and tender cabbage leaves that melt in your mouth. The ground beef adds a hearty, meaty depth, while the tomatoes bring a bright, tangy sweetness. Every spoonful bursts with aromatic garlic and onions, infusing the soup with a fragrant, comforting aroma. Meanwhile, the rice soaks up the flavors, giving each bite a satisfying, slightly chewy texture. Whether you crave something cozy or crave-worthy, Cabbage Roll Soup delivers a symphony of tastes and textures that feel like a hug in a bowl.
Boosting the flavor
Elevate your Cabbage Roll Soup by stirring in a splash of Worcestershire sauce for a savory umami kick or topping it with fresh parsley for a pop of color and freshness. For extra richness, try swapping ground beef with Italian sausage or adding a dollop of sour cream to balance the tangy tomatoes. If you love bold spices, a pinch of smoked paprika or a bay leaf deepens the flavor profile. Pair it with crusty bread for dipping, or explore our garlic bread recipe to complete the meal. Craving more cozy soups? Our tomato basil soup offers another delicious way to warm up.
Tips for Success
Best practices for results
Always brown the ground beef well before adding it to your Cabbage Roll Soup, as this builds deeper flavor. For the best texture, chop the cabbage into bite-sized pieces so it cooks evenly. Stir the soup occasionally while simmering to prevent sticking, and taste for seasoning before serving. If you prefer a thicker broth, let the soup reduce for an extra 5-10 minutes. Finally, garnish with fresh parsley to brighten the dish.
Mistakes to avoid
Overcrowding the pot with cabbage can lead to uneven cooking, so add it in batches if needed. Another common error is skipping the tomato paste, which adds richness to the broth—don’t leave it out! For more tips on balancing flavors, check out our guide on seasoning soups perfectly. Also, avoid boiling the soup vigorously after adding the rice, as this can make it mushy. Instead, try the gentle simmer method we recommend in our perfect rice texture article.
Serving and Pairing Suggestions
How to serve this dish
For a cozy family dinner, ladle steaming Cabbage Roll Soup into deep bowls and top with a dollop of sour cream or fresh dill. Meanwhile, if you’re hosting a casual gathering, serve it in rustic bread bowls for a fun, edible presentation. To make it extra inviting, sprinkle crispy bacon bits or grated Parmesan on top just before serving. Additionally, this hearty soup shines at holiday potlucks or chilly weeknight meals when you crave something comforting yet effortless.
h-it">What goes well with it
Pair Cabbage Roll Soup with warm, crusty bread like our Easy Homemade Focaccia to soak up every flavorful bite. For a lighter option, try a crisp side salad with tangy vinaigrette—our Spring Mix Salad balances the soup’s richness perfectly. Finally, a glass of chilled white wine or sparkling cider cuts through the savory notes, making each spoonful even more satisfying.
What is cabbage roll soup made of?
Cabbage Roll Soup is a deconstructed version of traditional stuffed cabbage rolls, featuring ground beef, rice, cabbage, tomatoes, and savory seasonings. It captures all the flavors of classic cabbage rolls but in a comforting, easy-to-make soup form. Common ingredients include onions, garlic, broth, and sometimes a touch of brown sugar for balance.
rank-math-faq-item">
How do you thicken cabbage roll soup?
To thicken Cabbage Roll Soup, simmer it uncovered to reduce excess liquid, or add a slurry of cornstarch and water. Alternatively, mash some of the cooked rice or potatoes in the soup to create a thicker texture. The natural starch from the ingredients will help achieve a heartier consistency.
Can you freeze cabbage roll soup?
Yes, Cabbage Roll Soup freezes well for up to 3 months. Let it cool completely before transferring it to airtight containers or freezer bags. Thaw overnight in the fridge and reheat gently on the stove for the best texture and flavor.
Is cabbage roll soup healthy?
Cabbage Roll Soup can be a nutritious meal, packed with lean protein, fiber-rich cabbage, and vitamins from tomatoes. For a healthier version, use lean ground turkey or chicken and brown rice. The soup is naturally low in calories but high in flavor, making it a great balanced option.