“`html
Table of Contents
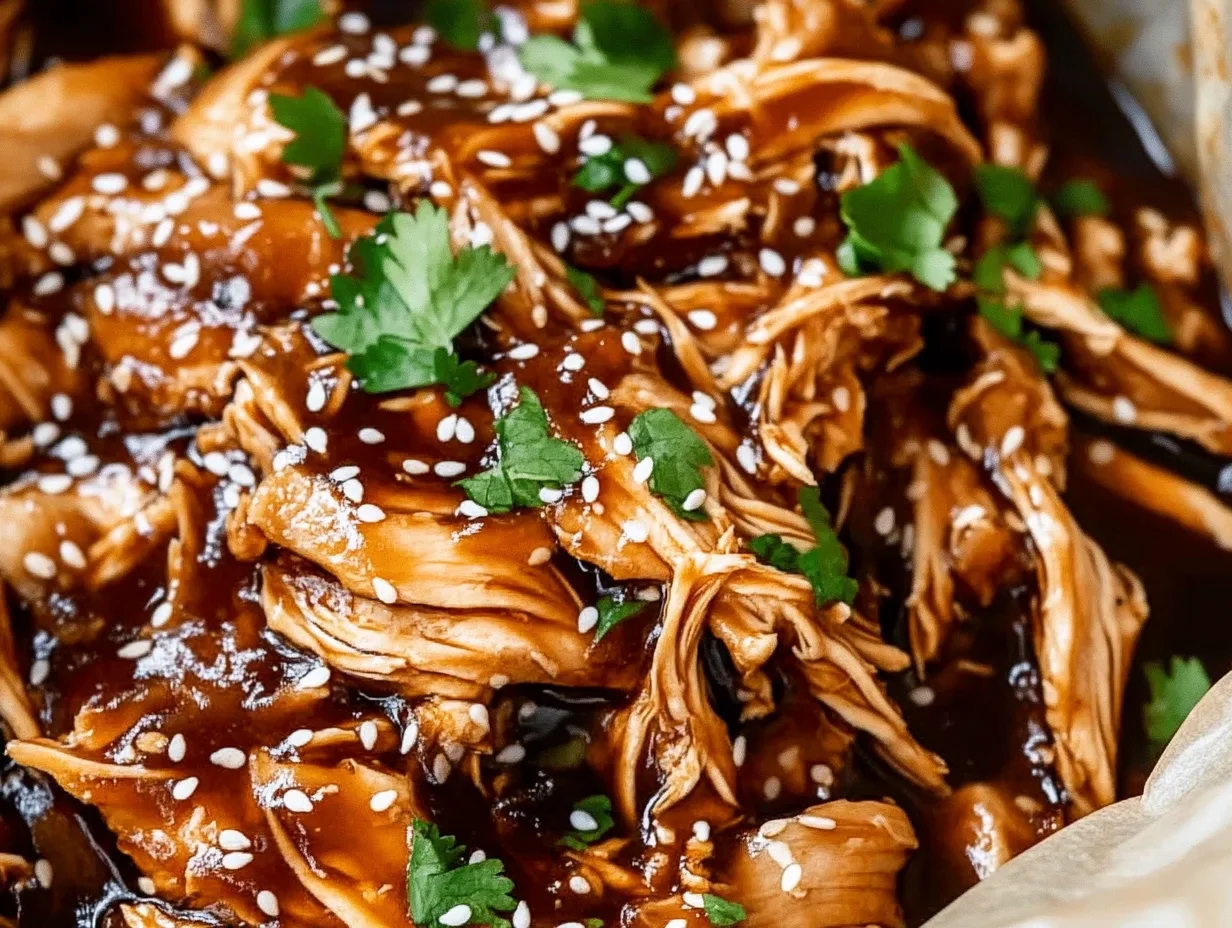
Easy Hoisin Chicken Recipe for Your Slow Cooker
Busy Weeknights? Meet Your New Best Friend: Slow Cooker Hoisin Chicken!
Are you constantly on the lookout for dinner solutions that are both incredibly easy and spectacularly delicious, especially on those chaotic weeknights? If so, you’re not alone! The average home cook spends hours each week meal planning and preparing, and we’re always searching for ways to reclaim that time without sacrificing flavor. That’s where this Easy Hoisin Chicken Recipe for Your Slow Cooker swoops in to save the day. This dish is a weeknight warrior, promising tender, deeply flavored chicken with minimal effort. Imagine coming home to the comforting aroma of Asian-inspired goodness, knowing that a satisfying meal is just minutes away from hitting your plate. This recipe is designed for maximum flavor with minimal fuss, making it a go-to for busy families, students, or anyone who appreciates a set-it-and-forget-it approach to dinner.
Ingredients: The Symphony of Flavors
The magic of this hoisin chicken lies in its simple yet impactful ingredient list. We’re using pantry staples and a few key players to create a complex flavor profile that’s both savory and slightly sweet. Here’s what you’ll need:
- 1.5 – 2 lbs Boneless, Skinless Chicken Thighs or Breasts: Chicken thighs are our top pick for slow cooking as they stay incredibly moist and tender, virtually guaranteeing success. Their higher fat content renders beautifully, creating a richer sauce. (If using breasts, be mindful of cooking time to prevent dryness).
- 1 cup Hoisin Sauce: This is the star! Look for a good quality hoisin sauce. It’s a thick, dark, and incredibly flavorful condiment made from fermented soybeans, garlic, chili peppers, and spices, offering a unique balance of salty, sweet, and umami.
- 1/4 cup Soy Sauce (or Tamari for Gluten-Free): Adds a foundational salty, umami depth. We prefer low-sodium to control the saltiness, especially with the hoisin.
- 2 tablespoons Rice Vinegar: Provides a welcome tanginess that cuts through the richness of the hoisin and balances the sweetness. Its mild, slightly sweet flavor is perfect for Asian-inspired dishes.
- 1 tablespoon Sesame Oil: Toasted sesame oil adds a nutty aroma and a distinct, irresistible flavor that screams “Asian cuisine.” A little goes a long way for that signature taste.
- 2-3 cloves Garlic, minced: Fresh garlic is essential for that aromatic punch. You can substitute with 1 teaspoon of pre-minced garlic from a jar if you’re in a pinch.
- 1 teaspoon Fresh Ginger, grated: Adds a warm, spicy, and slightly citrusy note that complements the other flavors beautifully. If you don’t have fresh ginger, 1/2 teaspoon of ground ginger can work, though fresh is preferred for its brightness.
- 1 tablespoon Brown Sugar (Optional, for extra sweetness): Depending on your hoisin sauce and personal preference, you might want a touch more sweetness. This is easily adjustable.
- Optional Garnishes: Sliced green onions, toasted sesame seeds, or a pinch of red pepper flakes for a hint of heat. These add freshness and visual appeal.
Timing: The Art of Slow Cooker Efficiency
Compared to traditional stovetop or oven methods which can take 30-60 minutes of active cooking and preparation, this slow cooker recipe shaves off significant hands-on time. The 10 minutes of prep are incredibly low-effort, and then your slow cooker does all the hard work. This makes it ideal for busy schedules where you might be out of the house or otherwise occupied.
Step-by-Step Instructions: Effortless Culinary Magic
Let’s get this deliciousness cooking! The beauty of this recipe is its simplicity. You’re just a few easy steps away from a mouthwatering meal.
Step 1: Prepare the Chicken
First things first, place your chicken thighs (or breasts) into the bottom of your slow cooker insert. If you’re using chicken breasts, you might want to trim any excess fat, though it’s less critical than with thighs.
Step 2: Mix the Sauce
In a medium bowl, whisk together the hoisin sauce, soy sauce (or tamari), rice vinegar, sesame oil, minced garlic, grated ginger, and brown sugar (if using). Give it a good stir until everything is well combined and emulsified. Taste a tiny bit of the sauce (be mindful of raw garlic and soy sauce) and adjust seasonings if you like – maybe a touch more vinegar for tang or a pinch of sugar for sweetness. This is your chance to personalize!
Step 3: Combine and Cook
Pour the prepared sauce evenly over the chicken in the slow cooker. Make sure the chicken is mostly, if not fully, submerged in the sauce. Cover the slow cooker with its lid. Cook on HIGH for 3-4 hours or on LOW for 6-8 hours. The chicken should be cooked through and tender, easily shreddable with forks. Cooking time will vary slightly depending on your slow cooker and the size of the chicken pieces.
Step 4: Shred and Serve
Once the chicken is tender, remove it from the slow cooker and place it on a cutting board or in a large bowl. Using two forks, shred the chicken into bite-sized pieces. Return the shredded chicken to the slow cooker and stir it into the thickened sauce. Let it sit for about 10-15 minutes on the ‘warm’ setting (or just off) to allow the chicken to soak up more of that delicious sauce. Garnish with fresh green onions and toasted sesame seeds if desired. Serve hot!
Nutritional Information
This is an approximate nutritional breakdown per serving (assuming 4 servings), and can vary based on specific ingredients used and portion sizes.
- Calories: 350-450 kcal
- Protein: 30-40g
- Fat: 15-25g
- Carbohydrates: 10-20g
- Sodium: Varies greatly depending on soy sauce/hoisin used.
Healthier Alternatives & Flavor-Preserving Swaps
Looking to lighten things up without sacrificing that fantastic hoisin flavor? Here are a few ideas:
- Chicken Breast: As mentioned, opt for chicken breasts for a leaner protein source. However, be extra cautious with cooking times to prevent dryness.
- Reduced-Sodium Soy Sauce/Tamari: Essential for managing sodium intake.
- Less Hoisin, More Umami: If hoisin is too high in sugar or sodium for your needs, try reducing the amount of hoisin and supplementing with extra soy sauce, a tablespoon of oyster sauce (for unami), and a touch of molasses or maple syrup for sweetness.
- Vegetable Medley: Add chopped bell peppers, onions, or broccoli florets to the slow cooker during the last hour of cooking. They’ll absorb the flavors beautifully and add nutrients and fiber.
- Thickening Agent: Instead of a cornstarch slurry (often used when reducing sauce on the stovetop), let the sauce naturally thicken in the slow cooker. If it’s still too thin, you can remove the chicken and thicken the sauce on the stovetop for a few minutes, or use a cornstarch slurry in the slow cooker on the ‘high’ setting for about 15-20 minutes.
Serving Suggestions
This versatile hoisin chicken is a dream to serve! The rich, savory sauce makes it perfect for:
- Steamed Rice: The classic pairing. White, brown, or jasmine rice all work wonderfully to soak up the delicious sauce.
- Noodles: Serve over ramen, udon, soba, or even simple spaghetti for a fusion twist.
- Quinoa or Farro: For a whole-grain, heartier option.
- Fresh Vegetables: Serve alongside steamed broccoli, stir-fried snap peas, a simple cucumber salad, or a crisp coleslaw.
- Wraps or Lettuce Cups: Shredded chicken can be a fantastic filling for P.F. Chang’s-style lettuce wraps or even small flour tortillas.
- Loaded Baked Potatoes or Sweet Potatoes: For a comforting and filling meal.
Common Mistakes (And How to Avoid Them!)
Even the simplest recipes can have a few pitfalls. Here’s what to watch out for:
- Overcooking Chicken Breasts: If you’re using chicken breasts, they can dry out quickly. Stick to the shorter end of the cooking time (3-4 hours on high, 6-8 on low) and check for tenderness.
- Not Tasting and Adjusting: Sauces are personal! Don’t be afraid to taste the sauce before adding it to the slow cooker and make minor adjustments for your preferred balance of sweet, salty, and tangy.
- Not Allowing Sauce to Thicken: The sauce might seem a bit thin when you first open the lid. Letting the shredded chicken sit in the sauce for a bit, or cooking on ‘warm’ or ‘high’ briefly after shredding, helps it thicken.
- Using Old/Stale Spices: While this recipe relies more on bottled sauces, stale ginger or garlic powder will mute the fresh flavors. Always use fresh when possible!
Storing Tips
Leftover Slow Cooker Hoisin Chicken is a treasure!
- Refrigerator: Once cooled, store in an airtight container in the refrigerator for up to 3-4 days. The flavors often meld and improve overnight!
- Freezer: Freeze in freezer-safe bags or containers for up to 2-3 months. Thaw overnight in the refrigerator before reheating.
- Reheating: Reheat gently on the stovetop over low heat, in the microwave, or in a warm oven. You might want to add a splash of water or broth if it seems a bit dry.
Conclusion: Your Easiest, Most Flavorful Weeknight Dinner Awaits!
This Easy Hoisin Chicken recipe is proof that you don’t need a lot of time or fancy ingredients to create a truly delicious and satisfying meal. The slow cooker does all the heavy lifting, infusing tender chicken with the irresistible sweet, savory, and tangy notes of hoisin sauce. It’s the perfect solution for busy weeknights, packed lunches, or any time you crave a comforting, globally inspired dish with minimal effort. Give it a try and discover your new favorite go-to recipe!
Loved this recipe? Let us know in the comments below! Share your cooking tips, variations, and serving ideas. Don’t forget to tag us when you share your creations on social media!
Frequently Asked Questions
Can I use chicken breasts instead of thighs?
Yes, you can! However, chicken breasts are leaner and can dry out more easily. Cook them on the lower end of the recommended time (3-4 hours on High, 6-8 hours on Low) and check for tenderness. If using breasts, it’s even more crucial to avoid overcooking.
My sauce is too thin. How can I thicken it?
The sauce will thicken slightly as it cooks and after shredding the chicken. If it’s still too thin for your liking, you can remove the shredded chicken, turn the slow cooker to HIGH, and let the sauce simmer uncovered for about 20-30 minutes. Alternatively, whisk together 1-2 tablespoons of cornstarch with an equal amount of cold water to make a slurry, then stir it into the hot sauce in the slow cooker and cook on HIGH for another 15-20 minutes until thickened.
Can I add vegetables to the slow cooker?
Absolutely! Heartier vegetables like carrots, potatoes, or onions can be added at the beginning with the chicken and sauce. Softer vegetables like broccoli, bell peppers, or snap peas are best added during the last 30-60 minutes of cooking to prevent them from becoming mushy.
What if I don’t have hoisin sauce?
Hoisin sauce has a unique flavor profile that’s hard to replicate exactly. However, you can create a decent substitute by combining soy sauce, peanut butter (or tahini), a sweetener (honey, maple syrup, or brown sugar), garlic powder, and a splash of vinegar. You may need to adjust proportions to get the right balance.
Is this recipe gluten-free?
The recipe as written contains soy sauce, which typically contains gluten. To make it gluten-free, use tamari instead of soy sauce and ensure your hoisin sauce is also gluten-free, as some brands contain wheat. Serving it with gluten-free grains like rice or quinoa will keep the entire meal gluten-free.
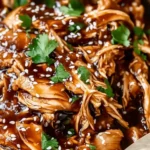
Slow Cooker Hoisin Chicken
Description
ThisSlow Cooker Hoisin Chickenis an effortless, flavorful dish that delivers tender, shredded chicken infused with savory, sweet, and tangy Asian-inspired flavors. Perfect for busy weeknights, it pairs wonderfully with rice, noodles, or fresh vegetables.
Ingredients
- Chicken:2pounds boneless, skinless chicken breasts or thighsSeasoning:1 tablespoonfresh ginger, minced1 tablespoongarlic, minced½ tablespoondried minced onions½ teaspoonsalt½ teaspoonblack pepperSauce:½ cuphoisin sauce½ cuplow-sodium soy sauce or coconut aminos⅓ cuprice wine vinegar1 tablespoonAsian sweet chili sauceThickener:1 tablespooncornstarch
- 2pounds boneless, skinless chicken breasts or thighs
- Seasoning:1 tablespoonfresh ginger, minced1 tablespoongarlic, minced½ tablespoondried minced onions½ teaspoonsalt½ teaspoonblack pepperSauce:½ cuphoisin sauce½ cuplow-sodium soy sauce or coconut aminos⅓ cuprice wine vinegar1 tablespoonAsian sweet chili sauceThickener:1 tablespooncornstarch
- 1 tablespoonfresh ginger, minced1 tablespoongarlic, minced½ tablespoondried minced onions½ teaspoonsalt½ teaspoonblack pepper
- 1 tablespoongarlic, minced½ tablespoondried minced onions½ teaspoonsalt½ teaspoonblack pepper
- ½ tablespoondried minced onions½ teaspoonsalt½ teaspoonblack pepper
- ½ teaspoonsalt½ teaspoonblack pepper
- ½ teaspoonblack pepper
- Sauce:½ cuphoisin sauce½ cuplow-sodium soy sauce or coconut aminos⅓ cuprice wine vinegar1 tablespoonAsian sweet chili sauceThickener:1 tablespooncornstarch
- ½ cuphoisin sauce½ cuplow-sodium soy sauce or coconut aminos⅓ cuprice wine vinegar1 tablespoonAsian sweet chili sauce
- ½ cuplow-sodium soy sauce or coconut aminos⅓ cuprice wine vinegar1 tablespoonAsian sweet chili sauce
- ⅓ cuprice wine vinegar1 tablespoonAsian sweet chili sauce
- 1 tablespoonAsian sweet chili sauce
- Thickener:1 tablespooncornstarch
- 1 tablespooncornstarch
Instructions
- 1️⃣Prepare the slow cooker:Lightly spray a 6-quart or larger slow cooker with nonstick cooking spray, or line it with a plastic slow cooker liner for easy cleanup.2️⃣Make the sauce:In a medium bowl, whisk together the hoisin sauce, soy sauce, rice wine vinegar, Asian sweet chili sauce, ginger, garlic, dried minced onions, salt, and black pepper until smooth.3️⃣Cook the chicken:Place the chicken breasts or thighs into the slow cooker and pour the prepared sauce over the top. Cover and cook:Onlow heatfor 6 hoursOnhigh heatfor 3 hoursOR until the chicken is tender and easily shreds with a fork.4️⃣Shred the chicken:Remove the cooked chicken to a cutting board and let it cool slightly before shredding with two forks.5️⃣Thicken the sauce:Dissolve 1 tablespoon of cornstarch in 2 tablespoons of water. Pour this slurry into the slow cooker, whisking well to combine with the sauce. Turn the slow cooker tohighand let the sauce thicken for about 5–10 minutes.6️⃣Combine and serve:Add the shredded chicken back into the slow cooker, stirring to coat it thoroughly in the thickened sauce. Serve warm.
- 2️⃣Make the sauce:In a medium bowl, whisk together the hoisin sauce, soy sauce, rice wine vinegar, Asian sweet chili sauce, ginger, garlic, dried minced onions, salt, and black pepper until smooth.
- 3️⃣Cook the chicken:Place the chicken breasts or thighs into the slow cooker and pour the prepared sauce over the top. Cover and cook:Onlow heatfor 6 hoursOnhigh heatfor 3 hoursOR until the chicken is tender and easily shreds with a fork.4️⃣Shred the chicken:Remove the cooked chicken to a cutting board and let it cool slightly before shredding with two forks.5️⃣Thicken the sauce:Dissolve 1 tablespoon of cornstarch in 2 tablespoons of water. Pour this slurry into the slow cooker, whisking well to combine with the sauce. Turn the slow cooker tohighand let the sauce thicken for about 5–10 minutes.6️⃣Combine and serve:Add the shredded chicken back into the slow cooker, stirring to coat it thoroughly in the thickened sauce. Serve warm.
- Onlow heatfor 6 hoursOnhigh heatfor 3 hoursOR until the chicken is tender and easily shreds with a fork.4️⃣Shred the chicken:Remove the cooked chicken to a cutting board and let it cool slightly before shredding with two forks.5️⃣Thicken the sauce:Dissolve 1 tablespoon of cornstarch in 2 tablespoons of water. Pour this slurry into the slow cooker, whisking well to combine with the sauce. Turn the slow cooker tohighand let the sauce thicken for about 5–10 minutes.6️⃣Combine and serve:Add the shredded chicken back into the slow cooker, stirring to coat it thoroughly in the thickened sauce. Serve warm.
- Onhigh heatfor 3 hoursOR until the chicken is tender and easily shreds with a fork.
- 4️⃣Shred the chicken:Remove the cooked chicken to a cutting board and let it cool slightly before shredding with two forks.5️⃣Thicken the sauce:Dissolve 1 tablespoon of cornstarch in 2 tablespoons of water. Pour this slurry into the slow cooker, whisking well to combine with the sauce. Turn the slow cooker tohighand let the sauce thicken for about 5–10 minutes.6️⃣Combine and serve:Add the shredded chicken back into the slow cooker, stirring to coat it thoroughly in the thickened sauce. Serve warm.
- 5️⃣Thicken the sauce:Dissolve 1 tablespoon of cornstarch in 2 tablespoons of water. Pour this slurry into the slow cooker, whisking well to combine with the sauce. Turn the slow cooker tohighand let the sauce thicken for about 5–10 minutes.6️⃣Combine and serve:Add the shredded chicken back into the slow cooker, stirring to coat it thoroughly in the thickened sauce. Serve warm.
- 6️⃣Combine and serve:Add the shredded chicken back into the slow cooker, stirring to coat it thoroughly in the thickened sauce. Serve warm.
Notes
Store leftovers in an airtight container in the refrigerator for up to 5 days.Reheat gently on the stovetop or in the microwave, adding a splash of water if needed to loosen the sauce.
Reheat gently on the stovetop or in the microwave, adding a splash of water if needed to loosen the sauce.
“`