There’s something deeply comforting about a dish that wraps you in warmth and nostalgia, and Lamb Shanks Massaman Curry does exactly that. Whether you’re craving a rich, aromatic meal to share with loved ones or simply want to treat yourself to something extraordinary, this recipe delivers. Tender lamb shanks simmered in a creamy, spiced coconut curry create a harmony of flavors that feels like a hug in a bowl. Plus, it’s easier to make than you might think. Let’s dive into why this dish deserves a spot in your culinary repertoire.
Lamb Shanks Massaman Curry is a Thai-inspired slow-cooked masterpiece that balances sweet, savory, and spicy notes in every bite. Originating from Southern Thailand, Massaman curry stands out for its Persian and Indian influences, featuring warming spices like cinnamon, cardamom, and star anise. The lamb shanks, braised until fall-off-the-bone tender, soak up the luxurious coconut milk base, making each mouthful unforgettable. This dish isn’t just a meal—it’s an experience, perfect for cozy dinners or impressing guests. If you love bold flavors and hearty comfort food, you’ll adore this recipe as much as we do.
Here at Exorecipes, we celebrate dishes that tell a story, and Lamb Shanks Massaman Curry fits perfectly. It’s a dish that invites you to slow down, savor the process, and enjoy the results. For more Thai-inspired favorites, check out our Thai Green Curry or explore the versatility of lamb in our Slow-Cooked Lamb Shoulder. Now, let’s talk about why this recipe holds a special place in my heart.
Why I Love This Recipe
I first fell in love with Lamb Shanks Massaman Curry during a trip to Bangkok, where a tiny street vendor served it with so much passion that I couldn’t resist asking for the recipe. Since then, I’ve made it countless times, tweaking the spices to perfection and sharing it with friends who now request it regularly. There’s something magical about how the lamb melts into the curry, creating a dish that feels both luxurious and deeply satisfying. Every time I make it, the aroma fills my kitchen with memories of that first unforgettable bite. Trust me, once you try it, you’ll understand why it’s a forever favorite.
Health and Nutrition
Why it’s good for your body
Lamb Shanks Massaman Curry packs a powerful nutritional punch while delivering rich, satisfying flavors. First, the tender lamb shanks provide high-quality protein, which helps build and repair muscles. Additionally, lamb offers essential nutrients like iron and zinc, supporting energy levels and immune function. Meanwhile, the curry’s coconut milk adds healthy fats that keep you full and promote nutrient absorption.
Beyond protein and fats, Lamb Shanks Massaman Curry includes an array of spices like turmeric, cinnamon, and cardamom. These spices not only enhance taste but also boast anti-inflammatory properties. For example, turmeric contains curcumin, a compound linked to reduced inflammation and improved digestion. Furthermore, the dish often features potatoes and peanuts, adding fiber and plant-based protein for a balanced meal.
Finally, Lamb Shanks Massaman Curry balances indulgence with nourishment. While it feels like a comforting treat, the ingredients work together to support overall wellness. Whether you need a post-workout recovery meal or a hearty dinner, this curry delivers both flavor and nutrition in every bite.
How it fits in a healthy lifestyle
Lamb Shanks Massaman Curry fits seamlessly into a balanced diet, especially if you prioritize protein-rich meals. The lamb shanks supply ample protein, making it ideal for muscle maintenance or weight management. Plus, the dish naturally suits gluten-free diets, as long as you pair it with rice or gluten-free sides.
For those focusing on heart health, the curry’s spices and coconut milk offer benefits. Moderate portions keep saturated fats in check while still providing satisfying flavors. If you’re exploring global cuisines for wellness, try pairing this curry with our healthy Thai recipes for a diverse meal plan. And if you love meal prepping, Lamb Shanks Massaman Curry stores well, so you can enjoy it throughout the week. For more tips on balancing hearty meals, check out our guide to nutritious comfort foods.
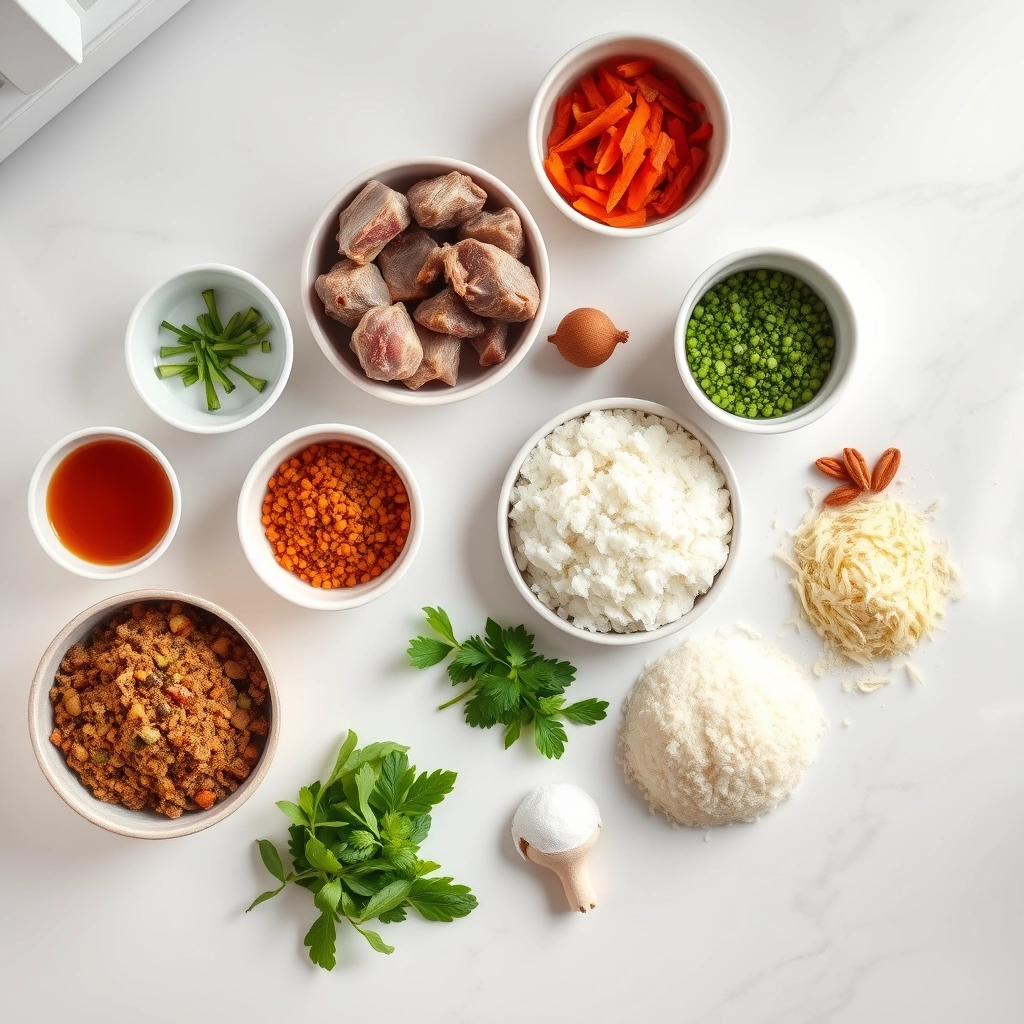
A rich and aromatic Thai-inspired curry with tender lamb shanks, potatoes, and peanuts in a creamy coconut sauce.
Ingredients
Scale
For the Crust:
2 lamb shanks
1 can (400ml) coconut milk
2 tbsp Massaman curry paste
2 medium potatoes, cubed
1 onion, sliced
1/4 cup roasted peanuts
1 tbsp fish sauce
1 tbsp palm sugar
1 cinnamon stick
2 star anise
1 bay leaf
2 cups water
Instructions
1. Prepare the Crust:
Heat oil in a large pot and sear lamb shanks on all sides until browned. Remove and set aside.
In the same pot, sauté Massaman curry paste until fragrant. Add coconut milk and stir well.
Return lamb shanks to the pot. Add potatoes, onion, peanuts, fish sauce, palm sugar, cinnamon, star anise, bay leaf, and water.
Simmer covered for 2 hours or until lamb is tender. Adjust seasoning if needed.
Serve hot with steamed rice.
Notes
You can customize the seasonings to taste.
“`html
="how-to-prepare-this-dish">How to Prepare This Dish
Steps and time-saving tips
Start by seasoning the lamb shanks generously with salt and pepper. Heat a large Dutch oven over medium-high heat and sear the shanks until they develop a deep brown crust on all sides. Remove them and set aside. In the same pot, sauté diced onions until translucent, then stir in minced garlic and ginger for a fragrant base. Add the Massaman curry paste and toast it briefly to release its aromas. Pour in coconut milk, stirring to blend the flavors, and return the lamb shanks to the pot. Simmer them gently, covered, for about two hours until the meat becomes fork-tender. Meanwhile, toss in peeled potatoes and chopped carrots during the last 30 minutes to cook through. For a time-saving tip, prep your vegetables while the lamb simmers. Finish with a squeeze of lime juice and a sprinkle of fresh cilantro for brightness. Serve the Lamb Shanks Massaman Curry over steamed jasmine rice to soak up the rich sauce.
Mistakes I’ve made and learned from
One mistake I made early on was rushing the sear on the lamb shanks, which left them lacking depth of flavor. Now, I patiently brown them in batches to avoid overcrowding the pot. Another lesson? Overcooking the vegetables until they turned mushy. Adding them later in the process keeps them perfectly tender. If you’re new to slow-cooked dishes like this, check out my guide on mastering slow cooking for more pro tips. Also, don’t skip toasting the curry paste—it makes all the difference, just like when making a proper curry paste base. Trust me, these small tweaks elevate the entire dish.
Lamb Shanks Massaman Curry carries a rich history, blending Persian, Indian, and Thai influences into one unforgettable dish. Traders and travelers brought spices like cardamom and cinnamon to Thailand centuries ago, where local cooks paired them with tender lamb shanks and creamy coconut milk. Today, you’ll find this curry warming homes across Thailand, especially during festivals and family gatherings.
In the south of Thailan
d, cooks often add extra chilies for heat, while northern versions might lean sweeter with tamarind or palm sugar. Some families braise the lamb shanks for hours until the meat falls off the bone, while others prefer a quicker simmer. No matter the method, Lamb Shanks Massaman Curry always feels like a celebration. My grandmother used to make it for special occasions, filling the house with the scent of toasted spices and slow-cooked lamb.
Globally, chefs put their own spin on it too. In Australia, you might find it served with crusty bread, while in the U.S., some cooks swap lamb for beef or even chickpeas for a vegetarian twist. Still, nothing beats the original—meltingly tender lamb shanks in a velvety, aromatic curry.
How it fits in today’s cooking
Lamb Shanks Massaman Curry hasn’t lost its charm. Modern cooks love it for its depth of flavor and versatility. Whether you’re hosting a dinner party or craving cozy weeknight comfort food, this dish delivers. Many home chefs now use slow cookers or Instant Pots to simplify the process, proving that tradition can adapt to busy lives.
It’s also a star
during cooler months, pairing perfectly with hearty sides like jasmine rice or roasted vegetables. Some even repurpose leftovers into creative next-day meals, like stuffing the curry into flatbreads or topping a baked potato. For more inspiration on balancing bold flavors, check out our guide to spice blends.
From its royal Thai roots to today’s kitchens, Lamb Shanks Massaman Curry bridges cultures and generations. It’s a dish that invites experimentation but always feels like coming home.
Taste and Texture
What makes it delicious
Lamb Shanks Massaman Curry wraps you in layers of rich, comforting flavor. The tender lamb shanks melt in your mouth, while the velvety sauce balances sweet, savory, and spicy notes. Fragrant spices like cinnamon and cardamom mingle with creamy coconut milk, creating a warm, aromatic depth. Each bite delivers a hint of nutty peanuts and a touch of tangy tamarind, making the dish irresistibly complex. The slow-cooked lamb soaks up the curry’s bold flavors, resulting in meat that’s both juicy and fall-off-the-bone tender. Meanwhile, chunks of potato add a soft, hearty contrast, rounding out every spoonful of Lamb Shanks Massaman Curry.
r">Boosting the flavor
For an extra flavor kick, toast whole spices like cumin and coriander before grinding them—this unlocks their earthy, citrusy undertones. A squeeze of lime just before serving brightens the dish, while a handful of fresh Thai basil adds a peppery freshness. If you love heat, stir in a spoonful of Thai chili paste for a smoky, fiery twist. Pair your Lamb Shanks Massaman Curry with coconut rice to soak up every drop of the luscious sauce. Experiment with toppings like crispy shallots or crushed roasted peanuts for added crunch and richness.
Tips for Success
Best practices for results
Always sear the lamb shanks first to lock in flavor before simmering them in the Massaman curry. Meanwhile, toast the spices lightly to deepen their aroma, but avoid burning them. For the creamiest texture, stir in coconut milk gradually and simmer the Lamb Shanks Massaman Curry on low heat. Finally, taste and adjust the seasoning just before serving to balance the sweet, spicy, and savory notes.
>Mistakes to avoid
One common error is rushing the cooking process, which results in tough lamb shanks. Instead, braise them low and slow until the meat falls off the bone. Another mistake is skipping the fish sauce or tamarind paste, which are key for authentic depth in Lamb Shanks Massaman Curry. For more on balancing flavors, check out our guide to Thai ingredient substitutions. Also, avoid overcrowding the pan when searing the lamb, as this steams the meat instead of browning it. Learn proper searing techniques in our guide to searing meat.
Serving and Pairing Suggestions
How to serve this dish
For a stunning presentation, serve Lamb Shanks Massaman Curry in shallow bowls to showcase the tender meat and rich sauce. Top with fresh cilantro, sliced red chilies, and a squeeze of lime for vibrant color and brightness. Alternatively, family-style plating in a deep serving dish with steamed jasmine rice on the side makes it perfect for gatherings. Whether you’re hosting a cozy dinner party or celebrating a special occasion, this dish brings warmth and elegance to the table. The aromatic spices and fall-off-the-bone lamb shanks will impress every guest.
What goes well with it
A crisp, slightly sweet Riesling balances the rich flavors of Lamb Shanks Massaman Curry beautifully. For a non-alcoholic option, try a cooling cucumber mint cooler to contrast the dish’s warmth. Pair it with fluffy coconut rice or a simple cucumber salad for refreshing texture. If you love bold flavors, our Spicy Thai Papaya Salad adds a tangy crunch. For dessert, finish with something light like our Mango Sticky Rice to round out the meal.
What makes Lamb Shanks Massaman Curry different from other Thai curries?
Lamb Shanks Massaman Curry stands out for its rich, mild flavor profile blending Thai and Indian influences. Unlike spicier curries, it features warm spices like cinnamon and cardamom, slow-cooked with tender lamb shanks for a melt-in-your-mouth texture. The dish often includes potatoes and peanuts for added depth.
How long should you cook Lamb Shanks Massaman Curry for optimal tenderness?
For perfect Lamb Shanks Massaman Curry, simmer the meat for 2-3 hours until it falls off the bone. The slow cooking allows the lamb shanks to absorb all the aromatic spices while becoming incredibly tender. This method ensures the signature rich consistency that makes Massaman so special.
ank-math-faq-item">
Can you make Lamb Shanks Massaman Curry in a slow cooker?
Absolutely! A slow cooker works wonderfully for Lamb Shanks Massaman Curry—just brown the shanks first for extra flavor. Cook on low for 6-8 hours, allowing the spices to fully develop and the lamb to become fork-tender. This hands-off method delivers authentic results with minimal effort.
What side dishes pair well with Lamb Shanks Massaman Curry?
Lamb Shanks Massaman Curry pairs beautifully with jasmine rice to soak up the luxurious sauce. For contrast, serve with crisp cucumber salad or steamed greens. The dish also complements traditional Thai accompaniments like roti bread for scooping up every last bit of the flavorful curry.
There’s something undeniably comforting about a dish that feels both elegant and familiar. Chicken Cordon Bleu delivers exactly that—a crispy, golden exterior hiding a juicy chicken breast stuffed with melted cheese and savory ham. Whether you’re cooking for a special occasion or just craving a hearty meal, this classic recipe never disappoints. Plus, with a few simple tricks, you can make it feel restaurant-worthy right in your own kitchen.
Chicken Cordon Bleu is a timeless dish that combines tender chicken, smoky ham, and gooey cheese, all breaded and baked or fried to perfection. Originating from Switzerland (despite its French name), it’s a staple in many households because it balances simplicity with impressive flavors. For busy home cooks, it’s a versatile recipe that works for weeknight dinners or dinner parties alike. If you love dishes that feel indulgent yet approachable, like our Creamy Garlic Chicken, you’ll appreciate how Chicken Cordon Bleu brings that same satisfying richness. The dish also pairs wonderfully with lighter sides, such as our Lemon Herb Roasted Vegetables, making it easy to customize for any meal.
Why I Love This Recipe
Chicken Cordon Bleu holds a special place in my heart because it was the first “fancy” dish I ever mastered. I remember serving it to my family years ago, nervously watching as they took their first bites—only to see their faces light up with every forkful. Since then, it’s become my go-to for celebrations and even lazy Sundays when I want to treat myself. The combination of textures and flavors never gets old, and I love how it feels both nostalgic and exciting every time I make it.
Health and Nutrition
Why it’s good for your body
Chicken Cordon Bleu packs a powerful nutritional punch while delighting your taste buds. First, the lean chicken breast provides high-quality protein, which helps build muscle and keeps you full longer. Additionally, the ham adds a savory flavor while contributing essential minerals like iron and zinc. Meanwhile, the melted cheese offers a dose of calcium for strong bones.
Moreover, Chicken Cordon Bleu balances indulgence with nourishment. The dish includes healthy fats from cheese and ham, which support brain function and energy levels. When you bake instead of fry it, you reduce unnecessary oils while keeping the crispy texture. Pair it with a side of steamed veggies or a fresh salad, and you elevate the meal’s vitamin and fiber content.
Furthermore, Chicken Cordon Bleu delivers key nutrients in every bite. The chicken provides B vitamins for metabolism, while the cheese offers vitamin D for immune support. If you use whole-grain breadcrumbs, you even add fiber for better digestion. With smart ingredient choices, this classic dish becomes a wholesome part of any diet.
How it fits in a healthy lifestyle
Chicken Cordon Bleu fits seamlessly into balanced eating habits when prepared thoughtfully. For a high-protein meal, focus on generous portions of chicken and pair it with fiber-rich sides like roasted Brussels sprouts. If you’re watching sodium, opt for low-sodium ham and cheese to keep the dish heart-healthy.
For gluten-free diets, swap traditional breadcrumbs with almond flour or gluten-free panko. This simple tweak makes Chicken Cordon Bleu just as crispy without the gluten. If you’re meal prepping, bake a batch ahead and store it with these easy meal prep strategies for quick, nutritious lunches.
Even on busy nights, Chicken Cordon Bleu can be a smart choice. Serve it with a light salad or quinoa for a well-rounded plate. For more ideas on balancing comfort food with nutrition, explore these healthy comfort food swaps. With a few adjustments, this dish becomes a delicious ally in your wellness journey.
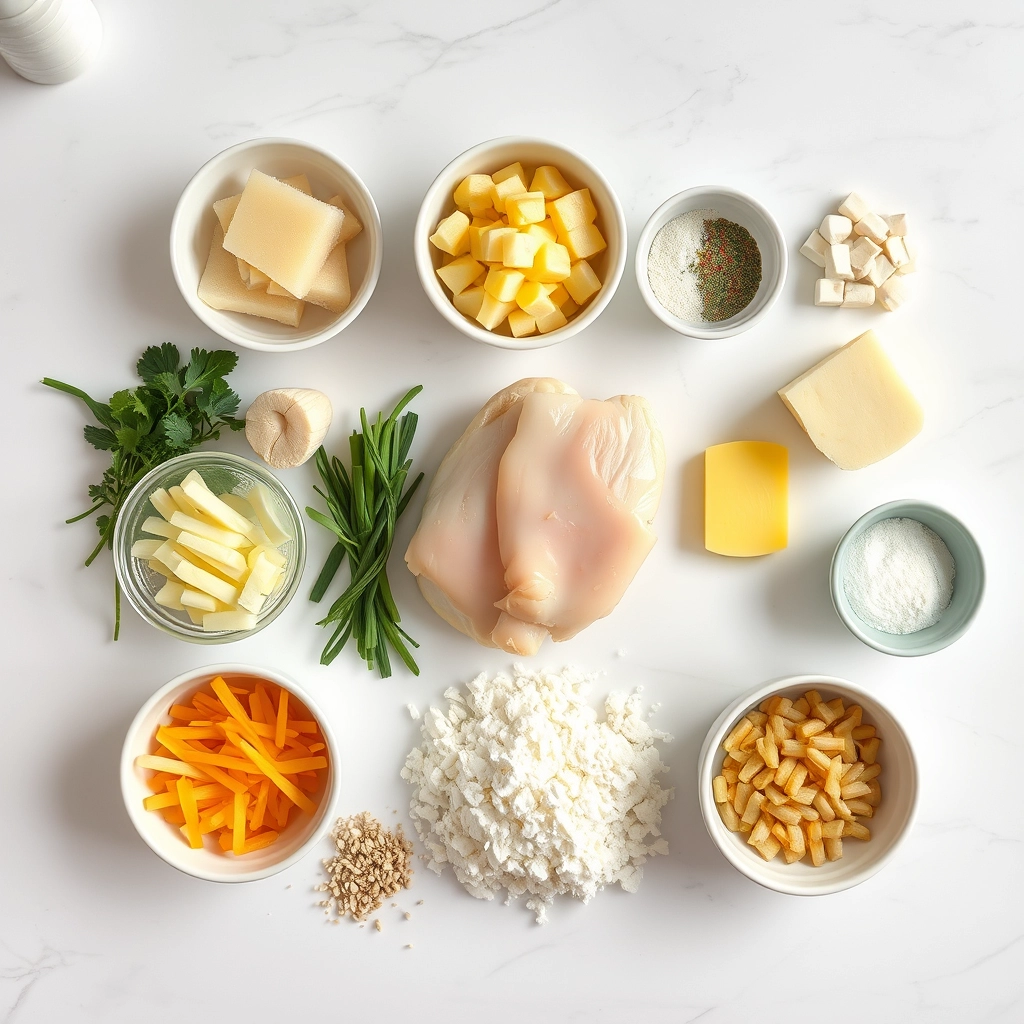
A classic dish featuring tender chicken breasts stuffed with ham and Swiss cheese, then breaded and baked to golden perfection.
Ingredients
Scale
For the Crust:
4 boneless, skinless chicken breasts
4 slices Swiss cheese
4 slices ham
1 cup breadcrumbs
1/2 cup all-purpose flour
2 eggs, beaten
1 tsp salt
1 tsp black pepper
1 tsp paprika
2 tbsp butter, melted
Instructions
1. Prepare the Crust:
Preheat oven to 350°F (175°C). Lightly grease a baking dish.
Pound chicken breasts to an even thickness. Season with salt, pepper, and paprika.
Layer a slice of ham and a slice of Swiss cheese on each chicken breast. Roll up tightly and secure with toothpicks.
Dredge each chicken roll in flour, dip in beaten eggs, then coat with breadcrumbs.
Place in the prepared baking dish and drizzle with melted butter.
Bake for 30-35 minutes or until chicken is cooked through and golden brown.
Notes
You can customize the seasonings to taste.
How to Prepare This Dish
Steps and time-saving tips
Start by preheating your oven to 375°F so it’s ready when you finish assembling the Chicken Cordon Bleu. Lay out four boneless, skinless chicken breasts and slice each one horizontally, but not all the way through, to create a pocket. Next, layer a slice of Swiss cheese and a slice of ham inside each pocket, then gently press the edges to seal. For extra security, you can secure the seams with toothpicks. In one shallow bowl, whisk two eggs with a splash of milk, and in another, mix breadcrumbs with a pinch of garlic powder and paprika for extra flavor. Dip each stuffed chicken breast into the egg mixture first, then coat it evenly with the breadcrumb blend. Place the breaded chicken on a greased baking sheet and drizzle with melted butter for a golden finish. Bake for 25-30 minutes until the internal temperature reaches 165°F. While the Chicken Cordon Bleu bakes, whip up a quick Dijon cream sauce by simmering heavy cream, mustard, and a dash of lemon juice. Serve the dish hot with a drizzle of sauce and a side of roasted veggies for a complete meal. To save time, prep the stuffing and breading stations ahead, or use pre-sliced ham and cheese.
and-learned-from">Mistakes I’ve made and learned from
My first attempt at Chicken Cordon Bleu ended in a cheesy disaster—literally. I overstuffed the chicken pockets, and the filling oozed out during baking, leaving me with a dry exterior and a messy pan. Now, I stick to thin slices of ham and cheese and press the edges firmly. Another lesson? Skipping the toothpicks. Without them, my filling escaped mid-bake, but a quick fix from my kitchen hacks guide saved the day. I also learned the hard way that overcrowding the baking sheet leads to uneven cooking. Spacing the chicken properly ensures crispiness all around. If you’re new to breading, check out my breading tips to avoid clumpy coatings. Trust me, a little patience goes a long way with this dish!
Cultural Connection and Variations
Where this recipe comes from
Chicken Cordon Bleu might sound French, but its origins are a bit murky. Many believe it evolved from the Swiss dish emince de veau, where chefs stuffed veal with ham and cheese. However, American cooks in the 1960s popularized the chicken version we know today. They swapped veal for chicken, creating a richer, more accessible dish. Now, Chicken Cordon Bleu graces dinner tables worldwide, each culture adding its own twist.
In Germany, cooks often
use schnitzel-style breading for extra crunch. Meanwhile, some Italian versions replace ham with prosciutto or add a sprinkle of herbs. My grandma, for instance, always added a dash of paprika to the breadcrumbs. Whether you bake or fry it, Chicken Cordon Bleu adapts beautifully. Some families even serve it during holidays, turning it into a celebratory centerpiece.
How it fits in today’s cooking
Today, Chicken Cordon Bleu remains a crowd-pleaser because it balances elegance and comfort. Busy home cooks love shortcuts like pre-sliced cheese or air-frying for a lighter version. Others pair it with seasonal sides—think roasted asparagus in spring or a cozy creamy mashed potato dish in winter. It’s also a star at dinner parties, proving classic flavors never fade.
Modern twists keep it fresh, too. Some recipes swap Swiss cheese for gruyère or add a drizzle of honey mustard sauce. Whether you stick to tradition or experiment, Chicken Cordon Bleu fits any occasion. From weeknight dinners to festive gatherings, it’s a dish that always delivers.
>Taste and Texture
What makes it delicious
Chicken Cordon Bleu delivers a symphony of textures and flavors in every bite. The golden, crispy breadcrumb coating shatters to reveal tender, juicy chicken wrapped around salty ham and melty Swiss cheese. Each layer adds depth—the smoky ham balances the rich, creamy cheese, while the chicken keeps everything hearty and satisfying. When baked to perfection, the aroma of buttery breadcrumbs and savory filling fills the kitchen, making it impossible to resist. Whether you slice into it or take a forkful, Chicken Cordon Bleu promises a luxurious yet comforting experience.
Boosting the flavor
Elevate your Chicken Cordon Bleu with a few clever tweaks. For extra tang, swap Swiss cheese for Gruyère or add a dollop of Dijon mustard to the filling. A drizzle of homemade honey mustard sauce adds sweet and spicy notes, while a sprinkle of smoked paprika amps up the smokiness. If you love herbs, try mixing fresh thyme or rosemary into the breadcrumbs. Serve it with a side of garlic herb roasted potatoes to round out the meal. With these small changes, you can turn an already delicious dish into something unforgettable.
Tips for Success
Best practices for results
Always pound the chicken breasts evenly to ensure uniform cooking and easy rolling. For the best Chicken Cordon Bleu, chill the stuffed rolls for 15 minutes before breading to help them hold their shape. Use toothpicks to secure the edges, and remove them just before serving. Additionally, bake the dish on a wire rack to keep the bottom crispy while allowing heat to circulate evenly.
Mistakes to avoid
Avoid overstuffing the chicken with ham and cheese, as this can cause leaks during cooking. Instead, layer the fillings thinly and roll them tightly. Many cooks also forget to season the chicken properly—always add salt and pepper to each layer for maximum flavor. For more tips on handling poultry, check out our guide on how to prepare chicken breasts. Finally, don’t skip the resting time after baking; letting Chicken Cordon Bleu sit for 5 minutes ensures juicier slices. For extra help with timing, read our article on perfect baking times.
Serving and Pairing Suggestions
How to serve this dish
Elevate your Chicken Cordon Bleu by serving it on a warm white platter for a classic look or a rustic wooden board for a cozy feel. For a pop of color, garnish with fresh parsley or thyme sprigs alongside lemon wedges. Meanwhile, slice the chicken diagonally to showcase the cheesy ham filling, making it irresistible for guests. Perfect for dinner parties or holiday gatherings, this dish pairs beautifully with candlelight and soft music for an elegant touch. Alternatively, serve it family-style with shared sides for a comforting weeknight meal.
h-it">What goes well with it
Complement your Chicken Cordon Bleu with creamy garlic mashed potatoes for a rich, satisfying bite. The buttery texture balances the crispy chicken perfectly. For a lighter option, try a crisp arugula salad with lemon vinaigrette, which cuts through the dish’s richness. Additionally, a chilled glass of Chardonnay or sparkling apple cider enhances the flavors. If you love dipping sauces, our tangy honey mustard sauce or creamy dill yogurt dip adds extra zest. Each pairing brings out the best in this timeless recipe.
What is Chicken Cordon Bleu made of?
Chicken Cordon Bleu is a classic dish made with chicken breast, ham, and Swiss cheese. The chicken is pounded thin, stuffed with ham and cheese, then breaded and baked or fried until golden. This creates a crispy exterior with a delicious melted cheese center.
ank-math-faq-item">
Why is it called Chicken Cordon Bleu?
The name “Cordon Bleu” comes from French, meaning “blue ribbon,” which historically symbolized excellence. While the dish isn’t traditionally French, Chicken Cordon Bleu borrows the name to represent its gourmet quality. It’s a nod to the dish’s elegant presentation and rich flavors.
Can you make Chicken Cordon Bleu ahead of time?
Yes, you can prepare Chicken Cordon Bleu up to 24 hours in advance. Assemble the stuffed chicken breasts, wrap them tightly in plastic, and refrigerate until ready to cook. For best results, bread them just before baking or frying to maintain crispiness.
What sides go well with Chicken Cordon Bleu?
Chicken Cordon Bleu pairs beautifully with light sides like roasted asparagus, garlic mashed potatoes, or a fresh green salad. For heartier meals, try it with buttered noodles or wild rice. The rich flavors of the dish complement both starchy and vegetable sides.
div>
Best Brazilian Coconut Chickpea Curry Recipe
Introduction
There’s something magical about a dish that wraps you in warmth while whisking your taste buds away to another corner of the world. That’s exactly what Brazilian Coconut Chickpea Curry does—it’s a creamy, fragrant bowl of comfort that feels like a hug from the inside. Whether you’re craving a meatless meal that doesn’t skimp on flavor or just want to try something new, this recipe delivers. Plus, it’s packed with protein and vibrant spices, making it as nourishing as it is delicious. Let’s dive into what makes this dish so special.
Brazilian Coconut Chickpea Curry is a vibrant fusion of creamy coconut milk, tender chickpeas, and a medley of spices like cumin, coriander, and turmeric. Unlike traditional curries, this version leans into Brazil’s love for bold, tropical flavors, blending them with influences from global cuisine. What sets it apart is its balance of richness and freshness, often brightened with lime juice or cilantro. For anyone exploring plant-based eating, this dish proves that meatless meals can be hearty and deeply satisfying. It’s also incredibly versatile—serve it over rice, quinoa, or even with a side of garlic naan for a cross-cultural twist.
This recipe fits perfectly with our blog’s mission to celebrate accessible, globally inspired dishes. Whether you’re a seasoned cook or just starting out, Brazilian Coconut Chickpea Curry is forgiving and adaptable. You can tweak the spice level or add veggies like spinach or sweet potatoes to make it your own. If you’re looking for more weeknight-friendly recipes, check out our quick vegetable stir-fry for another easy favorite. Above all, this curry is about joy—the kind of meal that brings people together and leaves everyone asking for seconds.
Why I Love This Recipe
Brazilian Coconut Chickpea Curry holds a special place in my heart because it’s the dish that made me fall in love with plant-based cooking. The first time I tried it, I was amazed by how something so simple could burst with so much flavor. It reminds me of lazy Sunday dinners with friends, where we’d pile our plates high and lose track of time laughing over stories. Even now, the smell of coconut milk simmering with spices instantly transports me back to those cozy moments. It’s more than just a recipe—it’s a reminder that great food doesn’t need to be complicated to be unforgettable.
Health and Nutrition
Why it’s good for your body
Brazilian Coconut Chickpea Curry packs a powerful nutritional punch while delighting your taste buds. First, chickpeas deliver a hearty dose of plant-based protein and fiber, keeping you full and supporting digestion. Additionally, coconut milk adds healthy fats that boost brain function and help your body absorb fat-soluble vitamins.
Moreover, this dish brims with antioxidants and anti-inflammatory spices like turmeric and cumin. These ingredients not only enhance flavor but also promote heart health and reduce oxidative stress. Meanwhile, the tomatoes and garlic in Brazilian Coconut Chickpea Curry provide immune-boosting vitamins like C and B6.
Furthermore, the dish balances macronutrients beautifully. The combination of slow-digesting carbs, plant protein, and healthy fats stabilizes blood sugar levels. Whether you enjoy it for lunch or dinner, Brazilian Coconut Chickpea Curry fuels your body efficiently. Finally, its rich flavors mean you won’t miss heavy creams or excessive salt, making it a smarter choice for long-term wellness.
How it fits in a healthy lifestyle
Brazilian Coconut Chickpea Curry fits seamlessly into a balanced diet. If you follow a gluten-free or plant-based lifestyle, this dish naturally aligns with your needs. The chickpeas offer a protein alternative to meat, while the coconut milk keeps it dairy-free. For those focused on heart health, the spices and healthy fats support cholesterol management.
You can easily pair this curry with quinoa or brown rice for a complete meal. It also reheats well, making it perfect for meal prep. If you’re exploring more plant-based recipes, check out our guide to vegan protein sources to keep your diet varied and nutritious. Whether you’re cooking for one or feeding a family, Brazilian Coconut Chickpea Curry simplifies healthy eating without sacrificing flavor.
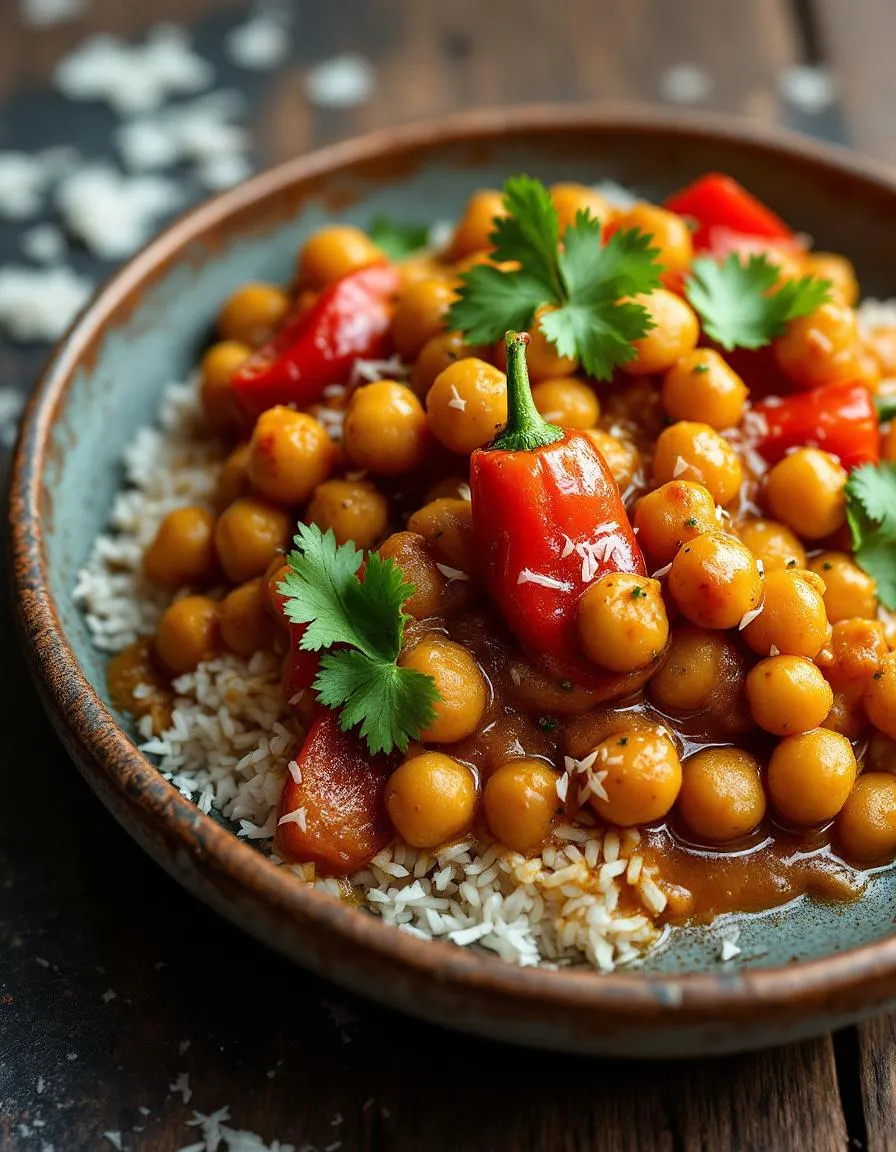
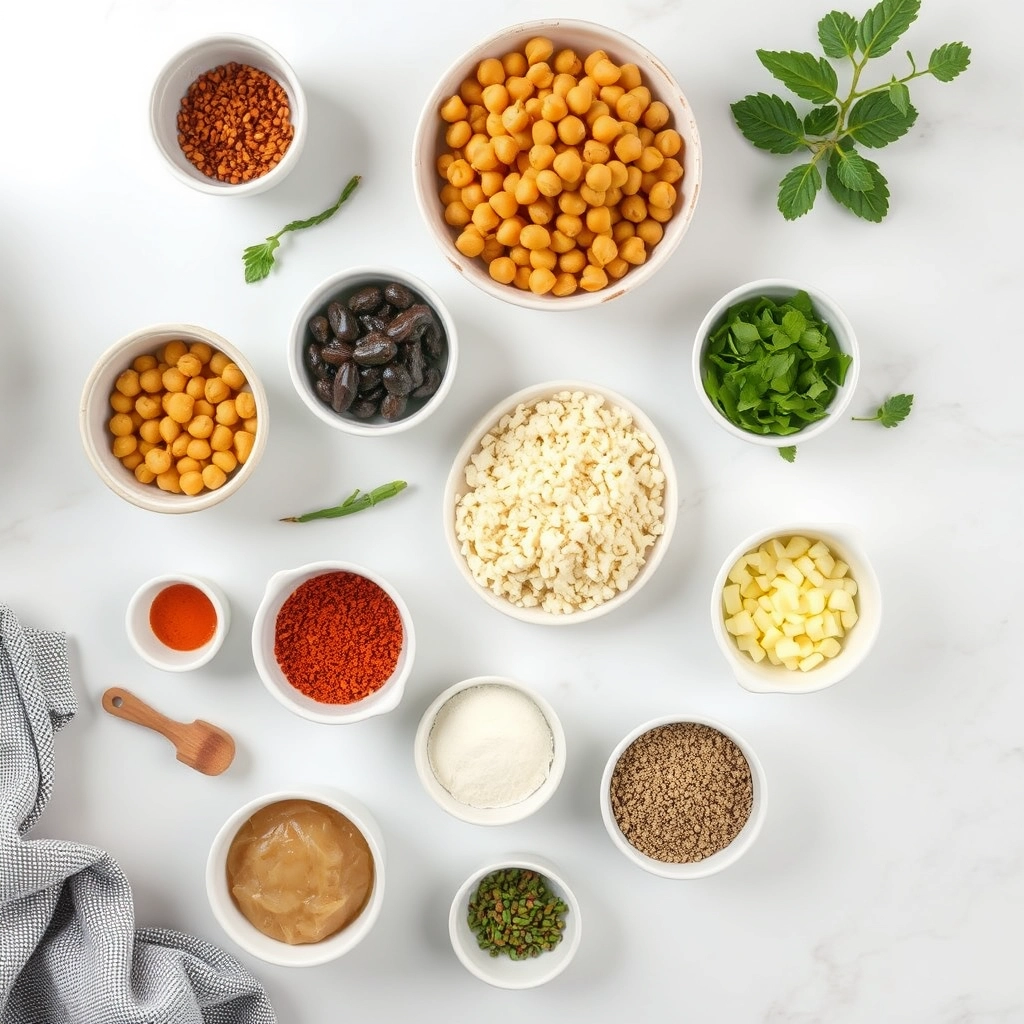
A creamy and flavorful curry with chickpeas, coconut milk, and Brazilian-inspired spices.
Ingredients
Scale
For the Crust:
2 cups cooked chickpeas
1 can (14 oz) coconut milk
1 onion, finely chopped
3 garlic cloves, minced
1 red bell pepper, diced
1 tbsp olive oil
1 tbsp curry powder
1 tsp ground cumin
1 tsp paprika
1/2 tsp turmeric
1/2 tsp chili flakes (optional)
1 cup vegetable broth
1 tbsp lime juice
Fresh cilantro, chopped (for garnish)
Salt and pepper to taste
Instructions
1. Prepare the Crust:
Heat olive oil in a large pot over medium heat. Add onion and sauté until translucent, about 3-4 minutes.
Add garlic, red bell pepper, and spices (curry powder, cumin, paprika, turmeric, and chili flakes). Stir well and cook for another 2 minutes.
Pour in the coconut milk and vegetable broth. Bring to a gentle simmer.
Add the chickpeas and stir to combine. Let the curry simmer for 15-20 minutes, stirring occasionally.
Stir in lime juice and season with salt and pepper to taste.
Garnish with fresh cilantro before serving. Serve hot with rice or bread.
Notes
You can customize the seasonings to taste.
How to Prepare This Dish
Steps and time-saving tips
Start by heating a large pot over medium heat and adding a drizzle of coconut oil. Once the oil shimmers, toss in diced onions and minced garlic, stirring until they turn golden and fragrant. Next, add chopped bell peppers and grated ginger, cooking them just until they soften. Sprinkle in your curry powder, cumin, and a pinch of turmeric, stirring quickly to toast the spices without burning them. Pour in a can of coconut milk and vegetable broth, then bring the mixture to a gentle simmer. Now, fold in drained chickpeas and diced tomatoes, letting everything cook together for about 15 minutes so the flavors meld. If you’re short on time, use pre-minced garlic and ginger from the jar—it’s a game-changer. Finally, stir in a handful of fresh cilantro and a squeeze of lime juice just before serving. Pair your Brazilian Coconut Chickpea Curry with steamed rice or warm naan for a complete meal that’s ready in under 30 minutes.
Mistakes I’ve made and learned from
I once rushed the onion-and-garlic step, thinking a quick sauté would suffice, but undercooking them left my Brazilian Coconut Chickpea Curry tasting bland. Now, I take an extra minute to let them caramelize deeply—it makes all the difference. Another blunder? Overcrowding the pot with chickpeas, which diluted the creamy coconut sauce. I’ve since learned to stick to the right ratios, like those in my perfect curry ratios guide. And if you’ve ever ended up with a too-thin curry, don’t panic—simmer it uncovered for a few more minutes, or try the tricks from my thickening sauces post. Trust me, even small tweaks can turn a good dish into a great one.
Brazilian Coconut Chickpea Curry carries the vibrant spirit of Bahia, a region where African, Indigenous, and Portuguese flavors collide. Locals often serve it during festivals, where the creamy coconut milk and earthy chickpeas reflect the area’s tropical abundance. Yet, families tweak the recipe—some add dendê oil for a deeper color, while others toss in extra veggies like okra or sweet potatoes. My aunt swears by a splash of lime juice at the end, a trick she learned from a friend in Salvador.
Across the globe, cooks reinvent Brazilian Coconut Chickpea Curry to suit local tastes. In India, they might swap coconut milk for yogurt and amp up the spices. Caribbean versions sometimes include callaloo or Scotch bonnet peppers for heat. Even in my kitchen, I love folding in spinach for extra greens. No matter the twist, the dish always feels like a hug—warm, nourishing, and deeply comforting.
ays-cooking">How it fits in today’s cooking
Today, Brazilian Coconut Chickpea Curry shines as a weeknight hero. Busy cooks adore its one-pot simplicity, and plant-based eaters celebrate its protein-packed goodness. During cooler months, it becomes a cozy staple, but its bright flavors also suit summer dinners when paired with a crisp salad. Many modern kitchens even prep it ahead, storing portions for easy lunches—just like these meal-prep ideas suggest.
It’s also a star at gatherings. Friends rave about it at potlucks, and some families serve it alongside holiday favorites for a festive twist. Whether you simmer it low and slow or crank up the spice level, Brazilian Coconut Chickpea Curry adapts effortlessly to today’s rhythms. That’s the beauty of it—tradition and flexibility in every bite.
Taste and Texture
What makes it delicious
Brazilian Coconut Chickpea Curry wraps your taste buds in a rich, velvety embrace. The creamy coconut milk melds with earthy chickpeas, while warm spices like cumin and coriander add a fragrant depth. Each bite delivers a subtle sweetness, balanced by a gentle kick from fresh ginger and garlic. Meanwhile, tender chickpeas offer a satisfying chew, and a squeeze of lime brightens the dish with a citrusy zing. Brazilian Coconut Chickpea Curry isn’t just hearty—it’s a vibrant dance of flavors that lingers deliciously on the palate.
r">Boosting the flavor
Elevate your Brazilian Coconut Chickpea Curry with a handful of toasted cashews for crunch or a swirl of tangy yogurt for contrast. For extra heat, stir in a spoonful of harissa or smoked paprika. Fresh herbs like cilantro or Thai basil add a pop of color and freshness. If you love bold flavors, try pairing it with a side of garlic naan or a cooling mango salsa. Small tweaks can transform this dish into a showstopper without overpowering its comforting essence.
Tips for Success
Best practices for results
Always toast your spices before adding them to the Brazilian Coconut Chickpea Curry—this unlocks their full flavor. Meanwhile, use full-fat coconut milk for the creamiest texture, and simmer the curry uncovered for the last 5 minutes to thicken it perfectly. For the best balance, taste and adjust the salt and lime juice just before serving. Finally, let the curry rest for 5 minutes after cooking so the flavors meld beautifully.
>Mistakes to avoid
Overcooking the chickpeas can make them mushy, so check their tenderness early if using canned. Additionally, skipping the step to bloom the spices in oil weakens the depth of your Brazilian Coconut Chickpea Curry—instead, gently fry them for 30 seconds. If your curry tastes too thin, avoid adding flour; instead, try reducing it longer or blending a portion as shown in our guide to thickening sauces. Lastly, don’t forget to balance the heat—if it’s too spicy, stir in a touch of coconut cream or yogurt, as explained in our tips for fixing flavors.
Serving and Pairing Suggestions
How to serve this dish
Bring vibrant energy to your table by serving Brazilian Coconut Chickpea Curry in shallow bowls to showcase its rich, creamy texture. For a pop of color, top it with fresh cilantro, lime wedges, or thinly sliced red chili peppers. Meanwhile, if you’re hosting a casual gathering, consider setting up a build-your-own bowl station with toppings like toasted coconut flakes or diced avocado. This dish shines at cozy weeknight dinners, but its tropical flair also makes it a standout for festive occasions like summer cookouts or plant-based holiday spreads.
What goes well with it
Pair Brazilian Coconut Chickpea Curry with fluffy jasmine rice or warm naan bread to soak up every bit of the fragrant coconut sauce. For a refreshing contrast, serve it alongside a crisp mango avocado salad, which balances the curry’s warmth with bright, tangy flavors. If you love bold drinks, try a chilled glass of hibiscus iced tea or a citrusy Brazilian caipirinha—both enhance the dish’s tropical notes. For more pairing inspiration, check out our guide to vegan side dishes or our favorite summer refreshers to round out your meal.
Yes, Brazilian Coconut Chickpea Curry is naturally vegan, as it relies on coconut milk, chickpeas, and vegetables for its rich flavor. The dish avoids animal products while delivering a creamy, satisfying texture. It’s a great option for plant-based diets.
What spices are used in Brazilian Coconut Chickpea Curry?
Brazilian Coconut Chickpea Curry typically features warm spices like cumin, coriander, turmeric, and paprika. Some versions include a hint of chili for heat or ginger for extra depth. These spices blend perfectly with the coconut milk for a fragrant, flavorful dish.
ank-math-faq-item">
Can I make Brazilian Coconut Chickpea Curry in a slow cooker?
Absolutely! Brazilian Coconut Chickpea Curry works well in a slow cooker—just combine all ingredients and cook on low for 4-6 hours. The slow cooking enhances the flavors, making the chickpeas tender and the curry even more aromatic.
What can I serve with Brazilian Coconut Chickpea Curry?
Brazilian Coconut Chickpea Curry pairs beautifully with steamed rice, quinoa, or warm naan bread. For a fresh contrast, try a side of mango salsa or a simple green salad. The creamy curry balances well with these accompaniments.
Best Crispy Baked Chicken Tenders Recipe
Introduction
There’s something undeniably comforting about biting into a perfectly crispy, golden-brown chicken tender—especially when you know it’s baked, not fried. Whether you’re craving a nostalgic childhood favorite or need a crowd-pleasing dinner that’s both easy and wholesome, these Crispy Baked Chicken Tenders deliver every time. Plus, they’re a healthier twist on a classic, so you can enjoy guilt-free crunch without sacrificing flavor. Let’s dive into why this recipe deserves a permanent spot in your weekly rotation.
Crispy Baked Chicken Tenders are a game-changer for busy home cooks and health-conscious eaters alike. Unlike traditional fried versions, these tenders achieve their irresistible crunch through a clever combination of seasoned breadcrumbs and a quick bake in the oven. The result? Tender, juicy chicken with a satisfying crisp that rivals any drive-thru order. What makes this dish stand out is its versatility. Serve them as a quick weeknight dinner with a side of roasted veggies, pack them for lunch, or even turn them into a fun appetizer for game day. For more family-friendly meal ideas, check out our Easy Weeknight Dinners collection.
This recipe also aligns perfectly with our blog’s mission: making wholesome, delicious food accessible to everyone. We prioritize simple ingredients and straightforward techniques, so even beginner cooks can succeed. For example, the breading process might remind you of our Crispy Oven-Fried Chicken, but with a lighter, quicker approach. Whether you’re meal-prepping or cooking for picky eaters, these tenders check all the boxes—flavor, texture, and ease. Best of all, they’re customizable. Swap the seasonings, try gluten-free breadcrumbs, or add a spicy kick with cayenne. The possibilities are endless, and that’s what keeps this recipe fresh and exciting.
Why I Love This Recipe
I’ll admit it: Crispy Baked Chicken Tenders hold a special place in my heart. They were the first dish I mastered as a new cook, and they’ve saved me on countless hectic evenings when my family needed something quick and satisfying. What I love most is how they bring everyone to the table—kids, adults, even skeptical teens—without fail. There’s a quiet pride in watching someone take that first bite and immediately ask for seconds. Plus, knowing I’m serving a healthier version of a comfort food classic makes the victory even sweeter. This recipe isn’t just food; it’s a little triumph in every crispy, golden bite.
Health and Nutrition
Why it’s good for your body
Crispy Baked Chicken Tenders deliver a satisfying crunch without the excess oil of deep-fried versions. Because they bake instead of fry, they retain lean protein while cutting unnecessary fats. Additionally, chicken provides essential amino acids that support muscle repair and growth. Whether you use whole wheat breadcrumbs or almond flour, you boost fiber and nutrients compared to traditional recipes.
Moreover, Crispy Baked Chicken Tenders pack a punch of vitamins like B6 and B12, which help maintain energy levels. They also contain minerals such as iron and zinc, crucial for immune function. If you pair them with a side of roasted veggies or a fresh salad, you create a well-rounded meal. Unlike processed fast-food options, homemade versions let you control sodium and additives.
Finally, Crispy Baked Chicken Tenders work well for active lifestyles. They offer a quick protein fix after workouts or a balanced dinner option for busy families. By skipping heavy batters, you keep calories in check without sacrificing flavor. In short, they prove that healthier choices can still be delicious.
How it fits in a healthy lifestyle
Crispy Baked Chicken Tenders fit seamlessly into balanced eating habits. For gluten-free diets, simply swap regular breadcrumbs for alternatives like crushed rice cereal or gluten-free oats. High-protein meal plans benefit from their lean chicken base, especially when paired with quinoa or a smart meal prep strategy.
Heart-healthy eaters will appreciate the lower saturated fat content compared to fried tenders. Baking preserves nutrients while keeping the dish light and flavorful. If you’re watching portions, serve them with easy portion control tricks to stay on track. Even picky eaters love them, making family dinners stress-free and nutritious.
Busy weeknights call for simple solutions, and Crispy Baked Chicken Tenders deliver. They reheat well, so you can prep ahead for lunches or quick dinners. With wholesome ingredients and minimal processing, they align with clean eating goals without compromising taste.
Juicy and crispy chicken tenders baked to perfection with a golden crust.
Ingredients
Scale
For the Crust:
1 lb chicken tenders
1 cup panko breadcrumbs
1/2 cup grated parmesan cheese
1 tsp garlic powder
1 tsp paprika
1/2 tsp salt
1/2 tsp black pepper
2 eggs
1/4 cup all-purpose flour
Instructions
1. Prepare the Crust:
Preheat oven to 400°F (200°C) and line a baking sheet with parchment paper.
In a shallow bowl, mix panko, parmesan, garlic powder, paprika, salt, and pepper. In another bowl, beat eggs. Place flour in a third bowl.
Dredge each chicken tender in flour, dip in egg, then coat with breadcrumb mixture. Place on baking sheet.
Bake for 20-25 minutes until golden and internal temperature reaches 165°F (74°C).
Notes
You can customize the seasonings to taste.
s-dish">How to Prepare This Dish
Steps and time-saving tips
First, preheat your oven to 400°F and line a baking sheet with parchment paper for easy cleanup. While the oven heats, whisk together flour, paprika, garlic powder, and a pinch of salt in a shallow bowl. In another bowl, beat two eggs until smooth, then pour panko breadcrumbs into a third bowl. Now, coat each chicken tender in the flour mixture, shaking off excess, then dip it into the eggs, and finally press it firmly into the panko until fully covered. Arrange the tenders on the baking sheet with space between them so they crisp evenly. For extra crunch, lightly spray them with olive oil before baking. Slide the tray into the oven and bake for 15 minutes, then flip each tender and bake another 10 minutes until golden. If you’re short on time, skip the flour step and use seasoned panko—it adds flavor and cuts prep in half. Let the Crispy Baked Chicken Tenders rest 5 minutes before serving; this keeps the coating intact. Pair them with honey mustard or ranch for dipping, and they’ll disappear fast.
Mistakes I’ve made and learned from
I used to overcrowd the baking sheet, thinking I could fit all my Crispy Baked Chicken Tenders at once. Big mistake! They steamed instead of crisping, turning soggy. Now I bake in batches or use two trays—patience pays off. Another blunder? Skipping the parchment paper. Scraping stuck-on crumbs taught me the hard way. For more kitchen hacks, check out my guide on perfect baking temperatures. Also, I once substituted regular breadcrumbs for panko, and the texture suffered. Panko’s lightness is key, as I learned while testing tips from my crust secrets post. Now I always keep a bag in my pantry.
n-and-variations">Cultural Connection and Variations
Where this recipe comes from
Crispy Baked Chicken Tenders might feel like a modern weeknight staple, but their roots stretch back to Southern comfort food traditions. Originally, fried chicken strips gained popularity in the U.S. as a quicker, kid-friendly twist on classic fried chicken. However, the baked version we love today emerged as families sought healthier alternatives without sacrificing crunch. In some regions, like the Midwest, cooks add a dash of cayenne for heat, while Southern versions often include buttermilk for extra tenderness.
Around the world, similar dishes take on unique flavors. In Japan, karaage—bite-sized marinated chicken—delivers a crispier texture thanks to potato starch. Meanwhile, in the UK, “goujons” often feature breadcrumbs and herbs for a pub-style twist. Even in my own family, Crispy Baked Chicken Tenders became a Sunday dinner favorite, served with honey mustard or alongside a fresh summer salad. Whether you dress them up or keep them simple, these tenders carry a universal appeal.
How it fits in today’s cooking
Today, Crispy Baked Chicken Tenders hold their own as a versatile crowd-pleaser. Busy parents love them for quick dinners, while meal preppers bake batches for protein-packed lunches. Thanks to air fryers and gluten-free breadcrumbs, modern cooks easily adapt the recipe to fit dietary needs. They’ve also become a game-day staple, replacing wings for a lighter yet equally satisfying crunch.
Seasonally, these tende
rs shine year-round. In summer, pair them with grilled corn or a cool refreshing drink. Come winter, they’re cozy alongside mashed potatoes. No matter how you serve them, Crispy Baked Chicken Tenders prove that comfort food can be both timeless and adaptable.
Taste and Texture
What makes it delicious
Crispy Baked Chicken Tenders deliver a satisfying crunch with every bite, thanks to their golden, oven-baked coating. Inside, the chicken stays juicy and tender, creating a perfect contrast with the crisp exterior. Aromatic spices like garlic powder and paprika add a warm, savory depth, while a hint of buttermilk keeps the meat irresistibly moist. The first whiff from the oven fills the kitchen with a mouthwatering, toasty aroma that promises comfort. Whether dipped in sauce or enjoyed plain, Crispy Baked Chicken Tenders offer a crowd-pleasing balance of texture and flavor.
Boosting the flavor
Elevate your Crispy Baked Chicken Tenders by experimenting with bold seasonings or zesty sauces. For a smoky twist, try adding chipotle powder to the breading mix. Alternatively, drizzle them with a tangy honey mustard sauce for a sweet-and-savory kick. If you love heat, serve them with a side of spicy ranch dressing to amplify the flavor. You can also swap panko breadcrumbs for crushed cornflakes to double the crunch. Small tweaks make a big difference, so don’t hesitate to get creative!
Pat the chicken dry before coating to help the breading stick better. Meanwhile, preheat the oven fully so your Crispy Baked Chicken Tenders cook evenly from the start. For extra crunch, lightly spray the tenders with oil before baking. Additionally, use a wire rack on the baking sheet to promote airflow and prevent sogginess. Finally, let them rest for a few minutes after baking to lock in juiciness.
Mistakes to avoid
Overcrowding the baking sheet traps steam, which makes the coating soft instead of crisp. Instead, space the tenders apart and bake in batches if needed. Another common error is skipping the dredging steps—always dip in flour, then egg, then breadcrumbs for the crispiest results. For more on perfecting breaded dishes, check out our guide on crispy coating secrets. Also, avoid using cold chicken straight from the fridge, as it cooks unevenly. For tips on prepping proteins, see our chicken prep 101 tutorial.
g-suggestions">Serving and Pairing Suggestions
How to serve this dish
Serve Crispy Baked Chicken Tenders on a rustic wooden board for a casual family dinner or arrange them neatly on a platter with fresh lemon wedges for a party appetizer. For a fun twist, stack them vertically in a mason jar with dipping sauce at the base. Meanwhile, if you’re hosting a game-day gathering, pair them with colorful toothpicks for easy grabbing. Additionally, garnish with chopped parsley or a sprinkle of paprika to enhance their golden crispiness. Whether it’s a weeknight meal or a festive occasion, these tenders always steal the spotlight.
What goes well with it
Elevate your Crispy Baked Chicken Tenders with a side of creamy garlic mashed potatoes or a crisp garden salad for a balanced meal. For dipping, try our tangy honey mustard sauce or a spicy sriracha mayo to add extra flavor. Moreover, a chilled glass of lemonade or an ice-cold beer perfectly cuts through the richness. If you’re craving something heartier, serve them alongside our cheesy garlic bread for a crowd-pleasing combo. Every bite becomes even more satisfying with these pairings.
math-faq-block">
How do you keep baked chicken tenders crispy?
To keep Crispy Baked Chicken Tenders crispy, use a wire rack on your baking sheet to allow air circulation. Lightly coating them with oil or cooking spray and baking at a high temperature (around 425°F) also helps achieve that perfect crunch. Avoid overcrowding the pan, as steam can make them soggy.
What is the best breading for crispy baked chicken tenders?
The best breading for Crispy Baked Chicken Tenders combines panko breadcrumbs with grated Parmesan for extra crunch. For extra flavor, mix in spices like paprika, garlic powder, or Italian seasoning. A light egg wash or buttermilk dip helps the breading stick better.
Can you make crispy baked chicken tenders without flour?
Yes! You can make Crispy Baked Chicken Tenders without flour by using alternatives like almond flour, crushed pork rinds, or gluten-free breadcrumbs. These options still create a delicious crust while keeping the recipe low-carb or gluten-free.
ank-math-faq-item">
How long should you bake chicken tenders at 400°F?
Bake Crispy Baked Chicken Tenders at 400°F for 15–20 minutes, flipping halfway through. The exact time depends on thickness, but they’re done when golden brown and reach an internal temperature of 165°F. For extra crispiness, broil for 1–2 minutes at the end.
Easy Roasted Pumpkin with Yogurt Sauce & Pine Nuts
Introduction
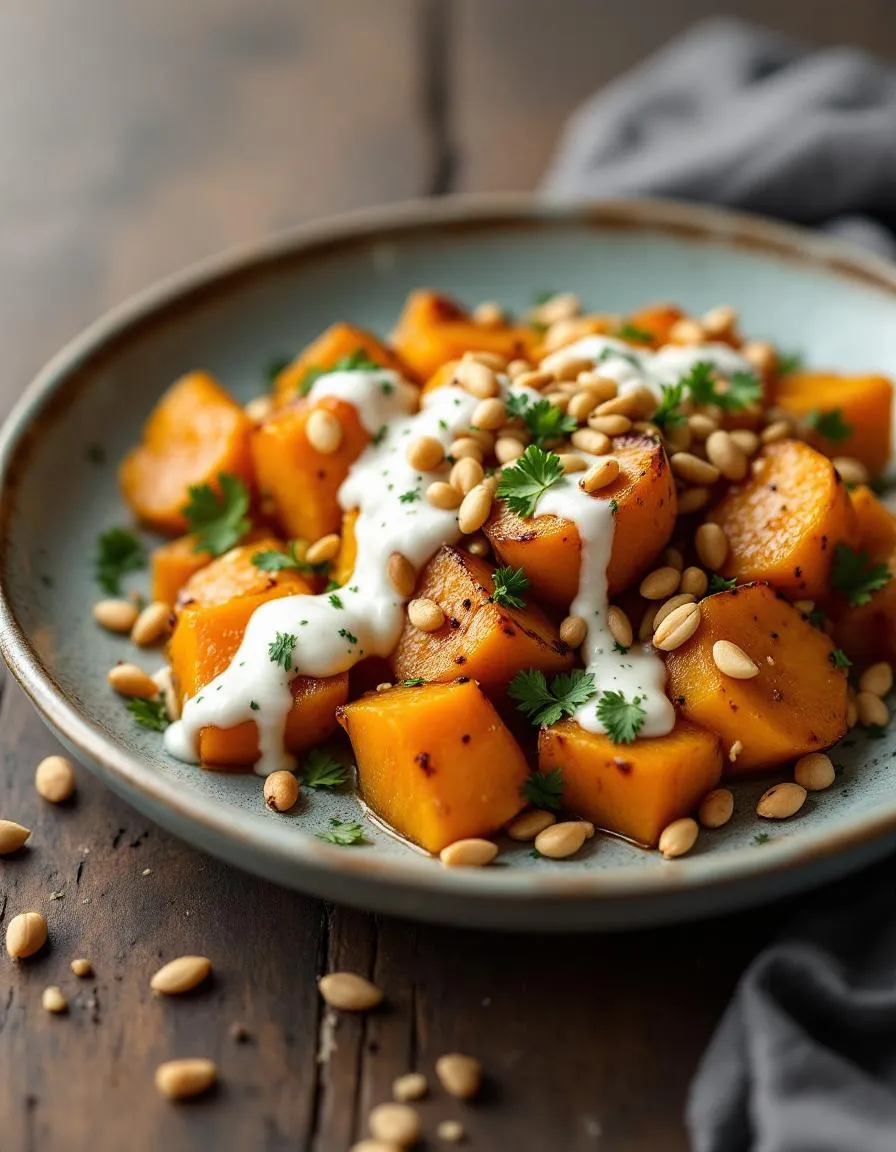
There’s something magical about the way roasted pumpkin caramelizes in the oven, its natural sweetness deepening into a rich, velvety flavor. Now, imagine pairing it with a tangy yogurt sauce and crunchy pine nuts—each bite becomes a harmony of textures and tastes. Whether you’re craving a cozy fall side dish or a show-stopping vegetarian centerpiece, this Roasted Pumpkin with Yogurt Sauce and Pine Nuts delivers. Plus, it’s as easy to make as it is impressive, proving that simple ingredients can create extraordinary meals.
Roasted Pumpkin with Yogurt Sauce and Pine Nuts is a dish that celebrates seasonal produce while offering a balance of earthy, creamy, and nutty flavors. The pumpkin roasts until tender and slightly caramelized, while the yogurt sauce—infused with garlic, lemon, and herbs—adds a bright contrast. Toasted pine nuts provide the perfect crunch, elevating every forkful. This recipe matters because it transforms humble ingredients into something elegant, making it ideal for weeknight dinners or holiday gatherings. It also fits perfectly with our blog’s mission to share approachable yet sophisticated recipes, like our Creamy Butternut Squash Soup or Garlic Herb Roasted Vegetables, that anyone can master.
Why I Love This Recipe
Roasted Pumpkin with Yogurt Sauce and Pine Nuts holds a special place in my heart because it reminds me of family gatherings during autumn. My grandmother used to roast pumpkins with just a drizzle of olive oil, and the smell would fill the entire house. When I added the yogurt sauce and pine nuts years later, it became my own twist on her classic. Now, it’s a dish I make every fall, not just for the flavors but for the warmth and nostalgia it brings. Every time I serve it, I’m sharing a piece of my story—and that’s what cooking is all about.
Health and Nutrition
Why it’s good for your body
Roasted Pumpkin with Yogurt Sauce and Pine Nuts packs a powerful nutritional punch. First, pumpkin delivers a hefty dose of vitamin A, which supports vision and immune health. Additionally, the yogurt sauce provides probiotics that promote gut health while adding a creamy texture. Meanwhile, pine nuts contribute healthy fats and magnesium, which help regulate energy levels.
Moreover, this dish balances macronutrients effortlessly. The roasted pumpkin offers complex carbs for sustained energy, while the yogurt sauce adds protein to keep you full longer. Furthermore, the pine nuts provide heart-healthy monounsaturated fats. Together, these ingredients create a meal that stabilizes blood sugar and satisfies cravings.
Roasted Pumpkin with Yogurt Sauce and Pine Nuts also boasts antioxidants. Pumpkin contains beta-carotene, which fights inflammation, and yogurt offers calcium for strong bones. Finally, pine nuts bring zinc, which supports immune function. Whether you seek a nutrient-dense side or a light main dish, this recipe delivers flavor and wellness in every bite.
How it fits in a healthy lifestyle
Roasted Pumpkin with Yogurt Sauce and Pine Nuts fits seamlessly into a balanced diet. It works well as a gluten-free option or a plant-based meal that doesn’t skimp on protein. For those focusing on heart health, the dish includes unsaturated fats from pine nuts and minimal added sugars.
You can easily pair this recipe with other nutrient-rich dishes, like our Mediterranean Quinoa Bowl, for a complete meal. It also aligns with meal prep strategies, as you can roast the pumpkin ahead and assemble it quickly. If you’re exploring more gut-friendly recipes, try our Fermented Vegetable Guide to complement the probiotics in the yogurt sauce.
Whether you’re cooking for a family or prepping lunches, Roasted Pumpkin with Yogurt Sauce and Pine Nuts adapts to your routine. Its wholesome ingredients support energy, digestion, and long-term wellness without sacrificing taste.
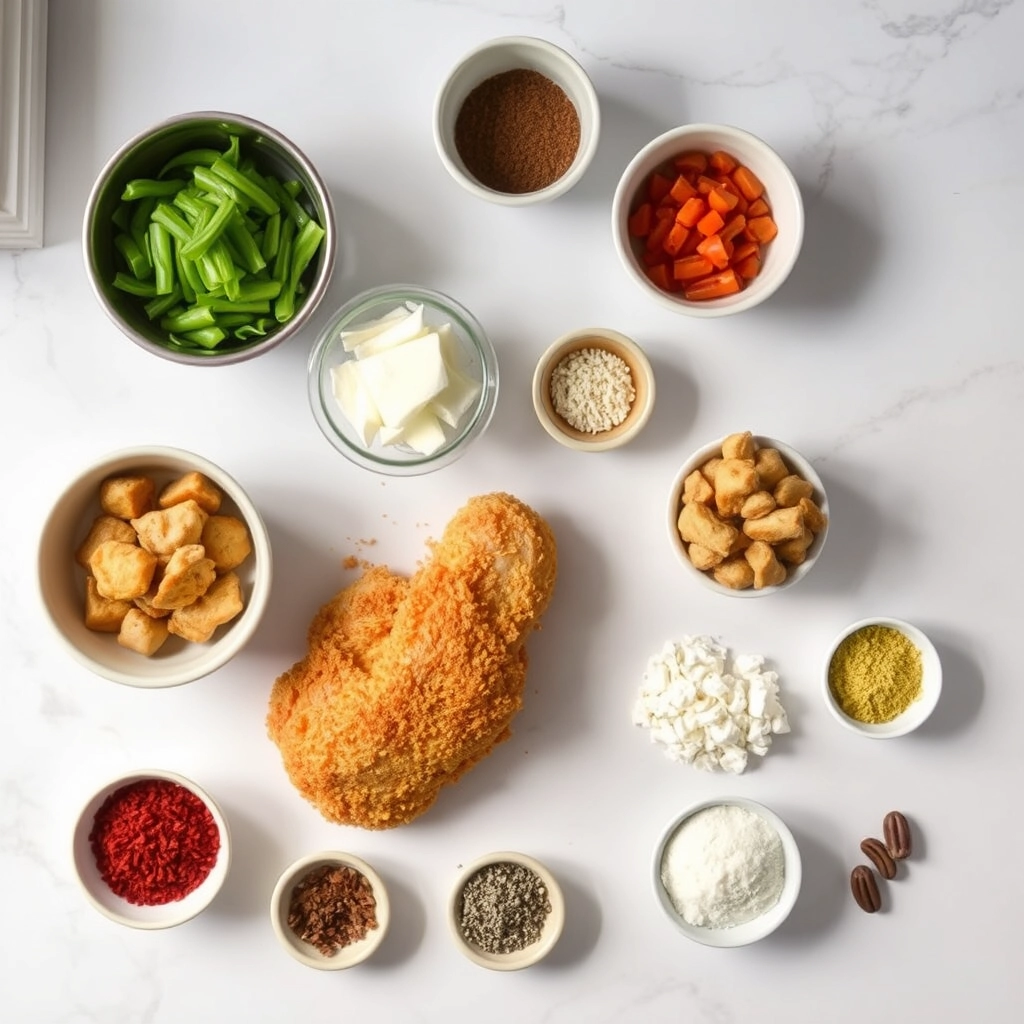
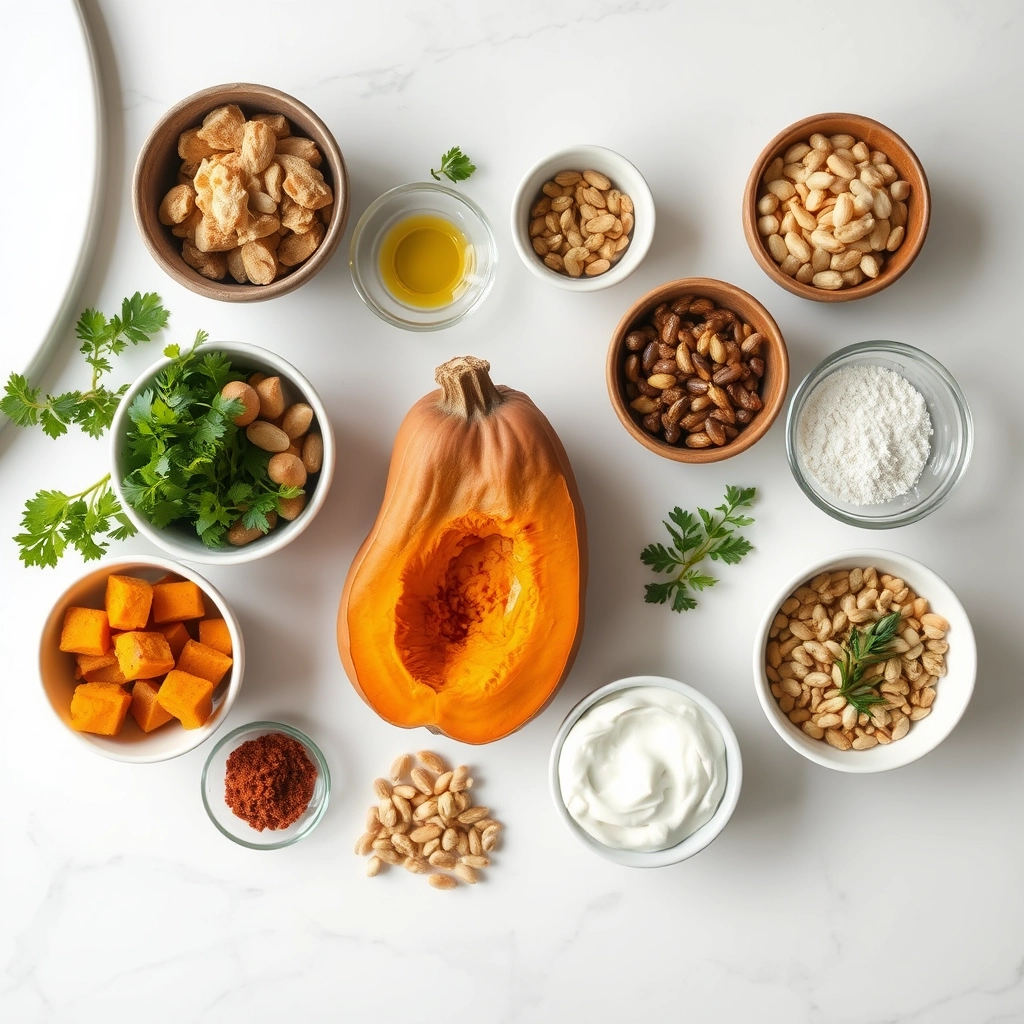
A delicious and healthy dish featuring roasted pumpkin topped with creamy yogurt sauce and crunchy pine nuts.
Ingredients
Scale
For the Crust:
1 small pumpkin (about 2 lbs), peeled and cubed
2 tbsp olive oil
1 tsp salt
1/2 tsp black pepper
1 tsp ground cumin
1 cup plain Greek yogurt
1 clove garlic, minced
1 tbsp lemon juice
1/4 cup pine nuts, toasted
1 tbsp fresh parsley, chopped
Instructions
1. Prepare the Crust:
Preheat oven to 400°F (200°C).
Toss pumpkin cubes with olive oil, salt, pepper, and cumin. Spread on a baking sheet in a single layer.
Roast for 25-30 minutes, flipping halfway, until pumpkin is tender and slightly caramelized.
While pumpkin roasts, mix yogurt, garlic, and lemon juice in a small bowl. Refrigerate until ready to serve.
Toast pine nuts in a dry skillet over medium heat for 2-3 minutes until golden, stirring frequently.
Arrange roasted pumpkin on a serving platter, drizzle with yogurt sauce, and sprinkle with toasted pine nuts and parsley.
Notes
You can customize the seasonings to taste.
How to Prepare This Dish
Steps and time-saving tips
Start by preheating your oven to 400°F to ensure it’s hot enough for roasting the pumpkin evenly. While the oven heats, peel and cube the pumpkin into bite-sized pieces—uniform sizes help them cook at the same rate. Toss the pumpkin with olive oil, salt, and your favorite spices like cinnamon or cumin for extra warmth. Spread the pieces on a parchment-lined baking sheet in a single layer to avoid steaming. Roast for 25-30 minutes, flipping halfway, until the edges caramelize and the center turns tender.
Meanwhile, whisk togeth
er the yogurt sauce. Combine Greek yogurt, minced garlic, lemon juice, and a pinch of salt in a bowl. For a smoother consistency, let it sit for 10 minutes so the flavors meld. Toast the pine nuts in a dry skillet over medium heat for 2-3 minutes, shaking the pan often to prevent burning. Once the pumpkin finishes roasting, let it cool slightly before layering it on a platter. Drizzle the yogurt sauce generously over the top, then sprinkle with toasted pine nuts and fresh herbs like mint or parsley for a bright finish.
To save time, prep the yogurt sauce and toast the pine nuts while the pumpkin roasts. If you’re doubling the recipe, use two baking sheets and rotate them in the oven for even browning. Leftovers keep well refrigerated for up to 3 days—just reheat the pumpkin gently and add fresh pine nuts for crunch.
Mistakes I’ve made and learned from
I once rushed the pumpkin cubing and ended up with uneven pieces—some turned mushy while others stayed undercooked. Now I take an extra minute to cut them uniformly, which makes all the difference. Another blunder? Over-toasting the pine nuts. They go from golden to bitter in seconds, so I stay close to the stove and stir constantly. If you’re new to working with pumpkins, my guide on choosing the right pumpkin helps avoid stringy or bland results. And if your yogurt sauce feels too thick, a splash of water or milk fixes it instantly—learned that trick from my yogurt sauce hacks post.
Roasted Pumpkin with Yogurt Sauce and Pine Nuts whispers stories of warmth and tradition, especially in Mediterranean and Middle Eastern kitchens. Many trace its roots to Lebanon and Turkey, where cooks often pair sweet, caramelized pumpkin with tangy yogurt and crunchy pine nuts for a dish that balances textures and flavors perfectly. Families there might serve it as a mezze or a side during festive gatherings, celebrating the harvest season.
Meanwhile, in Greece, you’ll find a similar version with a sprinkle of cinnamon or a drizzle of honey, turning it into a cozy autumn staple. Some Italian kitchens roast the pumpkin with rosemary and garlic, swapping yogurt for ricotta. Even in my own home, we tweak the recipe by adding a pinch of smoked paprika for depth. No matter where you go, Roasted Pumpkin with Yogurt Sauce and Pine Nuts adapts beautifully, reflecting local tastes and pantry staples.
ays-cooking">How it fits in today’s cooking
Today, this dish shines as a versatile star, whether you’re hosting a fall dinner party or need a quick weeknight side. Modern cooks love its simplicity and nutrient-packed ingredients, often pairing it with dishes like herb-roasted chicken for a complete meal. It’s also a favorite for meatless Mondays, proving that plant-based eating can feel indulgent.
Seasonal food bloggers and home chefs alike embrace Roasted Pumpkin with Yogurt Sauce and Pine Nuts for its Instagram-worthy colors and crowd-pleasing flavors. Some even repurpose leftovers into grain bowls or layer them onto autumn salads. Whether you stick to tradition or experiment with spices, this recipe bridges old-world charm and modern convenience effortlessly.
Taste and Texture
What makes it delicious
Roasted Pumpkin with Yogurt Sauce and Pine Nuts delivers a symphony of flavors and textures in every bite. The pumpkin caramelizes into a buttery, slightly sweet base with earthy depth, while the yogurt sauce adds a cool, tangy contrast that brightens each forkful. Toasted pine nuts bring a satisfying crunch and nutty richness, tying everything together. Meanwhile, warm spices like cinnamon or cumin infuse the dish with a fragrant aroma that makes it irresistible. Whether you savor it warm or at room temperature, Roasted Pumpkin with Yogurt Sauce and Pine Nuts balances creamy, crisp, and tender elements for a truly memorable meal.
r">Boosting the flavor
Elevate your Roasted Pumpkin with Yogurt Sauce and Pine Nuts by experimenting with bold flavors. For extra warmth, drizzle with honey-glazed carrots for a touch of sweetness or sprinkle smoked paprika for a smoky kick. If you love herbs, fold fresh thyme or rosemary into the yogurt sauce. Crumbled feta or toasted walnuts also add salty or earthy notes. For more inspiration, try pairing it with a garlic herb dip to amplify the savory layers. Small tweaks can transform this dish into a showstopper!
Tips for Success
Best practices for results
First, always cut your pumpkin into even-sized pieces so they roast uniformly. Meanwhile, preheat your oven thoroughly to ensure crispy edges and tender centers. For the yogurt sauce, use full-fat yogurt because it blends smoother and adds richness. Additionally, toast the pine nuts lightly in a dry pan to deepen their flavor before sprinkling them over the Roasted Pumpkin with Yogurt Sauce and Pine Nuts. Finally, drizzle the yogurt sauce just before serving to keep the dish fresh and vibrant.
>Mistakes to avoid
Avoid overcrowding the baking sheet, as this steams the pumpkin instead of roasting it. Instead, spread the pieces in a single layer with space between them. Also, don’t skip salting the pumpkin before roasting—it enhances the natural sweetness. If your yogurt sauce seems too thick, simply whisk in a teaspoon of water or lemon juice for a smoother consistency. For more roasting tips, check out our guide on perfect roasted vegetables. And if you’re new to working with yogurt sauces, our yogurt sauce variations will help you customize the flavor.
Serving and Pairing Suggestions
How to serve this dish
Roasted Pumpkin with Yogurt Sauce and Pine Nuts shines as a vibrant centerpiece for any table. For a stunning presentation, arrange the pumpkin slices on a rustic platter and drizzle the creamy yogurt sauce generously over the top. Scatter toasted pine nuts and fresh herbs like mint or parsley for a pop of color and texture. This dish works beautifully for holiday gatherings, but it also makes an elegant addition to a cozy weeknight dinner. If you want to impress guests, serve it alongside warm flatbread or crusty sourdough for scooping up every last bite.
What goes well with it
Pair Roasted Pumpkin with Yogurt Sauce and Pine Nuts with a crisp white wine like Sauvignon Blanc to balance its rich, earthy flavors. Alternatively, a spiced chai latte or warm apple cider enhances its autumnal vibe. For a complete meal, try serving it with a refreshing quinoa salad or a hearty lentil soup. The quinoa adds lightness, while the soup brings comforting warmth, making both pairings ideal for cooler weather.
What type of pumpkin works best for Roasted Pumpkin with Yogurt Sauce and Pine Nuts?
For Roasted Pumpkin with Yogurt Sauce and Pine Nuts, sugar pumpkins (also called pie pumpkins) are ideal because they have a sweeter, less fibrous flesh. Avoid large carving pumpkins, as they tend to be watery and bland. Roasting brings out the natural sweetness of the pumpkin, which pairs perfectly with the tangy yogurt sauce and crunchy pine nuts.
Can I substitute Greek yogurt for the sauce in Roasted Pumpkin with Yogurt Sauce and Pine Nuts?
Yes, Greek yogurt works wonderfully as a substitute for regular yogurt in this dish. Its thicker consistency and tangy flavor complement the roasted pumpkin and pine nuts beautifully. Just thin it slightly with lemon juice or water if needed to achieve a drizzling consistency.
ank-math-faq-item">
How do I prevent pine nuts from burning when making Roasted Pumpkin with Yogurt Sauce and Pine Nuts?
Toast pine nuts separately in a dry skillet over low heat, stirring constantly, for just 1-2 minutes until golden. Add them as a garnish after roasting the pumpkin to prevent burning. This ensures they retain their crunch and nutty flavor in the final dish.
What herbs pair well with Roasted Pumpkin with Yogurt Sauce and Pine Nuts?
Fresh thyme, rosemary, or sage work beautifully with Roasted Pumpkin with Yogurt Sauce and Pine Nuts. Sprinkle them over the pumpkin before roasting or mix into the yogurt sauce. These earthy herbs balance the sweetness of the pumpkin and add depth to the dish.