Best Creamy Peanut Butter Frosting Recipe

best-creamy-peanut-butter-frosting

Introduction

There’s something magical about the rich, velvety swirl of Creamy Peanut Butter Frosting atop a freshly baked cake or cupcake. Whether you’re a lifelong peanut butter lover or just craving a decadent treat, this frosting transforms ordinary desserts into unforgettable indulgences. It’s the kind of recipe that brings back childhood memories while satisfying grown-up cravings—simple to make yet impossibly delicious. If you’ve ever wondered how to achieve that perfect balance of sweetness and nutty depth, you’re in the right place.

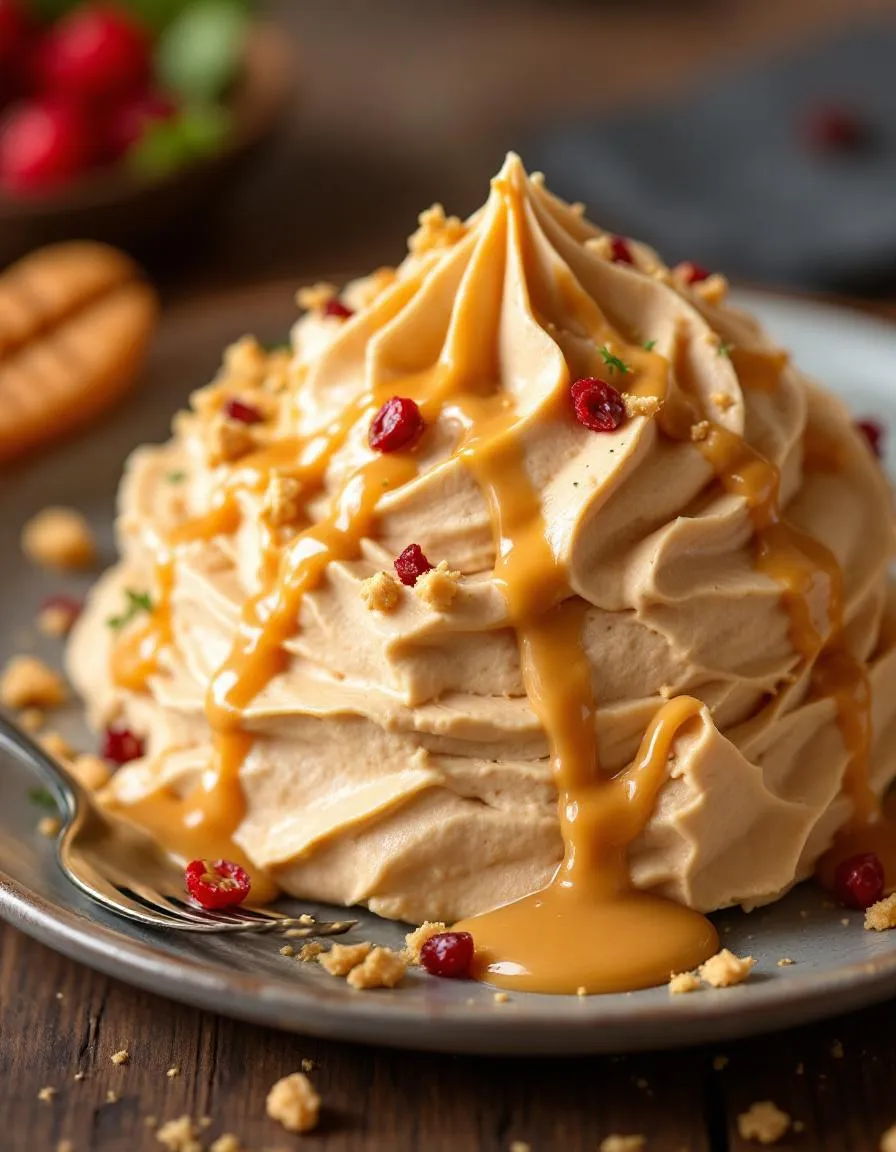
Creamy Peanut Butter Frosting is a luscious, smooth blend of peanut butter, butter, powdered sugar, and a touch of milk or cream. Unlike store-bought versions, homemade frosting lets you control the texture and flavor, ensuring it’s neither too stiff nor overly sweet. This versatility makes it ideal for piping onto cupcakes, spreading over layer cakes, or even dolloping onto brownies. For peanut butter enthusiasts, it’s a game-changer—elevating classics like chocolate cake or our banana bread into next-level delights. Plus, it pairs beautifully with so many flavors, from tangy cream cheese to rich dark chocolate.

What sets this frosting apart is its universal appeal. Kids adore it for its familiar, comforting taste, while adults appreciate its sophistication when paired with unexpected ingredients like sea salt or espresso. It’s also incredibly forgiving—if you prefer a thicker consistency for piping intricate designs, simply adjust the liquid. On the other hand, if you’re after a drizzle-worthy glaze for our cinnamon rolls, a splash of extra cream does the trick. No matter how you use it, Creamy Peanut Butter Frosting guarantees smiles and requests for seconds.

Why I Love This Recipe

My love for Creamy Peanut Butter Frosting started in my grandmother’s kitchen, where she’d let me lick the spoon after she whipped up a batch for her famous chocolate cupcakes. The way it melted slightly against the warm cake, creating pockets of gooey goodness, felt like pure joy. Now, whenever I make it, I’m transported back to those sunny afternoons—but I also love how it bridges tradition and creativity. Whether I’m adding a pinch of cinnamon for warmth or using it to sandwich cookies, this frosting feels like both a hug and a blank canvas. It’s the recipe I turn to when I want dessert to taste like home.

Health and Nutrition

Why it’s good for your body

Creamy Peanut Butter Frosting packs a nutritious punch while satisfying your sweet tooth. First, peanut butter delivers healthy fats that support heart health and keep you full longer. Additionally, it provides plant-based protein, which helps repair muscles and maintain energy levels. Unlike traditional frostings loaded with refined sugar, this version offers a more balanced indulgence.

Moreover, Creamy Peanut Butter Frosting contains essential vitamins like vitamin E, a powerful antioxidant that protects your cells. The natural richness of peanut butter also means you can use less added sugar without sacrificing flavor. Meanwhile, the creamy texture comes from wholesome ingredients, avoiding artificial thickeners.

Finally, this frosting pairs well with nutrient-dense desserts, like whole-grain cakes or banana muffins. Whether you spread it or pipe it, Creamy Peanut Butter Frosting turns treats into smarter choices. So go ahead and enjoy it knowing you’re nourishing your body too.

How it fits in a healthy lifestyle

Creamy Peanut Butter Frosting fits seamlessly into balanced eating habits. For those following a high-protein diet, it adds a delicious way to meet daily goals. If you prefer gluten-free options, it pairs perfectly with gluten-free baked goods, making desserts safer and tastier.

You can also enjoy it in moderation as part of a heart-healthy lifestyle. The unsaturated fats in peanut butter help manage cholesterol levels. For a lighter approach, try spreading a thin layer on whole-grain toast or apple slices. Small servings keep indulgence guilt-free while adding nutrients to your day.

Whether you’re meal prepping or treating yourself, Creamy Peanut Butter Frosting supports mindful eating. It proves that flavor and nutrition can go hand in hand.

Print
clock clock iconcutlery cutlery iconflag flag iconfolder folder iconinstagram instagram iconpinterest pinterest iconfacebook facebook iconprint print iconsquares squares iconheart heart iconheart solid heart solid icon

Creamy Peanut Butter Frosting

  • Author: Chef Mia

Description

A smooth and rich peanut butter frosting perfect for cakes, cupcakes, or cookies.


Ingredients

Scale

For the Crust:

  • 1 cup creamy peanut butter
  • 1/2 cup unsalted butter, softened
  • 2 cups powdered sugar
  • 1/4 cup heavy cream
  • 1 teaspoon vanilla extract
  • 1/4 teaspoon salt

Instructions

1. Prepare the Crust:

  1. In a large bowl, beat the peanut butter and softened butter together until smooth and creamy.
  2. Gradually add the powdered sugar, mixing on low speed until fully incorporated.
  3. Pour in the heavy cream, vanilla extract, and salt. Beat on medium-high speed until the frosting is light and fluffy, about 2-3 minutes.
  4. If the frosting is too thick, add more heavy cream, 1 tablespoon at a time, until desired consistency is reached.
  5. Use immediately to frost cakes or cupcakes, or store in an airtight container in the refrigerator for up to 1 week.

Notes

You can customize the seasonings to taste.

How to Prepare This Dish

Steps and time-saving tips

Start by gathering all your ingredients for the Creamy Peanut Butter Frosting so everything is within reach. Measure out the creamy peanut butter, powdered sugar, butter, vanilla extract, and milk before you begin. Next, beat the softened butter in a large mixing bowl until it turns light and fluffy. This usually takes about 2 minutes with an electric mixer. Gradually add the peanut butter and continue mixing until fully combined. Meanwhile, sift the powdered sugar to avoid lumps, then slowly incorporate it into the mixture. If the frosting feels too thick, drizzle in a tablespoon of milk at a time until you reach the perfect consistency. Finally, stir in the vanilla extract for a subtle flavor boost. For a time-saving tip, use room-temperature ingredients to speed up blending. If you’re in a hurry, chill the frosting for 10 minutes to help it set faster before spreading it on your cake or cupcakes.

Mistakes I’ve made and learned from

When I first made Creamy Peanut Butter Frosting, I rushed the process and used cold butter straight from the fridge. The result was a lumpy, uneven texture that didn’t spread well. Now I always let the butter soften naturally or use the defrost setting on my microwave for short bursts. Another mistake was overmixing, which made the frosting too airy and less creamy. I’ve since learned to stop as soon as the ingredients are fully incorporated. If you’re new to frosting, check out my guide on perfect frosting consistency to avoid these pitfalls. Also, if your frosting splits, don’t panic—just warm it slightly and gently re-mix. For more troubleshooting, my post on fixing broken frosting covers simple solutions. Trust me, even small adjustments make a big difference!

rc="https://exorecipes.com/wp-content/uploads/2025/06/best-creamy-peanut-butter-frosting-recipe.webp" />

Cultural Connection and Variations

Where this recipe comes from

Creamy Peanut Butter Frosting traces its roots back to the early 20th century, when peanut butter became a pantry staple in American households. Families loved its rich, nutty flavor and smooth texture, making it a natural fit for frosting. In the South, bakers often paired it with chocolate cakes, while Midwestern home cooks spread it generously on vanilla cupcakes. Meanwhile, in other parts of the world, similar variations emerged. For example, in Southeast Asia, some versions incorporate coconut milk for a tropical twist.

My grandmother swore by her Creamy Peanut Butter Frosting recipe, which she whipped up for every birthday and potluck. She added a splash of vanilla and a pinch of salt to balance the sweetness. Over time, I’ve seen friends adapt it too—some swirl in melted chocolate, while others fold in crushed peanuts for extra crunch. No matter the variation, this frosting always brings people together, whether it’s slathered on a layer cake or piped onto cookies.

ays-cooking">How it fits in today’s cooking

Today, Creamy Peanut Butter Frosting remains a beloved classic, especially for bakers who crave nostalgia with a modern twist. It’s a star at birthday parties, but it also shines in everyday treats like peanut butter cupcakes or as a filling for whoopie pies. Many home cooks now experiment with healthier versions, swapping in natural peanut butter or reducing sugar without sacrificing flavor.

Seasonally, this frosting takes center stage during the holidays, often paired with gingerbread or spiced cakes. For a quick weeknight dessert, try spreading it on banana bread—it’s a game-changer. Whether you stick to tradition or put your own spin on it, Creamy Peanut Butter Frosting proves that some flavors never go out of style.

Taste and Texture

What makes it delicious

Indulge in the rich, velvety experience of Creamy Peanut Butter Frosting, where every bite melts luxuriously on your tongue. The deep, nutty aroma of roasted peanuts mingles with sweet vanilla, creating a fragrance that’s downright irresistible. Smooth and silky, this frosting glides effortlessly over cakes, while its subtle saltiness balances the sweetness for a crave-worthy finish. Creamy Peanut Butter Frosting delivers a luscious, almost fudgy texture that clings to your spoon—and your memory. Plus, the buttery undertones from high-quality peanut butter elevate it from simple to spectacular.

r">Boosting the flavor

For an extra flavor kick, swirl in a spoonful of honey or a dash of cinnamon to amplify the warmth of Creamy Peanut Butter Frosting. Alternatively, fold in crushed pretzels for a salty crunch or drizzle with chocolate ganache for a decadent twist. If you love bold contrasts, sprinkle flaky sea salt on top or pair it with vanilla cupcakes to let the peanut butter shine. Experiment with roasted peanuts for added texture or a hint of espresso powder to deepen the nutty notes. The possibilities are endless!

Tips for Success

Best practices for results

Always use room-temperature butter for smooth blending when making Creamy Peanut Butter Frosting. Otherwise, you risk lumps. Meanwhile, sift your powdered sugar to prevent clumps and ensure a silky texture. For extra richness, add a splash of heavy cream if the frosting feels too thick. Additionally, beat the mixture for at least 3 minutes to achieve the perfect fluffy consistency. Finally, taste as you go and adjust the sweetness with a pinch of salt if needed.

>Mistakes to avoid

Avoid over-measuring the peanut butter, as too much can make the frosting greasy. Instead, lightly spoon it into your measuring cup for accuracy. Also, don’t skip chilling the frosting before piping, or it may lose its shape. For more piping tips, check out our guide on frosting techniques. Another common mistake is using natural peanut butter, which often separates and creates an uneven texture. Stick to conventional creamy peanut butter for the best results. If you’re unsure about ingredient substitutions, our baking ingredients breakdown can help.

Serving and Pairing Suggestions

How to serve this dish

Turn Creamy Peanut Butter Frosting into a showstopper by piping it generously onto cupcakes or layering it between chocolate cake for a decadent dessert. For a playful twist, drizzle melted chocolate over the frosting or sprinkle crushed peanuts on top for extra crunch. Meanwhile, serve it at birthday parties or holiday gatherings to impress guests with its rich flavor. If you want a simpler approach, spread it on warm toast or graham crackers for a quick, satisfying treat.

What goes well with it

Pair Creamy Peanut Butter Frosting with a cold glass of milk to balance its richness, or try it with a bold coffee for a grown-up twist. For dessert lovers, layer it with our Classic Vanilla Cake to create a perfect flavor contrast. Alternatively, spread it on our Cinnamon Swirl Bread for a cozy breakfast upgrade. Each pairing enhances the frosting’s creamy texture and nutty sweetness.

rc="https://s3-placid.s3.eu-central-1.amazonaws.com/production/rest-images/rawp1noeia0hh/int-ee46ae90a07df814347ba909442cd83d-g4rr11gw.jpg" />

How do you make creamy peanut butter frosting less sweet?

To reduce sweetness in creamy peanut butter frosting, try using unsweetened peanut butter or adding a pinch of salt to balance flavors. You can also substitute part of the powdered sugar with cocoa powder or reduce the sugar amount slightly while increasing the milk or cream.

Can you freeze creamy peanut butter frosting?

Yes, creamy peanut butter frosting freezes well for up to 3 months. Store it in an airtight container, leaving some space for expansion. Thaw overnight in the refrigerator and rewhip with a mixer before using to restore the smooth texture.

ank-math-faq-item"> What’s the best peanut butter to use for creamy frosting?

For the smoothest creamy peanut butter frosting, use commercial creamy peanut butter (like Jif or Skippy) rather than natural varieties. These processed peanut butters blend more easily and create a stable, spreadable consistency without separating.

How long does homemade peanut butter frosting last?

Creamy peanut butter frosting keeps for 5-7 days in the refrigerator when stored in an airtight container. For best results, press plastic wrap directly onto the surface to prevent drying. Always check for freshness before using on cakes or cupcakes.

Best Easy Red Enchilada Sauce Recipe

best-easy-red-enchilada-sauce

Introduction

There’s something magical about a homemade sauce that transforms simple ingredients into a burst of flavor. If you’ve ever craved the rich, smoky depth of authentic Mexican cuisine but hesitated because store-bought sauces fall flat, this Easy Red Enchilada Sauce will change everything. Whether you’re drizzling it over enchiladas, simmering it with chicken, or using it as a dipping sauce, this recipe delivers restaurant-quality taste with minimal effort. Best of all, you likely already have the spices in your pantry.

Easy Red Enchilada Sauce is a versatile, from-scratch sauce that combines chili powder, garlic, cumin, and tomato paste for a bold, balanced flavor. Unlike store-bought versions packed with preservatives, this sauce lets you control the ingredients, ensuring a fresher, healthier result. For anyone who loves Mexican food but avoids complicated recipes, this sauce is a game-changer. It takes just 15 minutes to make, yet it elevates weeknight dinners into something special. Plus, it freezes beautifully, so you can always have a batch ready to go.

At Exorecipes, we celebrate recipes that strike the perfect balance between simplicity and flavor. This Easy Red Enchilada Sauce fits right in with our mission to help home cooks create memorable meals without stress. If you’re looking for more ways to use this sauce, try pairing it with our Cheesy Chicken Enchiladas or stirring it into our Vegetarian Taco Bowls for an extra kick. Once you taste the difference homemade makes, you’ll never go back to the jarred stuff.

Why I Love This Recipe

This Easy Red Enchilada Sauce holds a special place in my kitchen because it reminds me of my grandmother’s cooking. She always insisted that the secret to great Mexican food lies in the sauce, and this recipe captures that spirit. I love how it brings people together, whether I’m hosting a casual taco night or meal prepping for the week. Every time I make it, the aroma fills the house, and suddenly, everyone gathers in the kitchen, hungry and curious. That’s the power of a truly great sauce—it doesn’t just feed you, it creates moments.

Health and Nutrition

Why it’s good for your body

Easy Red Enchilada Sauce packs a flavorful punch while delivering real health benefits. First, it relies on tomatoes as a base, which means you get a dose of lycopene, a powerful antioxidant that supports heart health. Additionally, the blend of spices like cumin and chili powder not only enhances taste but also boosts metabolism and aids digestion. Since this sauce skips heavy creams and excessive oils, it keeps calories in check without sacrificing richness.

Moreover, Easy Red Enchilada Sauce contains minimal processed ingredients, making it a cleaner choice compared to store-bought versions. The garlic and onions often used in the recipe provide immune-boosting properties, while the capsaicin from chilies may help reduce inflammation. Whether you drizzle it over proteins or veggies, this sauce adds depth to meals without unnecessary additives. Finally, because it’s so versatile, you can easily incorporate it into nutrient-packed dishes like stuffed peppers or lean chicken enchiladas.

How it fits in a healthy lifestyle

Easy Red Enchilada Sauce fits seamlessly into balanced eating habits. If you’re gluten-free, you’ll love that it’s naturally free of wheat-based thickeners, unlike many pre-made sauces. For those focusing on heart health, its low saturated fat content aligns perfectly with dietary guidelines. Plus, the sauce’s bold flavor means you can use less salt without missing out on taste.

Pair it with fiber-rich ingredients like black beans or quinoa for a satisfying, high-protein meal. If you’re meal prepping, try adding it to batch-cooked chicken for easy lunches. And if you’re exploring plant-based options, it’s a great way to jazz up vegan stuffed peppers. Whether you’re cooking for one or feeding a family, this sauce helps you keep meals exciting and nutritious.

Print
clock clock iconcutlery cutlery iconflag flag iconfolder folder iconinstagram instagram iconpinterest pinterest iconfacebook facebook iconprint print iconsquares squares iconheart heart iconheart solid heart solid icon

Easy Red Enchilada Sauce

  • Author: Chef Mia

Description

A simple and flavorful homemade red enchilada sauce that’s perfect for any Mexican-inspired dish.


Ingredients

Scale

For the Crust:

  • 2 tablespoons vegetable oil
  • 2 tablespoons all-purpose flour
  • 4 tablespoons chili powder
  • 1/2 teaspoon garlic powder
  • 1/2 teaspoon salt
  • 1/4 teaspoon ground cumin
  • 1/4 teaspoon dried oregano
  • 2 cups chicken or vegetable broth

Instructions

1. Prepare the Crust:

  1. Heat the vegetable oil in a saucepan over medium heat.
  2. Whisk in the flour and chili powder, stirring constantly for about 1 minute to form a paste.
  3. Add the garlic powder, salt, cumin, and oregano, stirring to combine.
  4. Gradually pour in the broth while whisking continuously to avoid lumps.
  5. Bring the sauce to a simmer and cook for 10-15 minutes, stirring occasionally, until thickened.

Notes

You can customize the seasonings to taste.

How to Prepare This Dish

Steps and time-saving tips

Start by heating a medium saucepan over medium heat and adding a drizzle of oil. Once the oil shimmers, whisk in flour to create a smooth roux—this thickens your Easy Red Enchilada Sauce beautifully. Next, stir in chili powder, cumin, garlic powder, and a pinch of salt, letting the spices toast for just 30 seconds to unlock their flavor. Pour in tomato sauce and vegetable broth, then whisk vigorously to eliminate lumps. Bring the mixture to a gentle simmer, stirring occasionally, and let it cook for 10 minutes until slightly thickened. For a silky texture, blend the sauce briefly with an immersion blender or strain it through a fine mesh sieve. If you’re short on time, use pre-mixed taco seasoning instead of individual spices. Double the batch and freeze half for later—this sauce reheats perfectly. Finally, taste and adjust seasoning, adding a splash of lime juice for brightness if needed.

Mistakes I’ve made and learned from

I once rushed the roux for my Easy Red Enchilada Sauce, leaving tiny flour lumps that ruined the texture. Now I whisk constantly for a full minute and strain if necessary. Another blunder? Overloading the spices—I learned the hard way that a heavy hand with chili powder overwhelms the dish. Start with less, taste as you go, and remember you can always add more. For deeper flavor, try slow-roasting your tomatoes first, a trick I picked up from my Homemade Salsa Recipe. And if your sauce feels too thin, don’t panic—simmer it longer or thicken with a cornstarch slurry, just like in my Perfect Gravy Guide. Trust me, patience pays off here.

rc="https://exorecipes.com/wp-content/uploads/2025/06/best-easy-red-enchilada-sauce-recipe.webp" />

Cultural Connection and Variations

Where this recipe comes from

Easy Red Enchilada Sauce carries the vibrant soul of Mexican cuisine, where generations have simmered tomatoes, chilies, and spices into rich, velvety perfection. Originally, families in central Mexico crafted this sauce using dried ancho or guajillo peppers, roasting them to deepen their smoky sweetness. Over time, home cooks adapted the recipe, making it more accessible without losing its essence. Today, you might find versions with chipotle for heat or a touch of cocoa for complexity.

In my own kitchen, Easy Red Enchilada Sauce became a bridge between cultures. My grandmother added a pinch of oregano, while my aunt swore by blending in fire-roasted tomatoes. Meanwhile, in New Mexico, cooks often spotlight local Hatch chilies, and Tex-Mex versions might lean heavier on cumin. No matter the twist, the sauce always ties back to warmth and celebration.

ays-cooking">How it fits in today’s cooking

Easy Red Enchilada Sauce still shines as a weeknight hero and a festive star. Busy cooks love its versatility, whether drizzling it over Chicken Tinga Tacos or layering it into casseroles. During holidays, it anchors dishes like tamales or enchiladas, connecting families to tradition. Plus, modern twists—like swapping in vegetable broth or adding a splash of lime—keep it fresh for today’s palates.

For meal preppers, this sauce is a game-changer. It freezes beautifully, ready to elevate Breakfast Chilaquiles or roasted veggies. Whether you’re honoring heritage or experimenting, Easy Red Enchilada Sauce adapts without losing its heart.

Taste and Texture

What makes it delicious

Easy Red Enchilada Sauce wraps your taste buds in a rich, smoky embrace with just the right kick of warmth. The deep, earthy notes from toasted chili powder mingle with bright tomato tang, while garlic and cumin add layers of savory depth. As it simmers, the sauce thickens into a velvety texture that clings perfectly to tortillas or meats. Every spoonful delivers a balanced harmony of spicy, sweet, and umami—making Easy Red Enchilada Sauce a crave-worthy staple. The aroma alone, fragrant with toasted spices and fresh onions, will have everyone gathering in the kitchen.

r">Boosting the flavor

For a bolder twist, stir in a splash of citrus juice or a pinch of smoked paprika to amplify the sauce’s natural smokiness. If you love heat, a diced jalapeño or dash of cayenne will turn up the spice without overpowering the other flavors. Pair it with creamy toppings like avocado crema or crumbled queso fresco for contrast. You can also layer it into cheesy chicken enchiladas for a comforting, flavor-packed meal. Experiment with fresh herbs or a touch of honey to tailor Easy Red Enchilada Sauce to your perfect taste.

Tips for Success

Best practices for results

Always toast your dried chilies lightly before blending to deepen the flavor of your Easy Red Enchilada Sauce. Meanwhile, use a high-powered blender for the smoothest texture, and strain the sauce if you prefer it silky. Additionally, taste and adjust the seasoning after simmering, since flavors intensify as the sauce reduces. Finally, let the sauce cool slightly before using it to prevent soggy enchiladas.

>Mistakes to avoid

Avoid rushing the chili-toasting step, as under-toasted chilies leave your Easy Red Enchilada Sauce tasting bitter or raw. Instead, toast them just until fragrant for balanced flavor. Also, don’t skip the simmering time—simmering thickens the sauce and melds the spices, so patience pays off. For more on balancing spices, check out our guide to perfect spice blends. Lastly, resist over-salting early; wait until the end, since reducing concentrates saltiness. Learn how to fix over-seasoned dishes with our saving over-salted food tips.

Serving and Pairing Suggestions

How to serve this dish

Drizzle Easy Red Enchilada Sauce generously over enchiladas for a vibrant, saucy finish. For a festive touch, top with crumbled queso fresco, fresh cilantro, and thinly sliced radishes. Alternatively, serve it alongside warm tortilla chips as a dipping sauce for casual gatherings. Whether you’re hosting a taco night or preparing a cozy family dinner, this sauce adds rich flavor and color to every plate. For special occasions, layer it in a casserole dish with shredded chicken and cheese for a crowd-pleasing enchilada bake.

What goes well with it

Pair Easy Red Enchilada Sauce with a crisp Mexican lager or a tangy margarita to balance its smoky depth. For sides, try cilantro lime rice or charro beans—their fresh, zesty flavors complement the sauce perfectly. If you love bold combinations, serve it with our Spicy Mango Salsa for a sweet-heat contrast. For a heartier meal, layer the sauce into our Cheesy Chicken Quesadillas, adding extra richness to every bite.

rc="https://s3-placid.s3.eu-central-1.amazonaws.com/production/rest-images/rawp1noeia0hh/int-cf4b1d8f1108bc03cbb63ee95877a1d1-w2cunoy5.jpg" />

What is the easiest way to make red enchilada sauce from scratch?

The easiest way to make Easy Red Enchilada Sauce is by blending canned tomatoes, chili powder, garlic, and cumin, then simmering for 10 minutes. This method skips the traditional roux but still delivers rich flavor. You can adjust the spice level to taste for a perfect homemade sauce.

Can I use tomato paste instead of tomato sauce for red enchilada sauce?

Yes, tomato paste works well for Easy Red Enchilada Sauce—just dilute 2 tablespoons of paste with 1 cup of water or broth. This creates a concentrated tomato base that thickens the sauce beautifully. Add extra spices to balance the intense tomato flavor.

ank-math-faq-item"> How do you thicken homemade red enchilada sauce?

To thicken Easy Red Enchilada Sauce, simmer it uncovered for 5-10 minutes to reduce, or mix 1 teaspoon cornstarch with cold water and stir it in. The sauce should coat a spoon lightly when ready. Avoid over-thickening, as it will reduce further when baked with enchiladas.

What’s the best chili powder for authentic red enchilada sauce?

For authentic Easy Red Enchilada Sauce, use pure ancho or guajillo chili powder—they offer mild heat and deep flavor. Standard grocery-store chili powder blends work too, but check for additives. Toasting the chili powder briefly in oil before adding liquids enhances the sauce’s richness.

Ultimate Carrot Cake Cheesecake Cake Recipe

ultimate-carrot-cake-cheesecake-recipe

Introduction

Imagine biting into a dessert that combines the warm, spiced comfort of carrot cake with the creamy indulgence of cheesecake. That’s exactly what you get with this Carrot Cake Cheesecake Cake—a showstopping treat that’s perfect for celebrations, holidays, or just because. Whether you’re a seasoned baker or a beginner, this recipe delivers layers of flavor and texture that will leave everyone asking for seconds. Best of all, it’s easier to make than you might think, and the results are nothing short of spectacular.

Carrot Cake Cheesecake Cake is the ultimate fusion dessert, blending two beloved classics into one unforgettable creation. The bottom layer features a moist, spiced carrot cake packed with grated carrots, cinnamon, and nutmeg. Next comes a rich, velvety cheesecake layer, perfectly tangy and smooth. Finally, the top layer repeats the carrot cake, creating a harmonious balance of flavors. This dessert isn’t just delicious—it’s a conversation starter, ideal for birthdays, Easter, or any occasion where you want to impress. If you love decadent desserts, you’ll also adore our Classic Red Velvet Cake or our Decadent Chocolate Cheesecake. Both share the same crowd-pleasing appeal as this Carrot Cake Cheesecake Cake.

What makes this recipe stand out is its versatility. You can customize it with toasted pecans, raisins, or even a drizzle of caramel. Plus, the make-ahead nature of the cheesecake layer ensures stress-free preparation. Whether you’re serving it at a family gathering or gifting it to a friend, this dessert embodies the cozy, homemade goodness that defines our blog’s philosophy—approachable recipes with restaurant-quality results.

Why I Love This Recipe

Carrot Cake Cheesecake Cake holds a special place in my heart because it reminds me of my grandmother’s kitchen. She always made a towering carrot cake for family reunions, and the first time I tried adding a cheesecake layer, it felt like a revelation. The way the spices mingle with the creamy cheesecake takes me right back to those cherished moments. Now, I love sharing this recipe with others, knowing it might become part of their own traditions too.

Health and Nutrition

Why it’s good for your body

Carrot Cake Cheesecake Cake packs a surprising nutritional punch while satisfying your sweet tooth. First, carrots provide beta-carotene, which your body converts to vitamin A for healthy vision and immune function. Additionally, the cream cheese layer delivers calcium and protein, supporting strong bones and muscle repair. Even better, the spices like cinnamon and nutmeg offer antioxidants that help reduce inflammation.

Moreover, Carrot Cake Cheesecake Cake often includes nuts or raisins, adding fiber and healthy fats for sustained energy. While it’s a dessert, the natural sweetness from carrots and spices means you can enjoy it with less added sugar than many treats. Furthermore, the combination of whole eggs and dairy in the cheesecake layer provides essential amino acids for overall wellness.

Finally, indulging in Carrot Cake Cheesecake Cake can boost your mood, thanks to its rich, comforting flavors. After all, a balanced diet includes room for joy, and this dessert delivers both taste and nutrients. Just remember, moderation is key to reaping its benefits without overdoing calories.

How it fits in a healthy lifestyle

Carrot Cake Cheesecake Cake fits perfectly into a balanced diet when enjoyed mindfully. For example, pair a small slice with a protein-rich snack like Greek yogurt to balance blood sugar. If you’re gluten-free, simply swap the flour for almond or oat flour, as shown in our Gluten-Free Baking Guide.

For heart-healthy choices, use reduced-fat cream cheese and opt for walnuts, which contain omega-3s. Planning a special occasion? This dessert works well alongside lighter meals, like the Healthy Dinner Ideas we recommend. By savoring Carrot Cake Cheesecake Cake as an occasional treat rather than an everyday indulgence, you maintain both health and happiness.

Print
clock clock iconcutlery cutlery iconflag flag iconfolder folder iconinstagram instagram iconpinterest pinterest iconfacebook facebook iconprint print iconsquares squares iconheart heart iconheart solid heart solid icon

Carrot Cake Cheesecake Cake

  • Author: Chef Mia

Description

A decadent layered dessert combining the flavors of carrot cake and creamy cheesecake.


Ingredients

Scale

For the Crust:

  • 2 cups all-purpose flour
  • 2 cups granulated sugar
  • 2 tsp baking soda
  • 2 tsp ground cinnamon
  • 1 tsp salt
  • 4 large eggs
  • 1 1/2 cups vegetable oil
  • 3 cups grated carrots
  • 16 oz cream cheese, softened
  • 1/2 cup sour cream
  • 1/2 cup granulated sugar
  • 2 large eggs
  • 1 tsp vanilla extract
  • 8 oz whipped cream cheese frosting

Instructions

1. Prepare the Crust:

  1. Preheat oven to 350°F. Grease and line two 9-inch round cake pans.
  2. In a large bowl, whisk together flour, sugar, baking soda, cinnamon, and salt for the carrot cake layers.
  3. Add eggs and oil to the dry ingredients, mixing until combined. Fold in grated carrots.
  4. Divide batter evenly between the prepared pans. Bake for 25-30 minutes until a toothpick comes out clean. Cool completely.
  5. For the cheesecake layer: Beat cream cheese, sour cream, and sugar until smooth. Add eggs one at a time, then vanilla.
  6. Pour cheesecake batter into a greased 9-inch springform pan. Bake at 325°F for 35-40 minutes until set. Cool completely.
  7. Assemble the cake by placing one carrot cake layer, then the cheesecake layer, then the second carrot cake layer.
  8. Frost the entire cake with whipped cream cheese frosting. Chill for at least 2 hours before serving.

Notes

You can customize the seasonings to taste.

How to Prepare This Dish

Steps and time-saving tips

Start by preheating your oven to 350°F and greasing three 9-inch cake pans. For the carrot cake, whisk together flour, baking soda, cinnamon, and salt in a large bowl. In another bowl, beat eggs, sugar, and oil until smooth, then fold in shredded carrots and crushed pineapple. Gradually mix the dry ingredients into the wet until just combined. Meanwhile, prepare the cheesecake layer by beating cream cheese, sugar, and vanilla until creamy. Add eggs one at a time, then pour the batter into a lined springform pan. Bake the cheesecake for 35 minutes, then let it cool completely. While it chills, bake the carrot cake layers for 25 minutes or until a toothpick comes out clean. Once everything cools, level the cakes with a serrated knife for even stacking. Spread frosting between each layer, placing the cheesecake in the center. For a time-saving hack, bake the cheesecake a day ahead and refrigerate it overnight. This way, assembly becomes a breeze the next day.

and-learned-from">Mistakes I’ve made and learned from

My first attempt at Carrot Cake Cheesecake Cake ended with a cracked cheesecake layer because I rushed the cooling process. Now, I let it cool gradually in the oven with the door slightly ajar, which prevents sudden temperature changes. Another blunder? Overmixing the carrot cake batter, which made it dense. I’ve since learned to gently fold ingredients just until combined for a lighter texture. If you’re new to layered cakes, check out my guide to layering cakes like a pro for foolproof stacking tips. Also, if your frosting feels too soft, refrigerate it for 15 minutes before spreading—a trick I picked up from my frosting fixes post. Trust me, patience pays off with this showstopper!

Cultural Connection and Variations

Where this recipe comes from

Carrot Cake Cheesecake Cake feels like a love letter to two classic desserts. The carrot cake side traces its roots back to medieval Europe, where people sweetened carrots as a sugar substitute. Meanwhile, cheesecake has ancient Greek origins, but the creamy New York-style version we know today took shape in America. Combining them? That’s pure modern genius.

In the South, bakers mi

ght add pecans or a bourbon glaze to their Carrot Cake Cheesecake Cake for extra richness. Over in Europe, some versions skip the spices altogether, focusing on the carrot’s natural sweetness. My grandma’s twist? She layered hers with a tangy citrus cream cheese frosting, making it a springtime staple at family gatherings.

Interestingly, in Australia, they often top this dessert with toasted coconut, while in the Middle East, bakers might infuse the batter with cardamom or rosewater. No matter where you go, Carrot Cake Cheesecake Cake adapts beautifully, blending local flavors with its comforting core.

How it fits in today’s cooking

Today, Carrot Cake Cheesecake Cake shines as a showstopper for Easter brunches or cozy fall celebrations. Its versatility keeps it relevant—whether you’re serving it at a holiday feast or just craving a slice with afternoon coffee. Modern cooks love tweaking it, too, like swapping traditional walnuts for gluten-free alternatives or adding a drizzle of salted caramel for a trendy twist.

Busy bakers also apprec

iate make-ahead tricks, like prepping the cheesecake layer days in advance. For those who want a lighter version, sugar substitutes or Greek yogurt folds work wonders. Whether you stick to tradition or experiment, Carrot Cake Cheesecake Cake remains a crowd-pleaser, bridging nostalgia and today’s tastes effortlessly.

Taste and Texture

What makes it delicious

Carrot Cake Cheesecake Cake delivers a symphony of flavors and textures that make every bite unforgettable. The spiced carrot cake layers offer a moist, tender crumb with warm notes of cinnamon and nutmeg, while the rich cheesecake filling adds a velvety, creamy contrast. Toasted walnuts or pecans bring a satisfying crunch, and the tangy cream cheese frosting ties everything together with a smooth, luscious finish. As you slice into it, the aroma of caramelized carrots and vanilla fills the air, making Carrot Cake Cheesecake Cake as irresistible as it is indulgent.

Boosting the flavor

Elevate your Carrot Cake Cheesecake Cake with a few easy tweaks. For a deeper spice profile, add a pinch of cardamom or ginger to the batter. Drizzle warm salted caramel sauce over each slice for a buttery-sweet contrast, or top with a handful of candied pecans for extra crunch. If you prefer a tropical twist, fold shredded coconut into the cake layers. These small changes amplify the flavors without overshadowing the dessert’s classic charm.

rc="https://exorecipes.com/wp-content/uploads/2025/06/ultimate-carrot-cake-cheesecake-recipe.webp" />

Tips for Success

Best practices for results

For the best Carrot Cake Cheesecake Cake, always bring cream cheese and eggs to room temperature before mixing. This ensures a smooth, lump-free batter. Additionally, grate carrots finely so they blend seamlessly into the cake layers. To prevent overbaking, check for doneness 5 minutes early since ovens vary. Finally, chill the assembled cake for at least 4 hours so the flavors meld and slices hold their shape.

Mistakes to avoid

Avoid overmixing the carrot cake batter, as this can make layers dense instead of tender. Instead, gently fold ingredients just until combined. Many bakers also skip lining pans with parchment, but this guarantees easy release—especially important for delicate cheesecake layers. For more pan prep tips, see our baking tools guide. Lastly, don’t rush the cooling process; slicing too soon causes messy layers. Learn proper cooling techniques in our cake storage guide to keep your Carrot Cake Cheesecake Cake picture-perfect.

g-suggestions">Serving and Pairing Suggestions

How to serve this dish

For a stunning presentation, slice your Carrot Cake Cheesecake Cake into even layers and plate each piece with a dollop of whipped cream on the side. Alternatively, drizzle warm caramel or cream cheese frosting over the top for extra decadence. Since this dessert shines at gatherings, consider serving it at Easter brunch or Thanksgiving dinner. To make it even more festive, garnish with chopped walnuts or edible flowers. Whether you’re hosting a party or treating yourself, Carrot Cake Cheesecake Cake always steals the show.

What goes well with it

Pair your Carrot Cake Cheesecake Cake with a hot cup of spiced chai tea for a cozy contrast to its rich flavors. If you prefer something cold, a scoop of vanilla bean ice cream adds a creamy texture that balances the cake’s spice. For a lighter option, try our Homemade Whipped Cream to enhance each bite without overpowering it. If you’re serving a crowd, our Classic Coffee Cake makes a delightful companion for a dessert spread. No matter what you choose, these pairings elevate the Carrot Cake Cheesecake Cake experience.

math-faq-block">
What is a Carrot Cake Cheesecake Cake?

A Carrot Cake Cheesecake Cake is a decadent dessert that combines layers of moist carrot cake with creamy cheesecake. This hybrid treat offers the best of both worlds—spiced carrot cake flavors and rich cheesecake texture. It’s often topped with cream cheese frosting or chopped nuts for extra flavor.

How do you keep Carrot Cake Cheesecake Cake from drying out?

To prevent your Carrot Cake Cheesecake Cake from drying out, wrap it tightly in plastic wrap or store it in an airtight container. The cheesecake layer helps retain moisture, but refrigerating the cake also preserves its freshness. For best results, serve within 3-4 days of baking.

Can you freeze Carrot Cake Cheesecake Cake?

Yes, you can freeze Carrot Cake Cheesecake Cake for up to 2 months. Wrap individual slices or the whole cake in plastic wrap and aluminum foil to prevent freezer burn. Thaw overnight in the refrigerator before serving to maintain the perfect texture.

ank-math-faq-item"> What’s the difference between carrot cake and Carrot Cake Cheesecake Cake?

While traditional carrot cake is a single-layer spiced cake with cream cheese frosting, Carrot Cake Cheesecake Cake adds a layer of cheesecake between the carrot cake layers. This creates a richer, more complex dessert with contrasting textures and flavors. The cheesecake layer makes it denser and creamier than regular carrot cake.

Easy Patriotic Red, White and Blue Pastries Recipe

easy-patriotic-red-white-blue-pastries

Introduction

Nothing brings people together like a delicious, visually stunning dessert, especially when it celebrates something as meaningful as patriotism. If you’re looking for a showstopping treat that honors red, white, and blue pride, these Patriotic Red, White and Blue Pastries will steal the show at your next gathering. Whether it’s for the Fourth of July, Memorial Day, or just because, these pastries combine flaky layers, creamy fillings, and vibrant colors to create a dessert that’s as delightful to eat as it is to admire. Plus, they’re easier to make than you might think, so you can impress your guests without spending hours in the kitchen.

Patriotic Red, White and Blue Pastries are more than just a dessert—they’re a celebration on a plate. These pastries feature buttery, golden layers filled with luscious cream and topped with fresh berries, creating a perfect balance of textures and flavors. What makes them special is how effortlessly they capture the spirit of patriotism while still being versatile enough for any occasion. Whether you’re hosting a backyard barbecue or a cozy family dinner, these pastries add a festive touch that everyone will love. They also fit perfectly with our blog’s mission to share approachable yet impressive recipes, like our Easy Berry Tart, which highlights seasonal ingredients in simple ways. Moreover, if you enjoy baking with fresh fruit, you’ll appreciate how these pastries complement other summer favorites, such as our Homemade Lemonade, for a complete patriotic spread.

Why I Love This Recipe

Patriotic Red, White and Blue Pastries hold a special place in my heart because they remind me of summer gatherings with my family. Every year, my grandmother would bake something red, white, and blue for our Fourth of July picnics, and these pastries bring back those warm memories. I love how they look as stunning as a store-bought dessert but taste even better because they’re made with love. Plus, watching kids and adults alike light up when they see these colorful treats never gets old. For me, baking isn’t just about the food—it’s about creating moments, and these pastries do exactly that.

Health and Nutrition

Why it’s good for your body

Patriotic Red, White and Blue Pastries bring more than just festive flair to your table. First, they often feature antioxidant-rich berries like strawberries and blueberries, which support immune health and reduce inflammation. Additionally, these colorful treats can include Greek yogurt or whipped cream for a protein boost, helping you stay fuller longer. Moreover, the natural sweetness of fruit means you can enjoy Patriotic Red, White and Blue Pastries with less added sugar than typical desserts.

Another benefit comes from the whole-grain or almond flour bases some recipes use, offering fiber for better digestion. Meanwhile, the vibrant colors signal nutrient-dense ingredients, making these pastries a smarter indulgence. For instance, blueberries provide brain-boosting flavonoids, while strawberries deliver vitamin C for glowing skin. Finally, when you bake Patriotic Red, White and Blue Pastries at home, you control the ingredients, avoiding unnecessary preservatives. Whether for a holiday or everyday treat, these pastries balance flavor and nourishment.

How it fits in a healthy lifestyle

Patriotic Red, White and Blue Pastries fit seamlessly into a balanced diet when enjoyed mindfully. Pair them with protein-rich foods like Greek yogurt or nuts to stabilize blood sugar, making them a satisfying snack. For gluten-free diets, simply swap traditional flour with almond or oat flour—check out our gluten-free baking guide for easy substitutions. If you’re watching sugar intake, reduce added sweeteners and let the natural fruit flavors shine.

These pastries also work well for meal prep, so you can enjoy a portion-controlled treat without overindulging. For heart-healthy options, use unsaturated fats like avocado oil in the recipe. Craving more wholesome dessert ideas? Explore our healthy dessert swaps to keep your sweet tooth happy. With simple tweaks, Patriotic Red, White and Blue Pastries become a guilt-free part of your routine.

Print
clock clock iconcutlery cutlery iconflag flag iconfolder folder iconinstagram instagram iconpinterest pinterest iconfacebook facebook iconprint print iconsquares squares iconheart heart iconheart solid heart solid icon

Patriotic Red, White and Blue Pastries

  • Author: Chef Mia

Description

Festive and colorful pastries perfect for patriotic celebrations with layers of red, white, and blue flavors.


Ingredients

Scale

For the Crust:

  • 1 sheet puff pastry, thawed
  • 1/2 cup strawberry jam
  • 1/2 cup blueberry jam
  • 1 cup whipped cream
  • 1 egg, beaten (for egg wash)
  • 1 tbsp powdered sugar (for dusting)

Instructions

1. Prepare the Crust:

  1. Preheat oven to 400°F (200°C). Roll out the puff pastry sheet and cut into 12 equal squares.
  2. Spread strawberry jam on half of the squares and blueberry jam on the other half. Leave a small border around the edges.
  3. Top each jam-covered square with a plain square, pressing the edges to seal. Brush the tops with egg wash.
  4. Bake for 15-20 minutes until golden brown. Let cool completely.
  5. Once cooled, top each pastry with a dollop of whipped cream and dust lightly with powdered sugar before serving.

Notes

You can customize the seasonings to taste.

How to Prepare This Dish

Steps and time-saving tips

Start by preheating your oven to 350°F and lining a baking sheet with parchment paper. Meanwhile, whisk together the dry ingredients—flour, sugar, and baking powder—in a large bowl. In a separate bowl, beat the butter and eggs until creamy, then gradually fold in the dry mixture. For a shortcut, use store-bought puff pastry dough instead of making it from scratch. Divide the dough into three equal portions and tint one red and one blue with gel food coloring, leaving the third white. Roll each portion into thin layers, then stack them with white in the middle for that patriotic effect. Chill the dough for 15 minutes to make slicing easier. Cut into star shapes or simple rectangles, then bake for 12-15 minutes until golden. While the pastries cool, whip up a quick glaze by mixing powdered sugar with milk and a splash of vanilla. Drizzle it over the tops for a sweet finish. If you’re short on time, skip the glaze and dust with powdered sugar instead.

Mistakes I’ve made and learned from

I once rushed the chilling step and ended up with sticky, misshapen pastries—patience is key for clean cuts! Another time, I overmixed the dough, which made the texture tough. Now, I stop stirring as soon as the ingredients combine. If your colors bleed, try chilling the layers separately before stacking. For more troubleshooting tips, check out my guide on common baking mistakes. And if you love festive treats, don’t miss my holiday dessert hacks for keeping desserts vibrant and flavorful. Learning these lessons the hard way taught me that small adjustments make all the difference.

rc="https://exorecipes.com/wp-content/uploads/2025/06/easy-patriotic-red-white-blue-pastries-recipe.webp" />

Cultural Connection and Variations

Where this recipe comes from

Patriotic Red, White and Blue Pastries bring a burst of national pride to any table, especially during summer celebrations like the Fourth of July. These vibrant treats trace their roots to American holiday traditions, where bakers layer fresh berries and creamy fillings to mirror the colors of the flag. Families often pass down their own twists—some swap strawberries for raspberries, while others fold in whipped cream or custard for extra richness.

Around the world, similar pastries take on local flavors. In France, bakers might use crème pâtissière and fresh currants for a refined touch. Meanwhile, in Australia, you’ll find pavlovas topped with kiwi and blueberries for a tropical spin. Even within the U.S., regional differences shine. Southern bakers might add a splash of bourbon to the filling, while coastal towns opt for lighter, citrus-infused versions. No matter the variation, Patriotic Red, White and Blue Pastries always celebrate community and creativity.

ays-cooking">How it fits in today’s cooking

Today, these pastries remain a staple for holidays, but they’ve also found a place in everyday baking. Modern cooks love how versatile they are—whether as a showstopping dessert for a backyard BBQ or a fun weekend project with kids. Some even adapt them into healthier dessert alternatives, using Greek yogurt or coconut cream.

Social media has fueled new trends, too. Bakers now experiment with mini tartlets or no-bake versions for quick summer treats. Despite the updates, the heart of Patriotic Red, White and Blue Pastries stays the same. They’re a delicious way to honor tradition while making new memories.

Taste and Texture

What makes it delicious

Patriotic Red, White and Blue Pastries burst with vibrant flavors and irresistible textures. The buttery, flaky crust crumbles delicately with each bite, while the creamy filling melts smoothly on your tongue. Fresh strawberries and blueberries add juicy sweetness, balanced by a hint of tartness that keeps every mouthful exciting. Meanwhile, the vanilla-infused whipped cream layer brings a light, airy richness that ties everything together. As you take a bite, the fragrant aroma of baked pastry and ripe berries fills the air, making these treats as delightful to smell as they are to eat. Whether served warm or chilled, Patriotic Red, White and Blue Pastries deliver a satisfying contrast of crisp edges and soft centers.

r">Boosting the flavor

Elevate your Patriotic Red, White and Blue Pastries with a few easy tweaks. For extra depth, drizzle a tangy lemon glaze over the top—its citrusy zing enhances the berries beautifully. Alternatively, sprinkle toasted coconut flakes for a nutty crunch that complements the creamy layers. If you love bold flavors, try folding a spoonful of homemade vanilla extract into the whipped cream for an aromatic upgrade. A dusting of powdered sugar or a dollop of lemon curd also adds a refreshing twist. With these simple touches, you can customize the pastries to match any taste preference while keeping their festive charm intact.

Tips for Success

Best practices for results

Always chill the dough before rolling it out to prevent sticking and ensure clean layers in your Patriotic Red, White and Blue Pastries. For vibrant colors, use gel food coloring instead of liquid, as it won’t thin the dough. Additionally, roll the dough evenly to avoid uneven baking—aim for a consistent ¼-inch thickness. Finally, bake on parchment paper to maintain the delicate texture and prevent browning on the bottoms.

>Mistakes to avoid

Overmixing the dough can make your Patriotic Red, White and Blue Pastries tough instead of flaky. Instead, gently combine ingredients just until they come together. Another common error is skipping the cooling step for the filling, which can cause soggy layers. For more troubleshooting tips, check out our guide on fixing dough issues. Also, avoid overcrowding the baking sheet, as proper airflow ensures even baking—learn more about perfect baking temperatures for best results.

Serving and Pairing Suggestions

How to serve this dish

Showcase your Patriotic Red, White and Blue Pastries as the star of any celebration. For a stunning display, arrange them on a tiered dessert stand with fresh berries and mint leaves for a pop of color. Alternatively, serve them individually on small plates with a dusting of powdered sugar for an elegant touch. These pastries shine at Fourth of July gatherings, Memorial Day brunches, or even as a sweet surprise at summer picnics. To make them extra festive, drizzle them with a light vanilla glaze or add a dollop of whipped cream on top.

What goes well with it

Pair your Patriotic Red, White and Blue Pastries with a refreshing glass of homemade lemonade or iced tea for a classic summer combo. The citrusy tang balances the sweetness perfectly. For a richer option, try serving them with a scoop of vanilla bean ice cream from our homemade ice cream collection. If you want to keep things light, these pastries also pair wonderfully with a fresh fruit salad featuring seasonal berries. For more brunch inspiration, check out our easy brunch ideas to complete your spread.

rc="https://s3-placid.s3.eu-central-1.amazonaws.com/production/rest-images/rawp1noeia0hh/int-ba5b0aa312f625a018c7624cbf4202fb-0qmidteg.jpg" />

What are the best red, white, and blue desserts for the 4th of July?

Patriotic Red, White and Blue Pastries like flag cakes, berry tarts, and layered parfaits are perfect for 4th of July celebrations. These desserts use strawberries, blueberries, and whipped cream or white chocolate to create a festive look. They’re easy to make and always a hit at patriotic gatherings.

How do you make red, white, and blue cupcakes?

To make Patriotic Red, White and Blue Pastries like cupcakes, start with vanilla batter and divide it into three portions. Dye one red and one blue, leaving the third white, then layer or swirl them in the liners. Top with white frosting and fresh berries for a festive finish.

ank-math-faq-item"> Can I use natural food coloring for red, white, and blue treats?

Yes! For Patriotic Red, White and Blue Pastries, use beet juice or raspberry puree for red, and blueberry puree or butterfly pea flower for blue. Skip artificial dyes while keeping the vibrant colors perfect for patriotic themes. Natural options work great in cakes, cookies, and frostings.

What fruits work best for red, white, and blue desserts?

Strawberries and raspberries provide the perfect red, while blueberries and blackberries give a deep blue hue for Patriotic Red, White and Blue Pastries. Pair them with white elements like whipped cream, vanilla frosting, or coconut flakes for a balanced, delicious dessert.

Best Homemade Chicken Stock – Easy & Flavorful

best-homemade-chicken-stock-easy

Introduction

There’s something deeply comforting about a pot of Homemade Chicken Stock simmering on the stove. The aroma fills your kitchen, wrapping you in warmth and nostalgia. Whether you’re crafting a hearty soup, a creamy risotto, or simply sipping it straight from a mug, this golden elixir transforms ordinary dishes into something extraordinary. Unlike store-bought versions, Homemade Chicken Stock lets you control the flavors, avoid additives, and make the most of every ingredient. Plus, it’s a delicious way to reduce food waste—something we’re passionate about here at Exorecipes.

Homemade Chicken Stock is the foundation of countless recipes, from classic chicken noodle soup to rich gravies and stews. Essentially, it’s a flavorful liquid made by simmering chicken bones, vegetables, and aromatics for hours, extracting their essence into every spoonful. Unlike bouillon cubes or canned broth, which often contain excessive salt and preservatives, this version tastes cleaner and more nuanced. Moreover, it’s packed with collagen, which supports gut health and adds a luxurious mouthfeel to dishes. If you’ve ever wondered why restaurant meals taste so rich, the secret often lies in their stock.

At Exorecipes, we believe cooking should feel approachable and rewarding. That’s why we emphasize techniques like making Homemade Chicken Stock—simple processes with big payoffs. Once you try it, you’ll notice the difference in everything from our creamy chicken pot pie to a basic pan sauce. And if you’re new to scratch cooking, don’t worry. Our beginner’s soup guide breaks down each step without overwhelm.

Why I Love This Recipe

Homemade Chicken Stock reminds me of my grandmother’s kitchen, where nothing went to waste and every scrap had purpose. She’d save vegetable peels and chicken carcasses in the freezer, then simmer them into magic. Now, whenever I make a batch, I think of her—how something so humble could be so nourishing. It’s not just about the flavor, though that’s undeniable. It’s about the ritual, the patience, and the love that goes into each pot. Every time I ladle it into a recipe, I know I’m honoring those traditions while creating new ones.

Health and Nutrition

Why it’s good for your body

Homemade Chicken Stock packs a powerful nutritional punch while keeping ingredients simple and wholesome. First, it delivers collagen from simmered bones, which supports joint health and promotes glowing skin. Additionally, the slow cooking process extracts minerals like calcium, magnesium, and phosphorus, helping to strengthen bones and teeth. Unlike store-bought versions, Homemade Chicken Stock contains no artificial additives, so you control the sodium and avoid unnecessary preservatives.

Moreover, the amino acids in Homemade Chicken Stock, such as glycine and proline, aid digestion and support gut health. These compounds help repair the intestinal lining, making it easier to absorb nutrients from other foods. Furthermore, the warm liquid soothes the throat and provides hydration, especially during cold seasons. Since you make it from scratch, Homemade Chicken Stock also retains more vitamins like B12 and iron, which boost energy levels and immune function.

Finally, the natural gelatin in Homemade Chicken Stock promotes satiety, helping you feel full longer. This makes it a smart choice for anyone managing weight or seeking balanced nutrition. Whether you sip it alone or use it as a base for soups and stews, Homemade Chicken Stock offers a delicious way to nourish your body.

How it fits in a healthy lifestyle

Homemade Chicken Stock fits seamlessly into a balanced diet, whether you follow specific eating plans or just aim for cleaner meals. For gluten-free or paleo lifestyles, it serves as a flavorful foundation for dishes without grains or processed ingredients. If you prioritize heart health, you can easily adjust the sodium levels while still enjoying its rich taste and mineral benefits.

Protein-focused eaters will appreciate how Homemade Chicken Stock enhances meals like hearty chicken soup, adding depth without extra calories. It also works well in meal prep, since you can freeze batches for quick weeknight cooking. For gut-friendly eating, try incorporating it into vegetable-based broths to maximize nutrient absorption.

Beyond recipes, sipping Homemade Chicken Stock as a warm drink can curb cravings and replace less nutritious snacks. Its versatility makes it a kitchen staple for anyone committed to mindful, wholesome eating.

Print
clock clock iconcutlery cutlery iconflag flag iconfolder folder iconinstagram instagram iconpinterest pinterest iconfacebook facebook iconprint print iconsquares squares iconheart heart iconheart solid heart solid icon

Homemade Chicken Stock

  • Author: Chef Mia

Description

A rich and flavorful homemade chicken stock perfect for soups, stews, and sauces.


Ingredients

Scale

For the Crust:

  • 1 whole chicken carcass (or 2 lbs chicken bones)
  • 1 large onion, quartered
  • 2 carrots, roughly chopped
  • 2 celery stalks, roughly chopped
  • 3 garlic cloves, smashed
  • 1 bay leaf
  • 1 tsp black peppercorns
  • 2 sprigs fresh thyme
  • 8 cups cold water
  • 1 tsp salt (optional)

Instructions

1. Prepare the Crust:

  1. Place chicken carcass or bones in a large stockpot.
  2. Add all vegetables, garlic, bay leaf, peppercorns, and thyme to the pot.
  3. Pour in cold water until ingredients are fully submerged.
  4. Bring to a boil over high heat, then reduce to a low simmer.
  5. Skim off any foam or impurities that rise to the surface.
  6. Simmer uncovered for 3-4 hours, occasionally skimming fat.
  7. Strain the stock through a fine-mesh sieve into a large bowl.
  8. Discard solids and let stock cool before storing or using.

Notes

You can customize the seasonings to taste.

How to Prepare This Dish

Steps and time-saving tips

Start by gathering all your ingredients for Homemade Chicken Stock—this ensures a smooth process without interruptions. First, place the chicken carcass or bones in a large pot, then cover them with cold water. Turn the heat to medium-high and bring the water to a gentle boil. Meanwhile, roughly chop onions, carrots, and celery—no need for precision here, as they’ll soften anyway. Once the water boils, reduce the heat to low and skim off any foam that rises to the top with a slotted spoon. Next, add the chopped vegetables, a handful of peppercorns, and a bay leaf or two. Let everything simmer uncovered for at least 4 hours, though longer cooking deepens the flavor. Stir occasionally to prevent sticking, and top off the water if it reduces too much. For a time-saving hack, use a slow cooker on low for 8-10 hours—just set it and forget it. Finally, strain the stock through a fine-mesh sieve into a large bowl, discarding the solids. Let it cool before storing, and skim off any fat once chilled. Homemade Chicken Stock freezes beautifully, so make extra for future soups or sauces.

and-learned-from">Mistakes I’ve made and learned from

Early on, I rushed the simmering process for Homemade Chicken Stock, thinking an hour would suffice—big mistake. The result was weak and lacked depth. Now, I always let it simmer for at least 4 hours, or even overnight in the slow cooker for maximum richness. Another blunder? Skipping the skimming step. Foam and impurities clouded the stock, so I learned to skim diligently in the first 30 minutes. For more on avoiding cloudy stock, check out my guide on achieving crystal-clear broth. Oh, and once I forgot to cool the stock before refrigerating—condensation diluted the flavor. Now, I let it cool completely, a tip I picked up from my storage essentials post. Trust me, patience pays off with Homemade Chicken Stock.

Cultural Connection and Variations

Where this recipe comes from

Homemade Chicken Stock carries a rich history, simmering in kitchens across cultures for centuries. In France, chefs elevate it to a golden elixir called fond blanc de volaille, while in China, ginger and scallions infuse it with warmth for healing soups. Meanwhile, Jewish grandmothers swear by their slow-cooked versions, often adding parsnips or dill for extra depth. My own family’s recipe? A rustic blend of roasted bones and thyme, passed down with the rule: “Never waste a carcass.”

Travel further, and you

’ll find variations like Mexico’s caldo de pollo, brightened with lime and cilantro, or Greece’s avgolemono, where lemon and eggs transform the broth into something silky. Even within the U.S., Southern cooks might toss in a ham hock, while New Englanders keep it simple with bay leaves and peppercorns. No matter the twist, Homemade Chicken Stock remains a universal kitchen staple—flexible, forgiving, and full of flavor.

How it fits in today’s cooking

Today, Homemade Chicken Stock still holds its place as a culinary workhorse. Meal preppers swear by it for boosting weeknight risottos, while health-conscious cooks rely on its gut-friendly collagen. During holidays, it’s the secret behind gravy that earns compliments, and in winter, it turns humble ingredients into cozy soups. Modern twists? Instant Pots slash cooking time, and freezer-friendly jars make homemade broth more convenient than ever.

For those juggling busy schedules, batch-cooking stock aligns perfectly with meal-prep strategies. Others fold it into global dishes, like ramen or paella, proving its versatility. And let’s not forget its role in comfort food classics—because nothing beats chicken noodle soup on a sick day. Whether you’re a tradition-keeper or a time-saver, Homemade Chicken Stock adapts to your kitchen without losing its soul.

>Taste and Texture

What makes it delicious

Homemade Chicken Stock delivers a deeply savory, umami-rich flavor that coats your tongue with warmth. The aroma alone fills the kitchen with earthy notes from simmered herbs, while the golden liquid carries a silky, almost velvety texture. Each sip bursts with the natural sweetness of caramelized onions, the brightness of fresh celery, and the subtle peppery kick from black peppercorns. Unlike store-bought versions, Homemade Chicken Stock has a clean, pure taste—no artificial aftertaste, just layers of comfort in every spoonful.

Boosting the flavor

For a richer depth, try roasting the chicken bones before simmering—this adds a smoky, almost nutty undertone to your Homemade Chicken Stock. Alternatively, toss in a splash of apple cider vinegar to brighten the flavors or a handful of dried mushrooms for an earthy boost. If you love aromatic herbs, fresh thyme or a bay leaf elevates the broth beautifully. Pair it with crusty bread for dipping or use it as a base for soups like our Creamy Tomato Soup. For more inspiration, check out our guide to perfect herb pairings to customize your stock.

Tips for Success

Best practices for results

Always start with high-quality bones and vegetables for the best Homemade Chicken Stock. Simmer the mixture gently for at least 4 hours to extract maximum flavor, but avoid boiling it too vigorously, as this can make the stock cloudy. Additionally, skim off any foam or impurities that rise to the surface during the first 30 minutes for a cleaner taste. Finally, strain the stock through a fine-mesh sieve and let it cool completely before storing to preserve freshness.

Mistakes to avoid

One common mistake is adding too much salt early on. Since the liquid reduces as it simmers, the flavors concentrate, so wait until the end to season your Homemade Chicken Stock. Another error is using only chicken breasts—opt for a mix of bones, wings, and feet for richer gelatin content. For more tips on balancing flavors, check out our guide on perfect soup bases. Also, avoid overcrowding the pot with vegetables, as this can dilute the stock. If you need help choosing the right ingredients, our stock ingredient guide has you covered.

Serving and Pairing Suggestions

How to serve this dish

Homemade Chicken Stock shines as a versatile base, so serve it warm in cozy mugs for a comforting sip or as the foundation for heartier dishes. For a polished touch, garnish bowls with fresh herbs like parsley or thyme and a drizzle of olive oil. Meanwhile, consider serving it alongside crusty bread for dipping, especially during chilly evenings or holiday gatherings. If you’re hosting a dinner party, elevate the presentation by pouring the stock into elegant teacups as a starter. Whether you’re prepping for a weeknight meal or a special occasion, Homemade Chicken Stock adds warmth and depth to any table.

h-it">What goes well with it

Pair Homemade Chicken Stock with a crisp white wine like Sauvignon Blanc to balance its rich flavors, or try a light herbal tea for a soothing combo. For sides, serve it with a fresh garden salad or roasted vegetables to keep the meal balanced. If you’re craving something heartier, pair it with our Garlic Herb Focaccia for dipping, or use it as a base for our Creamy Wild Mushroom Soup to double down on comfort. Each pairing enhances the stock’s savory notes while keeping the meal satisfying and flavorful.

How long does homemade chicken stock last in the fridge?

Homemade chicken stock stays fresh in the refrigerator for 4–5 days when stored in an airtight container. For longer storage, freeze it for up to 3 months. Always check for off smells or mold before using your homemade chicken stock.

ank-math-faq-item"> What’s the difference between chicken stock and chicken broth?

Homemade chicken stock is made by simmering bones, which gives it a richer flavor and more gelatin than broth. Chicken broth uses meat instead of bones and is typically seasoned, while homemade chicken stock is a neutral base for recipes.

Can I make homemade chicken stock without vegetables?

Yes, you can make homemade chicken stock with just bones, water, and salt, but vegetables like onions, carrots, and celery add depth of flavor. For a minimalist version, skip the veggies and focus on high-quality bones for a pure, rich homemade chicken stock.

How do I make homemade chicken stock less greasy?

Skim the fat off the top of your homemade chicken stock while it simmers or chill it overnight—the fat will solidify for easy removal. Straining through a fine-mesh sieve or cheesecloth also helps reduce greasiness in homemade chicken stock.

div>