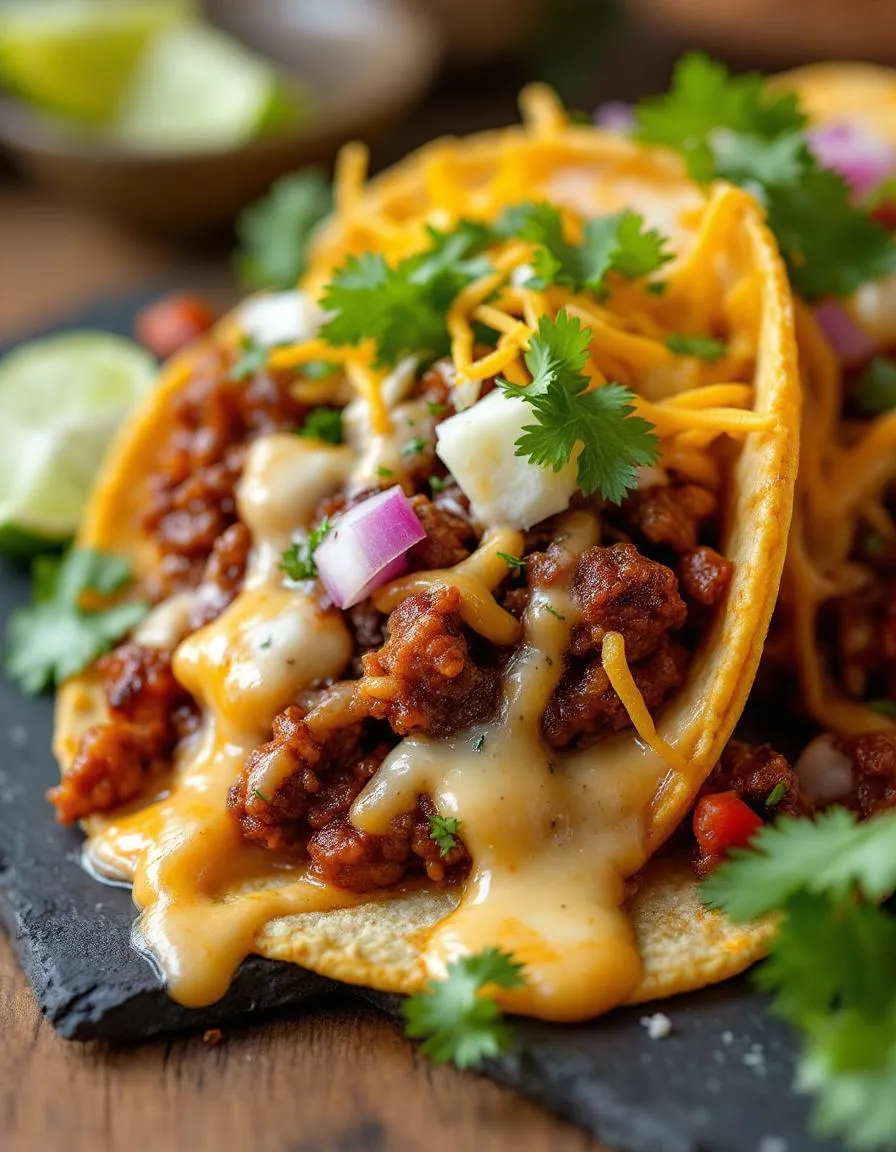
Imagine biting into a taco so rich and flavorful that it instantly transports you to a bustling street food market. The Smoked Quesa-Birria Taco Box: Flavorful Beef-Inspired Tacos delivers exactly that—a perfect blend of smoky, tender beef, melted cheese, and a deeply spiced consommé for dipping. Whether you’re hosting a game-day gathering or simply craving something extraordinary, these tacos promise to elevate your meal with every juicy, satisfying bite. Trust me, once you try them, you’ll never look at tacos the same way again.
The Smoked Quesa-Birria Taco Box: Flavorful Beef-Inspired Tacos combines two beloved culinary traditions: smoky barbecue and Mexican birria. Traditionally, birria features slow-cooked meat in a rich, aromatic broth, but this recipe takes it further by infusing the beef with smoky depth from low-and-slow cooking. The result? Tacos with layers of flavor—tender shredded beef, crispy cheese edges, and a consommé so good you’ll want to drink it. Plus, the interactive experience of dipping each taco adds a fun, communal element to any meal.
This dish fits perfectly with our blog’s mission to bring bold, globally inspired flavors to home cooks. If you love exploring unique twists on classics, you’ll adore how this recipe reinvents birria tacos with a smoky twist. For more taco inspiration, check out our Carnitas Tacos or dive into the world of homemade tortillas with our Flour Tortillas guide. Whether you’re a seasoned pitmaster or a weeknight warrior, these tacos offer a rewarding yet approachable project.
Why I Love This Recipe
I’ll never forget the first time I made Smoked Quesa-Birria Taco Box: Flavorful Beef-Inspired Tacos for friends. The moment they dipped their tacos into the consommé and took that first bite, the room fell silent—then erupted with praise. There’s something magical about how the smoky beef melds with the cheese and spicy broth, creating a harmony of textures and tastes. It’s more than a meal; it’s an experience that brings people together. Every time I make these, I’m reminded why cooking is my greatest joy—sharing unforgettable flavors with the people I love.
Health and Nutrition
Why it’s good for your body
The Smoked Quesa-Birria Taco Box: Flavorful Beef-Inspired Tacos packs a nutritious punch while delivering bold flavors. First, the protein-rich beef filling fuels muscle growth and keeps you full longer. Additionally, the slow-smoked cooking method locks in nutrients while enhancing taste. Moreover, the blend of spices like cumin and chili powder offers antioxidants that support immune health.
When you enjoy the Smoked Quesa-Birria Taco Box: Flavorful Beef-Inspired Tacos, you also benefit from collagen-rich broth. This key ingredient promotes joint health and gut wellness. Furthermore, the melted cheese provides calcium for strong bones. Since the tacos balance protein, healthy fats, and fiber-rich tortillas, they stabilize energy levels without spiking blood sugar.
Finally, the Smoked Quesa-Birria Taco Box: Flavorful Beef-Inspired Tacos includes fresh toppings like onions and cilantro. These add vitamins C and K, which boost skin health and circulation. Whether you savor them for lunch or dinner, these tacos turn flavor into nourishment.
How it fits in a healthy lifestyle
The Smoked Quesa-Birria Taco Box: Flavorful Beef-Inspired Tacos fits seamlessly into balanced eating. For high-protein diets, the beef and cheese deliver a satisfying macro boost. If you prefer gluten-free options, simply swap traditional tortillas for corn or almond flour versions. Heart-healthy eaters will appreciate the lean beef cuts and anti-inflammatory spices.
Pair these tacos with a side of roasted veggies or a light salad for a complete meal. For more gluten-free meal ideas, explore our gluten-free dessert guide. If you’re meal prepping, the Smoked Quesa-Birria Taco Box: Flavorful Beef-Inspired Tacos stores well for quick lunches. Check out our meal prep tips to keep flavors fresh all week. With smart choices, these tacos make healthy eating deliciously effortless.
A delicious fusion of smoky birria beef and melty cheese stuffed into crispy tortillas for the ultimate taco experience.
Ingredients
Scale
For the Crust:
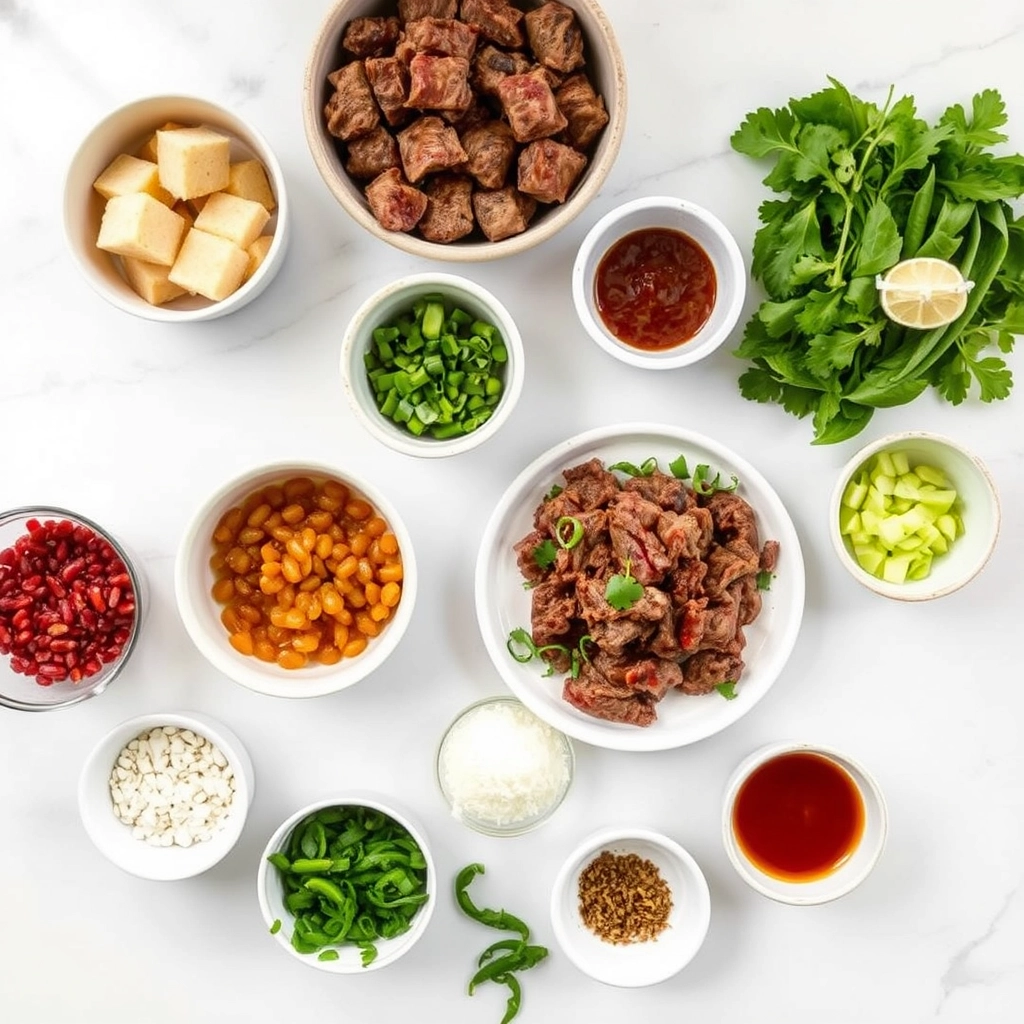
2 lbs beef chuck roast
4 dried guajillo chilies
2 dried ancho chilies
1 onion, quartered
4 cloves garlic
1 tsp cumin
1 tsp oregano
1 tsp smoked paprika
2 cups beef broth
12 corn tortillas
2 cups shredded Oaxaca cheese
1/4 cup chopped cilantro
1 lime, cut into wedges
Instructions
1. Prepare the Crust:
Soak dried chilies in hot water for 20 minutes, then blend with onion, garlic, and spices to make adobo sauce.
Rub beef with adobo sauce and smoke at 225°F for 4 hours until tender.
Shred the smoked beef and mix with remaining adobo sauce.
Dip tortillas in rendered beef fat and crisp on a griddle.
Fill each tortilla with shredded beef and cheese, then fold and cook until crispy.
Serve with cilantro, lime wedges, and consommé for dipping.
Notes
You can customize the seasonings to taste.
How to Prepare This Dish
Steps and time-saving tips
Start by seasoning your beef generously with a blend of smoked paprika, cumin, and garlic powder for that deep, rich flavor. Meanwhile, heat a cast-iron skillet over medium-high heat to sear the meat until it develops a caramelized crust. While the beef cooks, blend dried chiles, tomatoes, and spices in a food processor to create the signature birria sauce. Next, layer the shredded beef and sauce into corn tortillas, then fold them into perfect half-moons. For a crispy finish, lightly fry the tacos in a hot skillet until golden and slightly charred. To save time, prep the birria sauce a day ahead and store it in the fridge. Also, consider doubling the beef batch for leftovers—it freezes beautifully for quick meals later. Finally, serve your Smoked Quesa-Birria Taco Box with a side of consommé for dipping and fresh cilantro for brightness.
and-learned-from">Mistakes I’ve made and learned from
Early on, I rushed the beef sear, leaving it pale and lacking depth. Now, I patiently let it develop that crust—it’s worth every extra minute. Another blunder? Overloading the tacos with filling, which made them impossible to flip without falling apart. A light hand keeps them intact, just like my go-to taco folding techniques guide suggests. I also once skipped straining the birria sauce, resulting in a gritty texture. Lesson learned: always strain for silky smoothness. If you’re new to birria, my perfect birria broth breakdown helps avoid these pitfalls. Trust me, a little patience and attention transform these tacos from good to unforgettable.
Cultural Connection and Variations
Where this recipe comes from
The Smoked Quesa-Birria Taco Box: Flavorful Beef-Inspired Tacos traces its roots to the vibrant streets of Jalisco, Mexico, where birria—a slow-cooked, spice-infused meat dish—first gained fame. Traditionally, locals simmered goat or lamb in a rich adobo sauce, but over time, beef became a popular alternative. Meanwhile, the quesabirria twist, which adds melted cheese and a crispy tortilla, emerged as a modern street food sensation. Today, this dish bridges generations, blending ancestral techniques with bold, contemporary flavors.
Across Mexico, cooks pr
epare birria differently. In Tijuana, for instance, they often serve it as a stew with consommé for dipping. In contrast, the Smoked Quesa-Birria Taco Box: Flavorful Beef-Inspired Tacos highlights the smoky, grilled notes that American BBQ lovers adore. Some families even add a splash of vinegar or swap in pork for a tangier twist. No matter the variation, the dish always celebrates community, whether at weekend gatherings or late-night food trucks.
How it fits in today’s cooking
The Smoked Quesa-Birria Taco Box: Flavorful Beef-Inspired Tacos thrives in modern kitchens because it’s both nostalgic and Instagram-worthy. Home cooks love its versatility—it works for game-day spreads, cozy family dinners, or even meal prep. Many also tweak the recipe, like using an Instant Pot to speed up cooking or adding a smoky chipotle kick. For those hosting a crowd, pairing it with easy party appetizers creates a festive, shareable feast.
Seasonal twists keep it fresh year-round. In winter, the rich consommé warms you up, while summer calls for grilling the meat outdoors. Some even repurpose leftovers into creative leftover ideas, like birria grilled cheese. Ultimately, this dish proves that tradition and innovation can deliciously coexist.
>Taste and Texture
What makes it delicious
The Smoked Quesa-Birria Taco Box: Flavorful Beef-Inspired Tacos delivers a bold, mouthwatering experience from the first bite. Rich, smoky beef simmers in a fragrant blend of dried chilies and spices, creating a deep, savory flavor that lingers. Meanwhile, the melted cheese adds a creamy contrast, while the crispy-edged tortillas provide the perfect crunch. Each component works together, making every bite a harmony of textures—tender, gooey, and crisp. The aroma alone, with its hints of garlic and cumin, will have you reaching for seconds before you finish your first taco. Whether dipped in the savory consommé or enjoyed straight from the box, the Smoked Quesa-Birria Taco Box: Flavorful Beef-Inspired Tacos is a feast for the senses.
Boosting the flavor
Elevate your Smoked Quesa-Birria Taco Box: Flavorful Beef-Inspired Tacos with a few easy tweaks. First, try adding pickled red onions for a tangy brightness that cuts through the richness. Alternatively, a drizzle of creamy chipotle sauce adds a smoky kick. For extra heat, sprinkle crushed chili flakes or serve with a side of salsa verde. Fresh cilantro and lime wedges also bring a zesty freshness that balances the deep flavors. With these simple additions, you can customize each taco to your taste while keeping the soul of the dish intact.
Tips for Success
Best practices for results
Always sear the beef first to lock in juices before slow-cooking it for the Smoked Quesa-Birria Taco Box: Flavorful Beef-Inspired Tacos. Meanwhile, toast the dried chilies lightly to deepen their flavor without burning them. For the best texture, shred the beef while it’s still warm, as it becomes easier to handle. Additionally, warm your tortillas right before assembling to prevent cracking. Finally, serve the consommé hot for dipping—this step elevates the entire dish.
Mistakes to avoid
One common mistake is rushing the cooking process, which results in tough meat. Instead, give the beef enough time to become tender, checking it periodically. Another error is skipping the fat skim from the consommé, which can make it overly greasy. For perfectly balanced tacos, learn how to master meat prep and avoid these pitfalls. Also, don’t overcrowd the tortillas when filling them, or they may tear. For more tips on handling delicate ingredients, check out this guide on perfect tortilla techniques.
Serving and Pairing Suggestions
How to serve this dish
Bring the vibrant flavors of Smoked Quesa-Birria Taco Box: Flavorful Beef-Inspired Tacos to life with a festive presentation. For a crowd-pleasing setup, arrange the tacos on a large wooden board or colorful platter, then drizzle them with extra consommé for a glossy finish. Meanwhile, pile fresh garnishes like diced onions, cilantro, and lime wedges in small bowls nearby so everyone can customize their plate. These tacos shine at casual gatherings, game day parties, or even as a fun twist on Taco Tuesday. To elevate the experience, serve them alongside warm tortillas for dipping into the rich broth.
h-it">What goes well with it
Pair your Smoked Quesa-Birria Taco Box: Flavorful Beef-Inspired Tacos with refreshing sides and drinks to balance the smoky depth. First, a crisp Mexican street corn salad adds brightness and texture, while a creamy avocado crema enhances every bite. For drinks, try a tangy agua fresca or an ice-cold Mexican lager to cut through the richness. If you love bold flavors, our zesty mango habanero salsa adds a sweet-heat kick. Finally, end the meal on a sweet note with our churro cupcakes for a dessert that echoes the warmth of Mexican spices.
What makes Smoked Quesa-Birria Taco Box tacos different from regular birria tacos?
Smoked Quesa-Birria Taco Box: Flavorful Beef-Inspired Tacos stand out because they combine traditional birria flavors with a smoky twist. The beef is slow-smoked before being simmered in the rich consommé, adding depth to every bite. The melted cheese and crispy tortillas create the perfect quesabirria texture.
ank-math-faq-item">
How do I reheat Smoked Quesa-Birria Taco Box leftovers?
For best results, reheat your Smoked Quesa-Birria Taco Box tacos in a skillet over medium heat to maintain crispiness. Add a splash of the leftover consommé to keep the beef moist. Avoid microwaving, as it can make the tortillas soggy.
What sides pair well with Smoked Quesa-Birria Taco Box?
These Flavorful Beef-Inspired Tacos go perfectly with Mexican street corn, cilantro lime rice, or a fresh avocado salad. The rich smokiness of the Smoked Quesa-Birria Taco Box balances well with bright, acidic sides like pickled onions or tangy slaw.
Can I make Smoked Quesa-Birria Taco Box vegetarian?
While traditional Smoked Quesa-Birria Taco Box features beef, you can substitute jackfruit or mushrooms for a vegetarian version. Use the same smoking technique and spices to mimic the depth of flavor. The consommé can be made with vegetable broth and smoked paprika.
div>
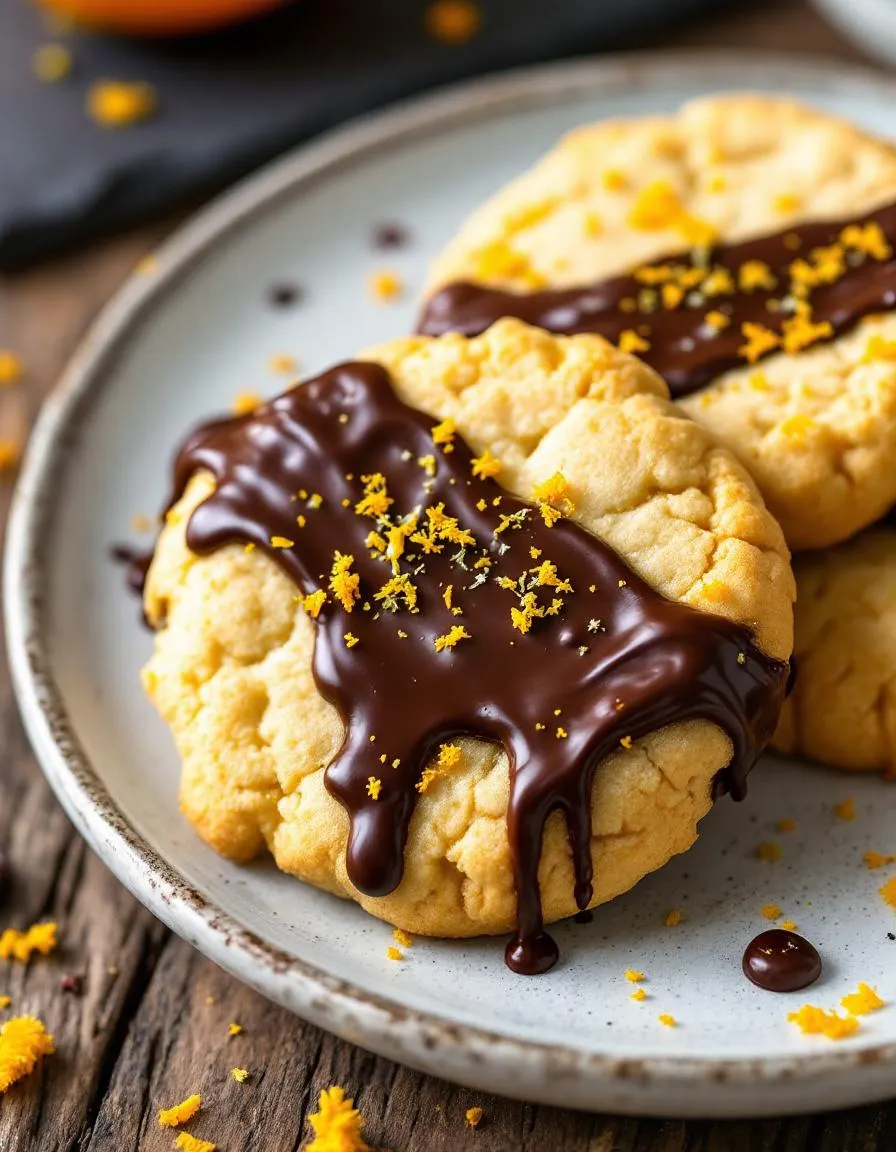
Best Zesty Chocolate Dipped Orange Shortbread Cookies
Introduction
There’s something magical about the first bite of a buttery shortbread cookie—especially when it’s infused with bright citrus and dipped in rich chocolate. If you’ve ever craved a treat that balances zesty freshness with indulgent sweetness, these Zesty Chocolate Dipped Orange Shortbread Cookies will steal your heart. Whether you’re baking for a holiday gathering, a cozy afternoon tea, or just because, this recipe delivers a flavor combo that feels both nostalgic and exciting. Trust me, one bite and you’ll understand why these cookies deserve a permanent spot in your dessert rotation.
Zesty Chocolate Dipped Orange Shortbread Cookies are a delightful twist on classic shortbread, blending tangy orange zest with a tender, crumbly texture. The citrusy kick cuts through the richness of the buttery dough, while the dark chocolate coating adds a luxurious finish. What makes this recipe special isn’t just the taste—it’s the simplicity. With just a handful of pantry staples, you can create a dessert that impresses without stress. Plus, the vibrant orange flavor pairs perfectly with seasonal ingredients, making it ideal for everything from winter celebrations to summer picnics. If you love easy yet elegant bakes, you’ll adore our Lemon Lavender Scones or Honey Fig Thumbprint Cookies for similar fuss-free wins.
This recipe fits our blog’s tone because it celebrates approachable creativity. We believe baking should feel joyful, not intimidating, and these cookies embody that spirit. They’re versatile enough for beginners but sophisticated enough to wow seasoned bakers. Whether you’re gifting them or savoring them solo, Zesty Chocolate Dipped Orange Shortbread Cookies bring a little sunshine to every bite. And let’s be honest—who can resist the combo of citrus and chocolate? It’s a match made in dessert heaven.
Why I Love This Recipe
These cookies remind me of my grandmother’s kitchen, where the scent of orange zest and melted chocolate always meant something delicious was coming. She taught me that the best recipes don’t need complexity—just quality ingredients and a dash of love. Every time I make these Zesty Chocolate Dipped Orange Shortbread Cookies, I feel that same warmth. They’re my go-to when I want to share a homemade treat that feels special but doesn’t keep me tied to the oven all day. Simple, satisfying, and full of flavor—that’s what baking should be.
Health and Nutrition
Why it’s good for your body
Zesty Chocolate Dipped Orange Shortbread Cookies offer a delightful balance of flavor and nutrition. First, the citrus zest provides a natural dose of vitamin C, which supports immune health and skin vitality. Additionally, dark chocolate delivers antioxidants that help combat oxidative stress, making these treats a smarter indulgence. Meanwhile, the buttery shortbread base offers sustained energy thanks to its balanced fat and carb content.
Moreover, the orange zest in Zesty Chocolate Dipped Orange Shortbread Cookies adds a refreshing twist while contributing dietary fiber. Fiber aids digestion and helps maintain steady blood sugar levels. Furthermore, dark chocolate contains flavonoids, which research suggests may support heart health. Together, these ingredients create a treat that satisfies cravings without excessive guilt.
Finally, portion control becomes effortless with these cookies since their rich flavor encourages mindful eating. Whether you enjoy one with tea or share them at gatherings, Zesty Chocolate Dipped Orange Shortbread Cookies deliver both taste and nourishment. Their combination of wholesome ingredients ensures you savor every bite while supporting your well-being.
How it fits in a healthy lifestyle
Zesty Chocolate Dipped Orange Shortbread Cookies fit seamlessly into a balanced diet when enjoyed in moderation. Their satisfying richness means you can curb sweet cravings with just one or two, making them a practical choice for mindful snacking. For those following a gluten-free lifestyle, simply swap the flour for a gluten-free blend to keep the recipe accessible.
Pair these cookies with a protein-rich snack like Greek yogurt or nuts to create a satisfying mini-meal. If you love heart-healthy desserts, explore our Dark Chocolate Avocado Mousse for another antioxidant-packed option. For more ideas on balancing treats with nutrition, check out our guide to Healthy Dessert Swaps. With thoughtful pairing and portion control, Zesty Chocolate Dipped Orange Shortbread Cookies become a delicious part of your wellness routine.
Buttery shortbread cookies infused with orange zest, dipped in rich dark chocolate for a delightful treat.
Ingredients
Scale
For the Crust:
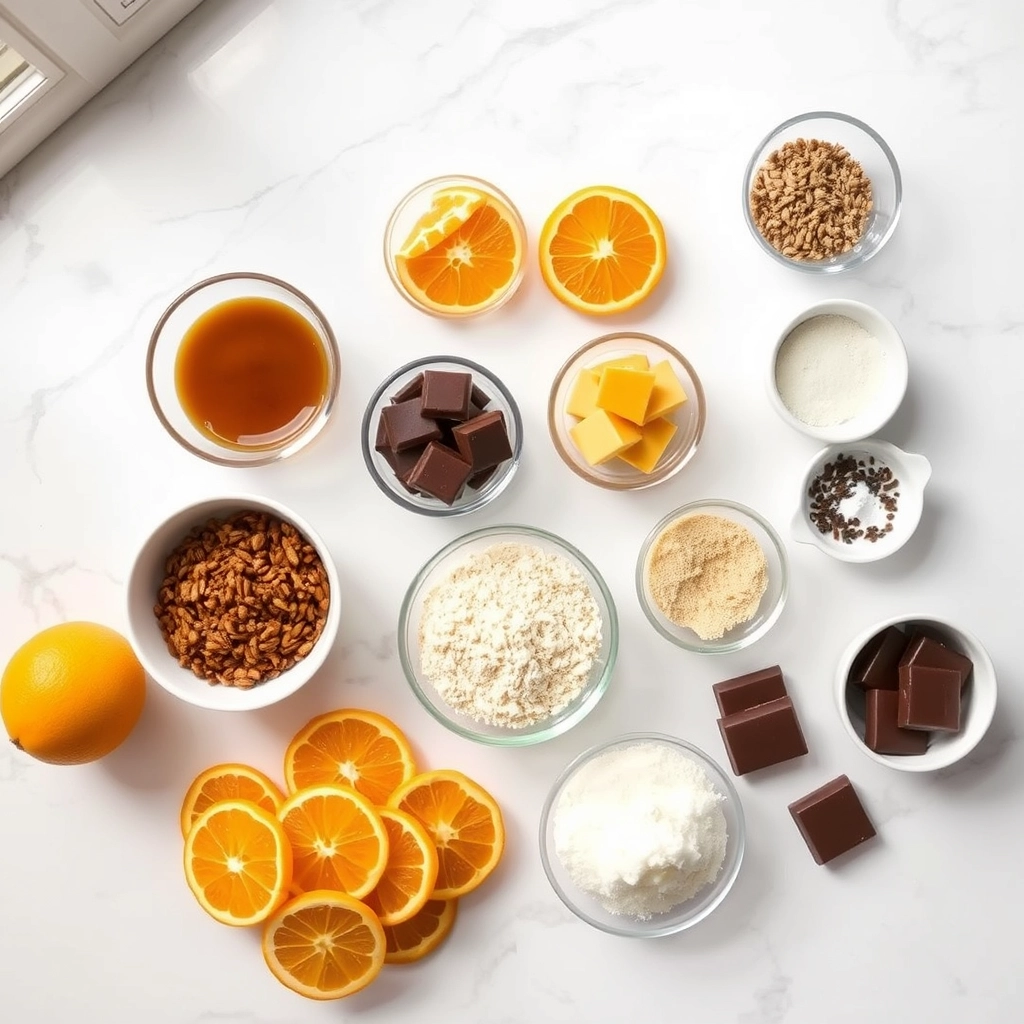
1 cup unsalted butter, softened
1/2 cup granulated sugar
2 cups all-purpose flour
1/4 teaspoon salt
2 tablespoons orange zest
1 teaspoon vanilla extract
1 cup dark chocolate chips, melted
Instructions
1. Prepare the Crust:
Preheat oven to 325°F (165°C). Line a baking sheet with parchment paper.
In a large bowl, cream together butter and sugar until light and fluffy.
Mix in orange zest and vanilla extract.
Gradually add flour and salt, mixing until a dough forms.
Roll dough into 1-inch balls and flatten slightly onto the baking sheet.
Bake for 12-15 minutes or until edges are lightly golden. Let cool completely.
Dip half of each cookie into melted dark chocolate and place on parchment to set.
Notes
You can customize the seasonings to taste.
s-dish">How to Prepare This Dish
Steps and time-saving tips
Start by preheating your oven to 350°F and lining a baking sheet with parchment paper. In a large bowl, cream together softened butter and sugar until light and fluffy, then mix in orange zest for that bright, zesty flavor. Gradually add flour and a pinch of salt, stirring just until the dough comes together—overmixing can make the shortbread tough. Roll the dough into small balls, flatten them slightly with your palm, and arrange them on the baking sheet. Bake for 12-15 minutes until the edges turn golden, then let them cool completely before dipping. Meanwhile, melt dark chocolate in short bursts in the microwave, stirring between intervals to avoid burning. Once the cookies are cool, dip each one halfway into the chocolate, let excess drip off, and place them on a wire rack to set. For a quicker set, pop them in the fridge for 10 minutes. If you’re short on time, skip rolling the dough and press it into a square pan, then slice after baking for uniform bars.
Mistakes I’ve made and learned from
I once rushed the cooling process and ended up with melted chocolate pooling off the cookies—patience is key! Now, I always test a cookie’s temperature with the back of my hand before dipping. Another blunder? Using cold butter straight from the fridge, which made the dough crumbly. Softening it to room temperature first, like I do for my Perfect Vanilla Cupcakes, ensures a smooth texture. And if your chocolate seizes, don’t panic—a splash of coconut oil or a trick from my Chocolate Troubleshooting Guide can save the day. Learn from my mishaps, and your Zesty Chocolate Dipped Orange Shortbread Cookies will turn out flawless every time.
n-and-variations">Cultural Connection and Variations
Where this recipe comes from
Zesty Chocolate Dipped Orange Shortbread Cookies weave together flavors that span continents and centuries. Shortbread itself traces back to medieval Scotland, where bakers prized its rich, buttery simplicity. Meanwhile, citrus and chocolate pairings gained fame in Europe, especially during the Renaissance, when explorers brought oranges from Asia and cacao from the Americas. Today, this cookie merges those traditions into a bright, indulgent treat.
Around the world, bakers put their own spin on similar recipes. In Italy, citrus-infused biscotti often get a dark chocolate drizzle. Mexican wedding cookies might include orange zest alongside cinnamon. Even in my family, we tweak Zesty Chocolate Dipped Orange Shortbread Cookies by adding a pinch of cardamom for warmth. Some bakers swap dark chocolate for white or mix in nuts for crunch. No matter the variation, the balance of tangy citrus and smooth chocolate always shines.
How it fits in today’s cooking
Zesty Chocolate Dipped Orange Shortbread Cookies still charm modern bakers because they’re versatile and nostalgic. They fit right into holiday cookie swaps, but their sunny citrus also makes them perfect for spring gatherings. Plus, they’re easy to customize—whether you prefer dairy-free butter or a vegan chocolate dip. For more inspiration, check out our guide to holiday baking tips.
Busy home cooks love ho
w these cookies freeze well, so they can bake ahead for parties or pack them in lunchboxes. Some even crumble them over ice cream for a quick dessert upgrade. If you’re looking for other creative cookie ideas, our easy dessert recipes collection has plenty of twists on classics. Whether you stick to tradition or experiment, Zesty Chocolate Dipped Orange Shortbread Cookies always deliver a bite of comfort and joy.
Taste and Texture
What makes it delicious
Zesty Chocolate Dipped Orange Shortbread Cookies deliver a perfect balance of rich, buttery sweetness and bright citrus tang. The shortbread crumbles delicately with each bite, while the dark chocolate coating adds a smooth, velvety finish. Fresh orange zest infuses every bite with a fragrant, zesty punch, complementing the deep cocoa notes. Meanwhile, the tender, melt-in-your-mouth texture contrasts beautifully with the slight snap of the chocolate shell. These cookies smell irresistible too—imagine warm vanilla, toasted butter, and a hint of sunny orange filling your kitchen. Whether you savor them slowly or devour them in one go, Zesty Chocolate Dipped Orange Shortbread Cookies leave a lingering, satisfying flavor that keeps you reaching for more.
Boosting the flavor
For an extra flavor twist, try swapping dark chocolate for white chocolate infused with vanilla bean or a sprinkle of sea salt. A dash of cinnamon or cardamom in the shortbread dough can deepen the warmth, while a drizzle of homemade caramel sauce adds gooey decadence. If you love citrus, fold in finely chopped candied orange peel for bursts of chewy sweetness. Pair these cookies with a cup of spiced chai latte to highlight the cozy, aromatic notes. Experimenting with toppings like crushed pistachios or flaky coconut can also add playful crunch and freshness.
Always chill the dough for at least 30 minutes before baking to prevent spreading and ensure Zesty Chocolate Dipped Orange Shortbread Cookies hold their shape. Additionally, use room-temperature butter for smooth blending, but avoid overmixing the dough to keep the texture tender. For even baking, rotate the tray halfway through, and let the cookies cool completely before dipping them in chocolate. Finally, use high-quality orange zest for the brightest flavor in your Zesty Chocolate Dipped Orange Shortbread Cookies.
Mistakes to avoid
One common mistake is skipping the parchment paper, which can lead to sticking and uneven browning. Instead, line your baking sheet for perfect results every time. Another error is adding too much flour, which makes the cookies dry. For the right consistency, follow our guide on measuring flour accurately. Also, avoid dipping warm cookies in chocolate, as it will melt and create a messy finish. For more troubleshooting tips, check out our article on common baking mistakes to keep your Zesty Chocolate Dipped Orange Shortbread Cookies flawless.
g-suggestions">Serving and Pairing Suggestions
How to serve this dish
Zesty Chocolate Dipped Orange Shortbread Cookies shine when you arrange them on a rustic wooden board or a vintage cake stand for a charming touch. Meanwhile, for special occasions, stack them in a clear glass jar tied with a ribbon to create a delightful edible gift. Alternatively, serve them alongside a scoop of vanilla bean ice cream for an elegant dessert pairing. These cookies also make a stunning addition to holiday cookie trays, especially when you sprinkle them with edible gold dust for extra sparkle.
What goes well with it
Pair Zesty Chocolate Dipped Orange Shortbread Cookies with a steaming cup of spiced chai tea to highlight their warm citrus notes. For a refreshing contrast, try them with a glass of cold almond milk or a citrus-infused sparkling water. If you love dessert pairings, serve them with our Vanilla Bean Panna Cotta for a creamy balance. Alternatively, enjoy them with a drizzle of our Salted Caramel Sauce to enhance the rich chocolate coating. Each pairing brings out the cookies’ vibrant flavors in a unique way.
math-faq-block">
What makes Zesty Chocolate Dipped Orange Shortbread Cookies unique?
Zesty Chocolate Dipped Orange Shortbread Cookies stand out for their perfect balance of rich buttery shortbread, bright citrus flavor, and a decadent chocolate coating. The combination of zesty orange zest and smooth chocolate creates a sophisticated twist on classic shortbread, making them a favorite for holiday gifting or elegant tea-time treats.
Can I use dark chocolate instead of milk chocolate for dipping?
Absolutely! Dark chocolate pairs beautifully with the citrus notes in Zesty Chocolate Dipped Orange Shortbread Cookies, offering a richer, less sweet contrast. Just ensure your chocolate has at least 60% cacao for the best flavor balance and smooth dipping consistency.
How long do Zesty Chocolate Dipped Orange Shortbread Cookies stay fresh?
When stored in an airtight container at room temperature, Zesty Chocolate Dipped Orange Shortbread Cookies remain fresh for up to 2 weeks. The shortbread base actually improves in texture after 1-2 days, allowing the orange flavor to meld beautifully with the chocolate coating.
ank-math-faq-item">
Can I freeze the dough for Zesty Chocolate Dipped Orange Shortbread Cookies?
Yes, the shortbread dough freezes wonderfully for up to 3 months—just wrap it tightly in plastic before freezing. Thaw overnight in the fridge before slicing and baking, then dip in chocolate as usual for freshly made Zesty Chocolate Dipped Orange Shortbread Cookies anytime.
Best Cheesy Spinach Chicken Burgers Recipe
Introduction
If you crave a juicy, flavorful burger with a healthy twist, Cheesy Spinach Chicken Burgers will quickly become your new go-to meal. These burgers pack a punch of protein, vibrant greens, and melty cheese—all while keeping things light and satisfying. Whether you need a quick weeknight dinner or a crowd-pleasing dish for your next cookout, this recipe delivers. Best of all, it’s easy to customize, so you can make it your own without sacrificing flavor or simplicity.
Cheesy Spinach Chicken Burgers combine ground chicken, fresh spinach, and gooey cheese into a patty that’s tender on the inside and perfectly seared on the outside. Unlike traditional beef burgers, this version offers a leaner protein option without skimping on taste. The spinach adds a subtle earthiness and a boost of nutrients, while the cheese ensures every bite stays irresistibly rich. Plus, these burgers fit seamlessly into busy lifestyles since they come together in under 30 minutes. If you love easy, wholesome meals, you’ll appreciate how this dish balances convenience and flavor. For more weeknight dinner ideas, check out our quick family dinners collection.
This recipe also aligns perfectly with our blog’s mission: making healthy eating approachable and delicious. Whether you’re a seasoned cook or just starting out, the straightforward steps guarantee success. You can serve these burgers on buns with your favorite toppings or enjoy them over a salad for a low-carb option. Either way, they’re versatile enough to suit any preference. If you’re looking for more creative ways to use chicken, our chicken meal prep guide offers plenty of inspiration.
Why I Love This Recipe
Cheesy Spinach Chicken Burgers hold a special place in my kitchen because they remind me of cozy family dinners. My kids often turn their noses up at greens, but when I mix spinach into these juicy patties, they devour every bite. I also love how forgiving the recipe is—whether I’m short on time or experimenting with extra spices, the result always feels like a win. It’s the kind of dish that brings everyone to the table without fuss, and that’s exactly what I cherish about it.
Health and Nutrition
Why it’s good for your body
Cheesy Spinach Chicken Burgers pack a powerful nutritional punch while delivering delicious flavor. First, lean chicken provides high-quality protein to support muscle growth and repair. Additionally, spinach adds a boost of iron, fiber, and vitamins A and C, which help strengthen immunity and digestion. The cheese not only enhances taste but also contributes calcium for strong bones.
Moreover, Cheesy Spinach Chicken Burgers offer a balanced meal in one convenient package. Unlike traditional beef burgers, they contain less saturated fat, making them a heart-friendly choice. Furthermore, the combination of protein and fiber keeps you full longer, reducing cravings for unhealthy snacks. Whether you’re fueling a workout or need a satisfying family dinner, these burgers deliver nutrients without sacrificing taste.
Finally, Cheesy Spinach Chicken Burgers adapt easily to dietary preferences. You can swap ingredients like whole-grain buns or dairy-free cheese for added flexibility. With each bite, you get a meal that supports energy, vitality, and overall well-being.
How it fits in a healthy lifestyle
Cheesy Spinach Chicken Burgers fit seamlessly into a balanced diet. They work well for meal prepping, offering a quick protein-rich option for busy weeknights. If you’re following a high-protein plan, these burgers help meet your goals while keeping calories in check. For gluten-free eaters, simply pair them with a lettuce wrap or gluten-free bun.
These burgers also align with heart-healthy eating. By using lean chicken and nutrient-dense spinach, you reduce unhealthy fats without losing flavor. For more ideas on balancing meals, check out our guide to healthy weekly meal plans. If you love versatile recipes, explore our tips for meal prepping like a pro to make Cheesy Spinach Chicken Burgers a staple in your routine.
Juicy chicken burgers packed with spinach and melted cheese, perfect for a quick and healthy meal.
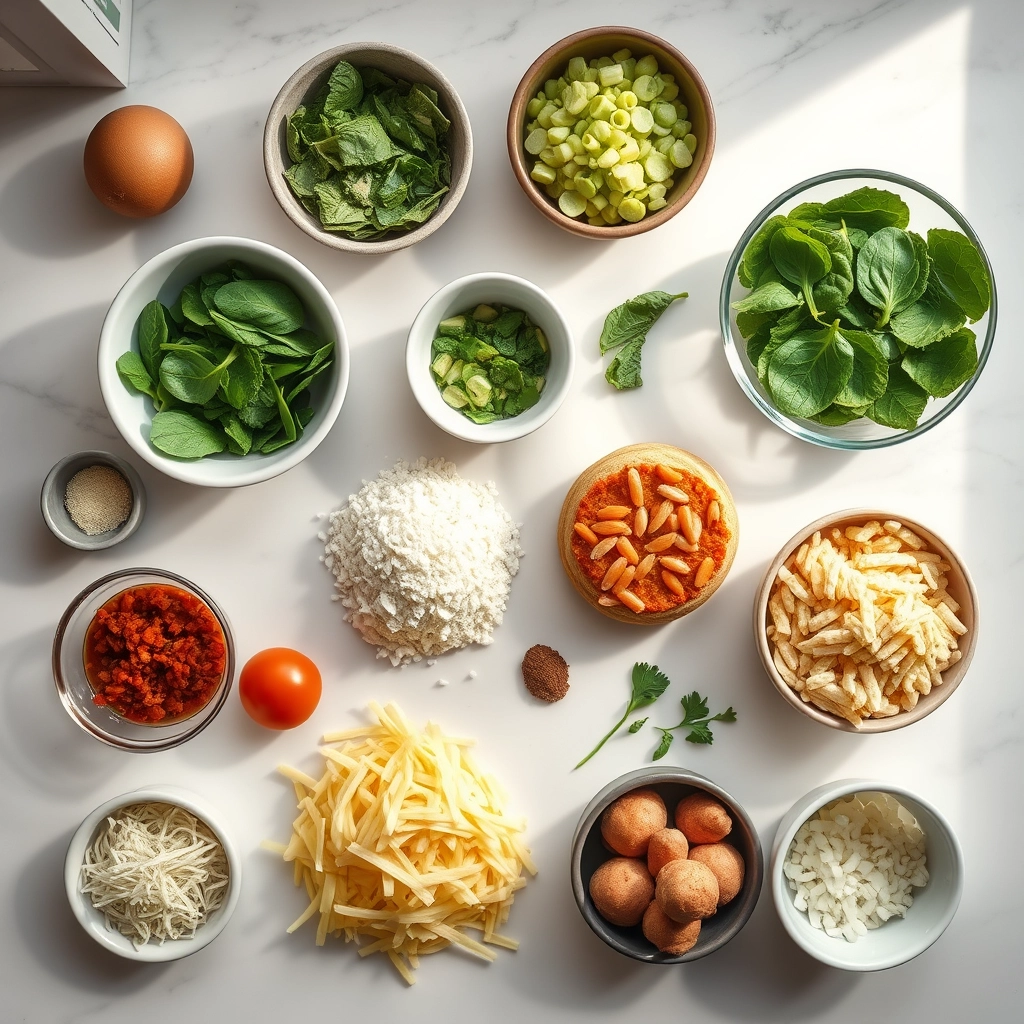
Ingredients
Scale
For the Crust:
1 lb ground chicken
1 cup fresh spinach, finely chopped
1/2 cup shredded cheddar cheese
1/4 cup breadcrumbs
1 egg
1 tsp garlic powder
1 tsp onion powder
1/2 tsp salt
1/4 tsp black pepper
4 burger buns
1 tbsp olive oil
Instructions
1. Prepare the Crust:
In a large bowl, combine ground chicken, chopped spinach, cheddar cheese, breadcrumbs, egg, garlic powder, onion powder, salt, and black pepper. Mix well.
Divide the mixture into 4 equal portions and shape into patties.
Heat olive oil in a skillet over medium heat. Cook the patties for 5-6 minutes per side, or until fully cooked and golden brown.
Toast the burger buns lightly if desired.
Assemble the burgers by placing each patty on a bun. Add your favorite toppings and serve immediately.
Notes
You can customize the seasonings to taste.
How to Prepare This Dish
Steps and time-saving tips
Start by preheating your oven to 375°F to save time while you prep the ingredients. Grab a large mixing bowl and combine ground chicken, finely chopped spinach, shredded cheese, breadcrumbs, and your favorite seasonings. Use your hands to mix everything evenly, but don’t overwork the meat—this keeps the burgers tender. Shape the mixture into four equal patties, pressing gently to avoid dense results. Meanwhile, heat a skillet with a drizzle of olive oil over medium-high heat. Sear the patties for 3-4 minutes per side until golden, then transfer them to a baking sheet. Pop them in the oven for 10-12 minutes to ensure they’re fully cooked yet juicy. While they bake, toast the buns lightly for extra crunch. Assemble your Cheesy Spinach Chicken Burgers by layering fresh lettuce, sliced tomatoes, and a dollop of garlic aioli. For a time-saving hack, prep the patties ahead and refrigerate them—they hold shape better when chilled. Serve immediately while the cheese is gloriously melty.
and-learned-from">Mistakes I’ve made and learned from
My first attempt at Cheesy Spinach Chicken Burgers ended in crumbly disaster because I skipped the breadcrumbs—turns out, they’re essential for binding. Now I always use this guide to burger binders to nail the texture. Another lesson? Overcooking. I used to fear underdone chicken, but a meat thermometer (like the one recommended in this kitchen tools roundup) solved that. Pull the patties at 165°F, and let them rest—they’ll stay moist. Also, wilting the spinach before mixing prevents excess moisture. Trust me, soggy burgers aren’t a vibe.
Cultural Connection and Variations
Where this recipe comes from
Cheesy Spinach Chicken Burgers might sound like a modern twist on comfort food, but they actually draw inspiration from global flavors. For instance, the combination of spinach and cheese echoes the filling of Greek spanakopita, while the chicken patty keeps it light yet hearty. In my family, we’ve always added a pinch of nutmeg to the spinach, a trick borrowed from German cuisine, giving these burgers a subtle warmth.
Across different region
s, cooks put their own spin on Cheesy Spinach Chicken Burgers. In the American South, you might find them smothered in a creamy pepper sauce, while in Italy, they could feature sun-dried tomatoes and mozzarella. Even the cooking method varies—some grill the patties for a smoky finish, while others pan-fry them for a crispy crust. No matter the variation, the dish always brings people together, whether at backyard BBQs or cozy weeknight dinners.
How it fits in today’s cooking
Today, Cheesy Spinach Chicken Burgers fit perfectly into our busy lives. They’re versatile enough for meal prep, yet special enough to serve at gatherings. Many home cooks lighten them up by using turkey instead of chicken or swapping in vegan cheese for a plant-based twist. Plus, they’re a great way to sneak greens into picky eaters’ meals—something every parent appreciates.
You can also pair these burgers with sides like air fryer sweet potato fries for a healthier twist or serve them alongside a refreshing watermelon feta salad in the summer. Whether you’re cooking for one or feeding a crowd, Cheesy Spinach Chicken Burgers adapt effortlessly to modern tastes and routines, proving that comfort food never goes out of style.
>Taste and Texture
What makes it delicious
Cheesy Spinach Chicken Burgers deliver a mouthwatering blend of savory, creamy, and earthy flavors. The juicy chicken patty, packed with tender spinach and melted cheese, offers a satisfying bite with every forkful. Garlic and herbs infuse the meat with a fragrant aroma, while the melted cheese adds a rich, gooey texture that contrasts perfectly with the slight crispness of the toasted bun. Fresh spinach keeps the dish light yet flavorful, balancing the richness of the cheese. Whether you grill or pan-fry them, Cheesy Spinach Chicken Burgers promise a hearty, comforting meal that’s as delicious as it is wholesome.
Boosting the flavor
Elevate your Cheesy Spinach Chicken Burgers with a few creative tweaks. For extra tang, mix crumbled feta into the patties or drizzle with a zesty garlic herb sauce. If you love heat, add diced jalapeños or a sprinkle of smoked paprika. Toasted brioche buns or a smear of sundried tomato aioli add gourmet flair without extra effort. Experiment with different cheeses, like sharp cheddar or pepper jack, to tailor the flavor to your taste. With these simple upgrades, your burgers will shine even brighter.
Tips for Success
Best practices for results
Always mix the ground chicken with the spinach and cheese gently to avoid overworking the meat, which can make the burgers tough. For the juiciest Cheesy Spinach Chicken Burgers, refrigerate the patties for at least 15 minutes before cooking to help them hold their shape. Additionally, use a meat thermometer to ensure the internal temperature reaches 165°F for perfect doneness. If you prefer a crispier exterior, lightly oil the grill or pan before cooking. Finally, let the burgers rest for a few minutes after cooking to lock in the flavors.
Mistakes to avoid
Avoid squeezing excess moisture from the spinach too aggressively, as this can dry out your Cheesy Spinach Chicken Burgers. Instead, pat it lightly with a paper towel for the right texture. Another common mistake is flipping the burgers too early—wait until they release easily from the pan to prevent sticking. For more grilling tips, check out our guide on grilling perfect burgers. Also, don’t skip resting the patties after shaping; this step ensures they stay intact during cooking. If you’re new to handling ground chicken, our ground chicken recipes offer helpful techniques.
Serving and Pairing Suggestions
How to serve this dish
For a picture-perfect presentation, stack your Cheesy Spinach Chicken Burgers on toasted brioche buns with a generous drizzle of garlic aioli. Meanwhile, tuck a few fresh spinach leaves under the patty for a vibrant pop of color. If you’re hosting a summer cookout, serve them alongside a build-your-own burger bar with toppings like caramelized onions, avocado slices, and roasted red peppers. Alternatively, slice them into sliders for game-day appetizers or holiday gatherings. No matter the occasion, these burgers always steal the spotlight.
h-it">What goes well with it
Crispy sweet potato fries make an irresistible side for Cheesy Spinach Chicken Burgers, offering a sweet contrast to the savory flavors. For a lighter option, try a tangy cucumber salad or our refreshing Lemony Herb Quinoa Salad. When it comes to drinks, a chilled citrus IPA or sparkling lemonade balances the richness perfectly. Don’t forget to whip up a batch of our creamy Avocado Ranch Dip for dunking—it’s a crowd favorite every time.
Can I use frozen spinach for Cheesy Spinach Chicken Burgers?
Yes, frozen spinach works perfectly for Cheesy Spinach Chicken Burgers. Just thaw and squeeze out excess water before mixing it into the chicken patty mixture. Fresh spinach also works, but frozen is often more convenient and budget-friendly.
ank-math-faq-item">
What cheese melts best in Cheesy Spinach Chicken Burgers?
Mozzarella, cheddar, or Monterey Jack are ideal for Cheesy Spinach Chicken Burgers because they melt smoothly and complement the flavors. For extra creaminess, try mixing cream cheese into the patty mixture before cooking.
How do you keep Cheesy Spinach Chicken Burgers from falling apart?
Bind the patties with an egg or breadcrumbs to prevent Cheesy Spinach Chicken Burgers from crumbling. Chilling the patties for 30 minutes before cooking also helps them hold their shape better on the grill or stovetop.
Can I make Cheesy Spinach Chicken Burgers ahead of time?
Absolutely! Prepare the Cheesy Spinach Chicken Burger patties up to 24 hours in advance and store them covered in the fridge. For longer storage, freeze uncooked patties between parchment paper for up to 3 months.
div>
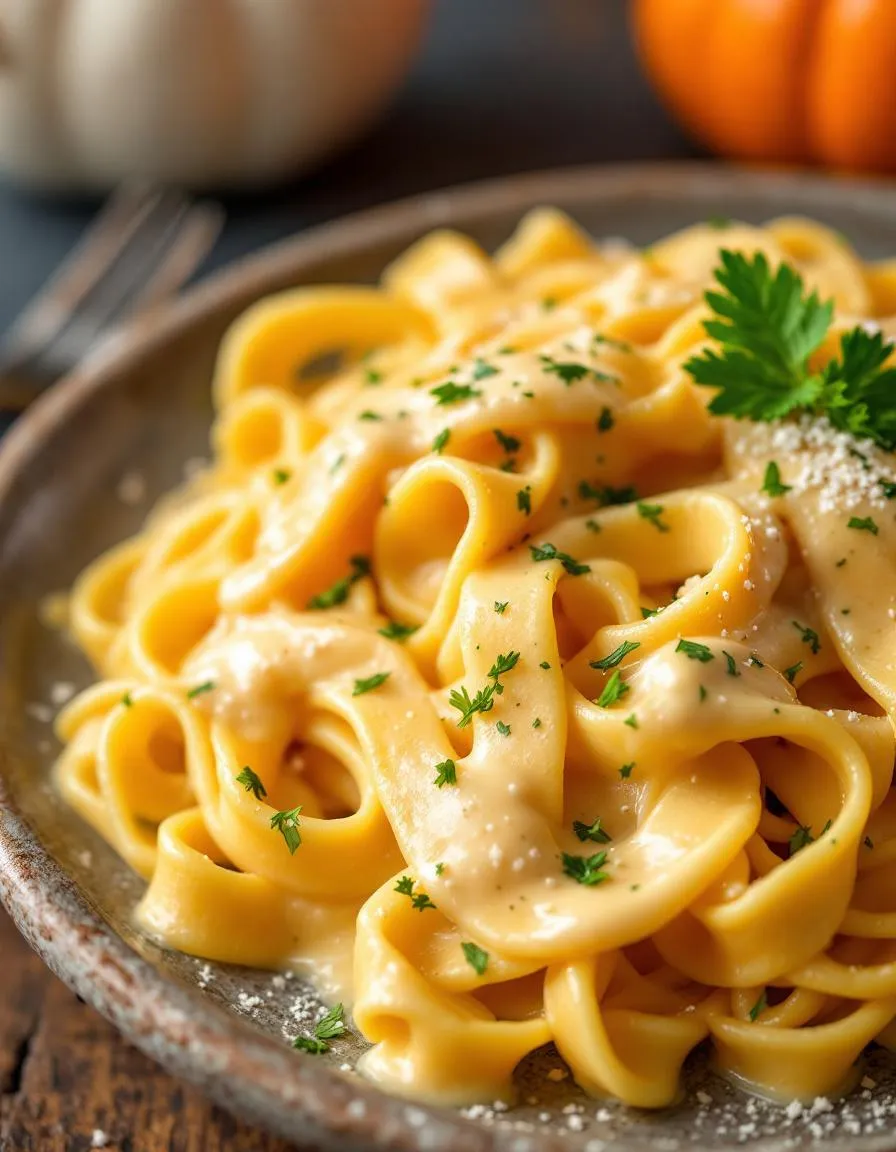
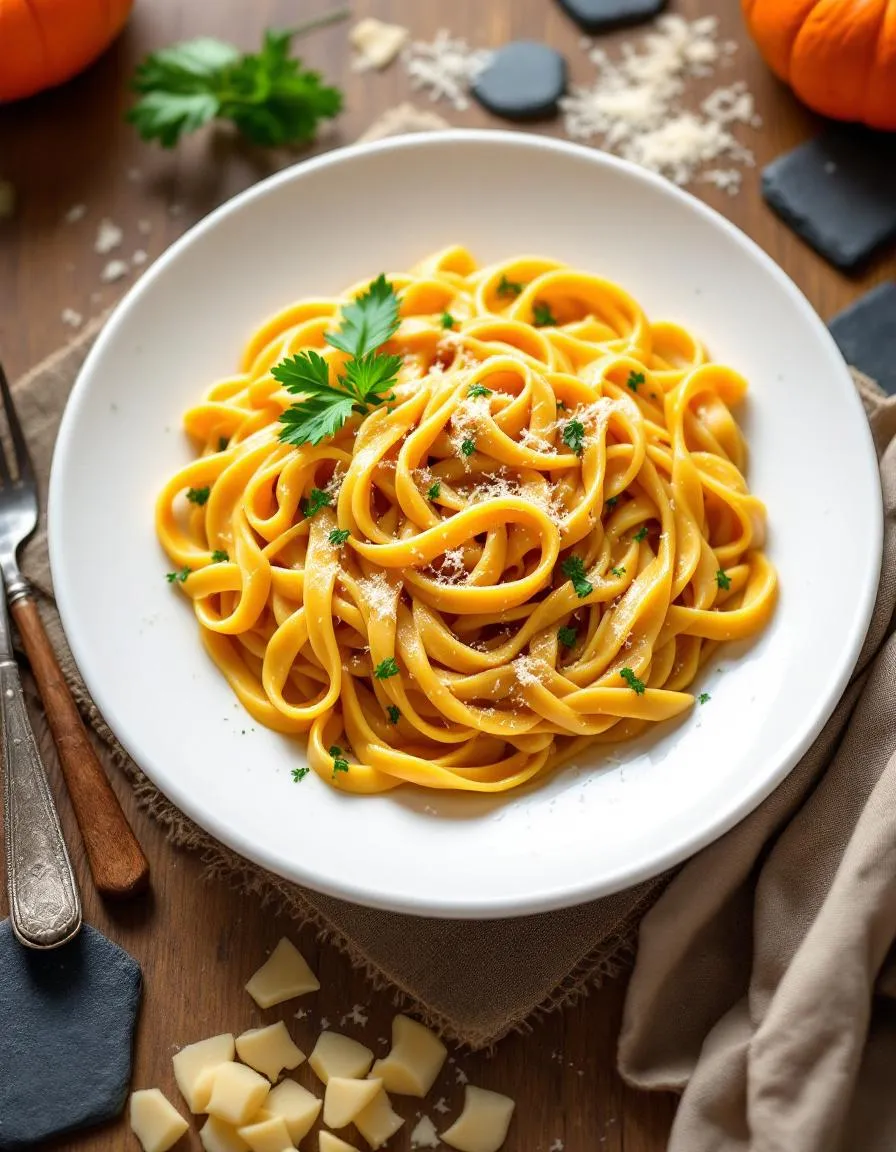
Best Creamy Pumpkin Alfredo Pasta Delight
Introduction
There’s something magical about the first bite of a dish that wraps you in warmth and nostalgia. If you crave a meal that feels like a cozy hug, this Creamy Pumpkin Alfredo Pasta Delight is your answer. Perfect for crisp autumn evenings or anytime you want a touch of comfort, this recipe blends rich, velvety flavors with a hint of seasonal charm. Whether you’re a pumpkin enthusiast or just looking for a twist on classic pasta, this dish promises to delight your taste buds and soothe your soul.
Creamy Pumpkin Alfredo Pasta Delight is a luxurious yet approachable dish that combines tender pasta with a silky sauce made from pumpkin puree, garlic, cream, and Parmesan. Unlike traditional Alfredo, this version adds a subtle sweetness and earthy depth, making it a standout for fall gatherings or weeknight dinners. What makes it special is its versatility. You can easily customize it with roasted vegetables, crispy bacon, or a sprinkle of nutmeg for extra warmth. Plus, it’s a fantastic way to sneak in nutrients, as pumpkin packs vitamins and fiber.
This recipe fits perfectly with our blog’s mission to bring joy to everyday cooking. Just like our Garlic Herb Roasted Chicken, it’s simple enough for beginners but impressive enough for special occasions. And if you love seasonal twists, you’ll adore how it pairs with our Cinnamon Apple Crisp for a full autumn-inspired meal. Whether you’re cooking for family or treating yourself, this dish delivers comfort and flavor in every forkful.
Why I Love This Recipe
This Creamy Pumpkin Alfredo Pasta Delight holds a special place in my heart because it reminds me of my grandmother’s kitchen. She always believed the best meals were the ones that brought people together, and this dish does exactly that. The first time I made it, the aroma of garlic and pumpkin filled my home, instantly transporting me back to her cozy dinners. Now, I love sharing it with friends, who always ask for seconds. It’s more than just a recipe. It’s a delicious way to create new memories while honoring old ones.
Health and Nutrition
Why it’s good for your body
Creamy Pumpkin Alfredo Pasta Delight packs a nutritious punch while satisfying your taste buds. First, pumpkin delivers a hefty dose of vitamin A, which supports vision and immune health. Additionally, the fiber in pumpkin aids digestion and keeps you feeling full longer. Meanwhile, the alfredo sauce, when made with wholesome ingredients, provides calcium and healthy fats for sustained energy.
Moreover, this dish balances indulgence with nourishment. Unlike heavy traditional alfredo dishes, Creamy Pumpkin Alfredo Pasta Delight incorporates lighter elements like garlic and herbs, which offer anti-inflammatory benefits. The pasta, especially if whole-grain, adds complex carbs for steady energy. Together, these ingredients create a meal that fuels your body without weighing you down.
Finally, pumpkin’s natural sweetness reduces the need for excess sugar. As a result, Creamy Pumpkin Alfredo Pasta Delight satisfies cravings while keeping added sugars low. Whether you seek comfort or nutrition, this dish delivers both in every bite.
How it fits in a healthy lifestyle
Creamy Pumpkin Alfredo Pasta Delight fits seamlessly into balanced eating habits. For those watching gluten intake, simply swap regular pasta for a gluten-free alternative. The dish also pairs well with lean proteins like grilled chicken or shrimp, making it a versatile option for muscle recovery. If you’re meal prepping, it stores beautifully for quick, wholesome lunches.
This recipe aligns with heart-healthy goals, too. Pumpkin’s potassium helps regulate blood pressure, while olive oil in the sauce promotes good cholesterol. For more ways to incorporate nutrient-rich meals, explore our healthy dinner ideas. And if you love seasonal ingredients, check out our fall recipes for more inspiration. Creamy Pumpkin Alfredo Pasta Delight proves that delicious and nutritious can go hand in hand.
A rich and creamy pumpkin-infused Alfredo pasta that’s perfect for fall.
Ingredients
Scale
For the Crust:
12 oz fettuccine pasta
1 cup pumpkin puree
1 cup heavy cream
1/2 cup grated Parmesan cheese
2 cloves garlic, minced
2 tbsp unsalted butter
1/2 tsp nutmeg
1/2 tsp salt
1/4 tsp black pepper
Fresh parsley for garnish
Instructions
1. Prepare the Crust:
Cook the fettuccine pasta according to package instructions until al dente. Drain and set aside.
In a large skillet, melt butter over medium heat. Add minced garlic and sauté until fragrant, about 1 minute.
Stir in pumpkin puree, heavy cream, nutmeg, salt, and black pepper. Simmer for 5 minutes, stirring occasionally.
Add Parmesan cheese and stir until the sauce is smooth and creamy.
Toss the cooked pasta in the sauce until well coated. Garnish with fresh parsley before serving.
Notes
You can customize the seasonings to taste.
“`html
How to Prepare This Dish
Steps and time-saving tips
Start by boiling your pasta in salted water until al dente, then drain and set it aside. Meanwhile, heat a large skillet over medium heat and melt butter before adding minced garlic for a quick sauté. Stir in pumpkin puree, heavy cream, and grated Parmesan cheese, whisking until the sauce turns smooth and velvety. For extra flavor, sprinkle in nutmeg and black pepper, then fold the cooked pasta into the sauce until every strand is coated. If the sauce feels too thick, thin it with a splash of reserved pasta water. While the Creamy Pumpkin Alfredo Pasta Delight simmers, toast some breadcrumbs in a separate pan for a crunchy topping. Finally, garnish with fresh parsley and serve immediately. To save time, use canned pumpkin puree and pre-grated Parmesan, but avoid oversaucing the pasta—start with less and add more as needed.
and-learned-from">Mistakes I’ve made and learned from
One mistake I made early on was overcooking the garlic, which gave the Creamy Pumpkin Alfredo Pasta Delight a bitter taste. Now, I sauté it just until fragrant, about 30 seconds. Another blunder was skipping the pasta water reserve, leaving the sauce too thick. Trust me, that starchy liquid is a lifesaver for adjusting consistency. I also learned the hard way that not all pumpkin purees are equal—some brands are watery, so I always opt for the thicker variety. For more sauce tips, check out my guide on perfecting pasta sauces. And if you’re new to working with pumpkin, my pumpkin cooking basics post will help you avoid common pitfalls.
“`
n-and-variations">Cultural Connection and Variations
Where this recipe comes from
Creamy Pumpkin Alfredo Pasta Delight blends the warmth of Italian comfort food with the cozy flavors of fall. While traditional Alfredo sauce hails from Rome, this version takes inspiration from American seasonal cooking, where pumpkin transforms everything from lattes to pies. Families in the Midwest often tweak the recipe by adding a pinch of nutmeg or swapping heavy cream for coconut milk, making it their own. Meanwhile, in Italy, chefs might use butternut squash instead of pumpkin for a similar earthy sweetness.
In my kitchen, Creamy Pumpkin Alfredo Pasta Delight became a Thanksgiving staple after a friend shared her twist on the classic. She roasted the pumpkin with garlic before blending it into the sauce, deepening the flavor. Across the globe, variations pop up—some cooks in Japan add miso for umami richness, while others in Mexico sprinkle chili flakes for heat. No matter where it’s made, this dish bridges cultures through shared comfort and creativity.
How it fits in today’s cooking
Today, Creamy Pumpkin Alfredo Pasta Delight fits perfectly into modern meal routines. Busy home cooks love it for weeknight dinners, while food bloggers spotlight it as a seasonal showstopper. Many adapt it for dietary needs, like using gluten-free pasta or vegan substitutes for a plant-based twist. Others pair it with a crisp salad or crusty bread for a complete meal.
Its versatility keeps i
t relevant year-round, not just during fall. Some even serve it at holiday gatherings alongside classics like holiday desserts, blending tradition with innovation. Whether you’re craving comfort or celebrating the season, this dish adapts to your table—proving that good food only gets better with time.
Taste and Texture
What makes it delicious
Creamy Pumpkin Alfredo Pasta Delight wraps your taste buds in a velvety embrace, blending rich pumpkin puree with garlic-infused Alfredo sauce for a decadent yet balanced flavor. The sauce coats each noodle smoothly, while a hint of nutmeg and Parmesan adds warmth and depth. Meanwhile, the tender pasta offers a satisfying chew, contrasting with the occasional crunch of toasted breadcrumbs or crispy sage. Every bite smells like autumn—earthy, buttery, and faintly sweet—making Creamy Pumpkin Alfredo Pasta Delight a feast for the senses.
Boosting the flavor
For a bolder twist, stir in roasted garlic or a splash of white wine while simmering the sauce—it deepens the savory notes beautifully. Top with crumbled bacon or toasted pecans for extra texture, or drizzle with homemade truffle oil for luxury. If you love heat, a pinch of red pepper flakes wakes up the dish. Pair it with a crisp arugula salad to cut through the creaminess, creating a meal that’s both indulgent and refreshing.
Always use fresh pumpkin puree for the best flavor in your Creamy Pumpkin Alfredo Pasta Delight. Additionally, stir the sauce constantly while simmering to prevent clumping. For extra creaminess, gradually whisk in the Parmesan instead of adding it all at once. Meanwhile, cook the pasta al dente since it will soften slightly when mixed with the sauce. Finally, taste and adjust seasoning just before serving to ensure a perfectly balanced dish.
Mistakes to avoid
Avoid overcooking the sauce, as high heat can cause it to separate. Instead, keep the temperature low and steady for a smooth texture. Also, don’t skip reserving pasta water—it helps thin the sauce if needed. For more sauce troubleshooting tips, check out our guide on fixing broken sauces. Another common mistake is using watery pumpkin puree, which dilutes the flavor. If your puree seems thin, strain it first or follow our thickening sauces method for better results.
g-suggestions">Serving and Pairing Suggestions
How to serve this dish
Elevate your Creamy Pumpkin Alfredo Pasta Delight by serving it in shallow bowls to showcase its rich texture. For a festive touch, sprinkle toasted pumpkin seeds or fresh sage leaves on top. Meanwhile, this dish shines at holiday gatherings or cozy weeknight dinners. If you want extra flair, drizzle a swirl of olive oil or add a sprinkle of grated Parmesan just before serving. Finally, pair it with warm breadsticks or a crisp salad for a complete meal.
What goes well with it
A crisp white wine like Chardonnay balances the richness of Creamy Pumpkin Alfredo Pasta Delight perfectly. Alternatively, try a warm apple cider for a seasonal twist. For sides, roasted Brussels sprouts or a light arugula salad add freshness. If you love bread, our garlic herb focaccia makes an irresistible companion. For dessert, our spiced pumpkin cake keeps the autumn flavors flowing.
math-faq-block">
What makes Creamy Pumpkin Alfredo Pasta Delight different from regular Alfredo pasta?
Creamy Pumpkin Alfredo Pasta Delight adds a seasonal twist to classic Alfredo by incorporating pumpkin puree, which gives the sauce a rich, velvety texture and subtle sweetness. The pumpkin also pairs perfectly with traditional Alfredo ingredients like garlic, Parmesan, and cream, creating a unique fall-inspired dish.
Can I make Creamy Pumpkin Alfredo Pasta Delight dairy-free?
Yes! Substitute heavy cream with coconut milk or cashew cream, use nutritional yeast instead of Parmesan, and opt for dairy-free butter. The pumpkin puree still gives Creamy Pumpkin Alfredo Pasta Delight its signature texture and flavor while keeping it plant-based.
What protein pairs well with Creamy Pumpkin Alfredo Pasta Delight?
Grilled chicken, crispy pancetta, or sautéed shrimp complement Creamy Pumpkin Alfredo Pasta Delight beautifully. For a vegetarian option, try adding roasted chickpeas or white beans to boost the protein while maintaining the dish’s cozy autumn vibe.
ank-math-faq-item">
How long does Creamy Pumpkin Alfredo Pasta Delight last in the fridge?
Store Creamy Pumpkin Alfredo Pasta Delight in an airtight container for 3-4 days. Reheat gently on the stovetop with a splash of milk or broth to restore the sauce’s creamy consistency. The flavors often deepen after a day, making leftovers even more delicious.
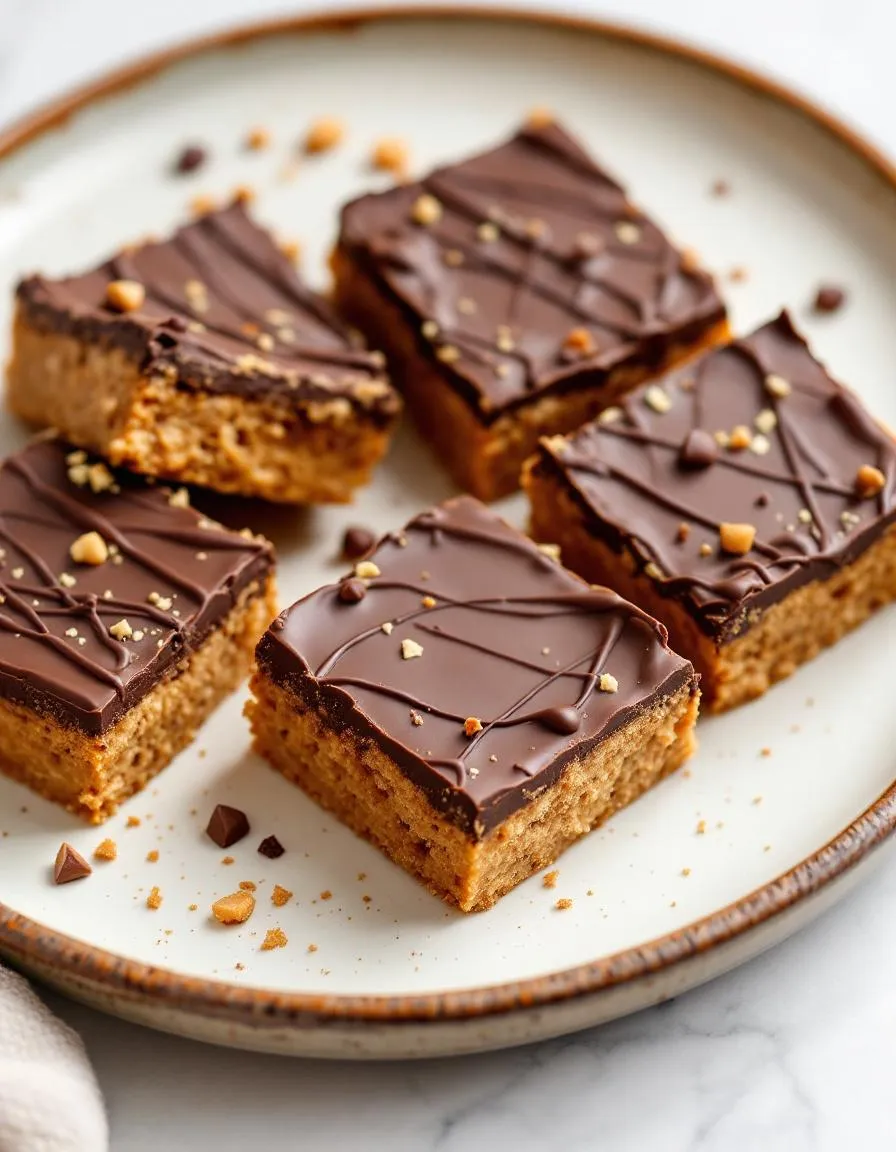
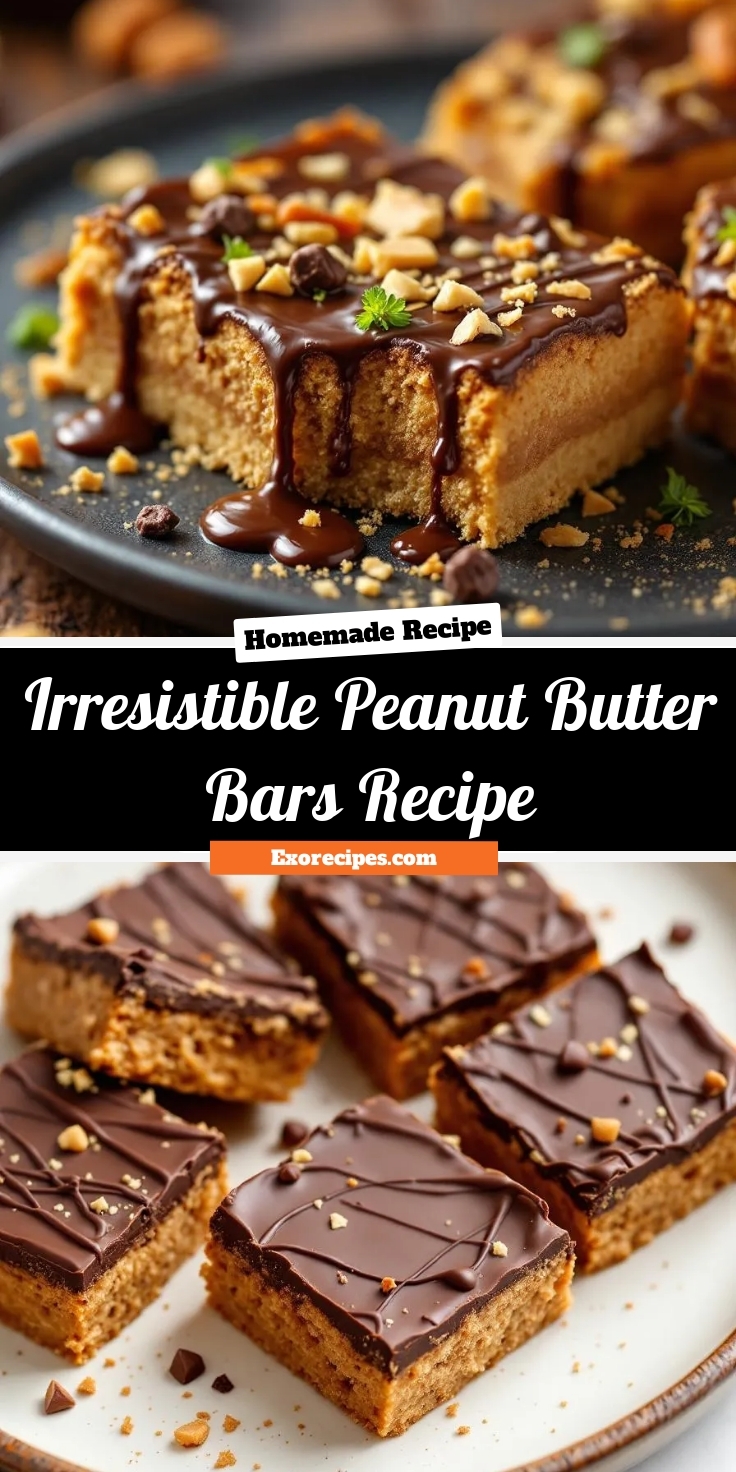
Best Peanut Butter Bars – Easy Homemade Recipe
Introduction
There’s something magical about the combination of sweet and salty, especially when it comes in the form of a no-bake treat. If you’ve ever craved a dessert that’s both indulgent and easy to make, this Irresistible Peanut Butter Bars Recipe will become your new go-to. Whether you need a quick snack for the kids, a potluck contribution, or just a little pick-me-up, these bars deliver every time. Plus, they’re so simple that even beginner bakers can whip them up in minutes. Trust me, one bite and you’ll understand why these bars live up to their name.
Irresistible Peanut Butter Bars Recipe is a classic dessert that combines creamy peanut butter, rich chocolate, and a buttery base for a treat that’s impossible to resist. Unlike complicated recipes that require hours in the kitchen, this one comes together with just a handful of pantry staples. What makes it special is its versatility. You can customize it with add-ins like crushed pretzels for crunch or a drizzle of caramel for extra decadence. Moreover, it fits perfectly with our blog’s mission to share approachable, crowd-pleasing recipes that anyone can master. If you love no-bake desserts, you’ll also adore our Easy No-Bake Cookies, which share the same simplicity and deliciousness.
Beyond being delicious, these bars also evoke nostalgia. Many of us grew up with peanut butter treats, and this recipe taps into that comforting familiarity. It’s perfect for busy weeknights, last-minute gatherings, or even as a homemade gift. For those who enjoy experimenting, try pairing it with our Homemade Ice Cream for an unforgettable dessert combo. Ultimately, Irresistible Peanut Butter Bars Recipe isn’t just a dessert. It’s a little slice of joy that brings people together.
Why I Love This Recipe
This recipe holds a special place in my heart because it reminds me of my grandmother’s kitchen. She used to make a similar version every summer, and the smell of peanut butter and chocolate instantly takes me back to those warm, carefree days. What I love most is how it bridges generations. Now, I make these bars with my own kids, and they adore pressing the crust into the pan or sneaking a taste of the melted chocolate. It’s more than just a dessert. It’s a tradition, a memory, and a guaranteed smile on everyone’s face.
Health and Nutrition
Why it’s good for your body
The Irresistible Peanut Butter Bars Recipe packs a nutritious punch while satisfying your sweet cravings. First, peanut butter delivers heart-healthy monounsaturated fats, which help lower bad cholesterol. Additionally, this recipe includes natural sweeteners like honey, offering antioxidants without refined sugar spikes. Moreover, oats provide fiber to keep digestion smooth and energy levels steady.
Protein plays a starring role in the Irresistible Peanut Butter Bars Recipe too. Peanut butter and oats combine to create a snack that fuels muscles and curbs hunger. Furthermore, dark chocolate chips add flavonoids, which support brain health and reduce inflammation. As a result, you get a treat that tastes indulgent but nourishes your body.
Finally, the Irresistible Peanut Butter Bars Recipe avoids artificial additives. Instead, it relies on whole ingredients for maximum nutrition. Whether you need a post-workout boost or a midday pick-me-up, these bars deliver both flavor and benefits. In short, they prove that healthy eating can still be delicious.
How it fits in a healthy lifestyle
The Irresistible Peanut Butter Bars Recipe fits seamlessly into balanced eating habits. For gluten-free diets, simply use certified gluten-free oats to keep the recipe celiac-friendly. If you focus on high-protein snacks, these bars provide lasting energy without empty calories. They also pair perfectly with a morning smoothie or afternoon tea for mindful portion control.
For heart-healthy choices, the monounsaturated fats in peanut butter support cardiovascular wellness. Meanwhile, the fiber from oats helps maintain steady blood sugar levels. If you love meal prepping, these bars store well for grab-and-go convenience. Check out our healthy snack ideas for more inspiration. You can also explore our gluten-free desserts to expand your options. With simple swaps and smart planning, the Irresistible Peanut Butter Bars Recipe becomes a staple in any wellness routine.
A delicious and easy-to-make no-bake peanut butter bar with a chocolate topping.
Ingredients
Scale
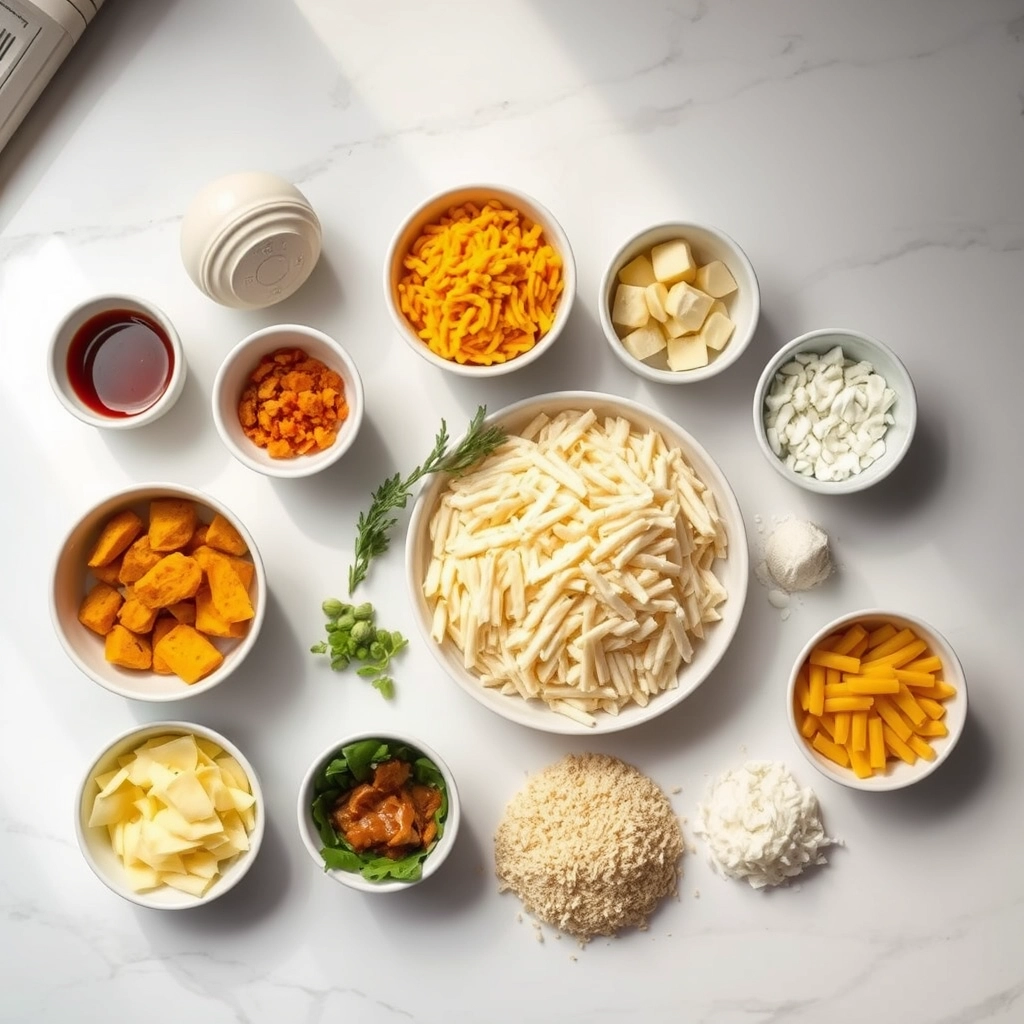
For the Crust:
1 cup creamy peanut butter
1/2 cup unsalted butter, melted
2 cups graham cracker crumbs
2 cups powdered sugar
1 1/2 cups semi-sweet chocolate chips
1/4 cup milk
Instructions
1. Prepare the Crust:
In a large bowl, mix together peanut butter, melted butter, graham cracker crumbs, and powdered sugar until well combined.
Press the mixture evenly into a greased 9×13-inch baking dish.
In a microwave-safe bowl, melt chocolate chips and milk together in 30-second intervals, stirring until smooth.
Spread the melted chocolate mixture over the peanut butter layer.
Refrigerate for at least 1 hour before cutting into bars.
Notes
You can customize the seasonings to taste.
s-dish">How to Prepare This Dish
Steps and time-saving tips
Start by lining an 8×8-inch baking pan with parchment paper, leaving some overhang for easy removal later. In a large bowl, mix together the melted butter, creamy peanut butter, and brown sugar until smooth. Next, whisk in the vanilla extract and egg until fully combined. Gradually fold in the dry ingredients—flour, baking powder, and salt—until just incorporated. Spread the thick batter evenly into the prepared pan, smoothing the top with a spatula. Bake at 350°F for 20-25 minutes, or until the edges turn golden brown. Let the bars cool completely before adding the chocolate topping. Meanwhile, melt chocolate chips with a splash of coconut oil for a silky drizzle. Pour it over the cooled bars, then chill in the fridge for 30 minutes to set. For a time-saving hack, use store-bought peanut butter cookie dough as a base, or swap in almond butter for a nutty twist. If you’re short on time, skip the chocolate layer and dust with powdered sugar instead. Either way, these Irresistible Peanut Butter Bars Recipe will disappear fast!
Mistakes I’ve made and learned from
I once rushed the cooling step and ended up with a melted chocolate mess—patience is key! Now, I always let the bars cool to room temperature before adding toppings. Another blunder? Overbaking the base, which made it crumbly. A toothpick test saved me; it should come out with a few moist crumbs, not clean. If you’re new to baking bars, my guide on perfect baking temperatures can help avoid dry results. Also, I learned the hard way that natural peanut butter separates, so stick to the creamy, stabilized kind for consistency. For more troubleshooting tips, check out my post on fixing crumbly bars. Trust me, these small adjustments make all the difference in nailing the Irresistible Peanut Butter Bars Recipe every time.
n-and-variations">Cultural Connection and Variations
Where this recipe comes from
The Irresistible Peanut Butter Bars Recipe has roots in classic American comfort food, blending the nostalgia of childhood snacks with the simplicity of pantry staples. Many families trace their love for these bars back to school bake sales or holiday gatherings, where their rich, creamy texture and sweet-salty balance made them a crowd favorite. Interestingly, some versions swap peanut butter for almond or sunflower seed butter, especially in regions where allergies or dietary preferences come into play.
Around the world, similar treats take on local twists. In Southeast Asia, cooks might add coconut or palm sugar for a deeper caramel note. Meanwhile, in Australia, they often layer the bars with chocolate biscuits for extra crunch. My grandmother’s version of the Irresistible Peanut Butter Bars Recipe included a sprinkle of sea salt on top—a trick she learned from a neighbor in the 1970s. Whether you prefer them chewy or firm, this recipe adapts effortlessly to personal tastes and traditions.
How it fits in today’s cooking
Today, the Irresistible Peanut Butter Bars Recipe still shines as a versatile treat, perfect for everything from lunchbox surprises to potluck desserts. Modern cooks love how easily it fits into meal prep routines, especially when paired with healthy snack ideas for balanced indulgence. During the holidays, many families bake them as edible gifts, wrapping them in parchment paper tied with twine for a rustic touch.
Others tweak the recipe
for dietary needs, using maple syrup instead of sugar or opting for gluten-free graham crackers. Some even blend it into quick dessert recipes for last-minute guests. No matter how you serve them, these bars bridge generations, proving that some flavors never go out of style.
Taste and Texture
What makes it delicious
The Irresistible Peanut Butter Bars Recipe delivers a decadent, melt-in-your-mouth experience with every bite. Rich, creamy peanut butter blends perfectly with a buttery, crumbly crust, while a smooth chocolate topping adds a luxurious finish. Each layer offers a contrast in texture—soft yet slightly chewy from the peanut butter filling, crisp from the base, and velvety from the chocolate glaze. The aroma alone is heavenly, with toasted nuts and sweet vanilla teasing your senses before you even take a bite. Whether you savor it slowly or devour it in seconds, the Irresistible Peanut Butter Bars Recipe satisfies cravings with its perfect balance of sweet and salty flavors.
Boosting the flavor
Elevate your Irresistible Peanut Butter Bars Recipe with a sprinkle of flaky sea salt on top for a gourmet touch that enhances the sweetness. For extra crunch, mix chopped roasted peanuts or pretzels into the crust. If you love bold contrasts, drizzle melted homemade caramel sauce over the chocolate layer or add a dash of cinnamon to the peanut butter filling. For a tropical twist, fold shredded coconut into the base—it pairs wonderfully with the nutty flavor. Craving more chocolate? Swap the topping for a dark chocolate ganache to deepen the richness. Small tweaks make a big difference, so get creative!
Always chill the dough for at least 30 minutes before baking to help the Irresistible Peanut Butter Bars Recipe hold its shape. Use parchment paper to line your pan, as it ensures easy removal and a perfect texture. Additionally, measure your peanut butter precisely—too much can make the bars overly dense. For even layers, press the crust firmly into the pan before adding the filling. Finally, let the bars cool completely before slicing to keep them neat and tidy.
Mistakes to avoid
Avoid overmixing the crust dough, as this can make it tough instead of tender. Instead, mix just until the ingredients combine. Many bakers also skip the chilling step, but this leads to crumbly bars that fall apart. For more tips on perfecting no-bake treats, check out our guide on no-bake desserts. Another common mistake is using natural peanut butter, which can separate and alter the texture. Stick to creamy, stabilized peanut butter for the best results. If you’re unsure about ingredient substitutions, our baking substitutions article can help.
g-suggestions">Serving and Pairing Suggestions
How to serve this dish
For a stunning presentation, cut your Irresistible Peanut Butter Bars Recipe into neat squares and arrange them on a rustic wooden board or a pastel-colored platter. Drizzle melted chocolate or caramel over the top for an elegant touch, then sprinkle crushed peanuts or sea salt to enhance both flavor and visual appeal. These bars shine at potlucks, holiday gatherings, or as a sweet surprise in lunchboxes. Alternatively, serve them warm with a scoop of vanilla ice cream for a decadent dessert that guests will rave about.
What goes well with it
Pair your Irresistible Peanut Butter Bars Recipe with a cold glass of milk or a creamy latte for a classic combination that balances richness with refreshment. If you prefer something bolder, try them alongside a cup of spiced chai tea, which highlights the warm notes in the peanut butter. For a fun twist, serve these bars with our Homemade Caramel Sauce for dipping or layer them with our Whipped Vanilla Frosting to create an over-the-top dessert experience.
math-faq-block">
What are the key ingredients for irresistible peanut butter bars?
The irresistible peanut butter bars recipe typically requires creamy peanut butter, graham cracker crumbs, powdered sugar, butter, and chocolate chips. These simple ingredients create a rich, no-bake dessert that’s easy to make and always a crowd-pleaser.
Can I make irresistible peanut butter bars without graham crackers?
Yes! If you don’t have graham crackers, you can substitute crushed digestive biscuits, vanilla wafers, or even pretzels for a salty-sweet twist. The texture might vary slightly, but your irresistible peanut butter bars will still taste delicious.
How do I store peanut butter bars to keep them fresh?
Store your irresistible peanut butter bars in an airtight container at room temperature for up to 5 days or refrigerate them for up to 2 weeks. For longer storage, freeze them in layers separated by parchment paper.
ank-math-faq-item">
Can I use natural peanut butter for this recipe?
Yes, but natural peanut butter may make the bars slightly softer due to its oil content. For best results with irresistible peanut butter bars, stir the natural peanut butter well or use a no-stir variety to maintain the perfect texture.