“`html
Table of Contents
Texas Roadhouse Smothered Chicken Recipe: A Delicious Classic!
Are you constantly dreaming of that irresistibly tender chicken, smothered in savory onions, mushrooms, and gooey cheese, just like at your favorite steakhouse? You’re not alone! Millions of us crave the comforting embrace of Texas Roadhouse’s legendary Smothered Chicken. The good news? You can recreate that culinary magic right in your own kitchen with this easy-to-follow recipe. Get ready to elevate your weeknight dinners and impress your taste buds!
Your Texas Roadhouse Smothered Chicken Craving Solved!
On average, restaurant-quality comfort food meals can be time-consuming and costly. But what if you could achieve that same rich, decadent flavor of Texas Roadhouse Smothered Chicken at home, without the long wait or the hefty bill? Many home cooks search for authentic steakhouse recipes that deliver on both taste and simplicity. This recipe aims to be your ultimate guide to recreating that beloved dish, featuring juicy chicken breasts topped with perfectly caramelized onions, earthy sautéed mushrooms, and a blanket of melted Monterey Jack cheese. It’s a symphony of textures and flavors designed to satisfy your deepest comfort food desires.
Gather Your Ingredients for Southern Comfort
The magic of this dish lies in its simple, wholesome ingredients working together to create an explosion of flavor. Don’t be intimidated; each component plays a vital role in building the rich, savory profile.
The Star: Juicy Chicken Breasts
What you need: 4 boneless, skinless chicken breasts (about 6-8 oz each)
Sensory Description: Look for plump, evenly sized breasts for consistent cooking. They should feel firm to the touch. The goal is a tender, moist interior that readily absorbs the surrounding flavors.
Substitutions: Boneless, skinless chicken thighs can be used, but they will require a slightly longer cooking time. You can also butterfly thicker breasts for quicker and more even cooking.
Flavor Foundation: Onions and Garlic
What you need: 1 large yellow onion, thinly sliced; 2 cloves garlic, minced
Sensory Description: A sweet, aromatic yellow onion that becomes deeply golden and tender when caramelized. Fresh garlic, with its pungent and savory notes, adds depth without being overpowering.
Substitutions: Sweet onions like Vidalia can be used for an even sweeter caramelization. Shallots can offer a milder, more refined onion flavor.
Earthy Goodness: Sautéed Mushrooms
What you need: 8 oz cremini mushrooms, sliced
Sensory Description: Cremini (baby bella) mushrooms provide a robust, earthy flavor and a satisfying, slightly chewy texture. They will release their moisture and brown beautifully.
Substitutions: White button mushrooms are a fine alternative, though slightly less flavorful. Shiitake mushrooms can add a more intense umami kick.
Silky Smooth Sauce
What you need: 1 cup chicken broth; 1/2 cup heavy cream; 1 tablespoon butter; 1 tablespoon all-purpose flour; 1 teaspoon Worcestershire sauce
Sensory Description: A light chicken broth forms the base, enriched by the luxurious, velvety texture of heavy cream. The butter and flour create a roux for a perfectly thickened, glossy sauce, while Worcestershire adds a touch of savory complexity.
Substitutions: For a lighter sauce, use half-and-half instead of heavy cream. For a gluten-free option, use a gluten-free flour blend or cornstarch slurry (1 tbsp cornstarch mixed with 2 tbsp cold water) to thicken.
The Glorious Melt: Monterey Jack
What you need: 4 oz Monterey Jack cheese, shredded
Sensory Description: Monterey Jack cheese melts beautifully, becoming creamy and gooey with a mild, slightly tangy flavor that complements the other ingredients without overwhelming them.
Substitutions: A blend of Colby Jack, Pepper Jack (for a hint of spice), or even mild cheddar can be used.
Essential Seasonings
What you need: Salt and freshly ground black pepper, to taste; 1 teaspoon paprika (optional, for color and mild flavor)
Sensory Description: The fundamental building blocks to enhance all the other flavors, bringing out their best qualities.
Timing is Everything
This recipe is designed for a satisfying weeknight meal, but accurate timing ensures perfection.
Compared to an average restaurant version, which can take longer due to preparation and service, this homemade recipe offers a quicker route to deliciousness. Many homemade versions aim for similar cook times, but ours is optimized for ease and speed.
Let’s Get Cooking!
Follow these steps closely for a restaurant-worthy Smothered Chicken that will have everyone asking for seconds!
Prepare Your Chicken
Pat the chicken breasts dry with paper towels. This is crucial for achieving a good sear. Season both sides generously with salt, pepper, and paprika (if using). If your chicken breasts are very thick, you can slice them horizontally to create thinner cutlets, or pound them gently to an even thickness for faster, more uniform cooking.
Caramelize Those Onions
In a large skillet (preferably oven-safe if you plan to finish it in the oven) over medium heat, melt 1 tablespoon of butter. Add the thinly sliced onions and cook slowly, stirring occasionally, for about 15-20 minutes, or until they are deeply golden brown and tender. This slow caramelization process unlocks their natural sweetness. Add the minced garlic during the last minute of cooking just until fragrant.
Pro Tip: Patience is key here! Don’t rush caramelizing onions; low and slow heat brings out the best flavor.
Sauté the Mushrooms
Once the onions are caramelized, remove them from the skillet and set aside. Add the sliced mushrooms to the same skillet (you may need to add a touch more butter or oil if the pan looks dry). Sauté the mushrooms over medium-high heat until they release their liquid and begin to brown, about 5-7 minutes. Season them lightly with salt and pepper.
Sear the Chicken
In the same skillet, or a separate one if you prefer, add another tablespoon of butter or oil over medium-high heat. Carefully place the seasoned chicken breasts in the hot skillet. Sear for 3-4 minutes per side until golden brown. The chicken doesn’t need to be cooked through at this stage; it will finish cooking in the sauce.
Build the Sauce
Sprinkle the flour over the onions and mushrooms still in the skillet. Stir and cook for about 1 minute to create a light roux. Gradually whisk in the chicken broth, ensuring no lumps form. Stir in the heavy cream and Worcestershire sauce. Bring the sauce to a gentle simmer, stirring constantly, until it begins to thicken.
Combine and Simmer
Return the caramelized onions and garlic to the skillet with the sauce. Stir everything together. Nestlé the seared chicken breasts into the sauce. Reduce the heat to low, cover the skillet, and let the chicken simmer gently in the sauce for 10-15 minutes, or until the chicken is cooked through and tender (internal temperature reaches 165°F / 74°C).
Restaurant Secret: For a restaurant-style finish, you can transfer the oven-safe skillet to a preheated 375°F (190°C) oven for the last 5-10 minutes of cooking instead of simmering on the stovetop.
Melt the Cheese
Once the chicken is cooked, remove the skillet from the heat. Spoon the onion and mushroom mixture generously over each chicken breast. Sprinkle the shredded Monterey Jack cheese evenly over the top of each portion. Cover the skillet for a minute or two, or place it under the broiler for a minute (watching carefully!) until the cheese is fully melted and gloriously gooey.
Serve and Enjoy
Serve the Texas Roadhouse Smothered Chicken immediately, spooning extra sauce over the chicken. Garnish with fresh parsley if desired for a pop of color.
Nutritional Snapshot
This is an approximate nutritional breakdown per serving (assuming 4 servings). Actual values may vary based on ingredient specifics and portion sizes.
- Calories: ~450-550 kcal
- Protein: ~40-45g
- Fat: ~25-35g
- Carbohydrates: ~10-15g
- Sodium: Varies based on broth and added salt.
Healthier Twists on a Classic
Craving that comfort food feel without all the richness? Try these swaps:
- Lighter Sauce: Use half-and-half or a blend of milk and a little cream. For a truly light option, use skim milk thickened with a cornstarch slurry, but be aware the flavor and texture will be different.
- Leaner Chicken: While thighs are flavorful, breasts are inherently leaner. Ensure they are not overcooked to maintain moisture.
- Reduced Cheese: Use less cheese, or opt for a reduced-fat Monterey Jack.
- Broth Base: Ensure you use a low-sodium chicken broth to control sodium intake.
- Vegetable Boost: Add more mushrooms or other vegetables like bell peppers or spinach to the sauté for added nutrients and bulk.
Perfect Pairings
This opulent chicken dish deserves sides that can stand up to its rich flavor:
- Mashed Potatoes: The ultimate classic pairing to soak up that delectable sauce.
- Steamed Green Beans or Broccoli: A simple, healthy side to balance the richness.
- Rice Pilaf: A fluffy bed for the chicken and sauce.
- Crusty Bread: Perfect for mopping up every last drop of sauce.
Avoid These Pitfalls
Steer clear of these common errors for the best Smothered Chicken:
- Not Patting Chicken Dry: This prevents a good sear, resulting in steamed, pale chicken instead of beautifully browned chicken.
- Rushing Onion Caramelization: Low and slow heat is essential for sweet, tender, deeply flavored onions.
- Overcrowding the Pan: This causes ingredients to steam rather than sear or sauté properly. Cook in batches if needed.
- Overcooking the Chicken: Chicken breast can dry out quickly. Cook until just done and let it rest in the sauce.
Leftovers Love!
Store any leftover Smothered Chicken in an airtight container in the refrigerator for up to 3-4 days. Reheat gently on the stovetop over low heat or in the microwave, adding a splash of broth or water if the sauce seems too thick.
Your New Favorite Comfort Food
This Texas Roadhouse Smothered Chicken recipe delivers all the comforting, savory, and cheesy goodness you crave, made easily in your own home. It’s a testament to how simple ingredients, prepared with care, can create an unforgettable meal. Don’t wait for a special occasion; treat yourself to this delicious classic tonight!
Ready to try another comforting classic? Explore our other chicken recipes for more weeknight inspiration!
Frequently Asked Questions
***Can I make this recipe ahead of time?***
While it’s best served fresh, you can prepare elements ahead. Caramelize the onions and sauté the mushrooms earlier in the day or the day before. Reheat them before proceeding with searing the chicken and making the sauce. The final assembly and melting of cheese is best done just before serving.
***What kind of skillet is best for this recipe?***
An oven-safe, heavy-bottomed skillet (like cast iron or stainless steel) is ideal. It helps with even heating for searing and caramelizing, and allows you to transfer the dish to the oven for finishing if desired.
***My sauce didn’t thicken properly. What went wrong?***
This usually happens if the flour wasn’t cooked long enough with the butter (not forming a proper roux), or if too much liquid was added at once without proper whisking. You can try simmering the sauce uncovered for a bit longer to reduce it, or making a cornstarch slurry (1 tbsp cornstarch mixed with 2 tbsp cold water) and whisking it in gradually while the sauce simmers until thickened.
***Can I use bone-in chicken?***
Yes, but it will require a significantly longer cooking time and may need to be finished in the oven. Bone-in chicken can also be harder to manage in the skillet and for layering the toppings. Boneless, skinless cuts are generally recommended for this specific preparation.

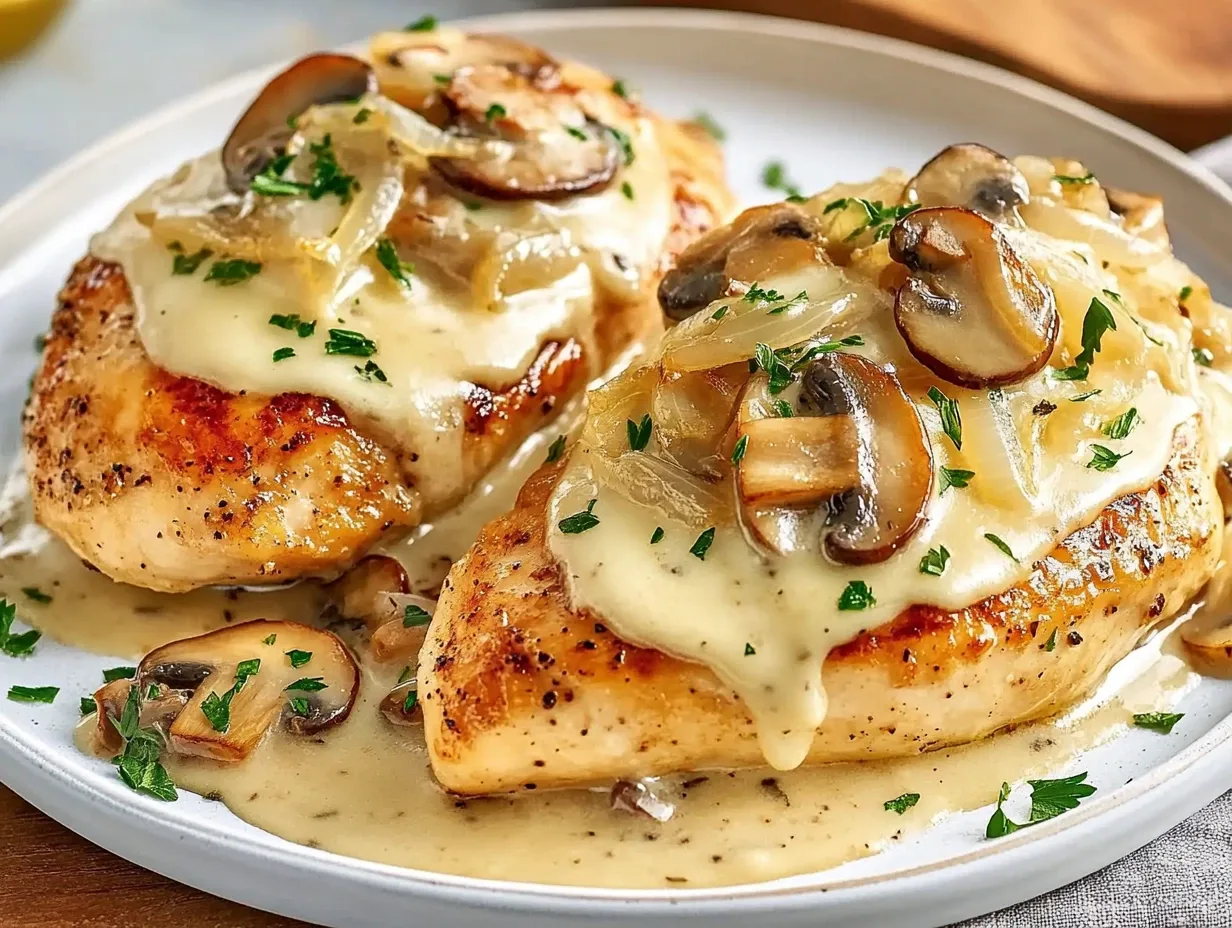
Texas Roadhouse Smothered Chicken
Description
This smothered chicken dish features juicy chicken breasts topped with caramelized onions, sautéed mushrooms, and melted Monterey Jack cheese. It’s a simple yet flavorful recipe inspired by Texas Roadhouse’s classic comfort food. Perfect for a weeknight dinner or a special treat!
Ingredients
- 2large chicken breasts1 teaspoonseasoned salt½ teaspoonblack pepper1 tablespoonbutter (plus extra as needed)1medium onion, sliced ¼-inch thick½pound button mushrooms, sliced¼pound Monterey Jack cheese, shreddedSalt to taste
- 1 teaspoonseasoned salt½ teaspoonblack pepper1 tablespoonbutter (plus extra as needed)1medium onion, sliced ¼-inch thick½pound button mushrooms, sliced¼pound Monterey Jack cheese, shreddedSalt to taste
- ½ teaspoonblack pepper1 tablespoonbutter (plus extra as needed)1medium onion, sliced ¼-inch thick½pound button mushrooms, sliced¼pound Monterey Jack cheese, shreddedSalt to taste
- 1 tablespoonbutter (plus extra as needed)1medium onion, sliced ¼-inch thick½pound button mushrooms, sliced¼pound Monterey Jack cheese, shreddedSalt to taste
- 1medium onion, sliced ¼-inch thick½pound button mushrooms, sliced¼pound Monterey Jack cheese, shreddedSalt to taste
- ½pound button mushrooms, sliced¼pound Monterey Jack cheese, shreddedSalt to taste
- ¼pound Monterey Jack cheese, shreddedSalt to taste
- Salt to taste
Instructions
- 1️⃣Prepare the Chicken:Slice each chicken breast horizontally to create two thinner pieces.Place the chicken pieces between plastic wrap and pound to an even thickness using a meat mallet.Season both sides of the chicken with seasoned salt and black pepper.2️⃣Sauté the Vegetables:Melt 1 tablespoon of butter in a skillet over medium-low heat.Add the sliced onions and a pinch of salt. Sauté for 3–4 minutes until softened.Stir in the sliced mushrooms and cook for another 3–4 minutes until browned.Remove the onions and mushrooms from the skillet and set aside.3️⃣Cook the Chicken:Add more butter to the skillet if needed. Increase the heat to medium.Place the seasoned chicken breasts in the skillet and cook for 6–8 minutes on the first side until golden brown.Flip the chicken and cook for an additional 3–4 minutes, or until fully cooked (internal temperature reaches 165°F/74°C).4️⃣Assemble the Dish:Reduce the heat to low. Top each chicken breast with the sautéed onions and mushrooms.Sprinkle the shredded Monterey Jack cheese evenly over the top.Cover the skillet with a lid and let the cheese melt for 1–2 minutes.5️⃣Serve:Remove the smothered chicken from the skillet and serve immediately.Pair with mashed potatoes, rice, or steamed vegetables for a complete meal.
- Slice each chicken breast horizontally to create two thinner pieces.Place the chicken pieces between plastic wrap and pound to an even thickness using a meat mallet.Season both sides of the chicken with seasoned salt and black pepper.2️⃣Sauté the Vegetables:Melt 1 tablespoon of butter in a skillet over medium-low heat.Add the sliced onions and a pinch of salt. Sauté for 3–4 minutes until softened.Stir in the sliced mushrooms and cook for another 3–4 minutes until browned.Remove the onions and mushrooms from the skillet and set aside.3️⃣Cook the Chicken:Add more butter to the skillet if needed. Increase the heat to medium.Place the seasoned chicken breasts in the skillet and cook for 6–8 minutes on the first side until golden brown.Flip the chicken and cook for an additional 3–4 minutes, or until fully cooked (internal temperature reaches 165°F/74°C).4️⃣Assemble the Dish:Reduce the heat to low. Top each chicken breast with the sautéed onions and mushrooms.Sprinkle the shredded Monterey Jack cheese evenly over the top.Cover the skillet with a lid and let the cheese melt for 1–2 minutes.5️⃣Serve:Remove the smothered chicken from the skillet and serve immediately.Pair with mashed potatoes, rice, or steamed vegetables for a complete meal.
- Place the chicken pieces between plastic wrap and pound to an even thickness using a meat mallet.
- Season both sides of the chicken with seasoned salt and black pepper.2️⃣Sauté the Vegetables:Melt 1 tablespoon of butter in a skillet over medium-low heat.Add the sliced onions and a pinch of salt. Sauté for 3–4 minutes until softened.Stir in the sliced mushrooms and cook for another 3–4 minutes until browned.Remove the onions and mushrooms from the skillet and set aside.3️⃣Cook the Chicken:Add more butter to the skillet if needed. Increase the heat to medium.Place the seasoned chicken breasts in the skillet and cook for 6–8 minutes on the first side until golden brown.Flip the chicken and cook for an additional 3–4 minutes, or until fully cooked (internal temperature reaches 165°F/74°C).4️⃣Assemble the Dish:Reduce the heat to low. Top each chicken breast with the sautéed onions and mushrooms.Sprinkle the shredded Monterey Jack cheese evenly over the top.Cover the skillet with a lid and let the cheese melt for 1–2 minutes.5️⃣Serve:Remove the smothered chicken from the skillet and serve immediately.Pair with mashed potatoes, rice, or steamed vegetables for a complete meal.
- 2️⃣Sauté the Vegetables:Melt 1 tablespoon of butter in a skillet over medium-low heat.Add the sliced onions and a pinch of salt. Sauté for 3–4 minutes until softened.Stir in the sliced mushrooms and cook for another 3–4 minutes until browned.Remove the onions and mushrooms from the skillet and set aside.3️⃣Cook the Chicken:Add more butter to the skillet if needed. Increase the heat to medium.Place the seasoned chicken breasts in the skillet and cook for 6–8 minutes on the first side until golden brown.Flip the chicken and cook for an additional 3–4 minutes, or until fully cooked (internal temperature reaches 165°F/74°C).4️⃣Assemble the Dish:Reduce the heat to low. Top each chicken breast with the sautéed onions and mushrooms.Sprinkle the shredded Monterey Jack cheese evenly over the top.Cover the skillet with a lid and let the cheese melt for 1–2 minutes.5️⃣Serve:Remove the smothered chicken from the skillet and serve immediately.Pair with mashed potatoes, rice, or steamed vegetables for a complete meal.
- Melt 1 tablespoon of butter in a skillet over medium-low heat.
- Add the sliced onions and a pinch of salt. Sauté for 3–4 minutes until softened.Stir in the sliced mushrooms and cook for another 3–4 minutes until browned.Remove the onions and mushrooms from the skillet and set aside.3️⃣Cook the Chicken:Add more butter to the skillet if needed. Increase the heat to medium.Place the seasoned chicken breasts in the skillet and cook for 6–8 minutes on the first side until golden brown.Flip the chicken and cook for an additional 3–4 minutes, or until fully cooked (internal temperature reaches 165°F/74°C).4️⃣Assemble the Dish:Reduce the heat to low. Top each chicken breast with the sautéed onions and mushrooms.Sprinkle the shredded Monterey Jack cheese evenly over the top.Cover the skillet with a lid and let the cheese melt for 1–2 minutes.5️⃣Serve:Remove the smothered chicken from the skillet and serve immediately.Pair with mashed potatoes, rice, or steamed vegetables for a complete meal.
- Stir in the sliced mushrooms and cook for another 3–4 minutes until browned.Remove the onions and mushrooms from the skillet and set aside.3️⃣Cook the Chicken:Add more butter to the skillet if needed. Increase the heat to medium.Place the seasoned chicken breasts in the skillet and cook for 6–8 minutes on the first side until golden brown.Flip the chicken and cook for an additional 3–4 minutes, or until fully cooked (internal temperature reaches 165°F/74°C).4️⃣Assemble the Dish:Reduce the heat to low. Top each chicken breast with the sautéed onions and mushrooms.Sprinkle the shredded Monterey Jack cheese evenly over the top.Cover the skillet with a lid and let the cheese melt for 1–2 minutes.5️⃣Serve:Remove the smothered chicken from the skillet and serve immediately.Pair with mashed potatoes, rice, or steamed vegetables for a complete meal.
- Remove the onions and mushrooms from the skillet and set aside.
- 3️⃣Cook the Chicken:Add more butter to the skillet if needed. Increase the heat to medium.Place the seasoned chicken breasts in the skillet and cook for 6–8 minutes on the first side until golden brown.Flip the chicken and cook for an additional 3–4 minutes, or until fully cooked (internal temperature reaches 165°F/74°C).4️⃣Assemble the Dish:Reduce the heat to low. Top each chicken breast with the sautéed onions and mushrooms.Sprinkle the shredded Monterey Jack cheese evenly over the top.Cover the skillet with a lid and let the cheese melt for 1–2 minutes.5️⃣Serve:Remove the smothered chicken from the skillet and serve immediately.Pair with mashed potatoes, rice, or steamed vegetables for a complete meal.
- Add more butter to the skillet if needed. Increase the heat to medium.Place the seasoned chicken breasts in the skillet and cook for 6–8 minutes on the first side until golden brown.Flip the chicken and cook for an additional 3–4 minutes, or until fully cooked (internal temperature reaches 165°F/74°C).4️⃣Assemble the Dish:Reduce the heat to low. Top each chicken breast with the sautéed onions and mushrooms.Sprinkle the shredded Monterey Jack cheese evenly over the top.Cover the skillet with a lid and let the cheese melt for 1–2 minutes.5️⃣Serve:Remove the smothered chicken from the skillet and serve immediately.Pair with mashed potatoes, rice, or steamed vegetables for a complete meal.
- Place the seasoned chicken breasts in the skillet and cook for 6–8 minutes on the first side until golden brown.
- Flip the chicken and cook for an additional 3–4 minutes, or until fully cooked (internal temperature reaches 165°F/74°C).4️⃣Assemble the Dish:Reduce the heat to low. Top each chicken breast with the sautéed onions and mushrooms.Sprinkle the shredded Monterey Jack cheese evenly over the top.Cover the skillet with a lid and let the cheese melt for 1–2 minutes.5️⃣Serve:Remove the smothered chicken from the skillet and serve immediately.Pair with mashed potatoes, rice, or steamed vegetables for a complete meal.
- 4️⃣Assemble the Dish:Reduce the heat to low. Top each chicken breast with the sautéed onions and mushrooms.Sprinkle the shredded Monterey Jack cheese evenly over the top.Cover the skillet with a lid and let the cheese melt for 1–2 minutes.5️⃣Serve:Remove the smothered chicken from the skillet and serve immediately.Pair with mashed potatoes, rice, or steamed vegetables for a complete meal.
- Reduce the heat to low. Top each chicken breast with the sautéed onions and mushrooms.
- Sprinkle the shredded Monterey Jack cheese evenly over the top.Cover the skillet with a lid and let the cheese melt for 1–2 minutes.5️⃣Serve:Remove the smothered chicken from the skillet and serve immediately.Pair with mashed potatoes, rice, or steamed vegetables for a complete meal.
- Cover the skillet with a lid and let the cheese melt for 1–2 minutes.5️⃣Serve:Remove the smothered chicken from the skillet and serve immediately.Pair with mashed potatoes, rice, or steamed vegetables for a complete meal.
- 5️⃣Serve:
- Remove the smothered chicken from the skillet and serve immediately.Pair with mashed potatoes, rice, or steamed vegetables for a complete meal.
- Pair with mashed potatoes, rice, or steamed vegetables for a complete meal.
Notes
Cheese Options:Swap Monterey Jack with mozzarella, Swiss, or cheddar for a variation in flavor.Add Heat:Sprinkle with red pepper flakes or serve with a spicy dipping sauce for an extra kick.Storage:Store leftovers in an airtight container in the fridge for up to 3 days. Reheat gently in a skillet or microwave.
Add Heat:Sprinkle with red pepper flakes or serve with a spicy dipping sauce for an extra kick.Storage:Store leftovers in an airtight container in the fridge for up to 3 days. Reheat gently in a skillet or microwave.
Storage:Store leftovers in an airtight container in the fridge for up to 3 days. Reheat gently in a skillet or microwave.
“`