“`html
Table of Contents
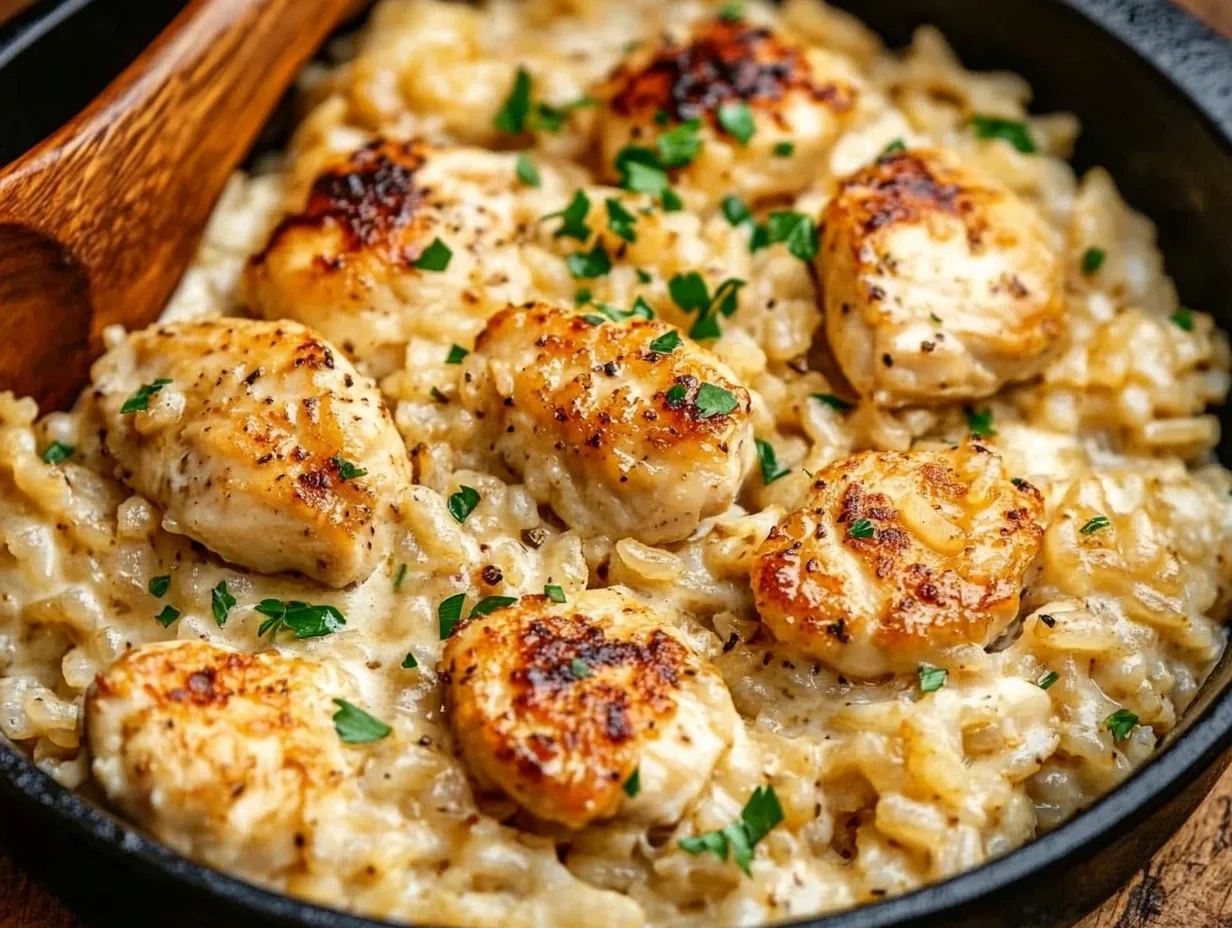
Easy One Pot Chicken and Rice Recipe
Tired of endless dishes after dinner? Looking for a weeknight meal that’s both delicious and ridiculously easy to clean up? You’ve come to the right place!
Creamy, Dreamy One-Pot Chicken and Rice: Your New Weeknight Hero
Did you know that the average American spends over an hour a day on food-related activities, including cooking and cleanup? If you’re aiming to reclaim some precious time without sacrificing flavor or family meal enjoyment, this Easy One Pot Chicken and Rice recipe is your answer. This is more than just a meal; it’s a testament to how simple ingredients can transform into a creamy, flavorful dish with minimal effort. Imagine tender, succulent chicken pieces nestled amongst perfectly cooked rice, all bathed in a luscious, rich Parmesan sauce. It’s the kind of comforting, satisfying dinner that your whole family will eagerly anticipate, and the best part? It all comes together in a single pot, meaning cleanup is a breeze!
Flavor-Packed Ingredients for Your One-Pot Wonder
The magic of this dish lies in its simplicity and the quality of its components. We’ve listed the essentials below, along with some thoughts and potential substitutions to suit your pantry and preferences. Each element plays a crucial role in building the irresistible flavor profile.
- 1 tbsp Olive Oil: The base of our sauté. You can also use avocado oil or even a little butter for extra richness.
- 1.5 lbs Boneless, Skinless Chicken Thighs or Breasts: Thighs offer more moisture and flavor, but breasts work beautifully too. Cut into bite-sized pieces (about 1-inch cubes) for even cooking.
- 1 medium Onion, finely chopped: Provides a sweet, aromatic foundation. A yellow or white onion is perfect.
- 2 cloves Garlic, minced: Essential for that pungent, savory depth. Fresh is always best here.
- 1.5 cups Long-Grain White Rice: Arborio or Calrose rice work wonderfully due to their starch content, leading to a creamier texture. Jasmine or Basmati rice can be used, but might result in a less creamy outcome. Do not rinse the rice – the starch is crucial for thickening the sauce.
- 4 cups Chicken Broth: Low-sodium is recommended so you can control the saltiness. Use good quality broth for the best flavor. Vegetable broth can be substituted for a vegetarian option (while omitting the chicken, of course).
- 1 tsp Dried Italian Seasoning: A blend of oregano, basil, thyme, and rosemary, adding an herbaceous complexity.
- 1/2 tsp Paprika: Adds a mild warmth and beautiful color. Smoked paprika offers a wonderful smoky undertone.
- Salt and freshly ground Black Pepper: To taste. Always season generously!
- 1/2 cup Heavy Cream: This is our secret to achieving that luxurious, velvety sauce.
- 1/2 cup Grated Parmesan Cheese: For that quintessential sharp, nutty, salty flavor that ties everything together. Use freshly grated for the best melt and taste.
- 2 tbsp Fresh Parsley, chopped (optional, for garnish): Adds a burst of freshness and a pop of color.
Quick & Easy: The Time Commitment
This recipe is designed for speed and convenience, making it a lifesaver on busy weeknights. Compared to traditional chicken and rice dishes that might involve separate cooking steps or longer simmering times, this one-pot wonder streamlines the process.
Step-by-Step Guide to One-Pot Perfection
Follow these simple steps to create your mouthwatering one-pot chicken and rice. The instruction is designed to be clear and easy to follow, even for novice cooks.
Step 1: Prep the Chicken
Begin by ensuring your chicken is prepared. Cut the boneless, skinless chicken thighs or breasts into uniform, bite-sized pieces, about 1-inch cubes. This ensures even cooking. Season the chicken generously with salt and freshly ground black pepper. Set aside.
Step 2: Sauté Aromatics
Heat the olive oil in a large, deep skillet or Dutch oven over medium-high heat. Add the seasoned chicken pieces and cook until they are browned on all sides, about 4-5 minutes. Don’t worry about cooking them through at this stage. Remove the chicken from the pot and set it aside, leaving any rendered fat behind.
Step 3: Toast the Rice
Reduce the heat to medium. Add the finely chopped onion to the same pot and cook until softened and translucent, about 3-4 minutes, scraping up any browned bits from the bottom of the pot. Add the minced garlic and cook for another minute until fragrant. Now, add the uncooked rice to the pot. Stir it constantly for about 2 minutes, toasting the grains. This step helps the rice absorb flavors more effectively and prevents it from becoming mushy. Stir in the Italian seasoning and paprika.
Step 4: Simmer and Cook
Pour in the chicken broth, ensuring it covers the rice and onion mixture. Bring the mixture to a boil, then reduce the heat to low, cover the pot tightly, and let it simmer. Cook for about 18-20 minutes, or until most of the liquid has been absorbed and the rice is tender. At this point, you’ll add your chicken back into the pot. Stir everything together, nestle the chicken pieces into the rice, and cover again. Continue to cook for another 5-7 minutes, or until the chicken is cooked through and the rice is perfectly tender.
Step 5: Finish with Parmesan
Once the rice is cooked and the chicken is done, remove the pot from the heat. Stir in the heavy cream and grated Parmesan cheese. Stir gently until the cheese is melted and the sauce is smooth and creamy. Taste and adjust seasoning with salt and pepper if needed. If the sauce is too thick, you can add a splash more broth or cream.
Nutritional Snapshot
This one-pot chicken and rice is a balanced meal, offering protein, carbohydrates, and some healthy fats. While exact nutritional values can vary based on specific ingredients and portion sizes, here’s a general estimate:
- Calories: Approximately 450-550 per serving.
- Protein: Around 30-40g.
- Carbohydrates: Roughly 40-50g.
- Fat: About 15-25g (varies with chicken cut and creaminess).
- Fiber: Low, unless whole grain rice is used.
Healthier Swaps Without Sacrificing Flavor
Looking for ways to make this delicious dish even lighter? Here are some simple, flavor-preserving adjustments:
- Leaner Protein: Opt for chicken breast over thighs for a lower fat content.
- Reduced Fat Cream: Substitute half of the heavy cream with evaporated milk or a good quality unsweetened almond milk for a lighter, creamy texture.
- Whole Grains: Use brown rice instead of white rice. Be aware that cooking times will increase, and more liquid might be needed. The texture will also be slightly chewier.
- Added Veggies: Stir in a handful of spinach or peas during the last 5 minutes of cooking for added nutrients and vibrant color. Broccoli florets or chopped bell peppers can also be sautéed with the onions.
- Lower Sodium Broth: Always choose low-sodium chicken broth and adjust salt to your personal preference.
Serving Suggestions for a Complete Meal
This one-pot chicken and rice is practically a meal in itself, but consider these additions to round it out:
- Fresh Green Salad: A simple side salad with a light vinaigrette offers a refreshing contrast.
- Steamed Vegetables: Asparagus, green beans, or broccoli complement the dish beautifully.
- Crusty Bread: Perfect for soaking up any extra sauce.
- Garnish: A sprinkle of extra Parmesan cheese and fresh parsley elevates the presentation.
Avoid These Common Pitfalls
To ensure your one-pot chicken and rice is a resounding success, steer clear of these common mistakes:
- Rinsing the Rice: This removes the beneficial starch that helps thicken the sauce.
- Overcrowding the Pot: Ensure there’s enough space for the rice to cook evenly and the chicken to brown properly.
- Not Browning the Chicken Enough: Browning adds a crucial layer of flavor (fond) to the dish.
- Using Stale Spices: Outdated herbs and spices won’t impart enough flavor.
- Skipping the Cream/Cheese: While you can lighten it, omitting these entirely will significantly alter the creamy texture and rich taste.
Storing and Reheating Leftovers
Leftovers can be stored in an airtight container in the refrigerator for up to 3-4 days. Reheating is best done gently on the stovetop over low heat with a splash of broth or milk to ensure it doesn’t dry out. Microwaving is also an option, but stir halfway through to prevent uneven heating.
Your Effortless, Delicious Dinner Awaits!
There you have it – a truly easy, incredibly satisfying one-pot chicken and rice that’s perfect for any night of the week. It’s a testament to the fact that delicious meals don’t need to be complicated or time-consuming. The creamy texture, savory chicken, and perfectly cooked rice make this a dish that’s sure to become a family favorite. Give it a try and discover how simple and rewarding weeknight cooking can be!
Frequently Asked Questions
***Is it really a true one-pot meal?***
Yes! Everything – from browning the chicken to cooking the rice and creating the creamy sauce – is done in a single pot or skillet, minimizing your cleanup effort.
***Can I use different types of rice?***
While long-grain white rice (like arborio or calrose) is recommended for optimal creaminess, you can experiment with others. Brown rice will require a longer cooking time and more liquid. Jasmine or Basmati will result in a less creamy, more distinct grain texture.
***What if I don’t have heavy cream?***
You can substitute half-and-half, evaporated milk, or even a plant-based milk like unsweetened cashew or oat milk for a lighter option. The creaminess might be slightly less intense.
***Can I make this vegetarian?***
Absolutely! Simply omit the chicken and either use vegetable broth or water, and perhaps add extra vegetables like mushrooms or chickpeas for substance.
***How do I prevent the rice from sticking?***
Ensure you toast the rice for a couple of minutes before adding liquid, and don’t stir the rice too much once it’s simmering. Keeping the heat low and the lid on tight also helps.

One-Pot Chicken and Rice
Description
ThisOne-Pot Chicken and Ricedish is a creamy, flavorful meal that combines tender chicken, perfectly cooked rice, and a rich Parmesan sauce. It’s quick to make, easy to clean up, and perfect for a weeknight dinner the whole family will love.
Ingredients
- 1½lbs boneless, skinless chicken breasts, diced2 tbspolive oil3cloves garlic, minced1 tbspItalian seasoning, divided½ tsponion powderSalt and pepper, to taste2½ cupschicken broth1 cupuncooked long-grain white rice¾ cupheavy cream⅓ cupgrated Parmesan cheese
- 2 tbspolive oil3cloves garlic, minced1 tbspItalian seasoning, divided½ tsponion powderSalt and pepper, to taste2½ cupschicken broth1 cupuncooked long-grain white rice¾ cupheavy cream⅓ cupgrated Parmesan cheese
- 3cloves garlic, minced1 tbspItalian seasoning, divided½ tsponion powderSalt and pepper, to taste2½ cupschicken broth1 cupuncooked long-grain white rice¾ cupheavy cream⅓ cupgrated Parmesan cheese
- 1 tbspItalian seasoning, divided½ tsponion powderSalt and pepper, to taste2½ cupschicken broth1 cupuncooked long-grain white rice¾ cupheavy cream⅓ cupgrated Parmesan cheese
- ½ tsponion powderSalt and pepper, to taste2½ cupschicken broth1 cupuncooked long-grain white rice¾ cupheavy cream⅓ cupgrated Parmesan cheese
- Salt and pepper, to taste2½ cupschicken broth1 cupuncooked long-grain white rice¾ cupheavy cream⅓ cupgrated Parmesan cheese
- 2½ cupschicken broth1 cupuncooked long-grain white rice¾ cupheavy cream⅓ cupgrated Parmesan cheese
- 1 cupuncooked long-grain white rice¾ cupheavy cream⅓ cupgrated Parmesan cheese
- ¾ cupheavy cream⅓ cupgrated Parmesan cheese
- ⅓ cupgrated Parmesan cheese
Instructions
- 1️⃣Prep the chicken:Dice the chicken into bite-sized pieces and season with 1 teaspoon of Italian seasoning.2️⃣Cook the chicken:In a large skillet, heat 2 tablespoons of olive oil over medium-high heat. Add the seasoned chicken and cook for about 5 minutes, stirring occasionally, until browned on all sides. Remove the chicken from the skillet and set it aside.3️⃣Sauté garlic & cook the rice:In the same skillet, add the minced garlic and sauté for about 30 seconds until fragrant. Pour in the chicken broth and stir in the uncooked rice. Bring the mixture to a boil, then reduce the heat to medium-low. Cover and let it simmer for 15-20 minutes, stirring occasionally, until the rice is tender and has absorbed most of the liquid.4️⃣Add cream & cheese:Once the rice is cooked, stir in the heavy cream and grated Parmesan cheese. Return the cooked chicken to the skillet and stir in the remaining Italian seasoning and onion powder.5️⃣Season and serve:Taste and adjust the seasoning with salt and pepper as needed. Serve hot and enjoy this creamy, hearty meal!
- 2️⃣Cook the chicken:In a large skillet, heat 2 tablespoons of olive oil over medium-high heat. Add the seasoned chicken and cook for about 5 minutes, stirring occasionally, until browned on all sides. Remove the chicken from the skillet and set it aside.
- 3️⃣Sauté garlic & cook the rice:In the same skillet, add the minced garlic and sauté for about 30 seconds until fragrant. Pour in the chicken broth and stir in the uncooked rice. Bring the mixture to a boil, then reduce the heat to medium-low. Cover and let it simmer for 15-20 minutes, stirring occasionally, until the rice is tender and has absorbed most of the liquid.4️⃣Add cream & cheese:Once the rice is cooked, stir in the heavy cream and grated Parmesan cheese. Return the cooked chicken to the skillet and stir in the remaining Italian seasoning and onion powder.5️⃣Season and serve:Taste and adjust the seasoning with salt and pepper as needed. Serve hot and enjoy this creamy, hearty meal!
- 4️⃣Add cream & cheese:Once the rice is cooked, stir in the heavy cream and grated Parmesan cheese. Return the cooked chicken to the skillet and stir in the remaining Italian seasoning and onion powder.5️⃣Season and serve:Taste and adjust the seasoning with salt and pepper as needed. Serve hot and enjoy this creamy, hearty meal!
- 5️⃣Season and serve:Taste and adjust the seasoning with salt and pepper as needed. Serve hot and enjoy this creamy, hearty meal!
Notes
Customizable:Add vegetables like spinach, peas, or mushrooms for extra nutrients.Rice alternative:You can use brown rice or quinoa, but adjust the cooking time and liquid as needed.Leftovers:Store in the refrigerator for up to 3 days. Reheat on the stovetop or microwave, adding a splash of broth or cream to restore its creamy texture.Pairings:Serve with a side salad or steamed vegetables for a complete meal.
Rice alternative:You can use brown rice or quinoa, but adjust the cooking time and liquid as needed.Leftovers:Store in the refrigerator for up to 3 days. Reheat on the stovetop or microwave, adding a splash of broth or cream to restore its creamy texture.Pairings:Serve with a side salad or steamed vegetables for a complete meal.
Leftovers:Store in the refrigerator for up to 3 days. Reheat on the stovetop or microwave, adding a splash of broth or cream to restore its creamy texture.Pairings:Serve with a side salad or steamed vegetables for a complete meal.
Pairings:Serve with a side salad or steamed vegetables for a complete meal.
“`