Craving the deep, comforting flavors of classic enchiladas but dreading the lengthy assembly process? We completely understand. Some nights, you simply need a big, warm hug in a bowl that comes together without any fuss. This is precisely why our incredible Easy Enchiladas Ground Beef Soup exists. It captures every bit of that beloved Tex-Mex taste in a single, spoonable dish that promises to soothe your soul and simplify your evening.
So, what exactly is this lifesaver of a meal? Essentially, Easy Enchiladas Ground Beef Soup deconstructs your favorite baked casserole into a hearty, brothy soup. We start with perfectly seasoned ground beef, the foundation of so many fantastic ground beef recipes. Then, we build layers of flavor with a rich enchilada sauce, black beans, sweet corn, and tender rice. The result is a vibrant, one-pot wonder that delivers the iconic enchilada experience without the rolling, stacking, or lengthy baking time. This recipe matters because it respects your time and your taste buds equally, offering a genuine from-scratch flavor with weeknight ease. Moreover, it fits our blog’s mission perfectly: to deliver incredibly delicious, reliable recipes that real people can actually make on a busy schedule. Furthermore, it’s incredibly versatile. You can easily adjust the spice level to your liking or toss in any extra veggies you have on hand. Ultimately, it’s the ultimate solution for anyone seeking maximum comfort with minimal effort.
Why I Love This Recipe
This soup holds a special place in my heart because it became our family’s go-to during a particularly hectic week. I desperately wanted to make my famous beef enchiladas but realized I had neither the time nor the energy. So, I decided to throw all the components into a pot with some broth. The outcome was an instant classic that everyone, including my pickiest eater, devoured. Now, it represents more than just a meal; it symbolizes a little kitchen victory, proving that a crazy day can still end with something truly delicious and deeply satisfying.
Health and Nutrition
Why it’s good for your body
This Easy Enchiladas Ground Beef Soup delivers a powerful nutritional punch that truly satisfies. First, the lean ground beef provides a fantastic source of high-quality protein, which is essential for building muscle and keeping you full for hours. Additionally, the tomatoes and tomato paste offer a rich concentration of lycopene, a powerful antioxidant known for supporting heart health.
Moreover, the beans contribute a significant amount of dietary fiber, which actively promotes healthy digestion and stable blood sugar levels. Consequently, you enjoy a steady release of energy without the dreaded crash. Furthermore, the blend of spices like cumin and chili powder doesn’t just add flavor; they also bring anti-inflammatory properties to your bowl.
Ultimately, this wholesome combination of ingredients creates a meal that supports your body from the inside out. Therefore, enjoying a bowl of Easy Enchiladas Ground Beef Soup means you are nourishing yourself with a balance of macronutrients and micronutrients. Finally, you can feel great about serving this deeply flavorful and nutritionally complete Easy Enchiladas Ground Beef Soup to your entire family.
How it fits in a healthy lifestyle
This soup seamlessly fits into a balanced and healthy lifestyle. It naturally aligns with high-protein eating plans, thanks to the lean beef and beans, helping you meet your fitness and satiety goals. For those monitoring their gluten intake, this recipe is inherently gluten-free, especially when you use a verified gluten-free enchilada sauce and broth.
You can easily make it ahead for meal prep, ensuring you have a wholesome lunch ready to go all week. Pair it with a light side salad for a complete and satisfying meal. If you love this approach to healthy, flavorful comfort food, you might also enjoy our Healthy Chicken Taco Soup for another weeknight option. For more inspiration on building nutritious meals, explore our guide to Creating a Balanced Plate that supports your wellness journey without sacrificing flavor.
Hearty and comforting soup loaded with ground beef, enchilada flavors, and a delicious blend of ingredients perfect for any day.
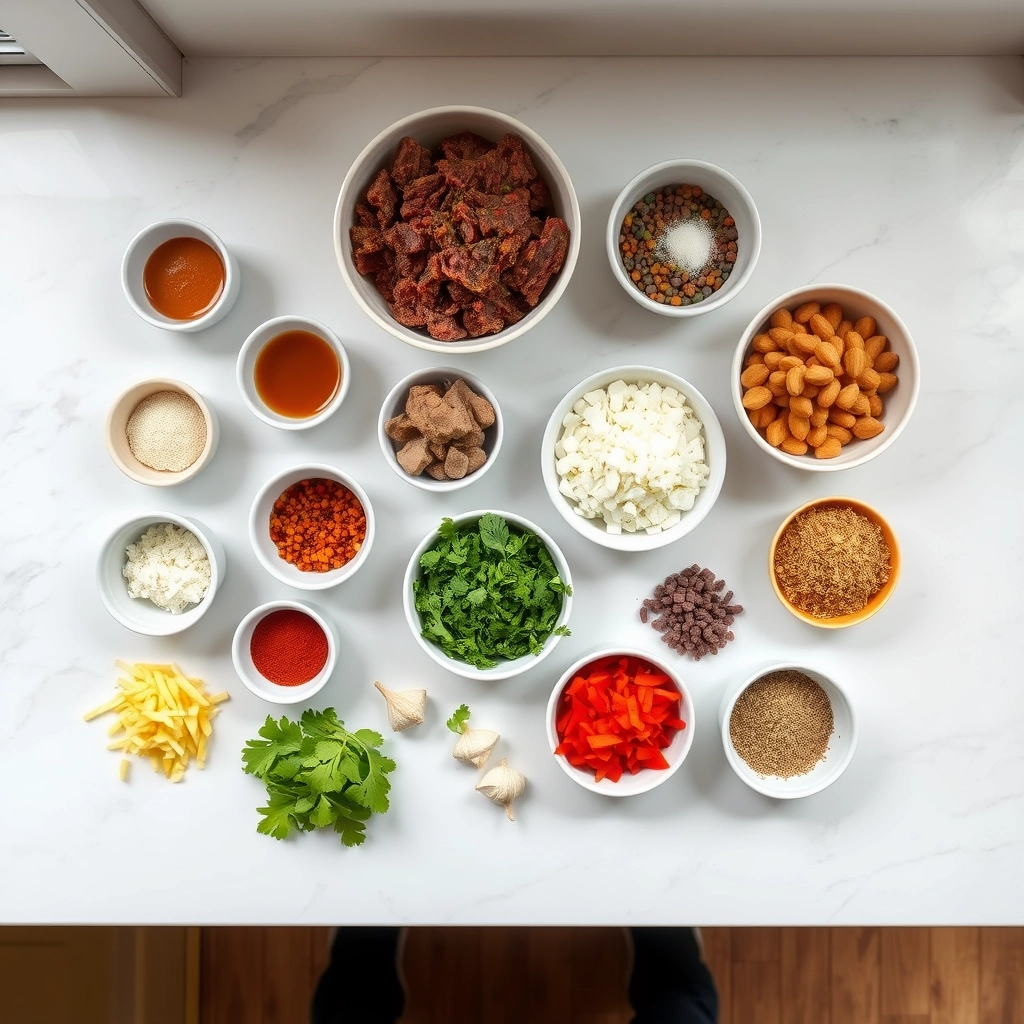
Ingredients
Scale
Soup Ingredients
1 lb ground beef
1/2 cup chopped onion
2 cloves garlic, minced
1 (10 oz) can red enchilada sauce
1 (15 oz) can black beans, drained and rinsed
1 (14.5 oz) can diced tomatoes
1 cup frozen corn
4 cups beef broth
1 tsp ground cumin
1 tsp chili powder
Salt and pepper to taste
Optional Toppings
Shredded cheese
Sour cream
Chopped green onions
Tortilla chips or strips
Instructions
Preparation:
Brown Ground Beef: In a large pot over medium heat, cook ground beef until no longer pink, breaking it apart as it cooks.
Add Onion and Garlic: Stir in chopped onion and minced garlic, cooking until softened and fragrant.
Make Soup: Add enchilada sauce, black beans, diced tomatoes, corn, beef broth, cumin, and chili powder to the pot. Stir well to combine.
Simmer: Bring soup to a boil, then reduce heat and simmer for 20 minutes to meld flavors. Season with salt and pepper to taste.
Serving:
Serve hot topped with shredded cheese, sour cream, green onions, and tortilla chips or strips as desired.
How to Prepare This Dish
Steps and time-saving tips
First, grab your largest soup pot or Dutch oven and place it over medium-high heat. Brown your ground beef, breaking it into small crumbles with your spoon as it cooks. Meanwhile, chop your onion and garlic. Once the beef loses its pink color, drain any excess grease. Next, add your chopped aromatics to the pot and sauté them with the beef until they become soft and fragrant. This step builds a fantastic flavor base for your Easy Enchiladas Ground Beef Soup. Pour in the enchilada sauce, diced tomatoes, and beef broth, then give everything a good stir. Bring the pot to a lively boil before reducing the heat to a gentle simmer.
Let your soup bubble aw
ay for about fifteen minutes, allowing all those wonderful flavors to marry together. For a brilliant time-saving tip, use a pre-cooked rotisserie chicken instead of ground beef to skip the browning step entirely. Now, stir in your black beans and frozen corn directly from the freezer. Finally, turn off the heat and fold in your shredded cheese until it melts into a creamy, luxurious broth. Ladle the hot soup into bowls and get ready for the best part. Top each serving with a handful of crunchy tortilla strips, a dollop of cool sour cream, and some fresh cilantro. This entire process is wonderfully straightforward and delivers massive flavor with minimal effort.
Mistakes I’ve made and learned from
I have definitely learned a few lessons the hard way with this Easy Enchiladas Ground Beef Soup. My biggest mistake was using a store-bought enchilada sauce that was far too spicy for my family, which completely overpowered the other ingredients. Now, I always taste the sauce straight from the can first to gauge its heat level. If it’s too intense, I simply use a milder version or mix it with a can of tomato sauce to temper the spice. Another common error I made was adding the cheese incorrectly. I would just dump it all in at once, which sometimes caused it to clump up instead of melting smoothly. To avoid this, I now always remove the soup from the heat first and then gradually stir the cheese in. For more guidance on selecting the right ingredients, my post on choosing the best enchilada sauce is a great resource. And if you’re worried about getting the consistency just right, my tips for fixing a soup that’s too thick have saved dinner more than once.
n-and-variations">Cultural Connection and Variations
Where this recipe comes from
This recipe pulls its vibrant soul straight from the heart of Mexican home cooking. Families across regions like Jalisco or New Mexico often prepare a similar, slow-simmered soup called Sopa de Albóndigas, but we take a delicious shortcut. My version, the Easy Enchiladas Ground Beef Soup, actually spins a weeknight favorite into a comforting bowl. Instead of rolling individual enchiladas, we deconstruct them. Ultimately, this creates a hearty, brothy dish that honors the original flavors while saving precious time.
Different regions certainly put their own stamp on it. For instance, some cooks in Northern Mexico might use a richer, spicier red chile broth. Conversely, families in Texas often add a generous handful of corn or pinto beans for extra heartiness. In my own home, my abuela always topped each bowl with a sprinkle of fresh cilantro and a squeeze of lime. This bright finish cuts through the richness beautifully. That personal touch makes every pot of Easy Enchiladas Ground Beef Soup feel like a warm hug.
How it fits in today’s cooking
This soup fits perfectly into our modern need for comforting, efficient meals. It delivers all the nostalgic flavor of a classic casserole without the assembly. Busy weeknights absolutely demand this kind of one-pot solution. Furthermore, its adaptability makes it a year-round staple. You can enjoy it during chilly fall evenings or even as a lighter summer meal by adjusting the toppings.
Today’s cooks al
so love making it their own. Many people easily swap the ground beef for ground turkey or a plant-based alternative. Others might stir in quinoa for a protein boost. It’s the ideal dish for a cozy family dinner or for meal prepping lunches. If you need another comforting idea for a busy night, our Easy Chicken Tortilla Soup follows a similar, stress-free philosophy. For a sweet ending that also comes together quickly, our Simple Vanilla Cupcakes are the perfect follow-up. This soup truly proves that classic comfort food can effortlessly keep up with our fast-paced lives.
Taste and Texture
What makes it delicious
This Easy Enchiladas Ground Beef Soup wraps you in a warm, savory embrace from the very first spoonful. Rich, tomato-forward enchilada sauce and deeply seasoned ground beef create a hearty and robust base. Meanwhile, soft beans and tender corn offer delightful little pockets of creamy and sweet texture in every bite. Ultimately, the melted cheese on top pulls everything together with its gooey, luxurious finish. Each element contributes to a fantastically satisfying and complete meal in a bowl.
Boosting the flavor
For an instant flavor boost, consider stirring in a spoonful of adobo sauce from a can of chipotles; it introduces a subtle smoky heat that complements the existing spices beautifully. Furthermore, a bright squeeze of fresh lime juice just before serving will lift all the rich flavors and add a welcome zesty note. Don’t forget the power of toppings; a dollop of cool sour cream or a handful of crunchy tortilla strips provides fantastic contrast. For more inspiration on building the perfect bowl, explore our guide to creative taco toppings that work wonderfully here too. If you find yourself with extra ground beef, you can always transform it into another family favorite like our easy beef taco pasta.
Always brown your ground beef thoroughly first to develop a rich, deep flavor base for your Easy Enchiladas Ground Beef Soup. Furthermore, use a good quality enchilada sauce, as it forms the soul of the dish. For the best texture, add your tortilla strips just before serving so they stay pleasantly chewy instead of becoming mushy. Finally, generously top each bowl with fresh cilantro and a squeeze of lime to brighten all the flavors instantly.
Mistakes to avoid
A common error is over-salting the broth early on, especially since the enchilada sauce and toppings contain sodium. Therefore, always taste your soup after it simmers and adjust the seasoning at the very end. Additionally, avoid using lean ground beef, as a higher fat content provides more flavor; however, you must remember to skim any excess grease after browning the meat for a cleaner soup. For more guidance on building flavor without salt, explore our guide on balancing soup seasonings. Moreover, do not let the soup boil vigorously after adding the dairy, as this can cause it to curdle. Instead, always stir in sour cream or cheese over low heat. For a deeper dive into perfecting creamy soups, check out our tips for avoiding curdled soup.
g-suggestions">Serving and Pairing Suggestions
How to serve this dish
Serve your Easy Enchiladas Ground Beef Soup piping hot in deep, colorful bowls. For a festive touch, top each serving with a generous handful of shredded cheese, a dollop of cool sour cream, and a bright sprinkle of fresh cilantro. Furthermore, set out small bowls of diced avocado, sliced jalapeños, and crunchy tortilla strips so everyone can customize their bowl. This vibrant presentation makes the meal feel special and interactive. Consequently, it becomes the perfect centerpiece for a casual weeknight dinner or a lively game day gathering.
What goes well with it
Pair this hearty soup with warm, buttery cornbread for a truly comforting experience. The sweet corn flavor beautifully balances the rich, savory notes of the Easy Enchiladas Ground Beef Soup. Alternatively, a crisp, refreshing side salad provides a light and crunchy contrast. For a complete Tex-Mex feast, consider serving it alongside our popular Easy Chicken Taquitos. Finally, a chilled glass of horchata or a light Mexican beer wonderfully cleanses the palate between each delicious spoonful. Moreover, our zesty Creamy Cilantro Lime Dressing makes a fantastic drizzle for those who love an extra kick.
math-faq-block">
What is the best ground beef to use for enchilada soup?
For the best flavor and texture in your Easy Enchiladas Ground Beef Soup, we recommend using lean ground beef, such as 85/15 or 90/10. This provides rich flavor without making the soup overly greasy. Leaner beef helps the other ingredients, like tomatoes and spices, shine through in this comforting dish.
Can I make this enchilada soup in a slow cooker?
Absolutely! This Easy Enchiladas Ground Beef Soup adapts perfectly to a slow cooker. Simply brown the ground beef on the stove first, then transfer it and all other ingredients to your crockpot. Cook on low for 6-8 hours or on high for 3-4 hours to let the flavors meld together beautifully.
What toppings are good on ground beef enchilada soup?
Traditional enchilada toppings work wonderfully here. We suggest shredded cheese, a dollop of sour cream, sliced avocado, fresh cilantro, and a squeeze of lime juice. Crushed tortilla chips or strips add a delightful crunch that makes this Easy Enchiladas Ground Beef Soup even more satisfying.
ank-math-faq-item">
How long does leftover enchilada soup last in the fridge?
Properly stored in an airtight container, your leftover Easy Enchiladas Ground Beef Soup will stay fresh for 3 to 4 days in the refrigerator. The flavors often deepen and improve the next day. Reheat it gently on the stovetop or in the microwave, adding a splash of broth if it has thickened too much.
Easy Homemade Roasted Tomato Soup Recipe
Introduction
Is there anything more comforting than a warm bowl of soup on a crisp day? Honestly, it feels like a hug from the inside. This Easy Homemade Roasted Tomato Soup delivers that exact feeling of cozy satisfaction without any fuss. Furthermore, it transforms simple ingredients into something truly magical. Let us show you how to make this classic comfort food your new weeknight hero.
This Easy Homemade Roasted Tomato Soup is a vibrant and flavorful dish that celebrates the humble tomato. We roast the tomatoes first to caramelize their natural sugars, which creates an incredibly deep and rich flavor base. This process is a game-changer compared to simply simmering them on the stovetop. The result is a velvety smooth soup that tastes far more complex than its short ingredient list would suggest. This recipe matters because it proves that you do not need a lot of time or fancy skills to create a restaurant-quality meal in your own kitchen. It fits our blog’s mission perfectly: to provide approachable, from-scratch recipes that empower home cooks. Whether you are a beginner or a seasoned pro, this soup is a rewarding and delicious project. It pairs beautifully with a classic grilled cheese sandwich for the ultimate comfort food experience. Moreover, you can easily make a big batch for meal prep, as it stores and reheats wonderfully. This makes it a fantastic staple for busy families looking for healthy and satisfying options. Essentially, this soup is a testament to how a few good ingredients and a simple technique can yield spectacular results.
Why I Love This Recipe
I absolutely love this Easy Homemade Roasted Tomato Soup because it connects me to fond memories. My grandmother always made a big pot of soup on Sundays, and the aroma of tomatoes and herbs roasting in the oven instantly brings me back to her kitchen. It is my go-to recipe whenever I need a quick, nourishing meal that feels both special and familiar. Additionally, I appreciate how the recipe is incredibly forgiving and adaptable, much like my favorite one-pot pasta dishes. It consistently delivers a bowl of pure, uncomplicated comfort that never fails to make my day better.
Health and Nutrition
Why it’s good for your body
This Easy Homemade Roasted Tomato Soup truly nourishes your body from the inside out. Roasting the tomatoes first, for instance, deeply concentrates their flavor. More importantly, this process also boosts your body’s ability to absorb lycopene, a powerful antioxidant. Consequently, this antioxidant helps protect your cells from damage and supports heart health.
Furthermore, a great bowl of Easy Homemade Roasted Tomato Soup delivers a fantastic dose of essential vitamins. It provides a significant amount of vitamin C, which bolsters your immune system, and vitamin A, which promotes healthy vision and skin. Additionally, tomatoes offer a good source of potassium, a mineral that helps regulate blood pressure.
You can also feel good about every spoonful of this Easy Homemade Roasted Tomato Soup because you control the ingredients. Unlike many canned versions, you skip the hidden sugars and preservatives. Ultimately, this simple act of cooking from scratch ensures you enjoy a meal that is as wholesome as it is delicious.
How it fits in a healthy lifestyle
This soup seamlessly fits into almost any eating plan. It is naturally gluten-free and vegan-friendly, making it a fantastic option for those with specific dietary needs. For a heart-healthy meal, simply pair it with a whole-grain roll or a side salad.
You can easily make this soup a complete, balanced lunch or a light dinner. Try adding a source of lean protein like shredded chicken or chickpeas to make it more filling. This flexibility makes it a perfect staple for weekly meal prep, ensuring you always have a healthy option ready to go.
Enjoying nourishing, homemade food is a cornerstone of wellness. This recipe proves that eating well does not require complicated steps or hard-to-find ingredients. For another simple way to incorporate more vegetables into your day, explore our guide to creating delicious veggie-packed smoothies.
Easy homemade Roasted Tomato Soup from fresh tomatoes, herbs and garlic. Add a splash of cream for extra decadence and ultimate comfort.
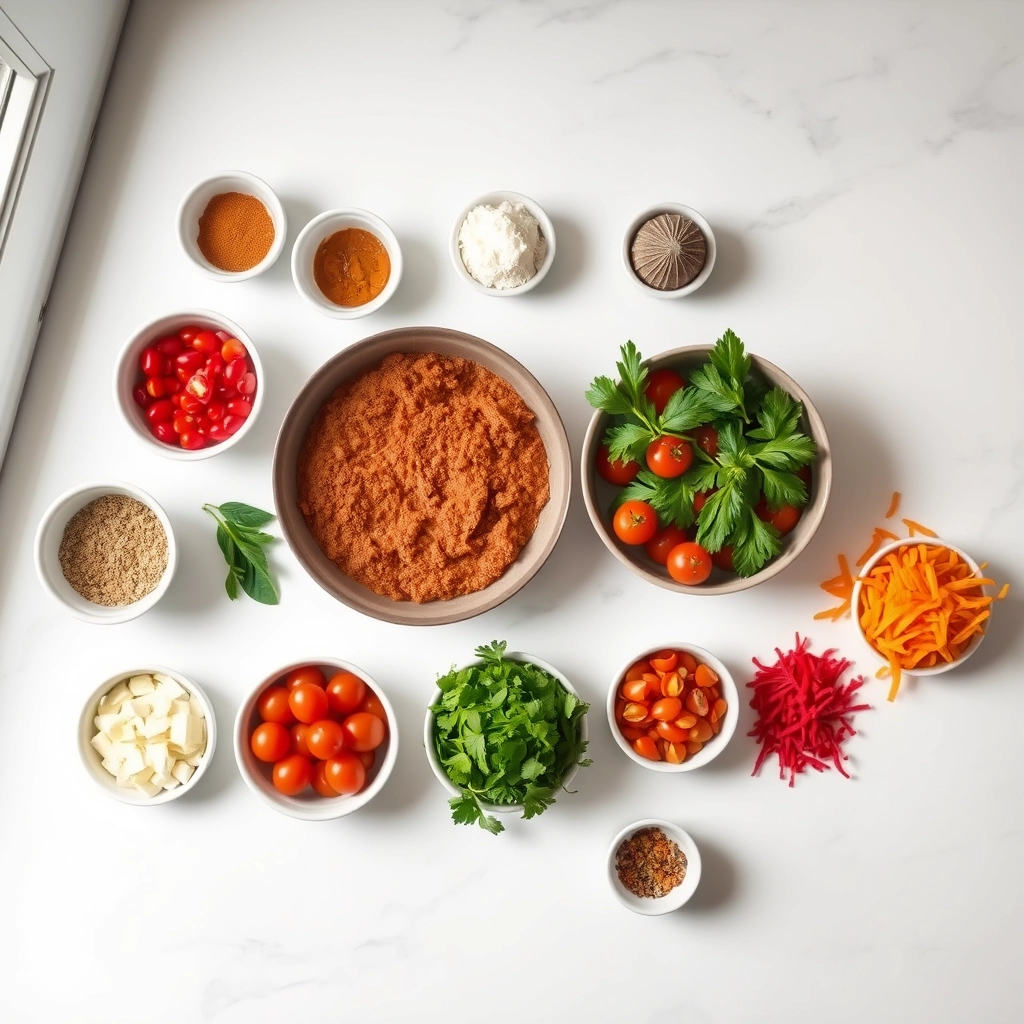
Ingredients
Scale
3 pounds roma tomatoes see body of post for tomato options
1 small yellow onion peeled and rough chopped
1 whole small garlic head
3 tablespoons olive oil
salt and black pepper to taste
1–1 1/2 cups chicken stock depending on how thick you want the soup
3–4 sprigs fresh thyme left whole
2 tablespoons butter
1/4 cup half and half can use heavy cream
Instructions
Instructions
Preheat oven to 450°.
Wash and quarter or halve the tomatoes so they're about the same size then rough chop the onions and transfer both to a large baking sheet.
Prepare the garlic: cut the top off then place in a piece of foil slightly larger than the garlic clove. Drizzle a little olive oil over the top, season with salt and pepper and pinch the foil closed forming a little package.
Season tomatoes and onions and salt and pepper, drizzle olive oil over the top and gently toss with your hands to coat.
Place the garlic package on the baking sheet with the tomatoes then lay thyme sprigs over the top and roast 25 minutes or until the tomatoes are softened and are starting to caramelized on the bottom and edges.
Remove the baking sheet from the oven, discard the thyme sprigs and transfer the tomato mixture to a large pot (including all juices and brown bits).
When the foil is cool enough to handle, open the pouch and squeeze as much of the garlic as you like from the cloves (I use it all) into the soup (discard the outer shell).
Add butter and stock then cook over medium to medium-low heat 5 minutes.
Pulse with an immersion blender until smooth, add a splash of cream then taste and adjust salt and pepper to your preference.
Serve hot with a few fresh basil leaves, grilled cheese croutons or a sprinkle of parmesan cheese.
How to Prepare This Dish
Steps and time-saving tips
First, preheat your oven to 400°F for a perfect roast. Next, grab a large baking sheet and toss your halved tomatoes, onion chunks, and whole garlic cloves with a generous drizzle of olive oil. Generously season everything with salt and pepper; this foundational step builds incredible flavor. Roast the vegetables for about 30 minutes until they develop beautiful, caramelized edges. Meanwhile, you can clean up or prepare your garnishes. Once roasted, carefully transfer the hot vegetables into a blender. Add your vegetable broth and a handful of fresh basil leaves. Then, blend the mixture until it becomes completely smooth and velvety. For a silky finish, pour the soup through a fine-mesh sieve back into your pot. Finally, warm the soup through on the stovetop and stir in a splash of cream if you like. This entire process for Easy Homemade Roasted Tomato Soup is wonderfully straightforward and delivers a rich, deep flavor that canned soup simply cannot match.
and-learned-from">Mistakes I’ve made and learned from
I have definitely learned a few lessons the hard way with this Easy Homemade Roasted Tomato Soup. My biggest mistake was overcrowding the baking sheet, which caused the tomatoes to steam instead of roast. They ended up soggy and lacking that sweet, concentrated flavor we all love. Now, I always use two pans if necessary to ensure everything has enough space. Another error was blending the soup while it was far too hot, which created a messy and dangerous situation. Letting it cool for just ten minutes makes all the difference. I also used to skip straining, but taking that extra minute truly gives you a professional-quality texture. For more on getting the most out of your oven, my guide on how to preheat your oven properly is a game-changer. And if you’re worried about blending hot liquids, my tips for blending soup safely will save you from a kitchen disaster.
Cultural Connection and Variations
Where this recipe comes from
Every culture, it seems, embraces the tomato in its own beautiful way. Consequently, our Easy Homemade Roasted Tomato Soup finds its roots in a global love affair. For instance, in Spain, they serve a chilled version called gazpacho during the hot summer months. Meanwhile, in Italy, a simple passata often forms the soulful base for pastas and other dishes. Personally, my grandmother always made her version with a hefty pinch of sugar to balance the acidity, a trick I still use today. Furthermore, some families swear by adding a splash of cream, while others keep it dairy-free and let the roasted tomato flavor truly shine. Ultimately, this flexibility makes the dish so special. You can find your own tradition within it. This particular journey for the perfect Easy Homemade Roasted Tomato Soup started in my kitchen, aiming to capture that deep, caramelized flavor you simply cannot find in a can.
ays-cooking">How it fits in today’s cooking
This classic soup fits perfectly into our modern cooking routines. Firstly, it embodies the whole “farm-to-table” movement beautifully, especially when you use summer’s peak harvest. Moreover, it serves as a fantastic make-ahead lunch option for busy weekdays, guaranteeing a wholesome meal in minutes. Naturally, many health-conscious cooks now adapt it to be vegan by using coconut milk instead of cream, or by blending in other roasted vegetables for extra nutrition. Additionally, it remains a cornerstone of comfort food, often paired with a classic grilled cheese sandwich for the ultimate cozy meal. This simple pairing never goes out of style. Furthermore, its versatility allows it to star in elegant dinners too. For example, you can serve a silky smooth version as a starter before a main course like herb-crusted pork tenderloin. Ultimately, this adaptability secures its place in contemporary kitchens everywhere.
Taste and Texture
What makes it delicious
This Easy Homemade Roasted Tomato Soup delivers a rich and velvety experience. Roasting the tomatoes first caramelizes their natural sugars, creating a deeply sweet and savory base. Consequently, each spoonful feels luxuriously smooth and creamy on your tongue. Fresh garlic and herbs mingle to produce an incredibly fragrant aroma that fills your kitchen. Ultimately, the roasted vegetables create a complex, umami-packed flavor that far surpasses any canned version.
Boosting the flavor
You can easily amplify your Easy Homemade Roasted Tomato Soup with a few creative additions. For a touch of luxury, swirl in a spoonful of basil pesto or a drizzle of high-quality olive oil just before serving. Alternatively, a sprinkle of parmesan cheese or homemade croutons adds a wonderful salty, crunchy contrast. If you enjoy a bit of heat, a pinch of red pepper flakes will beautifully elevate the entire bowl. For a perfect pairing, consider serving it alongside a crisp, green salad. Similarly, a warm, cheesy piece of bread makes for an ideal dipping companion that soaks up every last drop.
Always roast your tomatoes until they blister and caramelize, as this step builds the foundational flavor for your Easy Homemade Roasted Tomato Soup. Furthermore, use an immersion blender directly in the pot for a beautifully smooth texture and to save on cleanup. For the best results, do not skip the fresh basil garnish, since it adds a bright, fresh finish that complements the rich, roasted notes perfectly.
Mistakes to avoid
A common mistake is blending the hot soup in a standard blender without venting the lid, which can create a dangerous pressure buildup. Instead, always remove the center cap from the lid and cover the hole with a towel. Additionally, avoid overseasoning the soup with salt before roasting, because the tomatoes will naturally concentrate and their flavors will intensify. For more guidance on getting the most out of your oven, read our guide on how to roast vegetables perfectly every time. Moreover, if your soup turns out too thick, simply stir in some vegetable broth or water until you reach your desired consistency, a technique we often use for our creamy potato soup as well.
g-suggestions">Serving and Pairing Suggestions
How to serve this dish
Present your Easy Homemade Roasted Tomato Soup beautifully for maximum appeal. Pour the vibrant soup into a warm, shallow bowl to keep it hot longer. Furthermore, create a stunning visual contrast by adding a bright white dollop of sour cream or Greek yogurt right in the center. For a cozy family dinner, serve it in big mugs everyone can hold comfortably. This simple presentation makes your Easy Homemade Roasted Tomato Soup feel extra special.
Garnish generously for both flavor and a pop of color. Ultimately, a drizzle of high-quality olive oil and a sprinkle of fresh basil or chopped chives elevate every spoonful. You can also offer a side of crispy croutons or grated parmesan cheese for guests to add themselves. Consequently, this interactive element turns a simple meal into a memorable dining experience.
What goes well with it
Nothing beats a classic grilled cheese sandwich for dipping. The crispy, buttery bread and melted cheese create the perfect textural contrast to the smooth, rich soup. For an elevated twist, try our ultimate Gourmet Grilled Cheese which features a blend of three cheeses.
A simple, crisp salad m
akes another fantastic side. Specifically, a light vinaigrette and fresh greens cut through the soup’s acidity beautifully. Our popular Classic Caesar Salad offers a garlicky crunch that pairs wonderfully.
Finally, pair your meal with a refreshing beverage. A chilled glass of lemonade or sparkling water with a squeeze of lime cleanses the palate between each delicious bite.
math-faq-block">
What is the best way to thicken roasted tomato soup?
For a naturally thicker Easy Homemade Roasted Tomato Soup, you can blend in a small, peeled potato that has been roasted alongside the tomatoes. Alternatively, simply simmer the blended soup for an extra 10-15 minutes to allow it to reduce and concentrate, which will thicken it perfectly without altering the flavor.
Can you freeze homemade tomato soup?
Yes, this Easy Homemade Roasted Tomato Soup freezes exceptionally well. Allow the soup to cool completely before transferring it to airtight containers or freezer bags, leaving some space for expansion. It will keep for up to 3 months for a quick and delicious future meal.
What herbs go well with tomato soup?
Fresh or dried basil is a classic pairing, but thyme and oregano also complement the rich, sweet flavors of roasted tomatoes beautifully. For the best flavor, add hardy herbs like thyme during roasting and delicate herbs like fresh basil as a garnish after blending.
ank-math-faq-item">
Do you have to peel tomatoes for soup?
It is highly recommended to peel your tomatoes for the smoothest texture, as the skins can separate and become tough during cooking. However, if you are using a high-powered blender, it will puree the softened roasted skins seamlessly into your Easy Homemade Roasted Tomato Soup.
Best Squash Soup Recipe – Creamy & Homemade
Introduction
Is there anything more comforting than a warm bowl of soup on a crisp day? Honestly, we think not. This feeling is exactly why we crave that perfect, velvety bowl of squash soup each autumn. Moreover, finding a truly exceptional version can feel like a quest. Fortunately, your search ends right here with what we confidently call the Best Squash Soup Recipe. It promises not just a meal, but a deeply satisfying experience that will warm you from the inside out.
So what exactly makes this the Best Squash Soup Recipe? Essentially, it is a masterfully balanced, creamy puree that highlights the natural, sweet flavor of roasted butternut squash. Furthermore, we enhance it with aromatic spices like nutmeg and a hint of sage, creating a complex flavor profile that is both rustic and elegant. This recipe matters because it delivers consistent, restaurant-quality results right in your own kitchen. It transforms simple, seasonal ingredients into a luxurious dish that is perfect for a quiet weeknight dinner yet impressive enough for a holiday gathering. Consequently, it perfectly fits our blog’s tone of creating approachable, foolproof recipes that empower home cooks. For instance, if you love this style of cooking, you might also enjoy our Creamy Tomato Basil Soup for another classic option. Additionally, this soup freezes beautifully, making it a fantastic meal prep idea for busy weeks ahead. Ultimately, this recipe provides a foolproof path to a nourishing and deeply delicious autumnal staple.
Why I Love This Recipe
I absolutely love this Best Squash Soup Recipe because it is my ultimate comfort food. It reminds me of crisp fall weekends spent with family, where the entire house would fill with the incredible aroma of roasting squash and herbs. Making this soup now creates that same warm, nostalgic feeling for my own home. I truly appreciate how the simple process of roasting the vegetables first unlocks such a profound depth of flavor. Every single time I make it, I am reminded that the best meals come from honoring great ingredients with a thoughtful, straightforward approach.
Health and Nutrition
Why it’s good for your body
This Best Squash Soup Recipe truly nourishes your body from the inside out. For instance, butternut squash provides a powerhouse of beta-carotene, which your body converts into vitamin A. Consequently, this essential vitamin supports healthy vision, a robust immune system, and glowing skin.
Furthermore, the ingredients work in harmony to deliver a substantial health boost. Ginger and garlic, for example, offer potent anti-inflammatory and antioxidant properties. Meanwhile, the vegetable broth base keeps the soup hydrating and light. Ultimately, enjoying a bowl of this Best Squash Soup Recipe means you are fueling your body with vitamins and minerals it craves.
Additionally, this soup promotes excellent digestive health. The high fiber content from the squash and other vegetables aids digestion and helps you feel full and satisfied. Therefore, you can comfortably enjoy this meal without any heaviness. In the end, the combination of simple, whole foods makes this Best Squash Soup Recipe a clear winner for your well-being.
How it fits in a healthy lifestyle
This soup seamlessly fits into almost any eating plan, making healthy choices effortless. It is naturally gluten-free and vegan, so it accommodates specific dietary needs without any compromise on flavor. You can enjoy it as a light lunch or as a satisfying starter for dinner.
If you are focusing on heart-healthy choices, you will appreciate that this recipe is low in saturated fat and cholesterol. It supports a balanced diet by providing essential nutrients without excessive calories. For more ideas on crafting a nourishing weekly plan, explore our guide on easy meal prep ideas.
Making a big batch of this soup is a fantastic strategy for busy weeks. It stores and reheats beautifully, ensuring you always have a wholesome option ready to go. This approach helps you avoid less healthy convenience foods. Pairing it with a protein like grilled chicken or a side salad can create a perfectly rounded meal. Discover more ways to build a balanced plate with our tips for building healthy eating habits that last.
This butternut squash soup recipe is the best Made with squash, ginger, rosemary & sage, it’s super creamy and full of cozy fall flavor.
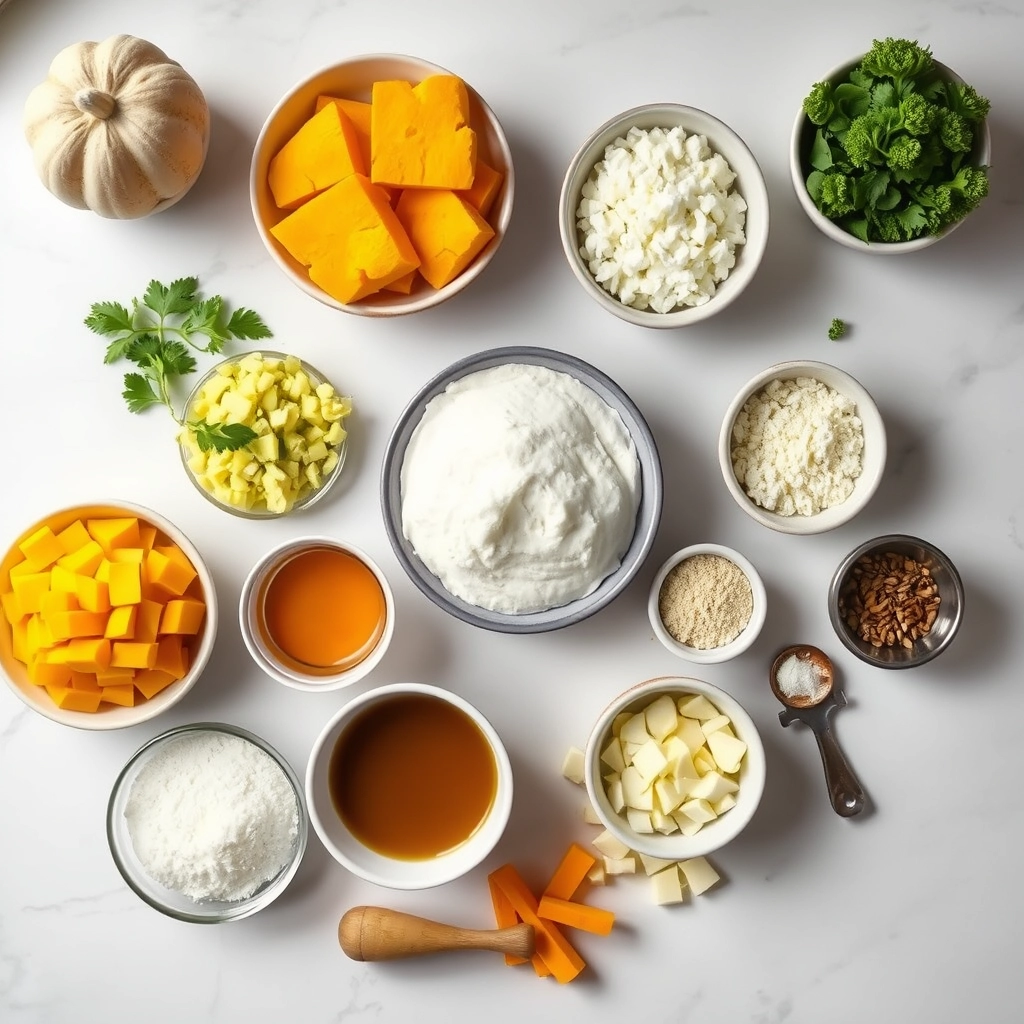
Ingredients
Scale
Ingredients
3 pounds butternut squash
1 yellow onion
2 cloves garlic
1 sprig fresh rosemary
4 fresh sage leaves
1 inch piece of ginger
2 tablespoons extra-virgin olive oil
4 cups vegetable broth
Salt
Freshly ground black pepper
Instructions
Instructions
Step 1: Chop the veggies.
Step 2: Sauté the onion until translucent.
Step 3: Add the squash and cook until it begins to soften.
Step 4: Stir in the herbs, garlic, and ginger.
Step 5: Pour in the broth and simmer until the squash becomes tender, about 20 minutes.
Step 6: Transfer the soup to a blender and blend until creamy and vibrant orange.
Step 7: Pour into bowls, garnish with chopped parsley and pepitas, and enjoy.
s-dish">How to Prepare This Dish
Steps and time-saving tips
First, preheat your oven to 400°F for roasting the squash. Meanwhile, carefully halve your squash and scoop out the seeds. Drizzle the cut sides generously with olive oil and season well with salt and pepper. Roast the halves face-down on a parchment-lined baking sheet until the flesh becomes incredibly tender. This deep, dry heat caramelizes the natural sugars, which is the absolute secret to the deepest flavor for your Best Squash Soup Recipe. While the squash roasts, you can multitask. Sauté diced onion and apple in a large stockpot with a little butter until they turn soft and fragrant. Then, simply scoop the soft squash flesh into the pot. Add your vegetable broth and a touch of maple syrup, then bring everything to a gentle boil. Finally, blend the soup directly in the pot using an immersion blender until it is perfectly smooth and velvety. For a luxurious finish, stir in a splash of coconut milk or cream. This entire process is straightforward, but the roasting step is non-negotiable for that rich, authentic taste.
Mistakes I’ve made and learned from
I have definitely learned a few lessons the hard way with this Best Squash Soup Recipe. My biggest mistake was under-seasoning during the roasting stage. I would just brush the squash with oil and forget the salt, resulting in a bland base that I could never fully correct later, no matter how much salt I added to the pot. Now, I am generous with seasoning every single layer. Another common error I made was blending the soup in a standard blender while it was too hot. This created a dangerous pressure situation that led to a few messy kitchen explosions. Thankfully, I now always use an immersion blender for total safety and easy cleanup. For more tips on avoiding common kitchen blunders, check out my guide on common baking mistakes. And if you’re looking for another fantastic blended soup that utilizes similar techniques, you must try my creamy tomato basil soup next.
n-and-variations">Cultural Connection and Variations
Where this recipe comes from
My grandmother first served me her Best Squash Soup Recipe on a crisp autumn afternoon. She learned it from her mother, who brought a version of it over from Italy, though they always used butternut squash instead of the pumpkin common in American versions. This dish, for us, always signaled the shift from summer’s bounty to winter’s cozy comforts. Around the world, cooks put their own beautiful spin on this classic. In France, they might swirl in crème fraîche and nutmeg. Meanwhile, in Thailand, they often incorporate creamy coconut milk and a hit of fiery curry paste. Some Caribbean versions even feature a surprising and delightful hint of allspice or rum. No matter the location, the goal remains the same: to celebrate the humble squash. Ultimately, our family’s Best Squash Soup Recipe is a warm, velvety hug in a bowl.
How it fits in today’s cooking
Thankfully, this classic soup fits perfectly into modern meal routines. Busy home cooks love that they can make a big batch for easy weekly meal prep. Furthermore, its naturally creamy texture without heavy dairy appeals to today’s health-conscious appetites. It remains a star of the holiday table, especially for Thanksgiving, offering a vibrant, flavorful start to a big feast. Many modern adaptations keep it exciting. For instance, some people top it with spicy roasted chickpeas for crunch, while others drizzle it with chili oil for a kick. It also pairs wonderfully with a simple, fresh side. Personally, I love serving it with a crisp apple pecan salad for a perfect lunch. Ultimately, this soup continues to thrive because it delivers deep, satisfying comfort in every single spoonful.
Taste and Texture
What makes it delicious
This Best Squash Soup Recipe delivers a velvety smooth and luxuriously creamy texture that feels incredibly rich in your mouth. Initially, you experience a gentle sweetness from the roasted squash, which then gives way to a warm, earthy depth from herbs like sage and thyme. A hint of savory onion and garlic perfectly balances the natural sugars, creating a complex and comforting flavor profile. Ultimately, the silky consistency and harmonious blend of sweet and savory notes make every spoonful of this Best Squash Soup Recipe utterly irresistible.
r">Boosting the flavor
Fortunately, you can easily elevate your soup with a few creative additions. For instance, a swirl of tangy sour cream or a dollop of rich, creamy Greek yogurt introduces a delightful cool contrast. Alternatively, top each bowl with crunchy roasted pumpkin seeds or crispy croutons for a satisfying textural surprise. Furthermore, a drizzle of sage brown butter or a sprinkle of smoked paprika adds a wonderful aromatic warmth. For more inspiration on building flavor, explore our guide to using spices in everyday cooking. Finally, consider serving it alongside a slice of our favorite rustic bread for the ultimate comforting meal.
Tips for Success
Best practices for results
First, always roast your squash to caramelize the natural sugars; this step builds a deep, rich flavor foundation for your Best Squash Soup Recipe. Furthermore, use a high-powered blender to achieve that signature velvety-smooth texture that makes this soup so luxurious. For the best results, gradually add your warm broth to the blender with the squash to control the consistency easily. Finally, do not skip the finishing garnish, as a swirl of coconut cream or a sprinkle of toasted pepitas adds crucial texture and flavor contrast.
>Mistakes to avoid
A common mistake is blending the soup while it is too hot, which can lead to a messy and dangerous explosion; therefore, always allow it to cool slightly first. Additionally, avoid overseasoning the soup before the roasting process is complete, as the flavors will concentrate; instead, season in layers and do a final taste test at the end. If your soup seems too thick, simply whisk in more broth or some coconut milk until it reaches your desired consistency, a technique we also recommend for our Creamy Vegan Potato Soup. Moreover, do not puree your soup in a standard food processor if you can avoid it, as it often leaves a less silky result than a blender; for more tips on getting smooth purees, check out our guide to making any soup creamy.
Serving and Pairing Suggestions
How to serve this dish
Present your Best Squash Soup Recipe in a beautiful way to truly wow your guests. Firstly, pour the vibrant soup into a warm, shallow bowl. Then, create a stunning contrast by drizzling a swirl of coconut cream or tangy Greek yogurt on top. For a final touch of texture and flavor, generously sprinkle roasted pumpkin seeds, crispy croutons, and fresh herbs like sage or chives over the center.
This Best Squash Soup Recipe truly shines as the star of an elegant dinner party or a cozy holiday meal. Conversely, it also makes a wonderfully quick and satisfying weeknight dinner. Always serve it with a side of warm, crusty bread for the ultimate comforting experience.
h-it">What goes well with it
A crisp, green salad offers the perfect fresh counterpoint to the creamy richness of this soup. Specifically, our Easy Arugula Salad with a sharp lemon vinaigrette cuts through the sweetness beautifully and adds a delightful peppery crunch.
For the ultimate cozy meal, pair your Best Squash Soup Recipe with a gourmet grilled cheese sandwich. The melted, savory cheese and buttery, toasted bread create a heavenly combination with every spoonful of soup. Additionally, a glass of chilled Chardonnay or a crisp hard cider complements the warm spices and squash flavors exceptionally well.
Finally, consider starting your festive feast with this soup. It leads perfectly into a main course like our Herb Roasted Chicken. The herbal notes from the chicken harmonize wonderfully with the sage and thyme in your Best Squash Soup Recipe.
Butternut squash is the top choice for the best squash soup recipe because of its sweet, nutty flavor and smooth, creamy texture when pureed. Acorn or kabocha squash are also excellent alternatives that yield a rich and velvety consistency.
How do you thicken butternut squash soup?
You can naturally thicken your best squash soup recipe by pureeing the cooked squash until completely smooth. For an even richer soup, simmer it uncovered to reduce and evaporate excess liquid, or add a small, cooked potato to the blender.
ank-math-faq-item">
Can you freeze squash soup?
Yes, this best squash soup recipe freezes beautifully for up to 3 months. Allow the soup to cool completely before transferring it to airtight freezer-safe containers, leaving some space for expansion.
What spices go well with butternut squash soup?
Classic warm spices like nutmeg, cinnamon, and ginger beautifully complement the natural sweetness of the squash. For a savory depth, roasted garlic, thyme, and a touch of curry powder are fantastic additions to your best squash soup recipe.
Easy Roasted Veggie Soup Recipe in Under 1 Hour
Introduction
There is something truly special about a warm bowl of soup on a crisp day. It feels like a hug from the inside, a moment of pure comfort. However, you do not always have hours to spend tending to a simmering pot. That is exactly why this recipe for Cozy Roasted Veggie Soup in Under 1 Hour is a total game-changer. It delivers deep, caramelized flavor without demanding your entire afternoon, making it the perfect solution for a hectic weeknight.
This Cozy Roasted Veggie Soup in Under 1 Hour is not your average vegetable soup. Fundamentally, the magic happens in the oven. Roasting a vibrant mix of vegetables like carrots, onions, and bell peppers caramelizes their natural sugars. This process, consequently, creates an incredible depth of flavor that you simply cannot achieve by boiling everything in a pot. The result is a rich, savory, and satisfying broth that tastes like it simmered all day. Moreover, this recipe perfectly aligns with our blog’s mission to deliver incredibly flavorful meals that respect your busy schedule. It is a testament to the idea that you do not need to compromise on taste for the sake of convenience. For those nights when you need a quick yet wholesome dinner, this soup is your answer. Furthermore, it is an excellent way to enjoy seasonal produce. In fact, you can adapt this base recipe with whatever vegetables you have on hand, making it a fantastic clean-out-the-fridge meal. If you are looking for another fantastic way to use your oven for easy meals, our popular One Pan Lemon Herb Chicken follows a similar, fuss-free philosophy. Ultimately, this approach to cooking empowers you to create restaurant-quality food in your own kitchen without any stress.
Why I Love This Recipe
This Cozy Roasted Veggie Soup in Under 1 Hour holds a special place in my weekly rotation because it never fails to deliver. I love how the simple act of roasting transforms humble ingredients into something extraordinary. The aroma that fills my kitchen as the vegetables caramelize is absolutely irresistible and signals that a comforting meal is just moments away. It is my go-to recipe when I need a reliable, nourishing dish that makes me feel good from the inside out. This soup also reminds me of my favorite Creamy Tomato Basil Soup, but with a heartier, rustic twist that is uniquely its own.
Health and Nutrition
Why it’s good for your body
This Cozy Roasted Veggie Soup in Under 1 Hour truly nourishes your body from the inside out. First, roasting the vegetables like carrots, bell peppers, and tomatoes caramelizes their natural sugars. Consequently, this process not only deepens the flavor but also helps your body absorb certain fat-soluble vitamins more effectively. Moreover, each vibrant spoonful delivers a powerful array of antioxidants and phytonutrients. These compounds actively combat oxidative stress and support your body’s natural defenses.
Additionally, this soup provides a fantastic source of soluble and insoluble fiber. As a result, this promotes healthy digestion and helps you feel satisfied and full for longer. Furthermore, the olive oil base contributes heart-healthy monounsaturated fats. Therefore, you support cardiovascular wellness while enjoying a deeply comforting meal. Ultimately, preparing this Cozy Roasted Veggie Soup in Under 1 Hour means you are choosing a meal that fuels your body with intention and care without sacrificing an ounce of flavor.
How it fits in a healthy lifestyle
This Cozy Roasted Veggie Soup in Under 1 Hour seamlessly fits into almost any healthy eating plan. It is naturally gluten-free and vegan, making it a fantastic option for those with specific dietary needs. You can easily enjoy it as a light lunch or pair it with a whole-grain roll for a more substantial dinner. This flexibility makes sticking to your wellness goals simple and delicious.
If you are focusing on heart-healthy choices, you will appreciate the soup’s low sodium profile, especially if you use a low-sodium broth. You can also easily add a can of rinsed beans for a plant-based protein boost that aligns with goals for building lean muscle. For more inspiration on crafting balanced meals, explore our guide on meal prepping efficiently. This soup stores and reheats beautifully, making it a perfect make-ahead option for your weekly routine. Finding recipes that are both quick and nutritious is key to sustainable healthy eating, and our collection of quick healthy dinners offers plenty of ideas to keep you on track.
This comforting roasted vegetable soup is packed with rich flavors and comes together in under an hour, perfect for a cozy meal any day.
Ingredients
Scale
Vegetables
3 large carrots, peeled and chopped
2 parsnips, peeled and chopped
1 small butternut squash, peeled, seeded, and diced
1 large red onion, peeled and quartered
3 cloves garlic, peeled
Olive Oil & Seasonings
3 tbsp olive oil
1 tsp dried thyme
1 tsp dried rosemary
Salt and black pepper to taste
Soup Base
4 cups vegetable broth
1 (14.5 oz) can diced tomatoes
1 cup water
Optional Garnish
Fresh parsley, chopped
Crusty bread for serving
Instructions
Preparation:
Preheat oven to 400°F (200°C).
Toss carrots, parsnips, butternut squash, red onion, and garlic cloves with olive oil, thyme, rosemary, salt, and pepper on a large baking sheet.
Roast vegetables for about 30 minutes, until tender and caramelized, stirring halfway through.
Cooking the Soup:
Transfer roasted vegetables to a large pot.
Add vegetable broth, diced tomatoes with juices, and water.
Bring to a boil, then reduce heat and simmer for 10-15 minutes to combine flavors.
Blending:
Use an immersion blender to puree soup until smooth and creamy. Alternatively, blend in batches in a countertop blender and return to pot.
Final Touches:
Adjust seasoning with salt and pepper as needed.
Serve hot garnished with chopped fresh parsley and crusty bread on the side.
How to Prepare This Dish
Steps and time-saving tips
First, preheat your oven to 425°F to get it nice and hot. Meanwhile, chop your carrots, onions, and bell peppers into even, one-inch chunks. This ensures everything roasts at the same pace. Next, toss all those vibrant veggies onto a large baking sheet. Drizzle them generously with olive oil, then season well with salt, pepper, and your favorite dried herbs like thyme or rosemary. Use your hands to mix everything thoroughly, making sure each piece gets a glossy coat. Roast the vegetables for about 25 minutes, or until you see those beautiful caramelized edges. While they roast, you can start simmering your vegetable broth in a large pot. This parallel task is a huge time-saver. Once the veggies are tender and fragrant, carefully add them to the simmering broth. Then, simply use an immersion blender to puree the soup directly in the pot until it is completely smooth and creamy. Finally, stir in a splash of cream or coconut milk for extra richness, taste for seasoning, and your Cozy Roasted Veggie Soup in Under 1 Hour is ready to serve. Garnish with fresh herbs and enjoy immediately.
and-learned-from">Mistakes I’ve made and learned from
I have definitely learned a few lessons the hard way with this Cozy Roasted Veggie Soup in Under 1 Hour. My biggest mistake was overcrowding the baking sheet, which caused the vegetables to steam instead of roast. They ended up soft and pale, lacking that deep, caramelized flavor that is so essential. Now, I always use two sheets if my batch is large. Another time, I underestimated the power of my immersion blender and ended up with soup splattered all over my kitchen walls. I learned that pulsing first and then blending on low speed gives me much more control. For more tips on avoiding common kitchen blunders, my guide on avoiding common baking mistakes has some crossover advice that really helps. Also, getting your seasoning right is crucial; I once accidentally used far too much salt. Now, I always taste and adjust at the end, a principle I detail in my post about perfecting soup seasoning. A little patience at the final stage makes all the difference.
Cultural Connection and Variations
Where this recipe comes from
Every culture, frankly, has its own version of a hearty vegetable soup. My version of Cozy Roasted Veggie Soup in Under 1 Hour pulls inspiration from a beautiful Italian tradition called *minestrone di forno*. Instead of boiling everything, they roast the vegetables first to create an incredible depth of flavor. This method unlocks a natural sweetness you simply cannot achieve any other way.
Families across Europe
often prepare a similar soup as a clever way to use the Sunday roast’s leftover vegetables. In France, they might swirl in a spoonful of pistou, their version of pesto. Meanwhile, a Greek yiayia might add a generous handful of feta cheese right at the end. The beauty truly lies in its adaptability.
In my own home, this soup became a weekly ritual during a particularly hectic fall. I needed something nourishing that could come together faster than takeout. Roasting a big pan of whatever looked best at the market became my secret weapon. Ultimately, this process birthed our beloved Cozy Roasted Veggie Soup in Under 1 Hour, a dish that feels both rustic and entirely new.
How it fits in today’s cooking
This recipe fits perfectly into our modern need for quick, wholesome meals. It delivers the deep, slow-cooked taste of a long-simmered soup without actually requiring hours of your time. Consequently, it has become a go-to for busy weeknights when everyone needs a warm, comforting bowl of goodness.
Many home cooks now ada
pt the base recipe to fit dietary needs, easily making it vegan or gluten-free. Furthermore, it shines as a fantastic make-ahead meal prep option for lunches. You can roast a double batch of vegetables and enjoy the soup all week long.
It also holds a special place in seasonal cooking, especially during the autumn harvest. Finally, pairing a warm bowl with a slice of crusty gluten-free banana bread creates the ultimate comforting experience. This simple soup continues to bring people together, proving that the best meals are often the most straightforward ones.
Taste and Texture
What makes it delicious
This Cozy Roasted Veggie Soup in Under 1 Hour delivers a deeply savory and sweet flavor profile. Roasting the vegetables first caramelizes their natural sugars, creating a rich, almost nutty base. Consequently, each spoonful feels incredibly velvety and smooth on the palate. Furthermore, the aromatic garlic and herbs provide a fragrant, earthy backbone that makes the entire kitchen smell amazing. Ultimately, this Cozy Roasted Veggie Soup in Under 1 Hour offers a hearty and utterly comforting experience from the first taste to the last.
r">Boosting the flavor
You can easily amplify this soup’s flavor with a few creative additions. For instance, a swirl of pesto or a sprinkle of Parmesan cheese right before serving adds a brilliant salty, umami kick. Alternatively, a spoonful of our Easy Homemade Croutons introduces a wonderful crunchy texture. Moreover, if you enjoy a bit of heat, a dash of smoked paprika or a drizzle of chili oil works perfectly. Finally, for a brighter finish, try a squeeze of fresh lemon juice or a dollop of our Creamy Herb Sauce to lift all the roasted flavors beautifully.
Tips for Success
Best practices for results
Always chop your vegetables into uniform, bite-sized pieces for even roasting. Additionally, make sure you preheat your baking sheet in the oven; this step jumpstarts the cooking process for a perfect sear. Use a high-quality olive oil to coat everything thoroughly, and finally, do not overcrowd the pan to guarantee those beautifully caramelized edges. Following these simple steps ensures your Cozy Roasted Veggie Soup in Under 1 Hour turns out perfectly every single time.
>Mistakes to avoid
Avoid using a dull knife to chop hard vegetables like carrots and potatoes; otherwise, you risk an inconsistent cook and potential injury. Instead, learn the right way to chop vegetables safely and efficiently for the best results. Furthermore, do not skip the roasting step and try to boil all the veggies directly. Roasting first develops a deep, complex flavor that defines this soup. If you are unsure about your seasoning, however, check out our guide on soup seasoning basics to perfectly balance your broth every time.
Serving and Pairing Suggestions
How to serve this dish
Serve your Cozy Roasted Veggie Soup in Under 1 Hour piping hot in a deep, colorful bowl to highlight its vibrant color. For a beautiful finish, swirl a tablespoon of cream or coconut milk on top and add a fresh garnish like chopped parsley or chives. Furthermore, a final sprinkle of black pepper or toasted pumpkin seeds adds wonderful texture. This dish truly shines as a simple weeknight dinner, yet it also makes an elegant starter for a holiday meal. Ultimately, its comforting warmth and rich flavor promise to delight your guests on any occasion.
What goes well with it
Firstly, a thick slice of crusty artisan bread is perfect for dipping into this hearty soup. For an even more satisfying meal, consider pairing it with our classic Garlic Herb Focaccia, which complements the roasted vegetable flavors beautifully. Secondly, a light, crisp white wine like Sauvignon Blanc or a pale ale balances the soup’s earthy richness. Alternatively, a simple side salad offers a fresh contrast. Our popular Easy Arugula Salad with a lemon vinaigrette, for instance, provides a delightful peppery bite that enhances every spoonful of your Cozy Roasted Veggie Soup in Under 1 Hour.
What vegetables are best for a quick roasted vegetable soup?
For a quick soup like Cozy Roasted Veggie Soup in Under 1 Hour, choose vegetables that roast quickly and caramelize well. Excellent choices include carrots, bell peppers, zucchini, broccoli, cauliflower, and onions. These veggies become tender and develop a deep, sweet flavor in the high heat of the oven, which is the secret to this delicious soup.
Can I make this roasted veggie soup ahead of time?
Absolutely! This Cozy Roasted Veggie Soup in Under 1 Hour is an excellent make-ahead meal. Simply let the soup cool completely after blending, then store it in an airtight container in the refrigerator for up to 4 days. The flavors often meld and become even more delicious the next day.
ank-math-faq-item">
Do I need a blender to make roasted vegetable soup?
Yes, a blender is essential for achieving the signature creamy and smooth texture of this Cozy Roasted Veggie Soup in Under 1 Hour. An immersion blender works directly in the pot, while a standard countertop blender will give you an ultra-smooth consistency—just be careful when blending hot liquids and work in batches if necessary.
How can I add more protein to this vegetable soup?
It’s easy to boost the protein in this quick soup. Stir in a can of rinsed white beans or chickpeas when you add the broth, or add shredded rotisserie chicken at the end just to warm through. For a creamy protein option, a dollop of Greek yogurt on top is a perfect finish.
Easy Hearty One-Pot Savory Soups Recipe
Introduction
Is there anything more comforting than a warm, flavorful bowl of soup on a crisp day? Honestly, we think not. Furthermore, the frantic search for weeknight dinner solutions is a universal struggle. That is exactly why we are so excited to share this collection of incredibly satisfying Hearty One-Pot Savory Soups. Consequently, you can say goodbye to piles of dishes and hello to deep, complex flavors that simmer together into a perfect meal.
Hearty One-Pot Savory Soups represent the ultimate culinary solution for busy home cooks. Essentially, these recipes transform simple, wholesome ingredients into a complete and nourishing meal using a single pot. This cooking method not only simplifies cleanup dramatically but also allows flavors to meld together in a way that creates something truly greater than the sum of its parts. Moreover, this approach to cooking aligns perfectly with our blog’s philosophy of creating accessible, delicious, and efficient recipes for real life. Whether you are a seasoned chef or just starting your kitchen journey, mastering a few core Hearty One-Pot Savory Soups will build your confidence and provide a reliable arsenal of go-to meals. For instance, understanding how to build a flavor base is a fundamental skill that applies to countless dishes. Ultimately, these soups deliver maximum comfort with minimal effort, making them a perennial favorite in households across the country.
Why I Love This Recipe
My love for Hearty One-Pot Savory Soups runs deep, truly stemming from my grandmother’s kitchen. I vividly remember how her entire house would fill with the incredible aroma of simmering broth and herbs, a smell that promised warmth and togetherness. Nowadays, as a parent, I appreciate these recipes on a whole new level. They give me the ability to create that same feeling of wholesome comfort for my own family, even on our most chaotic weeknights. Furthermore, the simplicity of the process means I often let my kids choose the veggies to add, making dinner a collaborative and fun experience. Ultimately, a pot of soup bubbling on the stove feels like a hug in a bowl, and that is a feeling I will always cherish.
Health and Nutrition
Why it’s good for your body
Hearty One-Pot Savory Soups deliver a powerful nutritional punch in every comforting bowl. For starters, the slow simmering process locks in vitamins and minerals from vegetables like carrots, kale, and tomatoes. Consequently, your body easily absorbs these essential nutrients to support your immune system and overall vitality. Moreover, the broth base keeps these meals hydrating and much lower in calories than many other comfort foods.
Additionally, these soups often feature lean proteins like chicken, beans, or lentils. Therefore, they provide sustained energy and help you feel full and satisfied for hours. This combination of fiber-rich vegetables and quality protein makes Hearty One-Pot Savory Soups a fantastic choice for managing weight. Furthermore, you can control the sodium and fat content by making them at home, which is a significant advantage for heart health.
Ultimately, the simplicity of throwing wholesome ingredients into one pot maximizes their natural goodness. As a result, you enjoy a meal that nourishes your body from the inside out. Regularly enjoying Hearty One-Pot Savory Soups is a delicious strategy for boosting your well-being.
How it fits in a healthy lifestyle
Hearty One-Pot Savory Soups seamlessly fit into almost any healthy eating plan. If you are following a gluten-free diet, you can easily use quinoa or rice instead of pasta or barley. They are also a cornerstone of heart-healthy cooking, allowing you to load up on vegetables and use lean cuts of meat.
This cooking method supports practical wellness because it saves time and reduces cleanup. You can make a large batch on a Sunday and have nutritious lunches ready for the entire week, preventing less healthy last-minute choices. For more inspiration on building a balanced plate, explore our guide on easy weekly meal prep ideas. Ultimately, these soups offer a flexible, convenient, and utterly delicious way to stay on track with your health goals.
This recipe is a hearty and savory one-pot soup that combines rich flavors and wholesome ingredients to deliver a comforting meal with minimal cleanup.
Ingredients
Scale
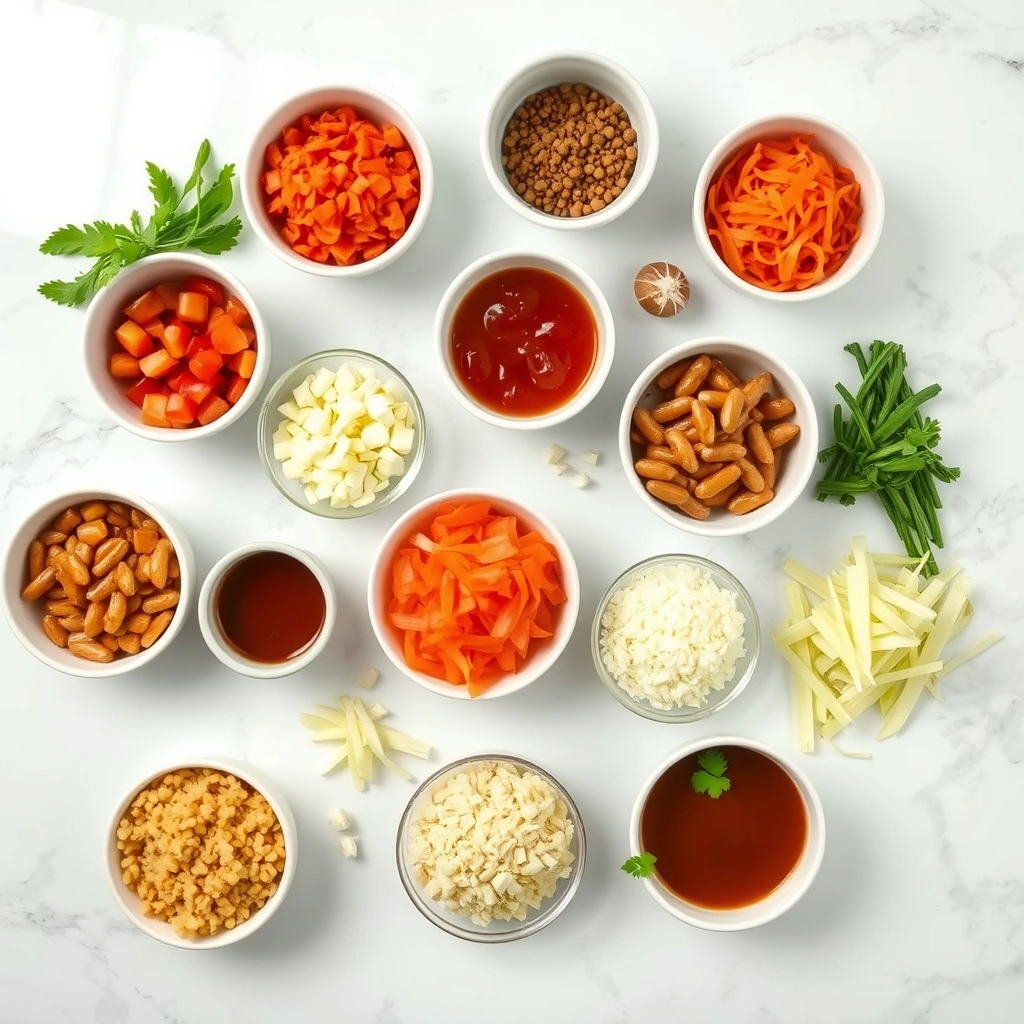
Soup Base
2 tablespoons olive oil
1 medium onion, diced
3 cloves garlic, minced
2 carrots, peeled and chopped
2 celery stalks, chopped
4 cups chicken or vegetable broth
1 (14.5 oz) can diced tomatoes
1 teaspoon dried thyme
1 teaspoon dried oregano
Salt and pepper, to taste
Hearty Add-ins
1 cup cooked shredded chicken
1 cup cooked beans (cannellini or navy)
1 cup chopped kale or spinach
1/2 cup small pasta (optional)
Instructions
Preparation:
Heat olive oil in a large pot over medium heat.
Sauté onion, garlic, carrots, and celery until softened, about 5-7 minutes.
Soup Simmering:
Add broth, diced tomatoes, thyme, oregano, salt, and pepper to the pot and bring to a boil.
Reduce heat and let simmer for 15 minutes to blend flavors.
Finishing Touches:
Stir in cooked chicken, beans, greens, and pasta if using.
Simmer for an additional 10 minutes until greens have wilted and pasta is tender.
How to Prepare This Dish
Steps and time-saving tips
First, gather and chop all your vegetables before you even turn on the stove. This mise en place step saves you from frantic chopping later and makes the entire process feel smooth. Next, heat a generous drizzle of oil in your largest, heaviest pot over medium-high heat. Then, add your tougher vegetables like carrots and celery; sauté them until they just begin to soften. After that, add your aromatics like garlic, stirring constantly for that perfect fragrant base. Now, pour in your broth and add any hardy grains or legumes, bringing everything to a lively boil. Immediately reduce the heat to a gentle simmer, cover the pot, and let time work its magic. Finally, stir in any delicate greens or pre-cooked proteins just a few minutes before serving to keep them perfectly tender. For a brilliant time-saving trick, use a store-bought rotisserie chicken and pre-chopped veggies from the produce aisle. Ultimately, this approach to Hearty One-Pot Savory Soups minimizes cleanup and maximizes flavor with very little active effort.
and-learned-from">Mistakes I’ve made and learned from
I used to make a huge mistake with my Hearty One-Pot Savory Soups by adding all the ingredients at once. The result was a mushy, overcooked mess where every vegetable lost its unique texture and identity. I learned the hard way that timing is everything; you must add ingredients in stages based on their cooking times. Another lesson came from under-seasoning. I would nervously add a pinch of salt at the start, afraid of overdoing it, which always led to a bland pot. Now, I season in layers, tasting and adjusting after each major addition. This builds a deep, complex flavor profile that is absolutely restaurant-quality. For more on building those foundational flavors, my guide on creating a rich stock from scratch was a game-changer for me. And if you’re worried about salt, my post on healthy low-sodium cooking methods offers great alternatives that don’t sacrifice taste.
Cultural Connection and Variations
Where this recipe comes from
Every culture, frankly, tells its story through a simmering pot. My own family’s version of Hearty One-Pot Savory Soups likely started with my grandmother, who never let a scrap of food go to waste. Consequently, her soup pot always bubbled with the week’s leftovers, creating a new masterpiece every Sunday. Meanwhile, across the globe, similar traditions thrive. In Italy, they craft rich minestrone, while in Mexico, they slowly build complex pozole. Similarly, Vietnamese pho simmers for hours, developing its legendary broth. Ultimately, these variations share a common soul: nourishment and community.
Furthermore, regional d
ifferences beautifully highlight local ingredients. For instance, a coastal version might burst with fresh seafood, while a heartland recipe relies on root vegetables and beans. In our home, however, we always add a parmesan rind for umami depth. This simple trick transforms the entire pot. Therefore, the next time you make Hearty One-Pot Savory Soups, remember you are continuing a global, timeless ritual of sharing and comfort.
How it fits in today’s cooking
This classic dish perfectly suits our modern need for simplicity and wholesomeness. Busy weeknights, for example, demand efficient meals that minimize cleanup. Fortunately, these soups deliver incredible flavor with just one pot. Moreover, they fit seamlessly into meal prep routines, as their taste often improves after a day or two in the fridge. Many health-conscious cooks, consequently, adapt the base by adding more greens or lean proteins.
Additionally, this cooking style aligns with a desire for seasonal eating. A summer harvest might inspire a bright tomato basil soup, while winter calls for something more robust. Ultimately, the recipe’s flexibility secures its place in contemporary kitchens. For a sweet ending to your comforting meal, consider pairing it with a slice of classic banana bread. This combination truly creates a balanced and satisfying dining experience any day of the week.
>Taste and Texture
What makes it delicious
These Hearty One-Pot Savory Soups deliver a deeply comforting and complex flavor profile. First, you experience the rich, savory broth that coats your tongue, followed by the tender give of slow-cooked vegetables and the satisfying chew of meat or beans. Aromatic herbs like rosemary and thyme create a fragrant steam that promises warmth in every spoonful. Ultimately, the creamy potatoes and soft noodles provide a wonderful textural contrast that makes each bite exciting. This combination creates a truly unforgettable bowl of comfort.
Boosting the flavor
You can easily elevate your soup with a few clever tweaks. For instance, try a squeeze of fresh lemon juice just before serving to brighten the entire pot. Furthermore, a dollop of our herb garlic compound butter will melt into a luxurious, flavorful finish. Alternatively, a sprinkle of crispy bacon or toasted nuts adds a delightful crunch. For a spicy kick, a dash of smoked paprika or a drizzle of chili oil works wonders. Finally, consider serving it alongside a slice of our rustic no-knead bread for the ultimate dipping experience.
Tips for Success
Best practices for results
Always start by sautéing your aromatics like onions and garlic first, because this builds a deep flavor foundation for your Hearty One-Pot Savory Soups. Furthermore, use a heavy-bottomed pot to distribute heat evenly and prevent any scorching. For the most tender meat and vegetables, simmer your soup gently instead of boiling it vigorously. Finally, always taste and adjust your seasonings right at the end for a perfectly balanced bowl.
Mistakes to avoid
A common mistake is adding all the salt at the beginning; however, broths reduce as they cook and can become too salty. Instead, season in layers and do your final tasting at the end. Moreover, do not overcrowd the pot with too many ingredients at once, as this will steam them instead of creating a nice sear. For more guidance on building flavors correctly, see our guide on how to sauté aromatics. Additionally, avoid overcooking any pasta or grains you add directly to the pot, otherwise they can become mushy. If you are unsure about timing, consider preparing them separately using our perfect pasta guide and adding them to each bowl when you serve.
Serving and Pairing Suggestions
How to serve this dish
Present your Hearty One-Pot Savory Soups in deep, pre-warmed bowls to keep them steaming hot. For a beautiful finish, top each serving with a fresh herb garnish like chopped parsley or a drizzle of high-quality olive oil. Furthermore, consider a side of crusty bread for dipping, which makes the meal feel complete and satisfying. Serve these soups as the star of a casual weeknight dinner or as a comforting starter for a holiday gathering. Ultimately, their rustic elegance and inviting aroma will impress any guest.
h-it">What goes well with it
A crisp, green side salad perfectly balances the rich depth of Hearty One-Pot Savory Soups. For instance, our classic Easy House Salad with a light vinaigrette offers a refreshing crunch. Additionally, no soup meal is complete without something warm and bready on the side. Consequently, we highly recommend a batch of our favorite Garlic Parmesan Dinner Rolls for the ultimate comfort food experience. Finally, for a drink pairing, a light-bodied lager or a glass of sparkling water with lemon cleanses the palate between each delicious spoonful.
What is the best way to thicken a one-pot soup?
For a naturally thicker consistency, try mashing some of the potatoes or beans directly in the pot with a fork. Alternatively, create a simple slurry by mixing a tablespoon of cornstarch or flour with two tablespoons of cold water, then stir it into your simmering Hearty One-Pot Savory Soup. Let it cook for a few more minutes until it reaches your desired thickness.
ank-math-faq-item">
Can you make one-pot soups in a slow cooker?
Absolutely! A slow cooker is perfect for creating tender, flavorful Hearty One-Pot Savory Soups. Simply add all your ingredients to the crockpot, set it on low for 6-8 hours or high for 3-4 hours, and let the flavors meld together beautifully. This hands-off method is ideal for developing deep, savory notes with minimal effort.
What are good protein additions for a hearty soup?
Excellent proteins that hold up well in cooking include diced chicken thighs, ground turkey, Italian sausage, or beef stew meat. For plant-based options, consider adding rinsed canned beans like kidney or cannellini beans, lentils, or chickpeas. These ingredients absorb the savory broth and make your one-pot meal more satisfying and nutritious.
How long do homemade savory soups last in the refrigerator?
Properly stored in an airtight container, most Hearty One-Pot Savory Soups will stay fresh for 3 to 4 days in the refrigerator. In fact, the flavors often improve after a day, making them fantastic for meal prep. Always allow the soup to cool completely before refrigerating to maintain food safety and quality.