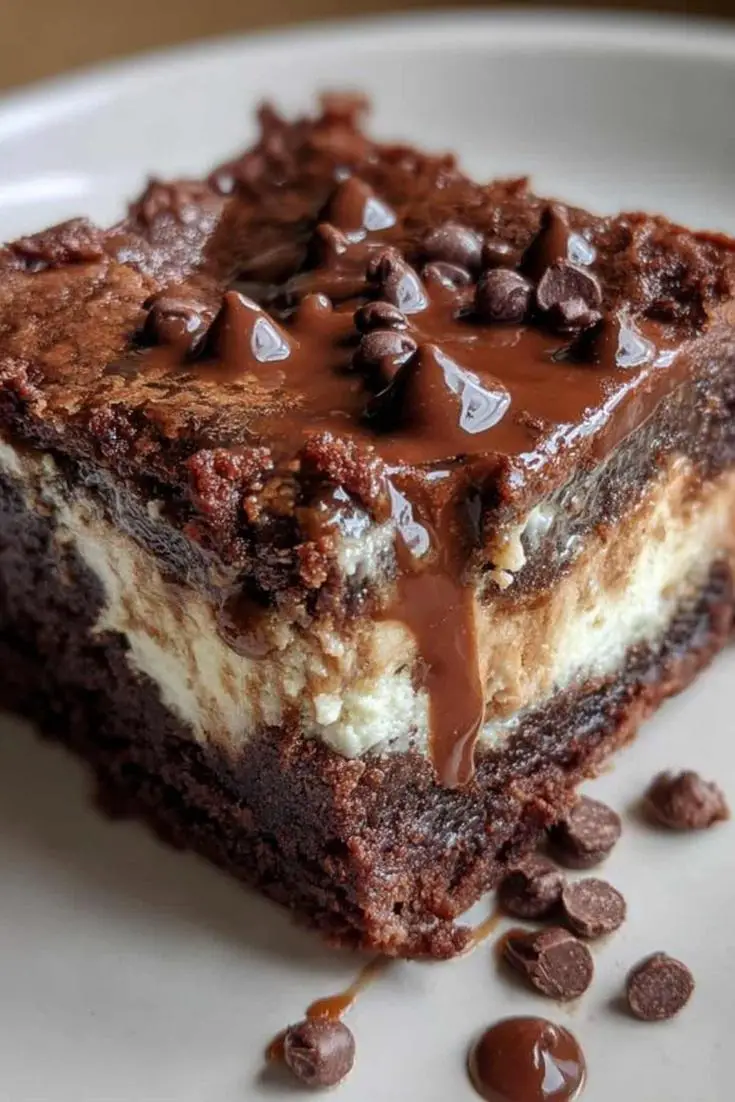
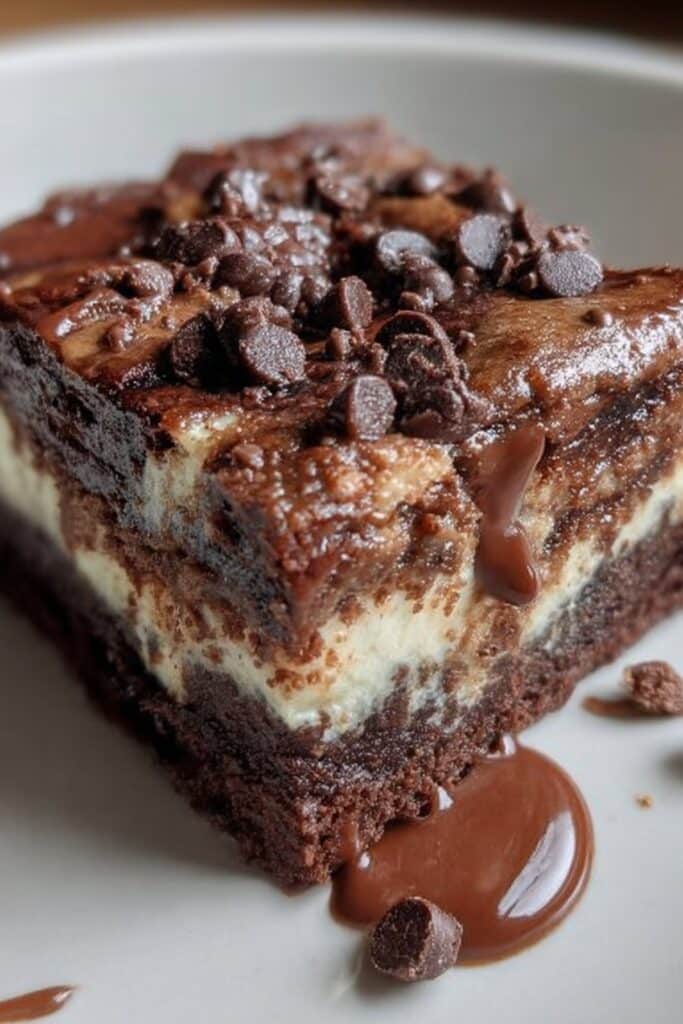
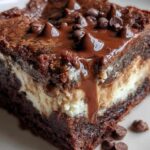
Big Boy’s Fresh Strawberry Pie: A Slice of Summer

There’s something truly magical about a perfectly ripe strawberry—the sweet fragrance, the bright red color, and the juicy flavor. Big Boy’s Fresh Strawberry Pie captures that essence in a dessert that’s both simple and sublime, making it a favorite among summer recipes. This classic dish combines the sweetness of strawberries with a glossy, flavorful jelly, all held together in a flaky pie crust. It’s a recipe that brings back memories of diners and homemade desserts, ideal for any summer gathering or a simple family dinner.

The Origins of a Classic

Big Boy’s Fresh Strawberry Pie is more than just a dessert; it’s a piece of American culinary history. Originating from the Big Boy restaurant chain, this pie became a staple menu item, beloved by patrons for its fresh flavors and simple elegance. This section will explore the pie’s roots, tracing its journey from restaurant favorite to a beloved homemade classic.

Ingredient Breakdown

  • Frozen Pie Crust: The convenient base for our pie, providing a flaky texture.
  • Sugar & Cornstarch: These combine with water to create a thick, sweet glaze that complements the strawberries.
  • Strawberry Jelly: Enhances the filling’s flavor, adding depth and a beautiful sheen.
  • Fresh Strawberries: The star of the show, lending the pie its vibrant color and fresh taste.

Step-by-Step Recipe Guide

From pre-baking the crust to creating the jelly glaze, this section will offer a detailed walkthrough of the recipe. Tips for achieving the perfect consistency and flavor balance will ensure your pie is a hit every time.

Customizing Your Strawberry Pie

While the classic recipe is beloved by many, there’s always room for a personal touch. This part of the article will suggest variations and substitutions, such as using a homemade pie crust, adding different berries for a mixed berry pie, or creating a lattice top for an extra touch of elegance.

Pairing and Serving Suggestions

Big Boy’s Fresh Strawberry Pie is versatile, pairing beautifully with a range of accompaniments. Recommendations for serving—whether with whipped cream, ice cream, or a cup of coffee—will help readers create the perfect dessert experience.

The Joy of Summer Desserts

Reflecting on the broader appeal of summer desserts, this section will celebrate the seasonal ingredients and flavors that make recipes like Big Boy’s Fresh Strawberry Pie so special. It’s a chance to connect the specific recipe to the wider context of summer cooking and eating, emphasizing freshness, simplicity, and the joy of sharing good food with loved ones.

Bringing It All Together

Concluding the article, this part will weave together the themes of history, simplicity, and seasonal freshness. It will reinforce the idea that Big Boy’s Fresh Strawberry Pie is more than just a dessert—it’s a celebration of summer, a nod to American diner culture, and a testament to the power of simple ingredients to create lasting memories.

Frequently Asked Questions About Big Boy’s Fresh Strawberry Pie

What’s the secret to selecting the best strawberries for Big Boy’s Fresh Strawberry Pie?
Choosing ripe, bright red strawberries with a fragrant aroma ensures your pie will have the best flavor. Look for berries that are firm, without bruises or soft spots, to ensure they hold up well in the pie.

Can I use a homemade pie crust instead of a frozen one for Big Boy’s Fresh Strawberry Pie?
Absolutely! A homemade pie crust can add a delightful touch to the pie. If you have a favorite recipe or want to experiment with making your own, it can elevate the dish to a new level of homemade goodness.

How do I prevent the pie crust from becoming soggy?
Pre-baking or “blind baking” the pie crust before adding the filling is key to preventing a soggy bottom. Additionally, allowing the strawberry jelly mixture to cool slightly before pouring it over the strawberries can also help.

Is there a vegan alternative for the ingredients in Big Boy’s Fresh Strawberry Pie?
For a vegan version, you can use plant-based butter for the crust, agar powder instead of cornstarch for the jelly, and substitute the jelly and cheeses with vegan alternatives available in the market.

What adjustments should I make if I want to add banana peppers to the recipe?
If you manage to open that jar of banana peppers, adding them to your pie can introduce a tangy twist. Start with a small amount, finely chopped, to ensure the flavors balance well with the sweetness of the strawberries and the richness of the jelly.

Can Big Boy’s Fresh Strawberry Pie be made in advance?
Yes, this pie can be prepared in advance. It’s actually recommended to allow the pie to set in the refrigerator for a few hours. If making more than a day ahead, assemble the pie but add the fresh strawberry topping and final jelly glaze closer to serving time to maintain the best texture and appearance.

How long will Big Boy’s Fresh Strawberry Pie last in the refrigerator?
When stored properly in the refrigerator, the pie can last for up to 3 days. Cover it with plastic wrap or aluminum foil to keep it fresh. For the best taste and texture, it’s recommended to enjoy the pie within the first day or two.

Print
clock clock iconcutlery cutlery iconflag flag iconfolder folder iconinstagram instagram iconpinterest pinterest iconfacebook facebook iconprint print iconsquares squares iconheart heart iconheart solid heart solid icon

Big Boy’s Fresh Strawberry Pie

  • Author: Chef Emy

Description

Big Boy’s Fresh Strawberry Pie is a classic dessert that captures the essence of summer in every bite. This delightful pie combines the sweetness of fresh strawberries with a luscious jelly glaze, all nestled in a flaky, golden crust. The recipe is straightforward, making it a perfect choice for both novice bakers and experienced pastry chefs looking to add a refreshing treat to their dessert repertoire. Here’s how you can recreate this beloved pie in your own kitchen.


Ingredients

Scale
  • 1 frozen pie crust: Serves as the base for your pie, offering a crispy texture.
  • 1 1/4 cup sugar: Sweetens the jelly mixture that will coat the strawberries.
  • 3 tbsp cornstarch: Thickens the jelly mixture, ensuring it sets properly.
  • 1 1/4 cups water: The liquid component needed to create the jelly.
  • 3 tbsp strawberry jelly: Enhances the strawberry flavor and adds a beautiful sheen.
  • 2 cups strawberries, sliced: The star of the pie, providing fresh, juicy bursts of flavor.

Instructions

  1. Prep the Pie Crust: Begin by baking the frozen pie crust according to the package’s instructions. This usually involves preheating your oven, placing the crust on a baking sheet, and baking until golden brown. Once done, remove it from the oven and let it cool for about 30 minutes. A properly cooled crust is crucial as it prevents the jelly mixture from making it soggy.

  2. Make the Jelly Mixture: While the crust is cooling, prepare the jelly mixture. In a small saucepan, combine the sugar, cornstarch, and water. Whisk these ingredients together over medium heat. The key is to keep whisking to prevent any lumps from forming as the mixture heats. Once it reaches a boil, reduce the heat to low and let it simmer for about 5 minutes, or until the mixture has thickened to a jelly-like consistency. Then, whisk in the strawberry jelly until it’s fully integrated and smooth. Remove the saucepan from heat and allow the mixture to cool. This step infuses the jelly with a deep strawberry flavor and ensures it will solidify correctly in the fridge.

  3. Assemble the Pie: With your cooled pie crust ready, arrange the sliced strawberries inside it, covering the bottom entirely. For an extra touch of elegance, you can arrange the slices in concentric circles or any pattern you like. Once the strawberries are in place, gently pour the cooled jelly mixture over them, making sure to cover all the strawberries evenly. The jelly acts as a glaze, sealing the strawberries in place and giving the pie a glossy, appetizing finish.

  4. Chill and Set: Transfer the pie to the refrigerator and let it chill for a few hours. This cooling period allows the jelly mixture to set, resulting in a firm filling that slices beautifully. The pie is ready to serve once the filling is no longer liquid and holds its shape when cut.

  5. Serving Suggestions:

    Big Boy’s Fresh Strawberry Pie is best enjoyed chilled, making it a refreshing dessert option for warm weather days. Serve it as is, or with a dollop of whipped cream or a scoop of vanilla ice cream for an extra indulgent treat. It’s perfect for picnics, summer gatherings, or simply as a delightful finish to any meal.


Notes

Big Boy’s Fresh Strawberry Pie is more than just a dessert; it’s a celebration of summer’s bounty. With its simple ingredients and easy-to-follow steps, anyone can bring this classic pie to life. Whether you’re reminiscing about visits to Big Boy restaurants or simply in the mood for a delicious strawberry dessert, this pie is sure to satisfy your cravings and impress your guests.

Ultimate Pasta Salad: A Symphony of Flavors in Every Bite

In the realm of comfort foods that double as perfect lunch companions, pasta salad holds a special place. It’s versatile, packed with flavor, and can be tailored to suit any palate. Today, we’re diving into an Ultimate Pasta Salad recipe that’s not just easy to make but is also a crowd-pleaser. This dish combines the heartiness of pasta with the freshness of vegetables and the richness of cheeses, all tied together with a zesty Italian dressing.

Crafting the Perfect Pasta Salad

The secret to a great pasta salad lies in its components – the quality of ingredients, the balance of flavors, and the harmony of textures. Let’s break down what makes this pasta salad a must-try recipe.

Ingredients Spotlight

  • Pasta: Choosing the right base is crucial. The garden and regular rotini in this recipe not only add a beautiful visual appeal but also ensure that each twist and turn holds onto the dressing and seasonings perfectly.
  • Proteins: A mix of diced ham, pepperoni, and salami brings a delightful savory note to the salad, making it substantial enough to serve as a meal.
  • Cheeses: The combination of Colby, sharp cheddar, and Italian style shredded cheese adds depth and creaminess.
  • Vegetables: Green and red peppers, along with red onion, inject a crisp freshness into the dish, while optional banana peppers offer a tangy kick.
  • Dressing: A bottle of Italian dressing, enhanced with a packet of Italian dressing mix, ensures that the salad is well-coated in a flavorful, zesty sauce.

Step-by-Step Guide to Assembly

  1. Preparation: Start by cooking the pasta and chopping the ingredients. This foundational step sets the stage for the salad’s success.
  2. Combining Flavors: Learn how to layer the ingredients for the best flavor distribution.
  3. Dressing the Salad: Tips on perfectly dressing the salad to ensure every bite is as delicious as the last.

The Art of Customization

One of the beauties of pasta salad is its adaptability. This section will explore how to customize the salad to cater to different dietary needs and taste preferences, ensuring everyone can enjoy this delightful dish.

Serving Suggestions

Pasta salad is perfect for picnics, potlucks, and meal prep. This part of the article will offer creative ideas for serving and presenting the salad to make it a standout dish on any occasion.

Beyond the Recipe

A great recipe is more than just instructions; it’s about creating memories and traditions. This section will delve into the joys of sharing food, the comfort of familiar flavors, and how dishes like this pasta salad become staples in our culinary repertoire.

Frequently Asked Questions About Ultimate Pasta Salad

What pasta works best for pasta salad?
The best pasta for pasta salad is one that holds onto dressings and seasonings well. Rotini, with its twists and spirals, is ideal because it catches and holds the dressing, ensuring that every bite is flavorful.

Can I make pasta salad ahead of time?
Yes, pasta salad can be made ahead of time. In fact, it often tastes better after the flavors have had a chance to meld together. Just prepare as directed, store it in an airtight container in the refrigerator, and enjoy within 3-4 days for the best taste and freshness.

How can I customize my pasta salad for dietary restrictions?
Customizing pasta salad for dietary restrictions is simple. For gluten-free options, use gluten-free pasta. For a vegetarian version, omit the meats and add more vegetables or a plant-based protein like chickpeas. To reduce calories, opt for low-fat cheeses and a lighter dressing.

What’s the best way to store leftover pasta salad?
Leftover pasta salad should be stored in an airtight container in the refrigerator. Properly stored, it can last for 3-4 days. If it seems a little dry when you go to eat it again, you can refresh it with a splash of extra Italian dressing.

How do I keep my pasta salad from getting soggy?
To prevent your pasta salad from getting soggy, cook your pasta until it’s just al dente. Pasta that is too soft will absorb too much dressing and become mushy. Also, if you’re making the salad ahead of time, consider adding half the dressing initially and then the rest just before serving.

Can pasta salad be frozen for later use?
Freezing pasta salad is not recommended. The texture of the pasta and the freshness of the vegetables can be adversely affected by freezing, leading to a less-than-ideal consistency upon thawing.

What are some creative add-ins for pasta salad?
To elevate your pasta salad, consider adding a variety of colorful vegetables, different cheeses, or unique proteins. Artichoke hearts, sun-dried tomatoes, olives, feta cheese, grilled chicken, or even flaked salmon can add new dimensions of flavor and texture to your dish.

Conclusion: A Dish for All Seasons

Wrapping up, the article will emphasize the pasta salad’s role in bringing people together, its versatility, and its ability to be a canvas for personal expression through cooking. It’s a celebration of simple ingredients coming together to create something extraordinary.

Print
clock clock iconcutlery cutlery iconflag flag iconfolder folder iconinstagram instagram iconpinterest pinterest iconfacebook facebook iconprint print iconsquares squares iconheart heart iconheart solid heart solid icon

Perfect Pasta Salad

  • Author: Chef Emy

Description

Creating a pasta salad for your boyfriend’s lunches is a fantastic idea! It’s not only delicious but also customizable and can be packed with flavors and textures that keep well, making it a perfect side dish for lunches throughout the week. Here’s how to whip up a hearty and flavorful pasta salad that’s sure to be a hit.


Ingredients

  • Garden Rotini: For a colorful and fun base.
  • Regular Rotini: Adds texture and holds onto the dressing well.
  • Colby Block Cheese & Sharp Cheddar Block Cheese: Cut into cubes for bites of cheesy goodness.
  • Italian Style Shredded Cheese: For an extra layer of cheesy flavor.
  • Pepperoni & Salami: Sliced or cubed for a hit of spicy, savory taste.
  • Diced Ham: Adds a sweet and salty flavor.
  • Bacon Bits: For a smoky crunch.
  • Green Pepper & Red Pepper: Diced for a crisp, fresh contrast.
  • Red Onion: Finely chopped for a sharp bite.
  • Bottle of Italian Dressing: For dressing the salad.
  • Packet of Italian Dressing Mix: To amplify the flavors.
  • Pepper: To taste, for a bit of spice.
  • Banana Peppers: Optional, for a tangy kick if you can get the jar open!

Instructions

  1. Cook the Pasta: Bring a large pot of salted water to a boil. Cook the garden and regular rotini according to the package instructions until al dente. Drain and rinse under cold water to stop the cooking process and cool down the pasta. This ensures your pasta salad isn’t too soft and has a nice bite.

  2. Prepare the Ingredients: While the pasta cooks, dice the Colby and sharp cheddar cheeses into small cubes, slice the pepperoni and salami (if not pre-sliced), and chop the ham, green peppers, red peppers, and red onion. If you manage to open the jar, slice the banana peppers into rings.

  3. Mix the Salad: In a large mixing bowl, combine the cooled pasta with the diced cheeses, pepperoni, salami, ham, bacon bits, green peppers, red peppers, and red onion. If using, add the banana peppers. Toss everything together until well mixed.

  4. Dress the Salad: Pour the Italian dressing over the salad, according to your preference for how moist you’d like the salad to be. Sprinkle the Italian dressing mix over the salad and add pepper to taste. Toss the salad again to ensure everything is evenly coated with the dressing and seasoning.

  5. Chill and Serve: For the best flavor, cover the salad and let it chill in the refrigerator for at least an hour before serving. This allows the flavors to meld together beautifully.

  6. Garnish Before Serving: Right before packing the salad for lunch, give it a good mix and sprinkle some Italian style shredded cheese on top for an extra cheesy finish.


Notes

Tips for the Perfect Pasta Salad:

  • Pasta Choice: Using two types of rotini adds visual appeal and texture, but feel free to use any pasta you prefer.
  • Cheese Variety: The combination of Colby, sharp cheddar, and Italian shredded cheese adds depth. Feel free to experiment with different cheeses based on taste preference.
  • Make-Ahead: Pasta salad tastes even better the next day after the flavors have had time to blend, making it perfect for meal prep.
  • Customize: The beauty of pasta salad is its versatility. Feel free to add or substitute ingredients based on what’s available or to suit dietary preferences.

This pasta salad is not only a delicious side for your boyfriend’s lunches but also a versatile dish you can enjoy at home. It’s packed with a variety of flavors and textures that make every bite interesting and satisfying. Enjoy the process of making it and the pleasure of tasting it!

The Ultimate Taco Casserole: A Budget-Friendly Feast

In the heart of home cooking lies the magic of transforming simple, affordable ingredients into meals that not only satisfy hunger but also comfort the soul. The Ultimate Taco Casserole is a testament to this magic, combining the convenience of pantry staples with the irresistible flavors of Mexican cuisine. Perfect for busy weeknights, this dish promises to be a hit with family and friends alike, proving that great taste doesn’t have to come at a high price.

A Dish That Has It All

The Taco Casserole is more than just a meal; it’s a celebration of flavor, ease, and economy. Crafted with budget-conscious cooks in mind, this recipe brings together the smokiness of canned chicken, the richness of black beans, the zestiness of Rotel tomatoes, and the creamy goodness of cheese, all nestled within a bed of fluffy, cheesy Mexican rice. It’s a one-pot wonder that’s as easy to make as it is delicious to eat.

Ingredients Overview

  • Cheesy Mexican Rice: The base that brings heartiness and flavor.
  • Canned Chicken: A convenient, budget-friendly protein source.
  • Black Beans and Rotel: For fiber and a kick of spice.
  • Taco Seasoning: Adjust to taste for that perfect Mexican flair.
  • Fiesta Cheese: Melty, cheesy topping that seals the deal.

Step-by-Step Cooking Guide

From prepping your ingredients to the final bake, this section will delve into the process of creating the casserole, offering tips and tricks to ensure perfection every time.

Why It’s a Must-Try

Here, the post will explore the unique blend of flavors and textures that make the Taco Casserole a standout dish. It will touch on the balance between the smokiness of the meat, the creaminess of the cheese, and the slight heat from the Rotel, creating a harmonious dish that pleases the palate.

Budget-Friendly Tips

In this section, the article will offer insights into making the Taco Casserole even more economical without sacrificing taste. It will include suggestions for ingredient substitutions and tips for sourcing the best deals on key components.

Customization Ideas

The versatility of Taco Casserole is one of its greatest strengths. This part of the article will provide readers with ideas for customizing the recipe to suit their tastes or dietary needs, such as making it vegetarian, gluten-free, or adding different vegetables and proteins.

Perfect Pairings

No meal is complete without the perfect side. Suggestions for complementary sides that enhance the casserole’s flavors, such as a crisp salad, garlic bread, or a refreshing beverage, will be covered here.

Making It Ahead

For those busy nights or meal prep Sundays, this section will guide readers on how to make the Taco Casserole ahead of time, including storage and reheating tips to maintain its deliciousness.

The Joy of Leftovers

Discover the delight in enjoying Taco Casserole leftovers, with creative ideas for repurposing them into new meals, ensuring nothing goes to waste.

Wrapping It Up

Concluding the article, this part will recap the joys of bringing such a simple yet flavorful dish to the table. It will emphasize the casserole’s role in creating memorable meals that bring people together, inviting readers to share their own experiences and variations.

Frequently Asked Questions About Taco Casserole

What makes Taco Casserole a perfect weeknight dinner?
Taco Casserole is the epitome of convenience, combining simple preparation, affordability, and delicious flavors into one dish. It’s ideal for busy weeknights because it requires minimal cleanup and can be made ahead of time, making dinner hassle-free and enjoyable.

Can I substitute ingredients in the Taco Casserole recipe?
Yes, the Taco Casserole is incredibly versatile. Feel free to substitute the canned chicken for cooked ground beef, turkey, or a plant-based protein. Similarly, if you prefer different beans or want to add more vegetables, go ahead. The recipe can be easily adjusted to suit dietary preferences or to use what you have on hand.

Is Taco Casserole freezer-friendly?
Absolutely. Taco Casserole freezes well and can be a lifesaver for future meals. To freeze, allow the casserole to cool completely, then cover it tightly with aluminum foil or transfer it to an airtight container. When ready to eat, thaw it in the refrigerator overnight and reheat in the oven until bubbly.

How can I make Taco Casserole healthier?
Making Taco Casserole healthier is simple. Opt for lean protein, like ground turkey, and increase the amount of beans and vegetables for added fiber. Consider using low-sodium taco seasoning and pasta sauce, and choose low-fat cheese to reduce the calorie content without sacrificing flavor.

What are the best sides to serve with Taco Casserole?
Taco Casserole pairs wonderfully with a variety of sides. A fresh green salad, corn on the cob, or a side of guacamole and chips can complement the flavors of the casserole. For a lighter option, consider steamed vegetables or a fruit salad.

Can Taco Casserole be made vegetarian?
Yes, it’s easy to make a vegetarian Taco Casserole. Simply substitute the meat with a plant-based protein or an extra can of beans. Adding more vegetables like bell peppers, zucchini, or corn can also enhance the dish and add variety.

How long does Taco Casserole last in the fridge?
Stored properly in an airtight container, Taco Casserole can last in the refrigerator for up to 3-4 days. Ensure it’s cooled to room temperature before storing to maintain the best quality.

Print
clock clock iconcutlery cutlery iconflag flag iconfolder folder iconinstagram instagram iconpinterest pinterest iconfacebook facebook iconprint print iconsquares squares iconheart heart iconheart solid heart solid icon

The Taco Casserole

  • Author: Chef Emy

Description

The Taco Casserole you’re planning to make is an epitome of convenience, affordability, and taste. This recipe effortlessly combines the rich flavors of Mexican cuisine into a one-dish wonder that’s sure to be a hit with family and friends. Let’s dive into how you can whip up this delightful meal with minimal fuss.


Ingredients

Scale
  • 2 boxes of Cheesy Mexican Rice: The base that gives this casserole its hearty texture and cheesy flavor.
  • 4 cups of Water: Needed to cook the rice perfectly within the casserole.
  • 2 cans of Chicken: A convenient and quick protein addition. Make sure to drain it to avoid excess liquid.
  • 1 can of Black Beans: Adds fiber and richness. Drain and rinse for the best texture.
  • 1 can of Rotel: Provides a tangy tomato and chili flavor to the mix, enhancing the overall taste.
  • Taco Seasoning: Half an envelope should do, but feel free to adjust to your taste preference for that perfect kick.
  • Fiesta Cheese: A blend of cheeses that melt beautifully, adding a gooey topping that’s irresistible.

Instructions

  1. Preheat Oven: Start by preheating your oven to 350°F, ensuring it’s ready for your casserole.

  2. Prepare the Base: In a large mixing bowl or directly in the baking dish, combine the Cheesy Mexican Rice and the seasonings provided in the boxes with 4 cups of water. Stir well to ensure the rice is evenly moistened.

  3. Add the Proteins and More: Drain the canned chicken well before adding it to the rice mixture. Follow with the drained and rinsed black beans and the can of Rotel. Sprinkle in the taco seasoning to your liking and give the mixture a thorough stir to make sure everything is well combined.

  4. Bake Covered: Transfer the mixture to a baking dish if you haven’t already mixed it in one. Cover the dish tightly with aluminum foil to keep the moisture in and ensure even cooking. Place it in the preheated oven and bake as per the rice package instructions or until the rice is fully cooked — usually around 25 to 30 minutes.

  5. Add Cheese and Finish Baking: Once the rice is tender and the flavors melded, remove the casserole from the oven and carefully take off the aluminum foil. Sprinkle a generous layer of Fiesta cheese over the top of the casserole. Return it to the oven, uncovered, and bake for an additional few minutes, just until the cheese is melted and bubbly.

  6. Serve and Enjoy: Let the casserole stand for a few minutes after taking it out of the oven to set slightly, making it easier to serve. Dish it up hot and enjoy the melty, cheesy, flavorful goodness!


Notes

Why You’ll Love This Taco Casserole:

  • Effortless: With minimal preparation and simple ingredients, this dish is incredibly easy to put together.
  • Budget-Friendly: Utilizing pantry staples and affordable ingredients, this casserole is cost-effective without skimping on taste.
  • Delicious: Combining classic Mexican flavors with cheesy goodness, this casserole is sure to satisfy your taco cravings in a new and exciting way.

This Taco Casserole is a perfect example of how a few simple ingredients can be transformed into a delicious meal that’s both comforting and satisfying. It’s ideal for busy weeknights, potlucks, or whenever you need a flavorful, filling meal without the hassle. Give it a try, and it might just become a new favorite in your recipe collection!

Baked Ziti: The Ultimate Comfort Food Made Easy

In the realm of comfort food, few dishes can rival the heartwarming embrace of a well-made Baked Ziti. This classic Italian-American casserole combines the robust flavors of seasoned meats, rich pasta sauce, creamy cheeses, and tender pasta in a symphony of culinary delight. It’s a dish that promises not only to satisfy hunger but also to create a sense of togetherness and warmth around the dinner table. In this post, we’ll explore the simplicity and beauty of creating a one-pot Baked Ziti that’s perfect for any day of the week.

The Essence of Baked Ziti

At its core, Baked Ziti is a celebration of simplicity. It’s a testament to how a few basic ingredients, when combined with care and a touch of culinary magic, can transform into something truly special. This dish is all about layers of flavor — from the savory depth of the meats to the creamy richness of the cheeses, all intermingled with the comforting presence of pasta.

Ingredients Breakdown

  • Ground Beef and Italian Sausage: The foundation of flavor, providing a savory and slightly spicy kick.
  • Ziti Noodles: The backbone of the dish, offering a perfect texture that holds up under layers of sauce and cheese.
  • Garlic and Herb Pasta Sauce: A convenient way to infuse the dish with herbal notes and garlic depth.
  • Ricotta and Mozzarella Cheese: For creaminess and that irresistible melted cheese pull.
  • Seasonings: Tailoring the dish to your taste preferences, making each bite a personalized experience.

Step-by-Step Guide to the Perfect Baked Ziti

Creating Baked Ziti is as much about the process as it is about the ingredients. Each step builds upon the last, layering flavors and textures into a cohesive whole.

Preparing Your Ingredients

A great Baked Ziti starts with quality ingredients. Opt for fresh meats, high-quality pasta, and the best cheeses you can find. This is also the time to cook your pasta just shy of al dente, as it will continue to cook in the oven.

Building the Flavor Base

Sautéing the meats with garlic and onions forms a rich base that’s further enriched by the addition of pasta sauce. This step is crucial for infusing the dish with deep, savory flavors.

Combining the Components

Mixing the cooked pasta with the meat sauce and ricotta cheese ensures that every bite is filled with flavor. The ricotta adds a creamy texture that balances the meat’s savoriness beautifully.

The Final Touch: Baking to Perfection

Topping the assembled dish with mozzarella cheese and baking until bubbly and golden brown creates a crust that’s irresistible. The broil at the end is the secret to achieving that perfectly melted and slightly crispy cheese topping.

Variations and Personal Touches

Baked Ziti is a template for creativity. Here are a few ideas for making the dish your own:

  • Vegetarian Version: Substitute the meats with grilled vegetables or a meat alternative for a vegetarian-friendly option.
  • Different Cheeses: Experiment with various cheeses for new flavors. A sprinkle of Parmesan can add a nice sharpness.
  • Add-Ins: Consider incorporating spinach, mushrooms, or bell peppers for added nutrition and taste.

Serving and Enjoying

Baked Ziti is best served hot, straight from the oven. Accompany it with a simple salad, garlic bread, or steamed vegetables for a well-rounded meal. It’s a dish that’s meant to be shared, creating moments of connection and joy at the table.

The Joy of Leftovers

One of the beauties of Baked Ziti is that it’s often even better the next day. The flavors have time to meld further, creating an even more delicious experience. Plus, it freezes beautifully, ensuring you have a ready-to-go meal for another night.

Frequently Asked Questions About Baked Ziti

What makes Baked Ziti the perfect comfort food?
Baked Ziti epitomizes comfort food with its hearty combination of creamy cheese, savory meats, and tender pasta, all baked to golden perfection. It’s the warm, satisfying embrace in every bite that makes it a go-to dish for family dinners and cozy nights.

Can you substitute meats in Baked Ziti?
Absolutely! While traditional Baked Ziti uses ground beef and Italian sausage, you can easily substitute with ground turkey, chicken, or even plant-based meats to cater to various dietary preferences or to simply experiment with different flavors.

Is Baked Ziti suitable for freezing?
Yes, Baked Ziti freezes exceptionally well. To freeze, let the dish cool completely after baking, cover it tightly with foil or transfer it to an airtight container, and freeze. When ready to enjoy, thaw in the refrigerator overnight and reheat in the oven until bubbly and warm.

How can I make a gluten-free Baked Ziti?
Making gluten-free Baked Ziti is straightforward—simply use gluten-free pasta in place of traditional ziti noodles. Additionally, ensure that your pasta sauce, meats, and any other added ingredients are certified gluten-free to avoid cross-contamination.

What are the best side dishes to serve with Baked Ziti?
Baked Ziti pairs wonderfully with a variety of side dishes. Light salads, garlic bread, steamed vegetables, or a simple antipasto platter complement the richness of the pasta and create a balanced, satisfying meal.

Can I make Baked Ziti vegetarian?
Yes, creating a vegetarian version of Baked Ziti is easy and just as delicious. Substitute the meat with a mix of vegetables like zucchini, mushrooms, spinach, and bell peppers, or use a vegetarian meat substitute. Be sure to add plenty of cheese and sauce for flavor and richness.

What’s the secret to the perfect Baked Ziti cheese topping?
The secret to achieving that irresistibly melty and golden cheese topping on Baked Ziti lies in the blend of cheeses used and the baking technique. Mix mozzarella for stretch and creaminess with a bit of parmesan for a crispy crust. Bake until the cheese is fully melted, then broil for the last few minutes to achieve golden perfection.

Conclusion: Celebrating the Art of Simple Cooking

Baked Ziti reminds us that great cooking doesn’t have to be complicated. With just a few ingredients and a single pot, you can create a meal that’s both nourishing and delightfully satisfying. It’s a dish that celebrates the joy of cooking and the beauty of sharing a homemade meal with loved ones.

Print
clock clock iconcutlery cutlery iconflag flag iconfolder folder iconinstagram instagram iconpinterest pinterest iconfacebook facebook iconprint print iconsquares squares iconheart heart iconheart solid heart solid icon

Baked ziti

  • Author: Chef Emy

Description

Transform your dinner routine with a dish that’s guaranteed to become a family favorite: Baked Ziti. This hearty, comforting meal combines tender ziti noodles, savory meats, rich pasta sauce, and creamy cheeses, all baked to perfection. Not only is it delicious, but it’s also efficient—prepared in just one pot and serving enough to cover another meal. Follow this simple recipe for a win-win situation at your dinner table tonight.


Ingredients

Scale
  • 1 pound Ground Beef: For a rich, meaty base.
  • 1 pound Ground Italian Sausage: Adds a spicy, flavorful kick.
  • 1 box Ziti Noodles: The star of the dish, perfectly shaped to hold the sauce and cheese.
  • 2 jars Garlic and Herb Pasta Sauce: Simplifies the seasoning and enriches the dish.
  • 4 oz Ricotta Cheese: Introduces a creamy, rich texture.
  • 8 oz Mozzarella Cheese: For that irresistibly melty, gooey topping.
  • Seasonings of Your Choice: Customize the flavor to your liking.
  • Parsley: For garnish, adding a fresh touch.

Instructions

  1. Prep the Pasta: Start by boiling the ziti noodles according to the package instructions until just al dente. You want them slightly undercooked since they’ll continue to cook in the oven. Once done, drain and set aside.

  2. Cook the Meats: In a large pot, cook the ground beef and Italian sausage over medium heat. Break the meat into small pieces as it cooks, ensuring it browns evenly. This is the time to add your preferred seasonings—anything from Italian seasoning to a simple salt and pepper mix will enhance the meat’s flavor.

  3. Combine with Sauce: Once the meat is fully cooked and seasoned, stir in the garlic and herb pasta sauce. Allow the mixture to simmer for a few minutes, blending the flavors together.

  4. Mix in Pasta and Cheese: Add the cooked ziti noodles to the pot, stirring to ensure they’re evenly coated with the meat sauce. Next, fold in the ricotta cheese, distributing it throughout the pasta for pockets of creamy texture.

  5. Assemble and Bake: Transfer the mixture into a baking dish. Sprinkle the shredded mozzarella cheese evenly over the top. For an added touch of color and flavor, garnish with chopped parsley. Bake in a preheated oven at 400°F for 20 minutes, allowing the cheese to melt and the edges to become slightly crispy.

  6. Broil for Perfection: For a golden-brown, bubbly cheese topping, switch your oven to broil for the last 5 minutes of cooking. Keep a close eye on it to prevent burning.

  7. Serve and Enjoy: Once the baked ziti is golden and bubbly, remove it from the oven and let it sit for a few minutes before serving. This resting period allows the dish to set, making it easier to cut into servings.


Notes

Tips for Success:

  • Make Ahead: Baked Ziti is a great make-ahead meal. Assemble the dish up to the point of baking, then cover and refrigerate. When ready to eat, bake as directed, adding a few extra minutes to the cooking time if coming straight from the fridge.
  • Leftovers: Store any leftovers in an airtight container in the refrigerator for up to 4 days. Reheat in the microwave or oven until warm throughout.

Baked Ziti is more than just a meal; it’s a celebration of flavors and textures that come together in harmony, promising a satisfying dining experience. It’s the perfect dish for those nights when you crave something hearty and comforting, yet easy enough to not spend all evening in the kitchen. Enjoy the delicious simplicity of this one-pot wonder, and savor the smiles it brings to your dinner table.

One Pot Cheesy Smoked Sausage Pasta: A Hearty Meal for Busy Weeknights

In the bustling rhythm of modern life, finding the time to prepare a hearty, delicious meal that doesn’t keep you tied to the kitchen sink can be a challenge. Enter the One Pot Cheesy Smoked Sausage Pasta – a dish that promises to deliver not just on taste and comfort, but also on convenience. This recipe is a testament to the magic of one-pot cooking, combining smoky flavors, creamy textures, and the wholesome goodness of pasta in a meal that’s sure to become a family favorite.

The Joy of One-Pot Cooking

One-pot meals are a revelation in the culinary world, celebrated for their simplicity and the unique melding of flavors they offer. The Cheesy Smoked Sausage Pasta epitomizes this cooking method, requiring minimal effort for maximum reward. Not only does it cut down on washing up, but it also ensures that every ingredient releases its full potential into the dish, creating a depth of flavor that is both rich and satisfying.

Ingredients: Simple, Yet Flavorful

  • Smoked Sausage: The star of the dish, providing a robust foundation with its deep, smoky taste.
  • Onion and Garlic: For that essential aromatic base that no hearty pasta dish can do without.
  • Chicken Broth and Heavy Cream: Combining to create a sauce that’s both flavorful and luxuriously creamy.
  • Bow Tie Pasta: Its shape not only adds a visual appeal but also ensures even cooking and perfect sauce cling.
  • Cheese: A mix of shredded blend cheese and mozzarella, melting into the dish to add a gooey, velvety texture.
  • Rotel: Introduces a tangy kick, balancing the richness of the cheese and sausage.

Preparation: Effortless Elegance

The process of bringing this dish to life is as straightforward as it is rewarding. Starting with browning the sausage to unlock its aromatic potential, to the final act of melting cheese into the mix, each step is designed to layer flavors upon each other, culminating in a dish that’s both complex and comforting.

Serving Suggestions: Beyond the Bowl

While the One Pot Cheesy Smoked Sausage Pasta is a complete meal in itself, pairing it with sides can elevate it to new heights. A simple green salad, garlic bread, or even a side of steamed vegetables can add a fresh contrast to the creamy, savory notes of the pasta.

Making It Your Own: Variations and Substitutions

  • Protein Swap: Consider using chicken sausage or a plant-based alternative for a lighter version of this dish.
  • Pasta Choices: Substitute bow tie pasta with your favorite kind, adjusting cooking times as needed.
  • Vegetable Add-Ins: Feel free to incorporate other vegetables like spinach or bell peppers to introduce new textures and flavors.

The Final Verdict: Why This Dish Wins Every Time

The One Pot Cheesy Smoked Sausage Pasta isn’t just a meal; it’s a celebration of what makes home cooking so special. It’s about gathering around the table, sharing a dish made with love, and enjoying the rich tapestry of flavors that only such a meal can provide. In this dish, every ingredient plays a crucial role, coming together to create a symphony of taste that’s both comforting and indulgent.

Frequently Asked Questions About One Pot Cheesy Smoked Sausage Pasta

Can I swap the pasta type?
Yes, use any pasta you like. Cooking times might change, so adjust accordingly.

Is this dish freezer-friendly?
Definitely. Cool it first, then freeze for up to 3 months. Thaw in the fridge before reheating.

Can I make it gluten-free?
Yes. Choose gluten-free pasta and check that your sausage and broth are gluten-free too.

What goes well with this pasta?
A green salad or garlic bread complements it nicely.

Can fresh tomatoes replace canned?
Yes, you can use fresh tomatoes. If you like it spicy, add a diced chili.

Conclusion: A New Staple in Your Culinary Repertoire

As we continue to navigate the demands of modern living, finding joy in the kitchen becomes ever more important. The One Pot Cheesy Smoked Sausage Pasta stands out as a beacon of culinary delight, offering a hassle-free route to a meal that satisfies the soul as much as the palate. So, the next time you’re pondering what to make for dinner, remember that this one-pot wonder is here to take the stress out of cooking, leaving you more time to enjoy the pleasures of dining.

Print
clock clock iconcutlery cutlery iconflag flag iconfolder folder iconinstagram instagram iconpinterest pinterest iconfacebook facebook iconprint print iconsquares squares iconheart heart iconheart solid heart solid icon

One pot cheesy smoked sausage pasta

  • Author: Chef Emy

Description

Creating a comforting and flavorful meal doesn’t have to involve a multitude of pots and pans or hours in the kitchen. The One Pot Cheesy Smoked Sausage Pasta is a testament to the beauty of simplicity in cooking. This dish combines the smoky flavors of sausage with the creamy richness of cheese and heavy cream, all brought together with pasta in a single pot for ease and convenience. Here’s how to make this deliciously hearty meal that’s perfect for any day of the week.


Ingredients

Scale
  • 1 lb of Smoked Sausage: Sliced into bite-sized pieces.
  • 1/2 Onion: Finely minced.
  • 3 Cloves of Garlic: Minced, for a fragrant base.
  • 2 Cups of Chicken Broth: Adds depth and cooks the pasta.
  • 1/2 Cup of Heavy Cream: For creaminess.
  • 1 Can of Rotel: Tomatoes and green chilies for a bit of heat and tang.
  • 8 oz of Bow Tie Pasta: Or any pasta of your choice.
  • Salt and Pepper: To taste.
  • 1 Cup of Shredded Blend Cheese: For gooey, melty deliciousness.

Instructions

  1. Prepare the Ingredients: Start by slicing the smoked sausage into bite-sized pieces. Mince the onion and garlic finely to ensure they distribute their flavor evenly throughout the dish.

  2. Cook the Sausage and Onions: In a large pot, heat a bit of cooking oil over medium heat. Add the sliced sausage and minced onions. Cook until the sausage is lightly browned and the onions are translucent. This not only cooks the sausage but also builds a flavor foundation with the onions.

  3. Add Garlic: Introduce the minced garlic to the pot and cook for another minute. Garlic burns quickly, so keep an eye on it to ensure it doesn’t turn bitter.

  4. Combine Remaining Ingredients: Pour in the chicken broth, heavy cream, and the can of Rotel (including the liquid for added flavor). Stir in the uncooked bow tie pasta and season with salt and pepper to taste. Bring the mixture to a boil, then cover and reduce the heat to a simmer.

  5. Simmer: Let the dish simmer with the lid on for about 20 minutes, or until the pasta is cooked through and most of the liquid has been absorbed. The starch from the pasta will help thicken the sauce, creating a creamy consistency.

  6. Add Cheese: Once the pasta is tender and the sauce has thickened, remove the pot from the heat and stir in the shredded cheese. The residual heat will melt the cheese, incorporating it into the sauce and coating the pasta and sausage evenly.

  7. Serve: Your One Pot Cheesy Smoked Sausage Pasta is now ready to be served. Dish it out while it’s hot, garnishing with additional cheese or fresh herbs if desired.


Notes

Tips for Perfect Results:

  • Cheese Choices: Feel free to experiment with different types of cheese for varying flavors. A blend of cheddar and mozzarella works well, but adding some smoked gouda can enhance the smoky flavor of the sausage.
  • Pasta Alternatives: While bow tie pasta adds a fun shape and texture to the dish, other pasta like penne, fusilli, or rigatoni can also be used. Just adjust the cooking time according to the pasta’s package instructions.
  • Adjusting Thickness: If the sauce is too thick for your liking, you can add a little more chicken broth or heavy cream to reach your desired consistency.

This One Pot Cheesy Smoked Sausage Pasta is not just a meal; it’s a celebration of flavors and textures, all brought together in the most convenient way possible. It’s proof that delicious, satisfying dinners don’t require complex recipes or extensive cleanup. Perfect for busy weeknights, this dish is sure to become a favorite in your recipe rotation, offering the warmth and comfort that only pasta can provide.