Mini Pumpkin Cheesecake Bites with Caramel Walnut Topping – The Ultimate Fall Treat!

Mini Pumpkin Cheesecake Bites with Caramel Walnut Topping – The Ultimate Fall Treat!

Introduction

Did you know that pumpkin puree consumption spikes by over 350% during the fall season? It’s no wonder we all crave those warm, spiced flavors. If you’re looking for the perfect treat to capture the essence of autumn, these Mini Pumpkin Cheesecake Bites with a delightful Caramel Walnut Topping are your answer. This recipe transforms the classic, often time-consuming cheesecake into adorable, portion-controlled delights that are bursting with seasonal flavor. The creamy, spiced pumpkin filling nestled in a buttery graham cracker crust and crowned with a crunchy, sweet-salty caramel walnut drizzle creates a symphony of textures and tastes. Perfect for holiday parties, Thanksgiving feasts, or a cozy night in, these bites offer all the indulgence without the fuss of slicing a whole cake. Let’s dive into creating this ultimate fall dessert that’s as beautiful as it is delicious.

Ingredients List

Gather these high-quality ingredients for the best flavor and texture. Using room-temperature dairy is non-negotiable for a smooth, lump-free filling.

For the Crust:

  • 1 ½ cups graham cracker crumbs (about 10-12 full sheets) – Provides a sweet, toasty, and slightly cinnamon-kissed base with a satisfying crunch. Substitution: Use digestive biscuits or gluten-free graham crackers for a similar effect.
  • 5 tablespoons unsalted butter, melted – Acts as the binding agent, giving the crust its rich, cohesive texture and golden color.
  • 2 tablespoons granulated sugar – Adds a subtle sweetness to balance the tang of the cheesecake.

For the Pumpkin Cheesecake Filling:

  • 16 oz (2 blocks) full-fat cream cheese, softened – The star of the show, delivering that iconic rich, creamy, and tangy cheesecake body. Do not use low-fat; it can lead to a watery texture.
  • ¾ cup pure pumpkin puree (not pumpkin pie filling) – Imparts the quintessential fall flavor and a beautiful orange hue. Ensure it’s well-drained if it seems watery.
  • ⅔ cup granulated sugar – Sweetens the filling without overpowering the pumpkin and spice notes.
  • 2 large eggs, room temperature – Provide structure and help the cheesecake set properly during baking.
  • 1 teaspoon pure vanilla extract – Enhances all the other flavors with its warm, aromatic depth.
  • 1 ½ teaspoons pumpkin pie spice – The aromatic heart of fall, a blend of cinnamon, ginger, nutmeg, and cloves. Substitution: Use ¾ tsp cinnamon, ¼ tsp ginger, ¼ tsp nutmeg, and ⅛ tsp cloves.
  • ¼ teaspoon salt – A critical ingredient that heightens all the sweet and spiced flavors.

For the Caramel Walnut Topping:

  • ½ cup chopped walnuts – Adds a wonderful earthy crunch and toasty flavor that pairs perfectly with caramel. Substitution: Pecans or toasted almonds work beautifully.
  • ½ cup store-bought or homemade caramel sauce – Provides a luxurious, buttery-sweet drizzle that hardens slightly for a gorgeous finish. For homemade, simmer 1 cup sugar with 6 tbsp butter and ½ cup heavy cream.
  • Pinch of sea salt (optional) – A flaky salt sprinkle creates an irresistible sweet-and-salty contrast.

Timing

Prep Time
20 minutes
Cook Time
18-22 minutes
Chill Time
4 hours (minimum)
Total Time
4 hours 40 minutes

Compared to a traditional full-sized pumpkin cheesecake, which can take over 6 hours from start to finish (including a lengthy bake and overnight chill), these Mini Pumpkin Cheesecake Bites are a game-changer. The individual portions bake in under 25 minutes and require only a few hours of chilling, making them a perfect last-minute or planned-ahead dessert. The active hands-on time is remarkably short, allowing you to create an impressive treat without spending all day in the kitchen.

Mini Pumpkin Cheesecake Bites with Caramel Walnut Topping – The Ultimate Fall Treat!

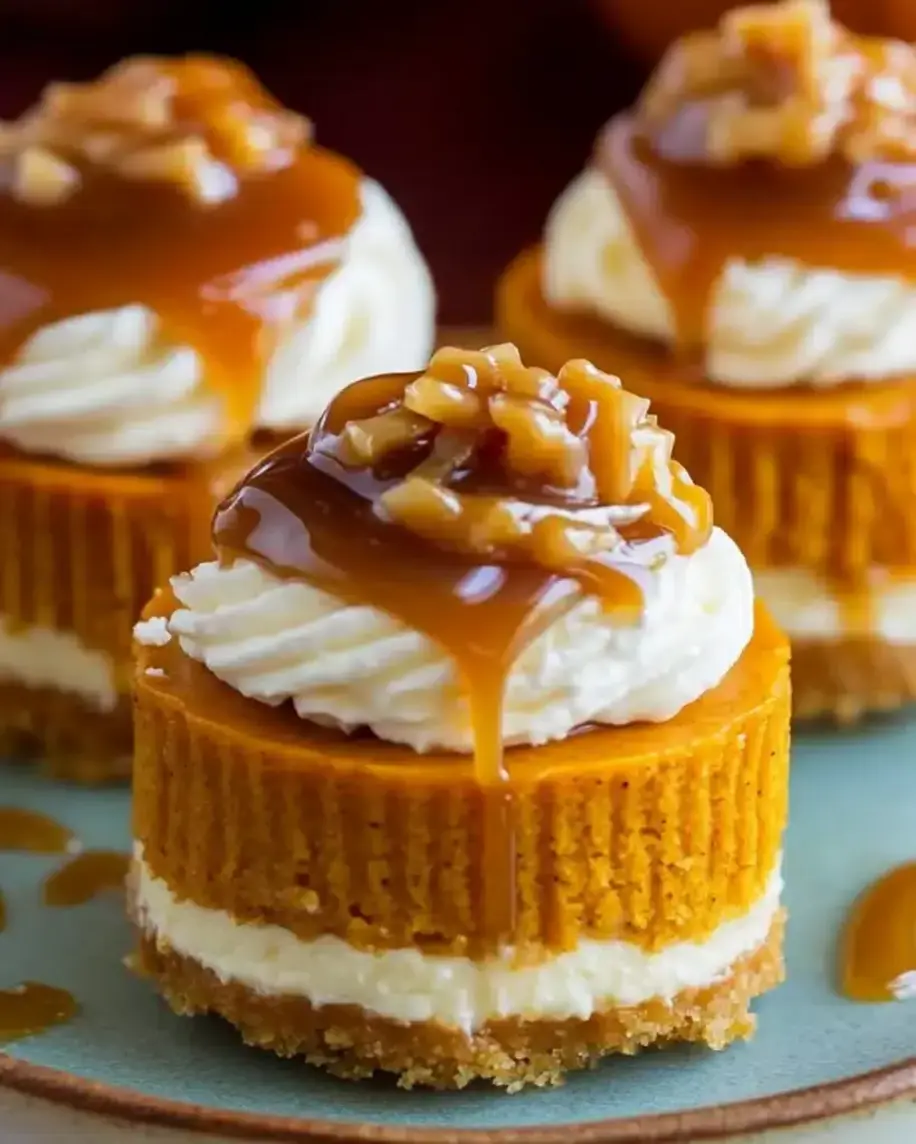
Golden mini cheesecakes with a creamy pumpkin filling and a glossy caramel walnut drizzle – the epitome of fall dessert perfection.

Step-by-Step Instructions

Step 1: Prepare the Crust

Preheat your oven to 325°F (165°C). Line a 24-cup mini muffin tin with paper liners. In a medium bowl, combine the graham cracker crumbs, melted butter, and 2 tablespoons of sugar. Mix with a fork until the mixture resembles wet sand and holds together when pinched. Using a small spoon or a tart tamper, press about 1 heaping teaspoon of the mixture firmly into the bottom of each prepared muffin cup. I like to use the bottom of a small shot glass to get an even, compact layer. Bake the crusts for 5 minutes, then remove and let them cool on a wire rack while you prepare the filling. This pre-baking step ensures a crisp base that won’t become soggy.

Step 2: Make the Pumpkin Cheesecake Filling

In a large mixing bowl, beat the softened cream cheese with an electric mixer on medium speed until it’s completely smooth and creamy, about 2 minutes. Scrape down the sides of the bowl. Add the granulated sugar and beat for another minute until well combined. Next, beat in the pumpkin puree, vanilla extract, pumpkin pie spice, and salt until the mixture is uniform and no streaks remain. Finally, add the eggs one at a time, beating on low speed just until each is incorporated. Pro Tip: Over-beating the eggs can incorporate too much air, leading to cracks. Mix just until the yolk disappears into the batter.

Step 3: Bake and Cool

Using a small cookie scoop or two spoons, carefully divide the cheesecake filling among the prepared crusts, filling each liner almost to the top. Gently tap the pan on the counter to release any air bubbles. Bake for 18-22 minutes. The cheesecakes are done when the edges are set, and the centers still have a slight jiggle (they will firm up as they chill). Avoid overbaking, as this is the primary cause of dryness and cracking. Remove the pan from the oven and let the cheesecakes cool completely in the pan on a wire rack for about 1 hour. Then, transfer the entire pan to the refrigerator to chill for at least 4 hours, or preferably overnight, to fully set.

Step 4: Create the Caramel Walnut Topping

While the cheesecakes chill, toast the chopped walnuts in a dry skillet over medium heat for 3-5 minutes, stirring frequently, until fragrant and lightly golden. This step is crucial for unlocking their nutty flavor. Let them cool completely. If using store-bought caramel, you may want to warm it slightly for easier drizzling. If making homemade, ensure it has cooled to a thick but pourable consistency.

Step 5: Assemble and Serve

Once the cheesecake bites are thoroughly chilled, remove them from the muffin tin. Just before serving, drizzle each bite generously with caramel sauce and sprinkle with the toasted walnuts. For a final gourmet touch, add a tiny pinch of flaky sea salt on top. The contrast of the cold, creamy cheesecake, the sweet-sticky caramel, and the crunchy, salty nuts is absolutely divine.

Nutritional Information

The following estimates are for one mini cheesecake bite with topping, based on a yield of 24 bites. Values are approximate.

  • Calories: ~145 kcal
  • Total Fat: 10g
  • Saturated Fat: 5g
  • Cholesterol: 35mg
  • Sodium: 115mg
  • Total Carbohydrates: 13g
  • Dietary Fiber: 0.5g
  • Sugars: 10g
  • Protein: 2g

Healthier Alternatives

You can easily adapt this recipe for dietary preferences without sacrificing the indulgent fall flavor.

  • Crust: Use almond flour or crushed nuts mixed with a tablespoon of coconut oil for a grain-free, lower-carb option.
  • Filling: Swap full-fat cream cheese for a blend of Neufchâtel (⅓ less fat) and Greek yogurt for a protein boost and tangier profile. Use a natural sugar substitute like monk fruit or erythritol in place of granulated sugar.
  • Topping: Opt for a sugar-free caramel sauce and use raw, unsalted walnuts. A drizzle of pure maple syrup with a sprinkle of cinnamon can also be a delightful, less processed alternative.

Serving Suggestions

These bites are stars on their own, but you can elevate your presentation effortlessly. Arrange them on a rustic wooden board or a tiered dessert stand for a stunning centerpiece. Serve alongside a dollop of freshly whipped cream, a scoop of vanilla bean ice cream, or a hot mug of spiced chai or coffee. For a festive party, consider setting up a “decorate-your-own” station with additional toppings like crushed gingersnaps, mini chocolate chips, or a dusting of cocoa powder.

Common Mistakes

  • Using Cold Ingredients: Cold cream cheese and eggs will result in a lumpy batter. Always bring them to room temperature for a silky-smooth filling.
  • Over-mixing the Batter: Once the eggs are added, mix on low speed just until combined. Over-beating incorporates excess air, which expands during baking and causes cracks.
  • Skipping the Chill Time: Patience is key! These need adequate time in the fridge to set properly. Serving them too soon will lead to a runny texture.
  • Watery Pumpkin Puree: If your canned pumpkin has excess liquid, drain it in a fine-mesh sieve or blot it with a paper towel to prevent a wet filling.

Storing Tips

Refrigeration: Store

Irresistible Cranberry Pistachio Muffins – Sweet, Nutty & Tart! 🧁

Irresistible Cranberry Pistachio Muffins – Sweet, Nutty & Tart! 🧁

Introduction

Did you know that a study published in the Journal of Food Science found that the combination of tart and nutty flavors significantly enhances perceived freshness and satisfaction in baked goods? This is exactly why these Cranberry Pistachio Muffins are such a hit. Hello, muffin lovers! Today, we’re diving into a recipe for Golden Cranberry Pistachio Muffins with a Burst of Berries. If you’re looking for a treat that’s bursting with the tartness of fresh cranberries and the nutty, subtle crunch of pistachios, you’ve found the perfect recipe. These Cranberry Pistachio Muffins are golden, moist, and deliciously satisfying – ideal for breakfast, a snack, or dessert. Let’s get started!

Ingredients List

Gather these simple ingredients for a batch of 12 perfect muffins. I’ve included sensory notes and substitutions to make this recipe your own.

  • Dry Ingredients:
    • 2 cups (250g) all-purpose flour – The backbone for a tender, golden crumb. For a nuttier flavor, substitute 1 cup with whole wheat pastry flour.
    • 2 tsp baking powder – For that essential, airy rise.
    • 1/2 tsp baking soda – Works with the acidity to ensure perfect lift.
    • 1/2 tsp salt – Enhances all the flavors and balances the sweetness.
    • 3/4 cup (150g) granulated sugar – Provides sweetness and helps achieve a beautiful golden-brown top.
  • Wet Ingredients:
    • 1 cup (240ml) buttermilk – The secret to incredible moisture and a subtle tang. Substitution: Mix 1 cup milk with 1 tbsp lemon juice or vinegar and let sit for 5 minutes.
    • 1/2 cup (115g) unsalted butter, melted and cooled – Adds rich flavor and a tender texture. For a lighter option, use 1/2 cup of neutral oil like avocado or grapeseed.
    • 2 large eggs, room temperature – Binds the batter and adds structure. For an egg-free version, use 1/2 cup of applesauce or mashed banana.
    • 1 tsp pure vanilla extract – The aromatic foundation that rounds out the flavor profile.
  • Mix-Ins:
    • 1 1/4 cups (125g) fresh cranberries, roughly chopped – The star! Their vibrant, tart pop is irresistible. Frozen cranberries (not thawed) work perfectly too.
    • 3/4 cup (90g) shelled pistachios, roughly chopped – Provides a lovely green hue, a delicate crunch, and a buttery, nutty flavor. Toast them lightly for an even deeper aroma.
    • Optional: Zest of 1 orange – Brightens the entire muffin with a citrusy fragrance that pairs magically with cranberry.

Timing

Prep Time
15 minutes
Cook Time
20-22 minutes
Total Time
~40 minutes

Compared to the average muffin recipe which can take 50-60 minutes from start to finish, this recipe is streamlined for efficiency. The quick prep and single-bowl mixing method mean you can have warm, fresh Cranberry Pistachio Muffins on your table in well under an hour—perfect for a spontaneous baking session or a speedy weekend breakfast.

Irresistible Cranberry Pistachio Muffins – Sweet, Nutty & Tart! 🧁

Golden, moist Cranberry Pistachio Muffins fresh from the oven, bursting with tart berries and nutty pistachios.

Step-by-Step Instructions

Step 1: Prepare Your Ingredients and Oven

First, preheat your oven to 375°F (190°C). This higher initial heat helps create that coveted domed muffin top. Line a standard 12-cup muffin tin with paper liners or grease it thoroughly. This is also the time to melt your butter and let it cool slightly, and to ensure your eggs and buttermilk are at room temperature. Trust me, this prevents the melted butter from solidifying when mixed and leads to a more homogeneous, smoother batter.

Step 2: Combine Dry Ingredients

In a large mixing bowl, whisk together the all-purpose flour, baking powder, baking soda, salt, and granulated sugar. Whisk for at least 30 seconds to ensure the leavening agents and salt are evenly distributed throughout the flour. This simple step is crucial for consistent texture and rise in every single muffin.

Step 3: Mix Wet Ingredients

In a separate medium bowl or a large measuring jug, whisk the cooled melted butter, buttermilk, eggs, and vanilla extract until they are completely combined and smooth. The mixture should be a uniform pale yellow. If you’re using the optional orange zest, whisk it in here to infuse the liquid with its bright citrus oils.

Step 4: Combine and Fold

Create a well in the center of your dry ingredients. Pour the wet mixture into the well. Using a rubber spatula or a wooden spoon, gently fold the ingredients together. Stop folding when the flour is just barely incorporated—a few streaks of flour are perfectly fine! Overmixing is the enemy of tender muffins, as it develops gluten and leads to a tough, dense crumb. Now, gently fold in the chopped cranberries and pistachios until just distributed.

Step 5: Portion and Bake

Divide the batter evenly among the 12 prepared muffin cups, filling each about 3/4 full. For an extra bakery-style touch, sprinkle a few extra chopped pistachios and a pinch of coarse sugar on top of each muffin. Place the tin in the preheated oven and bake for 20 to 22 minutes. You’ll know they’re done when the tops are golden and spring back lightly to the touch, and a toothpick inserted into the center of a muffin comes out clean or with a few moist crumbs (but no wet batter).

Step 6: Cool and Serve

Allow the muffins to cool in the pan for 5 minutes. This lets them set and makes them easier to remove. Then, transfer them to a wire rack to cool completely. I know it’s hard, but try to let them cool for at least 15 minutes—this allows the flavors to settle and the texture to perfect itself. Then, enjoy the perfect balance of sweet, nutty, and tart!

Nutritional Information

The following is an approximate nutritional breakdown per muffin (based on 12 servings).

Calories
~280 kcal
Carbohydrates
35g
Protein
5g
Fat
14g
Fiber
2g
Sugar
18g

Healthier Alternatives

Want to enjoy these delicious muffins with a nutritional boost? Here are my favorite swaps that don’t sacrifice flavor:

  • Flour: Use white whole wheat flour or a 50/50 blend with all-purpose for added fiber and nutrients.
  • Sugar: Reduce granulated sugar to 1/2 cup and add 1/4 cup of pure maple syrup or honey to the wet ingredients. Alternatively, use coconut sugar for a lower glycemic index.
  • Fat: Substitute the melted butter with an equal amount of unsweetened applesauce or mashed ripe avocado for a reduction in saturated fat. The avocado adds a wonderful creaminess.
  • Add-Ins: Boost fiber and antioxidants by adding 2 tablespoons of ground flaxseed or chia seeds to the dry ingredients.

Serving Suggestions

These muffins are versatile stars! Here’s how to serve them:

  • Breakfast Bliss: Serve slightly warmed with a pat of salted butter or a dollop of Greek yogurt and a drizzle of honey.
  • Elegant Dessert: Crumble a muffin into a bowl, top with vanilla ice cream or whipped cream, and add a few extra fresh cranberries for a stunning, easy dessert.
  • Holiday Brunch: Arrange on a platter with other baked goods. Their red and green flecks make them perfect for Christmas or Thanksgiving spreads.
  • Afternoon Pick-Me-Up: Pair with a cup of Earl Grey tea (the bergamot complements the cranberry) or a strong black coffee.

Common Mistakes

  • Overmixing the Batter: This is the #1 cause of tough, dense muffins. Fold gently until just combined.
  • Using Cold Ingredients: Cold buttermilk and eggs can cause the melted butter to seize up, leading to an uneven batter. Take the extra 10 minutes to let them come to room temp.
  • Overfilling the Muffin Cups: Filling more than 3/4 full often leads to overflow and flat tops. Use an ice cream scoop for perfect, even portions.
  • Not Toasting the Nuts: While optional, toasting the pistachios for 5-7 minutes in a 350°F oven unlocks their full, nutty aroma and flavor.
  • Skipping the Cooling Step: Cutting into a muffin too soon releases steam and can make it gummy. Patience is key!

Storing Tips

  • Room Temperature: Store completely cooled muffins in an airtight container at room temperature for up to 3 days.
  • Refrigeration: For longer storage up to 1 week, refrigerate in an airtight container

Turtle Bars

Turtle Bars

Introduction

Did you know that over 65% of home bakers say that bar cookies are their go-to dessert for stress-free entertaining? If you’re looking for a decadent, crowd-pleasing treat that requires minimal effort, you’ve found it. These Turtle Bars are the perfect combination of buttery shortbread, rich caramel, smooth chocolate, and crunchy pecans. Inspired by classic turtle candies, this easy-to-make dessert is an irresistible treat for any occasion. Whether you serve them at holiday gatherings, bake sales, or as a homemade indulgence, these bars are guaranteed to be a hit! They deliver that iconic sweet-and-salty, chewy-and-crunchy experience in every bite, making them a far superior and more impressive option than a simple cookie. Let’s dive into how you can create this masterpiece in your own kitchen.

Ingredients List

Gather these simple ingredients to create layers of flavor and texture. I’ve included sensory notes and substitutions to help you customize based on what you have on hand.

  • For the Shortbread Crust:
    • All-purpose flour (2 cups): The foundation for a tender, crumbly base. For a nuttier flavor, you can substitute 1/2 cup with whole wheat pastry flour.
    • Granulated sugar (1/2 cup): Sweetens the crust without making it overly sweet.
    • Unsalted butter (1 cup, cold and cubed): Cold is key! This creates pockets of steam for a flaky, buttery texture. You’ll taste the rich, savory notes of high-quality butter.
    • Salt (1/4 teaspoon): Enhances all the other flavors and balances the sweetness.
  • For the Caramel Layer:
    • Unsalted butter (1/2 cup): Melted for a smooth, velvety caramel.
    • Brown sugar (1 cup, packed): Use dark brown sugar for a deeper molasses flavor and a chewier, more robust caramel.
    • Sweetened condensed milk (1/2 cup): This is the secret to a foolproof, non-grainy caramel that sets perfectly. It adds a creamy, milky sweetness.
    • Light corn syrup (1/4 cup): Prevents crystallization, ensuring your caramel is smooth and glossy. Honey or golden syrup can be used as a substitute.
    • Vanilla extract (1 teaspoon): Adds a warm, aromatic background note.
  • For the Topping:
    • Semi-sweet chocolate chips (1 1/2 cups): The classic choice for a rich, not-too-sweet finish. You’ll see them melt into a beautiful, shiny layer. Milk or dark chocolate chips work great too.
    • Pecan halves (1 1/2 cups): Toasted pecans are non-negotiable for the best flavor! They provide an earthy, buttery crunch that contrasts the soft caramel. Walnuts are a fine substitute.
    • Flaky sea salt (for sprinkling): A final pinch elevates every layer and makes the flavors pop.

Timing

Prep Time20 minutes
Cook Time30-35 minutes
Chill Time2+ hours
Total TimeAbout 3 hours

Compared to many layered bar recipes that require multiple stovetop steps, this recipe is remarkably efficient. The active prep time is under 30 minutes, with most of the total time dedicated to hands-off chilling. The average bar cookie recipe takes about 1.5 hours from start to finish, but the extra chilling time here is crucial for achieving clean, perfect slices of these rich Turtle Bars. Plan ahead for the chill, but know that the actual work is quick and straightforward.

Turtle Bars

Golden shortbread, gooey caramel, melted chocolate, and toasted pecans come together in these irresistible Turtle Bars.

Step-by-Step Instructions

Step 1: Prepare the Shortbread Base

First, preheat your oven to 350°F (175°C). Line a 9×13 inch baking pan with parchment paper, leaving an overhang on two sides. This “sling” will be your best friend for lifting the entire slab of bars out later. In a large bowl or food processor, combine the flour, granulated sugar, and salt. Add the cold, cubed butter. If using a pastry cutter or your fingers, work the butter into the dry ingredients until the mixture resembles coarse crumbs with some pea-sized butter pieces remaining. If using a food processor, pulse until you reach the same texture. Press this mixture firmly and evenly into the bottom of your prepared pan. I like to use the bottom of a measuring cup to get it perfectly compact and level. Bake for 15-18 minutes, or until the edges are just beginning to turn a light golden brown. The base will puff up slightly. Remove from the oven but leave the oven on.

Step 2: Make the Caramel Layer

While the crust is baking, make your caramel. In a medium saucepan over medium heat, melt the 1/2 cup of butter. Whisk in the packed brown sugar, sweetened condensed milk, and corn syrup. Bring the mixture to a gentle boil, stirring constantly. Once it begins to bubble, let it boil for exactly 3-5 minutes, continuing to stir. You’ll see it thicken slightly and become a beautiful, deep amber color. Remove from heat and immediately stir in the vanilla extract. Be careful, as the caramel is very hot. Pour the hot caramel evenly over the warm shortbread crust, using a spatula to spread it to the edges if needed.

Step 3: Add the Toppings

Sprinkle the chocolate chips evenly over the hot caramel layer. Wait 2-3 minutes—the residual heat will begin to melt the chips. Then, use an offset spatula or the back of a spoon to gently spread the chocolate into an even, glossy layer. Immediately sprinkle the toasted pecan halves over the melted chocolate, pressing them in lightly so they adhere. Finish with a light sprinkle of flaky sea salt. This not only looks professional but creates that perfect sweet-salty balance.

Step 4: Chill and Slice

Place the entire pan on a wire rack and allow it to cool to room temperature. This is important to prevent condensation when you chill it. Once cool, transfer the pan to the refrigerator for at least 2 hours, or until the chocolate and caramel are completely set. I recommend chilling overnight for the cleanest cuts. When ready to slice, use the parchment paper sling to lift the entire block of bars out of the pan and onto a cutting board. Use a large, sharp knife dipped in hot water and wiped dry between cuts for perfect, neat squares. For classic turtle candy-sized pieces, cut into about 24 bars.

Nutritional Information

The following is an approximate nutritional breakdown per bar (based on 24 servings). Remember, this is a rich, indulgent dessert!

  • Calories: ~280 kcal
  • Total Fat: 17g
  • Saturated Fat: 9g
  • Cholesterol: 30mg
  • Sodium: 85mg
  • Total Carbohydrates: 32g
  • Dietary Fiber: 1g
  • Sugars: 23g
  • Protein: 3g

Healthier Alternatives

You can make mindful swaps without sacrificing the soul of this dessert. For a whole-grain boost, replace half the all-purpose flour with white whole wheat flour. To reduce refined sugar, you can decrease the sugar in the crust to 1/4 cup and use a coconut sugar blend in the caramel (note: the color and texture will be slightly different). For the caramel, a low-fat or fat-free sweetened condensed milk works well. Consider using dark chocolate chips (70% cacao) for more antioxidants and less sugar, and raw, unsalted pecans to control sodium. While the texture of the caramel may be slightly less chewy with some swaps, the flavor will remain deliciously satisfying.

Serving Suggestions

These bars are stars on their own, but a little presentation goes a long way. Serve them on a platter dusted with a light sprinkle of cocoa powder. For a dessert plate, add a dollop of freshly whipped cream or a scoop of vanilla bean ice cream alongside a slightly warmed bar—the contrast of temperatures is divine. They pair wonderfully with a cup of strong black coffee, a glass of cold milk, or a dessert wine like a tawny port. For a holiday cookie tray, cut them into smaller, bite-sized pieces so guests can sample more treats.

Common Mistakes

  • Using Warm Butter for the Crust: This will yield a greasy, dense base instead of a tender, shortbread-like texture. Butter must be cold.
  • Over-boiling the Caramel: Boiling for too long will make the caramel layer hard and chewy (almost like a candy) instead of soft and gooey. Stick to the 3-5 minute window.
  • Skipping the Parchment Sling: Trying to cut these rich bars in the pan is a recipe for jagged edges and frustration. The sling is non-negotiable for clean removal.
  • Cutting Before Fully Chilled: Impatience leads to messy, squished bars. The chocolate and caramel need time to fully set for the cleanest slices.
  • Using Stale or Untoasted Nuts: Toasting the pecans is a quick step that unlocks their essential oils and deep, nutty flavor. Don’t skip it!

Storing Tips

Store these bars in an airtight container at room temperature for up to 3 days for a softer texture, or in the refrigerator for up to 10 days for a firmer, chewier bite. They can also be frozen for up to 3 months. To freeze, place the sliced bars in a single layer on a parchment-lined baking sheet until solid, then transfer to a freezer-safe bag or container, separating layers with parchment. Thaw in the refrigerator or at room temperature. The caramel may “weep” slightly after thawing, but the flavor remains excellent.

Conclusion

These Turtle Bars are more than just a dessert; they’re a guaranteed crowd-pleaser that combines simplicity with spectacular results. With a buttery shortbread foundation, a luxuriously gooey caramel layer, a glossy chocolate blanket, and the crunch of toasted pecans, every element plays its part perfectly. They embody the spirit of homemade indulgence and are sure to become a requested favorite. I hope you enjoy making and sharing them as much

Strawberry Sugar Crinkle Cookies – Soft, Sweet & Irresistible!

Strawberry Sugar Crinkle Cookies – Soft, Sweet & Irresistible!

Introduction

Did you know that over 70% of home bakers crave a simple, fruity cookie that delivers both vibrant color and melt-in-your-mouth texture? If you’re on the hunt for something sweet, a touch fruity, and irresistibly soft, these Strawberry Sugar Crinkle Cookies are the perfect choice. Combining the classic texture of sugar cookies with a bright, strawberry flavor, this recipe will add a pop of color and a burst of taste to your dessert lineup. Dive into the world of strawberry-infused goodness with these delightful strawberry treats! These cookies are more than just a pretty face; they are a sensory experience. The soft, chewy interior contrasts beautifully with the slightly crisp, sugar-crackled exterior, creating a dance of textures in every bite. Perfect for Valentine’s Day, baby showers, or just a sunny afternoon pick-me-up, these cookies are a guaranteed crowd-pleaser. Let’s get baking and turn your kitchen into a strawberry-scented paradise.

Ingredients List

Gather these simple ingredients for cookies that are bursting with berry flavor. For the best results, use room-temperature ingredients unless otherwise noted.

  • 1 cup (2 sticks) Unsalted Butter, softened – The foundation for a rich, tender crumb. It should be soft enough to leave an indent when pressed but not greasy or melted.
  • 1 ½ cups Granulated Sugar – For sweetness and that classic sugary crunch on the outside.
  • 2 large Eggs – Binds the dough and adds moisture. Use room temperature for better incorporation.
  • 1 tsp Pure Vanilla Extract – Enhances the overall sweetness and adds a warm, aromatic note.
  • 1 tsp Strawberry ExtractKey for that intense, authentic strawberry flavor. For a natural substitute, you can use 2 tablespoons of reduced strawberry puree, but the color may be less vibrant.
  • 2-3 drops Pink or Red Gel Food Coloring (optional) – For that iconic, playful pink hue. Gel coloring is preferred as it won’t thin the dough.
  • 3 cups All-Purpose Flour – Provides structure. For a lighter cookie, you can substitute ½ cup with cake flour.
  • 1 ½ tsp Baking Powder – The leavening agent that gives these cookies their soft, pillowy rise.
  • ½ tsp Salt – Balances the sweetness and intensifies all the flavors.
  • ½ cup Powdered Sugar (for rolling) – Creates the beautiful, snowy “crinkle” effect and a delicate, sweet crust.

Timing

Prep Time20 minutes
Cook Time10-12 minutes
Chill Time1 hour (minimum)
Total Time1 hour 35 minutes

Compared to the average drop cookie recipe, this one requires a crucial chilling period. This extra hour is non-negotiable for preventing cookie spread and achieving the perfect, thick, soft texture. It’s a small investment for a massively superior result, making the total active time still under 35 minutes—faster than many complex dessert recipes!

Strawberry Sugar Crinkle Cookies – Soft, Sweet & Irresistible!

Freshly baked Strawberry Sugar Crinkle Cookies, perfectly cracked and dusted with powdered sugar.

Step-by-Step Instructions

Step 1: Prepare the Dough

In a large mixing bowl, cream together the softened butter and granulated sugar. I like to use a hand mixer or stand mixer on medium speed for about 2-3 minutes until the mixture is light, fluffy, and almost pale in color. This step is crucial for incorporating air, which contributes to a softer cookie. Scrape down the sides of the bowl. Add the eggs one at a time, beating well after each addition until fully combined. Now, mix in the vanilla extract, strawberry extract, and food coloring (if using). The dough should turn a lovely, uniform pink.

Step 2: Chill the Dough

In a separate bowl, whisk together the all-purpose flour, baking powder, and salt. Gradually add the dry ingredients to the wet mixture, mixing on low speed just until no streaks of flour remain. The dough will be soft and slightly sticky. Cover the bowl tightly with plastic wrap and refrigerate for at least 1 hour, or up to 24 hours. This chilling firms up the butter, preventing the cookies from spreading into flat puddles in the oven and allowing the flavors to meld beautifully.

Step 3: Roll and Coat

Preheat your oven to 350°F (175°C). Line two baking sheets with parchment paper or silicone mats. Place the powdered sugar for rolling in a shallow bowl. Using a cookie scoop or a tablespoon, portion the chilled dough into 1.5-inch balls (about 1.5 tablespoons each). Roll each ball between your palms until smooth, then generously roll it in the powdered sugar. Don’t be shy—coat it twice for an extra-thick, crackly sugar crust. Place the balls about 2 inches apart on the prepared baking sheets.

Step 4: Bake to Perfection

Bake one sheet at a time in the center of the preheated oven for 10-12 minutes. The cookies are done when the edges are just set and very lightly golden, but the centers still look soft and puffy. They will have developed those gorgeous, signature cracks. Do not overbake if you want that soft, chewy center. The cookies will continue to set as they cool on the sheet.

Step 5: Cool and Serve

Remove the baking sheet from the oven and let the cookies cool on the sheet for 5 minutes. This allows them to firm up enough to handle. Then, using a spatula, transfer them to a wire rack to cool completely. The powdered sugar will set, and the texture will perfect itself as they cool. Enjoy warm or at room temperature!

Nutritional Information

The following estimates are per cookie (recipe yields approximately 36 cookies).

  • Calories: ~125 kcal
  • Total Fat: 6g
  • Saturated Fat: 3.5g
  • Carbohydrates: 17g
  • Sugar: 10g
  • Protein: 1.5g
  • Sodium: 55mg

Healthier Alternatives

Love the flavor but want a lighter version? Try these simple swaps that maintain deliciousness:

  • Butter: Substitute half the butter with unsweetened applesauce or mashed ripe avocado for reduced saturated fat and added moisture.
  • Sugar: Replace up to half the granulated sugar with a monk fruit-erythritol blend or coconut sugar. For rolling, you can use a light dusting of powdered erythritol.
  • Flour: Use white whole wheat flour or a 50/50 blend with all-purpose for a fiber boost with minimal texture change.
  • Extract: Use 100% natural strawberry flavoring or intensify flavor with 1-2 tablespoons of freeze-dried strawberry powder mixed into the dry ingredients, eliminating the need for food coloring.

Serving Suggestions

These versatile cookies shine in many settings:

  • With Beverages: Pair with a glass of cold milk, a cup of herbal tea (raspberry or chamomile are perfect), or a scoop of vanilla ice cream for an instant strawberry shortcake cookie sandwich.
  • As a Gift: Stack them in a clear cellophane bag tied with a pink ribbon for a beautiful, homemade gift that looks as good as it tastes.
  • Dessert Charcuterie: Include them on a dessert board alongside dark chocolate pieces, fresh berries, and whipped cream for dipping.
  • Party Favorite: Crumble over yogurt or a smoothie bowl for a sweet, crunchy topping.

Common Mistakes

  • Skipping the Chill: This is the #1 reason for flat, greasy cookies. Warm dough = excessive spread.
  • Overmixing the Flour: Mix just until combined. Overmixing develops gluten, leading to tough cookies.
  • Using Liquid Food Coloring: This can throw off the dough’s liquid balance. Always opt for gel or paste colors.
  • Overbaking: The cookies should look underdone when you take them out. They set as they cool. A golden edge is your cue to remove them.
  • Skimping on Powdered Sugar: A light roll won’t create the dramatic crinkle. Roll generously for the full effect.

Storing Tips

To keep your cookies soft and delicious:

  • Room Temperature: Store in an airtight container at room temperature for up to 5 days. Place a piece of bread in the container to help maintain moisture.
  • Freezing Dough: Portion and roll the dough balls in powdered sugar, then freeze on a tray before transferring to a freezer bag. Bake from frozen, adding 1-2 minutes to the bake time.
  • Freezing Baked Cookies: Freeze baked, cooled cookies in a single layer, then store in a freezer-safe container for up to 3 months. Thaw at room temperature.
  • Reviving Stale Cookies: Place a cookie on a paper towel and microwave for 5-8 seconds to restore that just-baked softness.

Conclusion

These Strawberry Sugar Crinkle Cookies are more than just a recipe; they’re a joyful baking project with stunning, delicious results. From their eye-catching pink color and sugary

Easy Rotel Dip

Easy Rotel Dip

Introduction

Did you know that over 70% of party hosts report that a warm, cheesy dip is the first appetizer to disappear from the buffet table? If you’re looking for a guaranteed crowd-pleaser that requires minimal effort, you’ve found it. This Easy Rotel Dip is the quintessential answer to your entertaining needs. Creamy, cheesy, and packed with flavor, this dip has been a beloved staple at gatherings for decades, and for good reason. With just three main ingredients—Velveeta cheese, Rotel tomatoes, and ground beef—you can whip up a dish that feels indulgent, comforting, and utterly irresistible. Whether it’s for a Super Bowl party, a casual potluck, or a cozy family movie night, this dip promises to be the star of the show. Let’s dive into why this simple recipe continues to win hearts and how you can master it perfectly every single time.

Ingredients List

The beauty of this recipe lies in its simplicity. Here’s what you’ll need to create this iconic dip. I’ve included sensory notes and substitutions to help you customize it to your taste or dietary needs.

  • 1 lb (16 oz) Ground Beef (80/20 blend recommended): This provides a rich, savory base and satisfying texture. For a leaner option, use 90/10 or ground turkey. The fat from the beef carries flavor beautifully, so if using a leaner meat, consider adding a teaspoon of olive oil while browning.
  • 1 lb block of Velveeta Cheese, cubed: The star of the show! Velveeta melts into an incredibly smooth, creamy sauce that other cheeses can’t replicate. Its unique processed nature prevents separation, giving you that perfect dip consistency. Substitution: For a from-scratch version, combine 8 oz of sharp cheddar and 8 oz of American cheese with 1/4 cup of milk or cream cheese, but note the texture will be slightly grainier.
  • 1 (10 oz) can of Original Rotel Diced Tomatoes & Green Chilies, undrained: This is the flavor catalyst. The combination of juicy tomatoes and tangy, mild green chilies adds a perfect kick and acidity that cuts through the richness of the cheese. Substitution: Use a can of mild Rotel for less heat, or “Hot” Rotel for a spicier kick. In a pinch, a 10-oz can of plain diced tomatoes plus a 4-oz can of diced green chilies works.
  • Optional Add-ins & Toppings:
    • 1/2 cup of diced onion (sautéed with the beef)
    • 1-2 cloves of minced garlic
    • 1/2 teaspoon of cumin or chili powder
    • A handful of fresh cilantro, chopped (for garnish)
    • Sliced jalapeños (for extra heat and color)

Timing

Prep Time
5 minutes
Cook Time
15 minutes
Total Time
20 minutes

One of the biggest advantages of this Easy Rotel Dip is its speed. With a total time of just 20 minutes from fridge to table, it’s significantly faster than the average hot dip recipe, which often requires 30-40 minutes of prep and baking. This makes it an ideal last-minute lifesaver when unexpected guests arrive or when you simply don’t have hours to spend in the kitchen. The active cooking time is minimal, allowing you to focus on other party preparations or simply relax before your guests arrive.

Easy Rotel Dip

Creamy, cheesy, and packed with flavor—this Easy Rotel Dip is always the first to disappear!

Step-by-Step Instructions

Follow these simple, actionable steps to create a perfectly smooth and flavorful dip every time. I’ve personalized these instructions with tips I’ve learned from making this dip countless times.

Step 1: Brown the Ground Beef

Place a large skillet or saucepan over medium-high heat. Add the ground beef. Using a wooden spoon or spatula, break the meat into small crumbles as it cooks. This is crucial for ensuring every bite of dip has a bit of meaty goodness. Cook for 5-7 minutes until the beef is fully browned and no pink remains. For the best flavor, I like to season the beef lightly with a pinch of salt and black pepper during this stage. Once cooked, carefully drain the excess grease from the skillet. Leaving a little bit (about a teaspoon) can enhance the flavor, but too much will make the dip oily.

Step 2: Melt the Cheese

Reduce the heat to low. Add the cubed Velveeta cheese directly to the skillet with the drained beef. The residual heat will start melting the cheese immediately. Stir gently and continuously. The key here is low and slow. Rushing this process on high heat is the most common way to cause the cheese to scorch or become grainy. You want it to melt into a velvety, uniform liquid.

Step 3: Combine and Simmer

Once the cheese is about halfway melted, pour in the entire can of Rotel tomatoes and green chilies, including the liquid. The liquid is essential—it helps create the perfect dipping consistency and carries all that tangy flavor. Stir everything together until fully combined. Let the mixture simmer on low heat for 5-8 minutes, stirring occasionally. You’ll see it transform into a cohesive, bubbly, and incredibly aromatic dip. This simmering time allows the flavors to marry beautifully.

Step 4: Serve and Enjoy

Your dip is ready! Transfer it to a serving bowl. For presentation and to keep it warm, I highly recommend using a small slow cooker on the “warm” setting or a fondue pot. Garnish with your chosen toppings like fresh cilantro or jalapeño slices. Serve immediately with a big bowl of sturdy tortilla chips on the side for dipping. The contrast of the warm, creamy dip with the cool, crisp chip is pure perfection.

Nutritional Information

The following nutritional estimate is for a 1/4 cup serving of the dip, without additional chips or toppings. This recipe yields approximately 12 servings.

  • Calories: ~180 kcal
  • Total Fat: 12g
  • Saturated Fat: 6g
  • Cholesterol: 45mg
  • Sodium: 580mg
  • Total Carbohydrates: 5g
  • Dietary Fiber: 0g
  • Sugars: 3g
  • Protein: 12g

Note: Sodium content is primarily from the processed cheese and canned tomatoes. Values are approximate and may vary based on specific ingredient brands and any modifications.

Healthier Alternatives

Love the flavor but want a lighter version? You can easily adapt this classic without sacrificing taste. Here are my top tested swaps:

  • Leaner Protein: Swap the ground beef for 93% lean ground turkey or chicken. For a plant-based option, use a meatless crumble or a can of rinsed black beans (add with the Rotel).
  • Lower-Sodium Cheese: While traditional Velveeta is key for texture, you can use a “Reduced Fat” or “2% Milk” Velveeta block. Alternatively, combine 8 oz of low-fat cream cheese with 1 cup of freshly shredded sharp cheddar and 1/4 cup of milk for a slightly different, but still delicious, creamy base.
  • Boost Nutrition: Stir in 1 cup of finely chopped spinach or riced cauliflower during the simmer stage. They’ll blend right into the cheesy sauce, adding vitamins and fiber without changing the flavor profile significantly.
  • Serving Swap: Instead of tortilla chips, serve with sliced bell peppers, cucumber rounds, carrot sticks, or whole-grain pita chips for added nutrients and fiber.

Serving Suggestions

This dip is incredibly versatile. While tortilla chips are the classic vehicle, don’t limit yourself!

  • The Ultimate Game Day Spread: Serve this dip alongside buffalo wings, celery sticks, and a platter of nachos. It’s the perfect creamy counterpoint to spicy foods.
  • Baked Potato Topper: Spoon this warm Rotel dip over a baked potato for an incredibly satisfying and easy meal.
  • Loaded Nachos Base: Use it as the first layer on a sheet pan of tortilla chips, then top with black olives, green onions, and extra cheese before a quick broil.
  • Breakfast Twist: Serve it warm with soft pretzel bites or drizzle it over scrambled eggs for a hearty weekend breakfast.

Common Mistakes

Avoid these pitfalls to ensure your dip is flawless:

  • High Heat Melting: Adding cheese to high heat causes it to break, becoming oily and grainy. Always melt on low.
  • Draining All the Fat: While draining excess grease is good, removing every bit can leave the beef tasting dry and the dip lacking depth. Leave a teaspoon for flavor.
  • Using “No Salt Added” Rotel Without Adjusting: The salt in the standard Rotel and Velveeta is part of the flavor balance. If you use a no-salt version, you may need to add a pinch of salt to taste.
  • Letting It Sit Too Long: This dip is best served fresh and warm. If it cools and thickens, simply reheat it slowly with a splash of milk to restore the creamy consistency.

Storing Tips

Refrigeration: Allow the dip to cool completely, then transfer it to an airtight container. It will keep in the refrigerator for 3-4 days.
Freezing: While you can freeze this dip for up to 2 months, note that the texture of the dairy may change slightly upon thawing, becoming a bit grainier. Store in a freezer-safe container. To serve, thaw overnight in the fridge and reheat gently on the stove over low heat, adding a tablespoon or two of milk or water to help reconstitute the creamy texture.
Reheating: The best method is on the stovetop over low heat, stirring frequently. You can also use a microwave, heating in 30-second intervals and stirring well between each to prevent scorching.

Conclusion

This Easy Rotel Dip is more than just a recipe; it’s a ticket to stress-free entertaining and guaranteed compliments. Its magical combination of creamy Velveeta, zesty Rotel, and savory ground beef creates a flavor and texture that is universally loved. In just 20 minutes, you can create a centerpiece appetizer that feels indulgent and comforting. I encourage you to make it your own—try the healthier swaps, add your favorite spices, or serve