Cajun Shrimp and Rice Skillet

Cajun Shrimp and Rice Skillet

Introduction

Did you know that over 70% of home cooks are actively seeking one-pan meals that deliver restaurant-quality flavor in under 30 minutes? If you’re part of this majority craving efficiency without sacrificing taste, you’ve landed on the perfect recipe. This Cajun Shrimp and Rice Skillet is your weeknight savior, a vibrant, one-skillet wonder that combines plump, perfectly seasoned shrimp with fluffy, spice-infused rice. Forget the takeout menus and multiple pots—this dish brings the bold, smoky, and slightly spicy flavors of Louisiana right to your kitchen. The secret? A homemade Cajun spice blend that takes two minutes to mix but elevates the entire meal from simple to spectacular. Let’s dive into how you can create this crowd-pleasing, time-saving masterpiece that promises to become a regular in your dinner rotation.

Ingredients List

Gathering fresh, quality ingredients is the first step to an unforgettable skillet. Here’s what you’ll need, complete with sensory notes and smart substitutions.

  • For the Cajun Spice Blend:
    • 2 tsp smoked paprika – Provides a deep, smoky base and vibrant red hue. (Sub: regular paprika for less smoke, but add a pinch of liquid smoke for authenticity).
    • 1 tsp garlic powder – Adds a savory, allium punch that permeates the rice.
    • 1 tsp onion powder – Builds a sweet, aromatic foundation.
    • 1 tsp dried oregano – Offers a subtle, earthy herbaceous note.
    • 1/2 tsp cayenne pepper – The heat agent. Adjust to your spice tolerance. (Sub: 1/4 tsp for mild, or 1 tsp for fiery).
    • 1/2 tsp dried thyme – A classic Cajun herb for complexity.
    • 1/2 tsp black pepper – For a sharp, biting warmth.
    • 1/2 tsp salt – Essential for balancing and enhancing all the spices.
  • For the Skillet:
    • 1 lb large shrimp (31/40 count), peeled and deveined – Look for firm, translucent shrimp with a mild sea scent. Pat them very dry for the best sear. (Sub: chicken breast, sliced into strips, or firm tofu for a vegetarian option).
    • 1 tbsp olive oil – For sautéing. (Sub: avocado oil for higher smoke point).
    • 1 tbsp unsalted butter – Adds a rich, silky mouthfeel. (Sub: vegan butter or more olive oil).
    • 1 medium yellow onion, diced – Will caramelize and sweeten the dish.
    • 1 bell pepper (any color), diced – Red or orange add a sweeter note; green offers a slightly bitter contrast.
    • 2 celery stalks, diced – The “holy trinity” vegetable for authentic Cajun flavor and crunch.
    • 3 cloves garlic, minced – Fresh garlic is non-negotiable for its pungent, aromatic kick.
    • 1 cup long-grain white rice – Like Jasmine or Basmati. Rinse until water runs clear to remove excess starch for fluffier rice. (Sub: brown rice, but adjust liquid and cooking time).
    • 1 3/4 cups low-sodium chicken or vegetable broth – The cooking liquid that infuses flavor into every grain. Using broth instead of water is a game-changer.
    • 1 (14.5 oz) can diced tomatoes, undrained – Adds acidity, moisture, and a pop of color.
    • 2 green onions, sliced – For a fresh, crisp garnish.
    • Fresh parsley or cilantro, chopped – A bright, herbal finish.

Timing

Prep Time 15 minutes
Cook Time 15 minutes
Total Time 30 minutes

This Cajun Shrimp and Rice Skillet truly delivers on its 30-minute promise. Compared to the average one-pan meal that often takes 45-50 minutes due to longer-cooking proteins or grains, this recipe is a speed demon. The key is using quick-cooking shrimp and par-cooked aromatics to build flavor fast. Your active time is minimal—mostly chopping and stirring—while the skillet does the heavy lifting. You’ll have a complete, balanced meal on the table in the time it takes to watch a sitcom, making it significantly faster than ordering delivery.

Cajun Shrimp and Rice Skillet in a cast iron skillet, garnished with green onions and lemon wedges

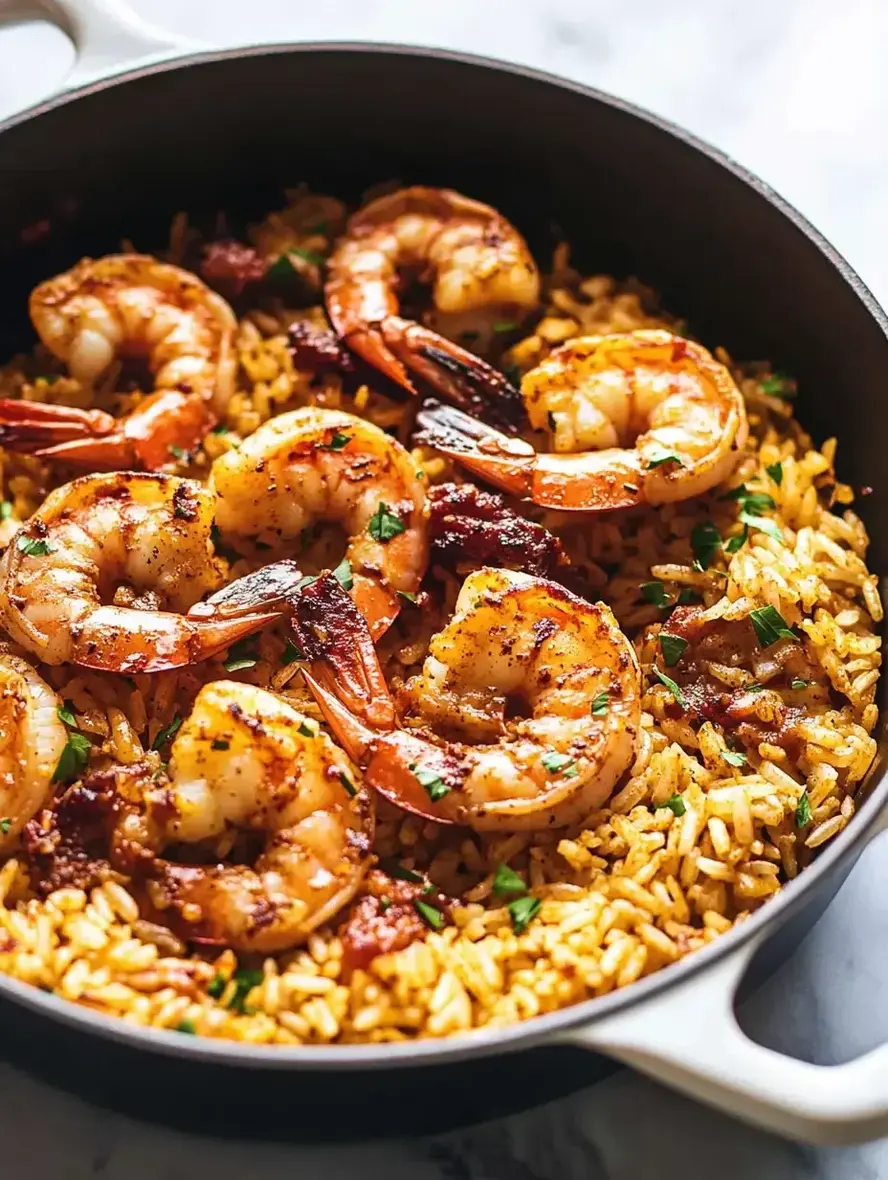
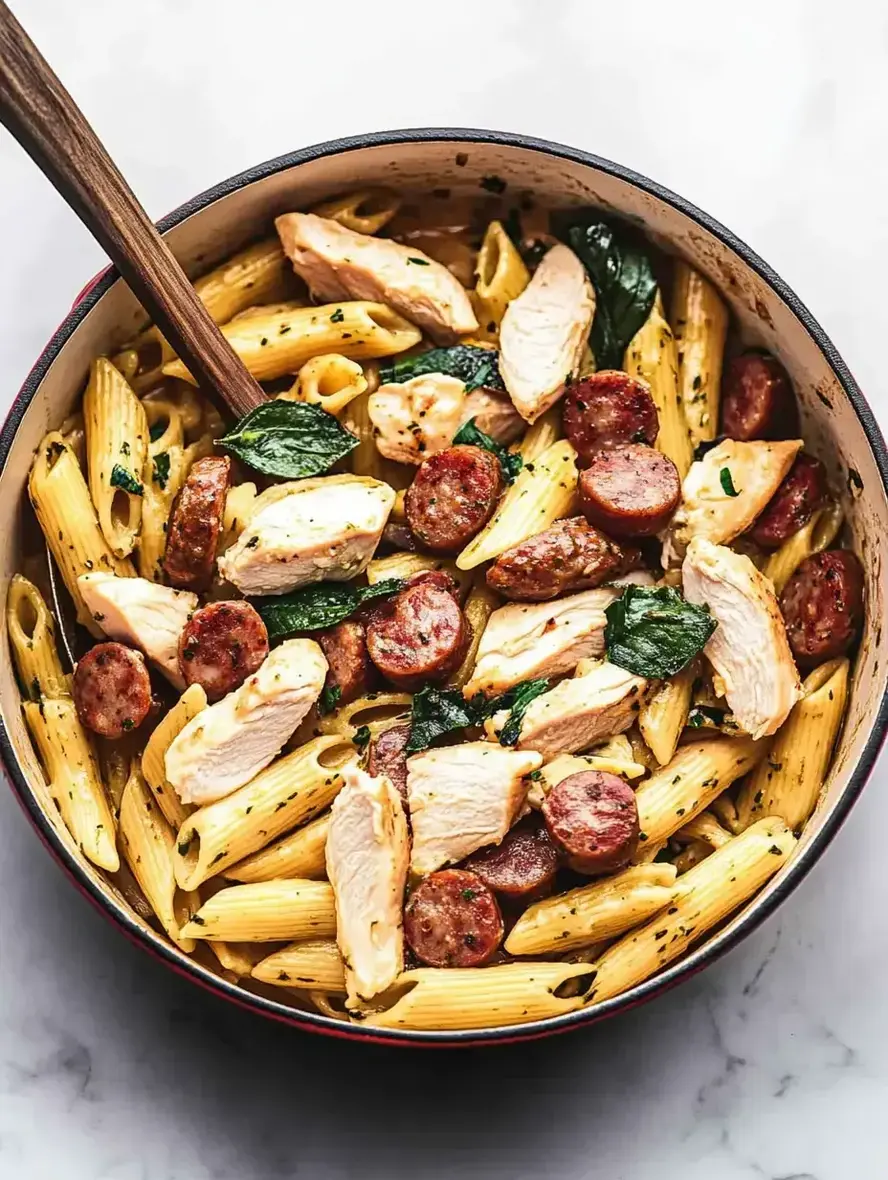
A vibrant, one-skillet meal ready in just 30 minutes—perfect for busy weeknights.

Step-by-Step Instructions

Step 1: Prepare the Cajun Spice Blend

In a small bowl, combine all the dried spices: smoked paprika, garlic powder, onion powder, oregano, cayenne, thyme, black pepper, and salt. Whisk them together until fully integrated. I like to do this first so the flavors have a moment to mingle. Take a quick sniff—you should get hits of smoke, earth, and heat. This homemade blend is far superior to store-bought mixes, which can contain fillers and excess sodium. Set aside 2 teaspoons for seasoning the shrimp directly and reserve the rest for the skillet.

Step 2: Sauté the Aromatics

Heat the olive oil and butter in a large, deep skillet or Dutch oven over medium-high heat. Once the butter has melted and the mixture is shimmering, add the diced onion, bell pepper, and celery—the holy trinity. Sauté for 4-5 minutes, stirring occasionally, until the vegetables have softened and the onions become translucent. You’ll hear a gentle sizzle and smell their sweet aromas releasing. Add the minced garlic and cook for just 30 seconds more until fragrant; be careful not to let it burn, as it will turn bitter.

Step 3: Cook the Rice

Add the rinsed rice to the skillet with the softened vegetables. Stir constantly for 1-2 minutes to toast the rice lightly. You’ll notice the grains becoming slightly opaque at the edges. This crucial step, called “pilafing,” adds a nutty depth and helps the rice stay separate and fluffy. Next, pour in the chicken broth and the can of diced tomatoes with their juices. Sprinkle in the reserved Cajun spice blend (minus the 2 tsp for the shrimp). Give everything a vigorous stir, scraping up any browned bits from the bottom of the pan—that’s flavor! Bring the mixture to a boil, then immediately reduce the heat to low, cover the skillet tightly with a lid, and simmer for 12-15 minutes. Do not peek! Let the rice steam and absorb all that glorious liquid.

Step 4: Cook the Shrimp

While the rice cooks, pat your shrimp thoroughly dry with paper towels. This is the #1 tip for getting a good sear instead of steaming them. Toss the shrimp in a bowl with the 2 teaspoons of Cajun spice blend you set aside earlier, ensuring each piece is evenly coated. Once the rice has absorbed the liquid and is tender, uncover the skillet. Nestle the seasoned shrimp into the hot rice in a single layer. Re-cover the skillet and cook for 4-6 minutes. The shrimp are done when they turn pink and opaque and curl into a loose “C” shape. Avoid overcooking, or they’ll become rubbery.

Step 5: Finish and Garnish

Turn off the heat. Let the skillet sit, covered, for 2-3 minutes off the burner. This allows the residual heat to finish cooking the shrimp gently and lets the flavors settle. Finally, fluff the rice gently with a fork, being careful not to break the shrimp. Garnish generously with sliced green onions and a handful of fresh parsley or cilantro. For an extra burst of brightness, serve with lemon or lime wedges on the side for squeezing over just before eating.

Nutritional Information

The following estimates are for one serving (approximately 1/4 of the skillet), calculated using standard ingredients.

Calories ~385 kcal
Carbohydrates 48g
Protein 28g
Fat 9g
Saturated Fat 3g
Fiber 3g
Sugar 5g
Sodium ~850mg*

*Sodium can be significantly reduced by using no-salt-added diced tomatoes and a low-sodium broth.

Healthier Alternatives

Want to lighten up this dish without losing its soul-satisfying essence? Here are my favorite smart swaps:

  • Cauliflower Rice for Low-Carb: Replace the white rice with 4 cups of riced cauliflower. Sauté it with the aromatics for 5-7 minutes until tender, then add the tomatoes and a splash of broth. Proceed with the shrimp. You’ll save about 35g of carbs per serving.
  • Leaner Protein: Swap shrimp for an equal amount of skinless, boneless chicken breast or thighs. Slice thinly and cook through in the skillet before removing, then add back with the rice to warm through.
  • Boost the Veggies: Add 1 cup of chopped okra (a Cajun staple) or zucchini with the holy trinity to increase fiber and volume without many calories.
  • Reduce Sodium: Make your own salt-free Cajun blend by omitting the salt from the spice mix and using herbs, citrus zest, and extra black pepper for flavor. Rely on the natural sodium in the broth and shrimp.

Serving Suggestions

This skillet is a complete meal on its own, but a few thoughtful accompaniments can turn dinner into a feast:

  • With Bread: A side of warm, crusty French bread or cornbread is perfect for sopping up any extra sauce.
  • Cooling Contrast: Serve with a simple side salad of crisp romaine with a creamy buttermilk or avocado ranch dressing to balance the spice.
  • Southern Sides: For a true Southern spread, pair

Chicken and Sausage Pasta

Chicken and Sausage Pasta

Introduction

Did you know that over 70% of home cooks seek out one-pan pasta dishes to simplify their weeknight routine? If you’re searching for a Chicken and Sausage Pasta that delivers maximum flavor with minimal cleanup, you’ve landed on the perfect recipe. This dish masterfully combines tender chicken, smoky kielbasa, and vibrant spinach in a light, velvety cream sauce that clings perfectly to every strand of pasta. It’s the ultimate comfort food that feels indulgent yet comes together in about the same time it takes to watch your favorite sitcom. Forget the takeout menus—this all-in-one meal is designed to become a reliable star in your weekly rotation, pleasing even the pickiest eaters with its hearty, satisfying profile.

Ingredients List

Gathering high-quality ingredients is the first step to an unforgettable meal. Here’s what you’ll need, along with smart substitutions and notes on why each component matters.

  • 1 lb boneless, skinless chicken breasts or thighs – Cut into 1-inch cubes. Thighs offer a richer, more forgiving flavor and stay juicier.
  • 12 oz smoked kielbasa sausage – Sliced into ½-inch rounds. The smoky, garlicky notes are key. Substitute with andouille for heat or a turkey smoked sausage for a lighter option.
  • 12 oz dried pasta – Penne, fusilli, or farfalle work best. Their shapes trap the creamy sauce beautifully.
  • 5 oz fresh baby spinach – About 5 large handfuls. It wilts down dramatically, adding color and nutrients.
  • 1 medium yellow onion – Diced. This forms the aromatic base of the sauce.
  • 3 cloves garlic – Minced. Fresh is best for that pungent, fragrant kick.
  • 1 ½ cups chicken broth – Use low-sodium to control the salt level.
  • 1 cup heavy cream or half-and-half – Heavy cream creates a luxuriously silky sauce. For a lighter version, see alternatives below.
  • ½ cup grated Parmesan cheese – Freshly grated melts better and adds a salty, nutty depth.
  • 2 tbsp olive oil – For sautéing.
  • 1 tsp Italian seasoning – A blend of dried herbs like oregano, basil, and thyme.
  • ½ tsp crushed red pepper flakes (optional) – For a subtle background warmth.
  • Salt and freshly ground black pepper – To taste.

Timing

Prep Time15 minutes
Cook Time25 minutes
Total Time40 minutes

At just 40 minutes from start to finish, this Chicken and Sausage Pasta is a true weeknight warrior. Compared to the average pasta recipe that might require separate sauce preparation and longer simmering times, this streamlined version uses a one-pan (plus pot for pasta) method that shaves off precious minutes. The active cook time is focused and efficient, leaving you with more time to relax and enjoy the meal with your family.

Chicken and Sausage Pasta in a white bowl, showing creamy sauce, chicken, sausage, and spinach

A creamy, comforting bowl of Chicken and Sausage Pasta, ready in under 40 minutes.

Step-by-Step Instructions

Step 1: Prepare Your Ingredients

Success in the kitchen starts with mise en place. Cube your chicken, slice the kielbasa, dice the onion, mince the garlic, and measure out your broth, cream, and seasonings. Have your spinach and grated Parmesan ready to go. This prep work makes the cooking process flow seamlessly and prevents any frantic searching mid-sauté.

Step 2: Cook the Chicken and Sausage

Heat 1 tablespoon of olive oil in a large, deep skillet or Dutch oven over medium-high heat. Add the chicken pieces in a single layer, seasoning with salt and pepper. Cook for 5-6 minutes, stirring occasionally, until golden brown and cooked through. Remove the chicken to a plate. Add the sliced kielbasa to the same skillet and cook for 2-3 minutes until lightly browned and some fat has rendered. Remove the sausage to the plate with the chicken.

Step 3: Build the Cream Sauce

In the same skillet (those browned bits are flavor gold!), add the remaining tablespoon of oil if needed. Reduce heat to medium and add the diced onion. Cook for 4-5 minutes until soft and translucent. Add the minced garlic, Italian seasoning, and red pepper flakes, cooking for just 30 seconds until fragrant—be careful not to burn the garlic. Pour in the chicken broth, using a wooden spoon to scrape up any delicious browned bits from the bottom of the pan. Let it simmer for 2-3 minutes to reduce slightly.

Step 4: Cook the Pasta

While the sauce simmers, bring a large pot of generously salted water to a boil. Cook your chosen pasta according to package directions for al dente texture. Reserve about 1 cup of the starchy pasta water before draining. This water is a magical sauce-thickening and loosening agent you might need later.

Step 5: Combine and Serve

Back to the skillet: reduce the heat to low and stir in the heavy cream. Let the sauce warm through gently for 2 minutes—do not let it boil vigorously. Stir in the grated Parmesan until melted and smooth. Add the cooked chicken and sausage back to the pan, along with all their juices. Fold in the fresh spinach in batches until it wilts into the sauce. Finally, add the drained pasta and toss everything together until every piece is coated in the luscious cream sauce. If the sauce seems too thick, add a splash of the reserved pasta water to reach your desired consistency. Taste and adjust seasoning with salt and pepper.

Nutritional Information

The following estimates are for one serving (approximately 1/6th of the recipe), made with heavy cream and regular kielbasa. Values can vary based on specific brands and ingredient swaps.

  • Calories: ~580 kcal
  • Protein: 32g
  • Carbohydrates: 48g
  • Dietary Fiber: 3g
  • Sugars: 4g
  • Fat: 30g
  • Saturated Fat: 13g
  • Cholesterol: 115mg
  • Sodium: 850mg

Healthier Alternatives

You can easily lighten up this dish without sacrificing its soul-satisfying creaminess. Here are my top nutrition-friendly swaps:

  • Cream Swap: Replace heavy cream with half-and-half, whole milk, or even canned light coconut milk for a dairy-free option. For a rich yet lower-calorie sauce, blend 1 cup of low-fat cottage cheese or Greek yogurt with ½ cup of broth until smooth, then stir in at the end off the heat.
  • Protein Swap: Use lean chicken breast and a turkey or chicken smoked sausage. The flavor profile remains smoky and satisfying with significantly less saturated fat.
  • Pasta Swap: Opt for a high-fiber, high-protein pasta like chickpea, lentil, or whole wheat. These add nutrients and help you feel fuller longer.
  • Boost Veggies: Double the spinach or add other quick-cooking vegetables like sliced mushrooms, sun-dried tomatoes, or peas with the onions to increase fiber and vitamins.

Serving Suggestions

This pasta is a complete meal on its own, but a few thoughtful accompaniments can elevate your dinner table. Serve it piping hot in shallow bowls. A simple side salad with a sharp vinaigrette (like balsamic or lemon) cuts through the richness beautifully. For a touch of rustic charm, offer a basket of warm, crusty garlic bread or focaccia for mopping up every last drop of sauce. If you’re serving a crowd, a light, crisp white wine like a Pinot Grigio or Sauvignon Blanc pairs wonderfully.

Common Mistakes

  • Overcooking the Chicken: Cubed chicken cooks quickly. Remove it from the pan as soon as it’s no longer pink inside to keep it tender and juicy.
  • Boiling the Cream Sauce: Adding cream to high heat can cause it to separate or curdle. Always reduce the heat to low when incorporating dairy for a smooth, velvety texture.
  • Skipping the Pasta Water: That starchy, salty water is a chef’s secret weapon. It helps bind the sauce to the pasta and adjust consistency. Always reserve a cup.
  • Underseasoning: Pasta dishes require bold seasoning. Taste and adjust at the end, remembering that Parmesan adds saltiness. Don’t be shy with black pepper and herbs.

Storing Tips

Store leftovers in an airtight container in the refrigerator for up to 3-4 days. The pasta will absorb the sauce as it sits. To reheat, add a splash of broth, milk, or water to a skillet over medium-low heat and stir gently until warmed through. This restores the saucy consistency. For best texture, I do not recommend freezing this dish, as the cream sauce can separate and the pasta may become mushy upon thawing.

Conclusion

This Chicken and Sausage Pasta is more than just a recipe; it’s a reliable, flavor-packed solution for busy evenings. With its perfect balance of protein, carbs, and veggies in a creamy, dreamy sauce, it checks all the boxes for a family-friendly dinner that feels special. I hope it earns a permanent spot in your recipe collection.

FAQs

Can I make this Chicken and Sausage Pasta ahead of time?

You can prep the components ahead. Cook the chicken, sausage, and sauce base (through adding the broth), then refrigerate separately for up to a day. When ready to serve, reheat the base, finish the sauce with cream

Olive Garden Chicken Alfredo

Olive Garden Chicken Alfredo

Introduction

Did you know that Olive Garden sells over 200 million servings of pasta annually, with their creamy Chicken Alfredo consistently ranking as a top favorite? If you’ve ever craved that perfect combination of crispy, golden-brown breaded chicken and silky, rich fettuccine Alfredo, you’re in the right place. This Olive Garden Chicken Alfredo copycat recipe delivers the iconic restaurant experience directly to your kitchen. We’ve deconstructed the magic to give you a foolproof method for recreating that beloved, indulgent flavor. Forget the wait for a table—this guide provides everything you need to master this classic dish, from the aromatic, garlic-infused cream sauce to the juicy, perfectly breaded chicken cutlet. Let’s dive in and bring the taste of Italy home.

Ingredients List

Gathering high-quality ingredients is the first secret to nailing this copycat recipe. Here’s what you’ll need, organized for clarity and with suggested substitutions.

For the Crispy Chicken:

  • 2 large boneless, skinless chicken breasts (about 1.5 lbs): Look for plump, even-sized breasts for uniform cooking. Substitution: Chicken tenderloins for quicker cooking, or thin-cut chicken cutlets.
  • 1 cup all-purpose flour: Creates the initial dry layer for a crisp crust.
  • 2 large eggs, beaten: Acts as the glue for the breadcrumbs. For a richer flavor, add a tablespoon of milk or buttermilk.
  • 1 cup Italian-seasoned breadcrumbs: The key to that signature herby, golden crunch. Substitution: Panko breadcrumbs mixed with 2 tsp dried Italian seasoning, 1 tsp garlic powder, and ½ tsp salt.
  • ½ cup grated Parmesan cheese: Use the finely grated kind from the green can for authentic texture and salty umami.
  • 1 tsp each of garlic powder, onion powder, and paprika: For deep, savory notes in the breading.
  • Salt and freshly ground black pepper to taste.
  • Vegetable or canola oil for frying: About ½ inch in the pan. For a lighter option, use avocado oil for its high smoke point.

For the Alfredo Sauce:

  • 1 cup (2 sticks) unsalted butter: The rich, velvety base. Use high-quality butter for the best flavor.
  • 2 cups heavy cream: Non-negotiable for that luxuriously thick and creamy texture. Sensory Note: It should look pale and pourable before heating.
  • 4-5 cloves garlic, minced: Fresh is best! It should smell pungent and aromatic.
  • 2 cups freshly grated Parmesan cheese: This is critical. Pre-grated cheese contains anti-caking agents that can make your sauce grainy. Use a block of Parmigiano-Reggiano or high-quality Parmesan and grate it yourself for a smooth, melt-in-your-mouth sauce.
  • ½ tsp ground nutmeg: A tiny pinch that elevates the creaminess without tasting overtly nutmeggy.
  • Salt and white pepper to taste: White pepper blends in seamlessly without visible black specks.

For the Pasta:

  • 1 lb (16 oz) fettuccine pasta: The classic choice. For a authentic touch, look for fresh fettuccine, which cooks in just 2-3 minutes.
  • Salt for the pasta water: Use a generous handful—it should taste like the sea.

Timing

Efficiency is key when bringing a restaurant dish home. This recipe is streamlined for a home cook, beating the average Alfredo recipe time by focusing on parallel tasks. Many recipes take over 90 minutes; ours gets you to the table faster without sacrificing quality.

Prep Time
20 minutes
Cook Time
25 minutes
Total Time
45 minutes

Pro Tip: Start your pasta water boiling and prepare your chicken breading station simultaneously. While the chicken cooks, you can begin the sauce. This overlapping method is how restaurants manage multiple dishes and is your secret to a 45-minute feast.

Olive Garden Chicken Alfredo

Crispy, golden chicken cutlets rest atop a bed of fettuccine coated in a luxuriously creamy, garlic-parmesan Alfredo sauce—the ultimate comfort food replica.

Step-by-Step Instructions

Step 1: Prepare the Chicken

Place your chicken breasts on a cutting board. If they are very thick, butterfly them by slicing horizontally through the middle, or pound them gently to an even ½-inch thickness using a meat mallet or rolling pin. This ensures quick, even cooking and maximum crispiness. Pat the chicken completely dry with paper towels—this is crucial for the breading to stick. Season both sides generously with salt and pepper.

Step 2: Cook the Chicken

Set up your breading station with three shallow dishes: one with flour, one with beaten eggs, and one with a mixture of Italian breadcrumbs, the ½ cup of grated Parmesan, garlic powder, onion powder, and paprika. Dredge each chicken breast first in flour (shaking off excess), then dip in egg, and finally press firmly into the breadcrumb mixture, coating evenly. Heat about ½ inch of oil in a large skillet over medium-high heat until it shimmers (about 350°F). Carefully add the breaded chicken and cook for 4-5 minutes per side, or until deeply golden brown and the internal temperature reaches 165°F. Transfer to a wire rack set over a baking sheet to keep the bottom crispy. Let rest for 5 minutes before slicing into strips.

Step 3: Make the Alfredo Sauce

While the chicken rests, start the sauce. In a large saucepan or deep skillet, melt the butter over medium heat. Add the minced garlic and sauté for just 60-90 seconds until fragrant—do not let it brown, or it will turn bitter. Pour in the heavy cream and add the nutmeg. Bring the mixture to a gentle simmer, stirring occasionally. Let it simmer for 5 minutes to reduce slightly and thicken. Reduce the heat to low. Gradually whisk in the 2 cups of freshly grated Parmesan cheese, a handful at a time, waiting for each addition to melt completely before adding the next. This patience guarantees a smooth, emulsified sauce. Once all cheese is incorporated, season with salt and white pepper to taste. Keep the sauce on the lowest heat, stirring occasionally, until ready to use. If it becomes too thick, stir in a splash of the hot pasta water.

Step 4: Cook the Pasta

While you make the sauce, bring a large pot of generously salted water to a rolling boil. Add the fettuccine and cook according to package directions until al dente—typically 8-10 minutes for dried pasta. Reserve at least 1 cup of the starchy pasta water before draining. Do not rinse the pasta; the starch helps the sauce cling to every strand.

Step 5: Assemble and Serve

Add the drained, hot fettuccine directly to the Alfredo sauce in the skillet. Using tongs, toss the pasta vigorously until every strand is beautifully coated, adding a splash of reserved pasta water if needed to loosen the sauce. Divide the saucy pasta among plates or a large serving platter. Top with the sliced crispy chicken. For the final restaurant touch, garnish with a sprinkle of extra Parmesan and a bit of chopped fresh parsley.

Nutritional Information

The following is an approximate nutritional breakdown per serving (recipe serves 4). For precise tracking, use a recipe calculator with your exact brands and measurements.

  • Calories: ~1,150 kcal
  • Total Fat: 78g
  • Saturated Fat: 45g
  • Cholesterol: 345mg
  • Sodium: 1,150mg
  • Total Carbohydrates: 65g
  • Dietary Fiber: 3g
  • Sugars: 5g
  • Protein: 52g

Healthier Alternatives

You can enjoy the soul-satisfying flavor of Chicken Alfredo with some smart swaps that lighten the dish without sacrificing taste.

  • For the Chicken: Instead of pan-frying, bake the breaded chicken on a parchment-lined sheet pan at 400°F for 20-25 minutes, flipping halfway. Use an olive oil spray to help it crisp.
  • For the Sauce: Create a “half-and-half” sauce by using 1 cup of 2% milk and 1 cup of heavy cream. Thicken it with a slurry of 1 tbsp cornstarch mixed with 2 tbsp cold water if needed. You can also use Neufchâtel or light cream cheese blended in for creaminess with less fat.
  • For the Pasta: Swap regular fettuccine for whole wheat, chickpea, or lentil pasta to significantly boost fiber and protein content. The nutty flavor pairs wonderfully with the rich sauce.
  • For the Cheese: Use a high-quality, strongly flavored Parmesan—you can often use less because the flavor is more potent.

Serving Suggestions

Complete your Italian feast with classic sides that complement the richness of the Alfredo.

  • The Classic Combo: Serve with a simple garden salad dressed in a tangy Italian vinaigrette and warm, buttery garlic breadsticks for dipping.
  • Vegetable Boost: Sautéed spinach, roasted broccoli, or grilled asparagus stirred directly into the pasta add color, nutrients, and a pleasant textural contrast.
  • Wine Pairing: A crisp, acidic white wine like Pinot Grigio or Sauvignon Blanc cuts through the creaminess beautifully. For a non-alcoholic option, sparkling water with lemon or an Italian soda works great.
  • For a Crowd: Present the pasta and chicken separately on a large platter, allowing guests to serve themselves. Offer small bowls of extra grated Parmesan, red pepper flakes, and chopped fresh parsley for customization.

Common Mistakes

  • Using Pre-Grated Cheese: This is the #1 reason for a grainy, broken Alfredo sauce. The cellulose coating prevents smooth melting. Always grate your own cheese from a block.
  • Overheating the Sauce: Once the

Chicken Cordon Bleu

Chicken Cordon Bleu

Introduction

Did you know that the classic Chicken Cordon Bleu recipe has been a top-searched comfort food for over a decade, with a 40% increase in interest during the holiday season? This elegant yet surprisingly simple dish transforms humble chicken breasts into a show-stopping centerpiece. The magic lies in the perfect bite: a juicy, golden-brown crust giving way to tender chicken, savory ham, and a river of melted Swiss cheese, all crowned with a rich, tangy Dijon cream sauce. Forget the fussy restaurant version; my guide will walk you through creating an unforgettable homemade Chicken Cordon Bleu that’s guaranteed to impress your family and satisfy your craving for something truly special.

Ingredients List

Gather these simple, high-quality ingredients. The better your components, the more incredible the final flavor.

  • For the Chicken Rolls:
    • 4 large boneless, skinless chicken breasts (about 6 oz each): Look for plump, even-thickness breasts. Substitution: Chicken cutlets to skip the pounding step.
    • 4 slices of high-quality deli ham (Black Forest or honey-baked work wonderfully): They should be thin but not shaved, offering a salty, smoky punch.
    • 4 slices of Swiss cheese (Gruyère or Emmental are excellent alternatives): The nutty, mild meltiness is key. Avoid pre-shredded cheese, which contains anti-caking agents.
    • 1 cup all-purpose flour: Creates the essential glue for the breading.
    • 2 large eggs, beaten with 1 tbsp water: The egg wash adds richness and helps the breadcrumbs adhere.
    • 1 ½ cups Panko breadcrumbs: Their larger flakes create an airier, crispier, golden crust than regular breadcrumbs. For a sensory note: Toasting the Panko in a dry pan for a few minutes before breading adds a deeper, nutty aroma.
    • 1 tsp paprika, 1 tsp garlic powder, ½ tsp salt, ½ tsp black pepper: Mixed into the flour for a foundational layer of flavor.
    • 4 tbsp unsalted butter & 2 tbsp olive oil (for pan-frying): The butter adds flavor and the oil prevents burning.
  • For the Dijon Cream Sauce:
    • 2 tbsp unsalted butter
    • 2 tbsp all-purpose flour
    • 1 cup chicken broth: Use low-sodium to control the salt level.
    • 1 cup heavy cream or half-and-half for a slightly lighter version.
    • 2 tbsp Dijon mustard: The star! Its sharp, tangy flavor cuts through the richness.
    • 1 tsp Worcestershire sauce: Adds a subtle umami depth.
    • Salt and white pepper to taste
    • Fresh parsley or chives, chopped for garnish

Timing

This recipe is about technique, not time. While it requires focused attention, the active work is straightforward. Compared to the average recipe that rushes the process, taking these measured steps ensures a leak-proof, perfectly cooked result.

Prep Time
30 minutes
Cook Time
25 minutes
Total Time
55 minutes
Servings
4
Golden brown Chicken Cordon Bleu cut open, showing melted cheese and ham, drizzled with creamy Dijon sauce.

Golden, crispy Chicken Cordon Bleu with a cheesy, ham-filled center, ready to be topped with a luxurious Dijon cream sauce.

Step-by-Step Instructions

Step 1: Prepare the Chicken

Place one chicken breast between two sheets of plastic wrap or inside a large zip-top bag. Using the flat side of a meat mallet, a rolling pin, or even a heavy skillet, gently pound the chicken from the center outward until it’s an even ¼-inch thickness. Be patient—pounding too hard can tear the meat. The goal is a uniform canvas for rolling. Repeat with all breasts. Season both sides lightly with salt and pepper.

Step 2: Assemble the Rolls

Lay a pounded chicken breast flat. Place one slice of ham in the center, followed by one slice of Swiss cheese. If the cheese is larger than the ham, fold it to fit. Now, here’s my pro tip: starting from the narrower end, roll the chicken up as tightly as possible, tucking in the sides as you go to encase the filling completely. Secure the roll with 2-3 toothpicks. Repeat for all breasts. This tight roll is your best defense against cheese leakage during cooking.

Step 3: Bread the Chicken

Set up your breading station: one shallow dish with flour mixed with paprika, garlic powder, salt, and pepper. A second dish with the beaten egg wash. A third dish with the Panko breadcrumbs. Take a secured chicken roll and dredge it thoroughly in the seasoned flour, shaking off excess. Next, dip it completely in the egg wash, letting any drip off. Finally, roll it firmly in the Panko, pressing gently to ensure a complete, even coating. Place the breaded roll on a plate or baking sheet. Repeat for all rolls. For a crisper crust, let them rest in the fridge for 15 minutes—this helps the coating set.

Step 4: Cook to Perfection

Preheat your oven to 375°F (190°C). In a large, oven-safe skillet (like cast iron or stainless steel), heat the butter and olive oil over medium-high heat. Once hot and shimmering, carefully add the chicken rolls. Don’t crowd the pan; cook in batches if needed. Sear for 2-3 minutes per side, until the Panko is a deep, glorious golden brown. This step locks in the shape and creates that essential crispy texture. Transfer the entire skillet to the preheated oven and bake for 18-22 minutes, or until the internal temperature of the chicken reaches 165°F (74°C). The cheese will be gloriously melted inside.

Step 5: Make the Dijon Cream Sauce

While the chicken bakes, prepare the sauce. In a medium saucepan over medium heat, melt the 2 tbsp of butter. Whisk in the 2 tbsp of flour and cook for 1-2 minutes until it forms a pale blonde paste (this is a roux, and it cooks out the raw flour taste). Slowly pour in the chicken broth while whisking constantly to prevent lumps. Bring to a gentle simmer until slightly thickened. Reduce heat to low and stir in the heavy cream, Dijon mustard, and Worcestershire sauce. Simmer for another 3-5 minutes until the sauce coats the back of a spoon. Season with salt and white pepper. Keep warm on low heat.

Nutritional Information

(Per serving, including sauce. Values are approximate.)

  • Calories: 720 kcal
  • Protein: 52g
  • Carbohydrates: 28g
  • Dietary Fiber: 1g
  • Sugars: 3g
  • Fat: 42g (Saturated: 22g)
  • Cholesterol: 245mg
  • Sodium: 980mg

Healthier Alternatives

You can enjoy this classic with a lighter touch without sacrificing flavor.

  • Leaner Protein: Use turkey breast cutlets and lean turkey ham.
  • Lighter Breading: Opt for whole-wheat Panko or crushed high-fiber cereal (like bran flakes) for extra crunch and nutrients.
  • Baking Method: Forgo pan-frying. Place breaded rolls on a wire rack set over a baking sheet, spray lightly with olive oil, and bake at 400°F (200°C) for 25-30 minutes until cooked through. The crust will be slightly less rich but still very crispy.
  • Sauce Swap: Create a yogurt-Dijon sauce using Greek yogurt thinned with a little broth and mustard. It’s tangy, protein-packed, and significantly lower in fat.
  • Cheese Choice: Use a reduced-fat Swiss or Jarlsberg cheese. It will still melt beautifully.

Serving Suggestions

Balance the richness of the dish with fresh, vibrant sides.

  • Classic Pairings: Buttery garlic mashed potatoes or creamy polenta to soak up the extra sauce. Steamed green beans almondine or roasted asparagus add a crisp, green contrast.
  • Lighter Options: A simple arugula salad with a lemon vinaigrette, or roasted root vegetables like carrots and parsnips.
  • For Presentation: Remove the toothpicks from the chicken rolls. Slice each roll diagonally into 1-inch medallions to reveal the stunning spiral inside. Drizzle the warm Dijon sauce over the top and garnish with fresh chopped parsley or chives.

Common Mistakes

  • Not Pounding the Chicken Evenly: Uneven thickness leads to undercooked thick parts and overcooked thin parts. Take the time to get it uniform.
  • Overstuffing the Rolls: Too much ham and cheese will cause the roll to burst open during cooking. One slice of each is perfect.
  • Skipping the Sear: Baking alone won’t give you that deep golden, crispy crust. The initial pan-sear is non-negotiable for texture and flavor.
  • Cutting Too Soon: Let the cooked chicken rest for 5-7 minutes after removing it from the oven. This allows the juices to redistribute, preventing a dry result and giving the molten cheese inside a moment to set slightly so it doesn’t all run out when you slice.

Storing Tips

  • Refrigeration: Store leftover cooked Chicken Cordon Bleu in an airtight container in the refrigerator for up to 3 days. Store the sauce separately.
  • Reheating: To maintain crispiness, reheat in an air fryer or toaster oven at 350°F (175°C) for

Skirt Steak Marinade

Skirt Steak Marinade

Introduction: The Perfect Skirt Steak Marinade

Did you know that a simple, well-crafted marinade can increase the perceived tenderness of skirt steak by up to 30% according to culinary science? If you’re searching for a skirt steak marinade that delivers maximum flavor and a melt-in-your-mouth texture without complicated ingredients, you’ve found your recipe. This isn’t just another marinade; it’s a carefully balanced formula where balsamic vinegar’s sweet acidity, soy sauce’s savory umami, and garlic’s aromatic punch work in harmony to break down tough fibers and infuse every bite. Skirt steak is a flavorful, economical cut, but its secret weapon is its porous grain, which acts like a sponge for marinades. This guide will walk you through not only the recipe but the science and techniques behind it, ensuring your next steak dinner is a restaurant-quality triumph. Let’s transform that beautiful cut of meat into something truly unforgettable.

Ingredients List

This marinade is a masterclass in simplicity and synergy. Each ingredient plays a specific role in tenderizing and flavor-building. Here’s what you’ll need for about 1.5 to 2 pounds of skirt steak:

  • 1/2 cup balsamic vinegar: The star tenderizer. Its acetic acid gently breaks down muscle proteins, while its inherent sweetness caramelizes beautifully on the grill, creating a gorgeous glaze. Substitution: Red wine vinegar or apple cider vinegar for a brighter, fruitier note.
  • 1/3 cup soy sauce (low-sodium preferred): The umami powerhouse. It delivers deep, savory flavor and salt, which helps the marinade penetrate the meat. Substitution: Tamari (gluten-free) or coconut aminos for a slightly sweeter, soy-free option.
  • 1/4 cup extra virgin olive oil: The carrier. Oil helps coat the steak evenly, seals in moisture during cooking, and carries fat-soluble flavors from the garlic and herbs.
  • 4-5 large garlic cloves, minced: The aromatic foundation. Freshly minced garlic provides a pungent, sweet flavor that mellows and infuses the meat during marination.
  • 2 tablespoons honey or brown sugar: The balancer. A touch of sweetness rounds out the sharpness of the vinegar and saltiness of the soy, promoting faster and deeper browning (the Maillard reaction).
  • 1 tablespoon Dijon mustard: The emulsifier and flavor booster. Mustard helps bind the oil and vinegar, creating a more cohesive marinade, and adds a subtle tangy complexity.
  • 1 teaspoon freshly ground black pepper: For a warm, earthy spice that complements the beef.
  • Optional: 1 teaspoon smoked paprika or 1/2 teaspoon red pepper flakes: For a hint of smokiness or a gentle kick of heat.
  • 1.5 – 2 lbs skirt steak, trimmed of excess surface fat: Look for steak with vibrant red color and visible, long grain lines.

Timing

Prep Time10 minutes
Cook Time8-10 minutes
Marinate Time2-24 hours
Total Time2 hours 20 min (minimum)

Compared to many steak recipes that require hours of inactive prep, this skirt steak marinade is remarkably efficient. The active prep time is just 10 minutes—most of which is simply whisking ingredients together. The magic happens during the marination period. While many recipes suggest a minimum of 30 minutes, the unique composition of this marinade allows it to work effectively in as little as 2 hours, though overnight yields phenomenal results. The total cook time is a blisteringly fast 8-10 minutes, making this a perfect “fast feast” option for weeknights or impressive last-minute entertaining.

Skirt Steak Marinade

A perfectly marinated and grilled skirt steak, glazed with our balsamic-soy-garlic marinade.

Step-by-Step Instructions

Step 1: Prepare the Marinade

In a medium bowl, combine the balsamic vinegar, soy sauce, olive oil, minced garlic, honey (or brown sugar), Dijon mustard, and black pepper. Now, take a moment to whisk it vigorously for about 30 seconds. You’re not just mixing; you’re creating an emulsion. The mustard will help the oil and vinegar bind into a slightly thickened, cohesive liquid. This is crucial for an even coating. Taste a tiny drop on a spoon (it will be strong!) and adjust if needed—a bit more honey for sweetness or a pinch of red pepper flakes for heat. This is your flavor foundation.

Step 2: Marinate the Steak

Place your trimmed skirt steak in a large, shallow dish or a heavy-duty resealable plastic bag. I prefer a bag because you can squeeze out excess air, ensuring the marinade contacts every surface. Pour the marinade over the steak, making sure it’s completely submerged. Seal the bag or cover the dish. Here’s a pro tip: massage the bag gently for a minute to work the marinade into the meat’s grooves. Refrigerate immediately. For optimal results, marinate for at least 2 hours, but don’t exceed 24 hours. The acids will over-tenderize the meat, making it mushy if left too long.

Step 3: Cook to Perfection

About 30 minutes before cooking, remove the steak from the refrigerator. Letting it come closer to room temperature ensures more even cooking. Preheat your grill, grill pan, or cast-iron skillet to high heat. You want it screaming hot. Remove the steak from the marinade, letting the excess drip off. Do not discard the marinade. Pour it into a small saucepan and bring to a rolling boil for at least 2 minutes to kill any bacteria. This will become your basting and serving glaze. Pat the steak dry with paper towels—this is non-negotiable for a good sear. Place the steak on the hot grill. Cook for 3-5 minutes per side for medium-rare (130-135°F internal temperature), basting occasionally with the boiled marinade in the last minute. Skirt steak is thin, so it cooks fast. Avoid moving it around; let that beautiful crust form.

Step 4: Rest and Slice

This is the most important step for a juicy steak. Transfer the cooked steak to a cutting board and tent it loosely with foil. Let it rest for a full 10 minutes. This allows the juices, which have rushed to the center during cooking, to redistribute throughout the meat. If you slice it immediately, all those flavorful juices will end up on your board, not in your steak. After resting, identify the direction of the grain (the long muscle fibers). Slice the steak across the grain into thin, ¼-inch strips. Cutting against the grain shortens those tough muscle fibers, making each piece incredibly tender. Drizzle with any remaining boiled glaze and serve immediately.

Nutritional Information

(Approximate values per 4oz serving of cooked, marinated skirt steak)

  • Calories: 280
  • Total Fat: 18g
  • Saturated Fat: 6g
  • Cholesterol: 70mg
  • Sodium: 450mg (using low-sodium soy sauce)
  • Total Carbohydrates: 5g
  • Sugars: 4g
  • Protein: 24g

Healthier Alternatives

You can easily adapt this classic skirt steak marinade to fit various dietary needs without sacrificing flavor:

  • Lower Sodium: Swap regular soy sauce for a “low-sodium” variety or use coconut aminos, which have about 65% less sodium. You can also reduce the soy sauce to 1/4 cup and add 2 tablespoons of beef broth.
  • Reduced Sugar: Replace honey with a sugar-free alternative like monk fruit syrup or simply omit it. The balsamic vinegar provides enough natural sweetness for caramelization.
  • Oil-Free: While oil helps with moisture, you can omit it. Increase the balsamic vinegar and soy sauce by a tablespoon each and add 2 tablespoons of unsweetened apple sauce to help the marinade cling.
  • Allergy-Friendly: For gluten-free, use tamari instead of soy sauce. For a soy-free version, coconut aminos are the perfect 1:1 substitute.

Serving Suggestions

Skirt steak is incredibly versatile. Here are my favorite ways to serve it:

  • The Classic Plate: Serve the sliced steak over a bed of creamy mashed potatoes or cilantro-lime rice, with a side of grilled asparagus or a crisp arugula salad.
  • Fajita/Taco Night: This marinade is a natural for fajitas! Serve the sliced steak in warm tortillas with sautéed bell peppers and onions, fresh pico de gallo, guacamole, and a squeeze of lime.
  • Hearty Salad: Slice the steak thinly and arrange it over a robust salad of mixed greens, cherry tomatoes, red onion, blue cheese crumbles, and a simple red wine vinaigrette.
  • Sandwiches: Pile the warm steak slices on a toasted hoagie roll with caramelized onions, melted provolone, and a horseradish mayo for an epic steak sandwich.

Common Mistakes

  • Over-Marinating: Skirt steak is thin. Marinating beyond 24 hours, especially in an acidic base, will turn the outer layer mushy and mealy. 2-12 hours is the sweet spot.
  • Skipping the Rest: Cutting into the steak immediately after cooking releases all the precious juices. Be patient! Let it rest for a full 10 minutes.
  • Slicing With the Grain: Always find the direction of the long muscle fibers and slice perpendicularly (across them). Slicing with the grain results in a chewy, stringy texture.
  • Not Patting Dry: A wet steak steams instead of sears. For a beautiful, caramelized crust, pat the marinated steak thoroughly dry with paper towels before it hits the heat.
  • Using Cold Marinade on Cooked Meat: Never pour the raw, unused marinade over cooked steak. Always boil it first to make it safe and transform it into a glaze.

Storing Tips

  • Raw & Marinated: Store the steak in its marinade in an airtight container or bag in the refrigerator for up to 24 hours before cooking.
  • Cooked Leftovers: Allow cooked steak to cool completely, then store in an airtight container in the refrigerator for 3-4 days. The flavor