Mushroom Sauce for Steak

Mushroom Sauce for Steak

Introduction

Did you know that a recent survey of home cooks revealed that over 70% feel intimidated by making restaurant-quality sauces? Yet, the secret to an unforgettable steak dinner often lies not in the cut of meat itself, but in the luxurious, flavor-packed sauce that accompanies it. This rich and creamy mushroom sauce for steak is your answer to that culinary challenge. Combining the earthy depth of sautéed mushrooms with the savory punch of garlic, the richness of butter, and the velvety finish of cream, this sauce transforms a simple steak into a gourmet experience. Best of all, it’s ready in just 15 minutes, proving that incredible flavor doesn’t require hours at the stove. Whether you’re hosting a special dinner or elevating a weeknight meal, this versatile sauce is the ultimate flavor enhancer.

Ingredients List

Gather these simple, high-quality ingredients for a sauce that sings with flavor. Using fresh, not pre-sliced, mushrooms makes a significant difference.

  • 2 tablespoons unsalted butter – The foundation for richness and that beautiful golden sauté. For a nuttier flavor, try European-style cultured butter.
  • 1 tablespoon olive oil – Helps prevent the butter from burning during the high-heat sauté.
  • 8 ounces cremini or baby bella mushrooms, sliced – These have a deeper, earthier flavor than white button mushrooms. Look for firm caps with no slimy spots.
  • 3-4 cloves garlic, minced – Fresh is non-negotiable for the best aromatic punch. You should smell its fragrance as you mince.
  • 1 small shallot, finely diced (about ¼ cup) – Adds a subtle, sweet onion note. Substitution: Use 2 tablespoons of finely diced yellow or red onion.
  • ½ cup beef broth or stock – Use a good-quality, low-sodium broth for the best control over saltiness. This forms the savory backbone of the sauce.
  • ½ cup heavy cream – For that luxurious, velvety texture and rich mouthfeel. It should coat the back of a spoon.
  • 1 teaspoon Dijon mustard – A chef’s secret for adding depth and a slight tang that balances the richness.
  • 1 teaspoon fresh thyme leaves (or ½ teaspoon dried) – The herbal, slightly floral note that pairs classically with mushrooms and steak.
  • Salt and freshly ground black pepper – Season in layers, tasting as you go.
  • Optional: 1 tablespoon brandy, cognac, or dry sherry – For a sophisticated flavor boost. The alcohol cooks off, leaving behind incredible complexity.

Timing

Prep Time5 minutes
Cook Time10 minutes
Total Time15 minutes

At a total of just 15 minutes, this mushroom sauce for steak is remarkably fast. Many traditional pan sauces or gravies can take 30-45 minutes to develop flavor and reduce properly. The key here is high heat and efficient technique, allowing the mushrooms to brown quickly and the liquid to reduce into a glossy, cohesive sauce in record time. This makes it a perfect last-minute addition to your steak cook, ensuring everything comes to the table hot and perfectly timed.

Mushroom Sauce for Steak

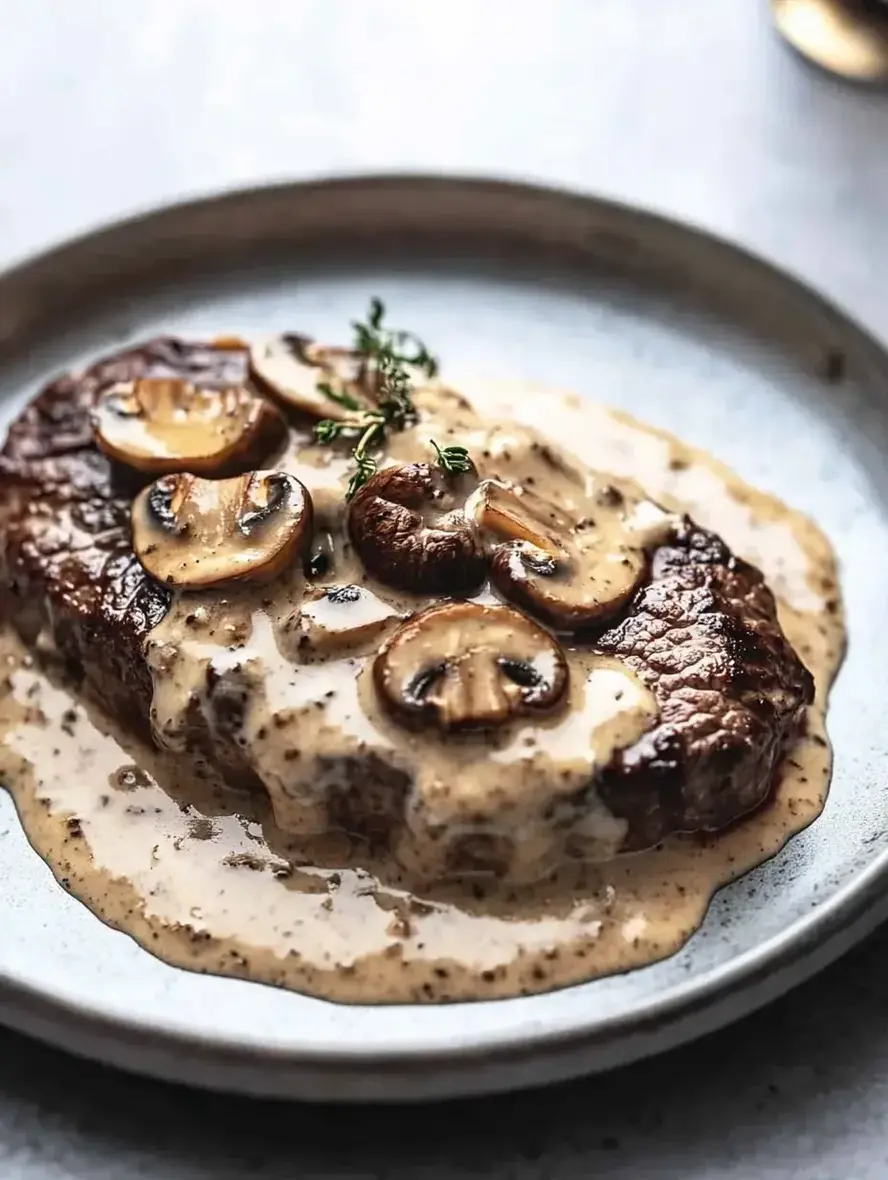
A rich, creamy mushroom sauce drizzled over a perfectly cooked steak, ready in just 15 minutes.

Step-by-Step Instructions

Step 1: Prepare Your Mise en Place

Before you turn on the heat, have everything ready. Slice your mushrooms to an even ¼-inch thickness so they cook uniformly. Mince the garlic and dice the shallot finely. Measure out your broth, cream, and other ingredients. This “mise en place” is crucial for a 15-minute sauce, as it allows you to move quickly and confidently once cooking begins, preventing anything from burning while you search for an ingredient.

Step 2: Sauté the Mushrooms and Aromatics

In a large skillet or the same pan you cooked your steak in (for extra flavor!), heat the butter and olive oil over medium-high heat until the butter is foaming. Add the sliced mushrooms in a single layer if possible. Don’t stir immediately—let them sear and develop a beautiful golden-brown color for 2-3 minutes. This browning, called the Maillard reaction, is where the deep, savory flavor comes from. After they’ve browned, stir and add the shallot and garlic. Cook for another 1-2 minutes until fragrant, stirring constantly to prevent the garlic from burning.

Step 3: Deglaze and Simmer

This is the step that builds incredible depth. Pour in the beef broth (and the optional brandy if using). As the liquid hits the hot pan, use a wooden spoon to scrape up all the browned bits (fond) stuck to the bottom. Those bits are pure flavor gold! Bring the mixture to a lively simmer and let it cook for 3-4 minutes, allowing the liquid to reduce by about half. You’ll notice it starting to thicken slightly and coat the mushrooms.

Step 4: Finish with Cream and Herbs

Reduce the heat to medium-low. Stir in the heavy cream, Dijon mustard, and fresh thyme. Let the sauce simmer gently for another 2-3 minutes, stirring occasionally, until it thickens to a luxurious, gravy-like consistency that will cling to your steak. Do not let it boil vigorously after adding the cream, as it could separate. Finally, season to taste with salt and plenty of freshly ground black pepper. The sauce is now ready to pour generously over your rested steak.

Nutritional Information

The following nutritional estimate is for approximately ¼ of the total sauce recipe (about a generous serving). Values can vary based on specific ingredients used.

  • Calories: ~180 kcal
  • Total Fat: 17g
  • Saturated Fat: 10g
  • Cholesterol: 50mg
  • Sodium: ~200mg (varies with broth)
  • Total Carbohydrates: 4g
  • Dietary Fiber: 0.5g
  • Sugars: 2g
  • Protein: 2g

Healthier Alternatives

You can easily adapt this mushroom sauce for steak to fit different dietary preferences without sacrificing the luxurious feel.

  • Lighter Cream: Substitute the heavy cream with half-and-half or full-fat coconut milk for a dairy-free option. Note the sauce will be slightly less thick; you can simmer it a minute longer or add a teaspoon of cornstarch slurry.
  • Butter/Oil Swap: Use all olive oil or avocado oil. For a rich, dairy-free flavor, try a plant-based butter alternative.
  • Boost Umami, Reduce Salt: Use a low-sodium or homemade beef broth. Amplify savoriness with a teaspoon of tomato paste added with the mushrooms or a dash of umami seasoning (like mushroom powder).
  • Thicken Naturally: For a cream-free version, puree a portion of the cooked mushrooms and broth before adding back to the pan to create a naturally thick, hearty texture.

Serving Suggestions

While this sauce is a match made in heaven for steak (think ribeye, filet mignon, or New York strip), its versatility is a chef’s dream.

  • The Classic: Drizzle over your perfectly cooked, rested steak. Garnish with an extra sprig of fresh thyme.
  • Beyond Steak: It’s phenomenal over pan-seared chicken breasts, pork chops, or even a hearty portobello mushroom for a vegetarian main.
  • With Sides: Serve alongside creamy mashed potatoes, polenta, or egg noodles—the sauce doubles as a gravy. Roasted asparagus or green beans make a perfect crisp-tender accompaniment.
  • Next-Level Breakfast: Spoon it over a steak and eggs breakfast hash for the ultimate weekend brunch.

Common Mistakes

  • Crowding the Pan: Adding too many mushrooms at once steams them instead of browning them. Cook in batches if your pan is small.
  • Burning the Garlic: Garlic burns in seconds. Add it after the mushrooms have browned and cook just until fragrant, about 30-60 seconds.
  • Skipping the Deglaze: Those browned bits are essential flavor. Don’t leave them stuck to the pan! Scrape thoroughly.
  • Boiling the Cream: A vigorous boil after adding cream can cause it to curdle or separate. Keep the sauce at a gentle simmer.
  • Underseasoning: Sauce needs seasoning. Taste and adjust with salt and pepper at the end. Remember, it should be seasoned to stand up to the steak.

Storing Tips

This sauce stores beautifully, making it a fantastic make-ahead option.

  • Refrigeration: Cool completely and store in an airtight container in the refrigerator for up to 4 days.
  • Freezing: While cream-based sauces can sometimes separate when frozen, this one freezes fairly well. Store in a freezer-safe container for up to 2 months. Thaw overnight in the fridge and reheat gently on the stove, whisking to re-emulsify.
  • Reheating: Always reheat gently over low-medium heat on the stovetop, stirring frequently. Add a small splash of broth or cream if it has thickened too much in the fridge.

Conclusion

Mastering a great sauce is a simple skill that pays enormous dividends in the kitchen. This 15-minute, rich and creamy mushroom sauce for steak is your ticket to turning everyday meals into restaurant-worthy plates. With its deep umami flavors, velvety texture, and incredible versatility, it’s a recipe you’ll return to again and again. The process is straightforward, the ingredients are accessible, and the result is consistently impressive.

FAQs

Carrot Cake Cookies

Carrot Cake Cookies

Introduction

Did you know that over 85% of home bakers are looking for ways to transform classic dessert flavors into convenient, handheld treats? That’s exactly why these Carrot Cake Cookies are about to become your new favorite recipe. Imagine all the warm, spiced comfort of a traditional carrot cake—packed with fresh, sweet carrots and aromatic cinnamon—but in a soft, chewy cookie form, crowned with a luscious brown butter cream cheese frosting. This recipe delivers the perfect balance of cozy flavor and satisfying texture, making it ideal for spring gatherings, holiday platters, or a simple afternoon treat with a cup of coffee. Let’s dive into how you can create these irresistible cookies that bring the essence of carrot cake into every bite.

Ingredients List

Gather these simple, wholesome ingredients to create your cookie masterpiece. For best results, use room-temperature ingredients unless specified.

For the Carrot Cake Cookies:

  • All-Purpose Flour (2 ¼ cups): The foundation for a tender, chewy crumb. For a nuttier flavor, you can substitute up to 1 cup with whole wheat pastry flour.
  • Baking Soda (1 tsp) & Baking Powder (½ tsp): This dual-leavening combo ensures the cookies rise beautifully and have the perfect airy texture.
  • Salt (½ tsp): Enhances all the other flavors and balances the sweetness.
  • Ground Cinnamon (2 tsp) & Ground Nutmeg (½ tsp): The essential warm spice blend that gives carrot cake its signature soul-warming aroma. For a more complex spice profile, add a pinch of ground ginger or cloves.
  • Unsalted Butter, softened (¾ cup): Creates richness and that desirable chewy texture. You should be able to press a finger into it easily.
  • Granulated Sugar (¾ cup) & Light Brown Sugar (½ cup), packed: The white sugar promotes spread and crisp edges, while the brown sugar, with its molasses notes, adds moisture, chew, and a deep caramel flavor.
  • Large Eggs (2), room temperature: Acts as a binder and adds structure. The eggs should feel neutral, not cold, to the touch.
  • Pure Vanilla Extract (2 tsp): Use the real stuff for the best floral, aromatic backbone.
  • Freshly Grated Carrots (1 ½ cups, packed): The star ingredient! Use the fine side of a box grater for moist, evenly distributed shreds that bake perfectly. They should smell sweet and earthy.
  • Optional Mix-ins (½ cup total): Toasted chopped walnuts or pecans for crunch, or raisins for bursts of sweetness. Rolled oats (¼ cup) can also be added for extra heartiness.

For the Brown Butter Cream Cheese Frosting:

  • Unsalted Butter (4 tbsp): We’ll brown this to create a deep, nutty, toffee-like flavor that elevates the classic frosting.
  • Cream Cheese (4 oz), full-fat, softened: Provides tangy creaminess. Full-fat is essential for a stable, non-runny frosting.
  • Powdered Sugar (1 ½ – 2 cups), sifted: Sweetens and thickens. Sifting is non-negotiable for a silky-smooth texture.
  • Pure Vanilla Extract (1 tsp) & a Pinch of Salt: Balances the sweetness and rounds out the flavor profile.

Timing

Prep Time25 minutes (plus 1 hour chilling)
Cook Time12-14 minutes per batch
Total TimeAbout 1 hour 45 minutes

Compared to baking a full layered carrot cake, which can take over 2 hours from start to finish, these Carrot Cake Cookies offer the same beloved flavor profile in nearly half the total active time. The one-hour chilling period is mostly hands-off and is crucial for flavor development and perfect cookie shape. The actual baking is quick, with each tray needing just over 10 minutes in the oven.

Carrot Cake Cookies with brown butter cream cheese frosting on a rustic wooden table

Freshly baked Carrot Cake Cookies with a swirl of decadent brown butter cream cheese frosting.

Step-by-Step Instructions

Step 1: Prepare the Wet Ingredients

In the bowl of a stand mixer fitted with the paddle attachment (or using a large bowl and a hand mixer), cream together the softened butter, granulated sugar, and packed light brown sugar on medium-high speed for 3-4 minutes. Stop and scrape down the sides of the bowl once. You’re done when the mixture is light, fluffy, and pale in color. This step is vital for incorporating air, which leads to a better texture. Then, add the room-temperature eggs one at a time, beating well after each addition until fully incorporated. Beat in the 2 teaspoons of vanilla extract. The mixture should look smooth and emulsified.

Step 2: Combine Dry Ingredients

In a separate medium bowl, whisk together the all-purpose flour, baking soda, baking powder, salt, cinnamon, and nutmeg. Whisk for at least 30 seconds to ensure the leavening agents and spices are evenly distributed throughout the flour. This prevents pockets of bitter baking soda or clumpy spice in your finished cookies.

Step 3: Fold in Carrots and Mix

With the mixer on low speed, gradually add the dry ingredient mixture to the wet ingredients. Mix only until the flour disappears and no dry streaks remain—overmixing at this stage leads to tough cookies. Using a sturdy spatula, gently fold in the freshly grated carrots and any optional mix-ins (like nuts or raisins) until they are evenly distributed. The dough will be thick, soft, and speckled with orange.

Step 4: Chill and Portion Dough

Cover the bowl with plastic wrap and refrigerate the dough for at least 1 hour (up to 24 hours). Chilling is non-negotiable; it solidifies the butter, preventing the cookies from spreading too thin, and allows the flour to hydrate fully, resulting in a chewier center and more complex flavor. Preheat your oven to 350°F (175°C) and line baking sheets with parchment paper. Using a medium cookie scoop (about 1.5 tablespoons), portion the dough onto the sheets, leaving at least 2 inches between each for spreading.

Step 5: Bake to Perfection

Bake one sheet at a time in the center rack of your preheated oven for 12-14 minutes. The cookies are done when the edges are set and lightly golden, but the centers still look soft and puffy. They will firm up as they cool. Do not overbake if you want that soft, cake-like texture. Let the cookies cool on the baking sheet for 5 minutes before transferring them to a wire rack to cool completely. They must be completely cool before frosting.

Step 6: Make Brown Butter Frosting

While the cookies cool, make the frosting. In a light-colored saucepan (so you can see the color change), melt the 4 tablespoons of butter over medium heat. Continue cooking, swirling the pan occasionally, until the butter foams, turns golden brown, and releases a nutty aroma. You’ll see little brown specks at the bottom. This takes about 3-5 minutes. Immediately pour the brown butter (including the specks) into a heatproof bowl and let it cool to room temperature, but not re-solidify. In a clean mixing bowl, beat the softened cream cheese until smooth. Gradually beat in the cooled brown butter, then the sifted powdered sugar (start with 1.5 cups), 1 tsp vanilla, and a pinch of salt. Beat on medium-high until light and fluffy. Add more powdered sugar if a thicker consistency is desired.

Step 7: Frost and Serve

Once the cookies are completely cool, spread or pipe a generous dollop of the brown butter cream cheese frosting onto the flat bottom side of one cookie. You can enjoy them open-faced or sandwich another cookie on top for a decadent whoopie-pie style treat. The brown butter adds an incredible depth that makes this frosting truly special.

Nutritional Information

The following is an approximate nutritional breakdown for one frosted cookie (based on a yield of 24 cookies).

  • Calories: 220 kcal
  • Total Fat: 10g
  • Saturated Fat: 6g
  • Cholesterol: 35mg
  • Sodium: 120mg
  • Total Carbohydrates: 31g
  • Dietary Fiber: 1g
  • Sugars: 20g
  • Protein: 2g

Healthier Alternatives

You can easily adapt this recipe for dietary preferences without sacrificing flavor:

  • Flour: Substitute the all-purpose flour 1:1 with a gluten-free all-purpose blend (like Bob’s Red Mill) for a gluten-free version.
  • Sugar: Replace granulated sugar with coconut sugar and use a monk fruit-blended brown sugar to reduce refined sugars.
  • Fat: For a dairy-free cookie, use a high-quality vegan butter stick. In the frosting, use a plant-based cream cheese alternative.
  • Add-Ins: Boost fiber and nutrients by adding 2 tablespoons of ground flaxseed or chia seeds to the dry ingredients, and use toasted sunflower seeds instead of nuts for a nut-free crunch.

Serving Suggestions

These cookies are versatile! Serve them as an elegant dessert at a brunch or afternoon tea. They pair wonderfully with a hot mug of chai tea, cold glass of milk, or a scoop of vanilla bean ice cream for an ultra-indulgent treat. For a festive touch, sprinkle the frosted tops with a little extra cinnamon, finely chopped toasted pecans, or a drizzle of honey.

Common Mistakes

  • Skipping the Chill Time: This leads to flat, greasy cookies as the butter melts too quickly in the oven.
  • Overmeasuring Flour: Spoon flour into your measuring cup and level it off. Scooping directly packs in too much flour, resulting in dry, dense cookies.
  • Overmixing the Dough:

Grilled Chicken Margherita

Grilled Chicken Margherita

Introduction

Did you know that over 75% of home cooks struggle to create restaurant-quality grilled chicken that’s both juicy and bursting with flavor? If you’re looking for a dish that solves this common culinary challenge, you’ve found it. This Grilled Chicken Margherita is an Italian-inspired masterpiece that transforms simple ingredients into a vibrant, protein-packed meal. By topping perfectly grilled chicken breasts with creamy mozzarella, aromatic pesto, and a fresh tomato-basil garnish, this recipe delivers a symphony of textures and tastes that rivals any trattoria. It’s the perfect answer for a quick weeknight dinner that feels special or an impressive centerpiece for weekend guests. Let’s dive into how you can master this classic combination with ease.

Ingredients List

Gather these fresh, high-quality ingredients for the best flavor. Sensory notes are included to help you select the perfect components.

  • For the Chicken:
    • 4 boneless, skinless chicken breasts (about 6 oz each): Look for plump, pinkish flesh with a firm texture. Substitution: Chicken thighs for a richer, more forgiving cut.
    • 3 tablespoons extra virgin olive oil: Use a fruity, golden-green oil for its peppery finish.
    • 2 cloves garlic, minced: Fresh is best, releasing a pungent, aromatic punch.
    • 1 teaspoon dried oregano: Crush between your fingers to awaken its earthy, slightly bitter aroma.
    • 1 teaspoon kosher salt
    • ½ teaspoon freshly cracked black pepper
  • For the Toppings:
    • 8 oz fresh mozzarella cheese: Seek out the soft, milky balls (mozzarella di bufala is sublime) stored in water. Substitution: Low-moisture mozzarella slices for easier melting, or burrata for ultimate creaminess.
    • ½ cup homemade or high-quality store-bought basil pesto: It should be vibrantly green with a glossy sheen, smelling intensely of basil and pine nuts.
    • 2 large ripe tomatoes: Choose vine-ripened or heirloom varieties that are heavy for their size and yield slightly to gentle pressure, promising sweet, juicy flesh.
    • ¼ cup fresh basil leaves: Look for bright green, unblemished leaves with a potent, sweet licorice-like fragrance.
    • 1 tablespoon balsamic glaze (optional, for drizzle): A thick, syrupy reduction that adds a sweet-tart complexity.

Timing

Prep Time
15 minutes
Cook Time
12-15 minutes
Total Time
30 minutes

This Grilled Chicken Margherita clocks in at a swift 30 minutes from start to finish. Compared to the average grilled chicken recipe which often requires longer marinating (45+ minutes), this version uses a quick, flavor-packed rub that penetrates the meat in the time it takes to preheat your grill. The efficient assembly of fresh toppings while the chicken cooks is what makes this recipe a true weeknight champion without sacrificing any gourmet appeal.

Grilled Chicken Margherita plated with fresh basil and tomatoes

Juicy grilled chicken topped with melted mozzarella, vibrant pesto, and a fresh tomato-basil garnish.

Step-by-Step Instructions

Step 1: Prepare the Chicken

Place the chicken breasts on a sturdy cutting board. If they are uneven in thickness, use the palm of your hand to gently press down on the thicker end, or carefully butterfly them by slicing horizontally through the center, leaving one edge intact, and opening like a book. This ensures even cooking. In a small bowl, combine the olive oil, minced garlic, oregano, salt, and pepper. Use a pastry brush or your hands to generously coat each chicken breast on both sides with this fragrant mixture. Let them rest at room temperature for 10 minutes as you preheat your grill or grill pan to medium-high heat. This brief rest allows the flavors to begin melding with the meat.

Step 2: Make the Pesto and Garnish

While the chicken rests, prepare your toppings. Slice the fresh mozzarella into ¼-inch thick slices. If using a large ball, you’ll need about two slices per chicken breast. Slice the tomatoes into similarly thick rounds. Take your fresh basil leaves and stack them, then roll them tightly into a cigar shape. Using a sharp knife, thinly slice across the roll to create beautiful basil ribbons (chiffonade). Set these components aside on a plate. Have your pesto ready in a small bowl with a spoon. This mise en place is crucial for a smooth, stress-free assembly later.

Step 3: Grill to Perfection

Ensure your grill grates are clean and lightly oiled to prevent sticking. Place the seasoned chicken breasts on the hot grill. You should hear a satisfying sizzle. Cook, undisturbed, for 5-7 minutes on the first side, until you see prominent grill marks and the chicken releases easily from the grates. Flip the chicken using tongs. Immediately top each breast with the slices of mozzarella cheese. Close the grill lid (or cover your grill pan with a lid or foil tent) and cook for an additional 5-7 minutes. The chicken is done when it reaches an internal temperature of 165°F (74°C) on an instant-read thermometer, and the cheese is gloriously melted and bubbly.

Step 4: Assemble the Margherita Masterpiece

Transfer the grilled chicken breasts with their melted mozzarella to a serving platter or individual plates. Working quickly while the chicken is hot, spoon a generous tablespoon of pesto over the center of each piece, allowing it to slightly melt into the cheese. Artfully arrange one or two slices of fresh tomato on top. Scatter the fresh basil ribbons over everything. For a final touch of elegance, drizzle a little balsamic glaze in a zigzag pattern over the plate. Serve immediately, capturing the perfect moment where the warm, savory chicken meets the cool, fresh toppings.

Nutritional Information

The following estimates are for one serving (one topped chicken breast), based on the ingredients listed.

  • Calories: ~450 kcal
  • Protein: 42g
  • Carbohydrates: 6g
  • Dietary Fiber: 1g
  • Sugars: 3g
  • Fat: 28g (Saturated Fat: 9g)
  • Sodium: ~750mg

Healthier Alternatives

This recipe is already a healthy choice, but you can tailor it to specific dietary goals with these flavorful swaps:

  • Lower Fat: Use part-skim mozzarella and a lighter pesto made with half the oil and added spinach or kale for bulk.
  • Dairy-Free: Substitute the mozzarella with a high-quality vegan mozzarella alternative that melts well, and use a dairy-free pesto (often made with nutritional yeast instead of Parmesan).
  • Lower Sodium: Reduce or omit the added salt in the chicken rub and use a low-sodium pesto. The natural flavors from the garlic, herbs, and fresh tomatoes will still shine.
  • Extra Lean: Use chicken breast tenderloins and swap the pesto for a fresh tomato salsa or a simple drizzle of high-quality aged balsamic vinegar.

Serving Suggestions

This versatile chicken is a complete meal on its own but can be elevated with the right sides:

  • Classic Italian: Serve alongside a bed of garlic sautéed spinach or a simple arugula salad with lemon vinaigrette. A slice of crusty, grilled ciabatta bread is perfect for soaking up any juices and pesto.
  • Light & Fresh: Pair with a cold pasta salad filled with roasted vegetables, or a quinoa salad with chopped herbs, lemon, and feta.
  • Comfort Food Twist: For a heartier meal, serve over a creamy polenta or a small portion of roasted potato wedges seasoned with rosemary.

Common Mistakes

  • Overcooking the Chicken: The #1 mistake. Rely on a meat thermometer. Remove chicken at 160°F (71°C); carryover cooking will bring it to 165°F (74°C). Overcooked chicken becomes dry and tough.
  • Using Cold Toppings: Adding cold cheese and pesto straight from the fridge can cool the chicken down too quickly. Let cheese and pesto sit out for 10-15 minutes before assembling.
  • Skipping the Rest for Chicken: Not letting the seasoned chicken rest at room temperature before grilling leads to uneven cooking and less flavor absorption.
  • Weak Grill Heat: A grill that isn’t hot enough won’t create proper sear marks or lock in juices. Wait until it’s properly preheated.

Storing Tips

  • Refrigeration: Store leftover assembled chicken in an airtight container for up to 3 days. Note that the fresh tomato and basil will soften. For best results, store components separately: chicken with cheese in one container, sliced tomatoes and basil in another, and pesto in its own jar.
  • Reheating: Reheat plain chicken (without fresh toppings) gently in a covered skillet over low heat with a splash of water or broth to prevent drying out, or in the microwave at 50% power. Add fresh pesto, tomato, and basil after reheating.
  • Freezing: Freeze un-topped, grilled chicken breasts in a single layer on a baking sheet before transferring to a freezer bag for up to 3 months. Thaw in the refrigerator overnight and reheat as above, adding fresh toppings.

Conclusion

This Grilled Chicken Margherita is more than just a recipe; it’s a reliable technique for creating a stunning, flavorful, and healthy meal in just 30 minutes. By mastering the simple steps of proper seasoning, confident grilling, and fresh assembly, you bring the essence of an Italian summer to your table any night of the week. The combination of juicy chicken, melted cheese, herbaceous pesto, and bright tomato-basil garnish is a timeless crowd-pleaser that never fails to impress.

Honey Sriracha Chicken

Honey Sriracha Chicken

Introduction

Did you know that over 60% of home cooks crave restaurant-style Asian takeout but are deterred by high sodium and hidden sugars? If you’re looking for a way to satisfy that sweet and spicy craving with a healthier, homemade touch, you’ve landed on the perfect recipe. This Honey Sriracha Chicken is your answer—a vibrant, sticky, and explosively flavorful dish that transforms simple pantry staples into a weeknight superstar. Forget waiting for delivery; this quick homemade version of a takeout favorite delivers that perfect balance of fiery sriracha and floral, sweet honey in under 30 minutes. Let’s dive into how you can create a better-than-takeout experience right in your own kitchen.

Ingredients List

Gathering high-quality ingredients is the first step to flavor success. Here’s what you’ll need for this sweet and spicy chicken masterpiece:

  • For the Chicken:
    • 1.5 lbs (680g) boneless, skinless chicken breasts or thighs, cut into 1-inch cubes. (Thighs are more forgiving and yield a juicier, more succulent bite due to their higher fat content.)
    • 2 tablespoons cornstarch – This creates the essential crispy, golden exterior that soaks up the sauce beautifully.
    • 1 tablespoon neutral oil (like avocado or vegetable oil) for high-heat cooking.
    • Salt and black pepper to season.
  • For the Honey Sriracha Sauce:
    • 1/3 cup honey – Look for raw, local honey for a more complex sweetness. (Substitution: Pure maple syrup or agave nectar for a vegan version.)
    • 1/4 cup sriracha sauce – The star of the show! Adjust to your heat preference.
    • 3 tablespoons low-sodium soy sauce – Provides the essential umami, salty depth. (Substitution: Tamari for gluten-free, or coconut aminos for a soy-free option.)
    • 2 cloves garlic, minced – Fresh is best for that pungent, aromatic kick.
    • 1 tablespoon rice vinegar – Adds a crucial bright, tangy note to cut through the richness. (Substitution: Apple cider vinegar or fresh lime juice.)
    • 1 teaspoon freshly grated ginger – For a warm, zesty undertone.
    • 1 tablespoon water – To adjust consistency.
    • 1 teaspoon sesame oil (toasted) – Do not skip! This is the flavor finisher that adds a nutty, authentic aroma.
  • For Garnish:
    • Sliced green onions
    • Toasted sesame seeds
    • Fresh cilantro leaves (optional)

Timing

Prep Time10 minutes
Cook Time15 minutes
Total Time25 minutes

At just 25 minutes from fridge to table, this Honey Sriracha Chicken is significantly faster than the average takeout order (which typically takes 45-60 minutes for delivery) and beats most comparable stir-fry recipes that can take 40+ minutes with marinating time. The secret is in the quick-cook method and the instant sauce that comes together in the same pan.

Honey Sriracha Chicken served in a bowl with green onions and sesame seeds

A glossy, sticky, and perfectly caramelized Honey Sriracha Chicken, ready in under 30 minutes.

Step-by-Step Instructions

Step 1: Prepare the Chicken

Pat your cubed chicken completely dry with paper towels—this is non-negotiable for achieving a good sear. Place the chicken in a medium bowl and toss it evenly with the cornstarch, a generous pinch of salt, and a few cracks of black pepper. The cornstarch will cling to the chicken, creating a delicate crust that browns beautifully and helps thicken the sauce later. Let it sit for 5 minutes while you prep your sauce ingredients.

Step 2: Make the Honey Sriracha Sauce

In a separate small bowl or measuring jug, whisk together the honey, sriracha, soy sauce, minced garlic, rice vinegar, and grated ginger until completely smooth and emulsified. Take a moment to taste the sauce and adjust the heat or sweetness to your liking. Remember, the flavor will concentrate slightly as it cooks. Set this vibrant orange-red sauce aside.

Step 3: Cook the Chicken

Heat the neutral oil in a large skillet or wok over medium-high heat until it shimmers. Add the coated chicken in a single layer, working in batches if necessary to avoid overcrowding. Overcrowding steams the chicken instead of searing it. Let the chicken cook undisturbed for 2-3 minutes per side until it develops a golden-brown, crispy exterior. The chicken doesn’t need to be fully cooked through at this stage. Remove the chicken to a clean plate.

Step 4: Combine and Simmer

Reduce the heat to medium. Pour the prepared honey sriracha sauce into the now-empty skillet. It will sizzle and bubble delightfully. Let it simmer for about 1-2 minutes, stirring occasionally, to allow the garlic and ginger to cook and the flavors to meld. Return the seared chicken and any accumulated juices back to the skillet. Toss everything together until every piece of chicken is gloriously coated in the glossy sauce. Let it simmer together for another 3-4 minutes, or until the sauce has thickened to a sticky, lacquered consistency and the chicken is cooked through.

Step 5: Garnish and Serve

Remove the skillet from the heat. Drizzle the toasted sesame oil over the top and give it one final toss. The sesame oil isn’t for cooking; it’s a finishing oil that adds an incredible layer of nutty fragrance. Transfer your Honey Sriracha Chicken to a serving platter and immediately garnish with a generous sprinkle of sliced green onions and toasted sesame seeds. For a fresh pop, add some cilantro leaves. Serve hot!

Nutritional Information

The following nutritional estimate is for one serving (based on 4 servings total), calculated using standard ingredients. Values may vary based on specific brands and modifications.

  • Calories: ~320 kcal
  • Protein: 35g
  • Carbohydrates: 28g
    • Sugars: 23g (primarily from honey)
  • Fat: 8g
    • Saturated Fat: 1.5g
  • Sodium: ~900mg (can be reduced with low-sodium soy sauce)
  • Fiber: 0.5g

Healthier Alternatives

Love the flavor but want to lighten it up? These simple swaps maintain the spirit of the dish while boosting its nutritional profile:

  • Swap the Honey: Use pure monk fruit sweetener mixed with a tablespoon of water, or sugar-free maple syrup, to drastically reduce the sugar content without sacrificing sweetness.
  • Boost the Protein & Reduce Carbs: Use chicken breast and increase the portion slightly. You can also reduce the honey by half and add a splash of chicken broth to the sauce for volume.
  • Cut the Sodium: Opt for reduced-sodium soy sauce or coconut aminos, which are naturally lower in sodium. You can also increase the garlic and ginger to boost flavor without salt.
  • Air Fryer Method: For an oil-free version, toss the cornstarch-coated chicken in an air fryer at 400°F (200°C) for 10-12 minutes until crispy. Then, toss it in the sauce you’ve simmered separately in a saucepan.

Serving Suggestions

This versatile chicken is the centerpiece of countless delicious meals:

  • The Classic: Serve over a bed of fluffy white or brown jasmine rice to soak up every drop of the incredible sauce.
  • Low-Carb Bowl: Pile it on a base of cauliflower rice alongside steamed broccoli, snap peas, and shredded carrots for a veggie-packed meal.
  • In a Wrap: Spoon it into large lettuce leaves (like butter or romaine) or whole-wheat tortillas with extra veggies for a quick lunch wrap.
  • Noodle Heaven: Toss it with cooked lo mein noodles, udon, or zucchini noodles for a heartier dish.
  • Appetizer Idea: Skewer the cooked chicken pieces on toothpicks for a crowd-pleasing party snack.

Common Mistakes

  • Not Drying the Chicken: Moist chicken steams instead of sears, leading to a rubbery texture and no crispy coating.
  • Overcrowding the Pan: This drops the pan temperature and causes the chicken to release liquid, resulting in boiled, pale chicken. Cook in batches if needed.
  • Adding Sesame Oil Too Early: Toasted sesame oil has a low smoke point and burns easily, turning bitter. Always add it off the heat at the end as a finishing oil.
  • Overcooking the Sauce: If you simmer the sauce alone for too long before adding the chicken, the honey can burn and become bitter. A brief 1-2 minute simmer is sufficient.
  • Using Bottled Minced Garlic/Ginger: While convenient, the flavor is significantly less vibrant and potent than fresh. For the best Honey Sriracha Chicken, take the extra minute to grate and mince fresh.

Storing Tips

  • Refrigeration: Allow the dish to cool completely before transferring to an airtight container. It will keep in the refrigerator for 3-4 days.
  • Freezing: This dish freezes quite well! Portion it into freezer-safe bags or containers, leaving a little space for expansion. It can be frozen for up to 2 months. Thaw overnight in the refrigerator.
  • Rehe

Raspberry Sorbet

Raspberry Sorbet

Introduction

Did you know that a single cup of raspberries provides over 50% of your daily vitamin C needs? This powerful antioxidant is just one reason why making a light and refreshing raspberry sorbet is not only a treat for your taste buds but a boost for your wellness. When summer’s heat is relentless, there’s nothing quite as satisfying as a scoop of homemade sorbet. This recipe transforms plump, fresh berries into a vibrant, dairy-free dessert that’s bursting with pure, unadulterated fruit flavor. Forget the overly sweet, artificially colored versions from the store. Our raspberry sorbet is a celebration of simplicity, requiring just a handful of ingredients to create a dessert that’s both elegant and incredibly easy to make. Let’s dive into how you can create this perfect summer finale in your own kitchen.

Ingredients List

The magic of this sorbet lies in the quality of its few components. Here’s what you’ll need for about 1 quart of sorbet:

  • Fresh Raspberries (4 cups / 500g): The star of the show. Look for berries that are deeply colored, plump, and fragrant. Their natural tartness and floral notes are the soul of the sorbet. Substitution: Frozen raspberries work perfectly year-round and are often more economical. No need to thaw completely; just let them sit out for 10-15 minutes before using.
  • Granulated Sugar (1 cup / 200g): Essential for sweetness and texture. Sugar lowers the freezing point, preventing the sorbet from becoming a solid block of ice and giving it that signature scoopable, slightly creamy texture. Substitution: For a deeper flavor, use half white and half light brown sugar. For a liquid sweetener, agave nectar or light honey can be used, but reduce by 2 tablespoons as they are sweeter.
  • Water (1 cup / 240ml): Used to create a simple syrup that evenly distributes sweetness.
  • Fresh Lemon Juice (2 tablespoons): The secret weapon! A splash of bright acidity from fresh lemon juice heightens the raspberry flavor, balances the sweetness, and adds a layer of complexity that makes the sorbet taste more “berry-forward.” Do not skip this.
  • Optional: A pinch of salt and 1 tablespoon of vodka or liqueur: Salt enhances all flavors. A tablespoon of vodka (which doesn’t freeze) or a berry liqueur like Chambord can improve texture, making the final product even softer and easier to scoop.

Timing

Prep Time
15 minutes
Cook Time
10 minutes (for syrup)
Chill/Freeze Time
4 hours minimum
Total Time
4 hours 25 minutes (mostly hands-off)

Compared to many frozen desserts that require lengthy custard-making or multiple churning cycles, this raspberry sorbet is remarkably efficient. The active prep time is under 30 minutes. The majority of the time is hands-off freezing, which is about 25% faster than traditional ice cream recipes that need a custard base to cool completely before churning.

Vibrant pink raspberry sorbet in a glass dish, garnished with fresh mint and whole raspberries

This vibrant, homemade raspberry sorbet is the essence of summer in a scoop.

Step-by-Step Instructions

Step 1: Prepare the Raspberries

Give your fresh raspberries a gentle rinse under cool water in a colander and pat them completely dry with paper towels. If you’re using frozen berries, place them in a bowl and let them thaw just enough to be breakable, about 10-15 minutes. This step is crucial—excess water from washing or thawing can dilute the flavor and affect the freezing texture. Place the berries in your blender or food processor pitcher.

Step 2: Create the Simple Syrup

In a small saucepan, combine the granulated sugar and water. Heat over medium heat, stirring occasionally, just until the sugar has completely dissolved. This should take about 3-5 minutes; you don’t need to bring it to a rolling boil. The mixture will turn clear. Immediately remove it from the heat and let it cool for 5 minutes. This simple syrup ensures the sugar is fully integrated and won’t create a grainy texture in your final sorbet.

Step 3: Blend and Strain

Carefully pour the warm (not hot) simple syrup over the raspberries in the blender. Add the fresh lemon juice and the optional pinch of salt. Secure the lid and blend on high until the mixture is completely smooth and liquid, about 1-2 minutes. Now, for an ultra-smooth, seed-free texture, press this puree through a fine-mesh sieve into a large bowl. Use a rubber spatula to press and scrape all the beautiful, vibrant pulp through, leaving the seeds behind. This step is what gives professional-quality sorbet its velvety mouthfeel.

Step 4: Chill the Mixture

Cover the bowl of strained raspberry puree with plastic wrap, pressing the wrap directly onto the surface of the liquid. This prevents a skin from forming. Refrigerate for at least 2 hours, or until it’s thoroughly chilled. Chilling the base is non-negotiable—it ensures faster, more even freezing in your ice cream maker and results in a finer texture.

Step 5: Churn and Freeze

Pour the chilled sorbet base into the bowl of your ice cream maker. Churn according to the manufacturer’s instructions, usually about 20-25 minutes. You’ll know it’s ready when it has thickened to the consistency of soft-serve ice cream. If using, add the tablespoon of vodka or liqueur during the last minute of churning. Transfer the churned sorbet to a freezer-safe container with a tight-fitting lid. Smooth the top, press a piece of parchment paper directly on the surface, and seal the lid. Freeze for at least 2 hours to firm up before serving.

Step 6: Scoop and Serve

For the perfect scoop, let the sorbet sit at room temperature for 5-7 minutes before serving. This slight softening allows the full flavor and aroma to blossom and makes scooping a breeze. Use a warmed ice cream scoop for beautiful, round servings.

Nutritional Information

(Per ½ cup serving, estimated)

  • Calories: ~120 kcal
  • Total Fat: 0.5g
  • Saturated Fat: 0g
  • Cholesterol: 0mg
  • Sodium: 5mg
  • Total Carbohydrates: 30g
  • Dietary Fiber: 4g
  • Sugars: 25g
  • Protein: 1g
  • Vitamin C: 40% of the Daily Value (DV)
  • Manganese: 30% of the DV

Healthier Alternatives

You can easily tailor this sorbet to fit various dietary preferences without sacrificing flavor:

  • Reduce Sugar: Cut the granulated sugar to ¾ cup and add 1-2 pitted Medjool dates to the blender. The dates add natural sweetness and fiber.
  • Sugar-Free Option: Use a monk fruit-erythritol blend (1:1 sugar substitute) in the simple syrup. Be aware that some sugar substitutes can cause a slightly harder freeze, so the optional alcohol becomes more important for texture.
  • Boost Nutrition: Add a handful of fresh spinach (you won’t taste it!) or a tablespoon of chia seeds to the blender for an extra nutrient punch. The chia seeds will also help absorb excess liquid and improve texture.
  • Lower Glycemic Index: Replace half the water with chilled brewed hibiscus tea in the simple syrup. It adds a tangy, floral note and antioxidants, while complementing the berry flavor beautifully.

Serving Suggestions

  • Classic Elegance: Serve in chilled coupe glasses with a sprig of fresh mint and a few whole raspberries.
  • Adult Affogato: Pour a shot of hot espresso or a splash of Prosecco over a scoop for a stunning dessert.
  • Berry Trio: Create a “berry patch” sundae with a scoop of raspberry sorbet alongside blueberry and strawberry sorbets.
  • Palate Cleanser: Serve a small scoop between courses of a rich meal to refresh the taste buds.
  • Fruity Float: Drop a scoop or two into a glass of sparkling water or lemonade for a fun, fizzy treat.

Common Mistakes

  • Skipping the Sieve: Not straining the seeds results in a gritty texture that detracts from the luxurious feel of a good sorbet.
  • Using Hot Syrup: Pouring boiling hot syrup onto the berries can “cook” them slightly, dulling their bright, fresh flavor and vibrant color. Let it cool for 5 minutes first.
  • Insufficient Chilling: Churning a warm base leads to icy crystals and longer churn times. Patience during the chilling phase is key.
  • Overlooking Acidity: Forgetting the lemon juice makes the sorbet taste flat and one-dimensionally sweet. The acid is a flavor catalyst.
  • Freezing Without a Cover: Storing sorbet in the freezer without pressing parchment paper directly on the surface leads to freezer burn and ice crystals forming on top.

Storing Tips

  • Store in an airtight, freezer-safe container with parchment paper pressed on the surface for up to 2 weeks for optimal flavor and texture.
  • For longer storage (up to 1 month), place the entire container inside a heavy-duty freezer bag, squeezing out all the air before sealing.
  • If the sorbet freezes rock-solid, let it thaw in the refrigerator for 30-45 minutes, then break it into chunks and re-blend briefly in a food processor to restore a creamy texture before re-freezing or serving.
  • Label your container with the date so you remember when you made this delightful treat.