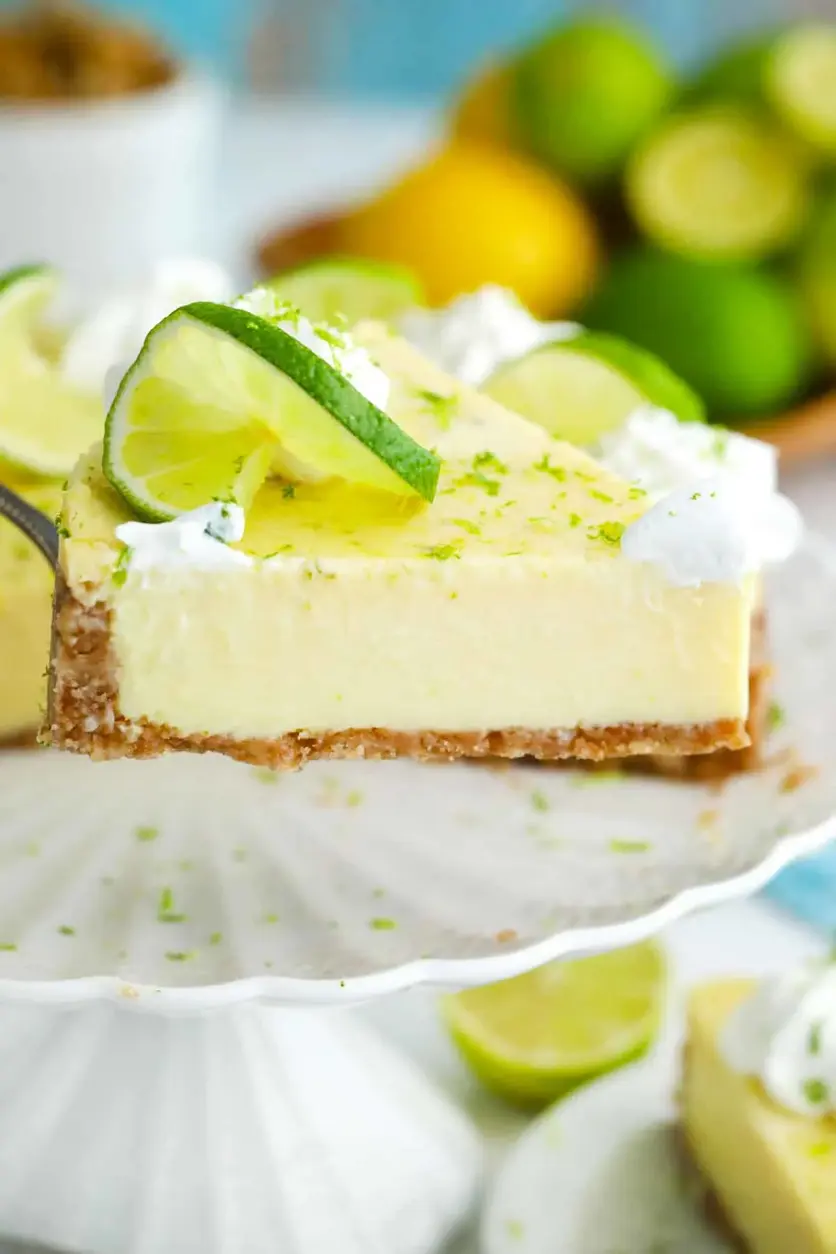
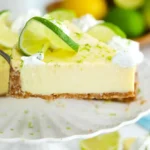
Cheesy Baked Potatoes with Broccoli Cheese Sauce 🥦 – So Creamy & Delicious!

“`html

Cheesy Baked Potatoes with Broccoli Cheese Sauce 🥦 – So Creamy & Delicious!

Welcome to Our Delicious Kitchen Corner!

Are you constantly searching for that perfect, comforting dish that’s both incredibly satisfying and relatively simple to whip up? One that can serve as a hearty lunch, a delightful dinner, or an irresistible side? You’re not alone! Millions of home cooks are on the hunt for recipes that hit all the right notes. Today, we’re diving headfirst into the world of Cheesy Baked Potatoes with Broccoli Cheese Sauce. This dish is a beautiful symphony of textures and flavors: the satisfying crisp of a perfectly baked potato cradling a lusciously creamy, utterly decadent broccoli cheese sauce. It’s a guaranteed winner for cheese aficionados and a fantastic way to sneak those much-loved greens onto plates, even for the pickiest eaters. Get ready to bookmark this one – it’s destined to become a staple in your culinary repertoire. Let’s get cooking!

The Star Ingredients

The magic of this dish lies in its simplicity and the quality of its components. Here’s what you’ll need:

  • Large Russet Potatoes (4-6): The foundation of our dish. Choose firm, blemish-free potatoes that are uniform in size for even baking. Their starchy interior crisps up beautifully on the outside.
  • Fresh Broccoli Florets (2 cups, packed): The vibrant green star of our sauce. Ensure they are fresh, crisp, and bright green. You can also use frozen broccoli florets, thawed and drained, in a pinch.
  • Unsalted Butter (4 tablespoons): The rich base for our roux. High-quality butter will lend a superior flavor.
  • All-Purpose Flour (4 tablespoons): The thickening agent for our creamy sauce. Provides a smooth, velvety texture.
  • Milk (2 cups): Whole milk is recommended for the creamiest texture. You can substitute with 2% milk, but avoid skim milk for optimal richness.
  • Shredded Cheddar Cheese (2 cups, sharp or medium): The heart and soul of the cheese sauce. Freshly shredded cheese melts better and tastes superior to pre-shredded varieties which often contain anti-caking agents. A sharp cheddar provides a bolder flavor, while a medium cheddar offers a smoother, milder taste.
  • Salt (1 teaspoon, or to taste): Essential for bringing out all the flavors.
  • Black Pepper (1/2 teaspoon, or to taste): Freshly ground black pepper adds a subtle warmth and spice.
  • Optional: Pinch of Nutmeg: Enhances the creamy, cheesy flavor beautifully.
  • Optional: Pinch of Garlic Powder/Onion Powder: For an extra layer of savory depth.

Perfecting the Timing

Prep time: 15 minutes
Cook time: 60-75 minutes
Total time: 75-90 minutes

Compared to many complex casseroles, this Cheesy Baked Potato with Broccoli Cheese Sauce recipe is quite efficient. While the potatoes bake, you can prepare the sauce, making it a manageable weeknight meal. The total time of 75-90 minutes is generally in line with or slightly longer than average similar baked potato dishes, primarily due to the initial baking of the potatoes to achieve that perfect crispy skin.

Cheesy Baked Potatoes with Broccoli Cheese Sauce 🥦 – So Creamy & Delicious!

Let’s Get Cooking: Step-by-Step

Step 1: Prep & Bake the Potatoes

First things first, let’s get those potatoes ready for their golden-brown transformation. Preheat your oven to 400°F (200°C). Scrub the potatoes thoroughly under cool running water to remove any dirt. Pat them completely dry with a paper towel. This is crucial for crispy skin; moisture is the enemy of crispiness! Pierce each potato several times with a fork. This allows steam to escape during baking, preventing them from bursting. Rub each potato all over with a little olive oil or melted butter and sprinkle generously with salt. Place the prepared potatoes directly on the oven rack or on a baking sheet. Bake for 60-75 minutes, or until the skins are crisp and the insides are tender when pierced easily with a knife or fork. The time will vary depending on the size of your potatoes.

Step 2: Craft the Broccoli Cheese Sauce

While the potatoes are baking, let’s whip up that glorious broccoli cheese sauce. You have two options for the broccoli: steam it until tender-crisp (about 5-7 minutes) then finely chop it, or if you prefer a smoother sauce with smaller broccoli pieces, you can lightly boil it until tender, then carefully pulse it a few times in a food processor. Set aside. In a medium saucepan, melt the butter over medium heat. Whisk in the flour and cook for about 1-2 minutes, whisking constantly, until it forms a smooth paste (this is your roux). Don’t let it brown too much. Gradually whisk in the milk, a little at a time, ensuring there are no lumps. Continue to cook and whisk until the sauce thickens to a creamy consistency, about 5-7 minutes. Season with salt, pepper, and a pinch of nutmeg or garlic/onion powder if using. Remove the saucepan from the heat. Stir in the shredded cheddar cheese, a handful at a time, stirring until each addition is melted and incorporated before adding the next. Once all the cheese is melted and the sauce is smooth and luscious, gently stir in your prepared broccoli florets. Taste and adjust seasoning if needed. The sauce should be rich, creamy, and wonderfully cheesy!

Step 3: Combine and Bake to Perfection

Once the potatoes are perfectly baked and tender, carefully remove them from the oven. Let them cool slightly so you can handle them. Slice each potato in half lengthwise, or cut a deep pocket into the top of each potato. You can gently fluff the insides with a fork to create more space. Spoon generous amounts of the warm broccoli cheese sauce over the cut potatoes, allowing it to spill into the crevices. If you like extra cheese, sprinkle a little more shredded cheddar on top of the sauce. Return the loaded potatoes to the oven (still at 400°F/200°C) for another 5-10 minutes, or until the cheese is melted and bubbly, and the sauce is heated through. For an extra crispy topping, you can even broil them for the last 1-2 minutes, watching carefully to prevent burning!

Nutritional Spotlight

While exact nutritional values can vary based on ingredient brands and portion sizes, a typical serving of Cheesy Baked Potatoes with Broccoli Cheese Sauce is a good source of carbohydrates, protein, and calcium. It’s also a way to incorporate vegetables into your meal.

  • Calories: Approx. 400-600 per serving (highly variable)
  • Protein: Good source from cheese and milk
  • Carbohydrates: Primarily from the potatoes
  • Fat: From butter, milk, and cheese
  • Fiber: Present in the potatoes and broccoli (skin on potatoes is best for fiber)

Healthier Twists

Looking for ways to lighten up this creamy delight without sacrificing flavor? Try these swaps:

  • Lighter Milk: Use 2% milk instead of whole milk.
  • Reduced-Fat Cheese: Opt for reduced-fat cheddar, though the texture might be slightly less creamy.
  • Whole Wheat Flour: Use whole wheat flour in the roux for added fiber.
  • Greek Yogurt: For an extra creamy tang and protein boost, stir in a dollop of plain Greek yogurt into the finished sauce (off the heat).
  • Cauliflower Mash: For an even lower-carb, veggie-packed sauce, steam and blend cauliflower into the cheese sauce base.

Serving Suggestions

These loaded baked potatoes are hearty enough to be a main course! They pair wonderfully with:

  • A crisp green salad with a light vinaigrette.
  • Grilled chicken or fish for a complete meal.
  • As a side dish to steak or roasted meats.
  • A dollop of sour cream or Greek yogurt and a sprinkle of chives or parsley for freshness.

Common Pitfalls to Avoid

To ensure your Cheesy Baked Potatoes with Broccoli Cheese Sauce turn out perfectly every time:

  • Undercooking Potatoes: Make sure potatoes are fully tender before loading.
  • Lumpy Sauce: Whisk the flour and milk gradually to prevent lumps.
  • Overheating Cheese Sauce: Cook the roux and thicken the milk over medium heat. Once cheese is added, keep it warm but avoid boiling, which can make the sauce oily or grainy.
  • Not Drying Potatoes: For crispy skins, ensure potatoes are dry before oiling and salting.

Storing Your Delicious Creation

Leftovers can be stored in an airtight container in the refrigerator for up to 2-3 days. Reheat gently in the oven or microwave until heated through. Note that the baked potato skin may lose some crispness upon reheating.

A Crowd-Pleasing Classic

Cheesy Baked Potatoes with Broccoli Cheese Sauce is more than just a meal; it’s an experience. It’s the ultimate comfort food that brings warmth and smiles to any table. Easy enough for a weeknight, yet special enough for company, this recipe is a keeper. Give it a try, and let us know how much you love it in the comments below!

Frequently Asked Questions

***Does the broccoli need to be cooked before adding to the sauce?***

Yes, it’s best to either steam or lightly boil the broccoli until tender-crisp before incorporating it into the cheese sauce. This ensures it’s cooked through and its flavor is well-integrated without becoming mushy.

***Can I use different types of potatoes?***

Russet potatoes are ideal for their starchy texture that crisps up well. While other potatoes like Yukon Gold can work, they might result in a softer skin and a different texture.

***My cheese sauce is too thick, what should I do?***

You can thin out a thick cheese sauce by whisking in a little more milk, a tablespoon at a time, until you reach your desired consistency. Ensure the sauce is warm when you do this.

***Can I make this recipe ahead of time?***

You can prepare the broccoli cheese sauce a day in advance and store it in the refrigerator. Reheat it gently before spooning over freshly baked potatoes. The potatoes themselves are best baked fresh for optimal crispiness.

Print
clock clock iconcutlery cutlery iconflag flag iconfolder folder iconinstagram instagram iconpinterest pinterest iconfacebook facebook iconprint print iconsquares squares iconheart heart iconheart solid heart solid icon

Cheesy Baked Potatoes with Broccoli Cheese Sauce | Easy Recipe

  • Author: Chef Mia

Description

Welcome to our delicious kitchen corner! Today, we’re diving into the world ofCheesy Baked Potatoes with Broccoli Cheese Sauce. This comforting dish combines crispy baked potatoes with a creamy, cheesy broccoli sauce that’s perfect for lunch, dinner, or even a side dish. Whether you’re a cheese lover or simply looking to add more veggies to your plate, this recipe will become a favorite! Let’s get cooking!


Ingredients

  • Optional Substitutions:

Instructions

  1. Preheat your oven to 425℉.
  2. Wash and scrub the potatoes, then pierce them with a fork in several spots.
  3. Brush the potatoes with olive oil and sprinkle with salt.
  4. Place them on a baking sheet and bake for 50-60 minutes until fork-tender.
  5. While the potatoes are baking, melt the butter in a saucepan over medium heat.
  6. Add the flour, whisking constantly until the mixture turns golden.
  7. Slowly pour in the milk, whisking continuously to avoid lumps.
  8. Add cayenne pepper, garlic powder, and salt, cooking until the sauce thickens.
  9. Gradually add the grated cheddar, stirring until the cheese melts into a smooth sauce.
  10. Fold in the finely chopped broccoli and cook for another 2-3 minutes. Remove from heat.
  11. Once the potatoes are done, let them cool for a few minutes.
  12. Slice them lengthwise and fluff the insides with a fork.
  13. Pour the warm broccoli cheese sauce over the potatoes.
  14. Garnish with black pepper, chives, or scallions. Serve immediately and enjoy!

Notes

Tip #1: Always use freshly grated cheese for the best melting results. Pre-packaged shredded cheese contains additives that prevent smooth melting.
Tip #2: If you want a spicier sauce, increase the cayenne pepper or add a dash of hot sauce.
Tip #3: You can prepare the cheese sauce in advance and store it in the fridge for up to two days. Simply reheat before serving.

“`

Delicious Turkey Bacon Cheese Baked Spaghetti Recipe You Must Try

“`html

Delicious Turkey Bacon Cheese Baked Spaghetti Recipe You Must Try

Craving Ultimate Comfort Food? This Creamy Turkey Bacon Baked Spaghetti is Your Answer!

Are you searching for that perfect, soul-warming dish that’s both incredibly delicious and surprisingly easy to make? In a world flooded with quick dinners, finding a recipe that hits all the right notes – creamy, cheesy, savory, and utterly satisfying – can feel like a quest. Well, your quest ends here! This creamy, cheesy baked spaghetti is loaded with savory turkey bacon, chive cream cheese, and melty mozzarella for the ultimate comfort food dish that your whole family will adore. Forget bland pasta bakes; this recipe elevates baked spaghetti to a whole new level of deliciousness, making it perfect for a cozy family dinner or a crowd-pleasing potluck.

Ingredients for Turkey Bacon Cheese Baked Spaghetti

This recipe relies on a harmonious blend of textures and flavors to create a truly memorable dish. The star ingredients come together to create a symphony of comfort:

  • 1 pound spaghetti: The classic backbone of any spaghetti dish. Look for good quality pasta that holds its shape well during baking. Whole wheat spaghetti is a great healthier alternative.
  • 1 pound ground turkey bacon: Adds a smoky, salty crispness without the grease of pork bacon. Choose a good quality ground turkey bacon for the best flavor. If you can’t find ground, you can finely chop regular turkey bacon.
  • 1 small yellow onion, finely chopped: Provides a subtle sweetness and aromatic depth. Shallots can be used for a milder flavor.
  • 2 cloves garlic, minced: Essential for that savory aroma and taste. Fresh garlic is always best for its pungent kick.
  • 1 (8-ounce) package cream cheese, softened: This is the secret to our creamy sauce! Chive & Onion cream cheese adds an extra layer of flavor, but plain works too. Ensure it’s at room temperature for smooth blending.
  • 1 cup milk (whole or 2%): Helps to create a smooth, luscious sauce consistency. Use dairy-free milk if needed.
  • 1/2 cup grated Parmesan cheese: Adds a sharp, nutty, salty element that enhances the overall richness. Freshly grated is always superior to pre-shredded.
  • 2 cups shredded mozzarella cheese, divided: For that irresistible, gooey, melty cheese pull. A blend of mild and sharp mozzarella can offer more complex flavor.
  • 1/4 cup chopped fresh chives: Adds a fresh, mild oniony bite that cuts through the richness. Alternatively, use green onions or parsley.
  • 1/2 teaspoon salt, or to taste.
  • 1/4 teaspoon black pepper, or to taste.
  • Optional: Red pepper flakes for a hint of heat.

Recipe Timing

Prep Time:
20 minutes
Cook Time:
30 minutes
Total Time:
50 minutes

Compared to the average baked spaghetti that often requires longer baking times or multiple stages, this recipe is remarkably efficient. The 20-minute prep time is ample for browning the turkey bacon and chopping aromatics, while the 30-minute cook time ensures a perfectly melty, bubbly dish without a lengthy wait. This makes it ideal for busy weeknights.

Delicious Turkey Bacon Cheese Baked Spaghetti Recipe

Step-by-Step Instructions

Step 1: Cook the Turkey Bacon

Start by browning your turkey bacon in a large skillet over medium heat. Break it up with a spoon as it cooks. Once it’s nicely browned and somewhat crispy, drain off any excess fat, leaving just a tablespoon or two in the skillet. Remove the cooked turkey bacon from the skillet and set it aside on a paper towel-lined plate to drain further. This step ensures that your bacon bits are perfectly crisp and not greasy.

Step 2: Sauté Aromatics

In the same skillet (with the reserved fat), add the finely chopped yellow onion. Sauté it over medium heat until it becomes translucent and tender, about 5-7 minutes. Then, add the minced garlic and cook for another minute until fragrant, being careful not to burn it. The aroma building in your kitchen right now is just the beginning!

Step 3: Make the Cream Sauce

Reduce the heat to low. Add the softened cream cheese to the skillet with the onions and garlic. Stir until it starts to melt and combine with the aromatics. Gradually whisk in the milk until you have a smooth, creamy sauce. Then, stir in the grated Parmesan cheese, half of the shredded mozzarella cheese, salt, pepper, and optional red pepper flakes. Continue stirring until the cheese is melted and the sauce is thick and luscious. Taste and adjust seasoning if needed.

Step 4: Combine and Bake

While you’re making the sauce, cook your spaghetti according to package directions until al dente. Drain the spaghetti well. Add the drained spaghetti to the skillet with the cream sauce. Toss gently to coat all the pasta evenly. Stir in most of the cooked turkey bacon and chopped chives (save a little for garnish). Pour the spaghetti mixture into a greased 9×13 inch baking dish. Top with the remaining shredded mozzarella cheese and sprinkle with the reserved turkey bacon and chives. Bake in a preheated oven at 375°F (190°C) for 20-25 minutes, or until the cheese is melted, bubbly, and golden brown around the edges.

Nutritional Information

While exact nutritional values can vary based on ingredients and portion sizes, a typical serving of this delicious baked spaghetti offers:

  • Calories: Approximately 450-550 per serving (this can vary significantly with cheese and pasta quantities).
  • Protein: Around 25-35g (from turkey bacon, cheese, and pasta).
  • Fat: Approximately 20-30g (mostly from cheese and cream cheese).
  • Carbohydrates: Around 40-50g (from spaghetti).

Please note: These are estimates and can be adjusted with ingredient substitutions.

Healthier Alternatives

Looking to lighten up this comfort classic without sacrificing flavor? Here are some simple swaps:

  • Whole Wheat Spaghetti: Boost fiber content and added nutrients.
  • Low-Fat Cream Cheese & Milk: Reduce saturated fat.
  • Lean Ground Turkey: If you can’t find turkey bacon, or want even less fat, use lean ground turkey and add a pinch of smoked paprika and extra salt for that smoky flavor.
  • More Veggies: Stir in steamed broccoli florets or sautéed spinach for added nutrients and fiber.
  • Reduced-Fat Cheese: Use reduced-fat mozzarella for a similar melt with less fat.

Serving Suggestions

This Turkey Bacon Cheese Baked Spaghetti is a meal in itself, but it pairs wonderfully with a crisp side salad dressed with a light vinaigrette to balance the richness. A side of crusty garlic bread for soaking up any extra sauce is always a popular choice for a more indulgent meal. For a complete family dinner, consider serving it with steamed green beans or roasted asparagus.

Common Mistakes to Avoid

* Overcooking the Spaghetti: Remember, it will continue to cook in the oven. Aim for al dente.
* **Not Softening the Cream Cheese:** Lumpy cream cheese makes for a less smooth sauce.
* Using Stale Cheese: Freshly grated Parmesan and good quality mozzarella make a significant difference in flavor.
* Skipping the Browning Step: Properly browning the turkey bacon and sautéing the aromatics builds essential flavor depth.

Storing and Reheating Tips

Leftovers can be stored in an airtight container in the refrigerator for up to 3-4 days. Reheat in the oven or microwave until heated through. For best results when reheating in the oven, cover with foil to prevent the top from drying out, then uncover for the last few minutes to re-melt the cheese.

A Comfort Food Masterpiece

This Delicious Turkey Bacon Cheese Baked Spaghetti is more than just a recipe; it’s an experience. It’s the warm hug on a chilly evening, the comforting aroma that fills your home, and the satisfied smiles around your dinner table. The combination of savory turkey bacon, creamy chive cream cheese, and gooey mozzarella over perfectly cooked spaghetti is simply irresistible. Don’t wait another minute to try this guaranteed crowd-pleaser!

Frequently Asked Questions

***Can I use pork bacon instead of turkey bacon?***

Absolutely! Pork bacon will add a different, richer flavor. If using regular pork bacon, be sure to drain off most of the grease before adding the onions.

***Can I make this ahead of time?***

Yes, you can assemble the entire dish (up to the point of baking) and cover it tightly with plastic wrap or foil. Store it in the refrigerator for up to 24 hours. You may need to add an extra 5-10 minutes to the baking time if baking directly from the fridge.

***What kind of pasta is best?***

While spaghetti is traditional, you can also use other pasta shapes like penne, rotini, or rigatoni. Just ensure they are cooked al dente before combining with the sauce.

***How can I make it spicier?***

Add more red pepper flakes to the sauce, or stir in a pinch of cayenne pepper. You could also add a few dashes of your favorite hot sauce to the sauce mixture.

Print
clock clock iconcutlery cutlery iconflag flag iconfolder folder iconinstagram instagram iconpinterest pinterest iconfacebook facebook iconprint print iconsquares squares iconheart heart iconheart solid heart solid icon

Turkey Bacon Cream Cheese Baked Spaghetti

  • Author: Chef Mia

Description

Thiscreamy, cheesy baked spaghettiis loaded withsavory turkey bacon, chive cream cheese, and melty mozzarellafor the ultimate comfort food dish. Perfect for a cozy family dinner!


Ingredients

  • ✅For the Spaghetti:4 cupsmilk10.5 ozcondensedcream of baconsoup7.5 ozPhiladelphia Whipped Chive cream cheese1 teaspoonsalt1 teaspoonblack pepper1 tablespoongarlic powder1 tablespoononion powder1lb spaghetti2 cupsshredded mozzarella cheese½ cupreal turkey bacon bits✅For the Topping:2 cupsshredded mozzarella cheese1 tablespoonchopped chives½ cupreal turkey bacon bits
  • ✅For the Topping:2 cupsshredded mozzarella cheese1 tablespoonchopped chives½ cupreal turkey bacon bits

Instructions

  1. 1️⃣Preheat oven: Set your oven to400°F (200°C). Grease a9×13-inch baking dishand set aside.2️⃣Make the sauce: In a large pot over medium heat, combinemilk, cream of bacon soup, whipped chive cream cheese, salt, pepper, garlic powder, and onion powder. Stir well and bring to a gentle boil.3️⃣Cook the pasta: Once the liquid is boiling, break the spaghetti noodles in half and add them to the pot. Reduce heat tomedium-lowand cook for8 minutes, stirring occasionally.4️⃣Add cheese & turkey bacon: Stir in2 cups of shredded mozzarellaand½ cup of turkey bacon bits, mixing until fully incorporated.5️⃣Transfer to baking dish: Pour the spaghetti mixture into theprepared baking dish, spreading it evenly.6️⃣Add toppings: Sprinkle the top with2 more cups of shredded mozzarella, chopped chives, and turkey bacon bits.7️⃣Bake: Place the dish in the oven and bake for14-15 minutes, or until the cheese isfully meltedand slightly golden around the edges.8️⃣Let it rest: Remove from the oven and let the baked spaghetti sit fora few minutesbefore serving.
  2. 2️⃣Make the sauce: In a large pot over medium heat, combinemilk, cream of bacon soup, whipped chive cream cheese, salt, pepper, garlic powder, and onion powder. Stir well and bring to a gentle boil.
  3. 3️⃣Cook the pasta: Once the liquid is boiling, break the spaghetti noodles in half and add them to the pot. Reduce heat tomedium-lowand cook for8 minutes, stirring occasionally.4️⃣Add cheese & turkey bacon: Stir in2 cups of shredded mozzarellaand½ cup of turkey bacon bits, mixing until fully incorporated.5️⃣Transfer to baking dish: Pour the spaghetti mixture into theprepared baking dish, spreading it evenly.6️⃣Add toppings: Sprinkle the top with2 more cups of shredded mozzarella, chopped chives, and turkey bacon bits.7️⃣Bake: Place the dish in the oven and bake for14-15 minutes, or until the cheese isfully meltedand slightly golden around the edges.8️⃣Let it rest: Remove from the oven and let the baked spaghetti sit fora few minutesbefore serving.
  4. 4️⃣Add cheese & turkey bacon: Stir in2 cups of shredded mozzarellaand½ cup of turkey bacon bits, mixing until fully incorporated.5️⃣Transfer to baking dish: Pour the spaghetti mixture into theprepared baking dish, spreading it evenly.6️⃣Add toppings: Sprinkle the top with2 more cups of shredded mozzarella, chopped chives, and turkey bacon bits.7️⃣Bake: Place the dish in the oven and bake for14-15 minutes, or until the cheese isfully meltedand slightly golden around the edges.8️⃣Let it rest: Remove from the oven and let the baked spaghetti sit fora few minutesbefore serving.
  5. 5️⃣Transfer to baking dish: Pour the spaghetti mixture into theprepared baking dish, spreading it evenly.
  6. 6️⃣Add toppings: Sprinkle the top with2 more cups of shredded mozzarella, chopped chives, and turkey bacon bits.7️⃣Bake: Place the dish in the oven and bake for14-15 minutes, or until the cheese isfully meltedand slightly golden around the edges.8️⃣Let it rest: Remove from the oven and let the baked spaghetti sit fora few minutesbefore serving.
  7. 7️⃣Bake: Place the dish in the oven and bake for14-15 minutes, or until the cheese isfully meltedand slightly golden around the edges.8️⃣Let it rest: Remove from the oven and let the baked spaghetti sit fora few minutesbefore serving.
  8. 8️⃣Let it rest: Remove from the oven and let the baked spaghetti sit fora few minutesbefore serving.

Notes

🥗 Serve with afresh saladorgarlic breadfor a complete meal.🌶 Add a littlered pepper flakesfor a spicy kick.🧀 Mix in someparmesan cheesefor extra cheesiness.ThisTurkey Bacon Cream Cheese Baked Spaghettiis creamy, cheesy, and packed with smoky turkey bacon flavor.Enjoy!
ThisTurkey Bacon Cream Cheese Baked Spaghettiis creamy, cheesy, and packed with smoky turkey bacon flavor.Enjoy!

“`

Sbarro Mama’s Meatball Recipe – Easy Spaghetti & Sauce You’ll Love!

“`html

Sbarro Mama’s Meatball Recipe – Easy Spaghetti & Sauce You’ll Love!

Welcome to this classic Sbarro Mama’s Meatball Recipe with Spaghetti & Sauce! There’s nothing quite as comforting as a plate of delicious meatballs resting on a bed of spaghetti, drenched in rich marinara sauce. If you’re a fan of hearty Italian meals, you’re in the right place. This recipe brings the flavors of Sbarro’s right into your kitchen, with a simple step-by-step guide that will leave your family asking for seconds!

We’ve all had those days where only a deeply satisfying, home-cooked Italian meal will do. This Sbarro-inspired recipe captures that homestyle magic, making it accessible even for beginner cooks. Forget the freezer aisle; this is the real deal, a true taste of tradition that’s surprisingly easy to recreate.

Ingredients That Sing: The Heart of Mama’s Meatballs

The secret to incredible meatballs lies in the quality and combination of ingredients. We’ve focused on creating a balance of flavors and textures that are both traditional and irresistibly delicious.

For the Perfect Meatball Mix

  • 1 lb Ground Beef (80/20): The rich fat content from 80/20 beef ensures tender, juicy meatballs that don’t dry out. (Substitution: You can use 90/10 for a leaner option, but consider adding a tablespoon of olive oil for moisture.)
  • 1/2 lb Ground Pork: Adds a wonderful depth of flavor and tenderness, a classic Italian meatball secret. (Substitution: Use an additional 1/2 lb of ground beef or ground veal.)
  • 1/2 cup Italian-style Breadcrumbs: These seasoned crumbs add structure and absorb the juices beautifully. (Substitution: Use plain breadcrumbs and add 1/2 teaspoon each of dried oregano and basil.)
  • 1/4 cup Grated Parmesan Cheese: For that essential salty, nutty umami punch. (Substitution: Pecorino Romano for a sharper flavor, or nutritional yeast for a dairy-free option.)
  • 1/4 cup Milk: Helps to tenderize the meat and bind the ingredients. (Substitution: Water or a dairy-free milk alternative.)
  • 1 large Egg, lightly beaten: The crucial binder that holds your beautiful meatballs together.
  • 2 cloves Garlic, minced: Fresh garlic is key for that authentic aroma and taste. (Substitution: 1 teaspoon garlic powder if fresh isn’t available.)
  • 1 teaspoon Dried Oregano: An aromatic herb that is indispensable in Italian cooking.
  • 1/2 teaspoon Salt: Enhances all the other flavors.
  • 1/4 teaspoon Black Pepper: For a subtle kick.

For the Rich Marinara Sauce

  • 2 tablespoons Olive Oil: The foundation of our flavorful sauce.
  • 1 medium Onion, finely chopped: Adds a savory sweetness as it simmers.
  • 3 cloves Garlic, minced: Doubles down on the garlicky goodness.
  • 1 (28 ounce) can Crushed Tomatoes: The heart of our marinara, providing a vibrant, tangy base. (Substitution: Diced tomatoes for a chunkier sauce, or tomato passata for a smoother texture.)
  • 1 (15 ounce) can Tomato Sauce: Contributes to a velvety, rich sauce consistency.
  • 1 teaspoon Dried Basil: A fresh, slightly sweet herb that perfectly complements tomatoes.
  • 1/2 teaspoon Dried Oregano: Echoing the flavors in the meatballs.
  • 1/4 teaspoon Red Pepper Flakes (optional): For a hint of warmth.
  • 1 teaspoon Sugar (optional): Balances the acidity of the tomatoes.
  • Salt and Freshly Ground Black Pepper to taste.

For Assembling and Serving

  • 1 lb Spaghetti: The classic canvas for our meatballs and sauce. (Substitution: Linguine, fettuccine, or your favorite pasta shape.)
  • Fresh Parsley, chopped: For a bright, fresh garnish.
  • Grated Parmesan Cheese, for serving.
A plate of Sbarro-style meatballs with spaghetti and marinara sauce.

A Symphony of Flavors: Timing is Everything

Prep Time:
25 Minutes
Cook Time:
1 Hour 15 Minutes
Total Time:
1 Hour 40 Minutes
Yields:
6-8 Servings

Compared to the average spaghetti and meatball recipe which often clocks in around 1 hour total time, this Sbarro Mama’s recipe requires a bit more patience, especially for the sauce to meld with the meatballs. However, the extended simmering time is precisely what infuses every bite with deep, complex flavors, making it well worth the extra minutes.

Step-by-Step: Crafting Your Sbarro Mama’s Masterpiece

Step 1: Crafting the Flavorful Meatball Mixture

In a large bowl, combine the ground beef, ground pork, Italian breadcrumbs, grated Parmesan cheese, milk, beaten egg, minced garlic, dried oregano, salt, and pepper. Use your hands to gently mix everything together until just combined. Be careful not to overmix, as this can result in tough meatballs. The mixture should feel cohesive but still slightly loose.

Step 2: Rolling Perfection – Shaping the Meatballs

Lightly wet your hands to prevent sticking. Take about 2 tablespoons of the meat mixture and gently roll it between your palms to form uniform balls, roughly 1.5 inches in diameter. Place the formed meatballs on a baking sheet or platter. You should get about 18-24 meatballs, depending on size. If the mixture is too sticky, chill it in the refrigerator for 15-20 minutes.

Step 3: The Golden Touch – Browning the Meatballs

Heat the 2 tablespoons of olive oil in a large, heavy-bottomed pot or Dutch oven over medium-high heat. Carefully add the meatballs in batches, ensuring not to overcrowd the pot. Brown them on all sides until they have a nice golden-brown crust. This step is crucial for developing flavor and texture. Remove the browned meatballs with a slotted spoon and set them aside on a plate.

Step 4: Building the Aromatic Sauce Base

In the same pot (with a bit of the rendered fat from the meatballs, if desired, or add a little more olive oil if it’s dry), reduce the heat to medium. Add the finely chopped onion and sauté until softened and translucent, about 5-7 minutes. Add the minced garlic and cook for another minute until fragrant, being careful not to burn it.

Step 5: The Slow Dance – Simmering the Sauce with Meatballs

Pour in the crushed tomatoes and tomato sauce. Stir in the dried basil, dried oregano, red pepper flakes (if using), and sugar (if using). Season with salt and pepper to taste. Bring the sauce to a gentle simmer. Carefully return the browned meatballs to the pot, nestling them into the sauce. Cover the pot, reduce the heat to low, and let it simmer for at least 1 hour, or up to 1.5 hours. Stir occasionally to prevent sticking. The longer it simmers, the more the flavors will meld and deepen.

Step 6: Al Dente Dreams – Cooking the Spaghetti

About 15-20 minutes before you’re ready to serve, bring a large pot of generously salted water to a rolling boil. Add the spaghetti and cook according to package directions until al dente (tender but still with a slight bite). Drain the pasta, reserving about a cup of the pasta water.

Step 7: The Grand Finale – Plating Perfection

You have two options here: you can either gently toss the drained spaghetti with a ladleful of the sauce in the pot, or serve the spaghetti as is and spoon the sauce and meatballs over the top. For a richer flavor, toss the pasta with a little of the reserved pasta water to help the sauce coat each strand. Serve hot, garnished with fresh chopped parsley and extra grated Parmesan cheese.

Nutritional Spotlight: Guiding Your Culinary Journey

While exact nutritional values can vary significantly based on ingredient brands and specific quantities used, a typical serving (approximately 3-4 meatballs with sauce and pasta) of this Sbarro Mama’s Meatball Recipe contains:

  • Calories: 500-700 kcal
  • Protein: 25-35g
  • Fat: 20-35g (including saturated fat)
  • Carbohydrates: 45-60g
  • Sodium: Varies, can be high if relying on processed ingredients.

(Note: These are estimations. For precise tracking, use a nutritional calculator with your specific ingredients.)

Healthier Twists on a Classic Comfort

Maintaining the soul of this dish while making it more heart-healthy is entirely possible:

  • Leaner Meats: Swap some or all of the beef and pork for lean ground turkey, chicken, or even plant-based crumbles. For turkey/chicken, ensure you add a touch more olive oil to the meatball mix to maintain moisture.
  • Whole Wheat Pasta: Opt for whole wheat spaghetti for increased fiber content.
  • Reduced Sodium: Use low-sodium canned tomatoes and tomato sauce, and adjust salt to your taste.
  • Veggie Boost: Finely grate zucchini or mushrooms and add them to the meatball mix for added nutrients and moisture. Or, increase the onion and garlic in the sauce, and consider adding finely diced carrots or bell peppers.
  • Less Breadcrumbs: Use whole wheat breadcrumbs, or reduce the amount and compensate with finely ground oats for binding.

Serving Suggestions: Elevating Your Italian Feast

This dish is a star on its own, but here are a few ideas to make your meal even more special:

  • Garlic Bread: A crusty loaf of garlic bread is the perfect companion for soaking up that delicious sauce.
  • Side Salad: A simple, crisp green salad with a vinaigrette offers a refreshing contrast to the rich main course.
  • Roasted Vegetables: Broccoli, asparagus, or zucchini roasted with olive oil and herbs complement the Italian flavors beautifully.
  • Wine Pairing: A medium-bodied Italian red like Chianti or Sangiovese would be an excellent choice.

Avoiding Pitfalls: Common Mistakes to Skip

Even the most seasoned cooks can make errors. Here are a few common missteps to avoid:

  • Overmixing the Meat: This is the most frequent culprit behind tough, dense meatballs. Mix only until ingredients are just incorporated.
  • Not Browning the Meatballs: Skipping the browning step means missing out on a significant amount of flavor development and a desirable textured exterior.
  • Overcrowding the Pot: When browning meatballs or simmering sauce, give ingredients space to cook properly. Overcrowding leads to steaming rather than browning, and uneven cooking.
  • Sauce Too Thin/Thick: The simmering time is key. If your sauce is too thin after an hour, let it simmer uncovered for the last 15-20 minutes to reduce. If it’s too thick, add a splash of water or reserved pasta water.
  • Under-seasoning: Always taste and adjust seasoning (salt and pepper) at the end of cooking, especially after simmering.

Savoring the Leftovers: Smart Storing Tips

Leftovers are a gift! Properly stored, this dish can be enjoyed for days:

  • Refrigeration: Allow the spaghetti and meatballs to cool completely. Store them in an airtight container in the refrigerator for up to 3-4 days. It’s best to store the pasta and meatballs/sauce separately if possible to prevent the pasta from becoming too mushy.
  • Freezing: This dish freezes exceptionally well! Store cooled leftovers in freezer-safe containers or heavy-duty freezer bags for up to 2-3 months. It’s ideal to freeze the meatballs and sauce separately from the pasta for the best texture upon reheating.
  • Reheating: To reheat, thaw frozen items in the refrigerator overnight. Gently reheat on the stovetop over low heat, adding a splash of water or broth if needed. You can also reheat individual portions in the microwave. If reheating pasta, consider cooking fresh pasta to add to the warmed sauce and meatballs for optimal texture.

A Taste of Tradition, Made by You

This Sbarro Mama’s Meatball Recipe with Spaghetti & Sauce isn’t just a meal; it’s an experience. It’s about bringing people together, creating delicious memories, and savoring the kind of honest, comforting food that feels like a warm hug. You’ve got the power to recreate this classic Italian favorite right in your own kitchen, impressing your loved ones with your culinary prowess.

So, roll up your sleeves, gather your ingredients, and get ready to create a dish that will become a cherished part of your family’s mealtime traditions. Don’t forget to share your creations and any tips you discover in the comments below – we can’t wait to hear how your Sbarro Mama’s meatballs turn out!

Frequently Asked Questions

***Can I make the meatballs ahead of time?***

Absolutely! You can prepare the meatball mixture and form the meatballs up to 24 hours in advance. Store them covered in the refrigerator. You can also brown them ahead of time and store them separately. When ready to cook, add them to the simmering sauce.

***Can I freeze raw meatballs?***

Yes, you can freeze raw meatballs. Form them and place them on a baking sheet in a single layer to freeze until solid. Then, transfer them to a freezer-safe bag or container. Cook them directly from frozen (they may take a little longer) or thaw them in the refrigerator first.

***What kind of tomatoes are best for the sauce?***

For a classic marinara, crushed tomatoes provide a good balance of texture and smoothness. If you prefer a chunkier sauce, use diced tomatoes. San Marzano tomatoes are often considered the gold standard for their sweet, less acidic flavor.

***Can I make this vegetarian?***

Yes, you can adapt this recipe. For vegetarian meatballs, use a base of breadcrumbs, cheese, egg (or flax egg), and finely chopped vegetables like mushrooms, zucchini, or eggplant. You can also use plant-based ground meat alternatives. The sauce is naturally vegetarian, but ensure your cheese is vegetarian if needed.

***How do I prevent my meatballs from breaking apart in the sauce?***

Ensure you don’t overmix the meat, use enough binder (egg, breadcrumbs), and brown them properly before adding them to the sauce. Gentle simmering rather than vigorous boiling also helps maintain their shape.

Print

clock clock iconcutlery cutlery iconflag flag iconfolder folder iconinstagram instagram iconpinterest pinterest iconfacebook facebook iconprint print iconsquares squares iconheart heart iconheart solid heart solid icon

Sbarro Mama’s Meatball Recipe – Easy Spaghetti & Sauce

  • Author: Chef Mia

Description

Welcome to this classicSbarro Mama’s Meatball Recipe with Spaghetti & Sauce! There’s nothing quite as comforting as a plate of delicious meatballs resting on a bed of spaghetti, drenched in rich marinara sauce. If you’re a fan of hearty Italian meals, you’re in the right place. This recipe brings the flavors of Sbarro’s right into your kitchen, with a simple step-by-step guide that will leave your family asking for seconds!


Ingredients

  • Optional substitutions for dietary needs:

Instructions

  1. In a large mixing bowl, combinelean ground beef,Panko bread crumbs,egg,ricotta cheese,Romano cheese,kosher salt,black pepper,minced garlic,garlic powder,dried parsley, anddried basil. Use your hands to gently mix everything together until all ingredients are well combined. Avoid over-mixing as this can lead to tough meatballs.
  2. Using a portion scoop or a tablespoon, scoop about1 oz. of the meat mixtureand roll it into balls with your hands. Place the meatballs evenly on a baking sheet lined with parchment paper. You should get about 25 meatballs from this mixture.
  3. Preheat your oven to350°F. Bake the meatballs for18-22 minutesor until they are fully cooked through and reach an internal temperature of165°F. While the meatballs are baking, you can prepare your spaghetti.
  4. Cook yourspaghettiaccording to the package instructions until al dente. Once done, drain and set aside.
  5. Warm up your favoritejarred marinara sauceon the stove. Once the meatballs are done, serve them over a bed of spaghetti and pour marinara sauce generously on top. Garnish with freshly grated Romano cheese and parsley for an extra burst of flavor.

Notes

Use Fresh Ingredients:For the best flavor, use fresh garlic and herbs. It makes a huge difference in the final dish.
Don’t Overmix:Gently mix the meatball ingredients to prevent the meatballs from becoming tough.
Freezing Tip:You can freeze any leftover cooked meatballs for up to three months. Simply reheat in the oven or microwave when you’re ready to enjoy them again!


“`

Sheet Pan Chicken Shawarma Havarti Sandwich – Easy & Flavorful! 🧀🥙

“`html

Sheet Pan Chicken Shawarma Havarti Sandwich – Easy & Flavorful! 🧀🥙

Flavorful Fusion: Sheet Pan Chicken Shawarma Havarti Sandwich

Are you craving a weeknight meal that explodes with bold, exciting flavors but doesn’t keep you chained to the stove? If you’re nodding your head, then you’ve landed in the right place! This Sheet Pan Chicken Shawarma Havarti Sandwich recipe is your ticket to a culinary adventure combining the aromatic spices of Middle Eastern shawarma with the comforting, melt-in-your-mouth creaminess of Havarti cheese, all nestled within warm, fluffy naan. We’re talking about a symphony of textures and tastes – juicy, spiced chicken, gooey cheese, and a hint of freshness – that comes together with incredibly minimal effort. Imagine a dish that offers the satisfying chew of tender chicken, the rich indulgence of melted Havarti, and the delightful tang of shawarma spices, all wrapped up in a convenient, handheld package. This isn’t just a sandwich; it’s an experience that will transform your ordinary mealtime into something extraordinary, proving that complex flavors can indeed come from the simplest of preparations. Get ready to impress yourself and anyone lucky enough to snag a bite!

Sheet Pan Chicken Shawarma Havarti Sandwich with fresh toppings.

Ingredients for Sheet Pan Chicken Shawarma Havarti Sandwich

The magic of this sandwich lies in the balance of bold spices and creamy cheese. Here’s what you’ll need:

For the Chicken Shawarma

  • 1.5 lbs boneless, skinless chicken thighs (preferred for juiciness, but breasts work too!), cut into bite-sized pieces
  • 2 tablespoons olive oil
  • 1 tablespoon lemon juice (freshly squeezed for that bright zing!)
  • 2 teaspoons ground cumin (earthy and warm, the backbone of shawarma)
  • 2 teaspoons ground coriander (citrusy and floral notes)
  • 1 teaspoon paprika (for a touch of smoky sweetness)
  • 1 teaspoon turmeric (adds a beautiful golden hue and subtle peppery flavor)
  • 1/2 teaspoon ground cinnamon (a whisper of warmth and sweetness)
  • 1/4 teaspoon cayenne pepper (optional, for a gentle kick)
  • 1/2 teaspoon garlic powder (or 2 cloves fresh garlic, minced, for a pungent punch)
  • 1/2 teaspoon onion powder (enhances savory depth)
  • Salt and freshly ground black pepper to taste

For the Sandwich

  • 4 pieces of naan bread (fluffy and slightly chewy, the perfect vessel)
  • 4-6 slices of Havarti cheese (wonderfully creamy and mild, melts like a dream) – approximately 4 oz
  • 1/2 cup plain Greek yogurt or tahini sauce (for drizzling, adds tang and creaminess)
  • 1/4 cup chopped fresh parsley (for bright, herbaceous freshness)
  • 1/4 cup thinly sliced red onion (for a sharp, pungent bite)
  • 1 cup sprouts (alfalfa or broccoli sprouts add a lovely crunch and fresh taste)

Optional Additions

  • Sliced tomatoes
  • Pickled cucumbers or jalapeños
  • A drizzle of sriracha for extra heat

Timing Is Everything

Prep time: 15 minutes
Cook time: 20-25 minutes
Total time: 35-40 minutes

Compared to the traditional method of marinating and cooking shawarma meat separately, this sheet pan approach shaves off significant time and cleanup. Most shawarma recipes involve longer marination periods and multiple cooking steps. Our method streamlines this into a quick and efficient process, making it perfect for a busy weeknight when you crave something special without the fuss.

Crafting Your Sheet Pan Chicken Shawarma Havarti Sandwich

Step 1: Preheat and Prep

Preheat your oven to 400°F (200°C). Line a large baking sheet with parchment paper for easy cleanup. This is your foundation for a deliciously simple meal!

Step 2: Marinate the Chicken

In a medium bowl, combine the chicken pieces with olive oil, lemon juice, cumin, coriander, paprika, turmeric, cinnamon, cayenne (if using), garlic powder, onion powder, salt, and pepper. Toss everything together until the chicken is thoroughly coated in the vibrant spice mixture. Let it sit for at least 10 minutes while you prepare other components, or up to 30 minutes for deeper flavor.

Step 3: Roast the Chicken

Spread the marinated chicken in a single layer on the prepared baking sheet. Pop it into the preheated oven and roast for 15-20 minutes, or until the chicken is cooked through and slightly caramelized at the edges. The aroma will start to fill your kitchen, signaling deliciousness is on its way!

Step 4: Warm the Naan

While the chicken is roasting, gently warm the naan bread. You can do this in a dry skillet over medium heat for about 1-2 minutes per side, or pop it into the oven for the last 5 minutes of the chicken’s cooking time. It should be warm, soft, and pliable, ready to embrace its flavorful fillings.

Step 5: Assemble the Sandwiches

Once the chicken is cooked, carefully remove the baking sheet from the oven. Lay the warmed naan flat. Top each piece of naan with a generous portion of the shawarma chicken. Layer the Havarti cheese slices over the chicken. If you’re adding any quick-cooking toppings like sliced tomatoes, add them now.

Step 6: Broil to Perfection

Place the baking sheet with the assembled sandwiches back into the oven, this time under the broiler. Broil on high for 1-2 minutes, watching very closely, until the cheese is melted and bubbly and the naan is lightly golden. Be cautious; broilers are powerful and can burn things quickly!

Nutritional Snapshot

While exact nutritional values can vary based on specific ingredients and portion sizes, a typical serving of this Sheet Pan Chicken Shawarma Havarti Sandwich provides:

  • Calories: Approximately 450-600 kcal per sandwich
  • Protein: High, due to chicken
  • Fat: Moderate, from chicken, olive oil, and cheese
  • Carbohydrates: Moderate, from naan bread
  • Fiber: Lower, but can be increased with fresh vegetable additions

Healthier Twists on Your Shawarma Sandwich

Want to lighten things up without sacrificing flavor? Try these swaps:

  • Leaner Protein: Use chicken breast instead of thighs, or opt for turkey breast.
  • Whole Wheat Naan: Choose whole wheat naan for added fiber.
  • Lighter Cheese: Use a reduced-fat Havarti or a sharp white cheddar, which has a stronger flavor, so you can use less.
  • More Veggies: Load up on lettuce, tomatoes, cucumbers, and onions. Consider adding grilled bell peppers or spinach for extra nutrients.
  • Sauce Swap: Opt for a lightened-up tahini sauce made with less oil, or a simple Greek yogurt mixed with herbs and lemon juice instead of heavier sauces.

Serving Suggestions

These sandwiches are hearty enough to be a meal on their own. However, for a more complete dining experience, consider serving them with:

  • A crisp green salad with a light vinaigrette.
  • A side of hummus and pita chips.
  • A refreshing cucumber and tomato salad.
  • Batches of crispy oven-baked sweet potato fries.

Don’t forget to drizzle with your favorite sauce (Greek yogurt or tahini) and sprinkle with fresh parsley and red onion just before serving for maximum freshness and visual appeal.

Common Pitfalls to Avoid

To ensure your shawarma sandwich is a triumph:

  • Overcrowding the Pan: Ensure chicken pieces are in a single layer for even cooking and caramelization.
  • Burning Under the Broiler: Keep a close eye on the sandwiches when broiling. It only takes a minute or two!
  • Soggy Naan: Warm the naan just before assembly, and don’t let it sit too long with wet toppings.
  • Under-Spicing: Don’t be shy with the shawarma spices; they are key to the flavor profile.

Storing Your Shawarma Masterpiece

These sandwiches are best enjoyed fresh. However, if you have leftovers:

  • Cooked Chicken: Store the roasted chicken in an airtight container in the refrigerator for up to 3-4 days. Reheat it gently in a skillet or the microwave.
  • Assembled Sandwiches: It’s not recommended to store fully assembled sandwiches, as the naan can become soggy and the cheese won’t be ideal. It’s best to assemble them just before eating.

Final Bite

There you have it – a Sheet Pan Chicken Shawarma Havarti Sandwich that proves you don’t need hours in the kitchen to create a meal bursting with vibrant Middle Eastern flavors and cheesy goodness. It’s quick, it’s easy, and it’s incredibly satisfying. This recipe is perfect for busy weeknights, casual lunches, or even informal entertaining. Give it a try and let the bold, aromatic spices and creamy Havarti transform your sandwich game!

Frequently Asked Questions

***Can I make the shawarma spice mix ahead of time?***

Absolutely! You can mix all the dry shawarma spices together in a jar and store it in your pantry. This makes assembling the marinade even quicker on busy days.

***What if I don’t have Havarti cheese?***

Mild, melty cheeses like Monterey Jack, Provolone, or even a mild cheddar would work well as a substitute. Mozzarella can also be used for its excellent melting properties.

***Is it possible to make this vegetarian?***

Yes! You can swap the chicken for firm tofu cubes marinated and roasted in the same spices, or use chickpeas. Ensure they are well-drained and patted dry.

***How do I get crispier edges on the chicken?***

For crispier edges, ensure you don’t overcrowd the baking sheet, and consider turning the broiler on for an extra minute or two after the cheese melts, keeping a very close watch.

***Can I make this recipe gluten-free?***

Yes! Simply use gluten-free naan or wraps instead of traditional naan. Ensure all your spice blends and any other ingredients are also gluten-free.

Print
clock clock iconcutlery cutlery iconflag flag iconfolder folder iconinstagram instagram iconpinterest pinterest iconfacebook facebook iconprint print iconsquares squares iconheart heart iconheart solid heart solid icon

Sheet Pan Chicken Shawarma Havarti Sandwich Recipe

  • Author: Chef Mia

Description

Welcome to a delicious journey where bold Middle Eastern flavors meet cheesy, savory perfection! ThisSheet Pan Chicken Shawarma Havarti Sandwichis a delightful fusion of flavors, featuring juicy chicken, creamy Havarti cheese, and fresh sprouts wrapped in warm naan. If you’re a fan of shawarma and mouthwatering sandwiches, this recipe is sure to become a new favorite. With a quick prep time and even quicker cleanup, it’s a must-try for anyone who loves bold flavors in a simple, easy-to-make dish.


Ingredients

Scale
  • 1/3 cupfull-fat plain Greek yogurt
  • 1/4 cupextra virgin olive oil
  • 1 1/2pounds chicken breasts or thighs, sliced
  • 6cloves garlic, chopped
  • 2shallots, chopped
  • 1 tablespoonsmoked paprika
  • 2 teaspoonsdried oregano
  • 1/2 teaspoonturmeric
  • Chili flakes (to taste)
  • Salt (to taste)
  • 4pieces naan
  • 1/2 cupCaesar dressing, mayo, or garlic tahini
  • 6slices Havarti cheese
  • 6slices gouda cheese
  • 1/2 cupsun-dried tomatoes, sliced
  • 1/2 cupdill pickles/pepperoncini, sliced (or both)
  • 1/2 cuppickled red onions (optional)
  • 2 cupsfresh sprouts/microgreens
  • Use dairy-free cheese for lactose intolerant diners.
  • Substitute turkey for chicken to keep the recipe leaner.
  • For gluten-free options, swap naan for gluten-free wraps or pita.

Instructions

  1. In a large bowl, combine Greek yogurt, olive oil, chopped garlic, shallots, smoked paprika, oregano, turmeric, chili flakes, and salt. Toss the sliced chicken in the marinade, making sure each piece is well-coated. Allow the chicken to marinate for 15 minutes.
  2. Preheat your oven to 425°F (220°C). Arrange the marinated chicken slices on a baking sheet in a single layer. Bake for 20 minutes, or until fully cooked. For added flavor, broil the chicken for an additional 1-2 minutes to achieve a charred, smoky effect on the edges.
  3. Lay each naan flat on a clean baking sheet. Spread Caesar dressing or garlic tahini on one side of each naan. Next, layer sun-dried tomatoes, sliced pickles, and pepperoncini. Add slices of Havarti and gouda cheese over the veggies. Top with the freshly baked shawarma chicken.
  4. Cover the sandwiches with foil and bake them for 15 minutes or until the cheese has melted. Once melted, remove the foil and top the sandwiches with fresh sprouts and pickled onions.
  5. Fold the naan over the sandwich filling and gently press down. Rub the top of each naan with olive oil and sprinkle sesame seeds over the surface. Return to the oven for an additional 5 minutes to lightly toast. Slice and serve warm with extra dressing.

Notes

Marinate the chickenfor at least 15 minutes to fully absorb the flavors. If you have time, allow the chicken to sit longer—up to 24 hours in the fridge.
When broiling the chicken, watch closely as it can burn quickly. A light char on the edges adds depth but avoid overcooking.
If you prefer crispier naan, you can toast it in a pan before assembling the sandwich.

“`

Irresistible Pecan Brie Bites – A Perfect Southern Appetizer

“`html

Irresistible Pecan Brie Bites – A Perfect Southern Appetizer

Elevate Your Appetizer Game with Bourbon Pecan Brie Bites!

Are you searching for an appetizer that’s both incredibly delicious and remarkably easy to make, one that will have your guests raving and asking for the recipe? You’ve found it! These Bourbon Pecan Brie Bites are the ultimate Southern-inspired appetizer crafted for dazzling your taste buds without demanding hours in the kitchen. Imagine crisp, buttery phyllo cups cradling warm, melted brie, all crowned with a sweet, crunchy, and slightly boozy bourbon pecan topping. They’re elegant enough for holiday gatherings and sophisticated dinner parties, yet so simple to whip up that they’re perfect for a spontaneous indulgent snack. Forget complicated hors d’oeuvres; these bites bring together creamy, nutty, and sweet flavors in a delightful package that’s ready in about 15 minutes. Get ready to become the hero of your next event with this show-stopping, yet effortless, recipe.

Ingredients with a Southern Charm

The magic of these Pecan Brie Bites lies in their simple yet quality ingredients. We aim for a balance of textures and complementary flavors that truly sing together.

  • 24 mini phyllo shells: Look for the frozen variety for the best crispness. They provide a flaky, buttery vessel for our creamy filling.
  • 4 oz Brie cheese: Choose a ripe brie – its creamy, slightly tangy interior melts beautifully. Remove the rind if you prefer a milder flavor, though it’s edible and adds a lovely depth.
  • 1/2 cup chopped pecans: Freshly chopped nuts offer the best crunch and flavor. Toasted pecans add an extra layer of nutty goodness.
  • 2 tablespoons butter: Unsalted butter is ideal for controlling the saltiness.
  • 2 tablespoons brown sugar: Light or dark brown sugar will work, adding that classic caramel-sweetness.
  • 1 tablespoon bourbon: This is the secret ingredient that elevates the pecan topping. It adds a subtle warmth and depth. For a non-alcoholic version, you can substitute with a splash of vanilla extract or a bit of apple cider.
  • 1/4 teaspoon cinnamon: A hint of spice to complement the sweetness and bourbon.
  • Pinch of salt: To balance the sweetness.

Timing is Everything

One of the most appealing aspects of these Pecan Brie Bites is their speed. In under 20 minutes, you can go from preparing ingredients to serving a sophisticated appetizer. Let’s break it down:

Prep Time: 10 minutes
Cook Time: 5-8 minutes
Total Time: 15-18 minutes
Yield: 24 bites

Compared to the average appetizer that often requires more complex steps or longer baking times, these Pecan Brie Bites are a true winner for busy hosts. Most recipes of this caliber can take 30-45 minutes from start to finish.

Pecan Brie Bites appetizer spread on a serving platter.

Step-by-Step Instructions

Step 1: Preheat and Prepare

Start by preheating your oven to 375°F (190°C). If your phyllo shells are frozen, arrange them on a baking sheet. If they are thawed, you might want to bake them for a couple of minutes to ensure maximum crispness before adding the filling. It’s a small step that makes a big difference!

Step 2: Make the Bourbon Pecan Topping

In a small saucepan over medium heat, melt the butter. Stir in the chopped pecans, brown sugar, bourbon, cinnamon, and a pinch of salt. Cook, stirring constantly, for about 2-3 minutes, until the sugar is dissolved and the mixture is fragrant and slightly thickened. You want the pecans to be coated and slightly toasted, with the bourbon scent becoming wonderfully aromatic. Be careful not to burn the sugar!

Step 3: Assemble the Bites

This is where the magic truly starts to take shape. Cut the brie into small cubes, about 1/2 inch. Place one cube of brie into each phyllo cup. Don’t overstuff them; just enough to create a creamy layer that will melt beautifully.

Step 4: Bake to Perfection

Spoon a generous amount of the bourbon pecan mixture over the brie in each phyllo cup. You want a good balance of the nutty topping and the creamy cheese. Place the baking sheet back into the preheated oven. Bake for 5-8 minutes, or until the brie is soft and gooey, and the topping is bubbly and fragrant. Keep a close eye on them, as phyllo can brown quickly.

Step 5: Serve and Savor

Carefully remove the baking sheet from the oven. Let the Pecan Brie Bites cool for just a minute or two before transferring them to a serving platter. The melted brie will be very hot! Serve them warm and watch them disappear. The combination of warm, melted cheese, crisp pastry, and sweet, spiced pecans is utterly irresistible.

Nutritional Information (Approximate per bite):

  • Calories: 75-90 kcal
  • Fat: 5-7g
  • Carbohydrates: 5-7g
  • Protein: 2-3g
  • Sugar: 3-4g

Note: Nutritional values are approximate and can vary based on specific ingredient brands and portion sizes.

Healthier Alternatives & Flavor Swaps

Want to lighten things up without sacrificing flavor? Here are a few ideas:

  • Lighter Cheese: While brie is central to the flavor, you could experiment with reduced-fat cream cheese or even a goat cheese for a tangier, lighter option.
  • Nuts: Substitute some of the pecans with chopped walnuts or even almonds. For a nut-free option, toasted sunflower seeds can offer a similar crunch.
  • Sweetener: Reduce the brown sugar slightly, or use a sugar substitute like erythritol or monk fruit sweetener for a lower-carb version.
  • Phyllo Alternative: If phyllo is a concern, consider using mini sweet potato rounds or small baked wonton cups.
  • Bourbon Substitute: As mentioned, a splash of vanilla extract, maple extract, or even a tiny bit of apple cider can replace the bourbon for those avoiding alcohol or seeking a different flavor profile.

Serving Suggestions

These Pecan Brie Bites are incredibly versatile. They are perfect as a standalone appetizer, but here are a few ideas to enhance your spread:

  • Festive Platters: Arrange them on a beautiful platter alongside other holiday favorites like stuffed mushrooms, mini quiches, or a cheese board.
  • With a Drizzle: A light drizzle of extra bourbon or a festive cranberry sauce just before serving can add an extra touch of elegance and flavor.
  • Party Staple: They’re the ideal bite-sized accompaniment to cocktails at a cocktail party or pre-dinner nibbles before a formal meal.
  • Sweet & Savory Balance: Serve alongside a bowl of fresh fruit or a simple green salad for a more balanced meal.

Common Mistakes to Avoid

To ensure your Pecan Brie Bites turn out perfectly every time, steer clear of these common pitfalls:

  • Overbaking the Phyllo: While you want them crisp, burnt phyllo shells can ruin the texture and taste. Keep a close eye on them during baking.
  • Burning the Pecan Topping: The sugar in the topping can burn quickly. Stir constantly and remove from heat as soon as it thickens slightly.
  • Using Cold Brie: Ensure your brie is at room temperature or slightly softened to allow it to melt smoothly into the phyllo cups.
  • Sob soggy Shells: If your phyllo shells are not fresh or are slightly damp, they can become soggy. Consider a quick pre-bake to ensure crispness.
  • Ignoring the Bourbon: Even if you use a tiny amount, the bourbon adds a crucial depth of flavor to the pecan topping. Don’t skip it unless absolutely necessary!

Storing Tips

These Pecan Brie Bites are best enjoyed fresh and warm. However, if you have leftovers or need to prepare ahead:

  • Best Enjoyed Fresh: For optimal texture and flavor, these are meant to be served immediately after baking.
  • Reheating: Leftover baked bites can be gently reheated in a 300°F (150°C) oven for 5-7 minutes. Be careful not to overcook; you just want to warm them through.
  • Assembly Ahead: You can assemble the bites (brie and topping) up to an hour before baking and keep them on the baking sheet at room temperature. Bake just before serving.
  • Storage Advice: Do not store assembled, baked bites at room temperature for extended periods. Refrigeration will make the phyllo soggy.

Conclusion

These Irresistible Pecan Brie Bites are more than just an appetizer; they’re a delightful experience. From the rich, creamy brie to the sweet and nutty bourbon pecan topping, all encased in a crisp, golden phyllo shell, every bite is a little piece of heaven. They embody the warmth and hospitality of the South and are guaranteed to be a hit at any gathering. So go ahead, whip up a batch and prepare to receive compliments galore. You’ll love how easy they are to make, and your guests will adore how decadent they taste! Happy entertaining!

Frequently Asked Questions (FAQs)

***Can I make these ahead of time?***

You can prepare the components ahead of time (chop nuts, make topping mixture) but for the best crispy texture, it’s recommended to assemble and bake them just before serving. You can assemble the brie and topping into the phyllo cups up to an hour before baking and keep them at room temperature.

***What can I use if I don’t have bourbon?***

If you prefer non-alcoholic or don’t have bourbon, you can substitute it with a splash of vanilla extract, almond extract, a tiny bit of rum extract, or even a small amount of apple cider or maple syrup for a different flavor profile.

***How do I prevent the phyllo shells from getting soggy?***

Ensure your phyllo shells are fresh and crisp. If they seem a bit soft, you can bake them empty for 2-3 minutes at 375°F (190°C) before adding the filling. Also, serve them warm immediately after baking, as they will lose their crispness as they cool and sit.

***Can I use a different type of cheese?***

While brie is classic, you can experiment with other creamy, melty cheeses. A good quality cream cheese, goat cheese, or even a mild Gruyere could work, though the flavor profile will change significantly from the traditional brie. Remove the rind from the brie if you find it too strong for your liking.

***How do I reheat Pecan Brie Bites?***

The best way to reheat them is in a preheated oven at around 300°F (150°C) for 5-7 minutes. This helps to crisp up the phyllo and melt the cheese again without overcooking the nuts.

Print

clock clock iconcutlery cutlery iconflag flag iconfolder folder iconinstagram instagram iconpinterest pinterest iconfacebook facebook iconprint print iconsquares squares iconheart heart iconheart solid heart solid icon

Bourbon Pecan Brie Bites in Phyllo Cups

  • Author: Chef Mia

Description

TheseBourbon Pecan Brie Bitesare an elegant, bite-sized appetizer that combinesbuttery phyllo cups, creamy brie, and a sweet bourbon pecan topping. Perfect for holiday gatherings, dinner parties, or as a simple indulgent snack, they come together in just15 minutesand are always a crowd-pleaser!


Ingredients

Scale
  • ¼ cuppacked brown sugar2 tbspunsalted butter, melted1 tbspbourbon¼ cuproasted, chopped pecans8 ozround of brie cheese1.9 ozpackage of frozen mini fully baked phyllo shells (about15shells)
  • 2 tbspunsalted butter, melted1 tbspbourbon¼ cuproasted, chopped pecans8 ozround of brie cheese1.9 ozpackage of frozen mini fully baked phyllo shells (about15shells)
  • 1 tbspbourbon¼ cuproasted, chopped pecans8 ozround of brie cheese1.9 ozpackage of frozen mini fully baked phyllo shells (about15shells)
  • ¼ cuproasted, chopped pecans8 ozround of brie cheese1.9 ozpackage of frozen mini fully baked phyllo shells (about15shells)
  • 8 ozround of brie cheese1.9 ozpackage of frozen mini fully baked phyllo shells (about15shells)
  • 1.9 ozpackage of frozen mini fully baked phyllo shells (about15shells)

Instructions

  1. 1️⃣Preheat the Oven:Set your oven to350°F (175°C).2️⃣Prepare the Bourbon Pecan Mixture:In a small bowl, mix together thebrown sugar, melted butter, bourbon, and chopped pecans. Stir until well combined.3️⃣Prep the Brie:Carefully remove therindfrom the brie and discard it.Cut the brie into¼-inch cubes(one for each phyllo shell).4️⃣Assemble the Brie Bites:Place acube of brieinto eachphyllo shell.Top each with½ teaspoon of the bourbon pecan mixture.5️⃣Bake:Arrange the filled phyllo shells on asmall baking sheet.Bake for10 minutes, or until thebrie has melted and is bubbly.6️⃣Serve & Enjoy!Remove from the oven and let them cool slightly.Servewarm or at room temperature.
  2. Set your oven to350°F (175°C).2️⃣Prepare the Bourbon Pecan Mixture:In a small bowl, mix together thebrown sugar, melted butter, bourbon, and chopped pecans. Stir until well combined.3️⃣Prep the Brie:Carefully remove therindfrom the brie and discard it.Cut the brie into¼-inch cubes(one for each phyllo shell).4️⃣Assemble the Brie Bites:Place acube of brieinto eachphyllo shell.Top each with½ teaspoon of the bourbon pecan mixture.5️⃣Bake:Arrange the filled phyllo shells on asmall baking sheet.Bake for10 minutes, or until thebrie has melted and is bubbly.6️⃣Serve & Enjoy!Remove from the oven and let them cool slightly.Servewarm or at room temperature.
  3. 2️⃣Prepare the Bourbon Pecan Mixture:
  4. In a small bowl, mix together thebrown sugar, melted butter, bourbon, and chopped pecans. Stir until well combined.3️⃣Prep the Brie:Carefully remove therindfrom the brie and discard it.Cut the brie into¼-inch cubes(one for each phyllo shell).4️⃣Assemble the Brie Bites:Place acube of brieinto eachphyllo shell.Top each with½ teaspoon of the bourbon pecan mixture.5️⃣Bake:Arrange the filled phyllo shells on asmall baking sheet.Bake for10 minutes, or until thebrie has melted and is bubbly.6️⃣Serve & Enjoy!Remove from the oven and let them cool slightly.Servewarm or at room temperature.
  5. 3️⃣Prep the Brie:Carefully remove therindfrom the brie and discard it.Cut the brie into¼-inch cubes(one for each phyllo shell).4️⃣Assemble the Brie Bites:Place acube of brieinto eachphyllo shell.Top each with½ teaspoon of the bourbon pecan mixture.5️⃣Bake:Arrange the filled phyllo shells on asmall baking sheet.Bake for10 minutes, or until thebrie has melted and is bubbly.6️⃣Serve & Enjoy!Remove from the oven and let them cool slightly.Servewarm or at room temperature.
  6. Carefully remove therindfrom the brie and discard it.
  7. Cut the brie into¼-inch cubes(one for each phyllo shell).4️⃣Assemble the Brie Bites:Place acube of brieinto eachphyllo shell.Top each with½ teaspoon of the bourbon pecan mixture.5️⃣Bake:Arrange the filled phyllo shells on asmall baking sheet.Bake for10 minutes, or until thebrie has melted and is bubbly.6️⃣Serve & Enjoy!Remove from the oven and let them cool slightly.Servewarm or at room temperature.
  8. 4️⃣Assemble the Brie Bites:Place acube of brieinto eachphyllo shell.Top each with½ teaspoon of the bourbon pecan mixture.5️⃣Bake:Arrange the filled phyllo shells on asmall baking sheet.Bake for10 minutes, or until thebrie has melted and is bubbly.6️⃣Serve & Enjoy!Remove from the oven and let them cool slightly.Servewarm or at room temperature.
  9. Place acube of brieinto eachphyllo shell.
  10. Top each with½ teaspoon of the bourbon pecan mixture.5️⃣Bake:Arrange the filled phyllo shells on asmall baking sheet.Bake for10 minutes, or until thebrie has melted and is bubbly.6️⃣Serve & Enjoy!Remove from the oven and let them cool slightly.Servewarm or at room temperature.
  11. 5️⃣Bake:Arrange the filled phyllo shells on asmall baking sheet.Bake for10 minutes, or until thebrie has melted and is bubbly.6️⃣Serve & Enjoy!Remove from the oven and let them cool slightly.Servewarm or at room temperature.
  12. Arrange the filled phyllo shells on asmall baking sheet.
  13. Bake for10 minutes, or until thebrie has melted and is bubbly.6️⃣Serve & Enjoy!Remove from the oven and let them cool slightly.Servewarm or at room temperature.
  14. 6️⃣Serve & Enjoy!Remove from the oven and let them cool slightly.Servewarm or at room temperature.
  15. Remove from the oven and let them cool slightly.
  16. Servewarm or at room temperature.

Notes

✔Bourbon Substitute:If you prefer a non-alcoholic version, swap bourbon formaple syrupfor a delicious twist.✔Make Ahead:Assemble the bites a few hours in advance and refrigerate. Bake just before serving.✔Extra Flavor:Add atiny drizzle of honeyor a sprinkle offlaky sea saltbefore serving for an extra gourmet touch.✔Phyllo Alternative:If you can’t find mini phyllo cups, usecrescent dough or puff pastry cut into small squaresand bake in a mini muffin tin.✔Nut-Free Version:Replace pecans withcrushed pretzelsorsunflower seedsfor a crunchy alternative.


“`