Table of Contents
Butter Cake Recipe: The Only Recipe You’ll Ever Need
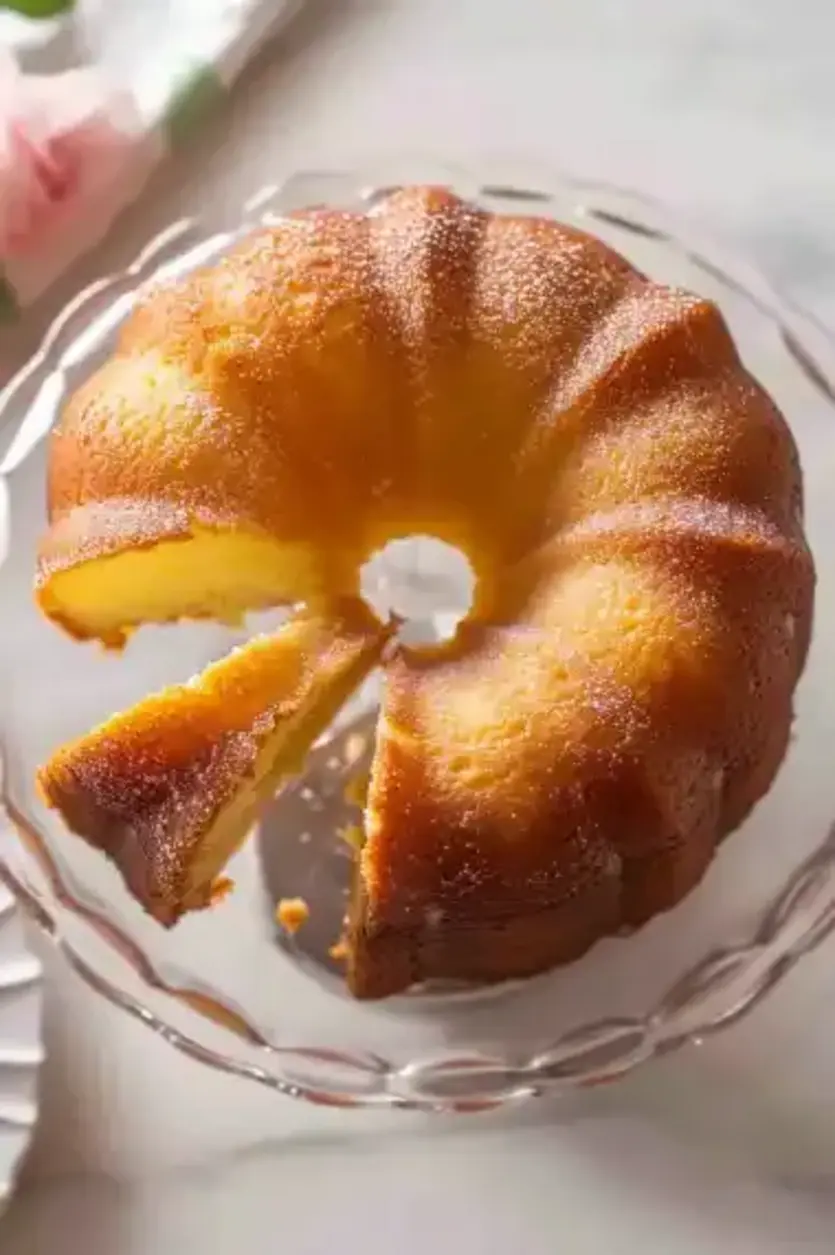
Imagine sinking your teeth into a slice of the most tender, buttery goodness that melts in your mouth—this is the ultimate Butter Cake Recipe that will transform your baking game. As a cherished staple in kitchens worldwide, this Butter Cake Recipe stands out with its secret yogurt twist for extra moisture and fluffiness, making it foolproof for beginners and pros alike. Crafted by Chef Mia, this easy Butter Cake Recipe promises a delightful balance of rich flavors and light texture, perfect for any occasion. Whether you’re a novice baker or a seasoned home cook, this recipe will become your go-to for creating that perfect, homemade treat that wows everyone at the table.
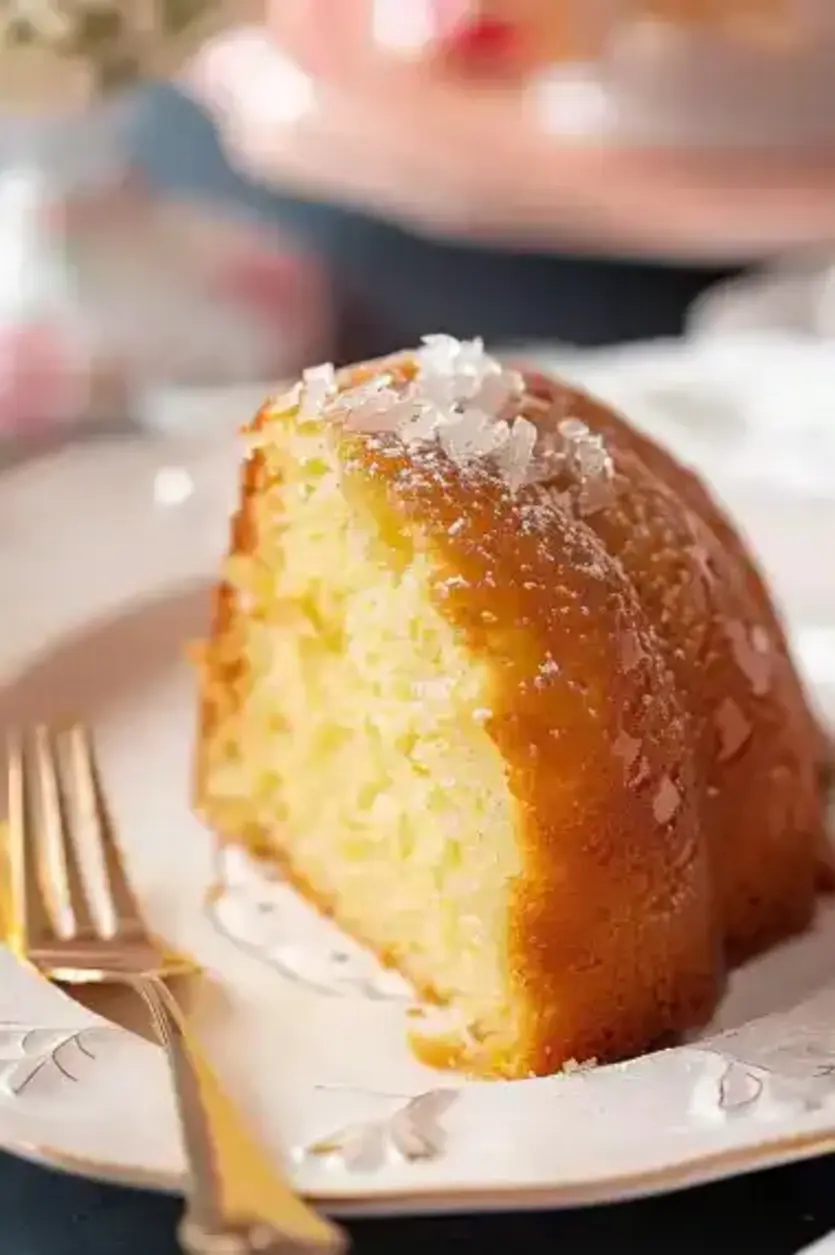
The allure of this Butter Cake Recipe lies in its irresistible sensory profile. Picture the golden crust forming a satisfying crunch, giving way to a soft, velvety crumb that’s infused with the pure essence of butter and vanilla. Each bite delivers a harmonious blend of sweetness from the granulated sugar, balanced by the subtle tang that keeps it from being overly rich. As it bakes, your kitchen fills with the warm, comforting aroma of vanilla and butter melding together, evoking memories of family gatherings and simple joys. This isn’t just a cake; it’s a textural masterpiece that feels luxuriously creamy on the palate while maintaining a light, airy structure that doesn’t weigh you down.
What sets this Butter Cake Recipe from exorecipes.com apart is our commitment to making it the most reliable and innovative version you’ll find online. Drawing from Chef Mia’s years of expertise, we’ve incorporated a unique angle that elevates it above standard recipes—think unbeatable moisture and flavor thanks to a simple chef’s secret we’ll reveal shortly. By the end of this post, you’ll gain confidence in mastering this American dessert classic, complete with detailed tips, ingredient spotlights, and answers to common questions. Prepare to impress your loved ones with a Butter Cake Recipe that’s been rigorously tested for consistent, heartwarming results every single time.
Why This Butter Cake Recipe is a Game-Changer
The Chef’s Secret: The standout feature of this Butter Cake Recipe is the addition of a tablespoon of yogurt to the batter, which creates an extra moist and tender crumb that sets it apart from ordinary versions. This simple twist, inspired by Chef Mia’s personal tweaks, introduces a subtle acidity that reacts with the baking powder, resulting in a lighter, more airy texture while locking in moisture for days. It’s this easy enhancement that makes your homemade Butter Cake Recipe not just good, but extraordinary, ensuring it stays fresh and flavorful longer than typical cakes.
Unbeatable Texture: The science behind the texture in this Butter Cake Recipe comes from using high-quality unsalted butter and room-temperature ingredients, which allow for better emulsification and air incorporation during creaming. This leads to a fine, even crumb that’s soft yet resilient, thanks to the precise balance of flour and baking powder. The yogurt’s role in adding fat and moisture prevents dryness, creating a cake that’s both fluffy and dense in all the right ways, making it a superior choice for any butter cake enthusiast.
Foolproof for a Reason: This Butter Cake Recipe has been tested multiple times in real home kitchens to guarantee success, even for those new to baking. With clear instructions and built-in tips, it minimizes errors and maximizes satisfaction, turning potential baking fails into effortless wins. Whether you’re baking for a crowd or just for yourself, this recipe’s reliability ensures consistent results, making it the best Butter Cake Recipe you’ll ever try.
Ingredient Spotlight: Quality Makes the Difference
For the 1 cup unsalted butter, softened: This is the heart of any great Butter Cake Recipe, providing that rich, creamy base that defines the flavor. High-quality unsalted butter allows you to control the salt levels and ensures a pure, buttery taste without any additives. Opt for European-style butter for higher fat content, which enhances the cake’s tenderness. If substituting, try using an equal amount of ghee for a nuttier flavor, but be cautious as it might alter the moisture slightly—always bring it to room temperature for optimal creaming.
Regarding the 1 1/4 cups granulated sugar: Sugar not only sweetens this Butter Cake Recipe but also contributes to the cake’s moisture and golden color through caramelization. Using fine granulated sugar helps it dissolve evenly, creating a smooth batter. For the best results, choose organic cane sugar to avoid refined additives. A tested substitution is coconut sugar, which adds a hint of caramel note, but use it in the same measure and expect a slightly darker cake—adjust if you’re aiming for a lighter hue in your butter cake.
The 4 large eggs play a crucial role in binding and adding structure to this Butter Cake Recipe, while also contributing to its richness and rise. Fresh, room-temperature eggs whip up better, incorporating air for a fluffier texture. Quality matters here as fresher eggs lead to a more stable emulsion. For substitutions, flax eggs can work for a vegan twist (mix 1 tablespoon ground flaxseed with 3 tablespoons water per egg), though it may make the cake denser—test this if dietary needs require it in your butter cake baking.
As for the 2 1/2 cups all-purpose flour: This forms the foundation of the Butter Cake Recipe, providing the necessary gluten for structure without making it tough. Sifting the flour ensures a lighter cake, and using unbleached varieties preserves natural nutrients. If you’re looking for a substitution, opt for a 1:1 gluten-free flour blend to keep it accessible, but add a bit more milk to maintain the batter’s consistency— this tweak keeps your homemade butter cake recipe inclusive yet delicious.
The 2 1/2 tsp baking powder is essential for leavening in this Butter Cake Recipe, helping the cake rise to a perfect height. Fresh baking powder reacts quickly with the wet ingredients, creating those desirable air pockets. Always check the expiration date for potency. A substitute could be baking soda with an acid like cream of tartar, but use half the amount and adjust accordingly to avoid a metallic taste in your butter cake.
Don’t overlook the 1/2 tsp salt; it enhances the flavors in this Butter Cake Recipe, balancing the sweetness and bringing out the butter’s nuances. Use fine sea salt for even distribution. If sodium is a concern, reduce it slightly, but avoid omitting it entirely as it could make the cake taste flat. No direct substitution is needed, but kosher salt works in a pinch—just measure precisely.
The 1 cup whole milk adds necessary liquid to this Butter Cake Recipe, contributing to its moistness and helping activate the baking powder. Full-fat milk ensures creaminess, but for a lighter version, 2% milk can substitute without much loss. For dairy-free options, unsweetened almond milk is a great swap, though it might make the cake a tad less rich—adjust with the yogurt secret for extra moisture.
Finally, the 2 tsp vanilla extract rounds out this Butter Cake Recipe with its aromatic warmth. Pure vanilla extract provides authentic flavor, far superior to imitation versions. Invest in a good quality one for that genuine essence. If you’re out, vanilla bean paste can replace it one-to-one for a more intense flavor, elevating your butter cake to new heights.
Step-by-Step Instructions
Step 1: Preparing the Oven and Pan
Start by preheating your oven to 350°F (175°C) and thoroughly grease and flour an 8-inch cake pan to prevent sticking. This step ensures even baking and easy removal. Measure your ingredients while the oven heats for efficiency.
Pro Tip: Use a high-quality baking spray with flour for better coverage, as this can make a noticeable difference in the release of your Butter Cake Recipe, preventing tears in the crust.
Step 2: Creating the Creamed Mixture
In a large mixing bowl, cream together the 1 cup softened unsalted butter and 1 1/4 cups granulated sugar using an electric mixer on medium speed until the mixture is light and fluffy, about 3-5 minutes. This incorporates air for a better rise. Then, beat in the 4 large eggs one at a time, ensuring each is fully incorporated before adding the next.
Common Mistake to Avoid: Over-beating the eggs can cause the batter to curdle, leading to a dense cake; mix just until combined to maintain the perfect texture in your Butter Cake Recipe.
Step 3: Combining the Dry Ingredients
In a separate bowl, whisk together the 2 1/2 cups all-purpose flour, 2 1/2 tsp baking powder, and 1/2 tsp salt until evenly distributed. This dry mix provides the structure and lift for your cake.
Pro Tip: Sift the dry ingredients to remove any lumps, which helps achieve a smoother batter and a more uniform rise in this foolproof Butter Cake Recipe.
Step 4: Alternately Adding Wet and Dry Ingredients
Gradually add the dry ingredients to the creamed mixture, alternating with the 1 cup whole milk, beginning and ending with the dry ingredients. Mix on low speed after each addition until just combined, then stir in the 2 tsp vanilla extract and a tablespoon of yogurt for that secret moisture boost.
Common Mistake to Avoid: Overmixing at this stage can develop too much gluten, resulting in a tough cake; stop as soon as the ingredients are incorporated for the best Butter Cake Recipe results.
Step 5: Pouring and Baking the Batter
Pour the prepared batter into your greased and floured 8-inch cake pan, smoothing the top with a spatula for even baking. Place it in the preheated oven and bake for 30-35 minutes, or until a toothpick inserted into the center comes out clean.
Pro Tip: Rotate the pan halfway through baking to ensure even heat distribution, which is key for a perfectly golden Butter Cake Recipe without any uneven spots.
Step 6: Cooling the Cake
Once baked, remove the cake from the oven and let it cool in the pan for 10 minutes. Then, carefully turn it out onto a wire rack to cool completely, allowing air to circulate around it.
Common Mistake to Avoid: Removing the cake from the pan too soon can cause it to break; wait the full 10 minutes to preserve the structure of your delicious Butter Cake Recipe.
Serving & Presentation
To elevate your Butter Cake Recipe, consider creative plating that turns a simple dessert into a showstopper. Dust the top with powdered sugar for a classic look, or drizzle with a homemade glaze made from powdered sugar and milk for added sweetness. Fresh berries like strawberries or raspberries pair beautifully, providing a tart contrast to the cake’s richness. For an impressive garnish, add edible flowers or a sprinkle of chopped nuts for texture and visual appeal.
When serving this Butter Cake Recipe as part of a larger meal, it’s an ideal companion to American-style desserts like ice cream or whipped cream, enhancing the overall experience. Pair it with coffee or tea for a cozy afternoon treat, or serve it alongside fresh fruit salads to balance the indulgence. This versatile cake shines as a standalone dessert or as a base for layered creations, making it perfect for birthdays or casual gatherings.
Make-Ahead & Storage Solutions
Make-Ahead Strategy: Prepare the batter up to 2 days in advance by mixing the dry ingredients and storing them in an airtight container, while keeping wet ingredients refrigerated. On the day of baking, combine them quickly for fresh results, or bake the cake fully and store it wrapped in plastic for up to 3 days before serving.
Storing Leftovers: To maintain maximum freshness, store cooled slices in an airtight container at room temperature for up to 2 days, or refrigerate for up to a week to preserve moisture—use parchment paper between layers to prevent sticking. For longer storage, freeze the cake wrapped tightly in foil for up to 3 months; thaw overnight in the fridge.
The Best Way to Reheat: Restore the original texture by warming slices in a 300°F oven for 10 minutes, or microwave on low power for 20 seconds. This gently revives the moist crumb without drying it out, ensuring your Butter Cake Recipe tastes as good as freshly baked.
Frequently Asked Questions (FAQ)
How long do you bake a butter cake for?
For this Butter Cake Recipe, baking typically takes 30-35 minutes at 350°F (175°C), but always check for doneness with a toothpick—it should come out clean. Factors like oven accuracy can vary, so start checking at 30 minutes to avoid overbaking and ensure a moist result.
Can I substitute butter with margarine in butter cake?
Yes, you can substitute butter with margarine in this Butter Cake Recipe, but it may affect the flavor and texture. Margarine has more water and less fat, potentially making the cake less rich and slightly denser. For the best results, use a high-fat margarine and adjust by adding an extra tablespoon of oil if needed to maintain moisture.
What are some tips for making butter cake moist?
To make your Butter Cake Recipe extra moist, ensure all ingredients are at room temperature for better incorporation, and add a tablespoon of yogurt as per our secret tip. Don’t overbake—remove it from the oven as soon as a toothpick is mostly clean. Also, use full-fat milk and store the cake properly to retain humidity.
What are good serving suggestions for butter cake?
Butter Cake is versatile; serve it warm with a scoop of vanilla ice cream for a decadent treat, or pair it with fresh fruits like berries for a lighter option. It’s also excellent as a base for trifles or topped with whipped cream and chocolate shavings, making it ideal for desserts at parties or as a simple afternoon snack.
Can I add flavors or mix-ins to this butter cake recipe?
Absolutely, you can customize this Butter Cake Recipe by folding in additions like chocolate chips or citrus zest for extra flavor. Add them during the final mixing step, but keep quantities to about 1/2 cup to maintain the cake’s structure—experiment to find your perfect variation.
Is this butter cake recipe suitable for beginners?
Yes, this Butter Cake Recipe is beginner-friendly with straightforward steps and detailed tips. Focus on measuring accurately and following the instructions closely, and you’ll achieve success on your first try, building confidence for more complex bakes.
Can I make this recipe vegan or gluten-free?
To make this Butter Cake Recipe vegan, substitute the butter with a plant-based alternative like vegan margarine, use flax eggs (1 tbsp ground flaxseed mixed with 3 tbsp water per egg), and swap milk for almond or oat milk. For gluten-free, replace the all-purpose flour with a gluten-free blend and add 1/2 tsp xanthan gum if not included. These swaps may slightly alter texture, so test a small batch first for the best results.
Tried This Recipe? Leave a Comment!
Did you make this recipe? I’d love to hear how it turned out! Please leave a comment and a rating below. Your feedback helps other home cooks and supports exorecipes!
For more delicious inspiration, follow me on Pinterest!

Butter Cake Recipe
- Prep Time: 15 minutes
- Cook Time: 35 minutes
- Total Time: 50 minutes
- Yield: 1 cake (8-inch round) 1x
- Method: Dessert
- Cuisine: American
Description
Welcome to your new favorite treat—my heartwarming Butter Cake! This recipe has been a staple in my kitchen for years, loved for its simplicity and mouthwatering goodness. It’s perfect for any occasion, whether you’re hosting a party or just craving a slice of something sweet and satisfying. Join me as we create magic in the kitchen with this foolproof recipe that’s sure to win hearts!
Ingredients
- 1 cupunsalted butter, softened
- 1 1/4 cupsgranulated sugar
- 4large eggs
- 2 1/2 cupsall-purpose flour
- 2 1/2 tspbaking powder
- 1/2 tspsalt
- 1 cupwhole milk
- 2 tspvanilla extract
Instructions
- Prep: Preheat yourovento 350°F (175°C). Grease and flour an 8-inch cake pan.
- Mix: In a bowl, cream together butter and sugar until light. Beat in eggs one at a time.
- Dry Ingredients: In another bowl, combine flour, baking powder, and salt.
- Combine: Alternately add dry ingredients and milk to the creamed mixture, starting and ending with dry. Stir in vanilla.
- Bake: Pour batter into the prepared pan. Bake for 30-35 minutes or until a toothpick comes out clean.
- Cool: Let cool in the pan for 10 minutes, then turn out onto awire rack.
Notes
For best results, ensure all ingredients are at room temperature.To keep the cake moist, add a tablespoon of yogurt to the batter.
Nutrition
- Calories: 330
- Sugar: 20
- Fat: 16
- Carbohydrates: 40
- Protein: 5
Conclusion
This butter cake recipe delivers a rich, buttery flavor that’s irresistibly moist and perfect for satisfying your sweet cravings anytime. Whether you’re baking for a family gathering or a simple weeknight treat, its straightforward preparation ensures a homemade delight that never disappoints. For a fun variation, try adding fresh berries to the batter or serving it warm with a scoop of vanilla ice cream to elevate the experience.