Table of Contents
Easy Valentine’s Day Cake: The Only Recipe You’ll Ever Need
Imagine surprising your sweetheart with a freshly baked Easy Valentine’s Day Cake that looks as stunning as it tastes, all without spending hours in the kitchen. This simple yet delightful recipe transforms a basic box mix into a heartfelt masterpiece, perfect for busy couples or families celebrating love. With our Box Mix Magic approach, you’ll achieve a moist, vibrant red cake that’s effortlessly romantic and ready in under an hour, making it the ultimate go-to for your Easy Valentine’s Day Cake needs. This foolproof method ensures every bite is packed with flavor, proving that homemade treats don’t have to be complicated. Let’s dive into why this Easy Valentine’s Day Cake will become your new tradition for February 14th.
The allure of this Easy Valentine’s Day Cake lies in its irresistible sensory appeal. Picture the soft, tender crumb yielding to your fork, releasing a burst of vanilla-infused sweetness with just a hint of red velvet essence from the food coloring. The aroma of baking fills your home with warm, comforting notes of vanilla and a subtle buttery richness, evoking memories of cherished celebrations. Once frosted, the cake boasts a creamy, velvety topping that melts on the tongue, balanced by the fresh tang of optional berries, creating a harmonious blend of textures and flavors that’s both indulgent and refreshing. It’s a treat that not only satisfies your sweet tooth but also adds a visual pop with its festive red hue.
What sets our Easy Valentine’s Day Cake recipe apart on exorecipes.com is its blend of simplicity and expert guidance, drawing from Chef Mia’s proven techniques. This version isn’t just another cake recipe; it’s been meticulously tested for consistent results, incorporating a special “Chef’s Secret” that elevates ordinary ingredients into something extraordinary. You’ll learn insider tips on achieving the perfect texture, smart substitutions, and creative twists to make this your signature dessert. Whether you’re a novice baker or a seasoned pro, this comprehensive guide ensures success, turning your kitchen into a hub of romantic innovation. Stick around for detailed steps, FAQs, and more to master this Easy Valentine’s Day Cake like a pro.
Why This Easy Valentine’s Day Cake Recipe is a Game-Changer
The Chef’s Secret: At the heart of this Easy Valentine’s Day Cake is our “Box Mix Magic” technique, which elevates a standard cake mix by incorporating vanilla extract and red food coloring at just the right moments. This simple addition infuses the batter with deeper flavor and a vibrant hue, transforming it from everyday to extraordinary. By whisking in the vanilla extract early, you enhance the cake’s aroma and moisture, while the red food coloring ensures that signature Valentine’s vibe without overpowering the taste—it’s all about balance for a truly memorable dessert.
Unbeatable Texture: The science behind this Easy Valentine’s Day Cake’s texture comes from using room-temperature ingredients, as noted in the recipe details. The softened butter in the frosting creates a smooth, airy consistency, while the cake mix’s structure, combined with oil and eggs, locks in moisture for a fluffy yet dense crumb. This prevents the common issue of dry cakes by ensuring even baking, resulting in a tender bite that’s neither too crumbly nor overly heavy—perfect for slicing and sharing.
Foolproof for a Reason: This Easy Valentine’s Day Cake has been tested multiple times in real home kitchens to guarantee success, even for beginners. With clear instructions and built-in tips, it minimizes errors like overbaking or uneven frosting, making it a reliable choice for holiday baking. Readers rave about its consistency, turning it into the go-to recipe for stress-free celebrations.
Ingredient Spotlight: Quality Makes the Difference
For the box of your favorite vanilla or red velvet cake mix, this is the foundation of our Easy Valentine’s Day Cake, providing a quick base that saves time while delivering reliable results. Choose a high-quality brand with no artificial preservatives for better flavor and texture; it acts as the canvas for your creativity, absorbing the vanilla extract and food coloring seamlessly. If you’re opting for substitutions, try a gluten-free cake mix to accommodate dietary needs without sacrificing the cake’s moist structure.
Ingredients required by the cake mix, such as water, oil, and eggs, are essential for binding and moisture in this Easy Valentine’s Day Cake. Eggs, in particular, add richness and help create a tender crumb—always use fresh, large eggs at room temperature for optimal rise. Quality matters here because fresh oil prevents greasiness, and if substituting, consider unsweetened applesauce for a lighter version, which maintains the cake’s fluffiness while reducing fat content.
One teaspoon of vanilla extract brings a warm, aromatic depth to your Easy Valentine’s Day Cake, enhancing the overall flavor profile. Opt for pure vanilla extract over imitation for a more authentic taste that elevates the cake from good to irresistible. If you’re out, almond extract can substitute in a pinch, but use half the amount to avoid overpowering the subtle sweetness.
Red food coloring is key for that festive, romantic look in this Easy Valentine’s Day Cake, turning the batter into a eye-catching red shade. Choose gel-based coloring for vibrant results with less liquid, which keeps the cake’s texture intact. For a natural alternative, beet juice powder works wonders, providing a similar hue without synthetic additives, though it may slightly alter the flavor—start with a small amount and adjust.
For the frosting, start with 1/2 cup of unsalted butter, softened, which forms the creamy base of your Easy Valentine’s Day Cake. High-quality, European-style butter ensures a richer taste and smoother consistency; let it soften naturally for easy whipping. If dairy-free, a plant-based butter substitute like coconut oil-based spread can replace it, maintaining the frosting’s spreadability and flavor.
Two cups of powdered sugar in the frosting provide sweetness and structure for this Easy Valentine’s Day Cake. Sift it first to avoid lumps, enhancing the silky texture—choose organic options for a cleaner taste. For a low-sugar version, powdered erythritol is a great substitute, though it may make the frosting less firm, so add a bit more for stability.
One teaspoon of vanilla extract in the frosting echoes the cake’s flavors, adding a layer of complexity. As with the cake batter, pure extract is best for authenticity; if needed, substitute with vanilla bean paste for visible specks and intensified aroma, which can make your Easy Valentine’s Day Cake even more visually appealing.
Two tablespoons of milk help achieve the perfect frosting consistency for this Easy Valentine’s Day Cake, making it easy to spread. Use whole milk for creaminess, but if lactose-free, almond or oat milk works seamlessly, ensuring the frosting remains glossy and not too thick.
Optional pink or red food coloring for the frosting adds a playful touch to your Easy Valentine’s Day Cake. Gel coloring is ideal for intensity; for natural swaps, use fruit-based powders like hibiscus for a subtle pink, which won’t affect the taste but will enhance the thematic presentation.
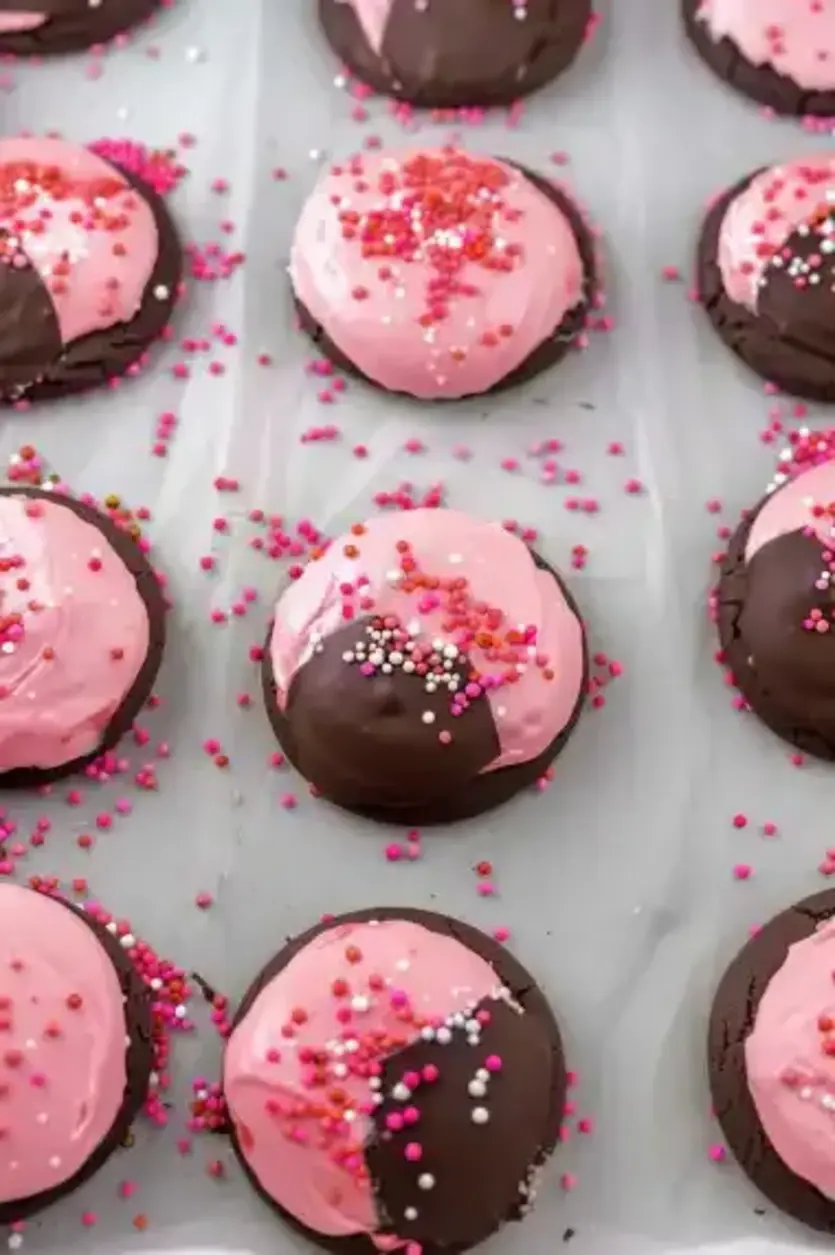
Decorations like heart-shaped sprinkles bring fun and festivity to this Easy Valentine’s Day Cake, adding a crunchy contrast to the soft layers. Choose nonpareils for their vibrant colors and even distribution; if unavailable, edible glitter or crushed candy can substitute for a similar sparkling effect.
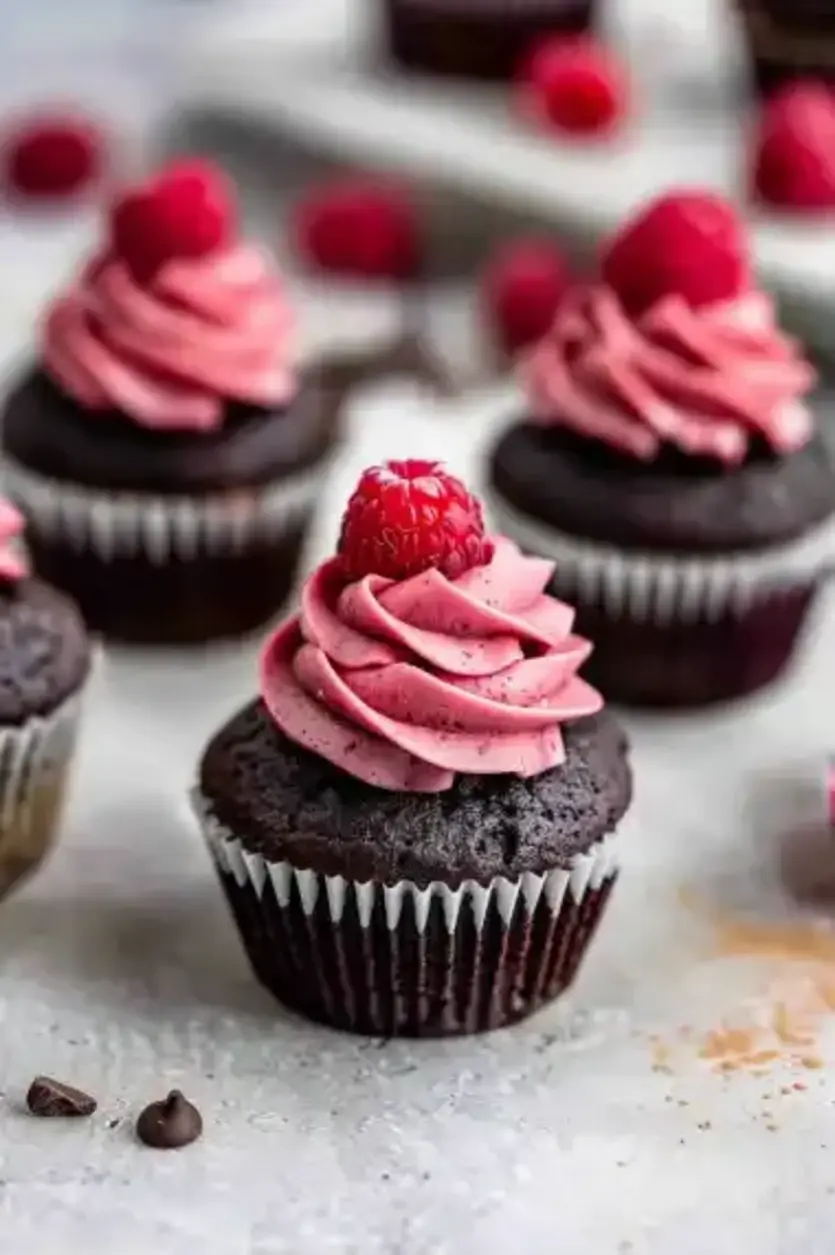
Fresh strawberries or raspberries serve as a fresh, tangy garnish for your Easy Valentine’s Day Cake, balancing the sweetness with natural acidity. Select ripe, seasonal berries for the best flavor and texture; if out of season, frozen and thawed options work, but pat them dry to prevent sogginess on the cake.
Step-by-Step Instructions
Step 1: Preparing the Cake
Preheat your oven as per the cake mix instructions, typically around 350°F, and grease and flour a heart-shaped cake pan to ensure easy release. In a large bowl, mix the cake mix with the required ingredients like water, oil, and eggs according to the package directions for a smooth batter.
Pro Tip: Always measure ingredients precisely to avoid a dense cake—use a kitchen scale for accuracy and let eggs reach room temperature for better incorporation.
Step 2: Creating the Batter
Add 1 teaspoon of vanilla extract and red food coloring to the batter, mixing until evenly colored. Pour the batter into the prepared pan, ensuring it’s level for even baking as directed on the package, then let it cool on a wire rack once baked.
Common Mistake to Avoid: Overmixing the batter can lead to a tough cake; stop stirring once combined to keep it light and airy.
Step 3: Making the Frosting
In a separate bowl, whip the 1/2 cup of softened unsalted butter until creamy, then gradually add 2 cups of powdered sugar, 1 teaspoon of vanilla extract, and 2 tablespoons of milk, beating until smooth. Adjust with optional food coloring for the desired shade.
Pro Tip: Sift the powdered sugar before adding it to prevent clumps, resulting in a professional, silky frosting.
Step 4: Decorating the Cake
Once the cake is fully cooled, frost it evenly with the prepared frosting, then add heart-shaped sprinkles and fresh strawberries or raspberries for a festive touch.
Common Mistake to Avoid: Frosting a warm cake can cause it to melt and slide off; always wait until it’s completely cool for a neat finish.
Serving & Presentation
Elevate your Easy Valentine’s Day Cake by plating it on a romantic, heart-shaped stand for an instant wow factor. Add a ring of fresh strawberries and raspberries around the base for a pop of color and natural sweetness, contrasting the cake’s rich frosting. For an impressive garnish, drizzle a light chocolate sauce or dust with edible rose petals to enhance the thematic appeal. This cake pairs beautifully with a light sparkling wine or a simple cup of coffee, making it ideal as a standalone dessert or a sweet finish to a romantic dinner.
Make-Ahead & Storage Solutions
Make-Ahead Strategy: Prepare the cake batter and bake the cake up to 2 days in advance; once cooled, wrap it tightly in plastic wrap and store at room temperature. For the frosting, mix it fresh on the day of serving to maintain its texture, or prepare it 1 day ahead and refrigerate in an airtight container, allowing it to come to room temperature before use.
Storing Leftovers: Store any remaining Easy Valentine’s Day Cake in an airtight container at room temperature for up to 2 days, or refrigerate for up to 5 days to preserve freshness—cover it well to avoid drying out. For longer storage, freeze individual slices wrapped in foil and placed in a freezer bag for up to 3 months.
The Best Way to Reheat: To restore the original texture and flavor, thaw frozen slices in the refrigerator overnight, then warm in a 300°F oven for 5-10 minutes. Avoid microwaving, as it can make the cake rubbery; instead, let it come to room temperature for the best results.

Frequently Asked Questions (FAQ)
How can I make my Easy Valentine’s Day Cake moist and tender?
To achieve a moist and tender Easy Valentine’s Day Cake, ensure all ingredients like eggs and butter are at room temperature before mixing, as this helps them incorporate evenly. Use the exact amounts of oil and water specified in the cake mix, and avoid overbaking by checking for doneness a few minutes early with a toothpick. Adding an extra teaspoon of vanilla extract can enhance moisture, but the key is in the cooling process—let it rest on a wire rack to prevent sogginess.
What are the best ingredient substitutions for this Easy Valentine’s Day Cake, like using gluten-free flour?
For substitutions in this Easy Valentine’s Day Cake, swap the cake mix for a gluten-free version to accommodate dietary needs, ensuring it’s a 1:1 substitute for the best results. If you want to reduce sugar, use a sugar-free cake mix or replace powdered sugar in the frosting with a powdered sweetener like erythritol. For dairy-free options, substitute milk in the frosting with almond milk and use plant-based butter; these changes maintain the cake’s texture while keeping it delicious and inclusive.
How long does it take to bake this Easy Valentine’s Day Cake?
Baking this Easy Valentine’s Day Cake typically takes about 25 minutes at the temperature specified on your cake mix package, usually 350°F. Factors like oven accuracy and pan size can vary this slightly, so start checking at 20 minutes with a toothpick for doneness to ensure it’s perfectly baked without drying out.
What are some creative serving suggestions for this Easy Valentine’s Day Cake?
Get creative with serving this Easy Valentine’s Day Cake by cutting it into heart-shaped slices and pairing it with a fresh fruit salad for a lighter contrast. For a romantic twist, serve with a dollop of whipped cream and a sprinkle of cocoa powder, or layer it in a trifle with yogurt and berries for a fun, shareable dessert. It’s also delightful as a breakfast treat with coffee, adding a sweet start to your day.
Can I make this recipe vegan?
Yes, you can adapt this Easy Valentine’s Day Cake to be vegan by using a vegan cake mix and substituting eggs with a flaxseed mixture (1 tablespoon flaxseed meal mixed with 3 tablespoons water per egg). For the frosting, swap butter and milk with vegan alternatives like coconut oil and almond milk, ensuring a creamy result while keeping the festive spirit intact.
What if I don’t have a heart-shaped pan?
If you don’t have a heart-shaped pan, use a round or square one instead for this Easy Valentine’s Day Cake—just adjust the baking time slightly as needed. After baking, use cookie cutters to shape portions into hearts, or simply decorate the top with heart motifs using frosting for the same charming effect.
Tried This Recipe? Leave a Comment!
Did you make this recipe? I’d love to hear how it turned out! Please leave a comment and a rating below. Your feedback helps other home cooks and supports exorecipes!
For more delicious inspiration, follow me on Pinterest!

Easy Valentine’s Day Cake
- Prep Time: 15 minutes
- Cook Time: 25 minutes
- Total Time: 40 minutes
- Yield: 1 heart-shaped cake 1x
- Method: Dessert
- Cuisine: American
Description
There’s nothing like a homemade treat to make Valentine’s Day extra special, and my Easy Valentine’s Day Cake is just the ticket! This delicious and simple cake is perfect for sharing with your loved ones, creating a moment to cherish over every single slice. Decorate it to your heart’s content and watch as it brings smiles and sweetness to your celebration!
Ingredients
- 1box of your favorite vanilla or red velvet cake mix
- Ingredients required by the cake mix (typically water, oil, and eggs)
- 1 teaspoonof vanilla extract
- Red food coloring
- For the frosting:1/2 cupunsalted butter, softened2 cupspowdered sugar1 teaspoonvanilla extract2 tablespoonsmilkOptional pink or red food coloring
- 1/2 cupunsalted butter, softened
- 2 cupspowdered sugar
- 1 teaspoonvanilla extract
- 2 tablespoonsmilk
- Optional pink or red food coloring
- Decorations (optional):Heart-shaped sprinklesFresh strawberries or raspberries
- Heart-shaped sprinkles
- Fresh strawberries or raspberries
Instructions
- Prepare the Cake: Preheat yourovenas per the cake mix instructions. Grease and flour a heart-shaped cake pan.
- Mix the cake ingredients in a large bowl according to the package instructions. Add vanilla extract and red food coloring to achieve the desired color.
- Pour the batter into the prepared pan and bake as directed. Once baked, let it cool on awire rack.
- Make the Frosting: Whip the butter, gradually add powdered sugar, vanilla, and milk until smooth. Adjust color with food coloring if used.
- Decorate: Frost the cooled cake and add sprinkles and berries for a festive touch.
Notes
For a perfect cake, ensure all ingredients are at room temperature. To make the cake a day ahead, simply wrap it up and frost before serving.
Nutrition
- Calories: .350
- Sugar: 25
- Fat: 15
- Carbohydrates: 50
- Protein: 3
Conclusion
This Easy Valentine’s Day Cake is a simple yet heartwarming dessert that captures the essence of the holiday with its moist texture and sweet, romantic flavors, perfect for sharing with loved ones. Whether you’re baking for a special date night or a family gathering, this cake comes together quickly to add a touch of sweetness to your celebrations. For a fun variation, try topping it with fresh strawberries or chocolate shavings to enhance the taste, and serve it warm for the best experience.