Sausage, Egg & Cream Cheese Hashbrown Casserole

Welcome to the delicious and comforting world of Sausage, Egg, and Cream Cheese Hashbrown Casserole! Whether you’re planning a brunch or looking for a satisfying meal, this casserole is sure to impress with its flavorful combination of sausage, eggs, and creamy cream cheese. But that’s not all – this dish is also incredibly easy to prepare, making it a go-to recipe for any occasion.

Key Takeaways:

  • Combine the classic flavors of sausage, eggs, and cream cheese in a satisfying casserole.
  • This recipe is perfect for brunch or any meal of the day.
  • Preparation is a breeze, making it an ideal choice for busy days.
  • Layer the ingredients and bake until golden brown and fully cooked.
  • Savor the deliciousness and enjoy every bite of this comforting dish.

Ingredients

To make the mouthwatering Sausage, Egg and Cream Cheese Hashbrown Casserole, you will need the following ingredients:

IngredientsQuantity
Large eggs8
Milk2 cups
Breakfast sausage (ground)2 lbs
Cream cheese8 oz
Frozen shredded hash browns4 cups
Shredded Cheddar cheese2 cups
Salt1 tsp
Black pepper1/2 tsp
Garlic powder1/2 tsp
Paprika1/2 tsp
Chives (optional)For garnish

Gather these ingredients to create a delicious casserole that combines the bold flavors of sausage, the creamy richness of cream cheese, and the comforting taste of hash browns.

Instructions

Prepare this delicious Sausage, Egg and Cream Cheese Hashbrown Casserole with these easy-to-follow instructions:

  1. Preheat your oven to 350 degrees.
  2. In a large skillet, sauté 2 pounds of ground breakfast sausage until fully cooked and browned. Remember to drain any excess grease.
  3. In a mixing bowl, combine the cooked sausage with 8 ounces of softened cream cheese. Stir until well blended and set aside.
  4. In the same skillet, sauté one package of frozen shredded hash browns until lightly browned. Remove from heat.
  5. Grease a 9×13 baking dish and layer the sautéed hash browns evenly at the bottom.
  6. Spread the sausage and cream cheese mixture over the hash browns, ensuring an even distribution of ingredients.
  7. Sprinkle shredded cheese over the meat layer.
  8. In a separate bowl, whisk together 8 large eggs, 2 cups of milk, and salt and pepper to taste.
  9. Pour the egg mixture over the cheese layer in the baking dish.
  10. Place the casserole dish in the preheated oven and bake for 40-50 minutes, or until the eggs are set and the top is golden brown.
  11. Remove from the oven and let it cool for a few minutes before serving.

With these simple instructions, you’ll have a savory and satisfying Sausage, Egg and Cream Cheese Hashbrown Casserole ready to enjoy with your loved ones.

Preheating the Oven and Sautéing the Sausage

One of the essential steps in making the delectable Sausage, Egg, and Cream Cheese Hashbrown Casserole is to preheat the oven to 350 degrees. Preheating the oven ensures that the casserole bakes evenly and cooks to perfection.

Next, it’s time to sauté the breakfast sausage. This step not only adds incredible flavor to the casserole but also ensures that the sausage is cooked through and nicely browned.

When sautéing the sausage, make sure to break it into small crumbles for even cooking. Cook it over medium heat until it is completely browned, stirring occasionally to prevent it from sticking to the pan.

After sautéing the sausage, it’s important to drain any excess grease. Excessive grease can make the casserole greasy and affect the texture. Using a slotted spoon or paper towels, remove the sausage from the pan, leaving behind the excess grease.

Once the sausage is cooked and drained, it’s ready to be combined with the cream cheese and other ingredients to create a mouthwatering filling for the casserole.

Combining Sausage with Cream Cheese and Sautéing Hashbrowns

Once the sausage is cooked and nicely browned, it’s time to take this casserole to the next level by combining it with cream cheese. This simple step adds a creamy and indulgent texture, complementing the savory flavors of the sausage. The combination of sausage and cream cheese creates a mouthwatering filling that will make every bite truly satisfying.

Next, let’s move on to the hashbrowns. Take the frozen shredded hash browns and sauté them in a hot skillet until they turn beautifully golden brown. This step adds a delightful crispiness and enhances the overall texture of the casserole. The hashbrowns provide a delicious base for the sausage and cream cheese mixture, creating a harmonious blend of flavors.

In summary, combining the cooked sausage with cream cheese adds a creamy element to the casserole, while sautéing the hashbrowns brings a crispy texture to the dish. These two steps elevate the overall taste and appeal of the Sausage, Egg, and Cream Cheese Hashbrown Casserole, creating a truly irresistible brunch or meal option.

Layering the Casserole

To create the perfect Sausage, Egg, and Cream Cheese Hashbrown Casserole, it’s important to master the art of layering. This step-by-step guide will ensure that every mouthful is a delicious combination of flavors.

Step 1: Prepare the Baking Dish

Start by greasing a 9×13 baking dish to prevent the casserole from sticking. This will make serving and cleaning up much easier.

Step 2: Layer the Hashbrowns

Now, layer the sautéed hashbrowns in the bottom of the greased baking dish. Make sure to spread them evenly, creating a solid base for the casserole.

Step 3: Top with the Meat Mixture

Next, it’s time to add the star of the show – the sausage and cream cheese mixture. Evenly spread this delicious combination on top of the hashbrowns, ensuring each bite is packed with flavor.

“Layering the hashbrowns and topping them with the meat mixture creates a perfect harmony of textures and tastes.” – Chef Joseph

By following these steps, you’ll achieve a beautifully layered Sausage, Egg, and Cream Cheese Hashbrown Casserole that will impress your family and friends!

Adding Cheese and Preparing the Egg Mixture

In this step, we take the Sausage, Egg, and Cream Cheese Hashbrown Casserole to the next level of deliciousness. Sprinkle a generous amount of shredded cheese over the meat layer, allowing it to melt and create a gooey sensation that will make your taste buds dance with joy. The cheese adds a savory richness that perfectly complements the other flavors in the casserole.

Next, let’s prepare the egg mixture. In a separate bowl, whisk together 8 large eggs and 2 cups of milk until well combined. This creamy and velvety mixture will bind everything together, ensuring each bite of the casserole is perfectly moist and flavorful. Feel free to add your favorite seasonings or spices to enhance the taste according to your preference.

Pouring and Baking

Once you’ve layered the casserole with the cheese and meat mixture, it’s time to pour the delicious egg mixture over everything. Carefully pour the egg mixture evenly over the top, ensuring that it covers all the ingredients in the dish.

Next, it’s time to bake your Sausage, Egg, and Cream Cheese Hashbrown Casserole to perfection. Place the casserole dish in a preheated oven at 350 degrees Fahrenheit and bake for 40-50 minutes. Keep an eye on it, as baking times may vary.

The casserole is ready when the eggs are set and the top is golden brown. To make sure it’s fully cooked through, you can perform the “knife test.” Insert a knife into the center of the casserole, and if it comes out clean, your casserole is ready to be enjoyed!

While the casserole is baking, your kitchen will be filled with the irresistible aroma of savory sausage, fluffy eggs, and creamy cheese. Trust us, the wait will be worth it!

Enjoy

Once the Sausage, Egg, and Cream Cheese Hashbrown Casserole is out of the oven, the aroma alone will make your mouth water. This comforting dish is bursting with flavors that will have your taste buds dancing with delight. The combination of savory sausage, creamy cream cheese, and golden hashbrowns create a symphony of deliciousness that is hard to resist.

To fully experience the magic of this casserole, gather your loved ones around the table and serve it up hot. The creamy and cheesy layers, complemented by the hearty textures of sausage and hashbrowns, will make every bite a moment of pure bliss.

Whether it’s a decadent brunch or a satisfying dinner, this Sausage, Egg, and Cream Cheese Hashbrown Casserole is sure to be a crowd-pleaser. So go ahead, dive in, and savor every forkful of this comforting dish. Enjoy!

Benefits of Enjoying Sausage, Egg & Cream Cheese Hashbrown Casserole
Delicious and comforting flavors
Perfect for brunch or any meal
Easy to prepare and enjoy with family and friends
A satisfying and hearty dish
Mouthwatering layers of sausage, cream cheese, and hashbrowns
An irresistible combination of flavors and textures

Conclusion

The Sausage, Egg, and Cream Cheese Hashbrown Casserole is a fantastic dish that combines the savory flavors of sausage, the creaminess of cream cheese, and the heartiness of hashbrowns. Its easy and straightforward preparation makes it a perfect option for brunch or any meal.

This casserole offers a delicious medley of ingredients that are layered and baked to perfection. By following the step-by-step instructions, you’ll be able to create a mouthwatering dish that will surely impress your family and friends.

Whether you’re hosting a brunch gathering or simply looking for a comforting meal, this casserole is sure to hit the spot. Treat yourself to the delightful combination of sausage, egg, and cream cheese hashbrown casserole and indulge in its rich and satisfying flavors.

FAQ

What are the ingredients required for making Sausage, Egg and Cream Cheese Hashbrown Casserole?

The ingredients needed for this delicious casserole include 8 large eggs, 2 cups of milk, 2 pounds of ground breakfast sausage, 32 ounces of frozen shredded hash brown potatoes, 16 ounces of cream cheese (softened), ¼ teaspoon of garlic powder, ¼ teaspoon of onion powder, 2 cups of shredded cheese, and salt and pepper to taste.

How do I prepare Sausage, Egg and Cream Cheese Hashbrown Casserole?

Follow these simple instructions to make this flavorful casserole. Preheat the oven to 350 degrees. Sauté the breakfast sausage over medium-high heat until completely browned, then drain any excess grease. In a bowl, combine the browned sausage with the softened cream cheese. Next, sauté the frozen shredded hash brown potatoes until lightly browned. Layer the sautéed hashbrowns in the bottom of a well-greased 9×13 baking dish. Top the hashbrowns with the sausage and cream cheese mixture, then sprinkle shredded cheese over the top. In a separate bowl, whisk together the eggs, milk, garlic powder, onion powder, salt, and pepper. Pour the egg mixture over the cheese in the baking dish. Bake for 40-50 minutes, or until the casserole is cooked through completely. Enjoy!

Why is it important to preheat the oven and sauté the sausage?

Preheating the oven to 350 degrees ensures that the casserole cooks evenly and at the correct temperature. Sautéing the breakfast sausage until completely browned not only enhances its flavor but also helps remove any excess grease, keeping the casserole lighter and more balanced in texture.

How do I combine the sausage with cream cheese and sauté the hashbrowns?

After sautéing the breakfast sausage, transfer it to a bowl and mix it with the softened cream cheese. The cream cheese adds a rich and creamy dimension to the sausage. In the same skillet, sauté the frozen shredded hash brown potatoes until they are lightly browned. This step helps to bring out their natural flavors and adds a crispiness to the final dish.

How do I layer the casserole?

Start by greasing a 9×13 baking dish. Then, layer the sautéed hashbrowns evenly on the bottom of the dish, creating a sturdy base for the casserole. Next, spread the sausage and cream cheese mixture over the hashbrowns, ensuring it is evenly distributed. This layering technique allows for a harmonious combination of flavors in each bite.

What should I do after layering the casserole?

Once you have layered the casserole with the hashbrowns and the sausage and cream cheese mixture, sprinkle shredded cheese over the top. This adds a cheesy, melty goodness to the casserole and enhances its overall taste and texture.

How do I prepare the egg mixture and what should I do with it?

In a separate bowl, whisk together 8 large eggs, 2 cups of milk, garlic powder, onion powder, salt, and pepper until well combined. After layering the casserole with the hashbrowns, sausage, cream cheese, and shredded cheese, pour the egg mixture evenly over the top. The egg mixture acts as a binding agent and adds a light and fluffy texture to the casserole when baked.

How long should I bake the casserole?

Bake the casserole in the preheated oven for 40-50 minutes, or until it is cooked through completely. This ensures that all the ingredients are fully cooked, and the flavors have melded together beautifully.

Can I enjoy leftovers of Sausage, Egg and Cream Cheese Hashbrown Casserole?

Absolutely! Leftovers of this casserole can be refrigerated and reheated for future meals. Simply cover the dish tightly with foil or transfer individual portions to a microwave-safe container and heat until warmed through. The flavors may even develop further, making the leftovers just as delicious as the first day.

Print
clock clock iconcutlery cutlery iconflag flag iconfolder folder iconinstagram instagram iconpinterest pinterest iconfacebook facebook iconprint print iconsquares squares iconheart heart iconheart solid heart solid icon

Sausage, Egg, and Cream Cheese Hashbrown Casserole

  • Author: Chef Emy

Description

When it comes to breakfast, nothing says “hearty and satisfying” quite like a casserole. This Sausage, Egg, and Cream Cheese Hashbrown Casserole combines all the beloved breakfast favorites into one delicious dish. Perfect for a weekend brunch, a special occasion, or even as a make-ahead breakfast for busy mornings, this casserole is sure to become a staple in your recipe collection. Let’s dive into how you can create this mouthwatering meal that will wake up your taste buds and start your day off right.


Ingredients

Scale
  • 8 Large eggs
  • 2 Cups Milk
  • 2 Pounds Breakfast sausage, ground
  • 32 Ounces Frozen shredded hash brown potatoes
  • 16 Ounces Cream cheese, softened
  • ¼ Teaspoon Garlic powder
  • ¼ Teaspoon Onion powder
  • 2 Cups Shredded cheese (your choice of variety)
  • Salt and pepper to taste

Instructions

  1. Preheat Your Oven: Begin by preheating your oven to 350 degrees Fahrenheit. This ensures that your oven is at the perfect temperature for baking your casserole to perfection.

  2. Cook the Sausage: In a large skillet over medium-high heat, sauté the ground breakfast sausage until it is completely browned. Be sure to break the sausage into small pieces as it cooks for even browning. Once done, drain any excess grease from the skillet.

  3. Combine Sausage and Cream Cheese: Transfer the browned sausage to a large bowl. Add the softened cream cheese to the sausage while it’s still warm. Mix the two together until they’re well combined. The warmth of the sausage will help soften the cream cheese, making it easier to mix.

  4. Brown the Hashbrowns: In the same skillet used for the sausage (no need to wash it), add the frozen shredded hash brown potatoes. Sauté them until they’re lightly browned, adding a bit of texture and flavor to the potatoes.

  5. Layer the Casserole: Grease a 9×13 inch baking dish well. Spread the browned hashbrowns in an even layer at the bottom of the dish. Next, layer the sausage and cream cheese mixture on top of the hashbrowns. Sprinkle the shredded cheese evenly over the sausage layer.

  6. Prepare the Egg Mixture: In a separate bowl, whisk together the eggs, milk, garlic powder, onion powder, salt, and pepper until well combined. This egg mixture will bind the casserole together as it bakes.

  7. Assemble and Bake: Pour the egg mixture over the cheese layer in the baking dish, ensuring it covers the casserole evenly. Place the dish in the preheated oven and bake for 40-50 minutes, or until the casserole is cooked through and the top is golden brown.

  8. Serving: Allow the casserole to cool slightly before cutting into it. This resting period helps the casserole set, making it easier to serve.


Notes

This Sausage, Egg, and Cream Cheese Hashbrown Casserole is more than just a meal; it’s a comforting embrace to start your day. With its creamy texture, savory flavors, and hearty ingredients, it’s guaranteed to please both family and friends. Whether you’re serving it at a brunch party or enjoying a slice on a quiet morning, this casserole is a delicious way to celebrate the morning. Enjoy ❤

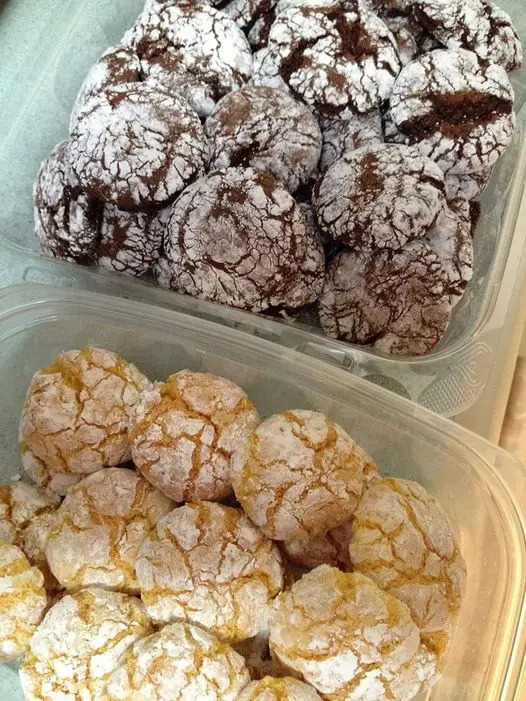
Cool Whip Cookies – Don’t Lose This Recipe

Are you ready to dive into the world of irresistibly delicious cookies? Look no further than Cool Whip Cookies! This delightful treat, made with any flavor cake mix, whether it’s rich chocolate or tantalizing red velvet, is guaranteed to satisfy your sweet tooth. Get ready to indulge in a fluffy and delectable experience that you won’t be able to resist!

Key Takeaways:

  • Discover the joy of making Cool Whip Cookies using any flavor cake mix.
  • Experience the unique and fluffy texture that Cool Whip brings to these cookies.
  • Whip up a batch of Cool Whip Cookies with just a few simple ingredients.
  • Follow the easy steps to create these delightful treats in no time.
  • Get creative with different flavors of cake mix to customize your Cool Whip Cookies.

What are Cool Whip Cookies?

Discover the delightful twist of Cool Whip Cookies, a unique take on traditional cookies. Unlike the usual ingredients, these cookies are made using Cool Whip and cake mix, creating a one-of-a-kind treat that will leave you craving for more.

When it comes to texture, Cool Whip Cookies take the cake. The addition of Cool Whip adds a light and fluffy element to the cookies, making each bite incredibly soft and irresistible. With their heavenly texture and delicious flavor combinations, these cookies are a true delight for the senses.

Whether you’re a fan of classic chocolate or prefer the indulgent taste of red velvet, Cool Whip Cookies can be easily customized to suit your preferences. Choose any flavor of cake mix and get creative with your toppings and mix-ins to create your own signature cookies.

So why settle for ordinary cookies when you can enjoy the fluffy goodness of Cool Whip Cookies? Let’s dive into the world of these delectable treats and discover the secrets behind their irresistible appeal.

Ingredients for Cool Whip Cookies

To whip up a batch of these scrumptious Cool Whip Cookies, you will need just a few simple ingredients. Let’s take a look at what you’ll need:

  • Cool Whip: The star of the recipe, providing the cookies with their irresistible fluffy texture.
  • 1 box of any flavor cake mix: Choose from a variety of options like chocolatered velvet, or lemon to add a burst of flavor to your cookies.

These two main ingredients are all you need to create these delectable treats. It’s incredible how such simple ingredients come together to create such a delightful dessert!

IngredientQuantity
Cool Whip1 cup
Box of any flavor cake mix1

How to Make Cool Whip Cookies

Making Cool Whip Cookies is a breeze! Follow these simple steps to enjoy these delightful treats in no time.

  1. Step 1: Preheat your oven to 350°F (175°C) and prepare a baking sheet with parchment paper or a non-stick spray.
  2. Step 2: In a large mixing bowl, combine one box of any flavor cake mix and 2 cups of Cool Whip. Mix well until the ingredients are fully blended.
  3. Step 3: Shape the dough into small balls, about 1 inch in diameter, and place them on the prepared baking sheet. Leave enough space between the cookies to allow for spreading during baking.
  4. Step 4: Flatten each cookie slightly with the back of a spoon or your fingers.
  5. Step 5: Bake for 10-12 minutes, or until the edges of the cookies are golden brown. The centers may appear slightly undercooked, but they will firm up as the cookies cool.
  6. Step 6: Remove the baking sheet from the oven and let the cookies cool for a few minutes before transferring them to a wire rack to cool completely.

And just like that, your delicious Cool Whip Cookies are ready to be enjoyed! This easy recipe is perfect for beginners or anyone looking for a quick and tasty treat.

IngredientsQuantity
Cake mix (any flavor)1 box
Cool Whip2 cups

These cookies are great for bake sales, parties, or simply enjoying with a cup of coffee or a glass of milk. Get creative and experiment with different cake mix flavors to find your favorite combination!

Cool Whip Cookies Variations

Get creative with your Cool Whip Cookies by experimenting with different flavors of cake mix. Whether you prefer the rich indulgence of chocolate or the luxurious taste of red velvet, the possibilities are endless. Customize your cookies to suit your taste and cravings!

With Cool Whip Cookies, you have the freedom to explore a wide range of flavor combinations. The simple substitution of cake mix flavors offers a delightful twist on this classic treat. Let your imagination run wild and discover new favorites that will leave your taste buds begging for more.

Flavorful Options:

  • Classic Chocolate: Use a chocolate cake mix for a rich and decadent cookie that chocolate lovers will adore.
  • Velvety Red Velvet: Embrace the luxurious taste of red velvet by using a red velvet cake mix for your cookies.
  • Tropical Pineapple: Add a taste of the tropics by incorporating a pineapple cake mix into your recipe.
  • Refreshing Lemon: Brighten up your cookies with a burst of citrusy goodness by using a lemon cake mix.
  • Decadent Devil’s Food: Indulge in the irresistible flavor of devil’s food cake for a truly indulgent treat.

These are just a few examples of the endless flavor variations you can create with Cool Whip Cookies. Feel free to experiment with other cake mix flavors and even mix different flavors together to create your own unique combinations.

Cake Mix FlavorDescription
ChocolateA rich and indulgent flavor perfect for chocolate lovers.
Red VelvetA luxurious and velvety flavor that adds elegance to your cookies.
PineappleBrings a tropical twist to your cookies with a hint of sweetness.
LemonA refreshing and citrusy flavor that adds a zing to your cookies.
Devil’s FoodAn indulgent and decadent chocolate flavor that satisfies your sweet tooth.

So why stick to one flavor when you can explore a world of delicious possibilities? Let your taste buds guide you, and have fun experimenting with different Cool Whip Cookies variations. With every batch, you’ll discover a new flavor sensation that will keep you coming back for more!

Serving and Storing Cool Whip Cookies

Once your cookies are baked to perfection, it’s time to enjoy them! Serve these fluffy treats as a standalone dessert or pair them with your favorite ice cream for an extra special treat. The combination of the soft Cool Whip cookies and the creamy ice cream creates a heavenly dessert experience that will leave everyone craving for more.

Here are some serving suggestions for your Cool Whip Cookies:

  1. Dessert Platter: Arrange a variety of Cool Whip Cookies on a platter for a colorful and eye-catching dessert display.
  2. Cookie Sandwiches: Take two Cool Whip Cookies and sandwich them together with a scoop of ice cream or a dollop of whipped topping.
  3. Cool Whip Cookie Sundae: Place a few Cool Whip Cookies in a bowl, top with a scoop of ice cream, drizzle with chocolate sauce and sprinkle some chopped nuts or sprinkles for a delightful sundae.
  4. Cookie Tower: Stack Cool Whip Cookies in a tower formation to create an impressive centerpiece for special occasions.

Remember to store any leftover Cool Whip Cookies properly to ensure their freshness. Here are some storage tips:

  • Airtight Container: Transfer the cooled cookies to an airtight container to protect them from moisture and maintain their texture.
  • Room Temperature: If you plan to consume the cookies within a few days, you can keep them at room temperature.
  • Refrigerator: For longer shelf life, store the cookies in the refrigerator, especially during warmer months.
  • Freezer: Cool Whip Cookies can also be frozen for up to 3 months. Just make sure to wrap them tightly in plastic wrap or place them in a freezer-safe container.

Following these serving suggestions and storage tips will ensure that your Cool Whip Cookies remain fresh and delicious for as long as possible. Enjoy every bite of these irresistible treats!

Cool Whip Cookies – A Crowd-Pleasing Dessert

Cool Whip Cookies are a crowd-pleasing dessert that is sure to impress at any gathering. Whether you’re hosting a potluck, a birthday party, or just want to treat your loved ones, these cookies are a hit. Whip up a batch and watch them disappear in no time!

Tips and Tricks for Perfect Cool Whip Cookies

Take your Cool Whip Cookies to the next level with these helpful tips and tricks. Whether you’re a baking novice or an experienced pro, these simple hacks will elevate your cookies to new heights of deliciousness.

Adjust Baking Time

One of the keys to achieving perfect Cool Whip Cookies is to adjust the baking time. Since every oven is different, it’s important to keep an eye on your cookies while they’re in the oven. Start with the recommended baking time in the recipe, but be ready to add or subtract a few minutes based on your oven’s performance.

Add Mix-Ins

While Cool Whip Cookies are scrumptious on their own, you can take them to the next level by adding tasty mix-ins. Consider adding chocolate chips, nuts, or even dried fruit to the cookie dough. These additional ingredients will bring extra texture and flavor to your cookies, making them truly irresistible.

Experiment with Flavors

Don’t be afraid to experiment with different flavors of cake mix for your Cool Whip Cookies. While chocolate and red velvet are classic choices, there are plenty of other delicious options to try. From lemon to strawberry to caramel, the possibilities are endless. Let your taste buds guide you and discover your favorite flavor combination.

  • Chocolate cake mix + white chocolate chips
  • Red velvet cake mix + cream cheese filling
  • Lemon cake mix + lemon zest

Chill the Dough

If you want your Cool Whip Cookies to hold their shape better and have a chewier texture, try chilling the dough before baking. Simply cover the dough and refrigerate it for about 30 minutes to an hour. This will help prevent the cookies from spreading too much while baking and result in a more defined shape.

Get Creative with Shapes

Cool Whip Cookies are not limited to the traditional round shape. Have some fun and get creative with different cookie shapes. Use cookie cutters to make heart-shaped cookies for Valentine’s Day or star-shaped cookies for Fourth of July. Let your imagination run wild and make your cookies even more visually appealing.

Allow for Cooling Time

After baking your Cool Whip Cookies, resist the temptation to immediately bite into them. Allow the cookies to cool on a wire rack for a few minutes before indulging. This will prevent them from breaking apart and give them a chance to set, ensuring a perfect, melt-in-your-mouth texture.

With these tips and tricks, you can easily master the art of making perfect Cool Whip Cookies. Whether you’re baking for a special occasion or simply satisfying a sweet craving, these delightful cookies will always hit the spot.

Conclusion

Cool Whip Cookies are the ultimate indulgence for any cookie lover. The combination of the fluffy texture and the variety of flavors make these cookies a delightful treat that is sure to satisfy your sweet cravings. And the best part? They are incredibly easy to make!

So why not take a break from your usual cookie recipes and try something new? With just a box of cake mix and some Cool Whip, you can whip up a batch of these irresistible cookies in no time. Whether you choose chocolate, red velvet, or any other delicious flavor, you won’t be disappointed.

Whether you’re hosting a party or simply treating yourself to a tasty dessert, Cool Whip Cookies are a guaranteed crowd-pleaser. They will disappear from the plate in no time, leaving everyone asking for more. So don’t wait any longer, gather your ingredients and get ready to enjoy the fluffy, flavorful goodness of these incredible cookies!

FAQ

What are Cool Whip Cookies?

Cool Whip Cookies are a delightful twist on traditional cookies. Instead of using the usual ingredients, these cookies are made using Cool Whip and cake mix. The Cool Whip adds a light and fluffy texture, making them a unique and delicious treat.

What ingredients are needed for Cool Whip Cookies?

To whip up a batch of these scrumptious cookies, you will need just a few simple ingredients. The star of the recipe is the Cool Whip, which gives the cookies their fluffy texture. You will also need a box of any flavor cake mix, such as chocolate or red velvet.

How do I make Cool Whip Cookies?

Making Cool Whip Cookies is a breeze! Just mix the cake mix and Cool Whip together, shape the dough into cookies, and bake them until golden brown. It’s a foolproof recipe that anyone can master!

Can I customize the flavors of Cool Whip Cookies?

Absolutely! Get creative with your Cool Whip Cookies by experimenting with different flavors of cake mix. Whether you prefer the rich indulgence of chocolate or the luxurious taste of red velvet, the possibilities are endless. Customize your cookies to suit your taste and cravings!

How should I serve and store Cool Whip Cookies?

Once your cookies are baked to perfection, it’s time to enjoy them! Serve these fluffy treats as a standalone dessert or pair them with your favorite ice cream for an extra special treat. Remember to store any leftovers in an airtight container to keep them fresh for longer.

Are Cool Whip Cookies a good choice for parties?

Absolutely! Cool Whip Cookies are a crowd-pleasing dessert that is sure to impress at any gathering. Whether you’re hosting a potluck, a birthday party, or just want to treat your loved ones, these cookies are a hit. Whip up a batch and watch them disappear in no time!

Do you have any tips for making perfect Cool Whip Cookies?

Perfect your Cool Whip Cookies with these helpful tips and tricks. From adjusting baking time to adding extra mix-ins like chocolate chips or nuts, these little tweaks can take your cookies to the next level. Get ready to elevate your baking game!

Print
clock clock iconcutlery cutlery iconflag flag iconfolder folder iconinstagram instagram iconpinterest pinterest iconfacebook facebook iconprint print iconsquares squares iconheart heart iconheart solid heart solid icon

Cool Whip Cookies

  • Author: Chef Emy

Description

The beauty of Cool Whip cookies lies in their ease of preparation and the soft, cake-like texture that’s hard to achieve with traditional cookie doughs. The secret ingredient, Cool Whip, adds a unique lightness to the batter, creating cookies that are both rich in flavor and delightfully fluffy. This recipe is also incredibly adaptable; you can experiment with any flavor of cake mix to suit your craving or the occasion.


Ingredients

Scale
  • 1 box of cake mix (any flavor: chocolate, red velvet, lemon, etc.)
  • 1 8-ounce container of Cool Whip
  • 1 egg
  • Powdered sugar, for coating

Instructions

  1. Preheat your oven to 350 degrees Fahrenheit (175 degrees Celsius), ensuring it reaches the correct temperature for baking.

  2. Mix the ingredients in a large bowl. Start by combining your chosen cake mix with the Cool Whip and the egg. Stir until all components are fully integrated, and you have a uniform batter. The mixture might be sticky, but that’s exactly what you’re aiming for.

  3. Shape the cookies. Using a teaspoon, scoop out small portions of the batter. Drop each portion into a bowl of powdered sugar, rolling it around until it’s well-coated. This not only adds an extra layer of sweetness but also helps in handling the dough.

  4. Bake to perfection. Place the sugar-coated dough balls on a cookie sheet, leaving enough space between each to allow for spreading. Slide the tray into your preheated oven and bake for 12 to 15 minutes. You’ll know they’re done when the edges start to lightly brown, and the tops crackle, revealing a soft, cake-like interior.

  5. Cool before serving. Allow the cookies to cool on the cookie sheet for a few minutes before transferring them to a wire rack. This step is crucial, as it helps the cookies set and makes them easier to remove without breaking.


Notes

Serving and Storage Tips

Cool Whip cookies are best enjoyed fresh, but they can also be stored in an airtight container for a few days, making them a fantastic treat to have on hand for any sweet craving. For a festive touch, consider adding food coloring to the batter or sprinkling the finished cookies with holiday-themed decorations.

Conclusion

Cool Whip cookies are a testament to the joy of simple baking, proving that you don’t need a plethora of ingredients or time-consuming techniques to create something utterly delicious. Whether you opt for the richness of chocolate, the elegance of red velvet, or the bright zest of lemon, these cookies are bound to impress. So next time you’re looking for a quick, easy, and satisfying dessert, remember this recipe. It’s not just a treat for the taste buds but a delightful adventure in baking that you’ll want to experience again and again.

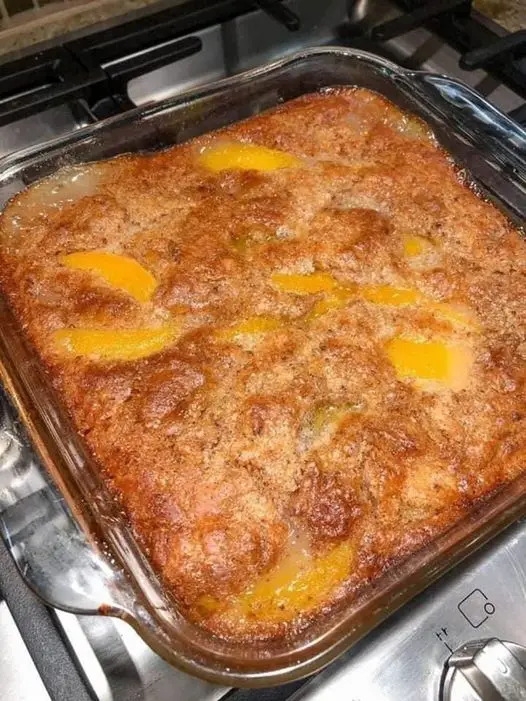
The Ultimate Guide to Making Old-Fashioned Peach Cobbler: A Summertime Delight

Introduction

As the days grow longer and the temperature warms up, there’s no dessert that quite captures the essence of summer like an Old-Fashioned Peach Cobbler. This dessert, with its rich history and simple, yet irresistible flavor profile, is a staple in Southern cuisine but has won the hearts of people everywhere. Today, we’re diving deep into the world of peach cobbler, offering you a comprehensive guide to creating this summertime delight from scratch. Whether you’re a seasoned baker or new to the kitchen, this article will equip you with everything you need to know to bake the perfect peach cobbler.

The History of Peach Cobbler

Peach cobbler traces its roots back to the early settlers in America. It emerged as a simplified version of traditional English steamed puddings. Due to the lack of suitable ingredients and cooking equipment, settlers had to adapt, creating what we now know as cobbler. This dish has evolved over centuries but has always remained a symbol of ingenuity and comfort.

Why Peach Cobbler is a Summer Staple

Peaches are at their peak during the summer months, making it the perfect time to create a cobbler. The warmth of the cinnamon and nutmeg paired with the sweetness of ripe peaches encapsulates the essence of summer in every bite. Moreover, peach cobbler is incredibly versatile, serving as the perfect end to a barbecue, a family dinner, or even as a comforting treat to enjoy on a lazy afternoon.

Selecting the Perfect Peaches

The key to a fantastic peach cobbler lies in the peaches themselves. Opt for fresh, ripe peaches that are firm yet yield slightly to pressure. The peaches should have a sweet fragrance and a vibrant color. Avoid peaches that are too soft or bruised, as they can lead to a mushy cobbler.

Preparation: Peeling and Slicing Peaches

Preparing your peaches is a crucial step in the cobbler-making process. To peel them easily, you can blanch the peaches in boiling water for about 30 seconds and then immediately transfer them to ice water. The skin should slide off effortlessly. Once peeled, slice the peaches into thin wedges. This ensures they cook evenly and absorb the delicious spices and sugar.

Crafting the Perfect Filling

The filling of the peach cobbler should strike the perfect balance between sweet and tart, with a hint of spice. To achieve this, mix your sliced peaches with white and brown sugar, cinnamon, nutmeg, lemon juice, and cornstarch. The cornstarch helps thicken the filling, giving the cobbler a luscious texture.

The Cobbler Crust: A Delicate Balance

The crust of a peach cobbler differs from a traditional pie crust. It’s softer and more biscuit-like, creating a delightful contrast to the juicy filling. The key is to incorporate cold butter into the dry ingredients until the mixture resembles coarse crumbs. Then, by adding boiling water, you create a dough that’s soft yet manageable.

Assembling and Baking Your Cobbler

Assembling your cobbler is a simple yet satisfying process. Begin by preheating your oven. While it’s warming up, pour the peach mixture into a baking dish. Next, dollop the crust mixture over the peaches in spoonfuls. Don’t worry about covering every inch; the charm of a cobbler lies in its rustic appearance. Finally, sprinkle a mixture of sugar and cinnamon over the top for an extra touch of sweetness and spice.

Serving Your Peach Cobbler

Peach cobbler is best served warm, with a scoop of vanilla ice cream or a dollop of whipped cream. The contrast between the warm, spiced peaches and the cold, creamy topping is truly irresistible.

Conclusion: The Joy of Homemade Peach Cobbler

Making an Old-Fashioned Peach Cobbler from scratch is a rewarding experience. Not only does it yield a delicious dessert that’s sure to impress your guests, but it also allows you to connect with a piece of culinary history. This summer, take the time to savor the flavors of the season by baking a peach cobbler. Whether enjoyed in the company of friends and family or as a personal treat, it’s a dessert that embodies the warmth and abundance of summer.

Frequently Asked Questions

  • Can I use canned peaches instead of fresh? While fresh peaches are preferred for their flavor and texture, you can use canned peaches in a pinch. Be sure to drain them well and adjust the sugar in the recipe, as canned peaches are often packed in syrup.
  • How do I store leftover peach cobbler? Leftover cobbler can be covered and stored in the refrigerator for up to 3 days. Reheat in the oven or microwave before serving.
  • Can peach cobbler be frozen? Yes, you can freeze peach cobbler either before or after baking. If freezing before, assemble the cobbler in a freezer-safe dish, cover tightly, and freeze. Thaw in the refrigerator overnight before baking. If freezing after baking, cool completely, then cover and freeze. Reheat in the oven until warm throughout.

Embarking on the journey of creating your own Old-Fashioned Peach Cobbler is a celebration of summer’s bounty. With each step, from selecting the ripest peaches to pulling the bubbling cobbler out of the oven, you’re crafting more than just a dessert; you’re creating memories that will last a lifetime.

Print
clock clock iconcutlery cutlery iconflag flag iconfolder folder iconinstagram instagram iconpinterest pinterest iconfacebook facebook iconprint print iconsquares squares iconheart heart iconheart solid heart solid icon

Old-Fashioned Peach Cobbler

  • Author: Chef Emy

Description

There’s something undeniably comforting about an old-fashioned peach cobbler. It’s a dessert that brings to mind warm summer evenings, family gatherings, and the simple joy of a sweet treat made with love. This particular recipe, with its ease and simplicity, brings the classic flavors of peach cobbler right into your kitchen, making it a perfect dish for both new cooks and seasoned chefs alike. Let’s dive into how you can create this delicious dessert, complete with the option of a scoop of vanilla ice cream for an extra layer of indulgence.


Ingredients

Scale
  • 1 can Sliced Peaches, drained: The star of the dish, providing a sweet and juicy filling.
  • 1 cup Bisquick Mix: Acts as a simple and quick base for the cobbler crust.
  • 1 cup Milk: Helps to bind the Bisquick mix into a smooth batter.
  • 1/2 teaspoon Nutmeg: Adds warmth and depth to the flavor profile.
  • 1/2 teaspoon Cinnamon: Brings a spicy sweetness that complements the peaches beautifully.
  • 1/2 cup Melted Butter: Gives the crust a rich, buttery taste and tender texture.
  • 1 cup Sugar: Sweetens the peach filling, balancing the tartness of the fruit.
  • Vanilla Ice Cream (optional): A scoop on top adds creaminess and a cool contrast to the warm cobbler.

Instructions

  1. Preheat and Prep: Begin by preheating your oven to 375°F (190°C). This ensures the cobbler cooks evenly and the crust achieves a golden brown color.

  2. Create the Crust: In an 8×8 inch baking dish, mix together the Bisquick, milk, nutmeg, and cinnamon until well combined. The spices will infuse the crust with their flavor, making it anything but ordinary. Then, stir in the melted butter, which helps to create a rich and moist base for your cobbler.

  3. Prepare the Filling: In a separate bowl, gently toss the drained peach slices with sugar. This not only sweetens the peaches but also helps to draw out their natural juices, creating a syrupy filling that’s full of flavor.

  4. Assemble the Cobbler: Pour the peach and sugar mixture over the crust in the baking dish. There’s no need to stir; as the cobbler bakes, the crust will rise up around the peaches, enveloping them in a warm, cakey embrace.

  5. Bake to Perfection: Place the cobbler in the oven and bake for 45 minutes to an hour. You’re looking for a crust that’s golden brown and set, with the peach filling bubbling around the edges. The aroma that fills your kitchen will be irresistible.

  6. Serve with Ice Cream: While the cobbler is delightful on its own, serving it with a scoop of vanilla ice cream takes it to the next level. The contrast between the warm, spiced peaches and the cold, creamy ice cream is a match made in dessert heaven.


Notes

Enjoying Your Peach Cobbler

This Old-Fashioned Peach Cobbler is more than just a dessert; it’s a trip down memory lane for some and a new discovery for others. It’s a testament to the power of simple ingredients to create something truly special. Whether you’re making it for a special occasion or a casual weeknight treat, it’s sure to bring smiles to the faces of those you share it with.

So, next time you’re in the mood for something sweet, warm, and wonderfully comforting, remember this peach cobbler recipe. It’s quick, easy, and utterly delicious—especially with that optional scoop of vanilla ice cream on top. Enjoy!

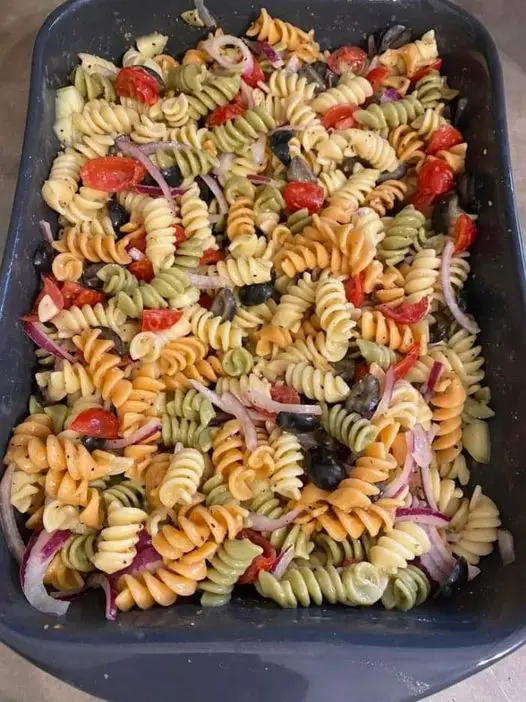
Perfect Pasta Salad with Olive Garden Italian Dressing

Pasta salad is a quintessential dish that embodies the essence of summer but is beloved year-round for its versatility, ease of preparation, and delightful combination of flavors. Whether you’re looking for the perfect side dish for your next barbecue, a light and satisfying lunch, or a nutritious addition to your dinner table, pasta salad fits the bill. This guide will take you through the steps to create a vibrant Pasta Salad dressed in Olive Garden Italian dressing, promising a dish that’s as delicious to eat as it is beautiful to behold.

The Joy of Pasta Salad

Introduction to Pasta Salad: Explore the origins of pasta salad and its evolution into a global favorite. Highlight the dish’s adaptability to different cuisines, dietary preferences, and occasions.

Ingredients: A Symphony of Flavors

  • Tri-Colored Pasta: Discuss the visual appeal and texture that tri-colored pasta brings to the dish.
  • Fresh Vegetables: Dive into the importance of using fresh, crisp vegetables for the best texture and flavor.
  • Olive Garden Italian Dressing: Explain why this particular dressing is a game-changer for achieving that restaurant-quality taste at home.

Step-by-Step Recipe Walkthrough

Preparing the Pasta: Tips for cooking pasta to the perfect al dente texture, essential for a salad that maintains its integrity even after dressing.

Chopping the Vegetables: Techniques for chopping vegetables uniformly for aesthetic appeal and even distribution of flavors.

Dressing the Salad: How to properly dress the salad to ensure each ingredient is beautifully coated, enhancing the overall taste without overwhelming the delicate balance of flavors.

Customizing Your Pasta Salad

Ingredient Variations: Suggestions for customizing the pasta salad with different proteins (grilled chicken, tuna, or a vegetarian option like chickpeas) or additional vegetables according to seasonal availability or personal preference.

Dressing Alternatives: For those looking to experiment, include a section on homemade dressing recipes or other store-bought dressings that complement the salad well.

The Art of Serving Pasta Salad

Presentation Tips: Ideas for presenting the pasta salad in an appetizing manner, whether it’s for a casual family dinner or a more formal gathering.

Pairing Suggestions: Offer recommendations on dishes that pair well with pasta salad, turning it from a simple side to part of a cohesive meal.

Making Ahead, Storage, and Leftovers

Prep in Advance: Discuss the benefits of making pasta salad ahead of time and how it can help the flavors meld together.

Storage Tips: Best practices for storing pasta salad to maintain freshness and prevent sogginess.

Revitalizing Leftovers: Creative ideas for repurposing leftover pasta salad into new meals, ensuring nothing goes to waste.

Frequently Asked Questions About Pasta Salad with Olive Garden Italian Dressing

What kind of pasta is best for making pasta salad?
For pasta salad, shapes that can hold dressing well, such as rotini, farfalle, or penne, are ideal. The tri-colored rotini not only adds a vibrant touch to the dish but also provides nooks and crannies for the dressing and flavors to cling to.

Can I make pasta salad ahead of time?
Yes, pasta salad can be prepared ahead of time, making it a convenient option for gatherings or meal prep. In fact, letting the salad sit in the fridge for a few hours before serving can enhance its flavors as the pasta absorbs the dressing.

How can I customize my pasta salad?
Pasta salad is incredibly versatile. You can add a variety of proteins like grilled chicken or chickpeas, different vegetables such as spinach or artichokes, or even mix in some cheese like feta or cubed mozzarella. The possibilities are endless, allowing you to tailor the dish to your taste preferences or dietary needs.

What’s the best way to store leftover pasta salad?
Leftover pasta salad should be stored in an airtight container in the refrigerator. It typically lasts for 3-4 days when kept chilled. If the salad seems a bit dry when you’re ready to enjoy it again, you can rejuvenate it with a little more Olive Garden Italian dressing.

Is pasta salad healthy?
Pasta salad can be a healthy dish depending on the ingredients you choose. Opt for whole grain pasta for added fiber, load up on fresh vegetables for vitamins and minerals, and be mindful of the dressing amount to keep calories in check. You can also include lean proteins to make it a well-rounded, nutritious meal.

Can pasta salad be served as a main dish?
Absolutely! To serve pasta salad as a main dish, consider adding a substantial protein source and ensure there’s a good variety of vegetables for a balanced meal. It’s filling, satisfying, and perfect for a light yet complete dinner option.

How do I keep my pasta salad from getting soggy?
To prevent pasta salad from becoming soggy, cook your pasta until it’s just al dente, and make sure to rinse it under cold water and drain it well after boiling. Be cautious not to overdo it with the dressing; you can always add more right before serving if needed.

Conclusion: Celebrating the Versatility of Pasta Salad

Wrap up the article by reflecting on the pasta salad’s role as a staple dish that brings people together. Emphasize its versatility, ease of preparation, and the joy of customizing it to suit any taste or occasion.

Print
clock clock iconcutlery cutlery iconflag flag iconfolder folder iconinstagram instagram iconpinterest pinterest iconfacebook facebook iconprint print iconsquares squares iconheart heart iconheart solid heart solid icon

Pasta Salad!!

  • Author: Chef Emy

Description

Looking for a refreshing and colorful dish to brighten up your mealtime? This pasta salad, featuring tri-colored pasta and a medley of fresh vegetables, all tossed in the famously delicious Olive Garden Italian dressing, is a simple yet flavorful option that’s sure to delight. Whether you’re preparing a side dish for a summer barbecue, a healthy lunch option, or a light dinner, this pasta salad is versatile, easy to make, and irresistibly tasty. Here’s how to whip up this vibrant dish in no time.


Ingredients

  • Tri-Colored Pasta: The base of your salad, bringing a cheerful array of colors and a delightful texture.
  • Black Olives: Sliced, these add a nice briny contrast to the freshness of the other ingredients.
  • Cherry Tomatoes: Diced, for a burst of juicy sweetness in every bite.
  • Purple Onions: Thinly sliced, adding a sharpness and crunch that balances the salad.
  • Cucumber: Chopped, for a crisp, refreshing element.
  • Olive Garden Italian Dressing: Half a bottle to dress the salad, lending it that signature zesty and herby flavor.

Instructions

  1. Prepare the Pasta: Start by boiling the tri-colored pasta according to the package instructions until it’s al dente. This ensures the pasta is cooked through but still retains a nice bite, which is perfect for pasta salads.

  2. Cool the Pasta: Once the pasta is cooked, drain it and rinse under cold water. This stops the cooking process and cools the pasta down quickly, making it ready for the salad. Ensure the pasta is well-drained to avoid a watery salad.

  3. Chop the Vegetables: While the pasta cools, prepare your vegetables. Slice the black olives, dice the cherry tomatoes into halves or quarters depending on their size, thinly slice the purple onions, and chop the cucumber. Aim for uniform pieces to ensure each bite of the salad is balanced.

  4. Mix the Salad: In a large mixing bowl, combine the cooled pasta with the sliced black olives, diced cherry tomatoes, sliced purple onions, and chopped cucumber. Pour half a bottle of Olive Garden Italian dressing over the mixture.

  5. Toss Well: Gently toss the salad until all the ingredients are well-coated with the dressing. The key here is to mix thoroughly but carefully, to ensure the pasta and vegetables are evenly dressed without being crushed or broken.

  6. Chill and Serve: For the best flavor, cover the salad and let it chill in the refrigerator for at least an hour before serving. This allows the flavors to meld together beautifully. Give the salad a quick toss before serving to redistribute the dressing and flavors.

Serving Suggestions:

This pasta salad is a versatile dish that can be served in a variety of ways. It’s perfect on its own as a light meal or paired with grilled meats for a more substantial dinner. It also makes an excellent side for picnics or potluck gatherings, as it can be made in advance and travels well.


Notes

Tips for the Perfect Pasta Salad:

  • Pasta Choice: While tri-colored pasta adds visual appeal, you can use any short pasta shape you have on hand.
  • Customization: Feel free to add other ingredients like mozzarella balls, pepperoncini, or artichoke hearts to tailor the salad to your tastes.
  • Dressing: Adjust the amount of Olive Garden Italian dressing to your preference. Some like their pasta salad more or less dressed, so start with half a bottle and add more if needed.

Packed with fresh ingredients and dressed in a tangy, herby dressing, this pasta salad is a celebration of flavors and textures. It’s a testament to the fact that sometimes, the simplest dishes are the most satisfying. Give this recipe a try, and enjoy a bowl of refreshing, delicious pasta salad that’s sure to become a favorite.

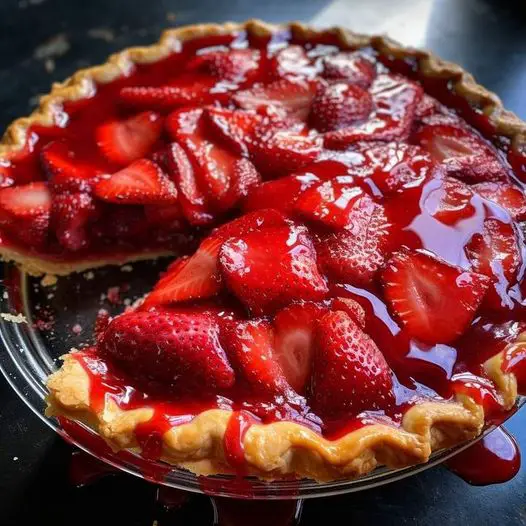
Big Boy’s Fresh Strawberry Pie: A Slice of Summer

There’s something truly magical about a perfectly ripe strawberry—the sweet fragrance, the bright red color, and the juicy flavor. Big Boy’s Fresh Strawberry Pie captures that essence in a dessert that’s both simple and sublime, making it a favorite among summer recipes. This classic dish combines the sweetness of strawberries with a glossy, flavorful jelly, all held together in a flaky pie crust. It’s a recipe that brings back memories of diners and homemade desserts, ideal for any summer gathering or a simple family dinner.

The Origins of a Classic

Big Boy’s Fresh Strawberry Pie is more than just a dessert; it’s a piece of American culinary history. Originating from the Big Boy restaurant chain, this pie became a staple menu item, beloved by patrons for its fresh flavors and simple elegance. This section will explore the pie’s roots, tracing its journey from restaurant favorite to a beloved homemade classic.

Ingredient Breakdown

  • Frozen Pie Crust: The convenient base for our pie, providing a flaky texture.
  • Sugar & Cornstarch: These combine with water to create a thick, sweet glaze that complements the strawberries.
  • Strawberry Jelly: Enhances the filling’s flavor, adding depth and a beautiful sheen.
  • Fresh Strawberries: The star of the show, lending the pie its vibrant color and fresh taste.

Step-by-Step Recipe Guide

From pre-baking the crust to creating the jelly glaze, this section will offer a detailed walkthrough of the recipe. Tips for achieving the perfect consistency and flavor balance will ensure your pie is a hit every time.

Customizing Your Strawberry Pie

While the classic recipe is beloved by many, there’s always room for a personal touch. This part of the article will suggest variations and substitutions, such as using a homemade pie crust, adding different berries for a mixed berry pie, or creating a lattice top for an extra touch of elegance.

Pairing and Serving Suggestions

Big Boy’s Fresh Strawberry Pie is versatile, pairing beautifully with a range of accompaniments. Recommendations for serving—whether with whipped cream, ice cream, or a cup of coffee—will help readers create the perfect dessert experience.

The Joy of Summer Desserts

Reflecting on the broader appeal of summer desserts, this section will celebrate the seasonal ingredients and flavors that make recipes like Big Boy’s Fresh Strawberry Pie so special. It’s a chance to connect the specific recipe to the wider context of summer cooking and eating, emphasizing freshness, simplicity, and the joy of sharing good food with loved ones.

Bringing It All Together

Concluding the article, this part will weave together the themes of history, simplicity, and seasonal freshness. It will reinforce the idea that Big Boy’s Fresh Strawberry Pie is more than just a dessert—it’s a celebration of summer, a nod to American diner culture, and a testament to the power of simple ingredients to create lasting memories.

Frequently Asked Questions About Big Boy’s Fresh Strawberry Pie

What’s the secret to selecting the best strawberries for Big Boy’s Fresh Strawberry Pie?
Choosing ripe, bright red strawberries with a fragrant aroma ensures your pie will have the best flavor. Look for berries that are firm, without bruises or soft spots, to ensure they hold up well in the pie.

Can I use a homemade pie crust instead of a frozen one for Big Boy’s Fresh Strawberry Pie?
Absolutely! A homemade pie crust can add a delightful touch to the pie. If you have a favorite recipe or want to experiment with making your own, it can elevate the dish to a new level of homemade goodness.

How do I prevent the pie crust from becoming soggy?
Pre-baking or “blind baking” the pie crust before adding the filling is key to preventing a soggy bottom. Additionally, allowing the strawberry jelly mixture to cool slightly before pouring it over the strawberries can also help.

Is there a vegan alternative for the ingredients in Big Boy’s Fresh Strawberry Pie?
For a vegan version, you can use plant-based butter for the crust, agar powder instead of cornstarch for the jelly, and substitute the jelly and cheeses with vegan alternatives available in the market.

What adjustments should I make if I want to add banana peppers to the recipe?
If you manage to open that jar of banana peppers, adding them to your pie can introduce a tangy twist. Start with a small amount, finely chopped, to ensure the flavors balance well with the sweetness of the strawberries and the richness of the jelly.

Can Big Boy’s Fresh Strawberry Pie be made in advance?
Yes, this pie can be prepared in advance. It’s actually recommended to allow the pie to set in the refrigerator for a few hours. If making more than a day ahead, assemble the pie but add the fresh strawberry topping and final jelly glaze closer to serving time to maintain the best texture and appearance.

How long will Big Boy’s Fresh Strawberry Pie last in the refrigerator?
When stored properly in the refrigerator, the pie can last for up to 3 days. Cover it with plastic wrap or aluminum foil to keep it fresh. For the best taste and texture, it’s recommended to enjoy the pie within the first day or two.

Print
clock clock iconcutlery cutlery iconflag flag iconfolder folder iconinstagram instagram iconpinterest pinterest iconfacebook facebook iconprint print iconsquares squares iconheart heart iconheart solid heart solid icon

Big Boy’s Fresh Strawberry Pie

  • Author: Chef Emy

Description

Big Boy’s Fresh Strawberry Pie is a classic dessert that captures the essence of summer in every bite. This delightful pie combines the sweetness of fresh strawberries with a luscious jelly glaze, all nestled in a flaky, golden crust. The recipe is straightforward, making it a perfect choice for both novice bakers and experienced pastry chefs looking to add a refreshing treat to their dessert repertoire. Here’s how you can recreate this beloved pie in your own kitchen.


Ingredients

Scale
  • 1 frozen pie crust: Serves as the base for your pie, offering a crispy texture.
  • 1 1/4 cup sugar: Sweetens the jelly mixture that will coat the strawberries.
  • 3 tbsp cornstarch: Thickens the jelly mixture, ensuring it sets properly.
  • 1 1/4 cups water: The liquid component needed to create the jelly.
  • 3 tbsp strawberry jelly: Enhances the strawberry flavor and adds a beautiful sheen.
  • 2 cups strawberries, sliced: The star of the pie, providing fresh, juicy bursts of flavor.

Instructions

  1. Prep the Pie Crust: Begin by baking the frozen pie crust according to the package’s instructions. This usually involves preheating your oven, placing the crust on a baking sheet, and baking until golden brown. Once done, remove it from the oven and let it cool for about 30 minutes. A properly cooled crust is crucial as it prevents the jelly mixture from making it soggy.

  2. Make the Jelly Mixture: While the crust is cooling, prepare the jelly mixture. In a small saucepan, combine the sugar, cornstarch, and water. Whisk these ingredients together over medium heat. The key is to keep whisking to prevent any lumps from forming as the mixture heats. Once it reaches a boil, reduce the heat to low and let it simmer for about 5 minutes, or until the mixture has thickened to a jelly-like consistency. Then, whisk in the strawberry jelly until it’s fully integrated and smooth. Remove the saucepan from heat and allow the mixture to cool. This step infuses the jelly with a deep strawberry flavor and ensures it will solidify correctly in the fridge.

  3. Assemble the Pie: With your cooled pie crust ready, arrange the sliced strawberries inside it, covering the bottom entirely. For an extra touch of elegance, you can arrange the slices in concentric circles or any pattern you like. Once the strawberries are in place, gently pour the cooled jelly mixture over them, making sure to cover all the strawberries evenly. The jelly acts as a glaze, sealing the strawberries in place and giving the pie a glossy, appetizing finish.

  4. Chill and Set: Transfer the pie to the refrigerator and let it chill for a few hours. This cooling period allows the jelly mixture to set, resulting in a firm filling that slices beautifully. The pie is ready to serve once the filling is no longer liquid and holds its shape when cut.

  5. Serving Suggestions:

    Big Boy’s Fresh Strawberry Pie is best enjoyed chilled, making it a refreshing dessert option for warm weather days. Serve it as is, or with a dollop of whipped cream or a scoop of vanilla ice cream for an extra indulgent treat. It’s perfect for picnics, summer gatherings, or simply as a delightful finish to any meal.


Notes

Big Boy’s Fresh Strawberry Pie is more than just a dessert; it’s a celebration of summer’s bounty. With its simple ingredients and easy-to-follow steps, anyone can bring this classic pie to life. Whether you’re reminiscing about visits to Big Boy restaurants or simply in the mood for a delicious strawberry dessert, this pie is sure to satisfy your cravings and impress your guests.