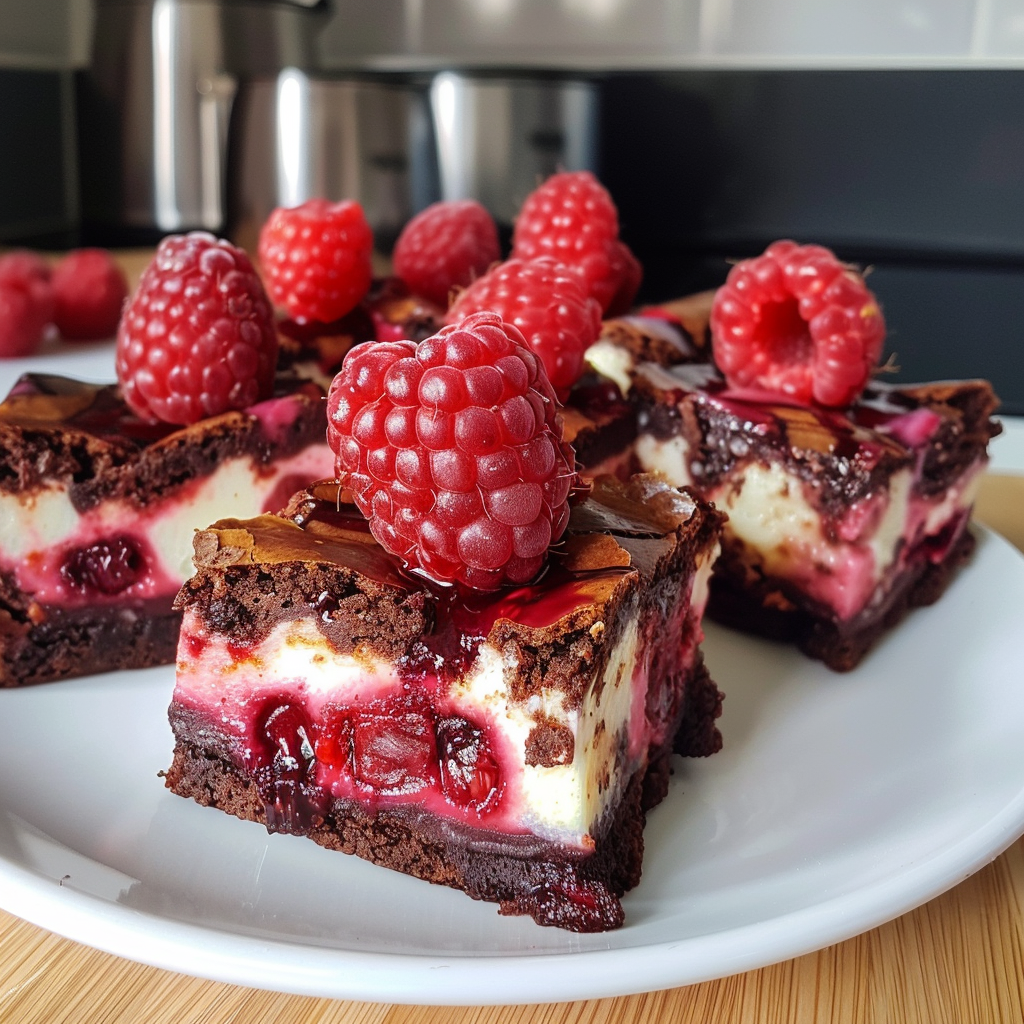
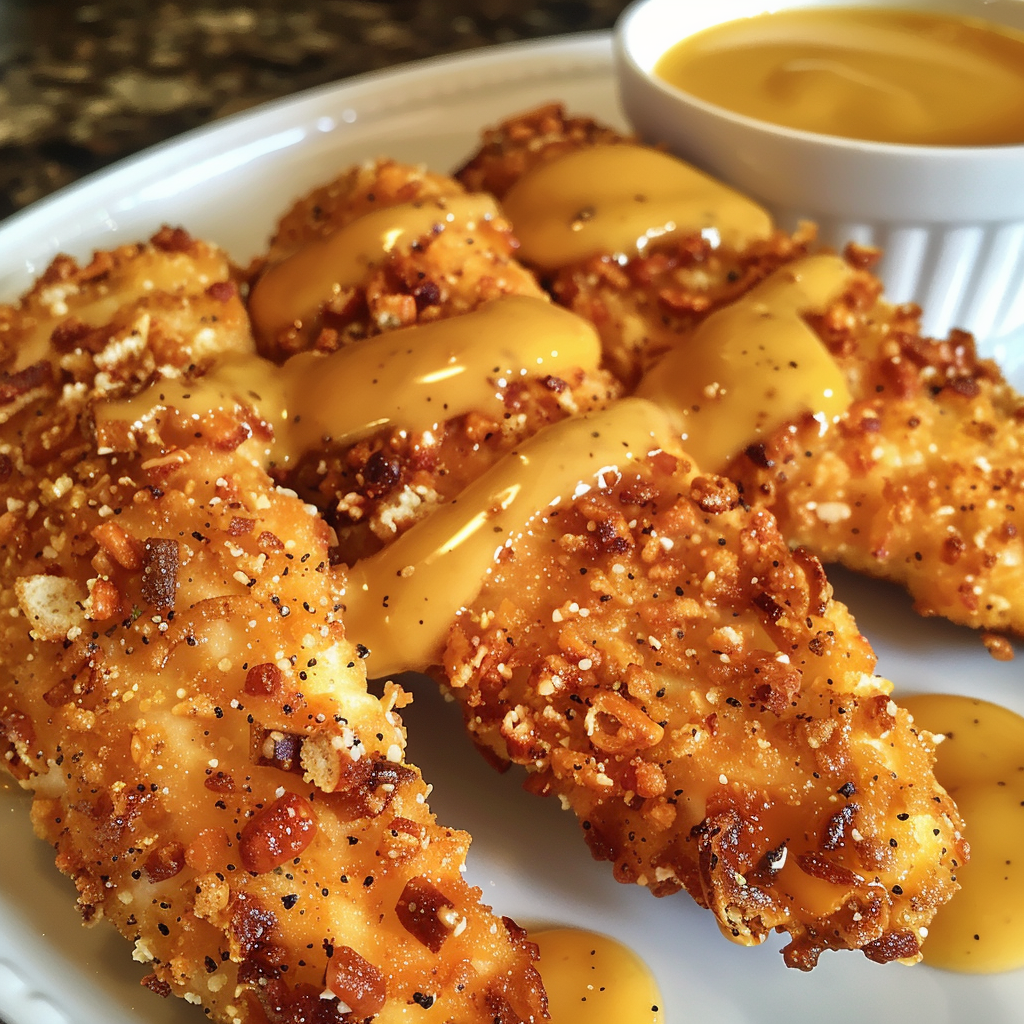
Smoked Gouda Mac and Cheese Balls Recipe

If you’re on the hunt for a delectable appetizer recipe that combines the best of comfort food with a delightful twist, look no further than these Smoked Gouda Mac and Cheese Balls. These rich and creamy bites are tailor-made for gatherings, striking a perfect balance between flavor and satisfaction. The smoky allure of gouda pairs exquisitely with classic mac and cheese, creating a snack that is both indulgent and crowd-pleasing. Whether you’re hosting a party or simply craving an irresistible treat, these cheese balls will surely elevate your dining experience.

Key Takeaways

  • Perfect for gatherings and entertaining guests.
  • Combines smoked gouda for a unique flavor with classic mac and cheese.
  • Rich and creamy texture that satisfies comfort food cravings.
  • Easy to customize with additional ingredients if desired.
  • A fun and indulgent way to enjoy a beloved dish.

Introduction to Smoked Gouda Mac and Cheese Balls

Smoked gouda mac and cheese balls offer a delightful twist on traditional comfort food. The marriage of creamy mac and cheese and the unique, smoky flavor of gouda results in a savory bite that excels as an appetizer introduction at any gathering. These perfectly fried balls create a rich taste and satisfying texture that will leave guests wanting more.

The appeal of smoked gouda lies not just in its flavor, but also in its ability to elevate ordinary dishes into memorable experiences. When transformed into mac and cheese balls, this cheese becomes the star, showcasing its versatility. Whether served at a casual get-together or a formal dinner, these delectable bites will undoubtedly impress everyone at the table.

Making smoked gouda mac and cheese balls is more than just cooking; it’s about creating a comforting, mouthwatering dish that resonates with food lovers. Entertaining becomes effortless when these savory morsels take center stage, providing a perfect blend of comfort food and gourmet flair.

Ingredients for Smoked Gouda Mac and Cheese Balls

Creating delicious smoked gouda mac and cheese balls starts with a solid ingredients list that highlights both essential components and optional elements for customization. This recipe balances classic flavors with opportunities for personal twists, ensuring a delightful experience for everyone.

Essential Ingredients

The foundation of the dish comprises key ingredients that contribute to its creamy texture and rich taste. To make these delightful mac and cheese balls, gather:

  • Macaroni: The base of the dish, providing the perfect shape to hold the cheesy filling.
  • Smoked Gouda Cheese: This cheese adds a distinct smoky flavor that elevates the entire dish.
  • Milk: Essential for creating a creamy cheese sauce.
  • Butter: Adds richness and helps bind the ingredients.
  • Flour: Necessary for thickening the cheese sauce.
  • Breadcrumbs: Used for coating the balls before frying, giving them a crispy texture.

Optional Ingredients for Customization

Enhance the flavor profile and personalize your smoked gouda mac and cheese balls with additional ingredients. Consider using:

  • Different Cheeses: Incorporate cheddar or mozzarella for diverse flavor variations.
  • Herbs: Fresh thyme or parsley can provide an aromatic touch.
  • Spices: A dash of paprika or garlic powder can introduce an exciting kick.

These customization options allow for creativity in the kitchen, enabling you to adapt the recipe to your taste preferences or what you have available at home.

Preparation Steps for the Perfect Mac and Cheese

Starting with the mac and cheese preparation, the first step involves cooking the macaroni until it becomes al dente. This ensures that the pasta retains some firmness when baked into the balls.

Next comes the crucial part of the cooking process, creating a roux. Begin by melting butter in a medium saucepan over medium heat. Stir in an equal amount of flour, whisking continuously until the mixture turns golden, about 2 minutes. Gradually add milk, whisking until smooth to prevent lumps. Maintaining a consistent heat is vital for achieving a creamy texture during this phase.

After forming the base, it’s time to add the cheeses. For a remarkable flavor, opt for smoked Gouda combined with sharp cheddar. Stir these cheeses into the roux until they fully melt, resulting in a rich and silky sauce. Pay close attention to the cheese incorporation, as lumpy cheese can detract from the desired creamy texture.

“Achieving the perfect balance in your cheese sauce is key to a delightful mac and cheese experience.”

Combine the cooked macaroni with the cheese sauce, mixing thoroughly to ensure every piece is generously coated. To complete the mac and cheese preparation, let it cool before forming the mixture into balls. This method avoids any messy handling and contributes to a more structured final product.

Preparation StepDescription
Cook MacaroniBoil until al dente to prevent mushiness.
Create RouxMelt butter and mix with flour, adding milk gradually.
Add CheesesIncorporate smoked Gouda and cheddar, ensuring thorough melting.
Mix with PastaCombine cheese sauce with macaroni until evenly coated.

How to Make Smoked Gouda Mac and Cheese Balls

Making mac and cheese balls is a delightful process that transforms creamy mac and cheese into bite-sized treats. Follow these recipe instructions closely for an enjoyable cooking experience. Ensure you allow the creamy mac and cheese to cool sufficiently before forming the balls, as this helps maintain the right consistency during frying.

Step-by-Step Recipe Guide

  1. Cool the Creamy Mac and Cheese: After preparing your mac and cheese, spread it out on a baking sheet and let it cool for at least 30 minutes. This will enhance texture improvement.
  2. Form the Balls: Once cooled, scoop portions of the mac and cheese and shape them into balls, approximately one inch in diameter.
  3. Dredging: Set up a breading station with flour, beaten eggs, and breadcrumbs. Roll each ball in flour, dip in egg, and finally coat with breadcrumbs.
  4. Chill Again: For best results, chill the breaded balls for an additional 30 minutes before frying. This step helps them hold their shape during cooking.
  5. Fry: Heat oil in a frying pan over medium heat. Fry the balls until they are golden brown and crispy, usually about 3-4 minutes per side.
  6. Drain: Place the fried mac and cheese balls on a paper towel to absorb excess oil before serving.

Tips for Achieving Creamy Texture

  • Use high-fat milk when preparing your sauce for a richer flavor.
  • Avoid overcooking the pasta to maintain its structural integrity and firmness.
  • Add cheese gradually to ensure a silky smooth sauce that isn’t too thick.
  • For another layer of flavor, consider mixing in various cheeses like cheddar or parmesan to enrich the creamy mac and cheese.

Coating and Frying the Mac and Cheese Balls

Coating and frying mac and cheese balls play a crucial role in achieving that perfect balance of crispiness and gooeyness. Start by preparing a breading procedure that includes three stations: flour, beaten eggs, and breadcrumbs. Using seasoned breadcrumbs can enhance the flavor significantly.

For a thicker crust, consider the double-dipping method. First, roll each ball in flour, dip it in egg wash, and then roll it in breadcrumbs. Repeat this process, dipping back into the egg wash and breadcrumbs for a heartier coating. This cooking technique helps the outer layer become extra crispy when frying.

Temperature matters when frying mac and cheese balls. Heat oil in a deep fryer or skillet to around 350°F. This temperature ensures the outer layer cooks quickly, leaving the inside warm and melty without becoming overly greasy. Fry in small batches to maintain oil temperature and secure an even golden-brown color throughout.

Frying TemperatureTime per BatchExpected Texture
350°F3-4 minutesCrispy outer shell, gooey inside
325°F4-5 minutesSoggy outer shell, cool inside

After frying, place the mac and cheese balls on a paper towel-lined plate to absorb any excess oil before serving. The right frying technique brings these delicious bites to life, making them irresistible for any gathering.

Serving Suggestions

Enhancing the experience of enjoying smoked gouda mac and cheese balls can be achieved through thoughtful serving ideas. Pairing these delectable cheesy bites with the right dipping sauces and side dishes makes for an inviting meal that satisfies various tastes.

Pairing With Dipping Sauces

Selecting appropriate dipping sauces elevates the flavor pairing and adds excitement to each bite. Consider these options:

  • Marinara – A classic that contrasts beautifully with the rich cheese.
  • Ranch – Creamy with a hint of herbs, it complements the texture perfectly.
  • Spicy Aioli – Adds a bold kick, ideal for those who enjoy some heat.

For convenience, both store-bought and homemade versions of these sauces are great choices. Each sauce contributes unique flavors to an impressive appetizer spread.

Best Sides to Accompany the Balls

Balance the richness of mac and cheese balls with fresh side dishes. Consider preparing:

  • Fresh Salads – Light and crisp, enhancing each bite.
  • Coleslaw – Offers a tangy crunch that meshes well with the cheesy goodness.
  • Vegetable Platters – Provide a colorful, healthy contrast to the richness.

These side dishes not only contribute to a well-rounded meal pairing but also ensure guests enjoy a variety of flavors in their meal or appetizer spread.

Storage and Reheating Tips

Properly storing mac and cheese balls ensures the delightful flavors and textures remain intact. Start by allowing the cooked mac and cheese balls to cool at room temperature. Once cooled, place them in an airtight container lined with paper towels to absorb excess moisture. This method aids in food preservation while preventing sogginess. For longer storage, consider freezing the balls. Arrange them in a single layer on a tray and freeze until solid. After that, transfer them to a freezer-safe bag or container, removing as much air as possible.

When it comes to reheating, select the method that best suits your preference. Reheat in the oven for even crispiness. Preheat the oven to 350°F (175°C), and bake the frozen mac and cheese balls for about 15-20 minutes. This process preserves their crunchy coating and cheesy interior. Alternatively, for quicker results, use the microwave. Place a few balls on a microwave-safe plate, cover with a damp paper towel, and heat in short intervals, flipping occasionally. Watch closely to avoid overcooking.

Follow these reheating advice tips to enjoy your mac and cheese balls with optimum taste and texture!

Storage MethodDurationReheating MethodTime Required
Airtight container (refrigerator)Up to 3 daysOven15-20 minutes
Frozen, sealed in a bagUp to 2 monthsMicrowave2-3 minutes
Frozen, sealed in a bagUp to 2 monthsOven15-20 minutes

Variations on the Classic Recipe

Smoked Gouda Mac and Cheese Balls are incredibly versatile, allowing for various adaptations that can elevate the classic dish. One way to explore this recipe versatility is to incorporate seasonal variations. For instance, during fall, consider integrating roasted pumpkin or sweet potatoes, which not only add flavor but also a delightful creaminess. In spring and summer, fresh herbs like basil or chives can add a refreshing twist, showcasing how ingredient swaps can make your mac and cheese balls unique and relevant throughout the year.

Adding Seasonal Ingredients

Emphasizing seasonal variations not only enhances the taste but also encourages home cooks to utilize what’s fresh and available in their local markets. As vegetables and fruits peak in flavor, your smoked Gouda mac and cheese balls can be transformed, presenting a fun culinary challenge in the kitchen. Whether it’s sautéing seasonal vegetables or mixing in a hint of zest from lemon or lime, these little adjustments can make a big impact on the final dish.

Making a Vegetarian Version

For those seeking a vegetarian version of this dish, it’s straightforward to create a meat-free alternative without sacrificing flavor. Swap any meat ingredients for roasted mushrooms, which lend a hearty texture, or blend lentils into the cheese mix for added protein. Recipe adaptations like these ensure that everyone can enjoy the rich taste of smoked Gouda while accommodating dietary preferences. With thoughtful ingredient choices, each bite remains delicious and satisfying, ensuring no one feels left out at the dinner table.

FAQ

What type of cheese is best for smoked gouda mac and cheese balls?

The best cheese to use for this recipe is smoked gouda due to its rich flavor and creamy texture. However, you can also experiment with types like cheddar or mozzarella for added depth and creaminess.

Can I prepare the mac and cheese balls ahead of time?

Yes! You can prepare the macaroni and cheese mixture in advance and refrigerate it. When you’re ready to serve, simply form the balls, coat them in breadcrumbs, and fry them fresh for the best results.

How can I make the mac and cheese balls spicier?

To add some heat, incorporate spicy ingredients like jalapeños or red pepper flakes into the cheese mixture. You can also serve the finished balls with a spicy dipping sauce like sriracha aioli.

Are smoked gouda mac and cheese balls suitable for vegetarians?

Absolutely! This recipe can easily be made vegetarian by using plant-based alternatives and ensuring none of the ingredients contain meat products. It’s a great option for meat-free diets.

What is the best way to store leftover mac and cheese balls?

Store leftover smoked gouda mac and cheese balls in an airtight container in the refrigerator for up to three days. For longer storage, you can freeze them, making sure to separate them with parchment paper to prevent sticking.

How can I reheat leftover mac and cheese balls?

The best way to reheat frozen or refrigerated mac and cheese balls is to bake them in an oven preheated to 350°F until heated through and crispy. This method helps maintain their crispy texture compared to using a microwave.

Can I customize the mac and cheese balls with seasonal ingredients?

Yes! Feel free to make seasonal variations by incorporating ingredients like roasted pumpkin in the fall or fresh herbs in the summer, adapting the recipe to what’s available for a unique twist.

What dipping sauces pair well with mac and cheese balls?

Popular choices include marinara, ranch, or spicy aioli. Each sauce enhances the experience and complements the rich flavors of the cheese balls, creating a delightful appetizer spread.
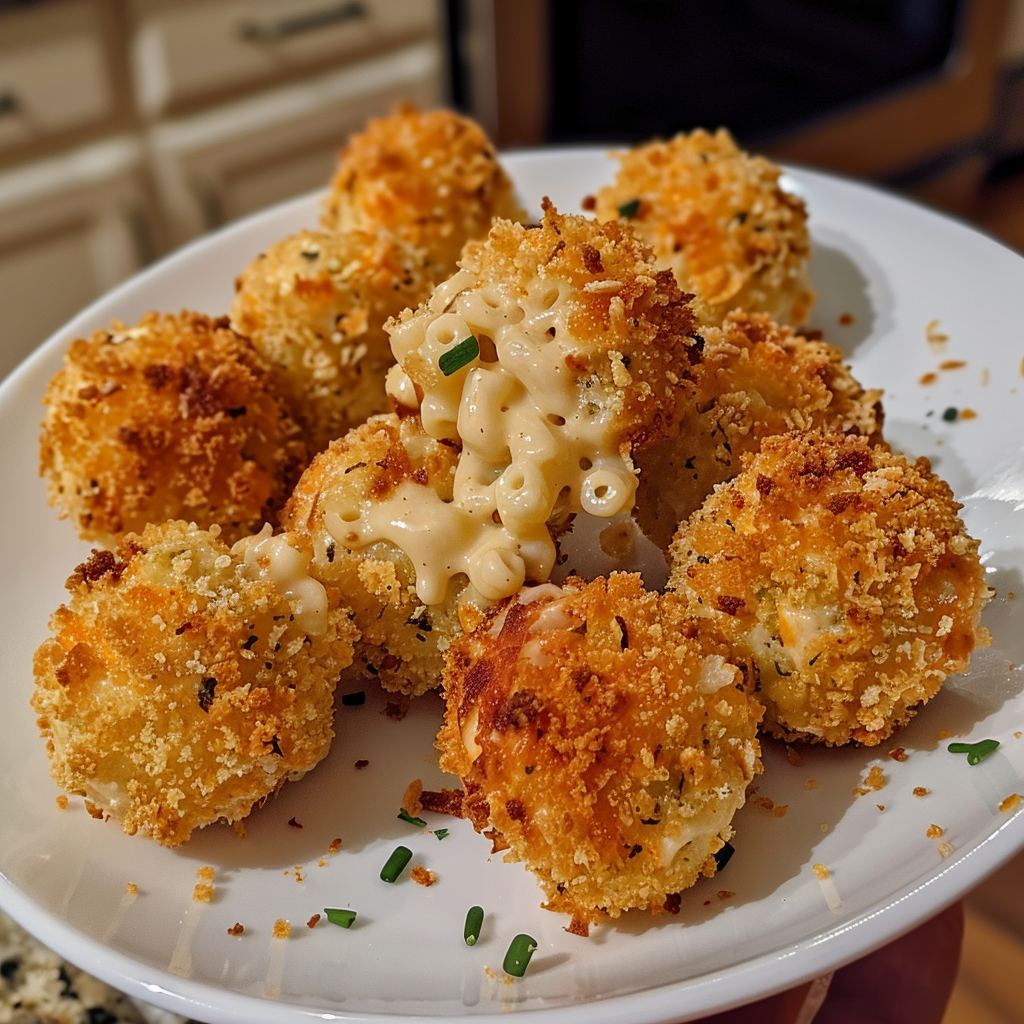
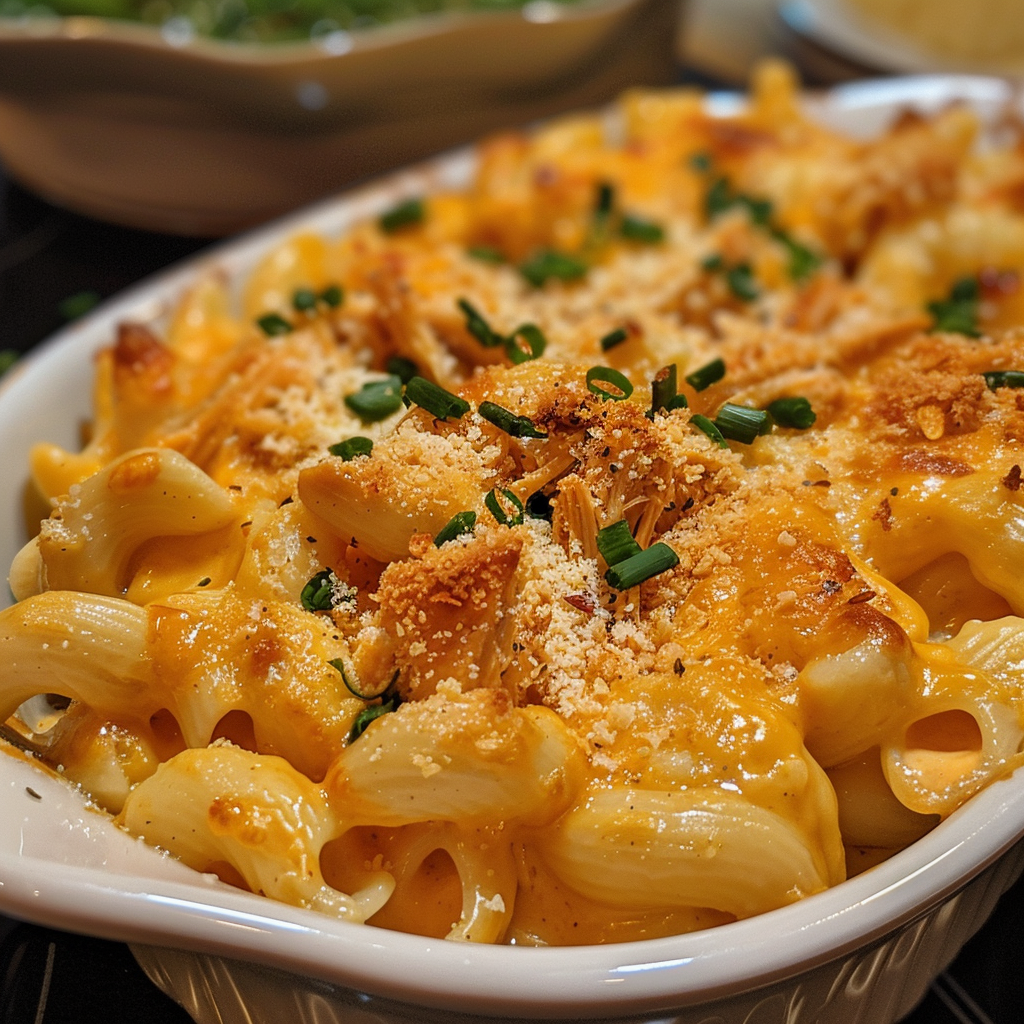
Buffalo Chicken Mac and Cheese Recipe | Quick & Easy

Welcome to the flavorful world of buffalo chicken mac and cheese! This delightful dish combines the comforting elements of creamy easy mac and cheese with the bold flavors of a quick buffalo chicken recipe. It’s the perfect harmony of tender chicken, rich cheese, and pasta that will satisfy your family’s cravings or impress your guests at gatherings. With just a few easy steps, you can create a spicy and creamy meal that’s sure to be a hit at your dinner table.

Key Takeaways

  • Buffalo chicken mac and cheese is a deliciously spicy twist on classic comfort food.
  • This recipe is designed to be quick and easy, making it perfect for busy weeknights.
  • Tender chicken and creamy cheese blend seamlessly for a satisfying meal.
  • Ideal for family dinners or entertaining friends, it’s a crowd-pleaser.
  • The dish allows for personalized spice levels, catering to different preferences.
  • Pair it with complementary sides for a complete meal experience.

Introduction to Buffalo Chicken Mac and Cheese

Buffalo chicken mac and cheese is a delightful blend of two beloved comfort foods, bringing together the rich, creamy texture of macaroni and cheese with the spicy kick of buffalo chicken. This dish has gained immense popularity, particularly for its ability to cater to both hearty cravings and spicy palates. With its roots in classic American cuisine, it showcases the ingenuity of combining flavors from a fiery buffalo sauce and tender chicken morsels with beloved pasta.

At the heart of this dish lies a simple yet effective buffalo chicken mac and cheese overview. The creamy cheese sauce perfectly complements the bold flavors of buffalo sauce, creating a symphony of taste that appeals to many. Ideal for a comforting family meal or a lively gathering with friends, spicy mac and cheese can make any occasion special. This versatility makes it a favorite choice for various dining settings.

Featuring key components such as shredded chicken, macaroni, and a lively buffalo sauce, this recipe invites cooks of all skill levels to experiment and personalize their dish. The balance of flavors leaves a lasting impression, encouraging everyone to take delight in a bowl of this alluring comfort food.

Ingredients for Buffalo Chicken Mac and Cheese

Creating the perfect Buffalo Chicken Mac and Cheese begins with selecting the right ingredients. Understanding the essential cooking ingredients needed for this dish will ensure a delightful balance of flavors and textures. Let’s break down the required components to get started.

Essential Ingredients

  • Elbow macaroni – This classic pasta shape holds the cheese sauce beautifully.
  • Cooked chicken – Shredded, made from your favorite buffalo chicken recipe ingredients.
  • Cheddar cheese – A must-have for that cheesy richness.
  • Cream cheese – Adds creaminess and depth to the sauce.
  • Buffalo sauce – The star of the recipe for that signature kick.

Using quality mac and cheese ingredients will greatly enhance the overall taste of your dish. Each component plays a vital role in achieving optimal flavor and texture.

Optional Ingredients to Enhance Flavor

  • Pepper jack cheese – Adds an extra layer of spice.
  • Blue cheese crumbles – Perfect for those who love the distinctive tang.
  • Green onions – A fresh garnish that brings color and crunch.
  • Garlic powder – For an aromatic boost.
  • Onion powder – Adds depth without the bulk.

Feel free to experiment with these optional ingredients to create exciting buffalo chicken variations tailored to your personal tastes. Each addition presents the opportunity for enhancing flavor and making your dish even more enjoyable.

Kitchen Tools You’ll Need

Preparing a delicious buffalo chicken mac and cheese requires the right cooking tools to make the process smooth and efficient. These kitchen essentials not only streamline your cooking experience but also enhance the final dish. Below is a list of recommended tools to gather before diving into your recipe.

  • Large pot: Essential for boiling pasta, allowing ample space for the noodles to cook evenly.
  • Medium saucepan: Necessary for making the creamy cheese sauce, ensuring it comes together without burning.
  • Measuring cups and spoons: Important for accurately measuring ingredients, especially when it comes to seasonings and cheese.
  • Wooden spoon or spatula: Great for stirring the cheese sauce and blending all the components together smoothly.
  • Baking dish: Ideal if you choose to bake your buffalo chicken mac and cheese for that crispy top layer.

With these buffalo chicken recipe tools, your cooking adventure will be both enjoyable and productive. Having the right equipment on hand makes all the difference, ensuring your mac and cheese turns out delicious every time.

ToolPurpose
Large potBoiling pasta
Medium saucepanMaking cheese sauce
Measuring cups and spoonsMeasuring ingredients
Wooden spoon or spatulaStirring and combining ingredients
Baking dishBaking mac and cheese

Step-by-Step Instructions for Preparing Buffalo Chicken Mac and Cheese

Creating the perfect Buffalo Chicken Mac and Cheese requires attention to each component of the dish. This step-by-step guide covers the essential pasta preparation, cheese sauce preparation, and the final steps to achieve a delicious meal.

Boiling the Pasta

Start with boiling water in a large pot to ensure optimal cooking conditions for the macaroni. Make sure to add plenty of salt during the boiling process for flavor enhancement. Follow these pasta cooking instructions closely to ensure the pasta cooks to an al dente texture:

  • Bring a large pot of water to a rolling boil.
  • Add the macaroni to the boiling water.
  • Cook the pasta according to the package instructions, usually around 7-9 minutes.
  • Taste for doneness before draining; aim for al dente.
  • Drain the pasta and set aside, saving a small amount of the pasta water if needed for later.

Making the Cheese Sauce

The creamy cheese sauce is the heart of this dish. Begin by following these steps for cheese sauce preparation, ensuring a rich and flavorful result:

  1. Melt butter in a saucepan over medium heat.
  2. Add flour to the melted butter, stirring to form a roux.
  3. Slowly whisk in milk, continuing to stir to avoid lumps.
  4. Once the mixture thickens, incorporate the cheese gradually, stirring to create a creamy cheese sauce.
  5. Adjust the heat to low and ensure the sauce does not burn.

Combining Ingredients

Now it’s time for the buffalo chicken mac and cheese preparation, bringing all the flavors together:

  • In a large mixing bowl, combine the drained macaroni, creamy cheese sauce, cooked shredded chicken, and buffalo chicken mac and cheese sauce.
  • Mix thoroughly to ensure all ingredients are evenly coated.
  • If desired, transfer the mixture to a baking dish for an added crispy topping.
  • Bake in a preheated oven at 350°F for about 20 minutes, or until bubbly and golden brown.
IngredientPreparation Method
MacaroniBoil until al dente
Buffalo SauceMix with cooked chicken
Cheese SaucePrepare with butter, flour, milk, and cheese
Final DishCombine and bake

Tips for Perfect Buffalo Chicken Mac and Cheese

Creating a delicious buffalo chicken mac and cheese requires attention to detail, especially when it comes to cheese selection and adjusting the spice level. Follow these tips to elevate your dish and impress your guests.

Choosing the Right Cheese

Using the best cheeses for mac and cheese can significantly enhance the flavor and texture. Here are some recommended cheese options to consider:

  • Sharp Cheddar: Delivers a strong, tangy flavor that complements buffalo sauce.
  • Gouda: Offers a creamy texture and a slightly sweet taste, balancing the heat.
  • Monterey Jack: Melts beautifully, adding a mild profile to the dish.
  • Parmesan: A sprinkle on top provides a salty bite and adds a crispy texture when baked.
  • Fontina: Known for its smooth melting quality, it creates a rich and luscious cheese sauce.

When customizing mac and cheese, remember that shredding cheese from blocks rather than using pre-shredded options improves melting and provides a smoother consistency.

Spicing it Up: Adjusting Heat Level

Adjusting spice level is key to achieving the perfect buffalo chicken mac and cheese. Consider these methods:

  • Buffalo Sauce Heat: Vary the quantity of buffalo sauce to control the overall spice. Start with a little and gradually increase to find your ideal heat level.
  • Mix-ins: For a milder flavor, combine buffalo sauce with ranch dressing or a milder hot sauce to tone down the heat.
  • Hot Sauce Options: Explore different brands to find a balance between flavor and heat to suit your taste.

By mastering cheese selection and spice adjustments, you can create a buffalo chicken mac and cheese that delights every palate.

Serving Suggestions

When enjoying buffalo chicken mac and cheese, selecting the right side dishes enhances the meal experience. A balance of flavors and textures elevates your dining occasion, making it memorable. Here are some enticing serving ideas that complement this delicious dish.

Pairing Sides with Buffalo Chicken Mac and Cheese

  • Light Salad: A fresh garden salad with a tangy vinaigrette provides a crisp contrast, making it one of the ideal side dishes for mac and cheese.
  • Garlic Bread: This classic pairing adds a savory element to the meal and brings together the rich flavors of buffalo chicken and cheese.
  • Celery Sticks with Blue Cheese Dressing: The crunchiness and sharpness of celery pairs harmoniously with the creamy mac and cheese, making it a favorite in buffalo chicken mac and cheese pairings.

To complete the meal, consider drink pairings such as a chilled lager or a refreshing lemonade. These beverages cleanse the palate and enhance the overall flavor profile of the dishes.

Storing and Reheating Leftovers

Enjoying buffalo chicken mac and cheese is a delight, and knowing how to handle your leftovers can enhance that experience. Proper leftover storage is key to maintaining the flavor and texture of this dish. Start by transferring the mac and cheese into airtight containers. These containers help to keep moisture in while preventing any unwanted odors from penetrating your delicious meal. Ensure that the leftovers cool down to room temperature before sealing to avoid condensation.

When you’re ready to enjoy your preserved buffalo chicken dish again, you can opt for reheating mac and cheese using a couple of methods. Both the oven and microwave are effective, though each has its nuances.

  • Oven Method: Preheat your oven to 350°F. Place your mac and cheese in an oven-safe dish and cover it with foil to retain moisture. Heat for about 20-30 minutes until warmed through. Stir halfway through for even heating.
  • Microwave Method: Place a serving in a microwave-safe bowl. Add a splash of milk to help rehydrate the pasta, then cover with a microwave-safe lid. Heat on medium power in short intervals, stirring in between, until heated all the way through.

By following these tips, you can enjoy your leftover storage for buffalo chicken mac and cheese without compromising its delightful flavors. Make your meals last longer with the right methods for reheating and preserving!

MethodTemperature/PowerTimeNotes
Oven350°F20-30 minsCover with foil to maintain moisture.
MicrowaveMedium PowerShort intervalsAdd milk to keep creamy texture.

Buffalo Chicken Mac and Cheese Variations

Buffalo chicken mac and cheese provides a mouthwatering experience loved by many. Variations of this dish cater to different dietary preferences without sacrificing flavor. Explore the delicious possibilities of a vegetarian version and gluten-free options for a delightful twist on this classic recipe.

Vegetarian Version

To create a vegetarian mac and cheese, consider substituting the chicken with plant-based protein. Options like tofu, tempeh, or even a mix of flavorful vegetables such as broccoli and bell peppers make for a tasty meatless buffalo dish. The spicy buffalo sauce retains its zesty kick, ensuring the dish remains satisfying and indulgent. Pair the alternative ingredients wisely to enrich texture and flavor, resulting in a comforting meal every vegetarian will enjoy.

Gluten-Free Option

Transform buffalo chicken mac and cheese into a gluten-free mac and cheese by using gluten-free pasta alternatives like rice or quinoa noodles. Ensure the sauces are gluten-free to accommodate those with gluten intolerance. This adaptation allows everyone to relish in the robust flavors of the dish while adhering to dietary needs. With careful selection of gluten-free ingredients, the final result will be an irresistible gluten-free dish for any occasion.

Healthier Alternatives for Buffalo Chicken Mac and Cheese

Making a classic buffalo chicken mac and cheese doesn’t mean sacrificing health. By incorporating a few simple substitutions, you can create a healthy mac and cheese that satisfies cravings without adding excessive calories.

Consider using whole-grain pasta as your base. This option increases fiber content and keeps you full longer. Additionally, opt for reduced-fat cheese. It delivers the creamy flavor you love while cutting back on saturated fat.

For a nutritious twist, swap out cream cheese for Greek yogurt. This change not only reduces calories but also boosts protein content. Together, these adjustments make for a delightful low-calorie buffalo chicken recipe that doesn’t compromise on taste.

Incorporate plenty of vegetables into your dish for added nutrition. Spinach, bell peppers, or even broccoli can enhance flavors while contributing vitamins and minerals. Each bite can be a step towards healthier eating.

By focusing on these nutritious options, your buffalo chicken mac and cheese can become a meal that is both satisfying and beneficial for your health.

Common Mistakes to Avoid

When preparing buffalo chicken mac and cheese, avoiding common cooking mistakes can significantly enhance your dish. Start with overcooking the pasta, a typical error that leads to a mushy texture. Aim for al dente pasta to maintain its structure during the baking process.

Inadequate seasoning is another frequent issue. Season the pasta water and cheese sauce to elevate flavors. Without this step, the dish can taste bland. Pay attention to spices and consider adjusting the heat level according to your preferences.

Avoid the mistake of burning the cheese sauce. Keep the heat moderate and stir frequently to prevent this mishap. Burnt sauce will ruin the creamy consistency and introduce unwanted bitterness to your dish.

Lastly, ensure you are mixing ingredients thoroughly. Uneven distribution of ingredients results in some bites being lacking in flavor while others are overwhelming. Proper buffalo chicken mac and cheese troubleshooting involves checking for even mixing before baking.

Utilizing these baking tips will guide you in preparing a successful and delicious buffalo chicken mac and cheese that everyone will enjoy.

Why Buffalo Chicken Mac and Cheese is a Crowd-Pleaser

Buffalo chicken mac and cheese has gained its reputation as a favorite dish for a simple reason: its strong flavors and satisfying texture. This dish combines classic comfort food with a spicy kick, appealing to a broad range of taste preferences. Whether it’s a casual family dinner, a game day gathering, or a potluck with friends, buffalo chicken mac and cheese stands out as one of those crowd-pleasing recipes that everyone loves.

The blend of creamy cheese, tender pasta, and zesty buffalo sauce creates a uniquely savory experience. This dish caters to both adults and kids, making it one of the popular comfort food options in many households. As guests dive into their plates, the delightful flavors and comforting qualities ensure it becomes a talking point during any meal.

  • Perfect for parties and gatherings.
  • Excellent for meal prep because it warms up beautifully.
  • Highly customizable to suit individual tastes and dietary needs.

With its remarkable buffalo chicken mac and cheese appeal, this dish not only fills stomachs but also warms hearts, making it a suitable centerpiece for any culinary occasion.

How to Make Buffalo Chicken Mac and Cheese Ahead of Time

Preparing make-ahead buffalo chicken mac and cheese allows for smooth meal prep, especially during busy weeks. This dish is perfect for convenient cooking because it can be assembled in advance and stored in the refrigerator before baking.

To get started, follow these steps for effortless preparation:

  • Prepare the pasta and cheese sauce as usual.
  • Combine the cooked pasta, chicken, and cheese sauce in a baking dish.
  • Cover tightly with plastic wrap or aluminum foil.
  • Store in the refrigerator for up to 24 hours.

When you’re ready to enjoy your meal, simply remove the cover and bake it in the oven at 350°F (175°C) for about 20-30 minutes, or until bubbly and golden on top. This method ensures that you can savor fresh, hot buffalo chicken mac and cheese without sacrificing precious time in the kitchen.

Storage MethodDurationReheating Instructions
Prepare and refrigerateUp to 24 hoursBake at 350°F for 20-30 minutes
Freeze (before baking)Up to 3 monthsThaw overnight, then bake as normal
Leftovers (after baking)3-5 days in the refrigeratorReheat in the microwave or bake at 350°F for 15 minutes

With this approach to meal prep, you can indulge in delicious, homemade make-ahead buffalo chicken mac and cheese that fits perfectly into a hectic lifestyle.

Conclusion

In this buffalo chicken mac and cheese summary, we’ve explored a delightful, comforting dish that merges the beloved flavors of buffalo chicken with the creamy satisfaction of macaroni and cheese. This recipe wrap-up highlights not only the simple yet effective ingredients but also the versatility that allows everyone to put their personal spin on it. Whether you’re looking for a weeknight dinner or a crowd-pleasing dish for gatherings, this recipe delivers.

As you try your hand at making buffalo chicken mac and cheese, remember the cooking tips shared throughout the article to elevate your dish. Don’t hesitate to adapt the recipe to suit your taste preferences—add more heat, experiment with different cheeses, or even make it vegetarian. We encourage you to share your experiences and any unique twists you come up with!

Ultimately, buffalo chicken mac and cheese stands out not just as a meal, but as a canvas for creativity in the kitchen. So gather your ingredients, invite friends or family, and enjoy the process of creating this delicious comfort food that brings everyone together.

FAQ

What is Buffalo Chicken Mac and Cheese?

Buffalo Chicken Mac and Cheese is a delicious and comforting dish that combines tender cooked chicken, creamy cheese, pasta, and spicy buffalo sauce for a flavorful meal that’s perfect for family gatherings or casual dinners.

How can I make the dish healthier?

You can make the dish healthier by using whole-grain pasta, reduced-fat cheese, and substituting Greek yogurt for cream cheese, ensuring you enjoy a nutritious yet satisfying version of this classic comfort food.

Can I prepare Buffalo Chicken Mac and Cheese ahead of time?

Yes, you can assemble Buffalo Chicken Mac and Cheese in advance by combining the ingredients and storing it in the refrigerator until you’re ready to bake, making it a convenient option for busy days.

What kitchen tools do I need?

Essential kitchen tools include a large pot for boiling pasta, a saucepan for making the cheese sauce, measuring cups and spoons, and a baking dish if you choose to bake it for that perfect golden crust.

Are there vegetarian options for Buffalo Chicken Mac and Cheese?

Absolutely! You can create a vegetarian version by using plant-based proteins such as tofu or tempeh and adding more vegetables like broccoli or bell peppers, while still enjoying the kick of buffalo sauce.

What sides pair well with this dish?

Great side dishes include a light salad, garlic bread, or celery sticks served with blue cheese dressing, all of which complement the rich flavors of Buffalo Chicken Mac and Cheese.

How can I adjust the spice level of the dish?

You can easily adjust the spice level by varying the amount of buffalo sauce used, or for a milder option, consider mixing in some ranch dressing or opting for a milder hot sauce.

What are some common mistakes to avoid?

Common mistakes include overcooking the pasta, under-seasoning the dish, burning the cheese sauce, and not mixing your ingredients thoroughly, so be mindful to avoid these pitfalls for a successful meal.

How should I store leftovers?

Store leftovers in airtight containers to preserve freshness, and for best results, reheat in an oven or microwave to maintain texture and flavor.

Raspberry Cheesecake Brownie Bites Recipe

Indulge in the delightful combination of rich chocolate and creamy cheesecake with our Raspberry Cheesecake Brownie Bites. These easy brownie bites are perfect for any occasion, offering a sweet treat that merges the beloved flavors of raspberry, cheesecake, and brownies in a bite-sized form. This recipe not only satisfies your sweet tooth but also makes for impressive cheesecake desserts sure to wow your guests. Whether you’re hosting a party or enjoying a quiet night in, these raspberry cheesecake brownie bites offer a delicious escape into dessert heaven.

Key Takeaways

  • Raspberry Cheesecake Brownie Bites combine rich chocolate and tart raspberry flavors.
  • They are easy to make and perfect for gatherings.
  • This dessert recipe is a crowd-pleaser.
  • These bites seamlessly blend the textures of brownies and cheesecake.
  • Perfect for satisfying a sweet tooth in a single bite.

Introduction to Raspberry Cheesecake Brownie Bites

Raspberry cheesecake brownie bites offer a delightful blend of rich chocolate and tangy raspberry, making them a standout among cheesecake treats. This unique dessert showcases a harmonious balance between the fudgy texture of brownies and the creamy smoothness of cheesecake, creating an indulgent experience for dessert lovers. The introduction raspberry cheesecake brownie bites to any gathering can elevate the dessert table, drawing attention with their vibrant hue and enticing flavor.

The brownie bites overview reveals their versatility. They can be served at various occasions, from festive birthdays to elegant dinner parties. Their bite-sized form makes them easy to share, allowing guests to savor multiple flavors without feeling indulgent. The addition of fresh raspberries adds a burst of fruitiness, appealing to those seeking a refreshing contrast to the richness of the chocolate.

Overall, these brownie bites not only look stunning but taste incredible. The unique combination of flavors ensures that they remain a crowd favorite, perfect for creating memorable moments with friends and family.

Ingredients for the Best Raspberry Cheesecake Brownie Bites

Creating delectable raspberry cheesecake brownie bites requires a careful selection of ingredients. The right components not only enhance flavor but also contribute to the perfect texture. Understanding these essential brownie ingredients and cheesecake ingredients makes all the difference in achieving that irresistible treat.

Essential Ingredients

The base for these delightful bites includes:

  • High-quality cocoa powder
  • Dark chocolate for rich brownie flavor
  • Cream cheese for a creamy cheesecake filling
  • Fresh raspberries for a burst of tartness
  • Sugar, eggs, and flour to ensure moist and fluffy brownie bites

Each of these ingredients plays a vital role in delivering luscious flavors and textures in the final product.

Optional Toppings and Variations

Enhancing your raspberry cheesecake brownie bites can be achieved with various toppings for brownie bites. Consider:

  • A drizzle of white chocolate for added sweetness
  • A sprinkle of powdered sugar for a touch of elegance
  • A dollop of whipped cream for extra creamy indulgence

Explore raspberry cheesecake variations by incorporating different berries, nut crusts, or even flavoring the cheesecake with citrus or chocolate. Each alternative allows for a personalized touch while maintaining the essence of the dessert.

Step-by-Step Instructions for Making Raspberry Cheesecake Brownie Bites

Creating raspberry cheesecake brownie bites involves precise steps that ensure delicious results. The process begins with brownie batter preparation, then moves to the cheesecake mixture, culminating in a delightful combination of flavors.

Preparing the Brownie Batter

Start how to make brownie bites by melting high-quality chocolate and unsalted butter together. This mixture forms the base of your brownie batter. Once melted, add cocoa powder and sugar, stirring until well combined. Incorporate eggs one at a time, ensuring they blend smoothly into the mixture. Finally, fold in all-purpose flour for that fudgy texture.

Preheat your oven to 350°F and prepare a baking pan lined with parchment paper. This step is crucial for easy removal and ensures even baking during the cheesecake brownie bites process. Pour the brownie batter into the pan, spreading it evenly.

Making the Cheesecake Mixture

Next, focus on cheesecake mixture preparation. Soften cream cheese at room temperature for easy blending. In a mixing bowl, combine the cream cheese filling with granulated sugar, eggs, and vanilla extract. Beat until the mixture is smooth and creamy, ensuring no lumps remain. This velvety consistency is vital when making cheesecake for brownie bites, as it creates a luscious topping for the brownies.

Combining the Two Flavors

The final stage involves combining brownie and cheesecake. Layer the cheesecake mixture over the brownie batter evenly. You can create a marbled effect by swirling a knife through both layers. If desired, add fresh raspberries on top for an extra burst of flavor. Bake the whole creation for about 30-35 minutes, allowing the flavors to meld and creating a satisfying texture in your brownie bites.

Tips for Perfecting Your Raspberry Cheesecake Brownie Bites

Creating the ideal Raspberry Cheesecake Brownie Bites requires attention to detail. Here are some effective tips for brownie bites that ensure success in your baking adventure.

  • Use room temperature ingredients: This is crucial for achieving a smooth and consistent batter, especially when mixing the cheesecake layer.
  • Check for doneness: A toothpick inserted in the center should come out with a few moist crumbs. Avoid overbaking to keep your brownie bites fudgy.
  • Cool before removal: Let the brownie bites cool in the pan for about 10-15 minutes. This prevents them from breaking apart when you try to lift them out.
  • Avoid common pitfalls: Make sure not to overmix your brownie batter, as this can lead to a tough texture. Following these baking tips can dramatically improve your results.
  • Perfect raspberry cheesecake: Aim for a balanced ratio between cream cheese and sugar in your cheesecake mix. Too much sugar can overpower the berry flavor.

Incorporating these insights will elevate your Raspberry Cheesecake Brownie Bites to new heights, making them a delightful treat everyone will love.

Serving Suggestions for Raspberry Cheesecake Brownie Bites

Enhance the experience of enjoying Raspberry Cheesecake Brownie Bites by pairing them with the perfect beverages. The right drink can elevate both the flavors of the dessert and the overall enjoyment of the occasion.

Pairing with Beverages

When choosing beverages for desserts, consider options that complement the tartness of raspberries and the creaminess of cheesecake. Here are some excellent choices:

  • Rich coffee: A bold coffee pairs wonderfully, balancing sweetness with robust flavors.
  • Dessert wines: Sweet dessert wines, like late-harvest Rieslings or Sauternes, enhance the fruity flavors of the brownie bites.
  • Raspberry lemonade: This refreshing drink offers a delightful contrast, making it a fun addition to any dessert table.

Ideal Occasions for Serving

Raspberry Cheesecake Brownie Bites shine at various events. Their alluring presentation and taste make them a coveted dessert choice for numerous settings:

  • Birthdays: Delight guests with these stunning bites at your next birthday celebration.
  • Holiday gatherings: Serve them during festive occasions to inspire joy and sweetness.
  • Casual get-togethers: Perfect for laid-back meetings with friends or family.
  • Picnics: Their portable size makes them an ideal dessert for outdoor fun.

Blending these serving suggestions will create memorable moments, making Raspberry Cheesecake Brownie Bites a true highlight at any gathering. The versatility of this dessert opens up endless ideas for celebrations and food pairing opportunities.

Storage Tips for Leftover Raspberry Cheesecake Brownie Bites

Proper storage is vital for maintaining the delightful taste and texture of leftover Raspberry Cheesecake Brownie Bites. By following specific refrigeration tips and freezing instructions, you can ensure that your dessert remains fresh and delicious for days to come.

Refrigeration Guidelines

When it comes to storing brownie bites in the refrigerator, consider the following:

  • Use an airtight container to prevent moisture loss and keep flavors intact.
  • Store brownie bites at a temperature of 35°F to 40°F for optimal freshness.
  • Leftover brownie bites can last for up to five days in the fridge without compromising taste.

Freezing Instructions

If you wish to enjoy your dessert over a longer period, freezing brownie bites is an excellent option. Here are some freezer storage tips:

  1. Allow the brownie bites to cool completely before wrapping.
  2. Wrap each bite individually in plastic wrap to protect them from freezer burns.
  3. Place the wrapped bites in a freezer-safe container for added protection.
  4. Label the container with the date for easy tracking.
  5. When ready to enjoy, simply move the bites to the refrigerator to defrost overnight before serving.

With these methods, you can be assured of long-term dessert storage that keeps your Raspberry Cheesecake Brownie Bites tasting fresh and delicious. Enjoy every delightful bite!

Variations on the Classic Raspberry Cheesecake Brownie Bites

The world of dessert offers endless possibilities, and Raspberry Cheesecake Brownie Bites can easily adapt to include various flavors and healthier ingredients. By experimenting with different fruit alternatives for cheesecake and making creative adjustments, you can produce delightful treats that cater to many preferences.

Fruit Alternatives

One exciting way to switch up your brownie bites is by incorporating different fruits. This not only enhances the flavor but also adds visual appeal. Consider these variations for brownie bites:

  • Strawberries: Fresh strawberry puree adds a sweet and fruity twist.
  • Blueberries: Incorporating blueberries offers a burst of antioxidants and flavor.
  • Mango Puree: This tropical option can create a unique cheesecake experience.

These customizable dessert recipes encourage creativity and allow you to tailor flavors to your liking.

Healthier Options

For those looking to cut down on calories without sacrificing taste, there are several healthier brownie bites adjustments you can explore. Here are some suggestions for low-calorie cheesecake options:

  • Utilize whole wheat flour in place of traditional flour to add more nutrients.
  • Experiment with natural sweeteners such as honey or maple syrup.
  • Opt for lighter cream cheese alternatives to reduce fat without losing creaminess.

These healthy dessert variations allow you to indulge guilt-free while enjoying the same rich flavors of Raspberry Cheesecake Brownie Bites.

Why Raspberry Cheesecake Brownie Bites are a Crowd Favorite

The popularity of brownie bites continues to rise, and raspberry cheesecake bites stand out among these delightful treats. Their luxurious blend of rich brownie and creamy cheesecake, paired with the vibrant tartness of raspberries, creates a unique flavor profile that satisfies various taste preferences. This combination captures what many consider the essence of a crowd-pleaser dessert.

One reason why raspberry cheesecake bites are loved is their versatility. They can be served at diverse gatherings, from casual get-togethers to elegant dinner parties, making them suitable for any occasion. Guests are often impressed by the beautiful presentation, which elevates their appeal. Each bite offers a perfect balance of sweetness and tartness, ensuring that both chocolate and fruit enthusiasts leave happy.

Additionally, these mini desserts are effortlessly portioned. Their bite-sized nature allows everyone to indulge without overdoing it, which enhances their charm at any event. The combination of convenience and exceptional taste solidifies their status as must-have treats, perfectly embodying the essence of crowd-pleaser desserts.

Ultimately, the blend of flavors and textures in raspberry cheesecake brownie bites has captivated dessert lovers everywhere, leading to their acclaim and enduring popularity.

Common Mistakes to Avoid When Making Raspberry Cheesecake Brownie Bites

Creating the perfect Raspberry Cheesecake Brownie Bites can be a delightful experience, but several common mistakes brownie bites makers might encounter can lead to less-than-perfect results. Understanding these baking pitfalls is crucial for success.

One of the primary errors is overmixing the batter. Doing so can result in dense brownies instead of the light and fluffy texture desired. When incorporating ingredients, mix gently just until combined to maintain an airy structure.

Another mistake is not using room temperature ingredients. Cold cream cheese or eggs can adversely affect the consistency of the cheesecake layer, making it harder to blend with the brownie mixture. To avoid cheesecake errors, always allow your ingredients to sit out before baking.

Accurate baking times are essential. Many novice bakers forget to check their batter regularly. Each oven behaves differently; relying solely on timing can lead to undercooking or overcooking. A simple toothpick test can help ensure optimal results.

Here’s a helpful table summarizing these key errors:

MistakeDescriptionTip to Avoid
Overmixing the BatterLeads to dense, hard brownies.Mix ingredients until just combined.
Using Cold IngredientsCauses uneven mixing and texture issues.Let ingredients come to room temperature before use.
Ignoring Baking TimeResults in undercooked or burnt bites.Perform a toothpick test to check doneness.

Avoiding these common mistakes brownie bites can greatly enhance the outcome of your baking adventures. Embrace these tips to ensure your Raspberry Cheesecake Brownie Bites are as delicious as possible!

Conclusion

As we wrap up this delicious journey of crafting Raspberry Cheesecake Brownie Bites, it’s clear that this dessert is a perfect marriage of rich brownie flavors, creamy cheesecake, and the delightful tang of fresh raspberries. This combination not only tantalizes the taste buds but also offers a visually stunning treat that can elevate any gathering. The summary of brownie bites highlights their versatility and the joy they bring to those who experience them.

Trying your hand at these bites is more than just baking; it’s an opportunity to share a delightful creation with friends and family. Encouraging everyone to experiment with this recipe fosters a sense of community among dessert lovers, inviting them to share their unique twists on the classic treat. In final thoughts on dessert, remember that Raspberry Cheesecake Brownie Bites can become a staple in your dessert repertoire, ideal for both casual get-togethers and special occasions.

These delightful bites not only satisfy sweet cravings but also create memories. So, gather your ingredients, embrace the process, and enjoy the delightful results that these Raspberry Cheesecake Brownie Bites bring to your table!

FAQ

What makes Raspberry Cheesecake Brownie Bites a unique dessert?

Raspberry Cheesecake Brownie Bites uniquely combine the rich, fudgy texture of brownies with the creamy, tangy taste of cheesecake and the vibrant flavor of raspberries, creating a delightful treat loved by many.

Are Raspberry Cheesecake Brownie Bites easy to make?

Yes! These brownie bites are relatively easy to make, especially with the step-by-step instructions provided. They offer a fun baking experience that’s perfect for both beginners and experienced bakers alike.

How long do the Raspberry Cheesecake Brownie Bites last in the refrigerator?

When stored in an airtight container, Raspberry Cheesecake Brownie Bites can last up to a week in the refrigerator. To ensure peak freshness, it’s best to consume them within a few days.

Can I freeze Raspberry Cheesecake Brownie Bites for later?

Absolutely! You can freeze these brownie bites by wrapping them in plastic wrap and placing them in a freezer-safe container. They can last up to three months in the freezer.

What are some delicious toppings I can add to my Raspberry Cheesecake Brownie Bites?

Great toppings include a drizzle of white chocolate, a sprinkle of powdered sugar, fresh raspberries, or even a dollop of whipped cream to enhance the overall flavor and presentation.

Can I customize the flavors in Raspberry Cheesecake Brownie Bites?

Yes! You can easily customize these bites by using different fruits like strawberries or blueberries, swapping in various chocolate flavors, or even adding a hint of citrus to the cheesecake mixture.

What occasions are best for serving Raspberry Cheesecake Brownie Bites?

These delightful bites are perfect for any occasion, from birthdays and holiday parties to casual gatherings and picnics. They are visually appealing and always a hit with guests!

What common mistakes should I avoid when making these dessert bites?

Common mistakes to avoid include overmixing the batter, using cold ingredients instead of room temperature, and not checking the baking time accurately, as these can affect the texture and flavor.

Juicy Bacon-Wrapped Jalapeno Popper Chicken Recipe

If you’re on the hunt for a deliciously unique and mouth-watering dish, look no further than bacon-wrapped jalapeno popper chicken. This chicken recipe combines the tenderness of succulent chicken breasts with a creamy filling and the fiery kick of spicy jalapenos, all enveloped in crispy bacon. It’s a delightful fusion that appeals to those who crave savory dishes that pack a flavor punch. Whether you’re planning a family dinner or hosting a party, this crowd-pleaser is sure to impress and satisfy with every juicy bite.

Key Takeaways

  • Bacon-wrapped jalapeno popper chicken is a standout chicken recipe perfect for gatherings.
  • The combination of creamy fillings and spicy chicken offers a balanced flavor experience.
  • This recipe is versatile and can be served on various occasions.
  • Crispy bacon enhances the overall texture, making it irresistible to savory flavor lovers.
  • Each bite promises a delightful mixture of heat and creaminess.

Introduction to Bacon-Wrapped Delights

Bacon-wrapped recipes have captured the hearts of food lovers everywhere. The appeal of these flavorful dishes lies not just in their tantalizing taste but also in their versatility. Bacon can elevate dishes, pairing seamlessly with various meats and vegetables. This characteristic makes it a fantastic choice for appetizer ideas as well as main courses.

These delightful creations are becoming increasingly popular in contemporary cuisine. Whether it’s a party or a casual gathering, bacon-wrapped wonders often steal the show. Different combinations, such as bacon-wrapped shrimp or jalapeno poppers, showcase the creative potential of this savory ingredient. The resulting textures and flavors are hard to resist, leading to unforgettable culinary experiences for everyone involved.

  • Appealing flavor combinations
  • Wide range of potential pairings
  • Great for parties and gatherings

These attributes ensure bacon-wrapped dishes remain a crowd-pleaser, drawing everyone to the table for just one more bite. You’ll find countless innovative takes on this age-old classic, making it more than just food—it’s a social experience. Embracing bacon in recipes boosts the excitement around meal times, creating lasting memories with every savory morsel.

What Makes This Chicken Recipe Unique?

The bacon-wrapped jalapeno popper chicken stands out in the world of unique chicken recipes due to its vibrant flavor combinations. This dish skillfully merges the heat of fresh jalapenos, the velvety creaminess of cream cheese, and the irresistible crunch of crispy bacon. Each ingredient plays a critical role, creating a harmony of flavors that appeals to diverse taste preferences.

For those who seek spicy culinary adventures, the jalapenos deliver a satisfying kick that invigorates the palate. The bacon flavors add a smoky richness, enhancing the dish’s overall profile. This savory blend ensures that each bite offers a delicious contrast between heat and creamy smoothness.

Beyond just a chicken dish, this recipe caters to both spice aficionados and those who prefer milder fare. The engaging texture contrasts provide an enjoyable experience, making it an excellent choice for gatherings and special occasions. The ability to please various palates contributes to its popularity as a standout option in many kitchens.

IngredientFlavor ProfileRole in the Recipe
JalapenosSpicy and BoldAdds heat and texture
Cream CheeseRich and CreamyBalances spice and adds creaminess
BaconSmoky and SavoryEnhances flavor and provides crunch
ChickenJuicy and TenderServes as the protein base

Ingredients You’ll Need

Creating the perfect bacon-wrapped jalapeno popper chicken requires a handful of quality ingredients. Each component plays a significant role in ensuring a delightful and flavorful dish. Below, discover the essential bacon-wrapped jalapeno popper chicken ingredients that will make your recipe a hit.

Fresh Jalapenos

Opt for fresh jalapenos for a crisp bite and vibrant flavor. These peppers not only provide heat but also contribute to the dish’s overall texture. Look for firm jalapenos without any blemishes for the best results. The heat level can vary, allowing you to choose according to your preference.

Chicken Breasts

High-quality chicken breasts are central to this dish. They should be boneless and skinless to ensure even cooking and easy wrapping with bacon. Look for plump and fresh chicken breasts to maintain juiciness and tenderness.

Bacon Options

When it comes to bacon, you have several delicious options. Thick-cut bacon or applewood-smoked bacon can enhance the smokiness and add depth of flavor. Choose a bacon that crisps well to create a perfect contrast with the creamy filling and tender chicken.

Seasonings and Cream Cheese

A blend of seasonings elevates this dish to another level. Commonly used jalapeno popper recipe components include garlic powder, onion powder, and paprika to bring out the flavors. Cream cheese adds a rich, creamy texture that complements the spicy jalapenos perfectly, making every bite mouthwatering.

The Perfect Cooking Method

Cooking bacon-wrapped chicken can seem daunting, but choosing the right cooking method simplifies the process. Each technique—baking, grilling, or air-frying—offers unique advantages that bring out the best in your oven-baked chicken recipe.

  • Baking: This classic technique ensures even cooking. Preheat the oven to 400°F. Place the chicken on a baking sheet and cook for about 25-30 minutes. This method allows the bacon to crisp up nicely while keeping the chicken juicy.
  • Grilling: For a smoky flavor, grilling works wonders. Set your grill to medium heat and grill each piece for approximately 15-20 minutes. Keep an eye on the chicken to avoid overcooking and dry meat.
  • Air-Frying: The air fryer offers a healthier alternative with crispy results. Set it to 375°F and cook for roughly 20 minutes. You’ll achieve a deliciously crispy bacon exterior while maintaining a moist interior.

To perfect your cooking techniques, utilize a meat thermometer. Aim for a safe internal temperature of 165°F for chicken. This guarantees both great texture and rich flavors, ensuring your bacon-wrapped jalapeno popper chicken is both delicious and safe to enjoy.

Cooking MethodCooking TimeBacon CrispinessFlavor Profile
Baking25-30 minutesExcellentMild, even flavor
Grilling15-20 minutesGoodSmoky, charred flavor
Air-Frying20 minutesVery GoodCrispy, lighter flavor

Preparing the Bacon-Wrapped Jalapeno Popper Chicken

Learning how to prepare bacon-wrapped chicken can elevate your dinner game, and this recipe is a perfect example. Follow these detailed cooking instructions to create a mouth-watering dish that will impress your guests. Get ready to dive into preparation tips that make the process smooth and enjoyable.

Step-by-Step Instructions

  1. Preheat the oven to 375°F (190°C).
  2. Start by slicing fresh jalapenos in half lengthwise, removing the seeds for a milder flavor or keeping them for extra heat.
  3. In a bowl, mix cream cheese with any preferred seasonings to create a flavorful stuffing.
  4. Fill each jalapeno half with the cream cheese mixture, ensuring an even amount in each.
  5. Take a chicken breast and place one stuffed jalapeno half on top. Wrap the chicken securely with bacon, ensuring the pieces overlap slightly.
  6. Place the wrapped chicken on a baking sheet, ensuring any loose ends of the bacon tuck underneath the chicken. This prevents unraveling during cooking.
  7. Bake for 25-30 minutes or until the chicken is fully cooked and the bacon is crispy.

Pro Tips for Best Results

  • Ensure necessary sealing of the bacon by wrapping it tightly around the chicken.
  • Use toothpicks if needed to hold the bacon in place during cooking.
  • Let the dish rest for a few minutes after baking to allow flavors to combine before slicing.
  • Experiment with different cheeses or spices to customize your bacon-wrapped chicken to your taste.
Preparation StepsTips
Slice jalapenosWear gloves to protect your hands
Fill with cream cheeseUse piping bag for easier filling
Wrap with baconOverlap the bacon for better coverage
Bake in the ovenCheck temperature with a meat thermometer

Serving Suggestions for Your Dish

Serving bacon-wrapped jalapeno popper chicken allows for endless creativity in both culinary presentation and meal pairing. This dish shines as a focal point at any gathering, and you can enhance its appeal with the right accompaniments.

For refreshing serving ideas, consider pairing the chicken with sides like:

  • Coleslaw – its crunch complements the richness of the chicken.
  • Potato Salad – a creamy texture that balances the excitement of the dish.
  • Grilled Vegetables – offering a vibrant and healthy contrast.

Plating is essential for elevating the dish’s presentation. A simple yet effective approach includes:

  • Using a white plate to make the colors pop.
  • Arranging the chicken on a bed of greens for a fresh element.
  • Drizzling a bit of barbecue sauce for an enticing finish.

Garnishing options such as chopped cilantro or sliced green onions can add bursts of flavor and color. Whether served as an appetizer or the main course, bacon-wrapped jalapeno popper chicken adapts beautifully to various dining occasions. With these serving ideas, your meal will surely impress family and friends alike.

Storage Tips and Reheating Instructions

Proper storage and reheating techniques can preserve the deliciousness of your bacon-wrapped jalapeno popper chicken. Using effective chicken storage tips helps maintain flavor and texture, ensuring your leftovers taste just as good as when freshly made.

How to Store Leftovers

To store your chicken leftovers, consider the following steps:

  • Place the chicken in an airtight container to prevent moisture loss and avoid absorbing other odors from the refrigerator.
  • For refrigerator storage, try to consume the leftovers within 3 to 4 days for optimal freshness.
  • If you need to store the chicken for a longer period, consider freezing. In the freezer, leftovers can last up to 2 to 6 months.

Best Reheating Methods

Reheating chicken properly ensures that the meal stays juicy and the bacon retains its crispy texture. Here are effective methods:

  • Oven Method: Preheat your oven to 350°F. Place the chicken in an oven-safe dish, covering it with foil to lock in moisture. Reheat for about 15 to 20 minutes, checking frequently to avoid drying out.
  • Microwave Method: If you’re short on time, use a microwave. Place the chicken on a microwave-safe plate, cover with a damp paper towel, and heat for 1 to 2 minutes. This method helps retain moisture.
  • Air Fryer Method: For those who own an air fryer, preheat it to 350°F. Reheat the chicken for about 5 to 7 minutes, which helps keep the bacon crispy while ensuring the chicken remains juicy.

By following these storage and reheating methods, you can enjoy your chicken leftovers while maintaining their quality and flavor.

Why People Love Bacon-Wrapped Jalapeno Popper Chicken

Bacon-wrapped jalapeno popper chicken has become a staple for many food enthusiasts. Understanding why this chicken dish is loved can deepen appreciation for its irresistible flavor and versatility. This dish excels as an option for various gatherings, making it an occasion-friendly meal that suits everything from casual cookouts to festive parties.

Popular Occasions for Serving

This savory dish shines on numerous occasions, capturing the hearts of guests and hosts alike. Here are some popular events where this meal often makes an appearance:

  • Birthday parties
  • Summer barbecues
  • Game day feasts
  • Family gatherings
  • Holiday celebrations

The unique combination of flavors and textures helps create memorable dining experiences, while the dish’s ease of preparation aligns perfectly with festive atmospheres.

Reviews and Feedback from Food Lovers

Customer feedback emphasizes the dish’s appeal, showcasing its reputation among food lovers. Many home cooks highlight both the flavor and simplicity of preparation. Here are some notable sentiments shared by those who have enjoyed this dish:

“This dish is always a hit at our parties! The combination of bacon, cheese, and jalapenos creates a crowd-pleaser that everyone devours.”

“I love making this for gatherings. It’s easy to prepare and has that wow factor that impresses my guests!”

Such enthusiastic responses affirm why this chicken dish enjoys popularity among those seeking an occasion-friendly meal that delivers on taste and satisfaction. Whether served as an appetizer or main course, bacon-wrapped jalapeno popper chicken consistently garners rave reviews and keeps culinary cravings at bay.

Common Mistakes to Avoid

Preparing bacon-wrapped jalapeno popper chicken can be a delightful experience, yet many encounter cooking errors that detract from the dish’s potential. One common recipe mistake is using too much cream cheese. While creaminess enhances flavor, an excess can lead to a soggy texture that overwhelms the other ingredients. It’s essential to strike a balance.

Another frequent issue arises from insufficient seasoning. Neglecting to properly season the chicken can result in a bland final product. Use a mixture of spices and herbs to elevate the taste, ensuring every bite is packed with flavor.

A critical aspect of bacon-wrapped chicken tips involves correct cooking temperatures. Cooking at too low a heat might not render the bacon properly, leading to an unappetizing chewiness. Aim for the right temperature to achieve crispy bacon, enhancing both texture and taste.

Sourcing high-quality ingredients plays a substantial role in success. Opting for fresh jalapenos and quality bacon can significantly impact the overall flavor of the dish. Make these careful choices to minimize mistakes.

Lastly, following the correct preparation techniques can help avoid mishaps. Always secure the bacon tightly around the chicken, ensuring it adheres during cooking. This technique not only enhances presentation but also guarantees even cooking. By being mindful of these common cooking errors and recipe mistakes, you can create a dish that impresses every time.

Variations of the Recipe to Try

Exploring different variations of bacon-wrapped chicken can elevate your cooking game. This dish offers ample opportunities to play with flavors and ingredients, ensuring fun and variety for every palate.

Other Cheeses You Can Use

While cream cheese is a favorite, consider using alternative ingredients to add your unique twist. Try:

  • Cheddar: Rich and sharp, perfect for those who enjoy a traditional taste.
  • Pepper Jack: Offers a creamy texture with a touch of spice, enhancing the overall flavor profile.
  • Blue Cheese: Adds a robust and tangy taste, appealing to adventurous eaters.

Experimenting with these variations in your bacon-wrapped chicken can lead to delightful surprises at your dining table.

Spicier Versions for Heat Lovers

If you crave something with a serious kick, consider spicing things up with these ideas:

  • Add chopped jalapenos to the filling for an extra burst of heat.
  • Incorporate spicy seasonings, such as cayenne pepper or chili powder, into your mix.
  • Substitute regular bacon with spicy varieties for a smoky, fiery flavor.

These adjustments will create an array of spicy jalapeno recipes, appealing to those who enjoy intense flavors and heat in their meals.

Conclusion

In this summary of the bacon-wrapped chicken dish, we’ve explored the delightful world of bacon-wrapped jalapeno popper chicken. This dish embodies a wonderful mix of flavors, combining the savory crunch of bacon with the spicy zing of jalapenos and the creamy richness of cheese. It’s a crowd-pleaser for any gathering, effortlessly elevating everyday meals into something extraordinary.

As we’ve discussed, the versatility of this recipe allows you to tailor it to your taste preferences, whether you enjoy a milder palate or crave something with an added kick. From family dinners to game day celebrations, this dish fits seamlessly into various occasions. In our final thoughts, it’s evident that preparing this dish is not only simple but also provides an impressive culinary experience that will impress your guests.

We encourage you to try making this bacon-wrapped jalapeno popper chicken and share your own variations or experiences with your friends and family. By doing so, you contribute to a community of food lovers who appreciate the rich flavors and creativity that this fantastic recipe has to offer. Happy cooking!

FAQ

What is bacon-wrapped jalapeno popper chicken?

Bacon-wrapped jalapeno popper chicken is a delicious dish that combines tender chicken breasts stuffed with a creamy mixture and spicy jalapenos, all wrapped in crispy bacon. It’s a savory dish perfect for various occasions.

How do I prepare bacon-wrapped jalapeno popper chicken?

To prepare this dish, you’ll want to slice fresh jalapenos, stuff them with a creamy cheese mixture, and then wrap the chicken breasts in bacon. Baking or grilling are popular methods for cooking it to perfection.

Can I use different types of cheese in this recipe?

Absolutely! You can experiment with other cheeses like cheddar, pepper jack, or blue cheese to create unique flavor combinations in your bacon-wrapped jalapeno popper chicken.

What are some good side dishes to serve with this chicken?

Pair this dish with refreshing sides like coleslaw, grilled vegetables, or potato salad to balance the richness of the chicken. It complements a variety of sides beautifully!

How should I store leftovers?

Store leftovers in airtight containers in the refrigerator for up to 3-4 days. For longer storage, you can freeze them, but try to consume them within 2-3 months for best flavor.

What is the best way to reheat bacon-wrapped jalapeno popper chicken?

The best reheating method is to place the chicken in the oven at a low temperature to restore moisture and crispness. Alternatively, you can use the microwave but be mindful of the cooking time to avoid drying it out.

Why is this dish a hit at gatherings?

Bacon-wrapped jalapeno popper chicken is popular because it combines spicy, savory, and creamy flavors in one bite, making it a versatile dish that’s ideal for parties, cookouts, and family dinners.

What are some common mistakes to avoid while making this recipe?

Common mistakes include using too much cream cheese, not properly seasoning the chicken, or cooking it at the wrong temperature, which can affect texture and taste. Make sure to follow cooking guidelines closely for the best results!

Can I make this dish spicier?

Yes! You can make spicier versions by adding more jalapenos or using hotter pepper varieties for those who love an extra kick in their bacon-wrapped jalapeno popper chicken.

Honey Mustard Pretzel-Crusted Chicken Tenders Recipe

If you’re looking for a delicious and unique chicken tender recipe, then look no further than honey mustard pretzel-crusted chicken tenders. This dish combines the delightful sweetness of honey, the tangy kick of mustard, and a crunchy pretzel coating that makes it truly stand out. Perfect as a family-friendly meal or a crowd-pleasing appetizer for gatherings, these chicken tenders are destined to be a hit for every occasion. Get ready to impress your family and friends with this fantastic twist on a classic favorite!

Key Takeaways

  • Honey mustard chicken tenders are a perfect blend of flavors.
  • The pretzel crust adds a delightful crunch to each bite.
  • Versatile enough for dinner or as an appetizer for parties.
  • Simple preparation steps make this dish easy to whip up.
  • Customize your dipping sauces to enhance the flavor profile.

Introduction to Honey Mustard Pretzel-Crusted Chicken Tenders

Honey mustard has become a beloved condiment, celebrated for its perfect balance of sweetness and tang. This delightful combination elevates countless dishes, making honey mustard chicken a popular choice among food enthusiasts. The innovative twist of pairing it with chicken tenders introduces a fun and tasty experience.

The irresistible crunch of pretzel crust enhances the flavor profile, creating a dish that stands out in any meal setting. Cooking with honey mustard is not just about flavor; it’s about creating a joyful eating experience that appeals to all ages. These tenders embody a modern take on a classic favorite, showcasing how versatile and exciting honey mustard can be in the culinary world.

Whether you’re preparing a family dinner or an appetizer for a gathering, honey mustard pretzel-crusted chicken tenders bring a sense of joy and satisfaction to the table. With their mouthwatering taste and crispy texture, you’ll find them to be a crowd-pleaser that keeps everyone coming back for more.

Why Choose Honey Mustard Pretzel-Crusted Chicken Tenders?

Choosing honey mustard pretzel-crusted chicken tenders for your next meal brings an array of flavors and textures, making it a standout option for any weeknight dinner or gathering. The combination of the savory chicken tenders coated in a crispy pretzel crust offers wonderful benefits of chicken tenders that everyone can enjoy.

The deliciously sweet and tangy flavor of honey mustard pairs perfectly with the crunch of pretzels. This leads to an exciting contrast that elevates the ordinary chicken tender experience. One of the notable chicken tender advantages is their versatility, appealing to both children and adults alike. Kids enjoy the familiar textures, while adults appreciate the flavor complexity.

Preparation plays a significant role in making these tenders a go-to choice. They require minimal effort to whip up, making them ideal for busy weeknights. Whether baked or fried, the ease of preparation ensures that you can focus on enjoying your meal rather than spending hours in the kitchen.

In terms of nutrition, chicken tenders provide a healthy, lean protein source. Their inclusion in meals supports a balanced diet, further enhancing the reasons why honey mustard chicken is a favored option. The added appeal of pretzels creates a familiar comfort food vibe, making it a perfect dish to share with family and friends.

Essential Ingredients for the Recipe

Creating the perfect honey mustard pretzel-crusted chicken tenders relies heavily on selecting high-quality ingredients. Knowing what to use for chicken dishes is essential for achieving the best possible flavor and texture. This section delves into the critical components, ensuring your dish stands out.

Chicken Tender Selection

When it comes to chicken tender ingredients, the choice of chicken can significantly impact your dish. Select fresh, boneless, skinless chicken tenders for optimal cooking. Fresh tenders typically provide a juicier texture and better flavor compared to frozen options. If you’re opting for frozen, ensure they are adequately thawed before preparing. Quality chicken is the foundation of delicious pretzel-crusted tenders.

Choosing the Right Pretzels

The coating can make or break your chicken tenders. For this recipe, it’s vital to consider the best pretzels for coating. Baked pretzels often yield a lighter crunch, while hard pretzels deliver a more robust texture and richer flavor. Crushed pretzels serve as an excellent coating that provides the desired crunch. Explore various types to discover which preference enhances your chicken tenders the most.

Preparation Steps for Honey Mustard Pretzel-Crusted Chicken Tenders

Embarking on the journey of making honey mustard pretzel-crusted chicken tenders involves careful chicken preparation steps. Start by preheating your oven to 400°F (200°C). This ensures the ideal temperature for achieving a crispy coating.

Next, focus on the chicken tenders. Trim any excess fat and season them with salt and pepper. Proper seasoning ensures that your homemade chicken tenders are flavorful.

Now, it’s time to create your dredging station, which is essential for successful cooking chicken tenders. Prepare three shallow bowls: one for flour, a second for a beaten egg wash, and the third for crushed pretzels mixed with breadcrumbs. Working sequentially through these bowls guarantees that each piece gets adequately coated.

Begin with the flour, coating each chicken tender evenly. Move the coated tenders to the egg wash, allowing any excess to drip off. Finish by pressing them into the pretzel mixture, ensuring each piece is generously covered. This thorough coating technique plays a significant role in the final texture produced during cooking.

After the chicken preparation steps are complete, place the coated tenders on a baking sheet lined with parchment paper. This setup prepares you for the last stage of how to make chicken tenders that are crispy and golden brown.

Making the Honey Mustard Sauce

The homemade honey mustard sauce adds the perfect zing to your chicken tenders. Achieving the ideal balance between sweet and tangy is key. The basic ratio of honey to mustard often begins at two parts honey to one part mustard, but you can adjust this according to personal taste preferences. For a smoother texture, whisk the ingredients thoroughly to prevent any separation.

Tips for Perfecting the Sauce

  • Start with quality ingredients. Use fresh honey and mustard for the best flavor.
  • Experiment with different types of mustard. Dijon offers a robust flavor, while yellow mustard provides a milder taste.
  • Add a splash of vinegar or lemon juice for extra tang.
  • Incorporate spices such as cayenne pepper or paprika for a little heat.
  • Store any leftovers in an airtight container in the refrigerator for up to a week.

Alternative Sauce Variations

For those looking to mix things up, there are numerous dipping sauce variations that can elevate the flavor profile. Consider these options:

VariationIngredientsFlavor Profile
Garlic Honey MustardHomemade honey mustard, minced garlicRich and savory
Herbed Honey MustardHomemade honey mustard, fresh herbs (thyme, parsley)Fresh and aromatic
Spicy Honey MustardHomemade honey mustard, hot sauceHot and tangy

Each variation brings something unique and exciting to the table, allowing for a delightful exploration of flavors alongside your chicken tenders!

Coating the Chicken Tenders

Coating chicken tenders properly is crucial for achieving that perfect crunch. The process is simple and can be broken down into two main steps: dipping and rolling. Knowing how to coat chicken effectively makes a significant difference in texture and flavor.

Start with the chicken tenders. First, dip each piece into the honey mustard sauce, ensuring a generous coating. The sauce not only adds flavor but also helps the pretzel crumbs stick during the pretzel coating technique. Allow any excess sauce to drip off before proceeding to the next step.

Next, prepare a plate or shallow dish filled with crushed pretzels. Carefully roll the honey mustard-coated chicken tenders in the crushed pretzels. Press gently to ensure that the pretzels adhere well, providing that delightful crunch once cooked. Remember to shake off any excess pretzel crumbs after coating, as this helps avoid sogginess and maintains a crispy finish.

These chicken coating methods, using the honey mustard sauce and pretzel coating technique, result in a delicious, crispy outer layer while keeping the tender juicy on the inside. Enjoy your cooking adventure!

Baking vs. Frying: Which is Better?

When it comes to preparing chicken tenders, choosing between baking and frying is crucial. Each method brings its own set of advantages, which can make a difference in your cooking experience. Depending on personal taste and dietary preferences, you might lean towards one of these cooking methods for chicken. Evaluating baking vs frying chicken reveals unique benefits that cater to different culinary goals.

Benefits of Baking

Baking chicken tenders offers various health benefits and is simpler to execute. Here are some of the key reasons to consider baking:

  • Lower Fat Content: Baking requires significantly less oil than frying, resulting in lower overall fat and calorie content.
  • Even Cooking: The heat circulates evenly in the oven, ensuring that chicken tenders cook uniformly without hot spots.
  • Less Mess: Baking minimizes splatter and cleanup compared to frying, making this method more convenient.

Frying Tips for Crispy Coating

If you prefer that irresistible crispy texture, frying remains one of the best chicken cooking techniques. Follow these tips to achieve perfectly fried chicken tenders:

  • Oil Temperature: Heat oil to around 350°F to 375°F for optimal frying. Using a thermometer helps maintain the right temperature and avoids greasy results.
  • Don’t Overcrowd: Fry in small batches to ensure even cooking and to maintain oil temperature throughout the process.
  • Drain Properly: Allow cooked tenders to rest on a wire rack instead of paper towels to preserve their crispy coating.

Understanding the strengths of these cooking methods for chicken empowers you to make delicious choices based on your culinary needs. Whether you opt for the healthful, effortless benefits of baking or the crunchy allure of frying, both promise satisfying chicken tenders.

Pairing Suggestions for Honey Mustard Pretzel-Crusted Chicken Tenders

When enjoying honey mustard pretzel-crusted chicken tenders, the right side dishes for chicken tenders can elevate your meal to an entirely new level. Consider serving these delicious tenders alongside a fresh coleslaw, as its creamy texture and tangy flavor perfectly balance the crispiness of the chicken. The crunch of the slaw adds a delightful contrast that can enhance your dining experience.

Another stellar pairing involves roasted vegetables, which not only contribute a splash of color to your plate but also provide a wholesome, earthy flavor that complements the sweet notes of honey mustard. You might opt for seasonal vegetables like carrots, zucchini, or bell peppers, giving your dish a healthy and vibrant twist. Alternatively, sweet potato fries are a crowd-pleaser and serve as one of the best pairings for chicken, offering a sweet and savory combination.

To take your meal to the next level, don’t forget about dipping sauces! A tangy ranch or creamy garlic sauce makes an excellent choice for additional honey mustard chicken accompaniments, enhancing the overall taste experience. With so many versatile options, you can create a delightful spread that will impress your guests and satisfy all palates.

FAQ

What makes honey mustard pretzel-crusted chicken tenders so special?

Honey mustard pretzel-crusted chicken tenders combine the sweetness of honey, the tanginess of mustard, and the crunchy texture of a pretzel coating, creating a delicious flavor profile that appeals to everyone from kids to adults. They are versatile for both family dinners and parties!

Can I use frozen chicken tenders for this recipe?

While fresh chicken tenders are recommended for the best flavor and texture, you can absolutely use frozen chicken tenders. Just ensure they are fully thawed and patted dry before coating to help the pretzel crust adhere better.

What kind of pretzels should I choose for coating?

For the best pretzel crust experience, opt for hard pretzels that you can crush into fine crumbs. These provide that perfect crunch without becoming too soggy when baked or fried!

How can I make the honey mustard sauce from scratch?

Making homemade honey mustard sauce is simple. Combine equal parts honey and mustard, then adjust to taste. For a spicier kick, you can add a dash of cayenne pepper or mix in some BBQ sauce for a unique variation!

Is it better to bake or fry the chicken tenders?

Both methods have their benefits! Baking is healthier and still results in a delicious coating, while frying gives you that extra crispy texture that many people love. It really depends on your personal preference and dietary goals!

What are some good side dishes to serve with these chicken tenders?

Pair your honey mustard pretzel-crusted chicken tenders with delicious sides such as coleslaw, sweet potato fries, or roasted vegetables. These pairings enhance the meal and cater to various taste preferences!

Can I prepare the chicken tenders in advance?

Yes! You can prepare the chicken tenders, coat them, and refrigerate them for a few hours before cooking. Just make sure to keep them covered to prevent the coating from getting soggy!

Are there any variations I can try with the recipe?

Absolutely! Consider adding spices to the pretzel coating for extra flavor, such as garlic powder or paprika. You can also try different dipping sauces or even swap the honey mustard for BBQ sauce or sriracha for a twist!