Table of Contents
- Heavenly Lemon Raspberry Meringue Cheesecake: The Only Recipe You’ll Ever Need
Heavenly Lemon Raspberry Meringue Cheesecake: The Only Recipe You’ll Ever Need
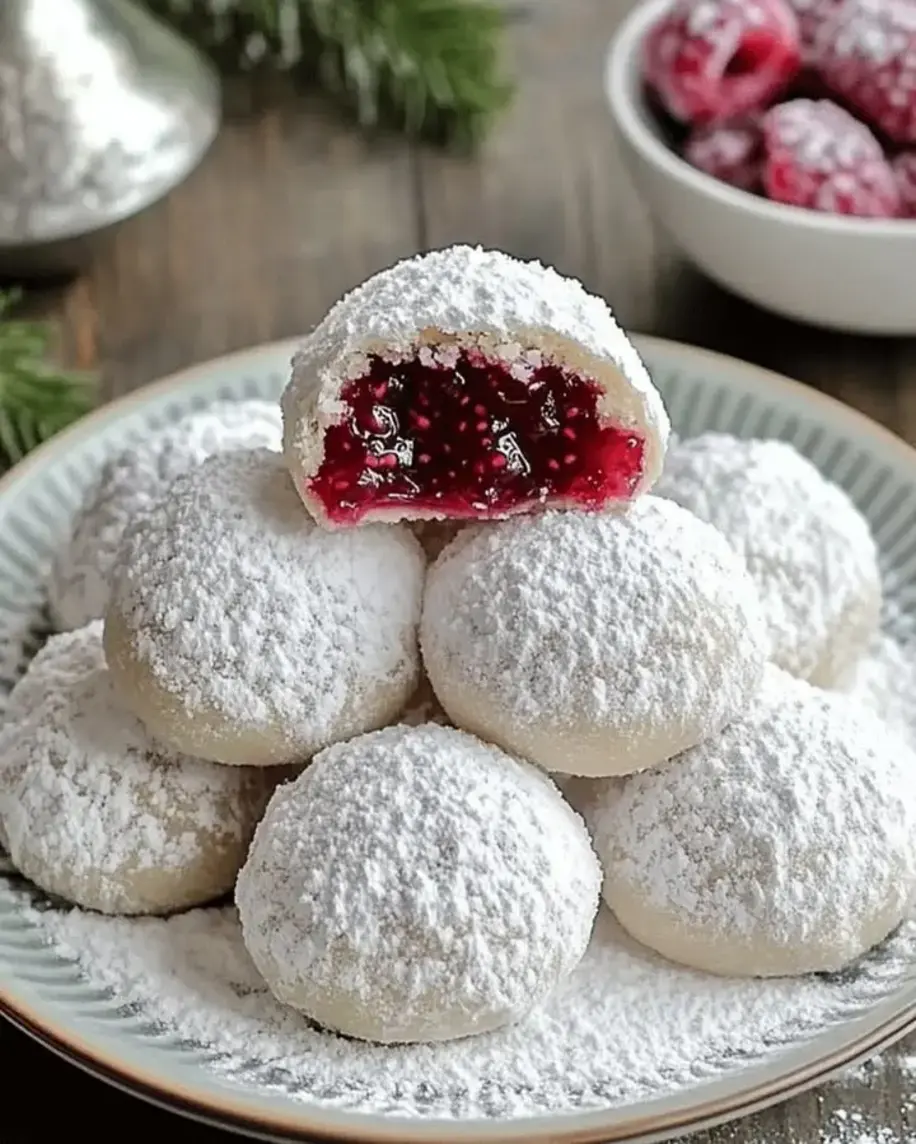
Imagine a dessert that combines the zesty tang of fresh lemons with the sweet burst of ripe raspberries, all crowned by an exceptionally light and airy meringue topping—this is the essence of our Heavenly Lemon Raspberry Meringue Cheesecake recipe. Perfect for summer gatherings or any special occasion, this no-bake lemon raspberry cheesecake variation offers an easy yet sophisticated twist that elevates your baking game without the fuss. Whether you’re a seasoned baker or a beginner, this raspberry meringue cheesecake recipe is designed to deliver foolproof results every time, making it the best meringue cheesecake you’ll ever taste. Created by Chef Sally, this recipe has been meticulously tested to ensure that heavenly blend of creamy, fruity, and fluffy textures that dance on your palate.
Dive deeper into the sensory delight of this Lemon Raspberry Meringue Cheesecake: the vibrant lemon zest infuses a bright, citrusy aroma that fills your kitchen, while the fresh raspberries add a juicy, tart contrast to the ultra-smooth, velvety cheesecake filling. Each bite offers a perfect harmony of creamy richness from the cheese base, the subtle crunch of the graham cracker crust, and the ethereal lightness of the meringue, which melts in your mouth like a cloud. The raspberries provide pops of vivid color and natural sweetness, making this not just a treat for your taste buds but a feast for the eyes, with its elegant layers promising to impress at any table.
What sets this version of Lemon Raspberry Meringue Cheesecake apart on exorecipes.com is our commitment to making it the single best resource online, packed with expert tips, step-by-step guidance, and Chef Sally’s secret for achieving that flawless meringue without any hassle. You’ll learn how to avoid common pitfalls, like cracking or weeping, while discovering substitutions and make-ahead tricks that build your confidence in the kitchen. Stay tuned for our ingredient spotlight and detailed instructions that turn this into a reliable go-to recipe, ensuring your desserts are always a hit.
Why This Heavenly Lemon Raspberry Meringue Cheesecake Recipe is a Game-Changer
The Chef’s Secret: The unique selling proposition of this Lemon Raspberry Meringue Cheesecake lies in its exceptionally light meringue topping, achieved through a precise technique of gradually adding sugar to whipped egg whites for maximum volume and stability. This method ensures the meringue doesn’t deflate or weep, creating a feather-light layer that contrasts beautifully with the creamy base, setting this recipe apart from ordinary cheesecakes. By incorporating room-temperature eggs and a touch of vanilla extract at the right moment, we elevate the flavor profile to new heights, making your dessert feel professionally crafted.
Unbeatable Texture: The science behind the texture is all about balance—the high-fat content in the cream cheese and butter creates a rich, creamy filling that sets perfectly without cracking, thanks to the even baking at 325°F (163°C). This controlled temperature prevents overcooking, allowing the proteins in the eggs to coagulate smoothly, resulting in that signature silky smoothness that defines the best Lemon Raspberry Meringue Cheesecake.
Foolproof for a Reason: This recipe has been tested multiple times in our kitchens to guarantee success, even for novice bakers. From the easy lemon raspberry cheesecake assembly to the no-bake inspired meringue broil, every step is streamlined for reliability, ensuring you get a stunning, Instagram-worthy result without the stress.
Ingredient Spotlight: Quality Makes the Difference
For the crust, start with 1 1/2 cups of graham cracker crumbs—these provide the foundational crunch that supports the entire cheesecake. Opt for freshly crushed crumbs from whole graham crackers for the best texture and flavor; pre-packaged ones can be stale. Quality matters because fresh crumbs absorb the melted butter evenly, creating a sturdy base that holds up under the weight of the filling. If you’re out of graham crackers, try digestive biscuits as a tested substitution to maintain that classic, slightly sweet undertone without altering the structure.
Moving to the filling, 3 packages (8 oz each) of softened cream cheese are essential for that ultra-creamy consistency in this Lemon Raspberry Meringue Cheesecake. Choose full-fat, brick-style cream cheese for the richest results, as lower-fat versions can lead to a watery texture. The lemon zest (1 tablespoon) and lemon juice (1/4 cup) add a zesty brightness that cuts through the richness—use organic lemons for more intense flavor and to avoid any waxy coatings. If lemons aren’t available, lime zest and juice make a great substitution, offering a similar tang with a
Fresh raspberries (1 cup) are the star of this raspberry meringue cheesecake recipe, providing juicy bursts of flavor and natural color. Select firm, ripe berries for the best taste and to prevent sogginess; frozen ones can work but may release excess water, affecting the texture. For the meringue, 4 large egg whites form the base of that light topping—fresh, high-quality eggs whip up better, creating more volume. The sugar (1 cup) should be superfine for quick dissolving, ensuring a glossy finish; powdered sugar is a good alternative if you’re aiming for a smoother meringue. Finally, 1/2 teaspoon of vanilla extract enhances the flavor—always go for pure extract over imitation for authentic taste, and almond extract can substitute for a nutty variation.
Step-by-Step Instructions
Step 1: Preparing the Crust
Preheat your oven to 325°F (163°C). In a medium bowl, mix 1 1/2 cups graham cracker crumbs, 1/4 cup sugar, and 1/2 cup melted unsalted butter until well combined. Press this mixture firmly into the bottom of a 9-inch springform pan to form an even layer. Bake for 10 minutes, then remove and let cool slightly. This step creates a solid base for your Lemon Raspberry Meringue Cheesecake.
Pro Tip: Use the bottom of a measuring cup to press the crust evenly for a professional finish, preventing any uneven baking.
Step 2: Creating the Filling
In a large bowl, beat 3 packages (8 oz each) of softened cream cheese and 1 cup sugar until smooth and creamy. Add 1 tablespoon lemon zest, 1/4 cup lemon juice, and 3 large eggs, mixing on low speed until just combined to avoid incorporating too much air. Pour this filling over the cooled crust in the pan and smooth the top. Bake for 50-60 minutes, or until the edges are set but the center still has a slight jiggle.
Common Mistake to Avoid: Overmixing the batter can introduce air bubbles, leading to cracks—mix just until combined to keep your cheesecake smooth and crack-free.
Step 3: Cooling and Adding Raspberries
Once baked, remove the cheesecake from the oven and let it cool at room temperature for about 1 hour. Then, top it with 1 cup of fresh raspberries, arranging them evenly across the surface for a beautiful presentation. This allows the flavors to meld while keeping the raspberries vibrant.
Pro Tip: Gently pat the raspberries dry before adding them to prevent excess moisture from making the cheesecake soggy.
Step 4: Making and Adding the Meringue
For the meringue, beat 4 large egg whites in a clean bowl until soft peaks form. Gradually add 1 cup sugar and 1/2 teaspoon vanilla extract, continuing to beat until stiff, glossy peaks form. Spread this meringue over the cooled cheesecake, ensuring it covers the raspberries completely. Broil for 1-2 minutes until golden brown, watching closely to avoid burning.
Common Mistake to Avoid: Ensure your bowl and beaters are completely dry and free of any grease, as moisture can cause the meringue to weep on your Lemon Raspberry Meringue Cheesecake.
Serving & Presentation
Elevate your Lemon Raspberry Meringue Cheesecake with creative plating that highlights its stunning layers—slice it carefully with a warm knife for clean cuts, revealing the vibrant raspberries against the creamy filling. Garnish with extra fresh raspberries, a sprinkle of lemon zest, or edible flowers for an Instagram-worthy touch. This easy lemon raspberry cheesecake pairs beautifully with a light herbal tea or a sparkling wine to balance its tangy sweetness, making it ideal for brunches or dinner parties. For a full dessert spread, serve alongside vanilla ice cream or fresh fruit salad to complement the no-bake inspired elements, ensuring every bite is a delightful experience.
Make-Ahead & Storage Solutions
Make-Ahead Strategy: Prepare the crust and filling up to 2 days in advance—bake the cheesecake as directed, cool it completely, and refrigerate it uncovered until ready to add the raspberries and meringue. Assemble the toppings just before serving to keep the meringue crisp, allowing you to enjoy fresh Lemon Raspberry Meringue Cheesecake with minimal effort on the day of your event.
Storing Leftovers: Cover the cheesecake tightly with plastic wrap or store in an airtight container in the refrigerator for up to 3 days. For longer storage, freeze individual slices on a baking sheet, then transfer to a freezer-safe bag for up to 2 months to maintain the best raspberry meringue cheesecake quality.
The Best Way to Reheat: Thaw frozen slices in the refrigerator overnight, then bring to room temperature for about 30 minutes. Avoid microwaving to preserve the texture; instead, use a low oven at 250°F for 10 minutes to gently warm and restore the light meringue without making it soggy.
Frequently Asked Questions (FAQ)
How do I prevent my meringue from weeping on cheesecake?
To prevent weeping in your meringue for this Lemon Raspberry Meringue Cheesecake, ensure your egg whites are at room temperature and your mixing bowl is completely clean and dry. Gradually add sugar while beating to stabilize the proteins, and avoid overbeating. Once applied, broil quickly and let the cheesecake cool slowly—this technique, straight from Chef Sally’s tips, keeps the meringue intact and fluffy.
What’s the best way to get a smooth, crack-free cheesecake filling?
Achieving a smooth, crack-free filling in your easy lemon raspberry cheesecake starts with using room-temperature ingredients to avoid lumps. Mix on low speed after adding eggs to prevent air bubbles, and bake in a water bath if possible, though our tested method at 325°F works wonders. Cool the cheesecake gradually in the turned-off oven with the door slightly ajar to manage temperature changes effectively.
Can I use frozen raspberries in lemon raspberry meringue cheesecake?
Yes, you can use frozen raspberries in this raspberry meringue cheesecake recipe, but thaw and drain them thoroughly to remove excess moisture, which could make the cheesecake soggy. Fresh raspberries are ideal for the best texture and flavor in our Lemon Raspberry Meringue Cheesecake, but frozen ones work in a pinch—just pat them dry before adding to preserve the integrity of the filling.
What are some good serving suggestions for lemon raspberry meringue cheesecake?
For serving this best meringue cheesecake, pair it with a dollop of whipped cream or a side of Greek yogurt to enhance the tangy lemon notes. It’s perfect as a standalone dessert or topped with mint leaves for a refreshing twist—serve chilled for a cool summer treat or at room temperature to let the flavors shine, making it versatile for any occasion.
Is this recipe suitable for beginners?
Absolutely, this Lemon Raspberry Meringue Cheesecake is beginner-friendly, with straightforward steps and our detailed pro tips to guide you. Even if you’re new to baking, the easy lemon raspberry cheesecake elements, like the simple crust and meringue, make it accessible while building your skills for more complex desserts.
How can I make this recipe gluten-free?
To make this recipe gluten-free, substitute the graham cracker crumbs with gluten-free alternatives like almond flour or gluten-free cookie crumbs. Ensure all other ingredients, such as any potential additives in the cream cheese, are certified gluten-free, maintaining the delicious integrity of your Lemon Raspberry Meringue Cheesecake.
Tried This Recipe? Leave a Comment!
Did you make this recipe? I’d love to hear how it turned out! Please leave a comment and a rating below. Your feedback helps other home cooks and supports exorecipes!
For more delicious inspiration, follow me on Pinterest!
.
Print
Heavenly Lemon Raspberry Meringue Cheesecake
- Prep Time: 30 minutes
- Cook Time: 60 minutes
- Total Time: 90 minutes
- Yield: 12 1x
- Method: Dessert
- Cuisine: American
Description
A delightful dessert featuring a creamy lemon cheesecake base topped with fresh raspberries and a light meringue.
Ingredients
- Crust:
- 1 1/2 cups graham cracker crumbs
- 1/4 cup sugar
- 1/2 cup unsalted butter, melted
- Filling:
- 3 packages (8 oz each) cream cheese, softened
- 1 cup sugar
- 1 tablespoon lemon zest
- 1/4 cup lemon juice
- 3 large eggs
- 1 cup fresh raspberries
- Meringue:
- 4 large egg whites
- 1 cup sugar
- 1/2 teaspoon vanilla extract
Instructions
- Preheat oven to 325°F (163°C).
- Mix graham cracker crumbs, sugar, and melted butter. Press into the bottom of a 9-inch springform pan. Bake for 10 minutes.
- In a large bowl, beat cream cheese and sugar until smooth. Add lemon zest, lemon juice, and eggs; mix well.
- Pour the filling over the crust and bake for 50-60 minutes until set.
- Let cool, then top with fresh raspberries.
- For meringue: Beat egg whites until soft peaks form, gradually add sugar and vanilla. Spread over cheesecake and broil until golden.
Notes
Ensure eggs are at room temperature for the best results. Store in the refrigerator for up to 3 days.
Nutrition
- Calories: 450
- Sugar: 35g
- Fat: 28g
- Carbohydrates: 45g
- Protein: 7g