“`html
Table of Contents
- Caramelized Butternut Squash with Gorgonzola and Cranberry-Balsamic Glaze: The Only Recipe You’ll Ever Need
- Why This Caramelized Butternut Squash with Gorgonzola and Cranberry-Balsamic Glaze Recipe is a Game-Changer
- Ingredient Spotlight: Quality Makes the Difference
- Step-by-Step Instructions
- Serving & Presentation
- Make-Ahead & Storage Solutions
- Frequently Asked Questions (FAQ)
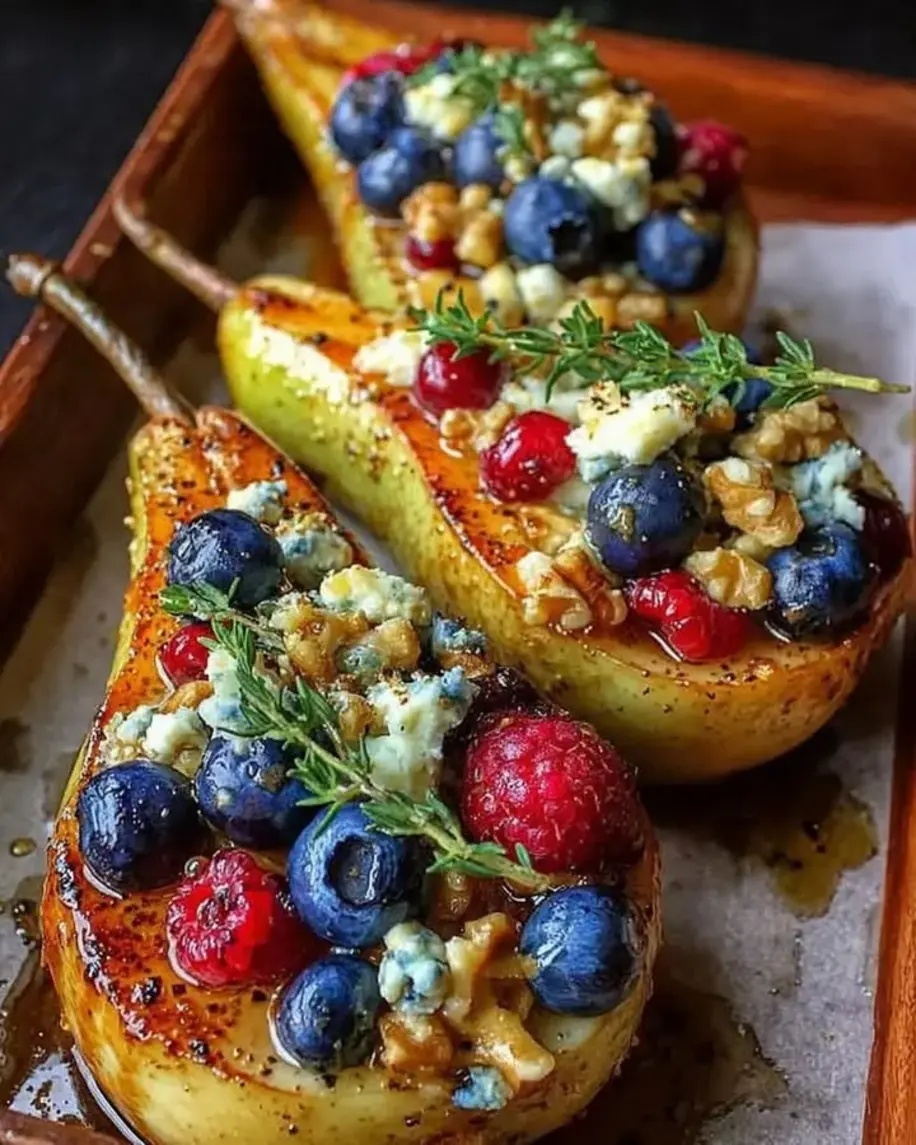
Caramelized Butternut Squash with Gorgonzola and Cranberry-Balsamic Glaze: The Only Recipe You’ll Ever Need
As the leaves turn golden and the air grows crisp, nothing beats a comforting roasted butternut squash recipe that brings warmth to your table. Imagine starting your fall feasts with caramelized butternut squash that’s perfectly tender, crowned with creamy gorgonzola and a zesty cranberry-balsamic glaze that makes every bite unforgettable. This dish isn’t just a side; it’s a standout caramelized butternut squash creation that combines sweet, savory, and tangy flavors in one harmonious bowl. Drawing from Chef Sally’s expertise, this recipe ensures your holiday gatherings are elevated with minimal effort and maximum flavor.
The allure of this caramelized butternut squash lies in its incredible sensory profile. Picture the rich, caramelized edges of the roasted butternut squash, achieving that perfect golden-brown crispness that contrasts with its silky, melt-in-your-mouth interior. The creamy gorgonzola adds a bold, pungent note that melts into the warm squash, while the cranberry-balsamic glaze introduces a vibrant tanginess, balancing the sweetness with a burst of tart cranberries and aged balsamic’s deep acidity. Every forkful delivers an aromatic symphony of nutty walnuts and honeyed undertones, making this butternut squash recipe an instant favorite for family dinners or festive occasions.
What sets this caramelized butternut squash with gorgonzola and cranberry-balsamic glaze apart on exorecipes.com is our commitment to being the ultimate resource for home cooks. Tested and refined by professional chefs like Chef Sally, this version includes a chef’s secret that guarantees foolproof results every time. You’ll learn insider tips, from achieving the ideal caramelization to creative substitutions, ensuring your dish turns out perfectly. Dive in for comprehensive guidance, stunning visuals, and answers to all your questions, making this the go-to butternut squash recipe for effortless success in your kitchen.
Why This Caramelized Butternut Squash with Gorgonzola and Cranberry-Balsamic Glaze Recipe is a Game-Changer
The chef’s secret to this recipe is the tangy cranberry-balsamic glaze, which provides an unmatched sweet-tart balance that elevates the humble butternut squash to gourmet status. By simmering fresh cranberries with balsamic vinegar and honey, we create a glossy reduction that not only adds visual appeal but also infuses the dish with layers of flavor, preventing the squash from becoming one-note. This unique angle ensures that even novice cooks can achieve a restaurant-quality result, as the glaze’s acidity cuts through the richness of the gorgonzola, making every bite more memorable.
Unbeatable texture comes from the roasting process, where high-heat caramelization draws out the natural sugars in the butternut squash, creating a crispy exterior while keeping the inside tender. Scientifically, this Maillard reaction enhances flavor compounds, resulting in a depth that store-bought versions can’t match. The addition of walnuts adds a satisfying crunch, contrasting the creaminess of the cheese for a textural masterpiece.
This recipe is foolproof because it’s been tested multiple times in real home kitchens, adjusting for common variables like oven differences. With clear steps and tips, you’ll avoid pitfalls and enjoy consistent success, making it the best caramelized butternut squash recipe for busy weeknights or holiday feasts.
Ingredient Spotlight: Quality Makes the Difference
Butternut Squash: As the star of this roasted butternut squash recipe, fresh butternut squash provides a naturally sweet base that’s packed with vitamins. Choose firm, unblemished squash for the best caramelization—avoid ones with soft spots. Quality matters because fresher squash roasts evenly, yielding that signature tender texture. For substitutions, you can use sweet potatoes for a similar sweetness, but they may alter the dish’s nutty flavor profile.
Olive Oil: This simple ingredient is key for achieving the perfect caramelized butternut squash. High-quality extra-virgin olive oil ensures even roasting and adds a subtle fruity note. Use it to coat the squash for optimal browning; cheap oils might smoke or impart bitterness. If needed, substitute with avocado oil for a higher smoke point, maintaining the recipe’s integrity.
Gorgonzola Cheese: The creamy gorgonzola brings a bold, tangy punch to this gorgonzola squash dish, melting beautifully over the warm squash. Opt for authentic Italian gorgonzola for its creamy texture and complex flavor—fresher cheese crumbles more evenly. This ingredient’s role is to balance the sweetness, but as noted in the recipe, a plant-based blue cheese alternative works for vegans.
Fresh Cranberries: Essential for the cranberry-balsamic glaze, these berries add a tart contrast that defines this caramelized butternut squash recipe. Fresh ones burst during simmering, releasing natural pectin for thickening. Quality ensures vibrancy; substitute frozen cranberries in a pinch, but adjust simmering time to avoid excess water.
Balsamic Vinegar: The backbone of the glaze, aged balsamic vinegar provides depth and tanginess. Choose a high-quality, barrel-aged version for its syrupy consistency, which enhances the honey’s sweetness. This ingredient ties the dish together; apple cider vinegar can substitute, but it will be milder.
Honey: Honey sweetens the glaze without overpowering, allowing the flavors in this butternut squash recipe to shine. Raw, local honey is best for its floral notes and health benefits. For a vegan swap, use agave nectar to maintain the glaze’s viscosity and taste.
Walnuts: Chopped walnuts add crunch and nutty richness to the finished dish. Fresh, untoasted walnuts provide the best texture; toasting them lightly amplifies flavor. Pecans can substitute for a milder taste, ensuring the caramelized butternut squash remains delightfully textured.
Step-by-Step Instructions
Step 1: Preparing the Butternut Squash
Start by preheating your oven to 400°F (200°C). Peel and cube 2 pounds of butternut squash into even 1-inch pieces for uniform roasting. Toss the cubes with 2 tablespoons of olive oil, salt, and pepper on a baking sheet to ensure every piece is coated.
Pro Tip: For the best caramelization, spread the squash in a single layer to allow air circulation—overcrowding leads to steaming instead of roasting.
Step 2: Roasting the Squash
Roast the butternut squash in the preheated oven for 25-30 minutes, stirring halfway through to promote even browning. This step creates that irresistible caramelized exterior while keeping the inside tender and flavorful.
Common Mistake to Avoid: Don’t skip stirring midway; it prevents uneven cooking and burning on one side.
Step 3: Creating the Cranberry-Balsamic Glaze
In a small saucepan, combine 1/2 cup fresh cranberries, 1/4 cup balsamic vinegar, and 2 tablespoons honey. Simmer over medium heat for 10 minutes, stirring occasionally, until the mixture thickens into a glossy glaze.
Pro Tip: Keep an eye on the heat to avoid scorching the honey—lowering it slightly ensures a smooth, pourable consistency.
Step 4: Assembling and Serving the Dish
Remove the roasted squash from the oven and immediately top it with 1/2 cup crumbled gorgonzola cheese and 1/4 cup chopped walnuts for added crunch. Drizzle the warm cranberry-balsamic glaze over the top just before serving.
Common Mistake to Avoid: Add the cheese while the squash is hot so it melts slightly, but not too soon or it might become overly runny.
Serving & Presentation
Elevate your caramelized butternut squash with creative plating: arrange the squash in a shallow bowl, letting the gorgonzola ooze dramatically, and finish with a generous swirl of cranberry-balsamic glaze for a pop of color. Garnish with fresh herbs like thyme or rosemary to enhance the roasted butternut squash’s earthy notes. This dish pairs beautifully as a side with roasted turkey for Thanksgiving or grilled chicken for a weeknight meal, complementing proteins with its sweet-tangy profile. For a complete meal, serve alongside quinoa for added heartiness or a crisp green salad to balance the richness.
Make-Ahead & Storage Solutions
Make-Ahead Strategy: Prep the butternut squash by peeling and cubing it up to 3 days in advance; store in an airtight container in the fridge. You can also make the cranberry-balsamic glaze ahead and reheat it gently on the stove.
Storing Leftovers: Refrigerate any leftovers in an airtight container for up to 3 days to maintain freshness. For longer storage, freeze the assembled dish (without glaze) for up to 2 months, as freezing can preserve the texture of the roasted butternut squash.
The Best Way to Reheat: Reheat in a 350°F oven for 10-15 minutes to restore the caramelized crispness; avoid microwaving, as it can make the squash soggy. Add fresh glaze before serving to revive flavors.
Frequently Asked Questions (FAQ)
How do you caramelize butternut squash perfectly?
To caramelize butternut squash perfectly, start with even cubes and toss them in oil, salt, and pepper before roasting at 400°F for 25-30 minutes, stirring midway. The key is high heat to trigger the Maillard reaction, which browns the sugars and enhances flavor. For this caramelized butternut squash recipe, using fresh squash and not overcrowding the pan ensures golden, tender results every time.
What can I substitute for gorgonzola cheese in this recipe?
Gorgonzola’s creamy, tangy flavor can be swapped with blue cheese for a similar punch, or feta for a milder option. For a vegan version, use a plant-based blue cheese alternative or nutritional yeast mixed with herbs to mimic the savory notes. This keeps the roasted butternut squash dish balanced while accommodating dietary needs.
How long does it take to roast butternut squash for this dish?
In this butternut squash recipe, roasting takes 25-30 minutes at 400°F, depending on cube size and oven. Stir halfway for even caramelization, and check for tenderness with a fork. This timing ensures the squash is perfectly caramelized without becoming mushy.
What are good serving suggestions for caramelized butternut squash with gorgonzola?
Serve this caramelized butternut squash as a vibrant side for holiday meals, paired with roasted meats or as a topping for salads. It’s also fantastic in grain bowls with farro or as an appetizer on crostini, where the cranberry-balsamic glaze adds a festive touch.
Is this recipe suitable for beginners?
Absolutely, this caramelized butternut squash recipe is beginner-friendly with simple steps and clear tips. Even if you’re new to roasting, the detailed instructions ensure success, making it a great starting point for fall cooking.
How can I adjust the sweetness in the glaze?
To adjust the sweetness, tweak the honey amount in the cranberry-balsamic glaze—add more for extra sweetness or reduce it for a tangier version. Taste as you simmer to customize based on your preference, keeping the butternut squash recipe versatile.
Tried This Recipe? Leave a Comment!
Did you make this recipe? I’d love to hear how it turned out! Please leave a comment and a rating below. Your feedback helps other home cooks and supports exorecipes!
For more delicious inspiration, follow me on Pinterest!
“`
.
Print
Caramelized Butternut Squash with Gorgonzola and Cranberry-Balsamic Glaze
- Prep Time: 15 minutes
- Cook Time: 30 minutes
- Total Time: 45 minutes
- Yield: 4 1x
- Method: Side Dish
- Cuisine: American
Description
A savory-sweet dish featuring caramelized butternut squash topped with creamy gorgonzola cheese and a tangy cranberry-balsamic glaze.
Ingredients
- 2 pounds butternut squash, peeled and cubed
- 2 tablespoons olive oil
- Salt and pepper to taste
- 1/2 cup gorgonzola cheese, crumbled
- 1/2 cup fresh cranberries
- 1/4 cup balsamic vinegar
- 2 tablespoons honey
- 1/4 cup walnuts, chopped
Instructions
- Preheat oven to 400°F (200°C).
- Toss the cubed butternut squash with olive oil, salt, and pepper on a baking sheet.
- Roast in the oven for 25-30 minutes, stirring halfway, until caramelized and tender.
- In a small saucepan, combine cranberries, balsamic vinegar, and honey. Simmer over medium heat for 10 minutes until thickened.
- Remove squash from oven and top with gorgonzola cheese and chopped walnuts.
- Drizzle with the cranberry-balsamic glaze before serving.
Notes
For a vegan version, substitute gorgonzola with a plant-based cheese alternative.
Nutrition
- Calories: 250
- Sugar: 15g
- Fat: 12g
- Carbohydrates: 30g
- Protein: 6g