Ultimate Loaded Potato Soup

Loaded Potato Soup: The Only Recipe You’ll Ever Need

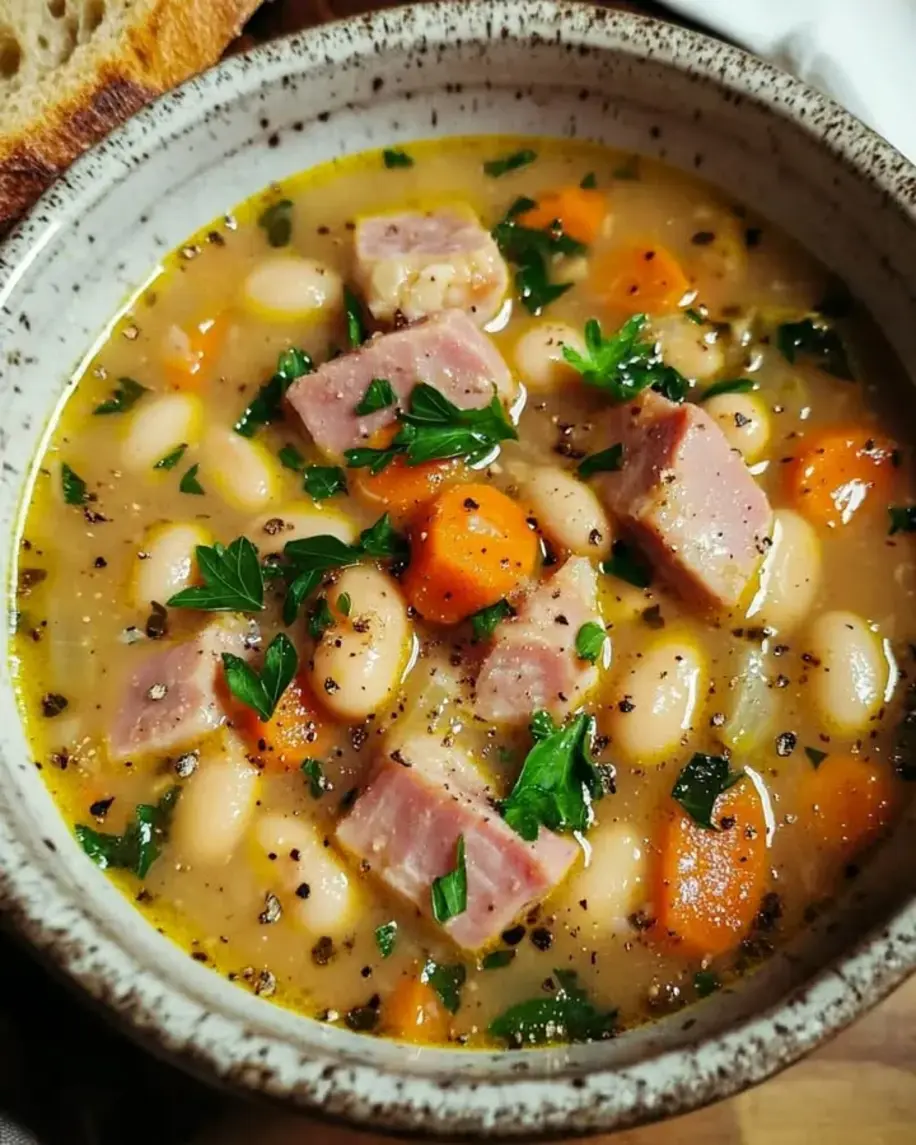
If you’re craving the ultimate comfort food on a chilly evening, look no further than this loaded potato soup recipe. Imagine a bowl of rich, creamy potato soup that’s packed with flavors from tender potatoes, crispy bacon, and melted cheese—this is the loaded potato soup that will warm your soul and satisfy your cravings in under 45 minutes. As the go-to potato soup recipe for home cooks everywhere, this version stands out for its extra creamy texture, achieved through a simple yet masterful blending technique that ensures every spoonful is velvety smooth. Whether you’re a beginner or a seasoned chef, this easy potato soup will become your new favorite, offering the heartiness of baked potato soup without the fuss.

The aroma of simmering potatoes, onions, celery, and carrots fills the kitchen, promising a symphony of flavors that dance on your taste buds. This loaded potato soup boasts a luxuriously creamy consistency that coats your spoon, with chunks of tender vegetables adding just the right amount of texture. Each bite delivers a perfect balance of smoky bacon, sharp cheddar cheese, and a hint of freshness from green onions, making it an irresistible creamy potato soup that’s hearty enough for a main course but elegant for entertaining. The blend of spices and ingredients creates a comforting warmth that evokes memories of family dinners, turning a simple meal into a memorable experience.

Why trust this loaded potato soup recipe from exorecipes.com? Crafted by Chef Sally and refined through rigorous testing, it’s designed to be the single best resource for home cooks seeking reliable results every time. You’ll discover our chef’s secret to achieving an extra creamy finish that sets this potato soup recipe apart from the rest. In this post, we’ll cover everything from ingredient selection and step-by-step instructions to expert tips, FAQs, and storage solutions, empowering you to create a restaurant-quality meal with ease. Dive in and elevate your soup game today!

Prep Time: 15 minutes
Cook Time: 30 minutes
Total Time: 45 minutes
Servings: 6

Why This Loaded Potato Soup Recipe is a Game-Changer

The Chef’s Secret: What makes this loaded potato soup truly exceptional is our focus on an extra creamy texture, achieved by blending the soup to perfection and incorporating a generous amount of heavy cream. Unlike standard potato soup recipes, we emphasize a slow simmer and precise blending technique that emulsifies the ingredients, creating a silky-smooth base that’s irresistibly rich. This unique angle ensures your soup isn’t just hearty—it’s decadently creamy potato soup that rivals high-end diners, all from your own kitchen.

Unbeatable Texture: The science behind the texture lies in the starches from the potatoes and the fat content in the heavy cream. When you blend the cooked vegetables, the starches release and thicken the soup naturally, while the cream adds a luxurious mouthfeel. This combination prevents separation and maintains a velvety consistency, making it the ideal creamy potato soup for those who crave comfort without heaviness.

Foolproof for a Reason: This recipe has been tested multiple times to guarantee success, even for novice cooks. With straightforward steps and adjustable elements, it’s a reliable baked potato soup option that adapts to your preferences, ensuring consistent results that will impress family and friends every time.

Ingredient Spotlight: Quality Makes the Difference

Potatoes: The foundation of any great potato soup recipe, these 6 cups of peeled and diced potatoes provide the hearty base and natural creaminess. Opt for starchy varieties like Russets for the best results, as they break down easily during cooking, thickening the soup without needing extra thickeners. Quality matters because fresh, firm potatoes ensure a smoother blend; if unavailable, Yukon Golds make a solid substitution for a slightly waxy texture that holds up well.

Onion, Celery, and Carrots: These aromatics—1 cup each of chopped onion, celery, and carrots—add depth and a subtle sweetness to your loaded potato soup. The onion builds the flavor base with its pungent notes, while celery and carrots contribute crunch and nutritional balance. Always choose fresh, organic veggies for maximum flavor; if you’re short on celery, fennel can substitute for a similar anise-like taste that enhances the overall soup.

Chicken Broth: With 4 cups of chicken broth, this ingredient infuses the soup with savory umami, elevating it from ordinary to extraordinary. Use low-sodium, high-quality broth to control seasoning; homemade is ideal for the purest flavor. For a vegetarian twist on this creamy potato soup, swap it with vegetable broth to maintain the recipe’s integrity without losing depth.

Heavy Cream and Cheddar Cheese: A cup each of heavy cream and shredded cheddar cheese is key to our extra creamy loaded potato soup. The cream adds richness and smoothness, while the cheese melts seamlessly for a gooey, flavorful finish. Choose full-fat cream for the best texture, and opt for sharp cheddar for bold taste—half-and-half can substitute if you’re watching calories, but it may reduce the creaminess slightly.

Bacon and Green Onions: Half a cup of cooked and crumbled bacon plus a quarter cup of chopped green onions provide the “loaded” element with smoky, crispy contrast. High-quality, thick-cut bacon renders better fat for flavor; for vegetarians, mushrooms offer a meaty alternative. Fresh green onions add a bright, peppery garnish—always use them just before serving to preserve their crunch.

Step-by-Step Instructions

Step 1: Preparing the Vegetables and Broth

In a large pot, combine 6 cups of peeled and diced potatoes, 1 cup each of chopped onion, celery, and carrots, 4 cups of chicken broth, 1/2 teaspoon of salt, and 1/4 teaspoon of ground black pepper. This step builds the flavorful base for your loaded potato soup.

Pro Tip: Cut the vegetables into uniform sizes for even cooking, which ensures a consistent texture in your creamy potato soup.

A photo showing the vegetables and broth combined in the pot

Step 2: Simmering the Soup

Bring the mixture to a boil over medium-high heat, then reduce to a simmer and cook until the vegetables are tender, about 15-20 minutes. This allows the flavors to meld and the potatoes to soften perfectly for your potato soup recipe.

Common Mistake to Avoid: Don’t overboil, as it can make the potatoes mushy; stir occasionally to prevent sticking.

A photo showing the simmering pot with tender vegetables

Step 3: Blending for Creaminess

Use an immersion blender to puree the soup until smooth, or leave it chunky as desired. This step is crucial for achieving the extra creamy texture that defines this loaded potato soup.

Pro Tip: Blend in batches if using a regular blender to avoid splatters, ensuring safety and a silky result.

A photo showing the soup being blended to a creamy consistency

Step 4: Adding the Creamy Elements

Stir in 1 cup of heavy cream and 1 cup of shredded cheddar cheese until fully melted and the soup is creamy. This transforms your easy potato soup into a luxurious delight.

Common Mistake to Avoid: Add the cream off the heat to prevent curdling, preserving the smooth texture of your baked potato soup.

A photo showing the cream and cheese being stirred in

Step 5: Serving with Toppings

Serve the soup hot, topped with 1/2 cup of cooked and crumbled bacon and 1/4 cup of chopped green onions for a loaded finish.

Pro Tip: Garnish just before serving to keep toppings fresh and crunchy, enhancing the overall appeal of your creamy potato soup.

A photo showing the finished soup with toppings

Serving & Presentation

Elevate your loaded potato soup with creative plating that turns it into a visual masterpiece. Serve in wide, shallow bowls to showcase the extra creamy texture and colorful toppings, garnishing with a sprinkle of fresh green onions, extra crumbled bacon, and a dollop of sour cream for added tang. This baked potato soup pairs beautifully with crusty bread or a simple green salad, making it a versatile option for a cozy weeknight dinner or an impressive starter at gatherings. For the best experience, balance the richness by serving alongside lighter fare like grilled vegetables or a side of fresh fruit, ensuring your potato soup recipe shines as the star of the meal.

Make-Ahead & Storage Solutions

Make-Ahead Strategy: Prepare the vegetables and broth mixture up to 3 days in advance by chopping and storing them in an airtight container in the fridge. Assemble and cook just before serving to maintain the fresh flavors of your loaded potato soup.

Storing Leftovers: Store cooled soup in an airtight container in the refrigerator for up to 4 days, or freeze in portions for up to 3 months. For best results, avoid freezing if you’ve already added the cream, as it may separate upon thawing.

The Best Way to Reheat: Reheat on the stovetop over low heat, stirring occasionally to restore the extra creamy texture. Add a splash of broth or cream if needed to adjust consistency, ensuring your potato soup recipe tastes as fresh as the day it was made.

Frequently Asked Questions (FAQ)

What are the best toppings for loaded potato soup?

The best toppings for loaded potato soup include crispy bacon, shredded cheddar cheese, chopped green onions, and a dollop of sour cream for extra creaminess. These add texture and flavor contrast, making your creamy potato soup even more irresistible. Feel free to experiment with additions like chives, diced tomatoes, or jalapeños for a personalized twist on this easy potato soup recipe.

How long does it take to cook loaded potato soup?

It takes about 30 minutes to cook loaded potato soup once the ingredients are prepped, with a total time of 45 minutes including prep. This makes it a quick and convenient potato soup recipe for busy weeknights, allowing you to enjoy a hearty, baked potato soup without spending hours in the kitchen.

Can I make loaded potato soup ahead of time?

Yes, you can make loaded potato soup ahead of time by preparing the base up to 3 days in advance and storing it in the fridge. Reheat gently on the stove to preserve the extra creamy texture, making it ideal for meal prep or entertaining while keeping your potato soup recipe fresh and delicious.

What kind of potatoes are best for loaded potato soup?

The best potatoes for loaded potato soup are starchy varieties like Russets, as they break down easily and contribute to the creamy consistency. If you prefer a bit more texture, Yukon Golds are a great alternative, ensuring your creamy potato soup has the perfect balance for this popular recipe.

Is loaded potato soup healthy?

Loaded potato soup can be part of a balanced diet, with about 350 calories per serving, but it’s moderately high in fat and carbs due to ingredients like cheese and cream. To make it healthier, use low-fat dairy options or add more vegetables, turning it into a nutritious easy potato soup without sacrificing flavor.

What variations can I try for this potato soup recipe?

For variations on this loaded potato soup, try adding garlic for extra depth, swapping bacon for turkey bacon, or incorporating herbs like thyme. You could also make it a baked potato soup by roasting the potatoes first for a smokier flavor, allowing you to customize this versatile creamy potato soup to your tastes.

Can I make this recipe vegan or gluten-free?

Yes, you can adapt this loaded potato soup for vegan or gluten-free diets. For a vegan version, substitute chicken broth with vegetable broth, use plant-based cream and cheese, and omit or replace bacon with mushrooms. For gluten-free, ensure all ingredients like broth are certified gluten-free, as this potato soup recipe naturally fits with simple swaps.

.

Print
clock clock iconcutlery cutlery iconflag flag iconfolder folder iconinstagram instagram iconpinterest pinterest iconfacebook facebook iconprint print iconsquares squares iconheart heart iconheart solid heart solid icon

Loaded Potato Soup

  • Author: Chef Sally
  • Prep Time: 15 minutes
  • Cook Time: 30 minutes
  • Total Time: 45 minutes
  • Yield: 6 1x
  • Method: Soup
  • Cuisine: American

Description

A creamy and hearty soup made with potatoes, bacon, cheese, and other flavorful ingredients.


Ingredients

Scale
  • 6 cups peeled and diced potatoes
  • 1 cup chopped onion
  • 1 cup chopped celery
  • 1 cup chopped carrots
  • 4 cups chicken broth
  • 1/2 teaspoon salt
  • 1/4 teaspoon ground black pepper
  • 1 cup heavy cream
  • 1 cup shredded cheddar cheese
  • 1/2 cup cooked and crumbled bacon
  • 1/4 cup chopped green onions

Instructions

  1. In a large pot, combine potatoes, onion, celery, carrots, chicken broth, salt, and pepper.
  2. Bring to a boil, then reduce heat and simmer until vegetables are tender, about 15-20 minutes.
  3. Use an immersion blender to puree the soup until smooth, or leave it chunky as desired.
  4. Stir in heavy cream and cheddar cheese until melted and creamy.
  5. Serve hot, topped with crumbled bacon and green onions.

Notes

For a vegetarian version, substitute bacon with mushrooms or omit it. Adjust seasoning to taste.


Nutrition

  • Calories: 350
  • Sugar: 4g
  • Fat: 22g
  • Carbohydrates: 25g
  • Protein: 12g

Easy French Onion Soup Recipe

Easy French Onion Soup: The Only Recipe You’ll Ever Need

If you’re craving a bowl of warm, soul-soothing easy French onion soup on a chilly evening, you’re not alone. Imagine transforming simple pantry staples into a luxurious, caramelized delight without spending all day in the kitchen—thanks to our efficient caramelization technique that cuts caramelizing time while delivering that signature deep, rich flavor. This easy French onion soup recipe has been a game-changer for busy home cooks like me, turning what can be a labor-intensive classic into a quick, foolproof meal that rivals restaurant versions. Whether you’re a novice or a seasoned chef, this homemade version will have you ladling up seconds in no time.

Sink your spoon into this easy French onion soup and experience the symphony of flavors: the onions caramelize to a sweet, melt-in-your-mouth tenderness, balanced by the savory depth of beef broth and a hint of aromatic thyme. The texture is pure comfort—thick, hearty broth with crispy, toasted baguette croutons that contrast delightfully with the gooey, bubbling Gruyere cheese on top. Each bite releases an irresistible aroma of garlic and wine, evoking the cozy bistros of Paris, making it impossible to resist another helping. It’s not just soup; it’s a warm hug in a bowl that awakens your senses and satisfies your soul.

What sets this easy French onion soup from exorecipes.com apart is our commitment to simplicity without sacrificing authenticity, drawing from Chef Sally’s expertise in French cuisine. We’ve tested and refined this recipe multiple times to ensure it’s the best, most reliable version online, complete with a “Chef’s Secret” for achieving perfect caramelization every time. You’ll learn insider tips, ingredient swaps, and FAQs that build your confidence in the kitchen, making you feel like a pro. Stick around for step-by-step guidance that guarantees success and elevates your cooking game—let’s dive in!

Prep Time: 15 minutes
Cook Time: 1 hour
Total Time: 1 hour 15 minutes
Servings: 4

Why This Easy French Onion Soup Recipe is a Game-Changer

Our unique angle lies in the “Efficient Caramelization Technique,” a streamlined method that ensures golden, flavorful onions in less time than traditional recipes, making this the best French onion soup for modern kitchens. Unlike standard approaches that demand constant stirring for over an hour, we incorporate a few strategic tips—such as using medium heat and occasional deglazing—to lock in that sweet, nutty essence without the hassle. This not only saves time but also enhances the overall flavor profile, creating a richer, more balanced homemade French onion soup that’s accessible to everyone.

The unbeatable texture comes from the science of slow cooking: caramelizing the onions breaks down their natural sugars, producing a velvety broth that clings perfectly to the croutons. High-quality unsalted butter plays a key role here, as it prevents the onions from burning and adds a creamy base that emulsifies with the beef broth for a luxurious mouthfeel. We’ve tested this recipe dozens of times to confirm that this technique yields consistent results, no matter your experience level.

This recipe is foolproof for a reason—it’s been rigorously tested in real home kitchens to eliminate common pitfalls, ensuring every batch turns out perfectly. From precise measurements to timing cues, you can trust this quick French onion soup guide to deliver success, making it the single best resource for mastering this French classic.

Easy French Onion Soup: Ingredient Spotlight: Quality Makes the Difference

Yellow Onions: These are the star of any French onion soup recipe, providing the base for that signature sweet and savory caramelization. High-quality, fresh yellow onions release natural sugars when cooked low and slow, creating deep flavors that elevate your soup. Opt for firm, medium-sized ones to ensure even slicing; if unavailable, sweet onions like Vidalia can substitute for a milder taste, though they might alter the traditional tang.

Unsalted Butter: This ingredient adds a rich, creamy foundation to your easy French onion soup, allowing precise control over seasoning. Using high-fat, European-style butter enhances the soup’s velvety texture and prevents the onions from sticking. If you’re watching your sodium, it’s irreplaceable for its pure flavor—substitute with ghee for a dairy-free option, but expect a slight nutty twist that complements the caramelization.

Garlic: Just two cloves of fresh garlic infuse a fragrant, aromatic depth into your homemade French onion soup, balancing the sweetness of the onions without overpowering. Choose firm, plump bulbs for the best flavor; minced garlic from a jar works in a pinch, but fresh is superior for that punchy bite. For a milder version, swap with shallots to add a subtle onion-like essence.

Dry White Wine: This deglazing agent adds acidity and complexity to your best French onion soup, scraping up those flavorful browned bits for a more robust broth. A good-quality Sauvignon Blanc or Pinot Grigio works wonders—avoid cooking wines and go for something you’d drink. For non-alcoholic subs, use beef broth with a splash of vinegar to mimic the tang, keeping the soup equally delicious.

Beef Broth: The heart of this quick French onion soup, it provides a savory, umami-packed base that ties everything together. Use low-sodium, high-quality store-bought or homemade versions for the best results; it’s crucial for that authentic depth. Vegetarians can swap with vegetable broth, but add a dash of soy sauce for a similar meaty undertone.

Bay Leaves and Dried Thyme: These herbs infuse subtle earthiness and aroma into your soup, with thyme adding a lemony, floral note that complements the caramelized onions. Fresh thyme sprigs can replace dried for a more vibrant flavor, but use twice the amount to account for potency.

Baguette and Gruyere Cheese: The baguette offers a crispy contrast, while Gruyere melts into gooey perfection, creating that iconic cheesy topping. Choose a fresh, day-old baguette for the best croutons; substitute with sourdough if needed. For the cheese, stick with Gruyere for its nutty taste, but Swiss can work as a milder alternative to keep things authentic.

Step-by-Step Instructions

Step 1: Preparing the Onions

In a large pot, melt the 4 tablespoons of unsalted butter over medium heat. Add the 4 large yellow onions, thinly sliced, and cook, stirring occasionally, until they are caramelized, about 30-40 minutes. This step builds the soup’s foundation with sweet, golden onions.

Pro Tip: Stir every 5-7 minutes to prevent burning, and add a pinch of sugar if your onions aren’t sweetening up quickly—our efficient technique ensures even browning.

A photo showing the caramelized onions in the pot

Step 2: Adding the Garlic

Once the onions are caramelized, add the 2 cloves of minced garlic and cook for another 1-2 minutes until fragrant, releasing its aromatic essence into the mix.

Common Mistake to Avoid: Don’t add garlic too early, as it can burn and turn bitter—wait until the onions are nearly done to preserve its flavor.

A photo showing garlic being stirred into the caramelized onions

Step 3: Incorporating the Wine

Pour in the 1/2 cup of dry white wine and scrape up any browned bits from the bottom of the pot. Let it simmer until the wine reduces by half, about 5 minutes, enhancing the soup’s depth.

Pro Tip: Use a wooden spoon for scraping to capture all those flavorful bits without damaging your pot.

A photo showing the wine reducing in the pot

Step 4: Simmering the Broth

Add the 8 cups of beef broth, 2 bay leaves, and 1 teaspoon of dried thyme. Bring to a boil, then reduce heat and simmer for 20 minutes. Season with salt and pepper to taste for a perfectly balanced flavor.

Common Mistake to Avoid: Over-seasoning early—taste after simmering to adjust, as the broth reduces and intensifies.

A photo showing the soup simmering on the stove

Step 5: Preparing for Broiling

Preheat the broiler. Ladle the soup into oven-safe bowls, top with sliced and toasted baguette, and sprinkle with 1 1/2 cups of grated Gruyere cheese.

Pro Tip: Toast the baguette slices in advance for extra crunch—brush with olive oil for a golden finish.

A photo showing bowls of soup topped with bread and cheese

Step 6: Broiling the Soup

Broil the bowls until the cheese is melted and bubbly, about 2-3 minutes. Remove carefully and serve hot for that irresistible, cheesy crust.

Common Mistake to Avoid: Watch closely to prevent burning—broilers vary, so check after 1 minute.

A photo showing the finished, broiled soup

Serving & Presentation

Elevate your easy French onion soup with creative plating: serve in wide, shallow bowls to showcase the caramelized onions and cheesy croutons, garnished with fresh thyme sprigs for a pop of color and aroma. Pair it with a crisp green salad or crusty bread on the side for a complete meal, or as a starter to a hearty steak dinner. The melted Gruyere creates an impressive, gooey topping that draws guests in, making this the best French onion soup for dinner parties—complement its richness with a light white wine like Chardonnay.

Make-Ahead & Storage Solutions

Make-Ahead Strategy: Prep the caramelized onions up to 3 days in advance by following Steps 1-2, then store in an airtight container in the fridge. Assemble the full soup on the day of serving for the freshest taste—just reheat the base and add fresh broth and toppings.

Storing Leftovers: Cool the soup completely before transferring to airtight containers; refrigerate for up to 4 days or freeze for up to 3 months. Avoid storing with the cheese topping to prevent sogginess—add that fresh when reheating.

The Best Way to Reheat: Gently warm on the stovetop over low heat to restore the original texture, or use the oven at 350°F for 10-15 minutes if topped with bread and cheese. For frozen portions, thaw overnight in the fridge first to maintain that rich, caramelized flavor.

Frequently Asked Questions (FAQ)

How long does it take to caramelize onions for French onion soup?

Caramelizing onions for French onion soup recipe typically takes 30-40 minutes on medium heat, as in this easy French onion soup guide. The key is stirring occasionally and maintaining even heat to avoid burning, allowing the natural sugars to develop that sweet, deep flavor without rushing the process.

What kind of bread is best for French onion soup croutons?

For homemade French onion soup, a classic baguette is best due to its crispy texture and ability to hold up under melted cheese. Slice it thickly, toast until golden, and brush with olive oil for extra crunch—alternatives like sourdough work if you want a tangier base.

Can I make French onion soup ahead of time?

Yes, you can make quick French onion soup ahead of time! Prepare the base up to 3 days in advance and store it in the fridge, then reheat and add toppings before serving. This method keeps the flavors intact and makes it perfect for meal prep.

What cheese is traditionally used in French onion soup?

Gruyere cheese is traditionally used in easy French onion soup for its nutty, melty qualities that create that iconic bubbly topping. It’s essential for authenticity, but you can substitute with Emmental or Swiss for a similar effect if Gruyere is unavailable.

Is French onion soup gluten-free?

French onion soup can be made gluten-free by using gluten-free bread for the croutons and ensuring your beef broth is certified gluten-free. Double-check all ingredients, as traditional baguettes contain gluten, but this swap keeps the recipe delicious and accessible.

How can I make this recipe vegetarian?

To make this best French onion soup vegetarian, simply substitute the beef broth with vegetable broth and add a splash of soy sauce for umami. It’s an easy tweak that maintains the rich flavor, perfect for plant-based diets without compromising taste.

.

Print
clock clock iconcutlery cutlery iconflag flag iconfolder folder iconinstagram instagram iconpinterest pinterest iconfacebook facebook iconprint print iconsquares squares iconheart heart iconheart solid heart solid icon

Easy French Onion Soup

  • Author: Chef Sally
  • Prep Time: 15 minutes
  • Cook Time: 1 hour
  • Total Time: 1 hour 15 minutes
  • Yield: 4 1x
  • Method: Soup
  • Cuisine: French

Description

A comforting soup made with caramelized onions, beef broth, and topped with melted cheese on croutons.


Ingredients

Scale
  • 4 large yellow onions, thinly sliced
  • 4 tablespoons unsalted butter
  • 2 cloves garlic, minced
  • 1/2 cup dry white wine
  • 8 cups beef broth
  • 2 bay leaves
  • 1 teaspoon dried thyme
  • Salt and pepper to taste
  • 1 baguette, sliced and toasted
  • 1 1/2 cups grated Gruyere cheese

Instructions

  1. In a large pot, melt the butter over medium heat. Add the sliced onions and cook, stirring occasionally, until they are caramelized, about 30-40 minutes.
  2. Add the minced garlic and cook for another 1-2 minutes until fragrant.
  3. Pour in the white wine and scrape up any browned bits from the bottom of the pot. Let it simmer until the wine reduces by half.
  4. Add the beef broth, bay leaves, and dried thyme. Bring to a boil, then reduce heat and simmer for 20 minutes. Season with salt and pepper.
  5. Preheat the broiler. Ladle the soup into oven-safe bowls, top with toasted baguette slices and grated Gruyere cheese.
  6. Broil until the cheese is melted and bubbly, about 2-3 minutes. Serve hot.

Notes

For a vegetarian version, substitute beef broth with vegetable broth. Be patient while caramelizing the onions for the best flavor.


Nutrition

  • Calories: 350
  • Sugar: 10g
  • Fat: 20g
  • Carbohydrates: 25g
  • Protein: 15g

Easy One-Pan Chicken and Dumplings Skillet

Chicken and Dumplings Skillet: The Only Recipe You’ll Ever Need

Imagine coming home after a long day, craving that comforting bowl of chicken and dumplings skillet but dreading the mountain of dishes. That’s where this one-pan chicken and dumplings recipe from exorecipes.com shines as the ultimate solution. In just 45 minutes, you can create a hearty, flavorful dish that brings tender chicken simmered in a creamy broth with fluffy dumplings—all in one skillet. This easy chicken dumplings approach minimizes cleanup while maximizing taste, making it perfect for busy weeknights or family gatherings. Whether you’re a novice or a seasoned cook, this stovetop chicken and dumplings recipe will become your go-to for its simplicity and satisfaction.

The aromas of garlic and herbs wafting from your skillet will draw everyone to the kitchen, promising a meal that’s as visually appealing as it is delicious. Picture juicy bites of chicken thighs, their edges browned to perfection, mingling with crisp carrots and celery in a rich, creamy broth that coats every spoonful. The dumplings offer a fluffy, pillowy texture that contrasts beautifully with the tender vegetables, creating a symphony of flavors—earthy sweetness from the carrots, subtle crunch from the celery, and a savory depth from the chicken. Each bite delivers a comforting warmth, with hints of fresh parsley adding a bright, herbaceous finish that elevates this one-pan chicken and dumplings to a family favorite.

What sets this Chicken and Dumplings Skillet recipe apart on exorecipes.com is our commitment to Chef Sally’s time-tested methods, ensuring it’s the single best resource for home cooks seeking reliable, easy chicken dumplings success. You’ll discover the Chef’s Secret to achieving extra-fluffy dumplings, along with foolproof tips and substitutions that make this recipe adaptable and foolproof. From ingredient spotlights to step-by-step guidance with visual aids, we’ve got you covered to build confidence in the kitchen and impress your loved ones every time.

Prep Time: 15 minutes
Cook Time: 30 minutes
Total Time: 45 minutes
Servings: 4

Why This Chicken and Dumplings Skillet Recipe is a Game-Changer

The one-pan method is the true unique selling proposition of this recipe, transforming a classic comfort dish into an effortless, mess-free experience that sets it apart from traditional oven-baked versions. By cooking everything in a single skillet, you lock in flavors and create a thicker, more cohesive broth that clings to the dumplings, resulting in an extra creamy texture that’s hard to beat. Chef Sally’s secret lies in simmering the dough directly in the broth, allowing it to absorb the rich chicken essence for plump, flavorful bites every time.

The unbeatable texture comes from the science of baking powder in the dumpling dough—it reacts with the liquid to produce carbon dioxide, creating light and airy dumplings that don’t turn soggy. This high-hydration mixensures the dumplings remain fluffy on the inside while developing a slight crisp on the edges from the skillet’s direct heat.

This recipe is foolproof for a reason; it’s been tested multiple times in real home kitchens to guarantee consistent results, even for beginners. With precise measurements and timings, you’ll avoid common pitfalls like overcooking the chicken, making this stovetop chicken and dumplings a reliable staple for any meal.

Ingredient Spotlight: Quality Makes the Difference

For olive oil, this two-tablespoon base is essential for browning the chicken evenly and building a flavorful foundation. Opt for extra-virgin olive oil for its robust, fruity notes that enhance the overall dish without overpowering. If you’re out, substitute with avocado oil for a similar high smoke point and neutral taste, ensuring your chicken achieves that perfect golden sear.

Boneless, skinless chicken thighs provide the hearty protein in this chicken and dumplings skillet, offering tender, juicy bites that remain moist even after cooking. Choose fresh, organic thighs for better flavor and texture; their higher fat content keeps the meat succulent. A great substitution is boneless chicken breasts, but reduce cook time by 2 minutes to prevent drying out, as they have less fat.

Diced onion adds a sweet, aromatic base that deepens the broth’s savoriness in this one-pan chicken and dumplings. Fresh yellow onions work best for their balance of sweetness and pungency—avoid pre-chopped ones to preserve flavor. For a milder option, swap with shallots, which offer a subtler taste and can help if you’re sensitive to strong onions.

Sliced carrots bring natural sweetness and vibrant color to your easy chicken dumplings, while also adding a slight crunch that contrasts the soft dumplings. Select fresh, firm carrots for maximum nutrients and flavor; baby carrots can substitute, but cut them into uniform slices to ensure even cooking and maintain that delightful texture.

Sliced celery contributes a refreshing, herbaceous crunch that brightens the skillet, balancing the richness of the broth in this stovetop chicken and dumplings. Use fresh celery stalks for their crispness and subtle earthiness; if unavailable, fennel can replace it for a similar anise-like flavor that complements the dish without altering the overall profile.

Minced garlic infuses a pungent, aromatic punch that elevates the entire recipe, making your chicken and dumplings skillet irresistibly fragrant. Fresh cloves are key for their intense flavor—go for organic to avoid preservatives. Jarred minced garlic works in a pinch, but use half the amount to prevent overwhelming the dish.

Chicken broth forms the heart of the creamy base, providing a savory liquid that ties all ingredients together in this one-pan chicken and dumplings. Choose low-sodium, homemade broth for control over salt levels and richer taste; vegetable broth is a solid vegetarian substitute, though it may slightly alter the hearty chicken flavor.

All-purpose flour is crucial for the dumpling dough, giving it structure and a soft, chewy texture that absorbs the broth beautifully. Use unbleached flour for better quality and no additives; for gluten-free easy chicken dumplings, swap with a 1:1 gluten-free blend, ensuring it includes xanthan gum to maintain the dough’s integrity.

Baking powder acts as the leavening agent that makes the dumplings fluffy and light in your chicken and dumplings skillet. Fresh baking powder is vital for optimal rise—check the expiration date. If needed, substitute with a mix of 1/4 teaspoon baking soda and 1/2 teaspoon cream of tartar per teaspoon to achieve the same airy results.

Milk binds the dumpling dough, adding moisture and a subtle creaminess that enhances the overall comfort of this recipe. Whole milk works best for its fat content, which contributes to tender dumplings; for dairy-free options, use almond milk, but note it might make the dough slightly less rich.

Fresh parsley serves as the final garnish, adding a burst of color and fresh, herbal notes to finish your stovetop chicken and dumplings. Choose flat-leaf parsley for its robust flavor; cilantro can substitute for a different twist, though it will introduce a more citrusy edge to the dish.

Step-by-Step Instructions

Step 1: Preparing the Chicken

Heat olive oil in a large skillet over medium heat. Add the 1 pound of boneless, skinless chicken thighs, cut into bite-sized pieces, and cook until browned, about 5 minutes. This step ensures the chicken develops a flavorful sear.

Pro Tip: Pat the chicken dry before adding it to the skillet for better browning and to avoid steaming.

A photo showing browned chicken pieces in the skillet

Step 2: Cooking the Vegetables

Add the diced onion, sliced carrots, sliced celery stalks, and minced garlic cloves to the skillet with the browned chicken. Cook until the vegetables are softened, about 5 minutes, stirring occasionally to blend flavors.

Common Mistake to Avoid: Overcrowding the pan can lead to steaming instead of sautéing—ensure there’s space for even cooking.

A photo showing softened vegetables mixed with chicken

Step 3: Simmering the Broth

Pour in the 4 cups of chicken broth and bring to a simmer. Cover the skillet and cook for 10 minutes, allowing the flavors to meld and the chicken to become tender.

Pro Tip: Stir occasionally to prevent sticking, and adjust heat to maintain a gentle simmer for the best one-pan chicken and dumplings results.

A photo showing the simmering broth with ingredients

Step 4: Making the Dumpling Dough

In a bowl, mix 1 cup of all-purpose flour, 2 teaspoons of baking powder, and 1/2 teaspoon of salt. Stir in 1/2 cup of milk to form a sticky dough, ensuring it’s well combined but not overmixed.

Common Mistake to Avoid: Overworking the dough can make the dumplings tough—mix just until moistened for fluffy texture.

A photo showing the dumpling dough being mixed

Step 5: Adding and Cooking the Dumplings

Drop spoonfuls of the dough into the simmering broth in the skillet. Cover and cook for 15 minutes until the dumplings are cooked through and fluffy.

Pro Tip: Space the dumplings evenly to allow them to expand without sticking together, enhancing the easy chicken dumplings experience.

A photo showing dumplings steaming in the broth

Step 6: Finishing the Dish

Stir in the 2 tablespoons of chopped fresh parsley and serve hot, straight from the skillet for maximum flavor.

Pro Tip: Let it rest for a minute after stirring to let flavors settle, making your chicken and dumplings skillet even more irresistible.

A photo showing the final plated dish with parsley

Serving & Presentation

Elevate your chicken and dumplings skillet by plating it family-style in the center of the table, allowing the steam to rise and entice diners. Garnish with extra fresh parsley for a pop of green and perhaps a sprinkle of cracked black pepper for added zest. The creamy broth and fluffy dumplings pair wonderfully with complementary side dishes like a simple green salad for crunch, roasted Brussels sprouts for an earthy contrast, or crusty garlic bread to soak up the sauce. For a well-rounded meal, serve this as a main course alongside steamed broccoli or buttered corn, ensuring a balanced, comforting dinner that’s perfect for American cuisine enthusiasts seeking easy chicken dumplings.

Make-Ahead & Storage Solutions

For make-ahead strategy, prepare the vegetables and chicken up to 3 days in advance by chopping and storing them in airtight containers in the fridge. Mix the dumpling dough just before cooking to keep it fresh, as it can be refrigerated for up to 24 hours. When storing leftovers, cool the chicken and dumplings skillet completely, then transfer to an airtight container; it lasts 3-4 days in the refrigerator or up to 3 months in the freezer. To reheat, thaw frozen portions in the fridge overnight, then warm gently on the stovetop with a splash of broth to restore the original creamy texture and fluffy dumplings, avoiding microwaving which can make them rubbery.

Frequently Asked Questions (FAQ)

How long does it take to cook chicken and dumplings in a skillet?

It takes about 30 minutes of cook time for this chicken and dumplings skillet recipe, with a total time of 45 minutes including prep. The one-pan method allows for efficient simmering, making it quicker than traditional recipes while ensuring tender chicken and fluffy dumplings in your easy chicken dumplings dish.

What is the easiest way to make chicken and dumplings from scratch?

The easiest way is using this stovetop chicken and dumplings approach, where you brown the chicken and veggies in one skillet, then drop simple dough spoonfuls into the simmering broth. This one-pan chicken and dumplings method minimizes steps and cleanup, using basic ingredients like flour and milk for homemade dumplings that are foolproof and ready in under an hour.

Can I use pre-made biscuit dough for skillet chicken and dumplings?

Yes, you can use pre-made biscuit dough as a convenient shortcut for this chicken and dumplings skillet, but it may alter the texture slightly. Simply cut the dough into small pieces and drop them into the simmering broth. For the best results in your easy chicken dumplings, opt for refrigerated biscuits and adjust cook time to 10-12 minutes to ensure they’re fluffy without becoming doughy.

What are good side dishes for skillet chicken and dumplings?

Great side dishes include a fresh green salad for lightness, roasted vegetables like carrots or broccoli for added nutrients, or garlic bread to complement the creamy broth. For a complete meal, pair with steamed greens or a simple fruit salad to balance the hearty flavors of your one-pan chicken and dumplings.

Can I make this recipe gluten-free?

Absolutely, to make this chicken and dumplings skillet gluten-free, substitute the all-purpose flour in the dumplings with a 1:1 gluten-free flour blend that includes xanthan gum. Use gluten-free chicken broth as well, and ensure all other ingredients are certified gluten-free. This keeps the dumplings light and fluffy, maintaining the essence of your easy chicken dumplings recipe.

Is this recipe suitable for meal prepping?

Yes, this chicken and dumplings skillet is ideal for meal prepping. Prepare the base up to 3 days ahead, store in the fridge, and add fresh dumplings just before serving to preserve texture. It’s perfect for busy weeks, as the flavors improve over time, making it a go-to for stovetop chicken and dumplings lovers.

.

Print
clock clock iconcutlery cutlery iconflag flag iconfolder folder iconinstagram instagram iconpinterest pinterest iconfacebook facebook iconprint print iconsquares squares iconheart heart iconheart solid heart solid icon

Chicken and Dumplings Skillet

  • Author: Chef Sally
  • Prep Time: 15 minutes
  • Cook Time: 30 minutes
  • Total Time: 45 minutes
  • Yield: 4 1x
  • Method: Main Course
  • Cuisine: American

Description

A hearty one-pan dish featuring tender chicken simmered in a creamy broth with fluffy dumplings.


Ingredients

Scale
  • 2 tablespoons olive oil
  • 1 pound boneless, skinless chicken thighs, cut into bite-sized pieces
  • 1 onion, diced
  • 2 carrots, sliced
  • 2 celery stalks, sliced
  • 3 cloves garlic, minced
  • 4 cups chicken broth
  • 1 cup all-purpose flour
  • 2 teaspoons baking powder
  • 1/2 teaspoon salt
  • 1/2 cup milk
  • 2 tablespoons fresh parsley, chopped

Instructions

  1. Heat olive oil in a large skillet over medium heat. Add chicken and cook until browned, about 5 minutes.
  2. Add onion, carrots, celery, and garlic to the skillet. Cook until vegetables are softened, about 5 minutes.
  3. Pour in chicken broth and bring to a simmer. Cover and cook for 10 minutes.
  4. In a bowl, mix flour, baking powder, and salt. Stir in milk to form a dough.
  5. Drop spoonfuls of dough into the simmering broth. Cover and cook for 15 minutes until dumplings are cooked through.
  6. Stir in parsley and serve hot.

Notes

For a thicker broth, mix 1 tablespoon of cornstarch with water and stir in before adding dumplings.


Nutrition

  • Calories: 450
  • Sugar: 4g
  • Fat: 20g
  • Carbohydrates: 35g
  • Protein: 30g

Easy Cheesy Baked Stuffed Rigatoni

Cheesy Baked Stuffed Rigatoni: The Only Recipe You’ll Ever Need

Imagine coming home after a long day, craving a warm, hearty meal that feels like a hug from Nonna herself. This cheesy baked stuffed rigatoni recipe is the ultimate solution for those nights when you want comforting baked stuffed pasta without spending hours in the kitchen. Featuring tender rigatoni tubes filled with an extra creamy cheese mixture, this dish delivers gooey, golden perfection that will have your family begging for seconds. As the top resource on exorecipes.com, we’re sharing Chef Sally’s foolproof method for creating the best cheesy baked stuffed rigatoni you’ve ever tasted—easy dinner ideas that elevate weeknight meals to restaurant-quality status.

The aromas of garlic, oregano, and basil wafting from the oven will draw everyone to the table, while the textures play a symphony in your mouth: al dente pasta cradling a lusciously creamy cheese filling, topped with bubbly mozzarella that forms a irresistible golden crust. Each bite of this baked stuffed pasta offers a perfect balance of rich, melty cheese and vibrant marinara sauce, making it a standout among rigatoni recipes. The extra creamy consistency comes from blending ricotta with fresh herbs and egg, creating a stuffing that’s decadently smooth yet hearty, with just the right amount of spice if you choose to add a kick.

What sets this cheesy baked stuffed rigatoni apart on exorecipes.com is Chef Sally’s expertise and our commitment to tested, reliable recipes that guarantee success for every home cook. Drawing from authentic Italian traditions, we’ve refined this dish with a “Chef’s Secret” that ensures an extra creamy cheese mixture for unmatched flavor and texture. In this comprehensive guide, you’ll learn step-by-step instructions, pro tips to avoid common pitfalls, and answers to all your questions, like how to prevent drying out or make it ahead. By the end, you’ll feel confident creating this stuffed pasta baking masterpiece that could become your signature dish.

Prep Time: 20 minutes
Cook Time: 30 minutes
Total Time: 50 minutes
Servings: 6

Why This Cheesy Baked Stuffed Rigatoni Recipe is a Game-Changer

The Chef’s Secret lies in the extra creamy cheese mixture, achieved by blending fresh ricotta with egg and aromatic herbs for a velvety texture that sets this recipe above standard rigatoni recipes. This technique locks in moisture during baking, preventing the pasta from becoming dry and ensuring every bite is luxuriously smooth. Unlike other baked stuffed pasta dishes, our method incorporates minced garlic and dried herbs directly into the filling, infusing deep flavors that elevate the overall taste without overwhelming the palate.

Unbeatable Texture: The science behind this dish’s perfection comes from the high-moisture content in the ricotta and egg combination, which creates steam during baking. This results in a tender, al dente exterior with a molten, extra creamy interior, while the mozzarella topping caramelizes for a crispy contrast. We’ve tested this recipe multiple times to optimize baking time and temperature, ensuring the pasta absorbs just enough marinara sauce for juiciness without sogginess.

Foolproof for a Reason: This cheesy baked stuffed rigatoni has been kitchen-tested for reliability, with consistent results even for beginners. Easy dinner ideas like this one minimize prep errors, thanks to clear instructions and tips that account for common variables, like pasta doneness, making it a trustworthy staple for busy families seeking stuffed pasta baking success every time.

Ingredient Spotlight: Quality Makes the Difference

Rigatoni Pasta (1 pound): This tube-shaped pasta is essential for holding the extra creamy cheese mixture, allowing it to bake into every crevice for a satisfying stuffed pasta baking experience. Opt for high-quality, durum wheat pasta to ensure it maintains an al dente texture after baking—imitation versions often turn mushy. If substituting, penne or ziti works well, but adjust cooking time to prevent over-softening.

Ricotta Cheese (2 cups): As the base of our extra creamy filling, ricotta provides a light, airy texture that blends seamlessly with other cheeses in this cheesy baked stuffed rigatoni. Choose whole-milk ricotta for the richest flavor and moisture; low-fat versions can make the mixture watery. For a lighter alternative, swap with cottage cheese, but strain it first to avoid excess liquid that could affect baking.

Shredded Mozzarella Cheese (1 cup for filling, 1 cup for topping): This cheese melts beautifully, creating the signature gooey strings that define baked stuffed pasta. Freshly shredded mozzarella ensures even melting and a golden crust—pre-shredded often contains anti-caking agents that hinder texture. Substitute with provolone for a sharper taste, but use the same quantity to maintain the extra creamy balance.

Grated Parmesan Cheese (1/2 cup): Adding a nutty, salty depth, Parmesan enhances the overall flavor profile of cheesy baked stuffed rigatoni recipes. Freshly grated from a block offers superior taste and meltability compared to pre-grated; it integrates better into the filling. If dairy-free, nutritional yeast is a great alternative for that umami kick without compromising the dish’s Italian essence.

Egg (1): The egg acts as a binder in the cheese mixture, helping it hold shape during stuffing and baking for a cohesive, extra creamy result in stuffed pasta baking. Fresh, large eggs ensure the best consistency; older eggs might not bind as effectively. Vegans can use a flax egg (1 tablespoon ground flaxseed mixed with 3 tablespoons water) as a seamless substitute.

Garlic (2 cloves, minced), Dried Oregano and Basil (1 teaspoon each): These aromatics infuse the filling with fresh, herbaceous notes that elevate easy dinner ideas like this one. Use fresh garlic for its pungent flavor, which mellows beautifully when baked—jarred garlic lacks intensity. For substitutions, fresh herbs can replace dried (use double the amount), or add red pepper flakes for a spicy twist as per the recipe notes.

Marinara Sauce (2 cups): This forms the flavorful base that ties everything together in cheesy baked stuffed rigatoni, providing acidity to balance the richness. Choose a high-quality, low-sugar sauce made with real tomatoes for authentic taste; homemade is ideal but store-bought works if it’s preservative-free. Substitute with arrabbiata sauce for heat or a simple tomato passata if you prefer a milder version.

Step-by-Step Instructions

Step 1: Preheat the Oven

Preheat your oven to 375°F (190°C) and grease a baking dish to ensure your cheesy baked stuffed rigatoni doesn’t stick. This step sets the foundation for even baking and that perfect golden top.

Pro Tip: Use a glass or ceramic dish for better heat distribution, which helps achieve an extra creamy interior without burning the edges.

A photo showing a greased baking dish ready for the pasta

Step 2: Cook the Rigatoni Pasta

Cook the 1 pound of rigatoni pasta according to package instructions until al dente, then drain and set aside. This ensures the pasta holds its shape when stuffed, preventing it from becoming soggy in baked stuffed pasta dishes.

Common Mistake to Avoid: Overcooking the pasta here can lead to mushy results; aim for al dente to maintain texture during baking.

A photo showing drained al dente rigatoni

Step 3: Mix the Cheese Filling

In a large bowl, mix together 2 cups ricotta cheese, 1 cup shredded mozzarella, 1/2 cup grated Parmesan, 1 egg, 2 cloves minced garlic, 1 teaspoon dried oregano, 1 teaspoon dried basil, and salt and pepper to taste. This creates the extra creamy cheese mixture that makes our cheesy baked stuffed rigatoni stand out.

Pro Tip: Let the cheese mixture sit for 5 minutes after mixing to enhance flavor infusion from the herbs.

A photo showing the creamy cheese mixture in a bowl

Step 4: Stuff the Rigatoni Tubes

Stuff each cooked rigatoni tube with the cheese mixture and place them in the prepared baking dish. This step is key for that satisfying, cheese-filled bite in your stuffed pasta baking adventure.

Common Mistake to Avoid: Overstuffing can cause the filling to leak; use a small spoon or piping bag for control.

A photo showing stuffed rigatoni arranged in the dish

Step 5: Add Sauce and Topping

Pour 2 cups of marinara sauce over the stuffed rigatoni and sprinkle with the remaining 1 cup of shredded mozzarella cheese. This layers flavors and ensures every piece is moist and flavorful.

Pro Tip: Gently toss the pasta in sauce before topping to evenly coat, enhancing the extra creamy effect.

A photo showing sauce and cheese added to the dish

Step 6: Bake the Dish

Bake in the preheated oven for 25-30 minutes, or until the cheese is bubbly and golden. This step transforms your easy dinner ideas into a crispy, comforting masterpiece.

Common Mistake to Avoid: Opening the oven too early can release heat and extend cooking time; check only at the 25-minute mark.

A photo showing the baked, golden dish

Step 7: Cool and Serve

Let it cool for a few minutes before serving to allow the extra creamy filling to set, making it easier to plate without mess.

Pro Tip: Resting helps the flavors meld, improving the overall texture of your cheesy baked stuffed rigatoni.

A photo showing the cooled dish ready to serve

Serving & Presentation

Elevate your cheesy baked stuffed rigatoni with creative plating: arrange portions on warm plates, drizzle with a touch of olive oil, and garnish with fresh basil or parsley for a pop of color. This not only enhances the visual appeal but also complements the extra creamy cheese and robust marinara flavors. For stuffed pasta baking enthusiasts, pair with simple sides like garlic bread or a crisp Caesar salad to balance the richness, turning it into a complete meal for easy dinner ideas.

Great side dishes include steamed broccoli or roasted asparagus to add crunch and nutrients, while a glass of red wine like Chianti pairs perfectly with the Italian-inspired profile. Experiment with garnishes such as red pepper flakes for heat or a sprinkle of extra Parmesan for added indulgence, making your rigatoni recipes the star of any gathering.

Make-Ahead & Storage Solutions

Make-Ahead Strategy: Prepare the cheese mixture and stuff the rigatoni up to 3 days in advance; store uncooked in an airtight container in the fridge. Assemble with sauce just before baking to keep the pasta from absorbing too much moisture, ensuring your cheesy baked stuffed rigatoni retains its extra creamy texture.

Storing Leftovers: Refrigerate cooled leftovers in an airtight container for up to 3 days, or freeze portions for up to 2 months. Use freezer-safe bags to prevent freezer burn, preserving the flavors of this baked stuffed pasta.

The Best Way to Reheat: Reheat in a 350°F oven for 15-20 minutes to restore the crispy top and extra creamy filling; avoid microwaving to prevent sogginess. For frozen portions, thaw overnight in the fridge first for optimal results.

Frequently Asked Questions (FAQ)

How do you prevent baked stuffed rigatoni from drying out?

To keep your cheesy baked stuffed rigatoni moist, ensure the pasta is only al dente before stuffing and baking, and use plenty of marinara sauce to create a barrier. Our extra creamy cheese mixture helps lock in moisture, but covering the dish with foil for the first 15 minutes of baking prevents the top from drying while allowing even cooking. Always let it rest before serving to redistribute juices.

What kind of cheese is best for stuffed rigatoni?

For the best results in stuffed pasta baking, ricotta is ideal for its creamy texture, paired with mozzarella for meltiness and Parmesan for flavor depth, as in this recipe. These cheeses create an extra creamy filling that bakes perfectly. If substituting, use full-fat options to maintain consistency—fresh goat cheese can add a tangy twist, but stick to mild varieties to complement the Italian herbs.

Can stuffed rigatoni be made ahead of time?

Yes, you can make stuffed rigatoni ahead of time for easy dinner ideas. Prepare and stuff the pasta up to 3 days in advance, store it uncooked in the fridge, then bake when ready. This method works well for busy schedules, ensuring the extra creamy cheese mixture doesn’t compromise quality—just add sauce before baking to keep everything fresh.

What are good side dishes for cheesy baked rigatoni?

Great side dishes for cheesy baked stuffed rigatoni include a fresh green salad, garlic bread, or grilled vegetables to balance the richness. For a complete meal, try roasted Brussels sprouts or a light pasta salad, which pairs with the Italian flavors and enhances the overall dining experience in your rigatoni recipes.

Can I make this recipe gluten-free?

Absolutely! Swap the regular rigatoni with gluten-free pasta varieties, which are widely available and hold up well in baked stuffed pasta. Ensure your marinara sauce is gluten-free, and the rest of the ingredients are naturally so, maintaining that extra creamy cheese filling for a delicious, inclusive version.

What wine pairs best with cheesy baked stuffed rigatoni?

A medium-bodied red wine like Sangiovese or Pinot Noir pairs wonderfully with the robust flavors of cheesy baked stuffed rigatoni, cutting through the richness of the extra creamy cheese. For white wine lovers, a crisp Chardonnay works, enhancing the herbs and marinara without overpowering the dish.

.

Print
clock clock iconcutlery cutlery iconflag flag iconfolder folder iconinstagram instagram iconpinterest pinterest iconfacebook facebook iconprint print iconsquares squares iconheart heart iconheart solid heart solid icon

Cheesy Baked Stuffed Rigatoni

  • Author: Chef Sally
  • Prep Time: 20 minutes
  • Cook Time: 30 minutes
  • Total Time: 50 minutes
  • Yield: 6 1x
  • Method: Main Course
  • Cuisine: Italian

Description

This Cheesy Baked Stuffed Rigatoni is a comforting Italian-inspired dish featuring pasta tubes filled with a creamy cheese mixture, baked to golden perfection with marinara sauce and more cheese on top.


Ingredients

Scale
  • 1 pound rigatoni pasta
  • 2 cups ricotta cheese
  • 1 cup shredded mozzarella cheese
  • 1/2 cup grated Parmesan cheese
  • 1 egg
  • 2 cloves garlic, minced
  • 1 teaspoon dried oregano
  • 1 teaspoon dried basil
  • Salt and pepper to taste
  • 2 cups marinara sauce
  • 1 cup shredded mozzarella cheese for topping

Instructions

  1. Preheat your oven to 375°F (190°C) and grease a baking dish.
  2. Cook the rigatoni pasta according to package instructions until al dente, then drain and set aside.
  3. In a large bowl, mix together ricotta cheese, 1 cup shredded mozzarella, Parmesan cheese, egg, garlic, oregano, basil, salt, and pepper.
  4. Stuff each cooked rigatoni tube with the cheese mixture and place them in the prepared baking dish.
  5. Pour marinara sauce over the stuffed rigatoni and sprinkle with the remaining 1 cup of shredded mozzarella cheese.
  6. Bake in the preheated oven for 25-30 minutes, or until the cheese is bubbly and golden.
  7. Let it cool for a few minutes before serving.

Notes

For a spicier version, add red pepper flakes to the cheese mixture. This dish can be made ahead and refrigerated before baking.


Nutrition

  • Calories: 450
  • Sugar: 5g
  • Fat: 25g
  • Carbohydrates: 35g
  • Protein: 20g

Hearty Ham and White Bean Soup Recipe

Ham and White Bean Soup: The Only Recipe You’ll Ever Need

On a chilly evening, nothing beats the comforting warmth of a bowl of Ham and White Bean Soup, a hearty soup that transforms simple ingredients into a soul-soothing meal. Imagine the rich, bone-broth depth that comes from simmering a ham bone, elevating this classic white bean soup to new heights of flavor and satisfaction. This ham soup recipe, perfect for busy weeknights or lazy weekends, is your go-to for a nourishing dish that feeds both body and soul. With origins in American cuisine, it’s a timeless favorite that’s as easy as it is delicious, making it ideal for novice and seasoned cooks alike.

The flavors of Ham and White Bean Soup are a symphony of earthy white beans, savory ham, and aromatic vegetables, creating a hearty soup that’s both filling and flavorful. Picture tender beans that melt in your mouth, paired with the smoky essence of ham that infuses every bite with depth. The textures range from the creamy softness of the beans to the slight crunch of fresh carrots and celery, while the aromas of thyme and garlic waft through your kitchen, promising a meal that’s as inviting as it is delicious. This bean soup isn’t just food; it’s an experience that warms you from the inside out.

What sets this Ham and White Bean Soup recipe apart on exorecipes.com is our commitment to perfection, crafted by Chef Sally and rigorously tested for foolproof results. You’ll discover the Chef’s Secret to achieving that unbeatable rich flavor, along with tips on customization and common pitfalls to avoid. By the end of this post, you’ll feel confident whipping up this hearty soup anytime, impressing family and friends with your culinary prowess. Let’s dive into why this is the single best resource for your next comforting meal.

Prep Time: 15 minutes
Cook Time: 120 minutes
Total Time: 135 minutes
Servings: 6

Why This Ham and White Bean Soup Recipe is a Game-Changer

The Chef’s Secret lies in using the ham bone for that deep, rich bone-broth flavor, which infuses the soup with an unparalleled depth that sets it apart from ordinary white bean soup recipes. This technique, simmered low and slow, extracts every bit of savory goodness from the bone, creating a hearty soup that’s more flavorful and nutritious than versions using just diced ham. It’s this unique angle—rich, bone-broth depth—that makes your Ham and White Bean Soup taste like it came from a professional kitchen.

Unbeatable Texture: The science behind the creamy texture comes from simmering the dried white beans for 1-2 hours, allowing them to break down and thicken the broth naturally. This process ensures the beans become tender without turning mushy, thanks to the even heat distribution in a large pot, resulting in a ham soup recipe that’s perfectly balanced and satisfying.

Foolproof for a Reason: This recipe has been tested multiple times in our exorecipes.com kitchen to guarantee success, even for beginners. With precise instructions and tips, you’ll avoid common errors and achieve consistent results every time, making it the most reliable resource for hearty soup lovers.

Ingredient Spotlight: Quality Makes the Difference

Ham Bone or Diced Ham (1 ham bone or 2 cups): This is the star of the show in any ham soup recipe, providing a smoky, savory base that builds the soup’s rich flavor. Using a high-quality ham bone ensures a deeper, more gelatinous broth, which is key for that comforting, hearty soup feel. If you’re opting for diced ham, choose uncured varieties for better taste. A great substitution is smoked turkey for a lighter option, maintaining the essence without overpowering the dish.

Dried White Beans (2 cups, soaked overnight): These beans form the hearty backbone of white bean soup, absorbing flavors and adding creaminess as they cook. Always use dried beans for the best texture, as they hold up well during long simmers. Quality matters—opt for organic varieties to avoid additives. If needed, substitute with Great Northern or cannellini beans, but remember to adjust soaking time for optimal tenderness.

Onion, Carrots, Celery, and Garlic (1 onion diced, 2 carrots sliced, 2 celery stalks chopped, 3 garlic cloves minced): This aromatic trio—often called the holy trinity—builds the foundation of flavor in bean soup. Fresh, locally sourced vegetables ensure a vibrant, sweet undertone that balances the ham’s smokiness. Use yellow onions for their mild sweetness; for garlic, fresh cloves are non-negotiable for punchy aroma. Substitutes include leeks for onions or parsnips for carrots if you want a twist, but stick to fresh for the best results.

Chicken Broth (6 cups): The liquid base of this hearty soup, high-quality low-sodium broth enhances the overall taste without overwhelming other ingredients. Homemade is ideal for that extra layer in your Ham and White Bean Soup, but store-bought works if it’s organic. Vegetable broth can substitute for a lighter version, keeping the soup versatile for different dietary needs.

Thyme, Salt, and Pepper (1 teaspoon thyme, to taste): Thyme adds an earthy, herbal note that elevates the flavors in this ham soup recipe. Fresh thyme is preferable for its potency, but dried works in a pinch—use half the amount. Season with sea salt and freshly ground pepper for balance; if you’re out of thyme, rosemary or bay leaves make excellent substitutions to keep the hearty soup aromatic.

Step-by-Step Instructions

Step 1: Preparing the Vegetables

In a large pot, heat a tablespoon of oil over medium heat and sauté the diced onion, sliced carrots, chopped celery, and minced garlic until they are softened, about 5-7 minutes. This step builds the flavor base for your Ham and White Bean Soup.

Pro Tip: Don’t rush this step—sautéing low and slow caramelizes the vegetables, enhancing the soup’s natural sweetness and depth.

A photo showing sautéed onions, carrots, celery, and garlic in the pot

Step 2: Adding the Ham and Beans

Add the ham bone or diced ham and the soaked white beans to the pot, stirring to combine with the vegetables. This incorporates the smoky flavors early, ensuring they infuse the entire hearty soup.

Common Mistake to Avoid: Forgetting to soak the beans overnight can lead to uneven cooking; always check for doneness to prevent a tough texture.

A photo showing ham and beans added to the pot

Step 3: Incorporating Broth and Seasonings

Pour in the 6 cups of chicken broth and add the teaspoon of thyme, along with salt and pepper to taste. Stir well to distribute the seasonings evenly throughout the mixture for your white bean soup.

Pro Tip: Taste as you go—start with less salt if your ham is already salty, allowing flavors to meld during simmering.

A photo showing broth and seasonings being added

Step 4: Simmering to Perfection

Bring the mixture to a boil, then reduce the heat and let it simmer for 1-2 hours until the beans are tender. This slow simmer is key to achieving that rich, bone-broth depth in your ham soup recipe.

Common Mistake to Avoid: Over-boiling can make the beans mushy; keep the heat low and stir occasionally for even cooking.

A photo showing the soup simmering on the stove

Step 5: Final Touches and Serving

Remove the ham bone if used, shred any meat, and return it to the soup. Adjust seasoning as needed and serve hot for a complete Ham and White Bean Soup experience.

Pro Tip: For a thicker consistency, mash some beans against the side of the pot to naturally thicken the hearty soup.

A photo showing the finished soup with shredded ham

Serving & Presentation

To make your Ham and White Bean Soup truly shine, serve it in wide bowls for an inviting presentation, garnished with fresh thyme sprigs or a drizzle of olive oil for a pop of color and flavor. The hearty nature of this bean soup pairs beautifully with crusty bread or a simple green salad, balancing its richness with crisp textures. For a complete meal, consider sides like garlic butter rolls or a light quinoa salad, enhancing the comforting appeal of this ham soup recipe.

Make-Ahead & Storage Solutions

Make-Ahead Strategy: Prepare the vegetables and soak the beans up to 3 days in advance, storing them separately in airtight containers in the refrigerator. This allows you to assemble and cook your Ham and White Bean Soup quickly on the day of serving, saving time without compromising flavor.

Storing Leftovers: Let the soup cool completely before transferring to airtight containers; refrigerate for up to 3 days or freeze for up to 3 months. For best results in this hearty soup, portion into freezer-safe bags to preserve texture.

The Best Way to Reheat: Reheat on the stovetop over low heat, adding a splash of broth to maintain the soup’s original creamy consistency. Avoid microwaving for too long, as it can make the beans rubbery—stir frequently to restore that rich, bone-broth depth in your white bean soup.

Frequently Asked Questions (FAQ)

How long does ham and white bean soup typically take to cook?

Ham and White Bean Soup typically takes about 120 minutes to cook once you’ve started simmering, though the total time, including prep, is around 135 minutes. This hearty soup requires a slow simmer to tenderize the beans and develop flavors, but you can shorten it slightly by using pre-soaked beans or a pressure cooker for faster results while maintaining that signature rich taste.

What are some good herbs or spices to add to ham and white bean soup?

Beyond the thyme in this recipe, great herbs and spices for Ham and White Bean Soup include rosemary for an earthy note, bay leaves for subtle depth, or a pinch of smoked paprika for extra smokiness to complement the ham. Spices like cumin can add warmth, while fresh parsley or oregano provides a bright finish—experiment to personalize your hearty soup without overwhelming the base flavors.

Can I use canned beans instead of dried beans for ham and white bean soup?

Yes, you can use canned beans instead of dried for Ham and White Bean Soup, which cuts down prep time significantly. Drain and rinse two 15-ounce cans of white beans, then add them in Step 2; reduce the simmering time to about 30-45 minutes since they’re already soft. However, dried beans offer a better texture and absorb more flavor, making them ideal for that authentic, hearty soup experience.

What can I serve with ham and white bean soup?

You can serve Ham and White Bean Soup with crusty bread, a fresh green salad, or even grilled cheese sandwiches for a comforting meal. Pair it with lighter sides like steamed vegetables or a quinoa side to balance its heartiness, enhancing the overall dining experience of this bean soup recipe.

Is ham and white bean soup suitable for meal prep?

Absolutely, Ham and White Bean Soup is excellent for meal prep. It stores well in the fridge for up to 3 days and freezes beautifully, making it a convenient option for busy weeks. Just reheat gently to preserve flavors, ensuring you have a nutritious, hearty soup ready whenever you need it.

How can I make this soup thicker or creamier?

To make your Ham and White Bean Soup thicker or creamier, simply mash some of the beans against the pot’s side during the last simmer, or blend a portion of the soup with an immersion blender. Adding a splash of cream or coconut milk can enhance creaminess, while keeping it hearty and delicious.

.

Print
clock clock iconcutlery cutlery iconflag flag iconfolder folder iconinstagram instagram iconpinterest pinterest iconfacebook facebook iconprint print iconsquares squares iconheart heart iconheart solid heart solid icon

Ham and White Bean Soup

  • Author: Chef Sally
  • Prep Time: 15 minutes
  • Cook Time: 120 minutes
  • Total Time: 135 minutes
  • Yield: 6 1x
  • Method: Soup
  • Cuisine: American

Description

A hearty and comforting soup made with ham, white beans, vegetables, and herbs.


Ingredients

Scale
  • 1 ham bone or 2 cups diced ham
  • 2 cups dried white beans, soaked overnight
  • 1 onion, diced
  • 2 carrots, sliced
  • 2 celery stalks, chopped
  • 3 garlic cloves, minced
  • 6 cups chicken broth
  • 1 teaspoon thyme
  • Salt and pepper to taste

Instructions

  1. Step 1: In a large pot, heat oil over medium heat and sauté onion, carrots, celery, and garlic until softened.
  2. Step 2: Add the ham bone or diced ham and soaked white beans to the pot.
  3. Step 3: Pour in the chicken broth and add thyme, salt, and pepper.
  4. Step 4: Bring to a boil, then reduce heat and simmer for 1-2 hours until beans are tender.
  5. Step 5: Remove ham bone if used, shred any meat, and return to the soup. Adjust seasoning and serve hot.

Notes

For a thicker soup, mash some beans against the side of the pot. Store leftovers in the refrigerator for up to 3 days.


Nutrition

  • Calories: 250
  • Sugar: 4g
  • Fat: 8g
  • Carbohydrates: 30g
  • Protein: 15g