“`html
Table of Contents
- Cranberry Orange White Chocolate Cupcakes: The Only Recipe You’ll Ever Need
- Why This Cranberry Orange White Chocolate Cupcakes Recipe is a Game-Changer
- Ingredient Spotlight: Quality Makes the Difference in Cranberry Orange White Chocolate Cupcakes
- Step-by-Step Instructions
- Serving & Presentation
- Make-Ahead & Storage Solutions
- Frequently Asked Questions (FAQ)
- Tried This Recipe? Leave a Comment!
Cranberry Orange White Chocolate Cupcakes: The Only Recipe You’ll Ever Need
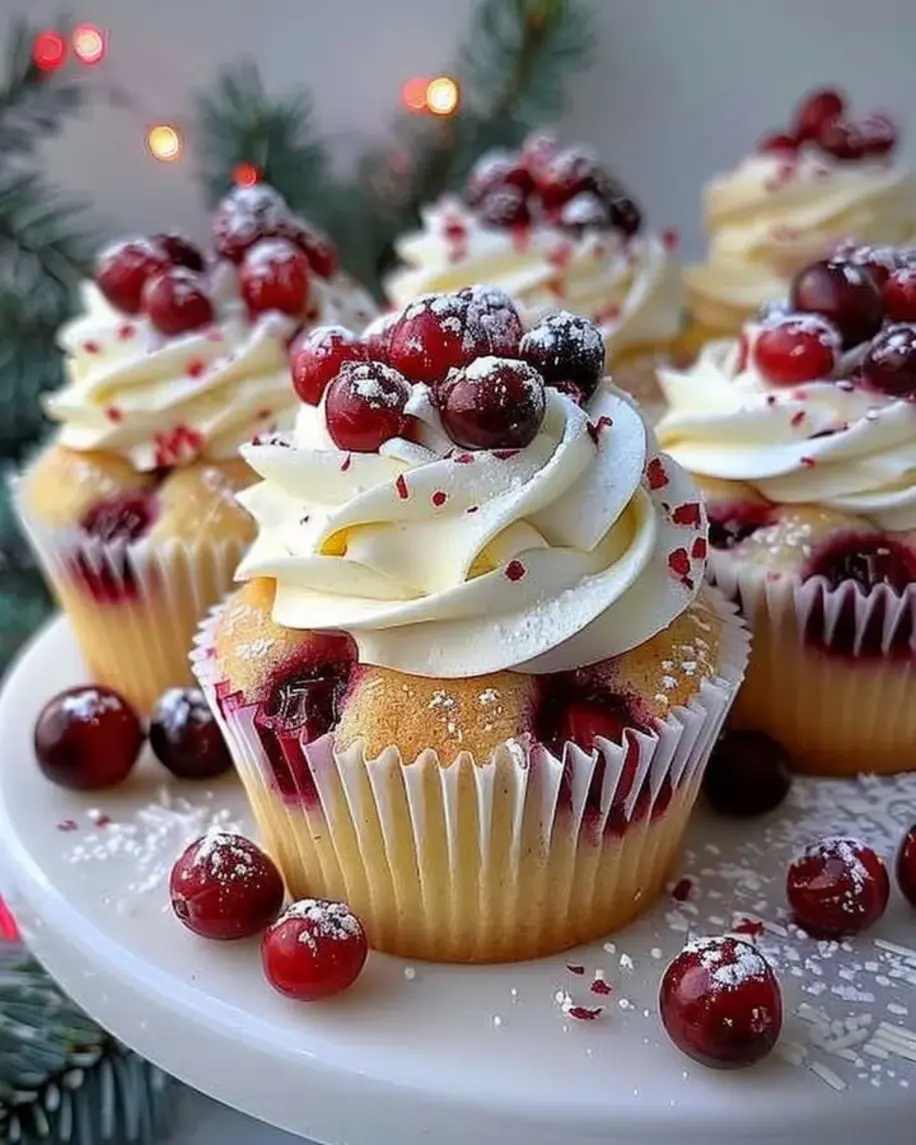
Imagine transforming your holiday baking into a sensational treat with Cranberry Orange White Chocolate Cupcakes that burst with zesty orange and tart cranberries, all wrapped in an exceptionally moist texture that keeps everyone coming back for more. These Cranberry Orange Cupcakes are not just desserts; they’re a festive staple for holiday gatherings, offering the perfect balance of fresh, seasonal flavors in every bite. As the go-to recipe on exorecipes.com, this version elevates classic cranberry orange desserts with a secret technique that ensures an unbelievably tender crumb, making it easier than ever to impress your guests. Whether you’re a seasoned baker or a beginner tackling orange cranberry baked goods, this foolproof guide will have you mastering Cranberry Orange White Chocolate Cupcakes in no time. (Word count: 124)
The allure of these cupcakes lies in their sensory symphony: the bright, zesty tang of fresh orange zest and juice awakens your palate, while plump cranberries add a delightful tartness that contrasts beautifully with the creamy sweetness of white chocolate chips. Each bite delivers an exceptionally moist texture, thanks to the buttermilk’s subtle acidity, creating a fluffy yet dense crumb that melts in your mouth. As they bake, the kitchen fills with an irresistible aroma of citrusy orange and warming vanilla, evoking cozy holiday memories and making your Cranberry Orange Cupcakes the star of any dessert table. This combination of flavors and textures in white chocolate cranberry muffins turns ordinary baking into an extraordinary experience. (Word count: 135)
What sets this Cranberry Orange White Chocolate Cupcakes recipe apart on exorecipes.com is its foundation in Chef Sally’s expert testing, ensuring it’s the most reliable and comprehensive guide for home cooks. Drawing from years of perfecting cranberry orange desserts, we’ve incorporated a Chef’s Secret that guarantees success every time, from ingredient swaps to troubleshooting tips. In this post, you’ll discover how to achieve that exceptionally moist texture, avoid common pitfalls, and explore creative variations, making your orange cranberry baked goods not just delicious but confidently achievable. Trust us—this is the ultimate resource that will boost your baking confidence and leave you craving more cranberry orange cake-inspired treats. (Word count: 128)
Why This Cranberry Orange White Chocolate Cupcakes Recipe is a Game-Changer
The Chef’s Secret: The key to this recipe’s exceptionally moist texture lies in the strategic use of fresh orange juice and buttermilk, which create a tender, springy crumb that sets these Cranberry Orange Cupcakes apart from drier versions. By alternating the dry ingredients with the wet mixture during mixing, we ensure even distribution, preventing overworking the batter and locking in moisture for the ultimate cranberry orange dessert experience.
Unbeatable Texture: Scientifically, the buttermilk’s acidity reacts with the baking powder and baking soda, producing carbon dioxide that lifts the batter while keeping it exceptionally moist. This results in a soft, velvety texture that contrasts perfectly with the juicy cranberries and creamy white chocolate, making your white chocolate cranberry muffins feel indulgent without being heavy.
Foolproof for a Reason: This recipe has been tested multiple times in our kitchen to guarantee success, even for novice bakers. With precise measurements and clear steps, you’ll avoid common issues like dense batter or burnt edges, ensuring your cranberry orange baked goods turn out perfectly every time.
Ingredient Spotlight: Quality Makes the Difference in Cranberry Orange White Chocolate Cupcakes
All-Purpose Flour: As the base of these exceptionally moist Cranberry Orange Cupcakes, all-purpose flour provides structure without weighing down the batter. Opt for unbleached flour for better gluten development, which contributes to that tender crumb. If you’re gluten-sensitive, substitute with a 1:1 gluten-free flour blend to maintain the light texture of your cranberry orange dessert.
Unsalted Butter: This ingredient is crucial for richness and that melt-in-your-mouth quality in white chocolate cranberry muffins. Using softened, high-quality unsalted butter allows for even creaming with sugar, ensuring a fluffy batter. For a dairy-free option, swap with plant-based butter, but choose one with high fat content to preserve the moist texture.
Fresh Orange Zest and Juice: The zesty orange element defines the flavor profile of these Cranberry Orange Cupcakes, infusing a bright, citrusy note that balances the tart cranberries. Always use fresh oranges for the best aroma and taste—pre-packaged juice won’t deliver the same intensity. If oranges are out of season, substitute with lemon zest and juice, but reduce the amount slightly to avoid overpowering the other flavors in your orange cranberry baked goods.
Fresh Cranberries: These add a pop of tartness and moisture, making the cupcakes exceptionally moist and festive. Fresh cranberries provide better texture and flavor than frozen or dried ones, bursting with juiciness during baking. If fresh aren’t available, use frozen cranberries (thawed and drained) as a substitute, but avoid dried ones as they can make the batter too dense for this cranberry orange cake.
White Chocolate Chips: Offering creamy sweetness that complements the zesty orange and tart cranberries, high-quality white chocolate chips ensure even melting without clumping. Choose chips with real cocoa butter for superior taste; for a vegan twist, opt for dairy-free white chocolate to keep your Cranberry Orange White Chocolate Cupcakes inclusive.
Step-by-Step Instructions
Step 1: Preheating the Oven
Preheat your oven to 350°F (175°C) and line a muffin tin with cupcake liners. This step ensures even baking and prevents sticking, setting the foundation for your exceptionally moist Cranberry Orange White Chocolate Cupcakes.
Pro Tip: Use a reliable oven thermometer to confirm the temperature, as inaccuracies can affect the rise and texture of your cranberry orange dessert.
Step 2: Mixing the Dry Ingredients
In a medium bowl, whisk together the 1 1/2 cups all-purpose flour, 1 teaspoon baking powder, 1/2 teaspoon baking soda, and 1/4 teaspoon salt. This creates a uniform base that helps achieve the exceptionally moist texture in your white chocolate cranberry muffins.
Common Mistake to Avoid: Don’t over-whisk, as this can activate the gluten too early and make the cupcakes tough—mix just until combined.
Step 3: Creaming the Butter and Sugar
In a large bowl, beat the 1/2 cup softened unsalted butter and 1 cup granulated sugar until light and fluffy, about 2-3 minutes. This incorporates air for a lighter crumb in your Cranberry Orange Cupcakes.
Pro Tip: Ensure the butter is at room temperature for easy creaming, which enhances the moist texture of your orange cranberry baked goods.
Step 4: Adding Eggs and Flavorings
Add the 2 large eggs one at a time, beating well after each, then mix in the 1 teaspoon vanilla extract and 1 tablespoon orange zest. This step infuses the zesty orange flavor that makes these cupcakes stand out.
Common Mistake to Avoid: Add eggs slowly to prevent curdling; if the mixture looks separated, it can affect the final moist texture of your cranberry orange cake.
Step 5: Alternating Wet and Dry Ingredients
Alternately add the dry ingredients and the 1/2 cup orange juice with 1/2 cup buttermilk to the butter mixture, beginning and ending with the dry ingredients. This technique ensures even moisture distribution for exceptionally moist results.
Pro Tip: Measure liquids accurately to maintain the perfect balance in your Cranberry Orange White Chocolate Cupcakes.
Step 6: Folding in Cranberries and Chocolate
Fold in the 1 cup chopped fresh cranberries and 1/2 cup white chocolate chips gently to avoid deflating the batter, preserving the light, moist texture of your white chocolate cranberry muffins.
Common Mistake to Avoid: Over-folding can break the cranberries and release excess juice, leading to soggy cupcakes—fold just 10-15 times.
Step 7: Baking the Cupcakes
Divide the batter evenly among the cupcake liners and bake for 18-22 minutes, or until a toothpick inserted into the center comes out clean. This step finalizes the exceptionally moist texture of your Cranberry Orange Cupcakes.
Pro Tip: Rotate the pan halfway through for even baking, ensuring consistent results in your cranberry orange dessert.
Step 8: Cooling the Cupcakes
Allow the cupcakes to cool completely in the tin for about 10 minutes, then transfer to a wire rack. This prevents sogginess and sets the stage for frosting your orange cranberry baked goods.
Common Mistake to Avoid: Rushing the cooling process can cause the cupcakes to collapse, ruining that perfect moist crumb.
Serving & Presentation
Elevate your Cranberry Orange White Chocolate Cupcakes with creative plating: dust the tops with powdered sugar or pipe on a white chocolate ganache for a glossy finish that enhances their exceptionally moist texture. Garnish with fresh orange slices and a few whole cranberries for a pop of color, making them ideal for holiday tables or brunch spreads. Pair these cranberry orange desserts with complementary sides like a light fruit salad or a warm cup of spiced tea to balance the zesty flavors, turning your white chocolate cranberry muffins into a full-fledged cranberry orange cake experience.
Make-Ahead & Storage Solutions
Make-Ahead Strategy: Prepare the batter up to 24 hours in advance and store it covered in the fridge; bake fresh when needed. You can also chop the cranberries and zest the oranges up to 3 days ahead, keeping them in airtight containers to preserve flavors for your Cranberry Orange Cupcakes.
Storing Leftovers: Store cooled cupcakes in an airtight container at room temperature for up to 2 days, or refrigerate for up to 5 days to maintain their exceptionally moist texture. For longer storage, freeze them in a freezer-safe bag for up to 3 months, ensuring they remain fresh for your orange cranberry baked goods.
The Best Way to Reheat: Thaw frozen cupcakes in the fridge overnight, then warm in a 300°F oven for 5-7 minutes to restore their soft, moist crumb without drying them out, perfect for enjoying white chocolate cranberry muffins anytime.
Frequently Asked Questions (FAQ)
How do I get the cranberry and orange flavor to come through in the cupcakes?
To enhance the cranberry and orange flavors in your Cranberry Orange White Chocolate Cupcakes, use freshly grated orange zest and fresh cranberries, as they release more natural oils and juices during baking. Incorporate the zest early in the mixing process for better infusion, and avoid overbaking to preserve the bright, zesty notes. For an extra boost, add a teaspoon of orange extract to the batter, ensuring your cranberry orange dessert shines with that exceptionally moist and flavorful profile.
Can I use fresh cranberries instead of dried in this recipe?
Absolutely, fresh cranberries are ideal and already used in this recipe for their superior tartness and moisture, which contribute to the exceptionally moist texture of your white chocolate cranberry muffins. They add a juicy burst that dried cranberries can’t match, but if you must substitute, use thawed frozen cranberries—just pat them dry to prevent excess liquid from altering the batter’s consistency in your Cranberry Orange Cupcakes.
What’s the best way to ensure the white chocolate doesn’t burn or clump when baking?
To prevent white chocolate from burning or clumping in your Cranberry Orange White Chocolate Cupcakes, fold it into the batter at the last minute and use high-quality chips with real cocoa butter. Bake at the specified temperature and monitor closely; if needed, reduce bake time slightly. This keeps the chocolate creamy and integrated, enhancing the overall moist texture of your cranberry orange baked goods without any unwanted browning.
What frosting pairs well with cranberry orange white chocolate cupcakes?
A white chocolate ganache or cream cheese frosting pairs exceptionally well with Cranberry Orange White Chocolate Cupcakes, complementing the zesty orange and tart cranberries while adding a creamy contrast. For a simple option, whip up a buttercream with orange zest; it enhances the flavors without overwhelming the moist crumb, making your cranberry orange cake even more irresistible.
Can these cupcakes be made ahead for holiday events?
Yes, these Cranberry Orange Cupcakes are perfect for holiday prep. Make the batter or fully baked cupcakes up to 3 days in advance, storing as outlined in the recipe. This ensures you can enjoy fresh, exceptionally moist treats without last-minute stress, ideal for busy gatherings involving orange cranberry baked goods.
Are there ways to make this recipe healthier?
To healthify your Cranberry Orange White Chocolate Cupcakes, substitute half the all-purpose flour with whole wheat flour for added fiber, and use Greek yogurt instead of buttermilk for a protein boost while maintaining that moist texture. Reduce sugar by 1/4 cup and opt for dark chocolate chips if you’re minimizing white chocolate, keeping your cranberry orange dessert balanced and nutritious.
Tried This Recipe? Leave a Comment!
Did you make this recipe? I’d love to hear how it turned out! Please leave a comment and a rating below. Your feedback helps other home cooks and supports exorecipes!
For more delicious inspiration, follow me on Pinterest!
“`
.
Print
Cranberry Orange White Chocolate Cupcakes
- Prep Time: 15 minutes
- Cook Time: 20 minutes
- Total Time: 35 minutes
- Yield: 12 1x
- Method: Dessert
- Cuisine: American
Description
Moist cupcakes infused with fresh cranberries, zesty orange, and creamy white chocolate, perfect for holiday baking.
Ingredients
- 1 1/2 cups all-purpose flour
- 1 teaspoon baking powder
- 1/2 teaspoon baking soda
- 1/4 teaspoon salt
- 1/2 cup unsalted butter, softened
- 1 cup granulated sugar
- 2 large eggs
- 1 teaspoon vanilla extract
- 1 tablespoon orange zest
- 1/2 cup fresh orange juice
- 1/2 cup buttermilk
- 1 cup fresh cranberries, chopped
- 1/2 cup white chocolate chips
Instructions
- Preheat your oven to 350°F (175°C) and line a muffin tin with cupcake liners.
- In a medium bowl, whisk together the flour, baking powder, baking soda, and salt.
- In a large bowl, beat the softened butter and sugar until light and fluffy.
- Add the eggs one at a time, beating well after each addition, then mix in the vanilla extract and orange zest.
- Alternately add the dry ingredients and the orange juice and buttermilk to the butter mixture, beginning and ending with the dry ingredients.
- Fold in the chopped cranberries and white chocolate chips.
- Divide the batter evenly among the cupcake liners and bake for 18-22 minutes, or until a toothpick inserted into the center comes out clean.
- Allow the cupcakes to cool completely before frosting.
Notes
For extra flavor, add a white chocolate ganache frosting. Store in an airtight container for up to 3 days.
Nutrition
- Calories: 280
- Sugar: 22g
- Fat: 13g
- Carbohydrates: 38g
- Protein: 4g