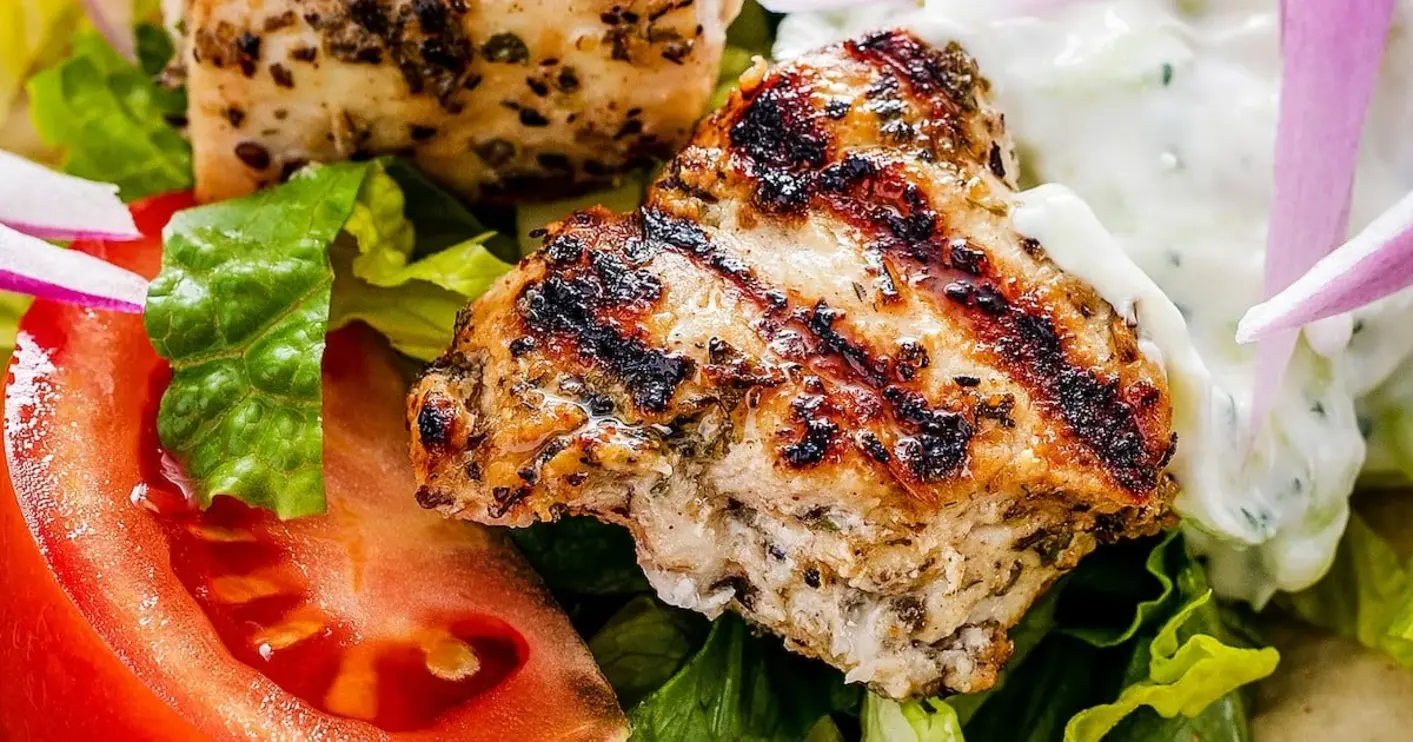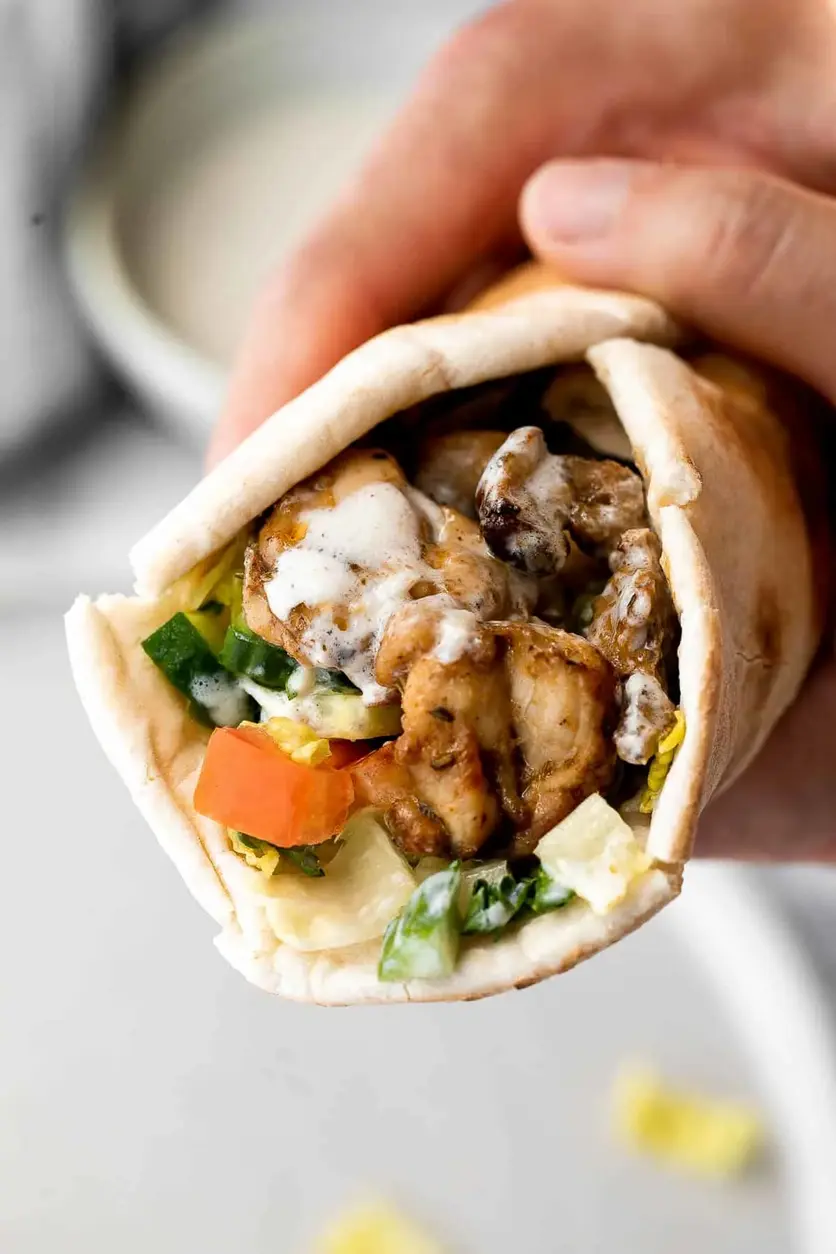
Easy Homemade Chicken Shawarma with Oven and Air Fryer Options

“`html

Authentic Chicken Shawarma: Easy Oven-Baked & Air Fryer Method – Juicy, Tender Chicken Every Time

⚖️
Difficulty
Easy
⏲️
Prep Time
20 mins
🕒
Cook Time
20 mins
⏱️
Total Time
40 mins
🍽️
Servings
6

Growing up in Morocco, the aroma of spices wafting from the souk was a daily serenade, and authentic chicken shawarma was a street food staple I adored. Yet, here in my bustling NYC kitchen, that slow-roasted spit isn’t always practical! That’s why I’ve perfected an easy chicken shawarma recipe that brings all the rich, complex flavors of the Middle East right to your home, without needing a special setup. This recipe is all about that deeply savory, perfectly spiced chicken, cooked to juicy tenderness in your oven or air fryer, making how to make chicken shawarma at home incredibly accessible and delicious. Trust me, it tastes like a memory.

The magic of truly great shawarma lies in its marinade, a symphony of warm spices like cumin, paprika, and coriander that transform humble chicken into something extraordinary. When the chicken hits the heat, whether it’s the oven or an air fryer, it caramelizes just enough, retaining its tender interior while developing those irresistible crispy edges. Imagine sinking your teeth into succulent pieces of chicken, nestled in warm pita, brightened by crisp lettuce, diced tomatoes, cucumbers, and a creamy, tangy garlic yogurt sauce. It’s a riot of textures and flavors that dance on your palate, a culinary journey from my childhood streets to your dinner table.

My version focuses on maximizing flavor and achieving that signature texture with minimal fuss. Instead of a traditional vertical spit, I’m showing you the secrets to an equally satisfying bake or air fry, ensuring that each strip of chicken is imbued with the marinade’s essence. I’ll share a pro tip for the ultimate tender chicken and help you avoid a common mistake that can dry out your precious poultry. This recipe proves that you don’t need a fancy restaurant to enjoy truly authentic flavors at home; just a handful of spices and a little love will get you there.

Why This Chicken Shawarma Recipe Is the Best

The secret to my unbeatable chicken shawarma recipe lies in a heavily spiced marinade, inspired by the spice blends I learned from my mother in Morocco. It’s a careful balance of earthy cumin, sweet paprika, pungent garlic powder, and a touch of cayenne for warmth, ensuring every bite is bursting with Middle Eastern flavor. By letting the chicken truly soak up these spices, we create a depth of flavor that’s often missed in quicker versions.

Achieving that perfect, juicy-on-the-inside, slightly-crispy-on-the-outside texture is crucial for great shawarma. My method, whether you choose oven-baked or air-fried, focuses on cooking the chicken quickly at a higher temperature to seal in the juices while developing a beautiful crust. This technique is something I refined during my culinary training in Paris, understanding how heat transfer affects texture – it’s all about precision for perfection.

I designed this easy chicken shawarma for busy home cooks who want maximum flavor with minimum effort. It’s foolproof and fast, meaning you can have a restaurant-quality meal on the table in under an hour (after marination). The beauty of using chicken thighs and breasts, sliced thin, is that they cook quickly and evenly, making this an ideal weeknight dinner. No special equipment needed, just delicious results every time.

Chicken Shawarma Ingredients

When I stroll through the bustling markets in NYC, I’m always looking for the freshest ingredients, much like my mother did in Morocco. For this chicken shawarma recipe, quality ingredients truly shine, especially with the spices and fresh produce. Don’t worry if you can’t find everything exactly as listed; I’ve included some great substitutes!

Ingredients List

  • 1 + 1/2 lb. chicken thighs or breasts, skinless and boneless, sliced into 1/2-inch thick strips
  • 2 tablespoons olive oil, divided
  • 2 teaspoons ground cumin
  • 1 teaspoon paprika
  • 1 teaspoon garlic powder
  • 1 teaspoon cayenne pepper (or to taste)
  • 1 teaspoon ground coriander
  • 1 teaspoon salt
  • 1/2 teaspoon ground black pepper
  • 6 small pita bread
  • 2 cups romaine lettuce, chopped
  • 1 medium tomato, diced
  • 2 Persian or mini cucumbers, diced
  • 1/4 cup fresh parsley, finely chopped
  • 1 cup plain Greek yogurt
  • 1 tablespoon fresh lemon juice
  • 1/2 tablespoon Dijon mustard (optional)
  • 1/2 teaspoon garlic, minced
  • 1/4 teaspoon salt
  • 1/4 teaspoon ground black pepper

Ingredient Spotlight

Chicken Thighs or Breasts: I often prefer boneless, skinless chicken thighs for this recipe because their higher fat content keeps them incredibly juicy and flavorful through high-heat cooking. If you opt for chicken breasts, ensure they are sliced evenly to prevent drying out. You can find both readily at any US grocery store.

Ground Cumin: This is a cornerstone spice in Middle Eastern cuisine, offering a warm, earthy, slightly pungent flavor that is quintessential to shawarma. While I always reach for quality ground cumin, if you only have whole cumin seeds, you can toast and grind them for a fresher, more intense flavor. There’s no direct substitute that captures its unique essence, so I highly recommend using it as specified.

Plain Greek Yogurt: This forms the creamy, tangy base of our essential garlic sauce. Its thickness provides a luxurious mouthfeel, and its acidity balances the rich spices of the chicken. If you don’t have Greek yogurt, regular plain yogurt can work, but it might be thinner; you can strain it through cheesecloth for 30 minutes to thicken it. A dairy-free alternative like unsweetened coconut yogurt can also be used, though the flavor profile will differ slightly.

Fresh Lemon Juice: Bright, zesty lemon juice is vital both in the marinade to tenderize the chicken and in the garlic yogurt sauce to cut through the richness and add a refreshing lift. Always use fresh-squeezed for the best results; bottled concentrate just doesn’t compare. If you’re out of fresh lemons, a splash of apple cider vinegar can offer a similar acidic kick, but the bright citrus note will be absent.

Original IngredientBest SubstitutionFlavor / Texture Impact
Chicken ThighsChicken BreastsSlightly less juicy, prone to drying if overcooked; slice thin and cook carefully.
Ground CuminWhole Cumin Seeds (freshly ground)More intense, fresher flavor. Toast lightly before grinding for depth. No easy single-spice alternative.
Plain Greek YogurtRegular Plain Yogurt (strained) or unsweetened coconut yogurtStrained regular yogurt is thinner but works. Coconut yogurt changes flavor profile but offers dairy-free option.
Fresh Lemon JuiceApple Cider VinegarProvides acidity but lacks the bright citrus notes. Use sparingly.

Chicken Shawarma

How to Make Chicken Shawarma — Step-by-Step

Making chicken shawarma at home is simpler than you think! Follow these steps, and you’ll have a fantastic meal ready in no time. I’ve broken it down to ensure delicious results for even the most novice cook.

Step 1: Marinate the Chicken

In a large Ziploc bag, combine the chicken strips with 1 tablespoon of olive oil and all the spices (cumin, paprika, garlic powder, cayenne, coriander, salt, and black pepper). Press out any excess air from the bag and seal it tightly. Gently massage the bag to ensure the seasoning thoroughly coats all the chicken strips. Let the chicken marinate for at least 1 hour in the fridge, or for maximum flavor, marinate it overnight. I often prepare this before I leave for work in the morning, so it’s ready to cook when I get back!

💡 mia’s Pro Tip: For a deeply infused flavor, try to marinate the chicken for at least 4 hours, or even up to 24 hours. The longer it sits, the more the spices penetrate the meat, leading to a much richer and more authentic shawarma taste. You can also add a tablespoon of fresh lemon juice to the marinade for extra tenderizing.

Step 2: Cook the Shawarma

Preheat your oven to 400°F (200°C). Line a large half-sheet baking pan with parchment paper for easy cleanup. Arrange the marinated chicken strips in a single, even layer on the prepared pan. This is crucial for achieving crispy edges. Bake in the preheated oven for 15-20 minutes, or until the chicken is fully cooked through, has nice crispy bits, and its internal temperature reaches 165°F (74°C). For air fryer users: spread chicken evenly in a single layer in the air fryer basket and cook at 375°F (190°C) for 10-12 minutes, shaking the basket halfway through, until golden brown and crispy. Let it rest for 10 minutes after cooking.

⚠️ Common Mistake to Avoid: Don’t overcrowd the baking sheet or air fryer basket. If the chicken is piled up, it will steam instead of roast, preventing it from getting those desirable crispy edges. Cook in batches if necessary, ensuring proper spacing.

Step 3: Prepare the Sauce and Assemble

While the chicken is cooking or resting, prepare your garlic yogurt sauce. In a medium mixing bowl, combine the plain Greek yogurt, fresh lemon juice, Dijon mustard (if using), minced garlic, salt, and black pepper. Stir until the sauce is completely smooth and well combined. Taste and adjust seasoning as needed. Now, it’s time to assemble! Warm your pita bread lightly. Fill each pita with a generous amount of the cooked shawarma chicken, then layer with chopped romaine lettuce, diced tomato, diced Persian or mini cucumbers, and a sprinkle of fresh parsley. Drizzle generously with the garlic yogurt sauce. You can also offer hummus or tzatziki as an alternative.

💡 mia’s Pro Tip: To warm pita bread quickly and perfectly, wrap them in foil and pop them in the preheated oven for 5 minutes, or heat them directly over a gas flame for a few seconds per side until slightly puffed and charred. This makes them pliable and adds a wonderful flavor.

StepActionDurationKey Visual Cue
1Marinate Chicken1 hour to overnightChicken strips evenly coated in deep orange-red spice mixture.
2Cook Chicken (Oven)15-20 minsNo pink, crispy edges, internal temp 165°F (74°C).
2 (Alt)Cook Chicken (Air Fryer)10-12 minsGolden brown and crispy, shaken halfway.
3Prepare Sauce & Assemble10 minsSmooth, creamy white sauce; colorful pita wraps.

Serving & Presentation

Plating chicken shawarma is all about creating a vibrant, appealing meal that invites you to dig in. I love laying out all the components on a large platter, much like my family would do for a communal meal in Morocco. Arrange the warm pita, a generous mound of the succulent chicken, and bowls of fresh, colorful toppings like crisp romaine, juicy diced tomatoes, cool cucumbers, and finely chopped parsley. The star is, of course, that creamy garlic yogurt sauce, drizzled generously or served on the side for individual customization.

While pita is the classic choice, you can also serve this chicken over a bed of fluffy couscous, warm basmati rice, or even in a fresh lettuce cup for a lighter, grain-free option. The contrast of the warm, spiced chicken with cool, crunchy vegetables and the tangy sauce is simply delightful. In my NYC kitchen, I often add a sprinkle of sumac over the finished wraps just before serving, for an extra pop of tartness and a beautiful reddish hue.

Pairing TypeSuggestionsWhy It Works
Side DishHummus, Tabbouleh Salad, Israeli SaladAdds freshness, texture contrast, and complements the Middle Eastern flavors.
Sauce / DipTzatziki, Tahini Sauce, Hot Sauce (Harissa)Offers cooling creaminess, nutty depth, or a spicy kick to customize each bite.
BeverageFresh Mint Tea, Lemonade, Light Lager BeerRefreshing and cuts through the richness, enhancing the meal experience.
GarnishFresh Parsley, Pickled Turnips, Sumac, Toasted Pine NutsAdds visual appeal, fresh aromatics, contrasting tartness, or a subtle crunch.

Make-Ahead, Storage & Reheating

As a busy chef in NYC, meal prep is my best friend, and this easy chicken shawarma is fantastic for making ahead! I often marinate a double batch of chicken on a Sunday and cook it throughout the week for quick lunches or dinners. It truly shines as a versatile component you can mix and match.

MethodContainerDurationReheating Tip
RefrigeratorAirtight container3-4 daysMicrowave until hot, or pan-fry for best texture.
FreezerFreezer-safe bag/container2-3 monthsThaw overnight in fridge, then pan-fry or microwave.
Make-AheadSeparate componentsChicken & sauce: 3-4 daysAssemble fresh when ready to eat for best results.

For reheating, my preferred method for the cooked shawarma chicken is a quick pan-fry in a little olive oil over medium-high heat. This helps to re-crisp those edges and brings back that fresh-off-the-oven flavor profile. Avoid over-microwaving, as it can make the chicken tough and chewy, although it’s certainly an option for speed.

The garlic yogurt sauce can be made several days in advance and stored in an airtight container in the fridge; its flavors actually meld beautifully over time. Just give it a good stir before serving. Keep the fresh veggies separate until assembly to maintain their crispness and vibrant color.

Variations & Easy Swaps

One of the joys of cooking is being able to adapt a recipe to your taste or what you have on hand. This chicken shawarma recipe is incredibly flexible, allowing for delicious variations without losing its authentic charm. Here are some of my favorite ways to shake things up, often inspired by my travels and local NYC farmers’ market finds.

VariationKey ChangeBest ForDifficulty Impact
Spicy Harissa Chicken ShawarmaAdd 1-2 tsp Harissa paste to marinadeThose who love a fiery kick and North African flavors.Minimal
Low-Carb Shawarma BowlsServe over cauliflower rice or lettuce cups instead of pitaDiet-conscious eaters, gluten-free, or seeking a lighter meal.Minimal
Lemon Herb ShawarmaIncrease lemon zest & add fresh dill/oregano to marinadeA brighter, more herbaceous flavor profile, great for summer.Minimal

Spicy Harissa Chicken Shawarma

For those who appreciate a deeper heat and a more pronounced North African influence, try adding 1-2 teaspoons of harissa paste to your chicken marinade. Harissa, a smoky, fiery chili paste, is a staple in Moroccan cuisine and will elevate the spice profile of your shawarma beautifully, adding layers of heat and complexity. My mother always said a little something spicy awakens the palate, and she was right!

Low-Carb Shawarma Bowls

If you’re looking to reduce carbs or avoid gluten, simply serve your delicious chicken shawarma over a bed of cauliflower rice, mixed greens, or in large lettuce cups. This transforms it into a refreshing and vibrant salad bowl, packed with flavor and texture. It’s a popular option here in NYC for a lighter lunch, and I find it equally satisfying without the pita.

Lemon Herb Shawarma

To give your shawarma a brighter, more aromatic twist, incorporate extra lemon zest and a tablespoon of finely chopped fresh herbs like dill or oregano into the chicken marinade. These additions bring a fresh, Mediterranean garden vibrancy that complements the warm spices wonderfully, especially during warmer months. It’s a delightful departure from the classic, yet still incredibly flavorful, and a pairing I often experiment with after finding beautiful fresh herbs at the Union Square Greenmarket.

What is the best marinade for authentic chicken shawarma?

The best marinade for authentic chicken shawarma is a rich blend of warm, earthy Middle Eastern spices. My recipe uses a combination of ground cumin, paprika, garlic powder, cayenne pepper, ground coriander, salt, and black pepper, along with a touch of olive oil. The key is balance – each spice plays a role in creating that signature complex flavor. Some recipes also include a squeeze of fresh lemon juice, which not only brightens the flavor but also helps to tenderize the chicken, making it incredibly succulent. For an added layer of flavor, sometimes I’ll include a hint of turmeric or ginger, depending on the desired undertone.

Can I make chicken shawarma in the oven instead of on a spit?

Absolutely! While traditional shawarma is cooked on a vertical spit, making it in the oven (or even an air fryer) yields fantastic results that are perfect for home cooks. My method involves spreading the marinated chicken in a single layer on a baking sheet and roasting it at a high temperature. This allows the chicken to cook through evenly while developing beautiful, slightly crispy edges, mimicking the texture from a spit. For even crispier bits, you can finish it under the broiler for a couple of minutes, keeping a close eye on it to prevent burning. This oven method is not only easy but truly delicious.

What are common side dishes or sauces to serve with chicken shawarma?

The beauty of chicken shawarma is its versatility when it comes to pairings. The most common and beloved sauce is a creamy garlic yogurt sauce, often with a hint of lemon, like the one in this recipe. Other popular options include a nutty tahini sauce or a spicy harissa for those who enjoy heat. For side dishes, fresh salads like tabbouleh, Israeli salad (chopped tomatoes and cucumbers), or a simple chopped romaine lettuce salad are refreshing. Pickled turnips or cucumbers add a wonderful tangy crunch. You can also serve it with hummus, rice, or even fries, making it a complete and satisfying meal.

How long should you marinate chicken for shawarma?

For the best flavor penetration, I recommend marinating chicken for shawarma for at least 1 hour. However, if you have the time, marinating it for 4 hours or even overnight (up to 24 hours) in the refrigerator will dramatically enhance the depth of flavor. The longer marination period allows the spices to truly infuse into the chicken, resulting in a more authentic and delicious taste experience. I often prepare the marinade the night before, so it’s ready to cook when I need a quick weeknight dinner, making my life in the city so much easier.

What kind of chicken is best for shawarma?

For chicken shawarma, I highly recommend using boneless, skinless chicken thighs. Their higher fat content ensures they remain incredibly juicy and tender even when cooked at high temperatures, which is essential for that perfect shawarma texture. If you prefer chicken breasts, they can also be used, but make sure to slice them into even, thin strips (about 1/2-inch thick) to ensure even cooking and prevent them from drying out. Regardless of your choice, slicing the chicken thin is key for quick cooking and maximizing the surface area for the marinade to coat.

Share Your Version!

I poured my heart into perfecting this authentic chicken shawarma recipe, balancing my Moroccan roots with my French culinary training, all from my bustling NYC kitchen. Now, it’s your turn to make it your own! I would absolutely love to hear how it turns out for you.

Did you try the oven method or the air fryer? What did you serve it with? Please leave a star rating and a comment below, sharing your experience. If you snap a photo, be sure to share it on Instagram or Pinterest and tag @exorecipes — I adore seeing your culinary creations! And tell me, what’s your go-to fresh garnish for shawarma, beside parsley?

From my NYC kitchen to yours — I hope this recipe brings as much warmth to your table as it does to mine. — mia 🧡

📌

Love This Recipe? Save It to Pinterest!

If you enjoyed this Chicken Shawarma recipe, don’t let it get lost in your browser tabs! 😄 Pin it now so you can find it again anytime — and explore hundreds more tried-and-tested recipes waiting for you on my Pinterest boards.

👉 Follow mia on Pinterest @chefrecipes2

📌 Pin this recipe · 🔁 Re-pin your favorites · 💬 Tag me when you make it — I love seeing your creations!

“`

Print
clock clock iconcutlery cutlery iconflag flag iconfolder folder iconinstagram instagram iconpinterest pinterest iconfacebook facebook iconprint print iconsquares squares iconheart heart iconheart solid heart solid icon

Chicken Shawarma

  • Author: Chef Mia

Description

Homemade chicken shawarma (donair) with juicy tender chicken marinated in Middle Eastern spices and wrapped in pita bread is easy to make at home.


Ingredients

Scale
  • 1 + 1/2 lb. chicken thighs or breasts, skinless and boneless, sliced into 1/2-inch thick strips
  • 2 tablespoons olive oil, divided
  • 2 teaspoons ground cumin
  • 1 teaspoon paprika
  • 1 teaspoon garlic powder
  • 1 teaspoon cayenne pepper (or to taste)
  • 1 teaspoon ground coriander
  • 1 teaspoon salt
  • 1/2 teaspoon ground black pepper
  • 6 small pita bread
  • 2 cups romaine lettuce, chopped
  • 1 medium tomato, diced
  • 2 Persian or mini cucumbers, diced
  • 1/4 fresh parsley, finely chopped
  • 1 cup plain Greek yogurt
  • 1 tablespoon fresh lemon juice
  • 1/2 tablespoon Dijon mustard (optional)
  • 1/2 teaspoon garlic, minced
  • 1/4 teaspoon salt
  • 1/4 teaspoon ground black pepper

Instructions

  1. In a large Ziploc bag, combine chicken strips with 1 tablespoon oil and all seasoning. Press air out of the bag and seal tightly. Press the seasoning around the chicken strips to coat. Let it marinate for 1 hour, up to overnight in the fridge. You can also marinate the chicken in a large mixing bowl and cover.
  2. Preheat oven to 400 F. Add and spread chicken evenly on a large parchment-lined half sheet baking pan in a single layer. Bake in the oven for 15-20 minutes until fully cooked through and crispy. Remove the pan from the oven and let cool for 10 minutes. Air Fryer Instructions: To air fry the chicken instead, spread chicken evenly in a single layer in the air fryer basket and cook at 375 F for 10-12 minutes until golden brown and crispy. Shake the basket halfway during cooking to brown evenly.
  3. Serve chicken in pita bread with lettuce, tomato, cucumber and parsley.
  4. In a medium mixing bowl, combine all the ingredients for the garlic yogurt sauce and stir until smooth. Drizzle on top of the chicken shawarma and serve. You can also add tzatziki sauce instead or a spread of hummus.


Nutrition

  • Calories: 315 calories
  • Sugar: 3.7 g
  • Fat: 12.6 g
  • Carbohydrates: 20.9 g
  • Protein: 30.2 g


Chicken Shawarma

ph">For more delicious inspiration, follow me on Pinterest!

Easy Harissa Chicken with Bold North African Flavors

Harissa Chicken (Spicy North African Chicken): Bold Flavor in Under 30 Minutes

⚖️
Difficulty
Easy
⏲️
Prep Time
10 mins
🕒
Cook Time
20 mins
⏱️
Total Time
30 mins
🍽️
Servings
4

Growing up in Morocco, the scent of a simmering tagine or a sizzling grilled meat seasoned with North African spices was the soundtrack to my childhood. While I loved the slow-cooked stews, there was always something incredibly exciting about the vibrant kick of harissa. This harissa chicken recipe for spicy North African chicken thighs brings that bold, complex flavor right into your kitchen with amazing ease. It’s a taste that transports me back to my mother’s bustling kitchen, but with a modern NYC twist—perfect for a busy weeknight yet impressive enough for company. We’re talking seriously delicious, deeply marinated chicken with a fantastic spice crust.

The beauty of this dish lies in the harissa. It’s not just about heat; it’s a symphony of smoky, earthy, and peppery notes that elevate simple chicken thighs to something truly special. The secret to those perfectly tender chicken thighs and that irresistible spicy crust comes from a two-step approach: a vibrant spice rub that penetrates deep, followed by a quick, high-heat bake. The succulent interior and slightly charred edges create a textural contrast that will have you coming back for more. In my Parisian culinary training, I learned the precision of balancing flavors, and here, the bright lemon juice cuts through the richness of the harissa beautifully.

Over the years, I’ve perfected this easy harissa chicken recipe to ensure maximum flavor with minimal effort. This rendition focuses on convenience without sacrificing authenticity, demonstrating how to achieve a deeply flavorful dish in under 30 minutes active time. I’ll share my secret for ensuring those chicken thighs cook through perfectly every time, a pro tip for boosting the smoky notes, and a common mistake to avoid so your chicken never dries out. Get ready to add this to your collection of favorite spicy chicken recipes!

Why This Harissa Chicken Recipe Is the Best

The Flavor Secret: Unlocking Harissa’s Depth. This recipe isn’t just about throwing harissa on chicken; it’s about building layers of North African flavor. By combining harissa powder with smoked paprika and cumin, we amplify the pepperiness and introduce a beautiful smokiness that complements the chicken perfectly. My mother always said the key to Moroccan cooking was knowing how to blend spices, and this marinade does just that, creating an incredible depth that permeates every bite of this spicy chicken. The lemon juice brightens it all up, preventing the spices from becoming too heavy.

Perfected Texture: Crispy Skin, Juicy Interior. The precise baking temperature and time are critical here, a lesson I took from my French pastry training where exact temperatures make all the difference. We bake at a relatively high temperature (425°F) which helps crisp up the exterior of the chicken thighs and activate those spices, while the natural fats in the boneless, skinless thighs keep the interior incredibly moist and tender. The marinating step also helps tenderize the meat, contributing to that desirable juicy texture.

Foolproof & Fast: Weeknight Wonder. I know how hectic life in NYC can be, so I designed this recipe to be incredibly efficient. The marinade comes together in minutes, and the chicken bakes quickly, making it an ideal choice for a busy weeknight meal. Plus, it’s forgiving! While marinating longer enhances flavor, even an hour will yield fantastic results. It uses readily available ingredients and straightforward steps, making it accessible for home cooks of all skill levels who want to explore delicious North African cuisine.

Harissa Chicken Ingredients

For me, sourcing ingredients for a dish like harissa chicken often involves a trip to one of the amazing international markets here in New York City, or even finding specialty items online. But for this recipe, I’ve kept it super accessible; you should be able to find everything at your local supermarket.

Ingredients List

  • 4 boneless chicken thighs (about 1.5 – 2 lbs total)
  • 2 tsp olive oil
  • 3 tbsp harissa powder (or 2-3 tbsp harissa paste for more intense flavor)
  • 1 tsp smoked paprika
  • 1/2 tsp cumin
  • 1/4 tsp cayenne pepper (optional, for extra heat)
  • 1 tbsp lemon juice

Ingredient Spotlight

Boneless Chicken Thighs: I prefer thighs for this harissa chicken recipe because they stay incredibly juicy and tender during baking, even with high heat. Their higher fat content prevents them from drying out, which can sometimes happen with leaner chicken breasts. When selecting, look for plump, firm thighs with good color. You could substitute with boneless chicken breasts, but reduce baking time slightly and be careful not to overcook, as they can become dry. The flavor will still be fantastic but the texture might be less forgiving.

Harissa Powder: This is the star of our North African chicken. Harissa powder is a blend of chili peppers, garlic, caraway, coriander, and sometimes mint. It provides an aromatic, smoky heat. If you can’t find harissa powder, a good quality harissa paste is an excellent substitute, but you might need to reduce the olive oil slightly if the paste is very loose, or add a touch more if it’s very thick, aiming for a spreadable consistency. Alternatively, you could create a similar flavor profile with a mix of anchos, pasilla, and chipotle chili powders, with a pinch of caraway and coriander.

Smoked Paprika: This spice adds an essential layer of smoky depth that rounds out the heat from the harissa. It gives this spicy chicken a rustic, slow-cooked flavor profile even in a short baking time. Choose a Spanish smoked paprika (pimentón ahumado) for the best quality and most pronounced flavor. If you only have sweet paprika, the dish will still be tasty, but it will lack that characteristic smoky complexity. You could try adding a tiny pinch of liquid smoke if you’re feeling adventurous and only have sweet paprika.

Lemon Juice: Fresh lemon juice is non-negotiable for me in this recipe. It brightens the rich, spicy flavors, adding a much-needed acidity that lifts the entire dish. Bottled lemon juice will work in a pinch, but the vibrancy and freshness of freshly squeezed lemon are truly unmatched and worth the extra minute of effort. Using lime juice would offer a similar acidic kick, but with a different aromatic profile that leans more Caribbean than North African.

Original IngredientBest SubstitutionFlavor / Texture Impact
Boneless Chicken ThighsBoneless Chicken BreastsSlightly drier texture; reduce cook time to prevent overcooking.
Harissa PowderHarissa Paste (2-3 tbsp)Often a more intense flavor; adjust oil for marinade consistency.
Smoked PaprikaSweet Paprika + pinch of Liquid SmokeLoses some smoky depth; liquid smoke can help mimic.
Lemon Juice (fresh)Bottled Lemon Juice or Lime JuiceLess vibrant, slightly different flavor profile.

Harissa Chicken (Spicy North African Chicken)

How to Make Harissa Chicken — Step-by-Step

Creating this bold and flavorful harissa chicken is easier than you think, and I’ll walk you through each step to ensure your dish turns out perfectly juicy and packed with flavor.

Step 1: Prepare the Harissa Marinade

In a small bowl, combine the 2 teaspoons of olive oil, 3 tablespoons of harissa powder, 1 teaspoon of smoked paprika, 1/2 teaspoon of cumin, and the optional 1/4 teaspoon of cayenne pepper. Add the 1 tablespoon of fresh lemon juice. Mix vigorously with a spoon or small whisk until you have a thick, uniform paste. The consistency should be spreadable but not watery.

💡 mia’s Pro Tip: Toasting your harissa powder (if using it alone) in a dry pan for 30 seconds before mixing can really awaken its aromas and deepen the overall flavor of your North African chicken. Just don’t let it burn!

Step 2: Marinate the Chicken

Place the 4 boneless chicken thighs into a large bowl or a sealable plastic bag. Pour the prepared harissa paste over the chicken. Using clean hands, rub the paste all over each chicken thigh, ensuring every surface is thoroughly coated. Make sure there are no bare spots. Once coated, refrigerate and marinate for at least 1 hour, or ideally, for 4-6 hours for the deepest flavor. If you’re short on time, even 30 minutes will start to infuse great taste into your spicy chicken recipes.

⚠️ Common Mistake to Avoid: Don’t skip the marinating step entirely! Even a short marination time vastly improves the flavor absorption and helps tenderize the chicken, making a significant difference to the final taste and texture of your easy harissa chicken.

Step 3: Preheat and Arrange

Preheat your oven to 425°F (220°C). As the oven heats, line a baking tray or a rimmed baking sheet with aluminum foil or parchment paper. This makes for much easier cleanup and prevents sticking. Arrange the marinated chicken thighs on the prepared baking sheet in a single layer, ensuring they are not overcrowded. Give them a little space so they can roast, not steam.

Step 4: Bake Until Done

Bake the chicken in the preheated oven for 18-20 minutes. Halfway through the cooking time, you might want to rotate the baking sheet for even browning. The surface should be beautifully caramelized and slightly charred in places. To confirm doneness, always check the internal temperature with a meat thermometer; it should read at least 165°F (74°C) at its thickest part.

💡 mia’s Pro Tip: If your chicken starts to look too dark on top but isn’t quite at temperature, you can loosely tent it with aluminum foil for the remaining cooking time. This prevents burning while allowing it to finish cooking through.

Step 5: Rest and Serve

Once the chicken reaches the correct internal temperature, remove the baking sheet from the oven. Let the chicken rest directly on the tray for 5-10 minutes before slicing or serving. This allows the juices to redistribute throughout the meat, ensuring every bite is incredibly tender and moist. Resting is a non-negotiable step for truly juicy chicken.

StepActionDurationKey Visual Cue
1Prepare Marinade5 minsThick, uniform paste forms.
2Marinate Chicken1-6 hours (min. 30 mins)Chicken evenly coated.
3Preheat & Arrange10-15 minsOven reaches 425F; chicken in single layer.
4Bake Chicken18-20 minsSurface caramelized, internal temp 165F.
5Rest & Serve5-10 minsJuices redistribute.

Serving & Presentation

Serving this Harissa Chicken is where you can truly let its vibrant character shine. For me, it evokes the colorful platters my aunt would prepare back in Morocco, a blend of rustic charm and abundant hospitality. I love to arrange the beautifully charred, spicy chicken thighs on a large platter, perhaps nestled among some fluffy couscous or a bed of vibrant green tabbouleh. A simple sprinkle of fresh cilantro or parsley adds a burst of freshness and a touch of color that makes the dish pop.

Beyond making it look inviting, consider the complementary flavors. The bold, spicy notes of the harissa chicken pair wonderfully with cooling elements. A dollop of plain Greek yogurt or labneh swirled with a touch of fresh mint offers a beautiful contrast and helps to temper the heat. You could also serve it alongside a simple lemon and herb salad, or a side of roasted root vegetables like carrots or sweet potatoes which caramelize beautifully and absorb some of those incredible pan juices.

In my NYC kitchen, I often opt for a deconstructed approach for a family meal. I’ll slice the chicken into thick strips, creating a vibrant main component for grain bowls with quinoa, pickled red onions, and a sprinkle of feta. The presentation, whether formal or casual, should always celebrate the ingredient’s natural beauty and reflect the warmth of North African cooking.

Pairing TypeSuggestionsWhy It Works
Side DishCouscous, Tabbouleh, Roasted Root VegetablesAbsorbs flavorful juices, offers textural contrast, or rounds out the meal.
Sauce / DipPlain Greek Yogurt, Labneh, Tahini SauceCooling and creamy, helps balance the heat of the harissa.
BeverageMint Tea, Crisp Rosé Wine, Pale AleRefreshment to cut through richness, complements spicy notes.
GarnishFresh Cilantro, Chopped Parsley, Lemon WedgesAdds freshness, visual appeal, and a last hit of acidity.

Make-Ahead, Storage & Reheating

Living in New York City, I’ve mastered the art of meal prepping, and this harissa chicken recipe is a gem for that. It’s incredibly versatile and holds its flavor wonderfully, making it perfect for packing into lunchboxes or having a quick, flavorful dinner ready after a long day. I often make a double batch on Sunday so I have delicious, spicy chicken ready for the week.

MethodContainerDurationReheating Tip
RefrigeratorAirtight container3-4 daysMicrowave on medium heat, or bake at 350°F until warmed through.
FreezerFreezer-safe bag/container2-3 monthsThaw overnight in fridge, then reheat as above.
Make-AheadMarinated (raw)Up to 24 hoursMarinate chicken, then cook freshly.

When reheating from the refrigerator, I find that a quick zap in the microwave works fine for a grab-and-go meal, but for optimal texture, especially if you want those slightly crispy edges back, a few minutes in a preheated oven (around 350°F / 175°C) or even a toaster oven can work wonders. Cover it loosely with foil to prevent it from drying out.

If you’ve frozen the chicken, make sure to thaw it completely in the refrigerator overnight before reheating. Reheating directly from frozen can lead to uneven cooking and a tougher texture. This easy harissa chicken is fantastic in salads, wraps, or simply served with fresh vegetables, making it a truly versatile make-ahead protein.

Variations & Easy Swaps

Part of the joy of cooking, as I learned in North Africa and honed in Paris, is adapting and innovating. This easy harissa chicken recipe is a beautiful canvas for creativity.

VariationKey ChangeBest ForDifficulty Impact
Harissa Chicken SkewersCut chicken into cubes, skewer with vegetablesGrilling or appetizers, more visual appeal.Slightly more prep.
Gluten-Free & Dairy-FreeNaturally compliant, ensure harissa is GF.Dietary restrictions, anyone sensitive to gluten/dairy.No impact, naturally free.
Lemon Herb Harissa ChickenAdd fresh herbs, increase lemon.Brighter, lighter flavor profile.No impact, simple additions.

Harissa Chicken Skewers

For a fun presentation or grilling option, cut your chicken thighs into 1-inch cubes before marinating. Thread them onto skewers, alternating with chunks of bell peppers, zucchini, or cherry tomatoes. Bake as directed, or grill over medium-high heat until cooked through with lovely grill marks. This method really plays up the charred, smoky notes of the spicy North African chicken.

Gluten-Free and Dairy-Free Harissa Chicken

This recipe is naturally gluten-free and dairy-free! Just be sure to check the labeling on your harissa powder or paste, as some brands might contain hidden allergens, though it’s rare. My preferred harissa paste from a small shop in Chelsea Market is always pure and vibrant, making it an excellent choice for those with dietary restrictions. It truly proves that delicious spicy chicken recipes don’t need dairy to be rich and satisfying.

Lemon Herb Harissa Chicken

To add a brighter, more aromatic twist to your easy harissa chicken, incorporate fresh herbs into the marinade or as a garnish. Finely chop 2 tablespoons of fresh cilantro, parsley, or a mix of both, and stir it into the harissa paste. You can also zest half a lemon into the marinade for an even more pronounced citrus hit. This variation adds a fresh, herbaceous lift that I often enjoy during those vibrant spring days here in NYC.

What is a good substitute for harissa paste if I can’t find it?

If you’re having trouble finding harissa paste, harissa powder is an excellent alternative, which is what this recipe uses! If neither is available, you can create a similar spicy and aromatic profile by mixing a combination of chili powders. I recommend using ancho chili powder for a deep, earthy heat, along with a pinch of caraway seeds, coriander, and a touch of garlic powder. The flavor won’t be exactly the same as true North African harissa, but it will give you a wonderfully spiced chicken that captures the essence of this easy harissa chicken dish. Just remember that harissa pastes vary wildly in heat, so start small and taste as you go.

How long should I marinate harissa chicken for the best flavor?

For the absolute best flavor in your spicy chicken recipes, I recommend marinating the harissa chicken thighs for at least 4 hours, and ideally up to 6-8 hours. This allows the vibrant spices to really penetrate the chicken and tenderize the meat, leading to a much more flavorful and juicy result. If you’re pressed for time, even a minimum of 1 hour will make a noticeable difference compared to no marination at all. For a true flavor bomb, you can even marinate overnight, up to 24 hours, but beyond that, the acidity from the lemon can start to break down the chicken fibers too much.

Can I make harissa chicken in an air fryer or on the grill?

Absolutely, harissa chicken is incredibly versatile and works beautifully in an air fryer or on the grill! For the air fryer, preheat it to 375°F (190°C) and cook the chicken thighs for 15-20 minutes, flipping halfway, until they’re cooked through and have those lovely crispy edges. On the grill, preheat to medium-high heat (around 400°F / 200°C), lightly oil the grates, and grill the chicken for 5-7 minutes per side, or until the internal temperature reaches 165°F (74°C). Both methods give fantastic smoky, charred results, perfect for a spicy chicken recipe!

What are good side dishes to serve with spicy harissa chicken?

To complement the bold flavors of this North African chicken, I love pairing it with dishes that offer a cooling contrast or soak up the delicious juices. Fluffy couscous, often found on Moroccan tables, is a classic choice. A vibrant tabbouleh salad with fresh parsley and mint offers a refreshing counterpoint. Roasted root vegetables like carrots or sweet potatoes that caramelize well are also excellent, absorbing some of the spice. For something creamy, a simple Greek yogurt, labneh, or even a tahini sauce can beautifully balance the heat and add a lovely texture to your meal.

Is harissa chicken very spicy, and can I adjust the heat level?

Harissa chicken can indeed be quite spicy, but the beauty of this easy harissa chicken recipe is that you have full control over the heat! The primary source of heat will be the harissa itself, and if you’re using harissa powder, the cayenne pepper is an optional addition. If you prefer a milder flavor, simply reduce the amount of harissa powder to 1-2 tablespoons and omit the cayenne pepper entirely. For those who love a fiery kick, feel free to add more cayenne or a touch of a hotter chili powder. Always taste a tiny bit of your marinade before adding it to the chicken to gauge the spice level for your preference.

Share Your Version!

I absolutely adore hearing from you! If you try this Harissa Chicken recipe, please come back and leave a star rating and a comment below. Your feedback truly brightens my day and helps other home cooks discover new favorites. Did you try a fun variation? Pair it with a unique side? I’d love to know!

Don’t forget to share a photo of your magnificent spicy North African chicken creation on Instagram or Pinterest. Tag @exorecipes so I can see and celebrate your culinary success! Tell me, what’s your favorite way to enjoy a bold and easy harissa chicken – in a wrap, with rice, or as part of a vibrant salad?

From my NYC kitchen to yours — I hope this recipe brings as much warmth to your table as it does to mine. — mia 🧡

📌

Love This Recipe? Save It to Pinterest!

If you enjoyed this Harissa Chicken (Spicy North African Chicken) recipe, don’t let it get lost in your browser tabs! 😄 Pin it now so you can find it again anytime — and explore hundreds more tried-and-tested recipes waiting for you on my Pinterest boards.

👉 Follow mia on Pinterest @chefrecipes2

📌 Pin this recipe · 🔁 Re-pin your favorites · 💬 Tag me when you make it — I love seeing your creations!

Print

clock clock iconcutlery cutlery iconflag flag iconfolder folder iconinstagram instagram iconpinterest pinterest iconfacebook facebook iconprint print iconsquares squares iconheart heart iconheart solid heart solid icon

Harissa Chicken (Spicy North African Chicken)

  • Author: Chef Mia

Description

Harissa chicken thighs is a spicy, flavorful chicken dish with a complex flavor, made using harissa chile paste. It is versatile, and you can easily control the heat level so all your family members can enjoy it!


Ingredients

Scale
  • 4 boneless chicken thighs
  • 2 tsp olive oil
  • 3 tbsp harissa powder
  • 1 tsp smoked paprika
  • 1/2 tsp cumin
  • 1/4 tsp cayenne pepper
  • 1 tbsp lemon juice

Instructions

  1. Mix the oil, harissa powder, lemon juice, and other spices in a small bowl to form a thick paste.
  2. Rub the paste all over the chicken thighs or put the paste and chicken into a large bowl or sealable bag.
  3. Shake or roll it around so the chicken is covered with it.
  4. Marinate for an hour or more (if you have the time).
  5. Preheat the oven to 425F.
  6. Line a baking tray or rimmed baking sheet with aluminum foil or parchment paper and arrange the chicken on it in a single layer.
  7. Bake the chicken in the preheated oven for 18-20 minutes and then check for doneness with a meat thermometer. The internal temperature should read at least 165F.
  8. Let the chicken rest for a few minutes before serving.


Nutrition

  • Calories: 289 kcal
  • Sugar: 0.2 g
  • Fat: 22 g
  • Carbohydrates: 5 g
  • Protein: 19 g


Harissa Chicken (Spicy North African Chicken)

Perfectly Tender Greek Chicken Souvlaki Every Time

“`html

Easy Greek Chicken Souvlaki Recipe – Tender and Juicy Grilled Chicken

⚖️
Difficulty
Easy
⏲️
Prep Time
15 mins
🕒
Cook Time
10 mins
⏱️
Total Time
<1 hour + marinating
🍽️
Servings
4

Growing up in my mother’s bustling kitchen in Morocco, the air was always thick with the scent of spices and stories. While our flavors leaned more North African, the spirit of simple, family-style dishes that burst with Mediterranean sunshine was always there. That’s why I adore this easy Greek chicken souvlaki recipe. It reminds me of those early kitchen days, full of vibrant flavor and effortless charm. This particular recipe ensures you get incredibly tender and juicy chicken every single time, making it a perfect weeknight meal or a show-stopping weekend grill. It’s truly a taste of the Mediterranean right in your own home, bringing joy to any table.

Imagine golden-brown chicken pieces, kissed by the grill, each bite releasing a symphony of garlicky, lemony, and herbaceous notes. The scent alone transports you to a seaside taverna! The secret lies in a balanced marinade that penetrates deep into the chicken, leaving it succulent and flavorful, never dry. When I trained in Paris, we focused on perfect flavor extraction, and that’s precisely what this souvlaki marinade does – it coaxes out the best from every ingredient, building layers of taste that are both complex and comforting. The tender texture is a hallmark of good cooking, and we’ll achieve that through careful marination and proper grilling technique.

My version of this classic Greek chicken souvlaki recipe takes all the guesswork out of achieving that perfect street food experience. I’ve tweaked and refined the marinade recipe to ensure maximum flavor penetration without an overly long soak, guaranteeing plump, juicy chicken without fail. You’ll learn a pro tip for ensuring your chicken stays ultra-moist on the grill, a little trick I picked up from a bustling NYC farmers market chef. Plus, I’ll share a common mistake many home cooks make when grilling chicken, so you can avoid it and impress everyone with your culinary prowess!

Why This Greek Chicken Souvlaki Recipe Is the Best

The true magic of this Greek chicken souvlaki recipe lies in its incredibly flavor-packed marinade. Drawing inspiration from both traditional Greek spices and the classic French culinary principle of respecting ingredients, I’ve perfected a blend that delivers a deep, aromatic punch. The olive oil helps distribute the flavors evenly, while the lemon juice and white wine vinegar work as tenderizers, infusing the chicken with that signature bright, Mediterranean zest you crave. It’s this thoughtful combination that results in chicken that tastes like it came straight from a bustling Athens market stall.

Achieving perfectly tender chicken on a skewer can sometimes be a challenge, but I’ve got you covered. My method, honed from years in professional kitchens and refined right here in my NYC apartment, focuses on precise cooking temperatures and a crucial resting period. This ensures the chicken remains incredibly juicy and succulent from the inside out, never dry or rubbery. It’s a technique similar to how we handled delicate cuts in Paris, allowing the juices to redistribute, leading to an exceptionally tender bite each time.

Beyond just amazing flavor and texture, this recipe is designed to be incredibly approachable. Despite its impressive taste, preparing this easy Greek chicken souvlaki is straightforward and doesn’t require any advanced culinary skills. With clear, step-by-step instructions and my pro tips sprinkled throughout, you’ll feel confident tackling this dish. It’s a foolproof recipe perfect for busy weeknights or when you need a delicious meal with minimal fuss, making it a staple in my own busy New York kitchen, and I know it will be in yours too!

Greek Chicken Souvlaki Ingredients

When I visit the Union Square Greenmarket here in NYC, I love picking up the freshest herbs and the most vibrant lemons for my Greek dishes. While the specific produce might change seasonally, the core ingredients for this authentic Greek Souvlaki Recipe remain universally delightful and easy to find. My mother always taught me that the best dishes start with the best ingredients, and that’s a philosophy I carry in every recipe.

Ingredients List

  • 1 lb. boneless, skinless, chicken breasts or thighs (cut into bite-size pieces)
  • 2 tablespoons olive oil
  • 1 tablespoon white wine vinegar
  • 4 large garlic cloves (minced)
  • 3 tablespoons Greek Seasoning
  • 1 large lemon (juiced)
  • 1/2 teaspoon salt
  • 1/2 teaspoon freshly cracked black pepper

Ingredient Spotlight

Chicken Breasts or Thighs: For this greek chicken souvlaki recipe, I find a mix of boneless, skinless chicken breasts and thighs yields the best result for both flavor and texture. Breasts are lean and take on flavors beautifully, while thighs offer a richer, juicier bite. Look for plump, well-colored chicken at your local grocery store or butcher. You can use all of one or the other, but the combination adds complexity. If you’re short on time, pre-cut chicken pieces work, but cutting them uniformly yourself ensures even cooking.

Olive Oil: A good quality extra virgin olive oil is crucial here. It’s not just a cooking medium; it’s a key flavor component in any Greek dish. The fruity, slightly peppery notes of a fine olive oil will elevate your souvlaki. When shopping, look for “cold-pressed” and “extra virgin” on the label. In a pinch, any pure olive oil will do, but you’ll lose some of that authentic Mediterranean depth. From what I learned in French culinary school, fat is a flavor carrier, and olive oil is the perfect vehicle for this marinade.

Fresh Lemon Juice: This is a non-negotiable for authentic Greek souvlaki! Freshly squeezed lemon juice brings a bright, acidic tang that balances the richness of the chicken and activates the herbs in the Greek seasoning. Avoid bottled lemon juice; it simply doesn’t have the same vibrant flavor. When picking lemons in the store, choose ones that are firm but slightly soft to the squeeze, indicating they’re ripe and juicy. If you don’t have white wine vinegar on hand, a little extra lemon juice can stand in for some of its acidity.

Greek Seasoning: While you can absolutely make your own blend of oregano, thyme, and other Mediterranean herbs, a good pre-made Greek seasoning blend often hits all the right notes. I love finding artisanal spice blends at my local NYC markets. If you’re making your own, ensure your dried herbs are fresh – old herbs lose their potency. This blend is what truly defines the flavor profile of your Greek chicken souvlaki.

Original IngredientBest SubstitutionFlavor / Texture Impact
White Wine VinegarRed Wine Vinegar or Apple Cider VinegarSlightly sweeter (red wine) or fruitier (apple cider) tang. Adds acidity.
Greek SeasoningDried oregano, thyme, a pinch of marjoram, garlic powder, onion powderSimilar herbaceous balance, but may lack some complexity of a pre-made blend.
Boneless, Skinless Chicken BreastPork Tenderloin or firm tofu (marinated longer)Pork will be a bit richer. Tofu is a great vegetarian option but needs extra marinating time for flavor absorption.
Olive OilAvocado OilMore neutral flavor, but still provides good fat for tenderness and flavor distribution.

Greek Chicken Souvlaki Recipe

How to Make Greek Chicken Souvlaki — Step-by-Step

Don’t be intimidated by grilling or skewers; this process is straightforward, and I’ll walk you through each step to ensure your Greek chicken souvlaki turns out perfectly every time.

Step 1: Prepare the Marinade

In a large ziplock bag or a tightly covered bowl, combine the olive oil, white wine vinegar, minced garlic, Greek seasoning, lemon juice, salt, and black pepper. Shake or whisk these ingredients together vigorously until everything is well combined. You want a homogeneous mixture to ensure even flavoring.

💡 mia’s Pro Tip: Make sure your garlic is finely minced. This releases its maximum flavor into the marinade and ensures no large chunks burn on the grill. A microplane works wonders for this!

Step 2: Marinate the Chicken

Add your bite-sized chicken pieces to the bag or bowl with the marinade. Ensure all chicken pieces are thoroughly coated. If using a bag, press out any excess air before sealing. If using a bowl, cover it tightly. Place the chicken in the refrigerator to marinate overnight, or for at least 6 hours. This long soak is key for the tender and juicy chicken souvlaki everyone craves.

⚠️ Common Mistake to Avoid: Don’t shortchange the marination time! While 30 minutes will add some flavor, less than 6 hours won’t give you the deep, tenderizing effects you want for truly amazing Greek chicken souvlaki. The acid needs time to work its magic.

Step 3: Skewer and Grill

Remove the chicken from the marinade, discarding any leftover marinade to prevent cross-contamination. Thread the chicken onto skewers, making sure not to pack them too tightly. Cook on a preheated outdoor grill or a stovetop grill pan over medium-high heat until the chicken is cooked through and reaches an internal temperature of 165°F (74°C) on an instant-read meat thermometer. This usually takes about 3-5 minutes per side, depending on the thickness of your chicken pieces and grill temperature.

💡 mia’s Pro Tip: If using wooden skewers, remember to soak them in water for at least 30 minutes before threading the chicken. This prevents them from burning on the grill, a trick I learned watching my mother prepare kebabs over charcoal.

Step 4: Rest and Serve

Once cooked, transfer the chicken skewers to a platter and loosely tent them with foil. Let them rest for 5 minutes. This step is crucial for allowing the juices to redistribute throughout the chicken, ensuring each piece is extra juicy and tender. Serve your amazing Greek chicken souvlaki as desired with your favorite accompaniments like pita, tzatziki, and a fresh Greek salad.

⚠️ Common Mistake to Avoid: Cutting into the chicken immediately after grilling can cause all those delicious juices to run out, leaving your chicken dry. Patience for just 5 minutes will be rewarded with a much juicier result.

StepActionDurationKey Visual Cue
1Prepare Marinade5 minsWell-combined liquid mixture
2Marinate Chicken6-12 hoursChicken fully coated, refrigerated
3Skewer & Grill10-15 minsGolden-brown, internal temp 165°F
4Rest & Serve5 minsJuices redistributed, chicken extra tender

Serving & Presentation

When I plate up these Greek chicken souvlaki skewers, I love to imagine I’m serving them at a vibrant outdoor café in Greece, or perhaps in a chic, rustic restaurant right here in NYC. The best way to present them is simply artful. Arrange the skewers dynamically on a large platter, perhaps fanned out or crisscrossed. A scattering of fresh chopped parsley or oregano over the top adds a pop of color and freshness. Don’t forget a generous sprinkle of vivid red paprika or sumac if you have it, for that extra visual and flavor boost, reminiscent of the bright spices in my Moroccan kitchen.

For me, the quintessential pairing is warm, fluffy pita bread, ready to soak up all those delicious juices and sauces. A dollop of creamy, homemade tzatziki is absolutely essential – its cool, refreshing cucumber and garlic notes perfectly complement the savory chicken. I also love to serve it with a vibrant Greek salad, full of crisp lettuce, cherry tomatoes, cucumbers, Kalamata olives, and a sprinkle of feta cheese, all tossed in a simple lemon-oregano vinaigrette. This balance of textures and flavors makes for a truly satisfying meal.

Beyond the classic pairings, you can get a little creative. Offer a side of lemony pilaf rice or roasted new potatoes seasoned with more Greek herbs. Sometimes, I even serve these souvlaki as part of a larger mezze spread, alongside hummus, baba ghanoush, and marinated olives, turning a simple meal into a delightful feast. The beauty of this easy greek chicken is its versatility – it shines beautifully on its own, but it truly sings when surrounded by its Mediterranean friends. It’s a taste of sunshine, no matter the weather outside my apartment window.

Pairing TypeSuggestionsWhy It Works
Side DishWarm pita bread, Greek salad, Lemon rice pilafPita soaks up juices, salad adds freshness, rice offers a comforting base.
Sauce / DipHomemade Tzatziki, Hummus, Feta DipCool & creamy tzatziki contrasts the grilled chicken, hummus adds earthy depth, feta dip for a tangy kick.
BeverageCrisp Sauvignon Blanc, Iced Mint Tea, Sparkling Water with LemonWine offers bright acidity, mint tea is refreshing, sparkling water cleanses the palate.
GarnishFresh parsley, Dill, Lemon wedges, Sprinkle of sumacAdds visual appeal, aromatic freshness, and an extra layer of citrusy tang.

Make-Ahead, Storage & Reheating

Living in New York City with a busy schedule, meal prepping and knowing how to properly store and reheat food is absolutely essential. This Greek chicken souvlaki recipe is fantastic for make-ahead meals, and I often prepare a large batch to enjoy throughout the week. It means I can have a delicious, healthy meal ready in minutes, even after a long day of work or exploring the city’s culinary scene.

MethodContainerDurationReheating Tip
RefrigeratorAirtight container3-4 daysMicrowave on medium with a splash of broth.
FreezerFreezer-safe bag or container2-3 monthsThaw overnight in fridge, reheat gently.
Make-AheadMarinated chicken in ziplockUp to 24 hours (marinated)Grill fresh, assemble when ready to eat.

When reheating, my preferred method for already cooked souvlaki is a quick sauté in a lightly oiled pan over medium heat. This helps to re-crisp the exterior without overcooking the inside. If using a microwave, add a tablespoon of chicken broth or water to the container before heating. This creates a little steam, preventing the chicken from drying out – a small but mighty French technique that makes all the difference! Always ensure it’s heated through to 165°F (74°C).

For make-ahead, you can do all the prep work, marinate the chicken, and even thread it onto skewers the night before. Then, when dinner time rolls around, all you have to do is grill and serve. This kind of planning makes entertaining a breeze and ensures you can enjoy a delicious, homemade meal without last-minute stress, which is truly invaluable in my fast-paced NYC life.

Variations & Easy Swaps

VariationKey ChangeBest ForDifficulty Impact
Spicy Souvlaki TwistAdd Harissa or red pepper flakes to marinadeThose who love a kick of heat in their food.Minimal
Dairy-Free Creamy TzatzikiUse coconut yogurt or cashew cream for tzatzikiLactose-intolerant or vegan guests.Slight (for making alternative sauce)
Mediterranean Herb BurstAdd fresh dill and mint to marinade/garnishHerb lovers, or a fresher, brighter flavor profile.Minimal

Spicy Souvlaki Twist

For those who appreciate a bit of heat, transform this easy greek chicken souvlaki into a spicy delight! Simply add a teaspoon of harissa paste (a nod to my Moroccan roots!) or a generous pinch of red pepper flakes to your marinade. The chili adds a wonderful depth and warmth that complements the Mediterranean flavors beautifully without overpowering them. It’s a subtle but impactful change that will awaken your taste buds.

Dairy-Free Creamy Tzatziki

If you’re dairy-free or hosting guests with dietary restrictions, you can still enjoy a creamy tzatziki. My go-to swap is using unsweetened coconut yogurt or a homemade cashew cream base instead of traditional Greek yogurt. Just be sure to drain any excess liquid from the coconut yogurt to get that thick consistency. The slight sweetness of coconut yogurt pairs surprisingly well with the garlic and cucumber, adding a unique twist without compromising the cooling effect this essential souvlaki accompaniment provides. I’ve tested this out many times in my NYC kitchen for clients, and it’s always a hit.

Mediterranean Herb Burst

While Greek seasoning is fantastic, sometimes I love to amplify the fresh herb notes, especially when I find beautiful fresh dill and mint at my local farmers market. You can finely chop a tablespoon of fresh dill and mint and add it directly to the marinade along with the dried Greek seasoning. This infusion of fresh herbs beforehand elevates the aroma and provides an even brighter, more herbaceous flavor profile to your chicken souvlaki. You can also sprinkle extra fresh herbs as a garnish for maximum impact.

What is the best marinade for Greek chicken souvlaki?

The best marinade for Greek chicken souvlaki, in my opinion, combines good quality olive oil, fresh lemon juice for brightness, white wine vinegar for tang, and plenty of minced garlic. The herbaceous backbone comes from a robust Greek seasoning blend, which typically includes oregano, thyme, and sometimes marjoram. The acidity from the lemon and vinegar not only infuses incredible flavor but also acts as a natural tenderizer, ensuring your chicken is juicy and succulent. This blend strikes the perfect balance for authentic, flavorful results every time.

Can I make Greek chicken souvlaki without a grill?

Absolutely! While grilling gives that classic charred flavor, you can certainly make delicious Greek chicken souvlaki without an outdoor grill. My go-to method in my NYC apartment is a stovetop grill pan, which offers similar char marks and flavor. Alternatively, you can bake the skewers in the oven at 400°F (200°C) for 15-20 minutes, flipping halfway, until cooked through. An air fryer is another fantastic option; cook at 375°F (190°C) for 10-12 minutes, shaking the basket occasionally. The key is to achieve a good internal temperature of 165°F for food safety.

What are traditional sides to serve with chicken souvlaki?

Traditional sides really complete the Greek chicken souvlaki experience. Hands down, the most classic pairing is warm pita bread and a generous dollop of creamy tzatziki sauce made with cucumber, garlic, and yogurt. A fresh Greek salad, with crisp lettuce, ripe tomatoes, red onion, Kalamata olives, and a sprinkle of feta, is also a must. Other delicious choices include lemon-infused rice pilaf, roasted potatoes seasoned with oregano and lemon, or a simple side of grilled vegetables like bell peppers and zucchini. It’s all about balancing flavors and textures to create a harmonious meal.

How long should you marinate chicken for souvlaki?

For Greek chicken souvlaki, I recommend marinating the chicken for at least 6 hours, and ideally overnight or up to 24 hours. The acidity from the lemon juice and vinegar needs time to tenderize the chicken and allow the robust Greek seasoning, garlic, and olive oil flavors to fully penetrate the meat. While a shorter marinade (around 30 minutes to an hour) will add some surface flavor, it won’t give you the deep, juicy, and tender results that make this dish truly shine. Plan ahead for the best possible outcome!

Can I prepare chicken souvlaki skewers ahead of time?

Absolutely! Chicken souvlaki is an excellent make-ahead meal. You can marinate the chicken for up to 24 hours in the refrigerator. For added convenience, you can even thread the marinated chicken onto skewers a few hours before you plan to cook them. Just keep them covered and chilled until you’re ready to grill or bake. This makes entertaining or busy weeknights so much easier, as all the prep work is done, and you simply need to cook the skewers fresh for the best flavor and texture.

What’s the best way to ensure the chicken stays juicy?

To ensure your chicken souvlaki stays incredibly juicy, there are a few key steps I always follow. First, don’t skimp on the marination time; the acid in the marinade helps tenderize the meat. Second, cook the chicken to the correct internal temperature of 165°F (74°C) without overcooking. Use an instant-read thermometer for accuracy. Finally, and crucially, let the cooked chicken rest for at least 5 minutes, loosely tented with foil, after it comes off the heat. This allows the juices to redistribute, leading to a much more tender and moist result. This is a fundamental technique I use with all my grilled meats.

Share Your Version!

I poured my heart and culinary experience into crafting this easy greek chicken souvlaki recipe, and I truly hope it brings a touch of Mediterranean sunshine to your kitchen! I’d be absolutely thrilled to hear how it turns out for you. Your feedback helps me refine my recipes and helps others discover new favorites.

Please leave a star rating and a comment below – tell me what you loved, any adjustments you made, or what you served it with! If you snap a photo of your beautiful creation, don’t forget to share it on Instagram or Pinterest and tag me @exorecipe. I absolutely adore seeing your culinary adventures. And tell me, what’s your favorite way to serve souvlaki for a crowd? I’m always looking for fresh ideas!.

From my NYC kitchen to yours — I hope this recipe brings as much warmth to your table as it does to mine. — mia 🧡

📌

Love This Recipe? Save It to Pinterest!

If you enjoyed this Greek Chicken Souvlaki Recipe recipe, don’t let it get lost in your browser tabs! 😄 Pin it now so you can find it again anytime — and explore hundreds more tried-and-tested recipes waiting for you on my Pinterest boards.

👉 Follow mia on Pinterest @chefrecipes2

📌 Pin this recipe · 🔁 Re-pin your favorites · 💬 Tag me when you make it — I love seeing your creations!

“`

Print

clock clock iconcutlery cutlery iconflag flag iconfolder folder iconinstagram instagram iconpinterest pinterest iconfacebook facebook iconprint print iconsquares squares iconheart heart iconheart solid heart solid icon

Greek Chicken Souvlaki Recipe

  • Author: Chef Mia

Description

This tender and juicy Chicken Souvlaki is a classic Greek street food. The marinated chicken is packed with Mediterranean flavor and will bring the taste of Greece right to your kitchen!


Ingredients

Scale
  • 1 lb. boneless, skinless, chicken breasts or thighs ( cut into bite size pieces)
  • 2 tablespoons olive oil
  • 1 tablespoon white wine vinegar
  • 4 large garlic cloves (minced)
  • 3 tablespoons Greek Seasoning
  • 1 large lemon (juiced)
  • 1/2 teaspoon salt
  • 1/2 teaspoon freshly cracked black pepper

Instructions

  1. Combine all ingredients in a ziplock bag and shake well to mix. Add chicken and shake to ensure the marinade is covering chicken. Allow to marinate in the refrigerator overnight, or for at least 6 hours. You can also do this in a tightly covered bowl.
  2. Remove chicken from marinade, and toss the leftover marinade. Thread chicken onto skewers and grill until cooked through on an outdoor grill, or on the stove top with a grill pan. Chicken is done once it is cooked through and reaches 165°F on an instant read meat thermometer. See notes below to cook in oven or air fryer.
  3. Let chicken rest for 5 minutes wrapped in foil, then serve as desired! This step seems unimportant, but it will ensure extra juicy and tender chicken.


Nutrition

  • Calories: 261 kcal
  • Fat: 11 g
  • Carbohydrates: 3 g
  • Protein: 36 g


Greek Chicken Souvlaki Recipe

Easy One Pot Shawarma Chicken and Rice Recipe

One Pot Shawarma Chicken and Rice – A Chef’s Quick Weeknight Delight

⚖️
Difficulty
Easy
⏲️
Prep Time
15 mins
🕒
Cook Time
30 mins
⏱️
Total Time
45 mins
🍽️
Servings
4

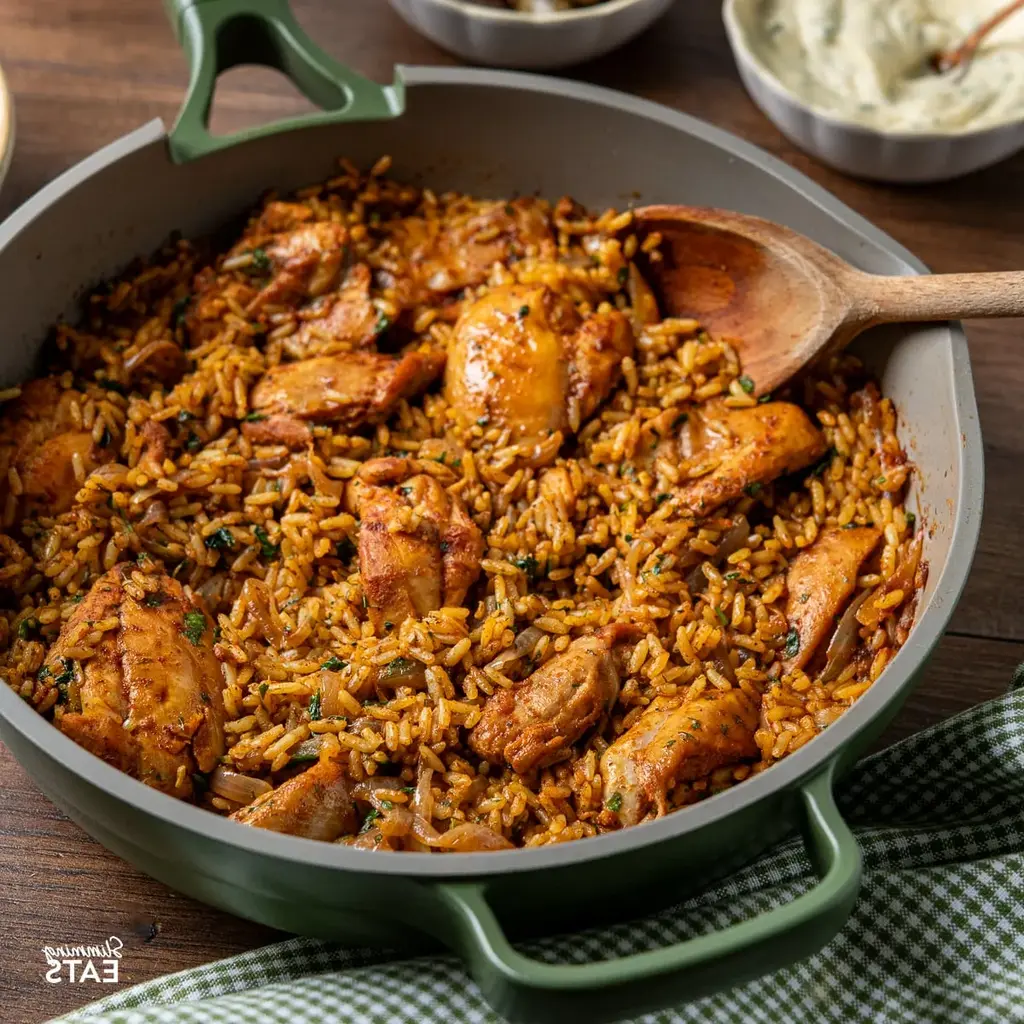
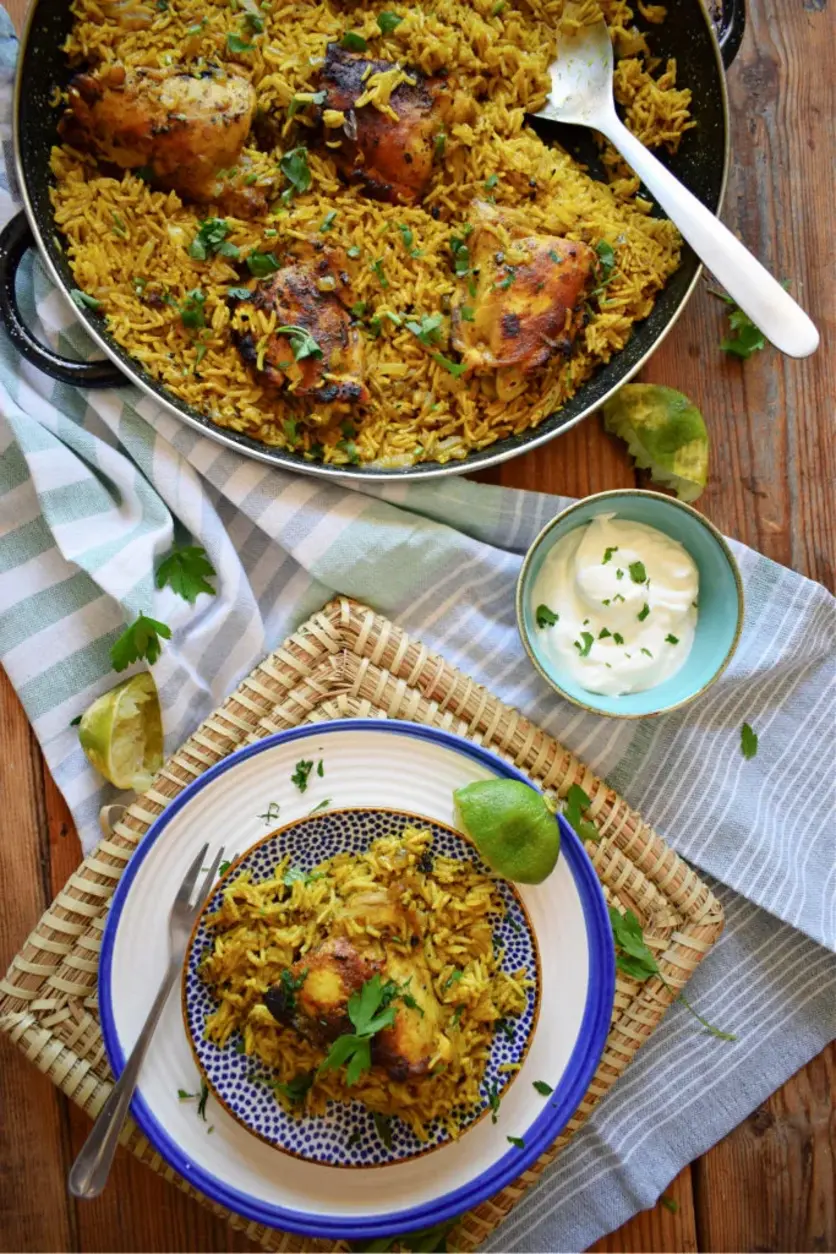
Growing up in Morocco, the kitchen was always the heart of our home, bustling with the aroma of spices and the warmth of family. After culinary training in Paris and now thriving in the vibrant food scene of New York City, I’ve learned to blend those rich traditions with the need for speed and simplicity. This One Pot Shawarma Chicken and Rice recipe is a perfect example – it brings all the complex, aromatic flavors of a classic Middle Eastern dish right to your weeknight table, but in a fraction of the time and with minimal cleanup. It’s a true game-changer for anyone craving authentic taste without the fuss, combining tender, spice-laden chicken with fluffy, flavorful rice, all cooked together in a single pan.

Imagine the scent of toasted cumin, earthy coriander, and sweet paprika mingling with the fragrant steam of simmering rice, punctuated by the bright tang of lemon and a hint of smoky heat. The chicken, seared to a golden crisp before gently simmering with the rice, becomes incredibly tender, absorbing all those beautiful shawarma spices. Each spoonful is a symphony of textures and tastes: the succulent chicken, the perfectly cooked grains of rice infused with onion and garlic, and the fresh burst of parsley and dill that brightens every bite. This dish isn’t just a meal; it’s an aromatic journey, reminiscent of the bustling souks of Marrakech and the vibrant spice markets of the Middle East, all from your own stovetop.

The beauty of this easy one pot chicken dinner lies in its simplicity and profound flavor development. Unlike traditional shawarma that demands hours on a vertical spit, I’ve adapted the essence of those spices and cooking methods to work efficiently in one pot. My unique chef’s approach focuses on building layers of flavor through proper searing and patient steaming, ensuring each component perfectly complements the other. I’ll share a special pro tip for achieving maximum flavor with minimal effort, and highlight a common mistake cooks often make when tackling one-pot dishes, so you can avoid it and create a truly spectacular meal.

Why This One Pot Shawarma Chicken and Rice Recipe Is the Best

This One Pot Shawarma Chicken and Rice stands out from the rest. My Moroccan roots taught me the power of spices, and my French training emphasized technique. Here, I’ve combined them to create a dish where the chicken isn’t just coated in spices; it’s deeply infused. The initial sear locks in juices and creates a beautiful crust, while the slow simmer allows the chicken to become incredibly tender and the rice to absorb every nuance of the shawarma seasoning. It’s a harmonious blend, not just a chicken dish with rice on the side.

The secret to its perfected texture lies in the steam. After searing the chicken and building the flavor base with onions and garlic, the rice is added and coated in the delicious pan drippings. Pouring in the hot stock and allowing it to absorb before sealing the pot for a final steam ensures that every grain of rice is perfectly cooked, separate, and fluffy, not mushy. This “don’t peek” steaming method, a trick I learned in my mother’s kitchen, is crucial for that ideal pilaf-like consistency, preventing the rice from sticking and ensuring even cooking.

As a busy chef in NYC, I know the value of a foolproof, fast meal. This recipe is designed for maximum flavor with minimum fuss, making it an excellent easy one pot chicken dinner for any night of the week. By using just one pan from start to finish, you save on cleanup without compromising on taste. It’s perfect for beginners yet satisfying enough for seasoned cooks, delivering a rich, satisfying meal that tastes like you spent hours, but actually comes together in under an hour. It truly is middle eastern chicken and rice made simple.

One Pot Shawarma Chicken and Rice Ingredients

When I shop for ingredients for this dish, I often pop into the amazing spice shops in Brooklyn or hit up the Union Square Greenmarket for the freshest produce. It reminds me of the vibrant markets back home in Morocco, where the scent of spices hangs heavy in the air. Quality ingredients truly make all the difference, but I’ve also perfected some fantastic swaps for when you can’t find that exact item.

Ingredients List

  • 6 boneless skinless chicken thighs, raw (trimmed of visible fat) – approx 21oz
  • 2 teaspoons of ground cumin
  • 2 teaspoons of ground coriander
  • 2 teaspoons of paprika
  • 1 teaspoon of smoked paprika
  • ¾ teaspoon of salt
  • ½ teaspoon of black pepper
  • ½ teaspoon of turmeric
  • ½ teaspoon of ground cardamom
  • ¼ teaspoon of chilli flakes (red pepper flakes) – can use more if you prefer
  • 1.5 tablespoons of lemon juice
  • 1 tablespoon of olive oil
  • 1 medium onion, halved and finely sliced
  • 3 cloves of garlic, crushed
  • 1 cup (180g) of uncooked long grain rice
  • 2 cups (480ml) of chicken stock (hot)
  • salt and black pepper (for seasoning)
  • 2 tablespoons of fresh chopped parsley
  • 1/2 teaspoon of dried dill

Ingredient Spotlight

Boneless Skinless Chicken Thighs: I prefer chicken thighs because their higher fat content keeps them incredibly moist and flavorful during cooking, which is essential for a one-pot dish where they simmer directly with the rice. When choosing, look for thighs that are plump and firm. If you only have chicken breast, you can use it, but slice it into larger 1-inch pieces and be mindful not to overcook it, or it can dry out. The flavor will be slightly less rich, but still delicious.

Aromatic Spices (Cumin, Coriander, Paprika, Turmeric, Cardamom, Chili Flakes): This blend is the soul of our shawarma chicken recipe. Cumin and coriander bring warmth, paprika offers depth, turmeric adds color and a subtle earthiness, and cardamom introduces a unique, intoxicating fragrance. The chili flakes provide a gentle kick. For best results, use freshly ground spices whenever possible. If you’re missing one, say cardamom, the dish will still be wonderful, just a little different. A good quality curry powder can be a last resort substitute for the entire blend, but the flavor profile will shift.

Long Grain Rice: Long grain rice is key for its fluffy, separate grains after cooking, which is what we want for a pilaf-style dish. Basmati or jasmine rice works beautifully here, offering a subtle fragrance. Avoid short-grain, sticky, or arborio rice, as they will release too much starch and result in a gummy texture. If you only have brown long-grain rice, you’ll need to increase the chicken stock and cooking time significantly, as it takes much longer to cook through.

Lemon Juice: Fresh lemon juice is crucial for brightening the heavy spices and tenderizing the chicken slightly. Always opt for fresh over bottled; the flavor is incomparable. It provides that essential tang that cuts through the richness and defines the shawarma taste. If you don’t have fresh lemon, a tablespoon of apple cider vinegar can offer some acidity, but it won’t quite replicate the fresh citrus notes.

Hot Chicken Stock: Using hot stock helps to maintain the pan’s temperature and speeds up the cooking process of the rice evenly. Low-sodium stock gives you more control over the final seasoning. If you don’t have chicken stock, vegetable stock or even water can be used, though you’ll miss out on some depth of flavor. In that case, add an extra pinch of salt to compensate.

Original IngredientBest SubstitutionFlavor / Texture Impact
Boneless, Skinless Chicken ThighsBoneless, Skinless Chicken Breast (cut into larger cubes)Slightly drier texture, less rich flavor; cook time might need minor adjustment.
Ground CardamomA pinch of allspice or nutmegDifferent aromatic profile; cardamom is unique, but this can mimic complexity.
Long Grain Rice (Basmati/Jasmine)Other long grain white rice (e.g., standard white rice)May be slightly less fragrant and fluffy, but still acceptable. Avoid short grain rice.
Fresh Lemon Juice1 tbsp apple cider vinegarProvides acidity but lacks the bright citrus notes; use sparingly.
Chicken Stock (Hot)Vegetable Stock (Hot) or Water + 1/2 tsp bouillonLess savory depth, a vegetarian option. Add extra seasoning if using water.
One Pot Shawarma Chicken and Rice
The vibrant spices and fresh chicken, ready to transform into a delicious one-pot meal.

How to Make One Pot Shawarma Chicken and Rice — Step-by-Step

Creating this Middle Eastern chicken and rice masterpiece is simpler than you think, even for a busy weeknight. Just follow these steps, and you’ll be enjoying a flavorful, satisfying meal in no time!

Step 1: Prepare the Chicken

Begin by slicing your boneless, skinless chicken thighs in half horizontally. This thoughtful cut helps them cook more evenly and assimilate more flavor from the spices. In a medium bowl, combine all the dry spices: ground cumin, ground coriander, paprika, smoked paprika, salt, black pepper, turmeric, ground cardamom, and chili flakes. Add the lemon juice to this spice mixture. Then, add the sliced chicken thighs to the bowl and mix thoroughly until every piece is beautifully coated in the aromatic spice blend. This ensures the chicken is packed with flavor.

💡 mia’s Pro Tip: The lemon juice here is not just for flavor; it slightly tenderizes the chicken and helps the spices adhere beautifully. Don’t skip this step – it’s a little trick I learned from marinating meats in Morocco!

Step 2: Sear the Chicken

Heat the olive oil in a large, deep frying pan or Dutch oven over medium-high heat. Once shimmering, carefully add the seasoned chicken thighs to the pan (you may need to do this in two batches to avoid overcrowding, which prevents proper searing). Fry the chicken for 3-4 minutes on each side until it develops a gorgeous golden-brown color. This searing step is vital for building deep flavor and creating a lovely texture. During the last minute of searing, or as you flip the chicken, scatter the finely sliced onion and crushed garlic in between the chicken pieces, allowing them to soften slightly and release their aromas into the pan.

⚠️ Common Mistake to Avoid: Overcrowding the pan during searing will steam the chicken instead of browning it, leading to a duller flavor and less appealing texture. Give the chicken room to breathe and brown beautifully.

Step 3: Cook Rice

Once the chicken is seared and the onions and garlic are fragrant, add the uncooked long grain rice directly to the pan. Stir gently for about one minute, allowing the rice to toast slightly in the flavorful pan drippings and olive oil. This step is often overlooked but contributes significantly to the nutty flavor and separate grains of the finished rice. Continue to stir until the rice turns slightly translucent.

Step 4: Simmer and Steam

Pour the hot chicken stock into the pan, submerging the chicken and rice. Give it one gentle stir to ensure everything is evenly distributed. Bring the mixture to a boil over medium-high heat. Once boiling, reduce the heat to medium and let it bubble uncovered until the liquid is just absorbed, and you can see small craters forming on the surface of the rice – this should take about 8-10 minutes. Crucially, do not stir during this period! Once the stock is mostly absorbed, immediately cover the pan tightly with a lid, turn OFF the heat, and let it steam undisturbed for 12 minutes. Resist the urge to peek!

💡 mia’s Pro Tip: “Don’t peek” rule is essential for perfectly fluffy rice! Lifting the lid releases the steam, which is critical for the rice to cook through evenly and prevent it from becoming sticky. This is a classic French pilaf technique adapted for our one-pot wonder.

Step 5: Season and Garnish

After the 12 minutes of steaming, carefully remove the lid. The aromas will be incredible! Taste a small spoonful of the rice and chicken, then season with additional salt and black pepper to your preference. Gently fluff the rice with a fork, incorporating any delicious crispy bits from the bottom. Finally, stir in the fresh chopped parsley and dried dill. These herbs add a wonderful freshness and visual appeal, balancing the richness of the spices.

Step 6: Serve

Your spectacular One Pot Shawarma Chicken and Rice is ready! Serve it hot, straight from the pan, perhaps with a dollop of yogurt or a fresh cucumber salad on the side. Enjoy the fruits of your quick weeknight chicken recipe — a truly satisfying and flavorful meal.

⚠️ Common Mistake to Avoid: Don’t over-stir the rice after it has cooked. A gentle fluff with a fork is all it needs to separate the grains without turning them mushy.

StepActionDurationKey Visual Cue
1Prepare the Chicken5 minsChicken coated in uniform spice paste.
2Sear the Chicken6-8 minsGolden-brown crust on chicken; fragrant onions/garlic.
3Cook Rice1 minRice becomes translucent.
4Simmer and Steam~10 mins (simmer) + 12 mins (steam)Liquid just absorbed, then steam with lid ON (no peeking!).
5Season and Garnish2 minsFresh parsley and dill stirred in.
6ServeImmediateAromatic, vibrant, and ready to eat.

Serving & Presentation

Serving this One Pot Shawarma Chicken and Rice is almost as delightful as making it. I love bringing the pan straight to the table, family-style, letting everyone dig into the fragrant, steaming dish. For a beautiful presentation, I often transfer it to a large, warm platter, arranging the chicken artfully over the rice, then scattering extra fresh chopped parsley and maybe a sprinkle of colorful pomegranate seeds, if they’re in season. A drizzle of good quality extra virgin olive oil and a squeeze of fresh lemon juice just before serving brightens everything up further.

To complete this middle eastern chicken and rice experience, think about balancing flavors and textures. In my NYC kitchen, I frequently pair it with a simple, refreshing salad – perhaps a finely diced cucumber and tomato salad with a mint-lemon vinaigrette, reminiscent of those I’d eat in Moroccan summers. A dollop of cool, creamy Greek yogurt or homemade labneh on the side offers a wonderful counterpoint to the spiced chicken.

For a more substantial meal, offer some warm pita bread or crunchy falafel. And to drink? A light, crisp white wine, or for a non-alcoholic option, a refreshing mint tea or homemade lemonade would be perfect. This dish is hearty enough on its own, but these thoughtful additions truly elevate it to a celebratory feast, whether it’s a casual weeknight or a special gathering.

Pairing TypeSuggestionsWhy It Works
Side DishCucumber & Tomato Salad, Hummus, Roasted VegetablesAdds fresh crunch, creamy texture, and balances the rich rice and chicken.
Sauce / DipGreek Yogurt, Tahini Sauce, TzatzikiCool, tangy contra to the warm spices; adds moisture.
BeverageMint Tea, Lemonade, Light White WineRefreshing and cleanses the palate, complementing the savory flavors.
GarnishFresh Parsley, Pomegranate Seeds, Extra Lemon WedgesAdds color, fresh aroma, and a burst of tartness.

Make-Ahead, Storage & Reheating

Living in NYC means life moves fast, and I often rely on clever make-ahead strategies to keep my culinary adventures going even on the busiest days. This One Pot Shawarma Chicken and Rice is fantastic for meal prepping, allowing you to enjoy those vibrant flavors long after it’s freshly cooked. It adapts beautifully to storage, making your weeknights incredibly easy.

MethodContainerDurationReheating Tip
RefrigeratorAirtight containerUp to 3-4 daysMicrowave with a splash of water, or in a covered pan on low heat.
FreezerFreezer-safe container or bagUp to 3 monthsThaw overnight in fridge, then reheat as above. Add fresh herbs.
Make-AheadPre-marinated chicken, pre-chopped onions/garlicChicken 1 day in advanceMarinate chicken, chop aromatics, measure spices. Assemble on cook day.

When reheating, particularly from the refrigerator, I always add a small splash of water or chicken stock (about a tablespoon or two per serving) before microwaving or heating in a pan on the stovetop. This helps create steam and prevents the rice and chicken from drying out, keeping them moist and flavorful. For stovetop reheating, use medium-low heat and keep the pan covered, stirring occasionally, until everything is heated through. It’s almost as good as fresh, and makes those quick weeknight chicken recipes a breeze.

If freezing, consider freezing individual portions. This makes thawing and reheating much quicker and more convenient. While the fresh herbs added at the end are best fresh, you can always stir in a few fresh sprigs after reheating to revive the dish’s brightness. This method ensures that your middle eastern chicken and rice retains its delicious quality, making it a stellar option for busy schedules.

Variations & Easy Swaps

Part of the culinary adventure is adapting and playing with flavors. This shawarma chicken recipe is incredibly versatile, and I love experimenting with variations inspired by my Moroccan heritage and the diverse influences I find in NYC’s food scene.

VariationKey ChangeBest ForDifficulty Impact
Spicy Moroccan TwistAdd more chili flakes, harissa paste, chickpeas and preserved lemon rind.Those who love bold, fiery flavors and aromatic complexity.Slightly increased prep for extra ingredients.
Gluten-Free / Dairy-Free AlternativeEnsure gluten-free stock, swap out any dairy sides.Dietary restrictions; maintains core flavor profile.No change to main recipe, minor side dish adjustment.
Mediterranean FreshnessAdd chopped bell peppers, zucchini, sun-dried tomatoes; finish with feta.Seeking a lighter, vegetable-forward profile with salty notes.Adds an extra chopping step.

Spicy Moroccan Twist

To give this one pot shawarma chicken and rice a vibrant Moroccan kick like I remember from my childhood, increase the chili flakes to ½ teaspoon or more, if you dare! You can also stir in 1-2 tablespoons of harissa paste along with the hot chicken stock for a deeper, smoky heat. For an authentic touch, add ½ cup of canned chickpeas (drained and rinsed) when you add the rice, and ½ preserved lemon rind, finely minced, at the end with the fresh herbs. The preserved lemon adds an incredible salty, tangy, umami depth that is truly Moroccan.

Gluten-Free / Dairy-Free Alternative

This middle eastern chicken and rice recipe is naturally quite adaptable for dietary needs! To ensure it’s fully gluten-free, simply double-check that your chicken stock is certified gluten-free (most are, but it’s always good to check the label). For a dairy-free version, simply omit any optional yogurt or labneh serving suggestions. The main recipe itself contains no dairy or gluten, making it a perfect quick weeknight chicken recipes solution for those with sensitivities without compromising flavor or texture.

Mediterranean Freshness

For a lighter, more vegetable-forward take on this easy one pot chicken dinner, you can stir in some chopped bell peppers (red, yellow, or orange) and diced zucchini along with the onions and garlic. They’ll soften beautifully as the dish cooks, adding color and sweetness. A handful of chopped sun-dried tomatoes (oil-packed, drained) can also be added with the rice for a burst of concentrated flavor. Finish the dish by crumbling some good quality feta cheese over the top just before serving, bringing a salty, briny Mediterranean flair that I often discover in the diverse offerings at the NYC farmers markets.

What cut of chicken is best for one pot shawarma chicken and rice?

For this One Pot Shawarma Chicken and Rice recipe, I highly recommend using boneless, skinless chicken thighs. Their higher fat content ensures they remain incredibly moist and tender throughout the cooking process, even when simmering directly with the rice. They absorb the vibrant shawarma spices beautifully, contributing a richer, more succulent flavor to the overall dish. While chicken breast can be used, it tends to dry out more easily, so if you opt for breast, consider cutting it into slightly larger pieces and being careful not to overcook it.

Can I make shawarma chicken and rice without a specific spice like sumac?

Absolutely! My recipe for One Pot Shawarma Chicken and Rice is designed to be flexible. While spices like sumac (not included in this particular recipe, but common in shawarma blends) or cardamom add unique layers of flavor, the core blend of cumin, coriander, paprika, and turmeric will still give you that recognizable Middle Eastern essence. If you’re missing one specific spice like cardamom, the dish will still be delicious, just a subtle variation from the original. Feel free to adjust the spice blend to your pantry’s contents and your personal preferences without fear of ruining the dish.

How long does it take to cook one pot shawarma chicken and rice?

This easy one pot chicken dinner is a fantastic quick weeknight chicken recipe! The total time from start to finish is approximately 45 minutes. You’ll spend about 15 minutes on prep work, which includes marinating the chicken and gathering your ingredients, and then around 30 minutes for active cooking. The beauty of this middle eastern chicken and rice dish is that much of the cooking time is hands-off, allowing the flavors to meld beautifully while you relax or prepare your optional side dishes.

What can I serve with shawarma chicken and rice for a complete meal?

To make your One Pot Shawarma Chicken and Rice a truly complete and balanced meal, I love to pair it with fresh, vibrant components. A simple cucumber and tomato salad dressed with a lemon-mint vinaigrette offers a refreshing crunch. A dollop of cool, creamy Greek yogurt or homemade labneh provides a lovely tangy contrast to the warm spices. Warm pita bread is fantastic for scooping up any extra rice. For greens, a side of lightly steamed or roasted green beans with a squeeze of lemon works wonderfully. It’s all about balancing the rich, savory flavors with fresh, bright accents.

Can I use brown rice instead of white long-grain rice?

While long-grain white rice like Basmati or Jasmine is traditionally preferred for its fluffy texture in this One Pot Shawarma Chicken and Rice, you can certainly use brown rice for a healthier, nuttier alternative. However, it’s crucial to adjust the cooking liquid and time. Brown rice typically requires more liquid (about 2.5 cups of stock per cup of rice) and a longer simmering and steaming period, often an additional 15-20 minutes, to soften properly. Keep an eye on it and add more liquid if needed, ensuring it’s fully cooked before turning off the heat.

Share Your Version!

I poured my heart and soul, and a dash of my Moroccan heritage, into perfecting this One Pot Shawarma Chicken and Rice recipe, and I truly hope it brings warmth and joy to your kitchen. I’d absolutely love to hear about your experience!

Please take a moment to leave a star rating and comment below to let me know how it turned out for you. Your feedback means the world to me and helps our growing community of home cooks. And if you snap a photo of your delicious creation, be sure to share it on Instagram or Pinterest and tag @exorecipes! I genuinely love seeing your culinary triumphs. How did the simple act of searing the chicken before cooking the rice impact the final flavor for you?

From my NYC kitchen to yours — I hope this recipe brings as much warmth to your table as it does to mine. — mia 🧡

📌

Love This Recipe? Save It to Pinterest!

If you enjoyed this One Pot Shawarma Chicken and Rice recipe, don’t let it get lost in your browser tabs! 😄 Pin it now so you can find it again anytime — and explore hundreds more tried-and-tested recipes waiting for you on my Pinterest boards.

👉 Follow mia on Pinterest @chefrecipes2

📌 Pin this recipe · 🔁 Re-pin your favorites · 💬 Tag me when you make it — I love seeing your creations!

Print

clock clock iconcutlery cutlery iconflag flag iconfolder folder iconinstagram instagram iconpinterest pinterest iconfacebook facebook iconprint print iconsquares squares iconheart heart iconheart solid heart solid icon

One Pot Shawarma Chicken and Rice

  • Author: Chef Mia

Description

If you’re in search of a hassle-free, one-pan recipe bursting with flavour, you’re going to adore this One Pot Shawarma Chicken and Rice, featuring an exquisite blend of Middle Eastern spices.


Ingredients

Scale
  • 6 boneless skinless chicken thighs, raw (trimmed of visible fat) – approx 600g (21oz)
  • 2 teaspoons of ground cumin
  • 2 teaspoons of ground coriander
  • 2 teaspoons of paprika
  • 1 teaspoon of smoked paprika
  • ¾ teaspoon of salt
  • ½ teaspoon of black pepper
  • ½ teaspoon of turmeric
  • ½ teaspoon of ground cardamom
  • ¼ teaspoon of chilli flakes (red pepper flakes) – can use more if you prefer
  • 1.5 tablespoons of lemon juice
  • 1 tablespoon of olive oil
  • 1 medium onion, halved and finely sliced
  • 3 cloves of garlic, crushed
  • 180g (1 cup) of uncooked long grain rice
  • 2 cups (480ml) of chicken stock (hot)
  • salt and black pepper
  • 2 tablespoons of fresh chopped parsley
  • 1/2 teaspoon of dried dill

Instructions

  1. Prepare the Chicken: Slice the chicken thighs in half horizontally. Add the chicken thigh halves to the bowl with the seasonings and lemon juice and mix until they are well coated.
  2. Sear the Chicken: Heat olive oil in a large, deep frying pan over medium-high heat. Add the seasoned chicken thighs to the pan. Fry the chicken for 3-4 minutes on each side until they turn a lovely golden color. Be patient during this step to achieve the desired colour. Scatter the chopped onion and minced garlic in between the chicken thighs when you flip them over.
  3. Cook Rice: Add the rice to the pan with the chicken and cook for about a minute until the rice becomes translucent. Pour in the chicken stock and gently stir to evenly distribute the ingredients.
  4. Simmer and Steam: Let the mixture bubble on medium heat with the lid off until the stock is just absorbed into the rice. Do not stir during this period. Once the stock is absorbed, cover the pan with a lid, turn off the heat, and leave it to steam with the lid on for 12 minutes. Do not lift the lid during this time.
  5. Season and Garnish: After 12 minutes, carefully remove the lid. Taste the dish and season with salt and black pepper as needed. Stir in the freshly chopped parsley and dill.
  6. Serve: Serve the Shawarma Chicken and Rice with your choice of sides and enjoy


Nutrition

  • Calories: 430 calories
  • Sugar: 2 grams sugar
  • Fat: 12 grams fat
  • Carbohydrates: 45 grams carbohydrates
  • Protein: 33 grams protein


One Pot Shawarma Chicken and Rice

k">

Tried This Recipe? Leave a Comment!

Did you make this recipe? I’d love to hear how it turned out! Please leave a comment and a rating below. Your feedback helps other home cooks and supports cheerychop.com!
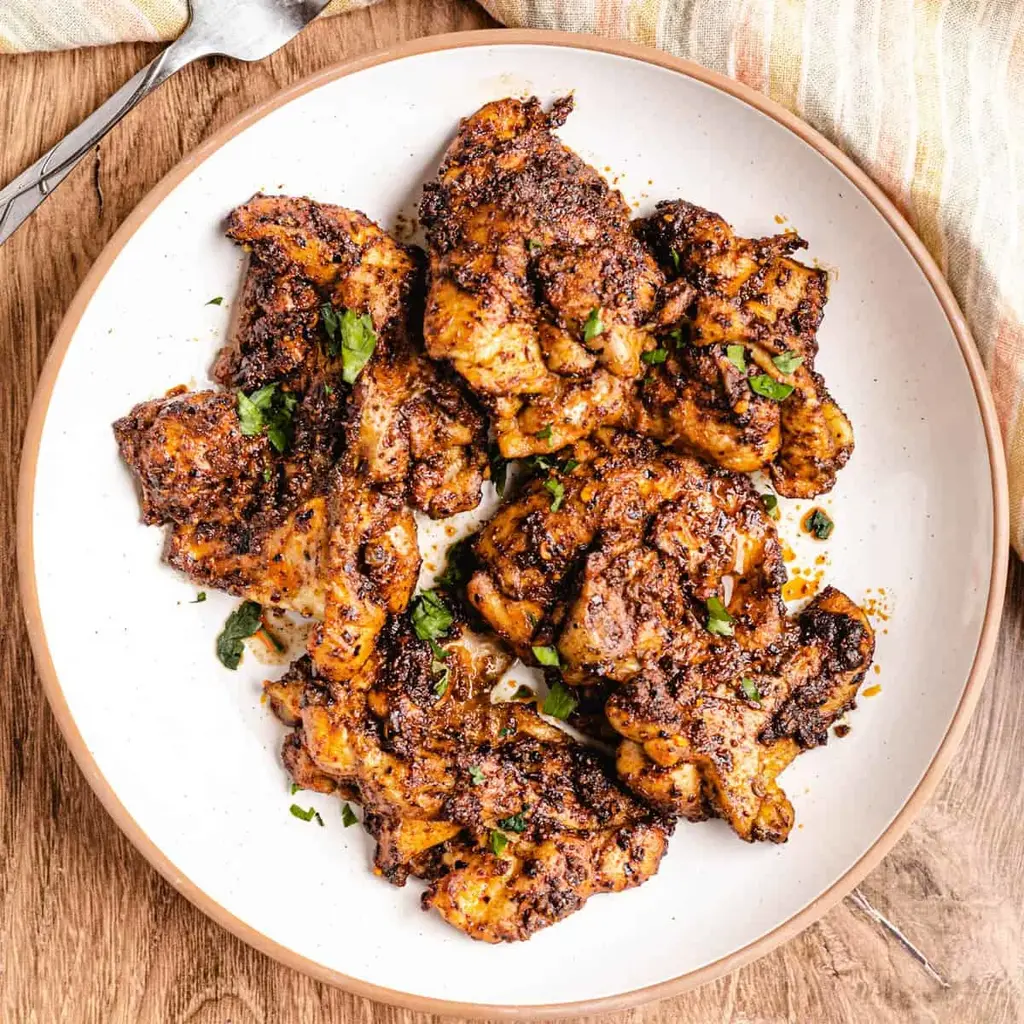
For more delicious inspiration, follow me on Pinterest!

Authentic Moroccan Chicken and Rice One-Pot Meal

Moroccan Chicken & Rice: One-Pot Wonder – Effortless Flavor

⚖️
Difficulty
Easy
⏲️
Prep Time
15 mins
🕒
Cook Time
40 mins
⏱️
Total Time
55 mins
🍽️
Servings
4

Growing up in Morocco, the aroma of spices was the soundtrack to my childhood kitchen. My mother, bless her heart, had a way with making simple ingredients sing. This Moroccan chicken and rice recipe, a true one-pot wonder, takes me right back to those cherished memories, but with a busy NYC twist – it’s designed to be effortlessly flavorful and simple enough for any weeknight. It’s a dish that perfectly marries tender, spice-infused chicken with aromatic, fluffy rice, creating a meal that feels both exotic and comforting. Forget complicated steps; this recipe is about maximizing flavor with minimal fuss, proving that authentic taste can be achieved even on a tight schedule.

What truly sets this Moroccan chicken recipe apart is the harmonious blend of warm spices like turmeric, cumin, and coriander that deeply penetrate the chicken during marination, then infuse into the rice as it cooks. The golden-hued basmati rice, tender and subtly fragrant, becomes a canvas for the succulent chicken thighs, their skins crisping up beautifully. The subtle char from browning the chicken before it gets nestled into the rice adds a depth of flavor that is simply irresistible. This isn’t just a meal; it’s a sensory experience, transporting you to the vibrant souks of Morocco with every delicious bite.

As a chef trained in Paris and now making my culinary home in New York, I’ve refined this Moroccan chicken and rice to capture the essence of my heritage while making it accessible. The beauty of this dish lies in its simplicity and the use of the right techniques. You’ll find my unique approach to perfectly fluffing the rice, a technique often overlooked but crucial for texture. I’ll share a pro tip on maximizing flavor from your spices and point out a common mistake to avoid when cooking one-pot dishes to ensure your success in the kitchen.

Why This Moroccan Chicken and Rice Recipe Is the Best

The flavor secret of this Moroccan chicken and rice lies in the marinade. Drawing from my French culinary training, I emphasize the importance of deep flavor penetration. The lemon juice tenderizes the chicken while the blend of turmeric, cumin, coriander, and oregano creates a complex, earthy, and aromatic profile that is distinctly Moroccan. This isn’t just seasoning; it’s a foundation built on generations of flavor knowledge, ensuring every bite is rich and satisfying.

Achieving perfectly cooked rice with chicken in a one-pot meal can be tricky, but I’ve perfected the texture. The initial browning of the chicken locks in juices, and then it gently finishes cooking nestled atop the rice. This allows the chicken to steam and remain incredibly tender, while the rice absorbs all those delicious pan drippings and stock, making it incredibly flavorful and fluffy, not mushy. It’s a technique that ensures both components are cooked to their individual perfections.

As a busy cook in NYC, I appreciate a foolproof and fast recipe. This easy Moroccan chicken and rice dish excels in both. By using a single ovenproof skillet, you minimize clean-up while maximizing flavor. The steps are straightforward, from marinating to browning and then baking, making it ideal for both beginners and experienced home cooks seeking a high-reward, low-effort meal. It’s a complete meal that comes together beautifully, leaving you more time to enjoy your evening.

Moroccan Chicken and Rice Ingredients

When I head to my local farmers market or a favorite spice shop here in NYC, I always look for the freshest ingredients to bring this dish to life. My mother always taught me that the quality of your ingredients directly impacts the soul of the dish, and it’s a lesson I carry with me from Morocco to my kitchen today.

Ingredients List

  • 6 Chicken thighs (bone-in, skin-on optional – I prefer skin-on for extra flavor!)
  • Juice of 1/2 lemon
  • 1/4 Cup chicken stock (for chicken cooking)
  • 1 Tablespoon olive oil (for chicken)
  • 1 1/2 Tablespoons turmeric (ground)
  • 1 Tablespoon cumin (ground)
  • 1/2 Teaspoon dried coriander (ground)
  • 1 1/2 Tablespoons oregano (dried)
  • 6 Garlic cloves (crushed, for chicken marinade)
  • Salt
  • Black pepper
  • 2 Cups Basmati rice
  • 3 1/2 Cups Chicken stock (for rice)
  • 1 Onion (finely chopped)
  • 4 Garlic cloves (crushed, for rice)
  • 1 Tablespoon turmeric (ground, for rice)
  • 1 Teaspoon coriander (ground, for rice)
  • 2 Tablespoons olive oil (for rice)
  • Lime wedges (for serving)
  • Greek yogurt (for serving)
  • Fresh coriander (for serving)

Ingredient Spotlight

Chicken Thighs: I always opt for bone-in, skin-on chicken thighs. The bone adds incredible depth of flavor and moisture to the meat, while the skin helps protect it from drying out and crisps up beautifully in the oven. When buying, look for plump, pale pink thighs. If you prefer boneless, skinless, reduce initial cooking time by a few minutes, but be aware the flavor won’t be quite as rich. Chicken breasts can be used, but they cook faster and can dry out; consider brining them first.

Turmeric: This golden spice is non-negotiable in Moroccan cooking, not just for its vibrant color but for its earthy, slightly bitter, and warming notes. It’s essential for that authentic taste of Moroccan chicken and rice. I always choose a high-quality ground turmeric from a reputable spice merchant. If you’re out, a tiny pinch of saffron threads steeped in hot water can provide color, but the flavor profile will be different, leaning more floral.

Basmati Rice: Basmati is my choice for its long grains, aromatic qualities, and ability to cook up light and fluffy. It stands up beautifully to the rich chicken flavors without becoming gummy. Look for aged basmati for the best aroma. If you can’t find basmati, jasmine rice is a decent second choice, though it will be slightly stickier. Avoid short-grain or medium-grain rice as they won’t yield the same texture and can become overcooked.

Fresh Garlic & Onion: These are the aromatic backbone of the dish. Fresh garlic provides a pungent, sweet kick, while onion adds a foundational sweetness and depth. When choosing, look for firm, unblemished bulbs. Pre-minced garlic or dried onion flakes can work in a pinch, but they truly don’t compare to the fresh versions in terms of flavor intensity and aroma.

Original IngredientBest SubstitutionFlavor / Texture Impact
Chicken Thighs (bone-in)Boneless, skinless chicken thighs or breastsLess rich flavor from bone, breasts may dry out faster. Adjust cooking time accordingly.
Basmati RiceJasmine riceSlightly sticker texture, less distinct aromatic profile.
TurmericSmall pinch of saffron (for color) + dash of curry powder (for warmth)Flavor profile will shift from earthy to more floral/complex curry notes.
Fresh Garlic / OnionGranulated garlic / onion powderLess pungent, fresh aroma. Use sparingly as dried herbs are more concentrated.

Moroccan Chicken & Rice - Julia's Cuisine

How to Make Moroccan Chicken & Rice — Step-by-Step

Don’t be intimidated by the number of steps; each one is simple and builds layer upon layer of incredible flavor for this easy Moroccan chicken and rice dish. You’ve got this!

Step 1: Marinade the Chicken

In a large bowl, whisk together the juice of 1/2 lemon, 1 1/2 tablespoons turmeric, 1 tablespoon cumin, 1/2 teaspoon dried coriander, 1 1/2 tablespoons oregano, 6 crushed garlic cloves, salt, and pepper. Add the 6 chicken thighs, ensuring they are thoroughly coated in the spice mixture. Cover the bowl and refrigerate for at least one hour, or ideally, overnight. This is where the magic truly begins, allowing those beautiful Moroccan flavors to seep deep into the meat.

💡 mia’s Pro Tip: The longer you marinate, the better the flavor! An overnight stay in the fridge will give you the most tender and intensely flavored chicken. It’s a lesson I learned from my mother in our Moroccan kitchen.

Step 2: Brown the Chicken

Preheat your oven to 350°F (175°C). Remove the marinated chicken from the fridge about 20 minutes before cooking to bring it closer to room temperature. Heat 1 tablespoon of olive oil in a large, ovenproof skillet over medium-high heat on the stovetop. Once hot, add the chicken thighs, skin-side down (if applicable). Cook for about 5 minutes until beautifully browned and crisp, then flip and cook the other side for another 5 minutes. Reduce heat to low, add 1/4 cup of chicken stock, cover, and let simmer for 10 minutes. This pre-cooking not only adds incredible flavor through caramelization but also ensures the chicken starts cooking evenly.

⚠️ Common Mistake to Avoid: Don’t overcrowd the pan when browning the chicken. Work in batches if necessary to ensure a proper sear, otherwise, the chicken will steam instead of brown, and you’ll miss out on that crucial flavor development.

Step 3: Sauté Aromatics and Rice

Remove the chicken from the skillet and transfer to a plate. In the same skillet, add the remaining 2 tablespoons of olive oil. Add the finely chopped onion and 4 crushed garlic cloves. Sauté for about 1 minute until fragrant, then add the additional 1 tablespoon of turmeric and 1 teaspoon of coriander. Stir well, cooking until the onions are softened, approximately 5 minutes. This builds a rich aromatic base for your rice. Next, add the 2 cups of Basmati rice to the skillet, stirring continually for 2-3 minutes until each grain is completely coated with the aromatic oil and spices. This step, called toasting the rice (or *pilaf* method in French cuisine), is key to achieving fluffy, separate grains.

Step 4: Bake with Chicken

Evenly pour 3 1/2 cups of chicken stock over the rice in the skillet and give it a quick stir to combine. Do not stir excessively after this. Carefully arrange the partially cooked chicken thighs on top of the rice mixture. Cover the skillet tightly with its lid or aluminum foil. Transfer the skillet to the preheated oven and bake for 20 minutes, or until all the liquid has been absorbed by the rice and the chicken is cooked through (internal temperature should reach 165°F or 74°C).

💡 mia’s Pro Tip: Resist the urge to peek or stir during the baking process! Keeping the lid on creates a steamy environment that allows the rice to cook perfectly and the chicken to remain moist. Patience is a chef’s virtue!

Step 5: Fluff and Serve

Once removed from the oven, allow the skillet to rest, still covered, for a few minutes (about 5-10 minutes). This allows the steam to redistribute, resulting in even fluffier rice. Gently fluff the rice with a fork, lifting from the bottom to aerate it. Serve immediately, garnished with fresh lime wedges, a dollop of cool Greek yogurt, and a sprinkle of fresh coriander. The contrast of the rich chicken and rice with the bright, cool accompaniments is absolutely divine, a true NYC-Moroccan fusion!

StepActionDurationKey Visual Cue
1Marinade Chicken1 hour to overnightChicken thoroughly coated
2Brown Chicken~10-15 minsGolden-brown crust on chicken
3Sauté Aromatics & Rice~7-8 minsOnions softened, rice translucent & coated
4Bake in Oven20 minsLiquid absorbed, chicken cooked through
5Rest & Fluff5-10 minsRice light and separate grains

Serving & Presentation

When I plate this Moroccan chicken and rice, I like to think about how it would be presented in a traditional Moroccan home, but with a touch of Parisian elegance. The vibrant colors of the turmeric-infused rice and golden chicken are already a feast for the eyes. I suggest serving it directly from the beautiful skillet it cooked in to emphasize the “one-pot wonder” aspect and keep it warm.

For garnishes, simplicity is key to complementing the complex flavors. Fresh lime wedges are essential—a squeeze of lime juice just before eating brightens every bite and cuts through the richness. A generous dollop of plain Greek yogurt, or even a homemade labneh, adds a creamy, tangy contrast that is absolutely delightful. Finally, a sprinkle of fresh, chopped coriander (cilantro) not only adds a pop of green but also a fresh, herbaceous aroma that ties all the flavors together beautifully, just like my mother would do in Morocco.

For a complete meal, consider a simple side salad with a light vinaigrette to add a fresh, crisp element. My favorite pairing is a simple cucumber and tomato salad with a hint of mint, reminiscent of the refreshing salads found across the bustling streets of Marrakech. A glass of chilled mint tea would also be a perfect accompaniment, rounding out the North African experience right here in your home.

Pairing TypeSuggestionsWhy It Works
Side DishSimple green salad, Cucumber & tomato salad, Steamed green beansAdds a fresh, crisp counterpoint; lightens the meal.
Sauce / DipGreek yogurt, Harissa (on the side for heat), LabnehOffers a cooling, creamy, or spicy contrast to the rich chicken and rice.
BeverageMint tea, Dry white wine (e.g., Sauvignon Blanc), Sparkling water with lemonRefreshes the palate and complements the spice.
GarnishFresh coriander, Toasted almonds, Lemon wedgesAdds herbaceous freshness, textural crunch, and bright acidity.

Make-Ahead, Storage & Reheating

Living in New York, I’m always looking for ways to streamline my meals, and this Moroccan chicken and rice is a fantastic candidate for meal prep. The flavors settle and deepen beautifully overnight, making it even more delicious the next day. This is one of those recipes that truly shines as leftovers, perfect for busy weekday lunches or quick dinners.

MethodContainerDurationReheating Tip
RefrigeratorAirtight container3-4 daysMicrowave on medium with a splash of water/broth, covered, or gently on stovetop.
FreezerFreezer-safe containerUp to 2 monthsThaw overnight in fridge. Reheat as above. Rice texture may be slightly softer.
Make-AheadMarinade chicken; prep/chop veggiesChicken marinated up to 2 daysAssembly is quick once individual components are prepped.

When reheating, especially from the refrigerator, I find that adding just a tablespoon or two of chicken stock or water before covering and gently warming in the microwave or on the stovetop helps the rice regain its moisture and fluffy texture. For chicken, ensure it’s heated through to an internal temperature of at least 165°F (74°C). The trick is to reheat slowly to avoid drying out the star of the show: that perfectly seasoned chicken!

Variations & Easy Swaps

VariationKey ChangeBest ForDifficulty Impact
Spicy KickAdd harissa to marinade, sprinkle red pepper flakesThose who love heatMinimal (easy)
Vegetable BoostStir in chopped bell peppers, zucchini, or chickpeas with the riceAdding nutrients/bulkModerate (extra prep)
Citrus & Herb AccentAdd orange zest/segments & fresh mint to finishBrighter, lighter flavor profileMinimal (easy)

Spicy Moroccan Chicken and Rice

If you, like me, sometimes crave a little extra heat, transforming this into a spicy Moroccan chicken and rice is simple. Just add 1-2 teaspoons of harissa paste to your chicken marinade. Harissa, a North African chili paste, brings not just heat but a wonderful smoky depth. Alternatively, a pinch of red pepper flakes stirred in with your rice spices will give it a noticeable kick, balancing beautifully with the existing warm spices.

Gluten-Free or Dairy-Free Swap

This recipe is naturally gluten-free if you ensure your chicken stock is checked for gluten-containing ingredients – most are fine, but always double-check the label! For a dairy-free version, simply omit the Greek yogurt at serving. You could instead offer a lemon-tahini dressing for a creamy, savory counterpoint without dairy, a clever trick I picked up from a vegan bistro in downtown NYC.

Seasonal Vegetable Boost

To add more color and nutrients, consider stirring in some seasonal vegetables. Chopped bell peppers (red or yellow for sweetness), zucchini, or even a handful of chickpeas (for plant-based protein) can be added when you introduce the rice to the skillet. They’ll cook beautifully with the rice, absorbing all the wonderful flavors. I love browsing the Union Square Greenmarket for whatever’s freshest to inspire these kinds of additions.

What are the key spices needed for authentic Moroccan chicken and rice?

For an authentic Moroccan chicken and rice, the absolute key spices are turmeric, cumin, and coriander. Turmeric provides that unmistakable golden color and earthy warmth, while cumin adds a deep, savory aroma. Coriander, especially ground or dried, contributes a subtle citrusy, floral note that truly brightens the dish. I also love to include dried oregano for an extra layer of herbaceous depth to the marinade. These spices are fundamental to the distinctive Moroccan flavor profile that my mother taught me to cherish, creating a complex yet inviting taste.

Can I use chicken breasts instead of thighs in this recipe?

Yes, you can certainly use chicken breasts instead of thighs in this Moroccan chicken and rice recipe, but there are a few considerations. Chicken breasts are leaner and can dry out more easily than thighs. If you opt for breasts, I recommend either brining them beforehand for extra moisture or reducing your cooking time slightly, especially during the initial browning and the final oven bake. Keep a close eye on them to ensure they don’t overcook. While thighs offer richer flavor and better moisture retention, seasoned chicken breasts will still be delicious.

How long does it take to cook Moroccan chicken and rice?

The total time to cook this one-pot Moroccan chicken and rice, including active prep and cook time, is approximately 55 minutes. This breaks down into about 15 minutes of active preparation (chopping, marinating), followed by a recommended minimum of 1 hour for the chicken to marinade (though overnight is ideal and doesn’t count towards active time). The cooking itself involves about 10-15 minutes of stovetop work, followed by 20 minutes in the oven, plus a short resting period. So, from start to finish on cooking day, you’re looking at under an hour for a truly satisfying meal.

What are some good side dishes to serve with Moroccan chicken and rice?

For this flavorful Moroccan chicken and rice, I love to serve simple, refreshing side dishes that complement the rich, spiced main course. A crisp green salad with a light lemon vinaigrette is always a winner. A traditional cucumber and tomato salad with a hint of fresh mint would also be perfect, providing a lovely textural and flavorful contrast. Braised or steamed greens, such as spinach or green beans, lightly seasoned, also work wonderfully. And don’t forget the fresh lime wedges and a dollop of cool Greek yogurt right on top of the dish for serving!

Can I make this Moroccan chicken and rice recipe spicier?

Absolutely! If you enjoy a bit of heat, you can easily turn up the spice in this Moroccan chicken and rice. My favorite way to do this is by adding a teaspoon or two of harissa paste to the chicken marinade. Harissa not only brings a wonderful kick but also a smoky, complex flavor that enhances the Moroccan profile. Alternatively, you can add a pinch of red pepper flakes along with the other spices when you’re sautéing the onions and garlic for the rice. Start with a small amount and adjust to your preference – it’s all about balancing flavors!

Share Your Version!

I poured my heart into perfecting this one-pot Moroccan chicken and rice recipe, blending my heritage with my culinary journey in NYC, and I truly hope it brings you as much joy as it does me. I would absolutely love to hear about your experience! Please leave a star rating and a comment below to let me know how it turned out. What was your favorite part? Did you add your own special twist?

Don’t forget to snap a photo of your beautiful creation and share it on Instagram or Pinterest. Tag @exorecipe so I can see and celebrate your culinary success! I’m always so inspired by what you create. And tell me, what’s your go-to trick for perfectly fluffy rice?

From my NYC kitchen to yours — I hope this recipe brings as much warmth to your table as it does to mine. — mia 🧡

📌

Love This Recipe? Save It to Pinterest!

If you enjoyed this Moroccan Chicken & Rice recipe, don’t let it get lost in your browser tabs! 😄 Pin it now so you can find it again anytime — and explore hundreds more tried-and-tested recipes waiting for you on my Pinterest boards.

👉 Follow mia on Pinterest @chefrecipes2

📌 Pin this recipe · 🔁 Re-pin your favorites · 💬 Tag me when you make it — I love seeing your creations!

Print

clock clock iconcutlery cutlery iconflag flag iconfolder folder iconinstagram instagram iconpinterest pinterest iconfacebook facebook iconprint print iconsquares squares iconheart heart iconheart solid heart solid icon

Moroccan Chicken & Rice

  • Author: Chef Mia

Description

Why not spice up your dinner with this Moroccan Chicken & Rice dish. I can’t tell you how tasty it is, so you’ll just have to try it for yourself!


Ingredients

Scale
  • 6 Chicken thighs (bone in (with skin, optional))
  • Juice of 1/2 lemon
  • 1/4 Cup chicken stock
  • 1 Tablespoon olive oil
  • 1 1/2 Tablespoons turmeric
  • 1 Tablespoon cumin
  • 1/2 Tablespoon dried coriander
  • 1 1/2 Tablespoons oregano
  • 6 Garlic cloves (crushed)
  • Salt
  • pepper
  • 2 Cups Basmati rice
  • 3 1/2 Cups Chicken stock
  • 1 Onion (finely chopped)
  • 4 Garlic cloves (crushed)
  • 1 Tablespoon turmeric
  • 1 Teaspoon coriander
  • 2 Tablespoons olive oil
  • Salt
  • Lime wedges
  • Greek yogurt
  • Fresh coriander

Instructions

  1. First marinade the chicken. Add the lemon juice, turmeric, cumin, coriander, oregano, garlic, salt and pepper to a large bowl and stir. Add chicken and stir to coat. Cover and refrigerate for one hour to overnight.
  2. Preheat oven to 350 degrees F.
  3. Remove chicken from fridge when ready to cook. Heat 1 tablespoon of olive oil in a large ovenproof skillet over the stove top. Add the chicken, the meaty side down. Cook for about 5 minutes until browned and flip over cooking the other side for a further 5 minutes or so. Reduce heat to low, add the 1/4 cup/60 ml of chicken stock, cover and leave to cook for a further 10 minutes. Remove chicken from pan and transfer to a plate.
  4. In the reserved pan, add the remaining olive oil, garlic and onion. Stir for for a minute and add the turmeric and coriander. Stir well. Leave to cook until the onions are softened, about 5 minutes. Add the rice and stir well until the rice is completely coated, about 2 – 3 minutes. Evenly pour over all the stock and give a quick stir.
  5. Arrange the chicken over the dish, cover and put in the oven for further 20 minutes or until the rice has absorbed all the liquid. Remove from oven and leave a few minutes before serving.
  6. Fluff rice with a fork before serving.
  7. I recommend serving this dish with lime wedges, Greek yogurt and fresh coriander.


Nutrition

  • Calories: 621 kcal
  • Sugar: 3 g
  • Fat: 29 g
  • Carbohydrates: 61 g
  • Protein: 28 g


Moroccan Chicken & Rice - Julia's Cuisine

k">

Tried This Recipe? Leave a Comment!

Did you make this recipe? I’d love to hear how it turned out! Please leave a comment and a rating below. Your feedback helps other home cooks and supports cheerychop.com!
For more delicious inspiration, follow me on Pinterest!