Peanut Butter Oatmeal Cookies: Naturally Sweetened and Gluten-Free
⚖️
Difficulty
Easy
⏲️
Prep Time
10 mins
🕒
Cook Time
12 mins
⏱️
Total Time
22 mins
🍽️
Servings
12 cookies
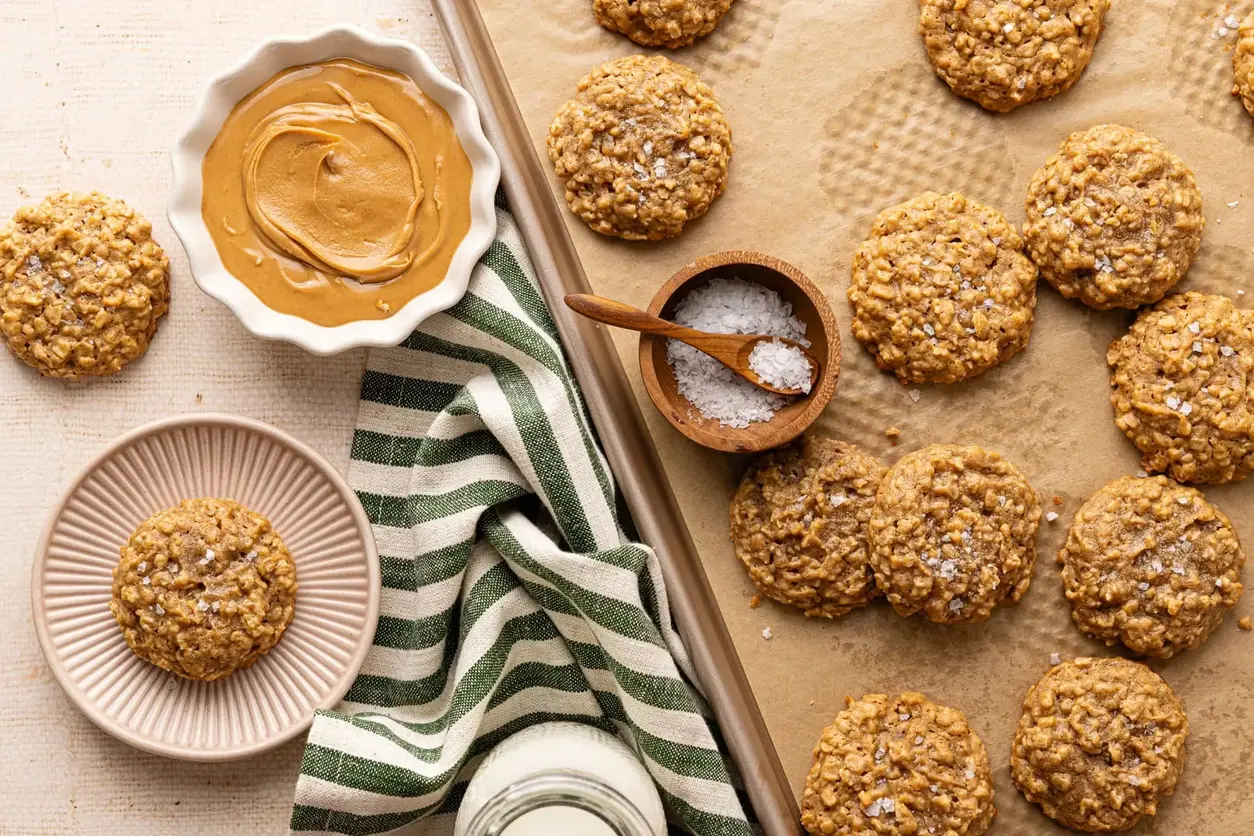
There are few things more comforting than pulling a tray of peanut butter oatmeal cookies from the oven. I first fell in love with the combination of peanut butter and oats years ago, standing beside my mother in our kitchen in Marrakech. She would roast peanuts in a cast-iron pan, and the scent would drift through the entire house. Today, I live in New York City, and when I come home from a busy afternoon at the Union Square Greenmarket with a bag of local rolled oats, I make these easy peanut butter cookies without flour. They remind me that simple, whole ingredients are all you really need.
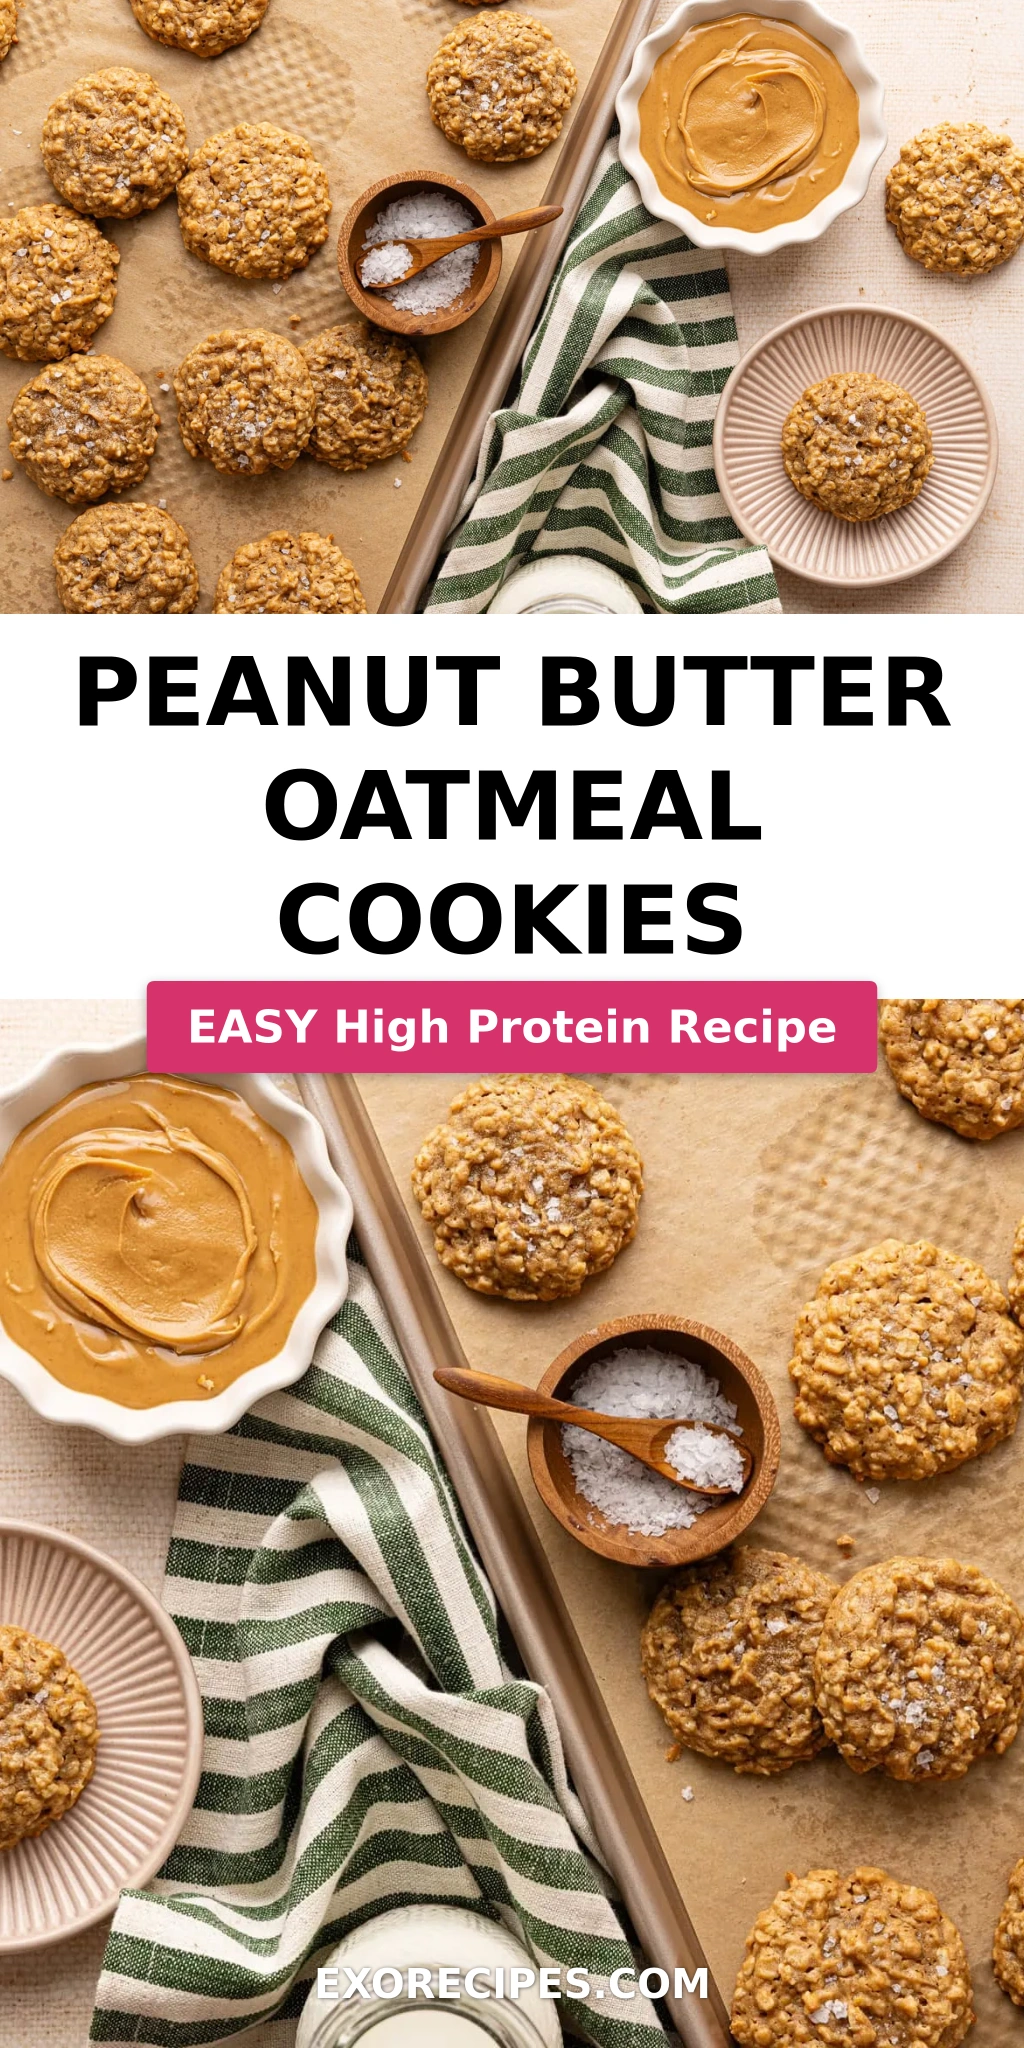
Each cookie is soft, chewy, and full of that nutty richness you crave. The peanut butter caramelizes slightly at the edges, while the oats keep every bite hearty and satisfying. There is no butter in this dough, no refined sugar either — maple syrup adds a gentle sweetness that pairs perfectly with the creamy peanut butter. When you take a bite, you get the perfect balance: a tender center and a slightly crisp edge, all wrapped around that bold peanut flavor.
So many cookie recipes rely on a laundry list of ingredients, but these no flour peanut butter cookies prove you don’t need all that. I use only four ingredients, and I rely on a method I learned in Paris: cream the peanut butter with the egg first until it becomes light and airy. This small trick makes all the difference. You end up with the chewiest texture without any complicated steps. Stick with me, and I will show you exactly how to get perfect results every time — including the one mistake most people make that leads to flat, dry cookies.
Why This Peanut Butter Oatmeal Cookies Recipe Is the Best
The flavor secret here is the quality of your peanut butter. I use a creamy, unsweetened natural peanut butter that contains only peanuts and salt. This keeps the cookies rich without being overly sweet. In my New York kitchen, I have tested this recipe with every brand I could find, and the winner every time is a simple stir-it-yourself jar. The oats, meanwhile, are not just filler. They absorb the moisture from the maple syrup and egg, creating a structure that holds together beautifully without any flour at all. This is the kind of honest baking I learned in Paris — let each ingredient do its job.
Texture is where this recipe really shines. I trained at Le Cordon Bleu in Paris, and one of the most valuable lessons I learned was the importance of not overmixing. When I combine the oats into the peanut butter mixture, I fold them just until everything is moistened. This leaves the oats intact, so they break apart slightly on your tongue and give the cookie a satisfying chew. If you overmix, the oats break down into a paste, and you lose that lovely texture. So keep that wrist gentle.
This recipe is foolproof and fast. You do not need a mixer or any special equipment. From start to finish, you have warm cookies in under twenty-five minutes. That is the kind of reliability I love sharing with my readers. Whether you are a beginner or a seasoned baker, these easy peanut butter cookies will turn out soft, chewy, and full of flavor every single time. Plus, they are naturally gluten-free, so everyone at the table can enjoy them.
Peanut Butter Oatmeal Cookies Ingredients
When I need a last-minute dessert or an after-school snack, I head straight to my pantry. Living in New York City, I love the convenience of bodegas and corner markets that stock the basics. I picked up a fresh jar of peanut butter just yesterday from my local market on the Upper West Side. These four simple ingredients are all you need to create something truly wonderful.
Ingredients List
1 cup creamy peanut butter
1 large egg
1/2 cup maple syrup
1 1/4 cup rolled oats
Ingredient Spotlight
Peanut Butter: This is the real star of the show. Choose a natural, unsweetened peanut butter — the kind where the oil separates on top. Stir it well before using. If you use a commercial sweetened peanut butter, the cookies will be much sweeter and may spread more because of the added sugar and hydrogenated oils. I always buy one with just peanuts and salt listed.
Egg: A large egg brings everything together and gives the cookies structure. It also adds moisture and helps them puff up in the oven. If you want to make this egg-free, I have tested it with a flax egg (1 tablespoon ground flaxseed mixed with 3 tablespoons water) — it works, but the cookies will be slightly less puffy and a bit denser. Still delicious though.
Maple Syrup: Pure maple syrup sweetens naturally and adds a subtle, earthy sweetness. Do not use pancake syrup, which is usually corn syrup and artificial flavoring. The maple syrup also contributes to the chewy texture because it attracts moisture. You can substitute honey, but the flavor will be different, and honey is sweeter, so you might want to reduce it slightly.
Rolled Oats: Rolled oats (old-fashioned oats) are essential here. Do not use quick oats, which are processed more finely and will make the cookie dough loose and the cookies flat. Steel-cut oats are too hard and will not soften enough during this short baking time. Rolled oats hold their shape and provide that wonderful, chewy texture.
Original Ingredient
Best Substitution
Flavor / Texture Impact
Creamy Peanut Butter
Almond Butter
Milder, slightly less rich nuttiness; cookies spread a little more
Large Egg
Flax Egg (1 tbsp ground flax + 3 tbsp water)
Denser, less puffy texture; works for vegan version
Maple Syrup
Honey or Agave Nectar
Honey: sweeter, more floral; Agave: milder, slightly thinner dough
Rolled Oats
Gluten-Free Rolled Oats
Same texture; ensures gluten-free for sensitive individuals
How to Make Peanut Butter Oatmeal Cookies — Step-by-Step
Follow these simple steps, and you will have the best chewy oatmeal cookies without any fuss. I have broken each step down so you can see exactly what to look for, along with my favorite tips.
Step 1: Preheat and Prepare
Preheat your oven to 350°F. Line a baking sheet with parchment paper or grease it lightly with a little oil. I like using a silicone baking mat — it helps the cookies slide right off and ensures even baking. This step sets the foundation for perfect cookies.
💡 mia’s Pro Tip: Always preheat your oven fully before mixing the dough. If you put the cookies into an oven that is not hot enough, they will spread too much before setting. Give your oven 15 minutes to reach the right temperature.
Step 2: Cream the Base
In a large bowl, combine the peanut butter, egg, and maple syrup. Use a spatula or a wooden spoon to mix until everything is completely smooth and uniform. This is the same creaming technique I learned in Paris — start with the wet ingredients to create an emulsion that traps air and gives the cookies lift.
Step 3: Fold in the Oats
Add the rolled oats to the bowl. Use a gentle folding motion — cut through the center of the mixture, lift from the bottom, and turn the bowl. Continue just until no dry oats remain. The dough will look sticky and thick, like a classic cookie dough. Do not overmix, or the cookies will become dense and tough.
⚠️ Common Mistake to Avoid: Overmixing the oats. When you stir too much, you break down the oat structure, which leads to a gluey paste and sad, flat cookies. Fold just until combined, and you will get that perfect, chewy bite.
Step 4: Shape the Cookies
Using a small cookie scoop or a tablespoon, scoop heaping spoonfuls of dough onto your prepared baking sheet. You should make about 10–12 cookies. Gently roll each portion between your palms into a round ball, then place it on the sheet and press it down slightly with your fingers to form a 1/2-inch thick disc. Leave about 2 inches between each cookie — they expand just a little during baking.
⚠️ Common Mistake to Avoid: Making the cookies too thick. If you do not flatten them, they will stay as tall mounds and bake unevenly. A gentle press ensures even baking and that signature chewy center.
Step 5: Bake and Cool
Bake in the preheated oven for 10–12 minutes. The cookies are done when the edges are lightly golden brown and the centers look just set. They will still feel soft — do not overbake them. Let the cookies cool on the baking sheet for 5 minutes, then transfer them to a wire rack to cool completely. This resting time allows them to firm up without getting dry.
💡 mia’s Pro Tip: For the chewiest texture, bake for exactly 10 minutes. For a slightly crispier edge, go for 12 minutes. Every oven is different, so check at the 10-minute mark.
Step
Action
Duration
Key Visual Cue
1
Preheat oven
15 mins
Oven reaches 350°F
2
Mix peanut butter, egg, maple syrup
2 mins
Smooth, uniform mixture
3
Fold in oats
1 min
Sticky dough, no dry oats visible
4
Shape cookies
5 mins
10–12 round, 1/2-inch thick discs
5
Bake and cool
10–12 mins + 5 mins cooling
Golden edges, set centers
Serving & Presentation
These peanut butter oatmeal cookies are wonderful on their own, but they also pair beautifully with a cold glass of milk — just the way I used to enjoy them after school in Morocco, though we had cups of hot mint tea instead. In my New York kitchen, I often serve them alongside a scoop of vanilla ice cream for an easy dessert. The warm, soft cookies melt the ice cream into a creamy sauce that coats every bite.
For a more elegant presentation, I sometimes dip half of each cookie in melted dark chocolate and let it set on a parchment-lined tray. It adds a touch of Parisian pastry flair to this simple American recipe. You can also sprinkle a pinch of flaky sea salt on top before serving — that salty-sweet contrast is irresistible.
Pairing Type
Suggestions
Why It Works
Side Dish
Fresh fruit salad, apple slices
Adds freshness and light acidity to balance the sweet, nutty cookies
Sauce / Dip
Dark chocolate ganache, caramel sauce, yogurt dip (yogurt + honey)
Enhances richness or adds a tangy contrast; great for dunking
Flaky sea salt, chopped peanuts, drizzle of melted peanut butter
Adds texture and enhances the peanut butter flavor visually
Make-Ahead, Storage & Reheating
Living in New York City often means I am running from market to kitchen to blog, so I love recipes that work with my schedule. These cookies are perfect for making ahead — they store beautifully, and you can even freeze the dough for last-minute cookie emergencies. Here is exactly how I do it.
These peanut butter oatmeal cookies are soft, chewy, and naturally sweetened with maple syrup. Made with just 4 simple ingredients, they are gluten-free and perfect for a quick snack or dessert.
Ingredients
Scale
1 cup creamy peanut butter
1 large egg
1/2 cup maple syrup
1 1/4 cup rolled oats
Instructions
Preheat the oven to 350 F.
In a large bowl, combine the peanut butter, egg and maple syrup. Mix well until smooth.
Add the oats and mixed until well combined. The consistency should be like a sticky cookie dough.
Using a small scoop, place heaping tablespoons of mixture on a greased baking sheet. You should have about 10-12 cookies. Use your hands to gently form into rounds and press down slightly to flatten.
Bake in the preheated oven for 10-12 minutes, until cooked through. Let cool and serve.
Nutrition
Calories:180
Sugar:9g
Fat:11g
Carbohydrates:17g
Protein:7g
Tried This Recipe? Leave a Comment!
Did you make this recipe? I’d love to hear how it turned out! Please leave a comment and a rating below. Your feedback helps other home cooks and supports cheerychop.com!
ph">For more delicious inspiration, follow me on Pinterest!
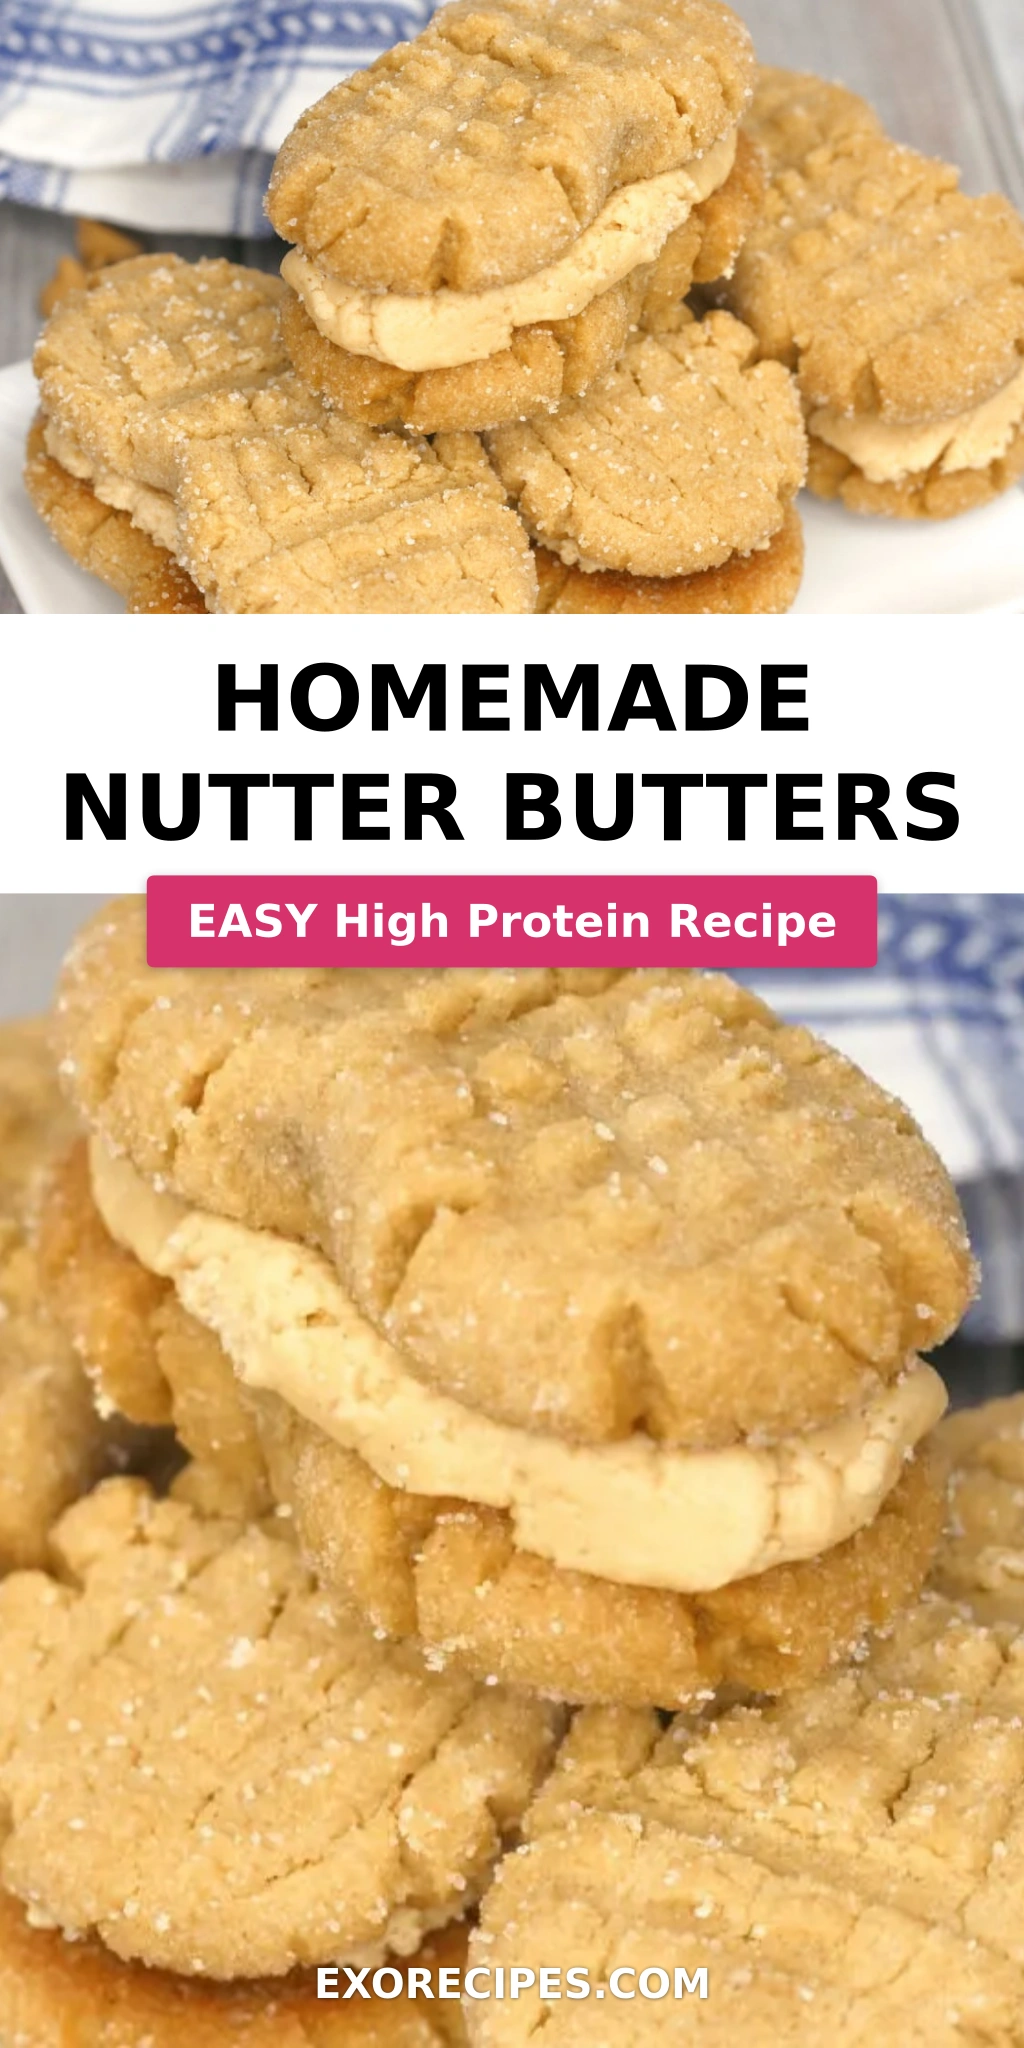
Easy Homemade Nutter Butters Better Than Store-Bought
Table of Contents
Homemade Nutter Butters – Peanut Butter Sandwich Cookies Better Than the Original
⚖️
Difficulty
Easy
⏲️
Prep Time
25 mins
🕒
Cook Time
12 mins
⏱️
Total Time
37 mins
🍽️
Servings
24 sandwich cookies
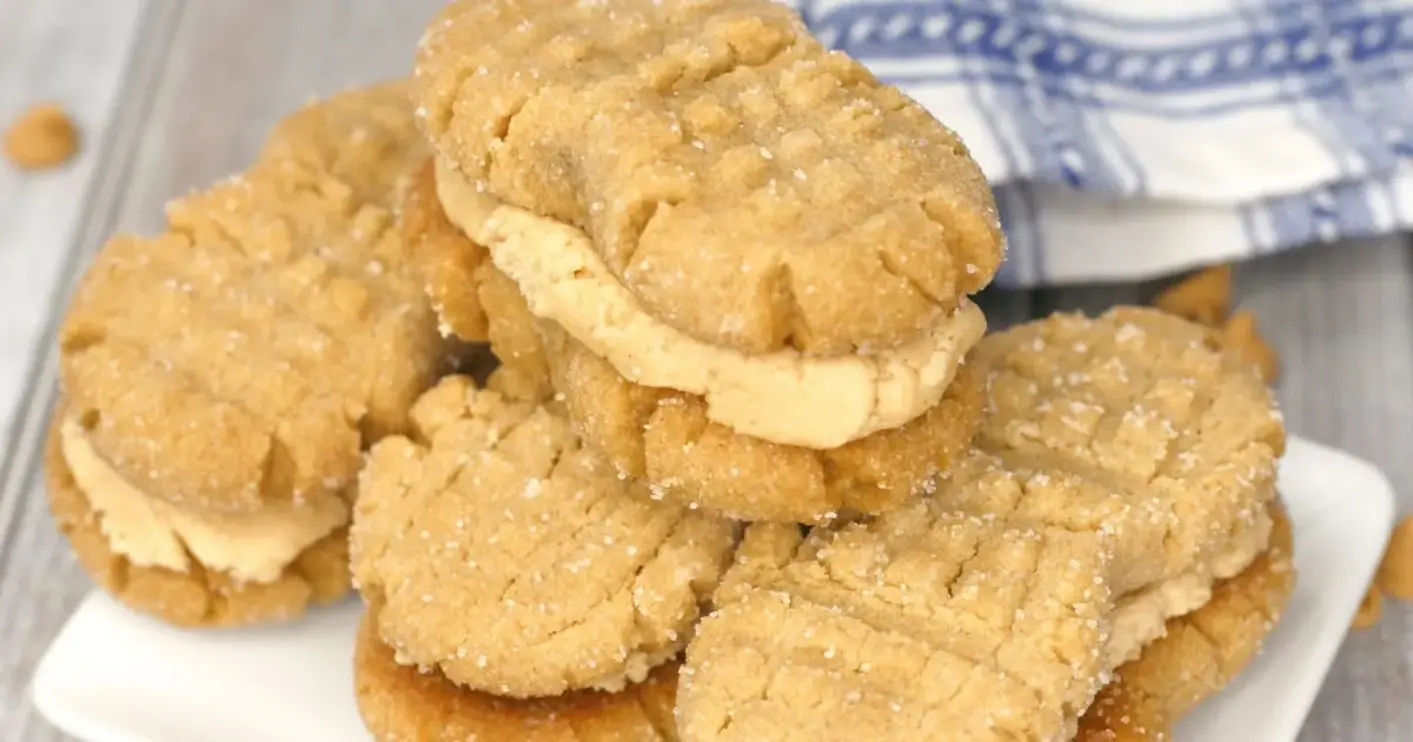
I still remember the first time I bit into a Nutter Butter as a kid in Morocco—my mother had picked up a box from a American import store in Casablanca, and I was absolutely hooked by that perfect peanut crunch and creamy filling. Now, after years of training in Paris pastry kitchens and cooking in my New York City apartment, I’ve developed what I truly believe is the ultimate copycat Nutter Butter recipe. This easy Nutter Butter recipe captures everything you love about the classic but with real butter, no preservatives, and a depth of flavor that only homemade baking can deliver. Let me show you how to make these irresistible peanut butter sandwich cookies from scratch!
These homemade peanut butter cookies have a beautifully tender, melt-in-your-mouth texture that’s slightly crisp on the edges but soft in the center. The aroma of peanut butter and vanilla fills your kitchen as they bake. Each bite delivers that iconic peanut-shape cookie that’s perfectly sweet, with a luscious, creamy filling that’s far richer than the store-bought version. The subtle saltiness of the peanut butter balanced with the sweetness of brown sugar creates a cookie you simply can’t stop eating.
I’ve tested this homemade Nutter Butter cookies recipe countless times—using American all-purpose flour, supermarket peanut butter, and standard baking tools—so it’s truly foolproof for any home baker. My unique angle? A light brown sugar base that adds a touch of molasses complexity, paired with a no-chill dough that saves you time. Plus, I’ll share my secret for getting that perfect criss-cross pattern and peanut shape every time—without any special equipment. From my NYC kitchen to yours, let’s bake!
Why This Homemade Nutter Butters Recipe Is the Best
The Flavor Secret: Most copycat recipes use granulated sugar alone, but I incorporate light brown sugar for a subtle caramel note that mimics the original’s distinct sweetness. Growing up in Morocco, my mother taught me that the best sweets have layers—and here, the brown sugar adds a warm, almost butterscotch undertone that complements the peanut butter beautifully. The filling also gets a pinch of salt that cuts the sweetness perfectly.
Perfected Texture: After years of refining pastry techniques in Paris, I learned that the key to a soft, not dry, sandwich cookie is using room-temperature butter and not overmixing the dough. This method ensures a delicate crumb that holds up perfectly to the filling. The cookies bake in just 10 to 12 minutes, staying soft in the center—just like the original—but with a far superior, homemade taste.
Foolproof & Fast: This easy Nutter Butter recipe requires no chilling time for the dough, which means you can go from mixing bowl to oven in under 30 minutes. The ingredients are all pantry staples you probably already have on hand. I’ve designed the steps to be clear and forgiving, so even a beginner baker will achieve gorgeous, professional-looking peanut butter cookies every single time.
Copycat Nutter Butter Cookies Ingredients
I source my peanut butter from a local market in Brooklyn where they have a creamy, natural grind that works perfectly here. But in my early days in Paris, I learned to use creamy, commercial peanut butter for the most reliable texture—it’s what makes these cookies so addictive. The ingredients are simple and come together beautifully.
Ingredients List
1 1/2 cups all purpose flour
1 teaspoon baking soda
1/4 teaspoon kosher salt
1/2 cup unsalted butter (softened)
1 cup light brown sugar
1 cup creamy peanut butter
1 large egg
1/2 teaspoon pure vanilla extract
1/2 cup sugar to roll the cookie dough in
For the Filling: 1/4 cup unsalted butter (softened)
1/2 cup creamy peanut butter
1 1/2 cups powdered sugar
2 Tablespoons milk
1/4 teaspoon vanilla extract
Ingredient Spotlight
Peanut Butter: The heart of this recipe. Use a creamy, commercial peanut butter like Skippy or Jif for the best texture—they have stabilizers that keep the cookies from spreading too much and the filling creamy. Natural peanut butter (the kind that separates) can work but may cause the dough to be a bit greasy and the cookies to spread more. Adjust by adding a tablespoon more flour if using natural.
Brown Sugar: I prefer light brown sugar here for its mild molasses flavor that doesn’t overpower the peanut butter. Dark brown sugar will make the cookies slightly darker and more caramel-like, which is also delicious but less like the original. Make sure to pack your brown sugar firmly into the measuring cup for accuracy.
Butter: Unsalted butter allows you to control the salt level. I use European-style butter when I can find it at the Union Square Greenmarket in NYC—it has a higher fat content, resulting in a richer cookie. If you only have salted butter, omit the added kosher salt in the recipe.
Slightly more oily dough; cookies may spread a little more
Light Brown Sugar
Dark brown sugar or 1 cup granulated sugar + 1 tbsp molasses
Darker cookie, richer caramel flavor
All-Purpose Flour
Gluten-free 1:1 baking flour (with xanthan gum)
Slightly more crumbly, but still delicious
How to Make Homemade Nutter Butters — Step-by-Step
Ready to bake? Follow these simple steps, and I promise you’ll be sinking your teeth into the best copycat Nutter Butter cookies in no time. Each step includes my tested tips for perfect results.
Step 1: Prep the Oven and Dry Ingredients
Preheat your oven to 350°F. Line a cookie sheet with parchment paper or a silicone baking mat. Pour 1/2 cup of sugar into a small bowl and set aside. In a mixing bowl, whisk together the flour, baking soda, and salt until combined.
💡 mia’s Pro Tip: For evenly baked cookies, place your baking sheet on the middle rack. Avoid using dark, non-stick pans—they absorb more heat and can over-brown the bottoms.
Step 2: Cream the Wet Ingredients
Using a standing mixer with the paddle attachment or an electric hand mixer, cream together the softened butter, brown sugar, and peanut butter on medium speed until light and fluffy—about 2 minutes. Scrape down the sides of the bowl. Add the egg and vanilla extract, then continue mixing until fully incorporated.
⚠️ Common Mistake to Avoid: Don’t overcream! Once the egg is in, mix just until combined. Overmixing can cause the cookies to spread too much during baking.
Step 3: Combine and Form Dough
Gradually pour the dry ingredient mixture into the wet ingredients while mixing on low speed. Stop as soon as the flour disappears—do not overmix. The dough will be quite soft but not sticky. Divide the dough into small balls using about 1 1/2 tablespoons each (a small cookie scoop works great). Roll each ball into a log shape about 2 inches long, then roll in the sugar bowl to coat evenly.
💡 mia’s Pro Tip: For a more authentic peanut shape, roll the logs slightly thicker in the center and taper the ends just a bit. This helps the criss-cross pattern look more defined.
Step 4: Create the Peanut Pattern
Place the dough logs on the prepared cookie sheet, spacing them about 2 inches apart. Using the tines of a fork, gently press a criss-cross pattern into the top of each log. First press lengthwise, then crosswise. Then use your fingers to gently pinch the center of the cookie to create the classic peanut waist.
⚠️ Common Mistake to Avoid: Don’t press too hard with the fork or you’ll flatten the cookies too much. A gentle, even press is all you need for a beautiful pattern.
Step 5: Bake and Cool
Bake for 10 to 12 minutes, until the edges are lightly golden brown but the centers are still soft and pale. The cookies will look slightly underdone in the middle—that’s perfect! Allow them to cool on the baking sheet for exactly 5 minutes, then transfer to a wire rack to cool completely before filling.
💡 mia’s Pro Tip: The 5-minute rest on the hot baking sheet is critical—it allows the cookies to set without over-baking. Move them too soon and they can break.
Step 6: Make the Filling and Assemble
While the cookies cool, make the filling: In a clean mixing bowl, beat the softened butter and peanut butter on medium speed until fluffy—about 2 minutes. Gradually mix in the powdered sugar, milk, and vanilla extract until smooth and spreadable. Group your baked cookies into pairs by size and shape. Spoon about 1 tablespoon of filling onto the flat bottom of one cookie, then gently press the second cookie on top to create a sandwich.
⚠️ Common Mistake to Avoid: Don’t overfill! The cookies are delicate, and too much filling will squish out the sides. A generous tablespoon is all you need for that perfect ratio of cookie to cream.
Step
Action
Duration
Key Visual Cue
1
Preheat oven, mix dry ingredients
5 minutes
Flour mixture uniform
2
Cream butter, sugar, peanut butter
2 minutes
Light and fluffy
3
Combine wet & dry, form logs
5 minutes
Dough comes together; logs coated in sugar
4
Press criss-cross and pinch centers
3 minutes
Defined peanut shape
5
Bake
10-12 minutes
Golden edges, soft centers
6
Cool, make filling, assemble
15 minutes
Cookies cool; filling creamy
Serving & Presentation
These homemade Nutter Butters are wonderful served as an afternoon treat with a glass of cold milk or a warm mug of coffee. I love arranging them on a simple wooden board or a vintage plate I picked up at the Brooklyn Flea Market—their golden peanut shape is so charming. For gatherings, stack them in a small tower or present them in a glass jar tied with a ribbon.
In Morocco, we’d serve these alongside a strong mint tea for a delicious contrast of sweet and herbal, but they’re also perfect for bake sales, lunchboxes, or an after-school snack. If you’re feeling fancy, dust the tops with a little confectioners’ sugar or drizzle with melted dark chocolate—both pair beautifully with the peanut butter filling. Think of them as a playful, irresistible addition to any dessert table.
Pairing Type
Suggestions
Why It Works
Side Dish
Fresh fruit (apple slices, strawberries)
Balances the richness with acidity and freshness
Sauce / Dip
Chocolate ganache, caramel sauce
Adds extra sweetness and decadence
Beverage
Cold milk, hot coffee, Moroccan mint tea
Creaminess complements the cookie; tea adds herbal note
Garnish
Confectioners’ sugar, melted chocolate
Enhances presentation and flavor
Make-Ahead, Storage & Reheating
Living in NYC means I’m always on the go, so I love a recipe that fits into a busy schedule. These cookies store beautifully and can be prepped in advance. Here’s how I keep them fresh and delicious all week.
Method
Container
Duration
Reheating Tip
Refrigerator
Airtight container
Up to 5 days
Tried This Recipe? Leave a Comment!
Did you make this recipe? I’d love to hear how it turned out! Please leave a comment and a rating below. Your feedback helps other home cooks and supports cheerychop.com!
For more delicious inspiration, follow me on Pinterest!
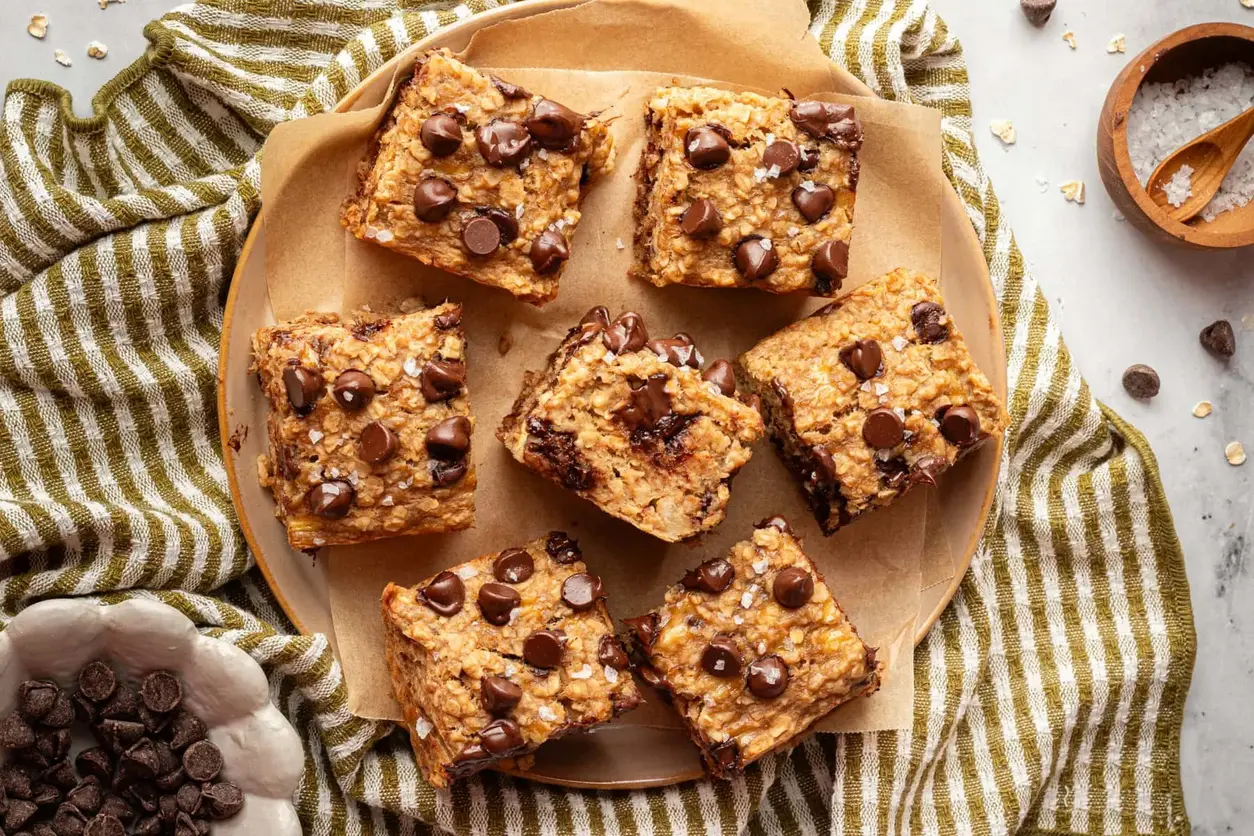
Growing up in my mother’s kitchen in Morocco, we made treats with whatever we had on hand – often just bananas, a little nut butter, and grains. That simplicity is the soul behind these 4-ingredient peanut butter banana bars. Whenever I need a quick, healthy banana bars fix that doesn’t sacrifice flavor, this easy peanut butter banana recipe is my go-to. It’s a no-bake peanut butter bars vibe, but we give it a gentle bake to bring out the best texture.
The smell of ripe bananas and peanut butter swirling together takes me straight back to those Saturday mornings. Each bite offers a soft, almost fudgy interior with slightly chewy edges, thanks to the humble instant oats. The chocolate chips melt into little pockets of sweetness, perfectly balanced by the natural saltiness of the peanut butter. It’s pure comfort food – no fuss, no unnecessary steps.
After years in Parisian pastry kitchens and now here in New York, I’ve learned that the simplest recipes are often the hardest to perfect. These peanut butter banana bars use a clever technique – mashing the bananas impossibly smooth to create a batter with no eggs needed – that I picked up from a French baker who specialized in vegan desserts. My pro tip for you: Always let the bars cool completely before slicing; it’s the secret to getting clean, bakery-style wedges instead of a crumbly mess. A common mistake I see is overbaking, which dries them out. Trust me – 25 minutes is usually all it takes.
Why This 4-Ingredient Peanut Butter Banana Bars Recipe Is the Best
The Flavor Secret: These healthy banana bars are a blank canvas that lets the natural sweetness of very ripe bananas shine. I use a tablespoon of vanilla extract – a trick from my days at Le Cordon Bleu – to deepen the flavor without any refined sugar. The peanut butter adds a rich, savory note that makes each bite utterly satisfying. It’s an easy peanut butter banana recipe that even beginners can master.
Perfected Texture: The key is in the oats. By using quick-cooking oats, they soften beautifully into the batter, creating a tender crumb. I tested this with whole rolled oats, but they stay too chewy. The quick oats absorb the moisture from the bananas and peanut butter perfectly, giving these peanut butter banana bars a consistency that’s almost like a cross between a dense muffin and a soft granola bar – ideal for packing in lunches.
Foolproof & Fast: With just one bowl and a spoon for mixing, this is the ultimate dump-and-bake recipe. No electric mixer needed. No waiting for butter to soften. This 4-ingredient banana bars recipe is designed for busy mornings or last-minute dessert cravings. It’s a staple in my NYC kitchen because it works every single time, and it’s endlessly adaptable – you can swap in any nut butter or add-ins you have on hand.
Peanut Butter Banana Bars Ingredients
I pick up my bananas from the Greenmarket in Union Square – the spottier, the better. The peanut butter I look for is the drippy kind, the one you have to stir, because it has no added sugar or oil. It reminds me of the fresh peanut paste we used to buy from the souk in Marrakech. Here’s everything you’ll need to make these 4 ingredient peanut butter banana bars.
Ingredients List
3 very ripe bananas (the blacker the better for sweetness)
1/4 cup smooth natural peanut butter (or any nut/seed butter)
1 teaspoon vanilla extract
1 1/4 cup instant or quick cooking oats
1/4 teaspoon salt
1/2 teaspoon baking powder
1/2 cup chocolate chips (optional, but highly recommended)
Ingredient Spotlight
Bananas: The backbone of these no bake peanut butter bars. They provide moisture, natural sweetness, and structure. Look for bananas that are fully brown or even black – they mash easier and pack more flavor. If yours are only yellow, not very ripe, you can roast them in a 350°F oven for 15 minutes to caramelize the sugars.
Peanut Butter: I use smooth, natural peanut butter (no stir kind) for the best texture. It must be pourable at room temperature. If your peanut butter is stiff, microwave it for 10 seconds to loosen it. Almond butter, cashew butter, or sunflower seed butter all work as substitutes – just note that sunflower butter will turn the bars a bit green on top (it’s a harmless reaction).
Oats: Instant or quick-cooking oats are non-negotiable for the right texture. They absorb moisture quickly and soften perfectly during the 25-minute bake. Old-fashioned rolled oats will work, but you’ll need to pulse them in a food processor for 10 seconds to break them down, otherwise the bars will be too chewy.
Original Ingredient
Best Substitution
Flavor / Texture Impact
Natural Peanut Butter
Almond Butter
Milder, slightly sweeter; bars will be softer.
Quick Oats
Pulsed Old-Fashioned Oats (10-second pulse)
Similar texture; bars may be slightly chewier.
Chocolate Chips (optional)
Chopped Dried Fruit (cranberries, cherries)
More fruity sweetness; less gooey pockets.
How to Make 4-Ingredient Peanut Butter Banana Bars — Step-by-Step
I promise, this is one of the easiest bakes you’ll ever make. With just a few steps, these 4 ingredient peanut butter banana bars will be fragrant and golden in your kitchen.
Step 1: Prepare the Bananas and Oven
Preheat your oven to 350°F. Grease a standard 9×5-inch loaf pan with butter or spray, or line it with parchment paper for easy removal. This step ensures your healthy banana bars come out in one perfect piece.
⚠️ Common Mistake to Avoid: Skipping the parchment paper. Even in a well-greased pan, these bars can stick because of the natural sugars in the bananas. Use parchment for foolproof release.
Step 2: Blend the Wet Ingredients
Add the 3 very ripe bananas to a large mixing bowl. Mash them thoroughly with a fork or potato masher until they are almost smooth – a few small lumps are fine, but the smoother the better for a unified texture. Add the 1/4 cup natural peanut butter and 1 teaspoon vanilla extract. Mix until completely combined. The mixture should look like a thick, creamy paste.
💡 mia’s Pro Tip: If your peanut butter is not runny, warm it for 10-15 seconds in the microwave. This makes it infinitely easier to blend into the bananas without any lumps.
Step 3: Add Dry Ingredients and Chocolate Chips
Add the 1 1/4 cups instant oats, 1/4 teaspoon salt, and 1/2 teaspoon baking powder to the bowl. Stir with a spatula until everything is evenly distributed – the batter will be thick and sticky. Fold in 1/3 cup of the chocolate chips, saving the remaining chocolate chips for the top. This ensures you get pockets of gooey chocolate in every bite.
⚠️ Common Mistake to Avoid: Overmixing the oats. Once the dry ingredients are incorporated, stop mixing. Overmixing will develop too much gluten (if using quick oats, which contain some) and make the bars tough.
Step 4: Bake and Test
Pour the batter into your prepared loaf pan. Use a rubber spatula to smooth the top into an even layer. Sprinkle the remaining chocolate chips on top, pressing them gently into the surface. Bake for 25-30 minutes. The top should be golden brown, and a knife inserted into the center should come out clean or with a few moist crumbs – not wet batter.
💡 mia’s Pro Tip: Ovens vary, so start checking at 22 minutes. If the top is browning too fast but the center is still wet, tent the pan loosely with foil for the remaining bake time.
Step 5: Cool and Slice
Remove the pan from the oven and let it cool on a wire rack for at least 15 minutes. Then, use the parchment paper to lift the bars out of the pan and transfer them to the rack to cool completely. Once fully cool, use a serrated knife to cut into 6-8 pieces. For clean cuts, wipe the knife clean between slices.
⚠️ Common Mistake to Avoid: Cutting too early. The bars are extremely delicate when warm. Patience pays off – cooling completely makes them firm and sliceable without crumbling.
Step
Action
Duration
Key Visual Cue
1
Prepare pan & wet ingredients
5 mins
Smooth banana-peanut butter paste
2
Combine dry & fold chips
3 mins
Thick, sticky, no dry streaks
3
Transfer to pan & top
2 mins
Even layer, chips pressed in
4
Bake
25-30 mins
Golden edges, clean knife test
5
Cool & cut
15+ mins
Firm to touch, clean slices
Serving & Presentation
I love serving these peanut butter banana bars straight from the loaf pan at a casual brunch, or dressed up on a plate with a drizzle of tahini and a sprinkle of flaky sea salt. The combination of the sweet bar, the savory nuttiness, and salty crunch is pure magic. For a NYC-inspired touch, I sometimes add a dollop of thick Greek yogurt on the side – it cuts through the richness beautifully.
In Morocco, we’d serve something similar with a glass of hot mint tea. In Paris, I’d pair it with a small espresso. Here at home, my family loves these bars as a post-school snack or a quick breakfast on the go. They’re versatile enough to pack in lunchboxes or to serve as a casual dessert after a light dinner. The natural banana sweetness means you don’t even need syrup or honey.
Pairing Type
Suggestions
Why It Works
Side Dish
Fresh fruit salad, yogurt parfait
Adds freshness and a creamy contrast.
Sauce / Dip
Tahini drizzle, honey, melted dark chocolate
Enhances the nutty and sweet notes.
Beverage
Mint tea, iced latte, cold brew
Cuts through richness and cleanses the palate.
Garnish
Flaky sea salt, crushed peanuts, banana slices
Adds texture and a pop of flavor.
Make-Ahead, Storage & Reheating
In my busy NYC schedule, I often double this recipe and store one loaf for the week. The bars actually taste better the day after baking as the flavors meld together. They make a perfect grab-and-go breakfast for those mornings when you’re rushing to the subway.
Method
Container
Duration
Reheating Tip
Refrigerator
Airtight container
Tried This Recipe? Leave a Comment!
Did you make this recipe? I’d love to hear how it turned out! Please leave a comment and a rating below. Your feedback helps other home cooks and supports cheerychop.com!
For more delicious inspiration, follow me on Pinterest!
Teriyaki Chicken Skewers – Perfectly Glazed and Grilled to Perfection
⚖️
Difficulty
Easy
⏲️
Prep Time
35 mins
🕒
Cook Time
30 mins
⏱️
Total Time
1 hr 5 mins
🍽️
Servings
4 people
I remember the first time I made homemade teriyaki sauce in my tiny Paris apartment—I was a culinary student, missing the warm, bold flavors of my mother’s kitchen in Morocco. She used to make a sweet-savory glaze with honey and ginger for lamb, and I thought, why not chicken? That experiment turned into this Teriyaki Chicken Skewers Recipe, a dish that has become a staple in my New York City home. The key is the homemade sauce—it’s thick, glossy, and packed with umami. This chicken teriyaki skewers recipe is the best because it uses a balanced, rich sauce and a quick grill that keeps the chicken juicy. I’m sharing everything you need to know, from how to marinate to achieving perfect char without drying out the meat.
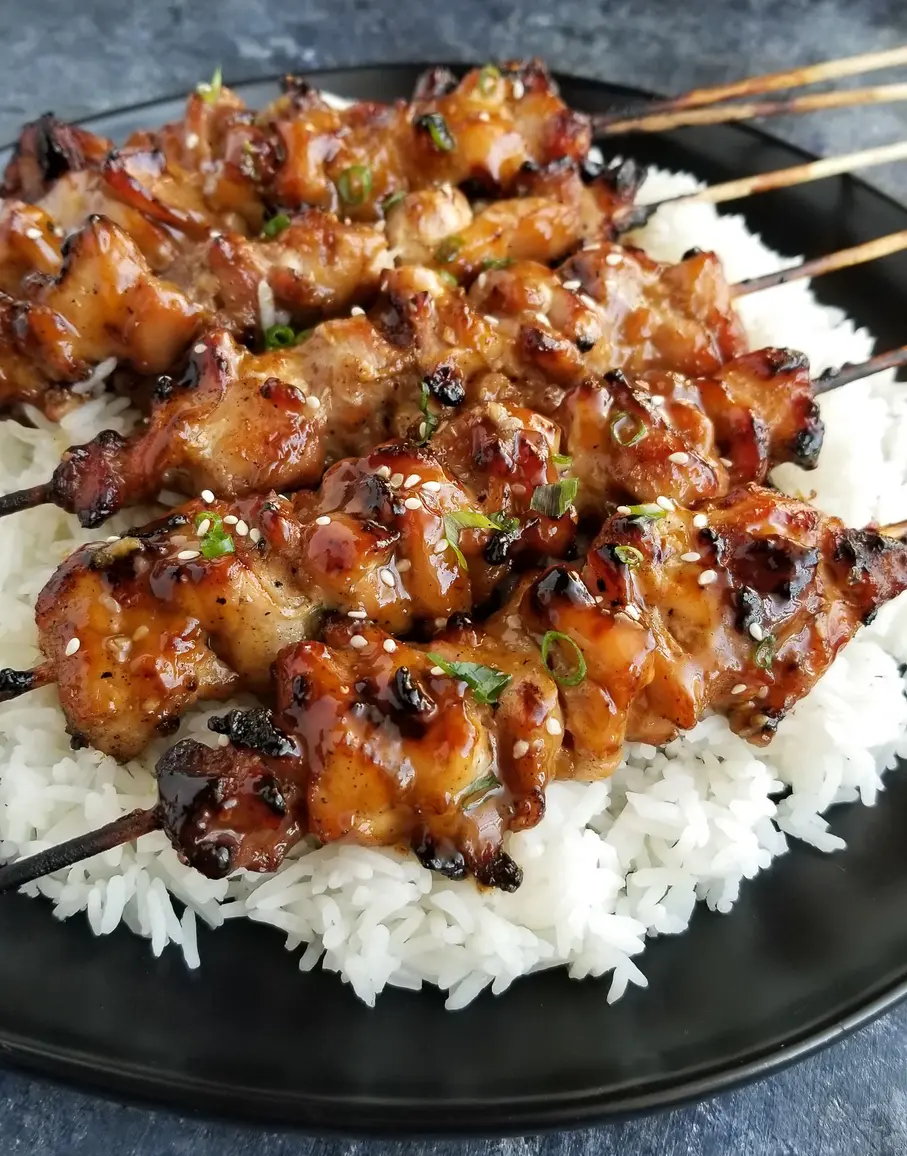
Picture this: tender, golden-brown cubes of chicken, slightly charred from the grill, glistening with a dark, sticky teriyaki glaze. Each bite offers a burst of sweet soy, a hint of garlic, and the warm tingle of fresh ginger. The aroma alone—smoky, sweet, and savory—will draw your family to the table before you even call them. I love how the sauce caramelizes on the grill, creating a thin, crispy edge on the chicken while the inside stays incredibly moist. Sprinkled with toasted sesame seeds and fresh green onions, this easy teriyaki chicken is a feast for the eyes and the palate. It’s the kind of meal that feels both special and incredibly comforting.
This grilled chicken skewers recipe is the result of years of tweaking—training in Paris taught me the art of sauce making, while my Moroccan roots taught me to trust my instincts with bold flavors. What sets this version apart is using a cornstarch slurry to thicken the sauce perfectly without making it gloppy, and a rice vinegar touch for brightness. The biggest mistake I see is rushing the marinating process—you need at least 30 minutes for the flavors to penetrate. 💡 💡 mia’s Pro Tip: Always reserve half the sauce for basting later; it’s the secret to that restaurant-quality shine.
Why This Teriyaki Chicken Skewers Recipe Is the Best
The flavor secret lies in balancing the five elements of Japanese cuisine—sweet, salty, sour, bitter, and umami—but with a Moroccan heart. I add a touch of honey for depth, just like my mother used to do with her lamb tagines. This homemade teriyaki sauce is not just sweet; it has a secret layer of savoriness from low-sodium soy sauce and a bright kick from rice vinegar. In Paris, I learned to reduce sauces slowly to concentrate flavors, and that patience pays off here. Every bite is a symphony of tastes that no bottled sauce can match.
Perfected texture is everything. In culinary school, we were taught that “the protein is only as good as the cooking method.” For chicken teriyaki skewers, that means high heat on the grill to sear in juices, then gentle cooking to ensure the center reaches 165°F without drying out. I also pat the chicken dry before marinating to help the sauce adhere and to promote better browning. The result is a skewer that’s tender, slightly charred on the outside, and perfectly cooked inside—never rubbery or dry.
Foolproof and fast, this recipe is designed for busy weeknights but impressive enough for guests. I’ve simplified the classic technique: no need for a double boiler or complicated reduction methods. The sauce comes together in one pan while the chicken marinates, and the grill does the rest. Even if you’re a beginner, the step-by-step guidance below will ensure success. Plus, I’ve included options for the oven and variations for different dietary needs, making this easy teriyaki chicken skewers truly for everyone.
Teriyaki Chicken Skewers Ingredients
When I’m in New York City, I source my ingredients from the Union Square Greenmarket or my local Whole Foods. For the soy sauce, I always choose a low-sodium variety to control salt levels, and I buy fresh ginger root that feels heavy and firm. This recipe brings back memories of my mother’s kitchen in Morocco, where she’d blend honey and ginger into almost everything. These simple, quality ingredients are the foundation of the best teriyaki taste you’ll ever make at home.
Ingredients List
2 lbs. chicken thighs (or breasts), cut into 1-inch cubes
2 tbsp cornstarch
1 cup water
1/3 cup brown sugar, packed
1/3 cup low-sodium soy sauce
2 cloves garlic, minced
1 tbsp rice vinegar
1/2 tbsp fresh ginger, minced
1 tbsp honey
1/2 tsp sesame oil
8 skewers (if wooden, soak in water 30 minutes before grilling)
Sesame seeds (for garnish, optional)
Chopped green onion (for garnish, optional)
Ingredient Spotlight
Low-sodium soy sauce: This is non-negotiable for me. Regular soy sauce can make the final dish overly salty because the sauce reduces during cooking. Low-sodium lets you control the salt and lets the other flavors shine. Best substitution: tamari (gluten-free) or coconut aminos (a bit sweeter). Expect a slightly milder saltiness, so you may want to add a pinch of salt at the end.
Fresh ginger: I always use fresh ginger—not ground. The sharp, aromatic heat is what gives teriyaki its signature zing. Look for ginger that is firm and smooth-skinned, without wrinkles. Best substitution: 1/4 tsp ground ginger per 1/2 tbsp fresh, but the flavor will be less bright and more earthy.
Chicken thighs vs. breasts: Chicken thighs are more forgiving due to higher fat content, staying juicy even with slight overcooking. Breasts work well but require careful temperature monitoring. Best substitution: Use boneless, skinless thighs for maximum tenderness. If using breasts, consider brining them for 15 minutes in salt water first to prevent dryness.
Brown sugar: Dark brown sugar provides a deeper, molasses-like sweetness that mimics the complexity of sake traditionally used in teriyaki. Light brown sugar works too, but you’ll have a slightly less rich flavor. Best substitution: 1/4 cup coconut sugar plus 1 tbsp maple syrup—this adds a subtle caramel note.
Rice vinegar: This mild, slightly sweet vinegar cuts through the richness and balances the sweetness. It’s essential for the authentic tang of Japanese-style sauce. Best substitution: Apple cider vinegar diluted with a pinch of sugar (use 1 tbsp vinegar + 1/2 tsp sugar). This swaps in well but adds a fruity note.
Original Ingredient
Best Substitution
Flavor / Texture Impact
Low-sodium soy sauce
Tamari or coconut aminos
Less salty, slightly sweeter with coconut aminos
Fresh ginger
1/4 tsp ground ginger per 1/2 tbsp fresh
More earthy, less bright heat
Chicken thighs
Chicken breasts (brined)
Leaner, needs careful cooking to avoid dryness
Brown sugar
Coconut sugar + maple syrup
Deep caramel notes, less sweet
Rice vinegar
Apple cider vinegar + pinch sugar
Fruity acidity, still tangy
How to Make Teriyaki Chicken Skewers — Step-by-Step
Don’t worry—this recipe is simpler than it looks. Follow these detailed steps, and you’ll have the best grilled chicken skewers of your life. I’ve broken it down so anyone can do it, from a weeknight cook to a weekend griller.
Step 1: Make the Teriyaki Sauce
In a small bowl, whisk together the cornstarch and water until smooth. This is your slurry—ensure there are no lumps. In a medium saucepan, combine the soy sauce, brown sugar, garlic, rice vinegar, ginger, honey, and sesame oil. Add the cornstarch mixture and stir. Place the pan over medium-high heat and bring the sauce to a simmer, stirring frequently. You’ll see it darken and thicken after about 3–5 minutes. The sauce should be glossy and coat the back of a spoon. Remove from heat and let cool completely. For faster cooling, place the saucepan in the refrigerator for 15–20 minutes.
💡 mia’s Pro Tip: Don’t walk away while the sauce is simmering! The cornstarch can cause it to thicken suddenly and burn on the bottom. Stir constantly and watch for the first bubbles that signal it’s ready.
Step 2: Marinate the Chicken
Once the sauce is completely cool, place your cubed chicken in a large ziptop bag. Pour half of the sauce over the chicken (reserve the other half for later). Gently massage the bag to coat all chicken pieces evenly. Seal the bag, pressing out as much air as possible, and place it in the refrigerator. Let it marinate for at least 30 minutes—up to 2 hours for deeper flavor. Do not marinate longer than 4 hours, as the acid from the vinegar can start to break down the chicken and make it mealy.
⚠️ Common Mistake to Avoid: Marinating with warm sauce. The sauce must be completely cool—room temperature or colder—before adding the chicken. Warm sauce will partially cook the chicken, leading to uneven texture and potential food safety issues.
Step 3: Skewer and Grill
When the chicken is done marinating, remove the pieces from the bag and discard the used marinade. Thread the chicken cubes onto the skewers, leaving small gaps between pieces for even heat circulation. Preheat your grill to medium heat (about 350–375°F). Lightly oil the grates with a paper towel dipped in vegetable oil. Place the skewers on the grill and cook for 20–30 minutes, turning every 3–4 minutes to char all sides. Use an instant-read thermometer to check for doneness—the internal temperature should reach 165°F.
💡 mia’s Pro Tip: If using wooden skewers, soak them in water for at least 30 minutes before grilling to prevent burning. For metal skewers, be careful, as they get very hot—use heatproof gloves or tongs to turn them.
Step 4: Baste and Finish
During the last 8–10 minutes of grilling, baste the skewers with the reserved teriyaki sauce. Use a silicone brush to apply a generous layer to all sides. This is when the sauce caramelizes, forming that beautiful, sticky glaze. Do not baste too early, or the sugar in the sauce will burn before the chicken is cooked through.
⚠️ Common Mistake to Avoid: Basting too often. Apply the sauce only during the last two turns. More than that, and the sauce will burn, turning bitter and black. Trust the process—the final baste is what gives you that restaurant shine.
Step 5: Rest and Serve
Remove the skewers from the grill and let them rest for 3–5 minutes on a cutting board or platter. This allows the juices to redistribute. Sprinkle generously with toasted sesame seeds and chopped green onions. Serve immediately with steamed rice and your favorite vegetables.
💡 mia’s Pro Tip: For an extra pop of flavor, drizzle a little fresh teriyaki sauce over the skewers just before serving. I like to reserve about 2 tablespoons of the sauce specifically for this purpose—it adds fresh, un-caramelized sweetness.
Step
Action
Duration
Key Visual Cue
1
Make sauce
5 minutes
Sauce thickens and darkens
2
Marinate chicken
30+ minutes
Chicken fully coated in cooled sauce
3
Grill skewers
20-30 minutes
Char marks, internal temp 165°F
4
Baste
Last 10 minutes
Sauce becomes glossy and caramelized
5
Rest & serve
3-5 minutes
Juices rest, seeds and onions added
Serving & Presentation
I love serving these teriyaki skewers on a large wooden platter, arranged in a crowd-pleasing fan shape. For a complete meal that’s perfect for a busy NYC night, I pair them with steamed jasmine rice and a side of sautéed bok choy or broccoli. You can also serve the skewers over a bed of rice with the sauce drizzled on top—this is how I ate them at a tiny izakaya in the East Village. The contrast of the warm, glazed chicken with the cool, crunchy green onions and toasted sesame seeds is magic. For a Moroccan twist, I sometimes serve them with a side of harissa yogurt dip—the spicy, creamy tang balances the sweet teriyaki beautifully.
When it comes to plating, I always pour a little extra teriyaki sauce from the reserved portion over the plate for dipping. The sauce is thick enough to cling to each bite without making a mess. For garnish, I pile on sesame seeds—white, black, or both—and a generous handful of chopped scallions. If I’m feeling fancy, I’ll add a few pickled ginger slices on the side to refresh the palate. This is a dish that looks as good as it tastes, and it’s always the star of the table whether at a backyard BBQ or a cozy weeknight dinner.
The most delicious marinated teriyaki chicken grilled to perfection and finished with a delicious teriyaki sauce. Serve with a sprinkle of sesame seeds, fresh chopped green onions over steamed rice.
Ingredients
Scale
2 lbs. chicken thighs (or breasts) (cut into 1" cubes)
2 tbsp cornstarch
1 cup water
1/3 cup brown sugar
1/3 cup soy sauce (*low sodium recommended )
2 cloves garlic (minced )
1 tbsp rice vinegar
1/2 tbsp fresh ginger (minced )
1 tbsp honey
1/2 tsp sesame oil
8 skewers
sesame seed
chopped green onion
Instructions
First make the sauce: Combine cornstarch and water in a small bowl. In a medium saucepan, add remaining ingredients along with the cornstarch/water mixture. Stirring frequently, bring sauce to a simmer. Cook until sauce lightly thickens. Sauce will be dark brown. Once sauce has thickened up, remove from heat and let cool completely. (place in fridge to speed up the process)
Once the sauce is completely cooled, place cubed chicken in a large ziplock bag. Pour half of the sauce over the chicken and gently shake to coat chicken. Let chicken marinate in the fridge for at least 30 minutes. Place remaining sauce aside for later.
When the chicken is done marinating, place your chicken on skewers and heat the grill to medium heat.
Once the grill is hot, place skewers on lightly oiled grill. Turn the skewers every 3-4 minutes until the chicken is cooked through (internal temp 165 degrees), about 20-30 minutes. During the last few turns baste with remaining teriyaki sauce.
Remove skewers from grill and serve with chopped green onion and a sprinkle of sesame seeds(optional).
Nutrition
Calories:390 kcal
Sugar:22 g
Fat:10 g
Carbohydrates:28 g
Protein:46 g
Tried This Recipe? Leave a Comment!
Did you make this recipe? I’d love to hear how it turned out! Please leave a comment and a rating below. Your feedback helps other home cooks and supports cheerychop.com!
For more delicious inspiration, follow me on Pinterest!
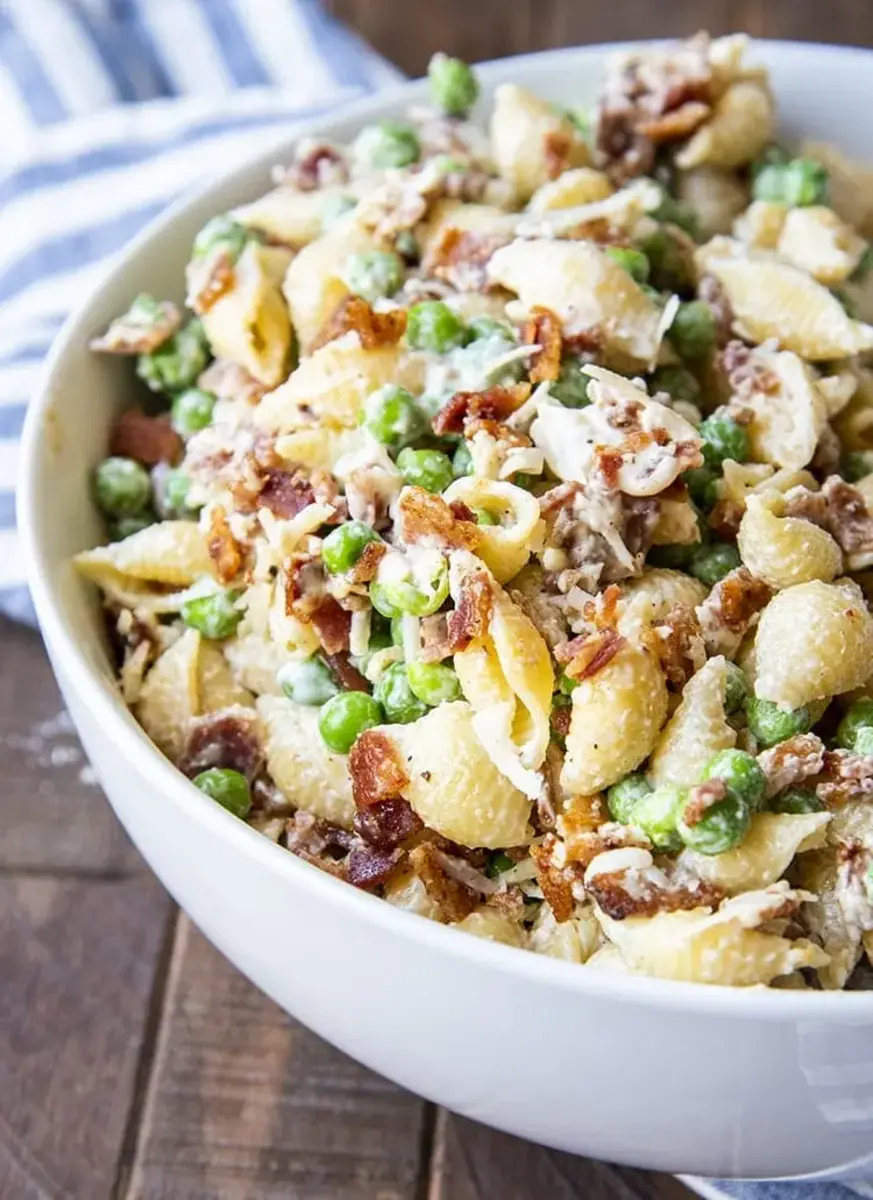
Creamy Pasta Salad with Bacon & Peas – Perfect Potluck Side
Table of Contents
Creamy Pasta Salad: A Moroccan-Parisian Twist – The Ultimate Cold Side
⚖️
Difficulty
Easy
⏲️
Prep Time
15 mins
🕒
Cook Time
10 mins
⏱️
Total Time
25 mins (plus chill time)
🍽️
Servings
8
I remember the first time I made my creamy pasta salad for a Brooklyn potluck. I was nervous — bringing a classic American side to a table full of bold flavors. But as soon as I drizzled my dressing, a whisper of apple cider vinegar and a touch of sugar that I learned from my Parisian chef, everything clicked. This is the best creamy pasta salad because it’s not just another mayonnaise-coated bowl of noodles. It’s a carefully balanced, cold pasta salad with creamy dressing that honors every single ingredient. Growing up in Morocco, we dressed salads with bright acidity and fresh herbs. Later, in Paris, I mastered the art of sauce work — the secret to a dressing that clings beautifully without being heavy.
Imagine cold, tender elbow macaroni, each piece coated in a silky, tangy cream sauce. With every bite, you get the sweet pop of thawed peas and the salty, smoky crunch of thick-cut bacon. Freshly grated Parmesan melts into the dressing, adding a nutty depth that store-bought shreds can’t touch. The whole thing is finished with a whisper of garlic and onion powder — nothing overwhelming, just a gentle hum of savory flavor. The result is a creamy macaroni salad that’s rich but never greasy, indulgent but perfectly balanced with a bright, clean finish. It’s the kind of dish that disappears fast at a summer barbecue.
What sets my easy creamy pasta salad apart is my approach to the dressing. In Paris, I was taught that a great sauce is about synergy — every element has a role. Here, the mayonnaise provides rich body, the olive oil adds a silky mouthfeel, and the apple cider vinegar cuts through it all with a sharp tang. A tiny bit of sugar rounds everything out. My mom would call it a harmony. I also insist on rinsing the pasta in cold water immediately after cooking — a simple step that stops the cooking process and cools the noodles so the dressing doesn’t wilt. This is the only best creamy pasta salad recipe you’ll ever need.
Why This Creamy Pasta Salad Recipe Is the Best
The Flavor Secret: The balance in this creamy pasta salad recipe comes from my French training — we call it “assaisonnement” — the art of seasoning every layer. The dressing is a perfect emulsion of mayonnaise, olive oil, and apple cider vinegar, with just a touch of sugar to soften the acidity. This isn’t a bland salad; it’s a flavor bomb that still lets the bacon and Parmesan shine.
Perfected Texture: I learned in Paris that texture is everything. That’s why I cook the pasta only to al dente — it holds up against the creamy dressing and stays firm even after a day in the fridge. The peas are thawed but not cooked, so they remain bright and tender. And the bacon is chopped into small, crisp pieces that provide a satisfying crunch in every forkful. No mushy noodles here.
Foolproof & Fast: This easy creamy pasta salad is perfect for beginners and busy cooks alike. The entire process takes just 25 minutes of active time. You can prep everything while the pasta cooks, and the only real wait is an hour of chilling (if you can resist it). It’s the kind of recipe I make on a busy Monday and take to a Saturday picnic — it actually gets better with time.
Creamy Pasta Salad Ingredients
I pick up almost all these ingredients at the Union Square Greenmarket here in NYC. The bacon from a small farm in Pennsylvania, the peas frozen from last summer’s harvest, and the Parmesan from a cheese stand run by a woman from Parma who explains how to grate it just right. These simple, fresh elements come together to create the perfect creamy macaroni salad.
Ingredients List
12 oz small pasta noodles (elbows or shells)
2 cups frozen peas (thawed)
12 oz thick cut bacon (cooked and chopped)
1/2 cup freshly grated Parmesan cheese
3/4 cup mayonnaise
2 tablespoons olive oil
1 tablespoon apple cider vinegar
1 teaspoon granulated sugar (adjust to taste)
1 teaspoon salt (adjust to taste)
1/2 teaspoon garlic powder
1/2 teaspoon onion powder
1/4 teaspoon black pepper
Ingredient Spotlight
Small pasta noodles like elbows or small shells are ideal. They catch the creamy dressing in every crevice, making each bite flavorful. I prefer a sturdy shape that doesn’t break apart easily.
The bacon must be thick-cut and cooked until very crispy. You want a solid crunch that contrasts the soft pasta and peas. If you’re in a rush, pre-cooked bacon can work, but the texture will be less satisfying.
Mayonnaise is the base of our dressing. I use a full-fat mayo — it creates the silkiness this cold pasta salad with creamy dressing needs. For a lighter version, you can use half Greek yogurt, but the texture will be tangier and less rich.
Original Ingredient
Best Substitution
Flavor / Texture Impact
Mayonnaise
Greek yogurt + mayo (1:1)
Tangier, lighter, less rich
Thick-cut bacon
Turkey bacon or ham
Less fat, less smoky, milder crunch
Parmesan cheese
Pecorino Romano
Saltier, sharper, similar melt
Frozen peas
Fresh peas or chopped broccoli
Firmer texture, different sweetness
How to Make Creamy Pasta Salad – Step-by-Step
Let me show you how to make this creamy pasta salad in a few simple steps. I’ve tested this dozens of times to make it as foolproof as possible.
Step 1: Cook the Pasta
Cook the pasta noodles in a large pot of salted water according to the package directions, until just al dente — about 8 to 10 minutes for most small shapes. Drain well in a colander, then rinse thoroughly under cold running water until the pasta is completely cool. This stops the cooking and rinses away surface starch, which helps the dressing cling better without becoming gummy.
💡 mia’s Pro Tip: Rinse with cold water until the pasta feels cool to the touch — not just until it runs cold. Warm pasta will melt the mayo dressing.
Step 2: Prep the Add-Ins
While the pasta cooks, make sure your peas are fully thawed — just hold them under warm water for a minute if needed, then drain. Your bacon should be cooked until very crispy, then chopped into small pieces. Grate your Parmesan finely from a block — the pre-grated stuff in a can won’t melt as smoothly. Set everything aside.
⚠️ Common Mistake to Avoid: Don’t add hot bacon directly to the salad! It will wilt the dressing and make everything greasy. Let it cool completely first.
Step 3: Make the Creamy Dressing
In a small bowl, combine the mayonnaise, olive oil, apple cider vinegar, granulated sugar, salt, garlic powder, onion powder, and black pepper. Whisk vigorously until the dressing is smooth and emulsified — about 30 seconds. Taste and adjust the sugar and salt to your liking. The dressing should be creamy, tangy, and just slightly sweet.
💡 mia’s Pro Tip: Whisk in the oil slowly, drizzling as you go, to create a stronger emulsion — that’s what gives this cold pasta salad with creamy dressing its silky texture.
Step 4: Assemble the Salad
Add the cooled pasta, thawed peas, chopped bacon, and grated Parmesan to a large mixing bowl. Pour the dressing over the top. Using a rubber spatula, fold everything together gently but thoroughly until every piece of pasta and every pea is evenly coated in the creamy dressing.
⚠️ Common Mistake to Avoid: Don’t overmix! Constant stirring can break up the pasta and turn the salad mushy. Fold only until combined.
Step 5: Chill and Serve
Cover the bowl with a lid or plastic wrap and place it in the refrigerator for at least 1 to 2 hours. Chilling allows the flavors to meld and the dressing to fully coat every piece. If you’re in a hurry, you can serve it immediately, but it’s truly best chilled. Before serving, give it a quick stir and taste for seasoning — you may want a pinch more salt.
💡 mia’s Pro Tip: If the salad looks dry after chilling, stir in a tablespoon of cold milk or extra mayo to revive the creaminess. Pasta absorbs dressing over time.
Step
Action
Duration
Key Visual Cue
1
Cook & rinse pasta
8–10 mins
Pasta is firm but tender; cold to touch
2
Prep add-ins
5–10 mins
Peas thawed; bacon crispy; cheese grated
3
Whisk dressing
1–2 mins
Smooth, emulsified, pale yellow
4
Assemble
2–3 mins
Everything evenly coated, no dry spots
5
Chill
1–2 hours
Dressing thickens slightly; flavors meld
Serving & Presentation
This creamy pasta salad is the perfect side dish for any cookout, potluck, or weeknight dinner. I love piling it into a large, shallow serving bowl so every colorful ingredient is visible — the green peas, the golden pasta, the speckled bacon. For a touch of Moroccan flair, I sometimes sprinkle a little smoked paprika on top and add a few fresh mint leaves. For a Parisian presentation, I serve it alongside a simple green salad with vinaigrette.
It’s incredibly versatile. Serve it cold next to grilled chicken, burgers, or hot dogs at a summer barbecue. Or pair it with a glass of crisp white wine and a slice of crusty bread for a light lunch. The creaminess of the dressing makes it feel indulgent, but the apple cider vinegar keeps everything bright and balanced. My NYC friends love it straight out of the bowl as a main dish on hot days.
Pairing Type
Suggestions
Why It Works
Side Dish
Grilled chicken, burgers, hot dogs
Creamy contrast to smoky, charred proteins
Salad / Fresh Element
Green salad, sliced tomatoes
Acidic vinaigrette cuts the richness
Beverage
Crisp white wine, lemonade, iced tea
Clean acidity balances the creamy dressing
Garnish
Smoked paprika, fresh mint, chives
Adds color, aroma, and a flavor pop
Make-Ahead, Storage & Reheating
This is my go-to make-ahead salad for the week. I often prep it on Sunday and enjoy it for lunches or quick dinners through Wednesday. The creamy dressing actually gets better as the flavors have time to meld, but I do add a little extra mayo before serving if it seems dry, because pasta absorbs moisture in the fridge.
Tried This Recipe? Leave a Comment!
Did you make this recipe? I’d love to hear how it turned out! Please leave a comment and a rating below. Your feedback helps other home cooks and supports cheerychop.com!
For more delicious inspiration, follow me on Pinterest!
Method
Container
Duration
Reheating Tip
Refrigerator
Airtight container
Up to 4 days
Serve cold or at room temp; stir in 1 tbsp milk to revive creaminess