“`html
Table of Contents
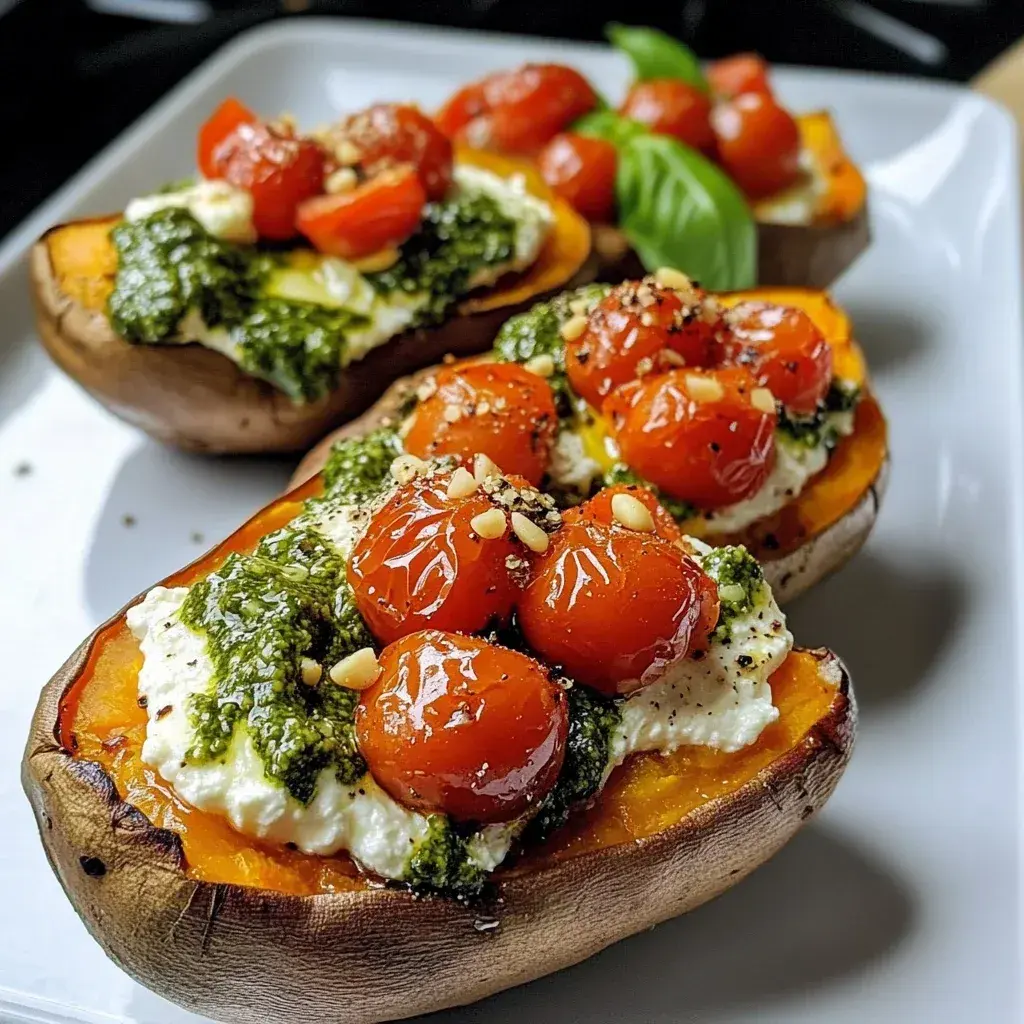
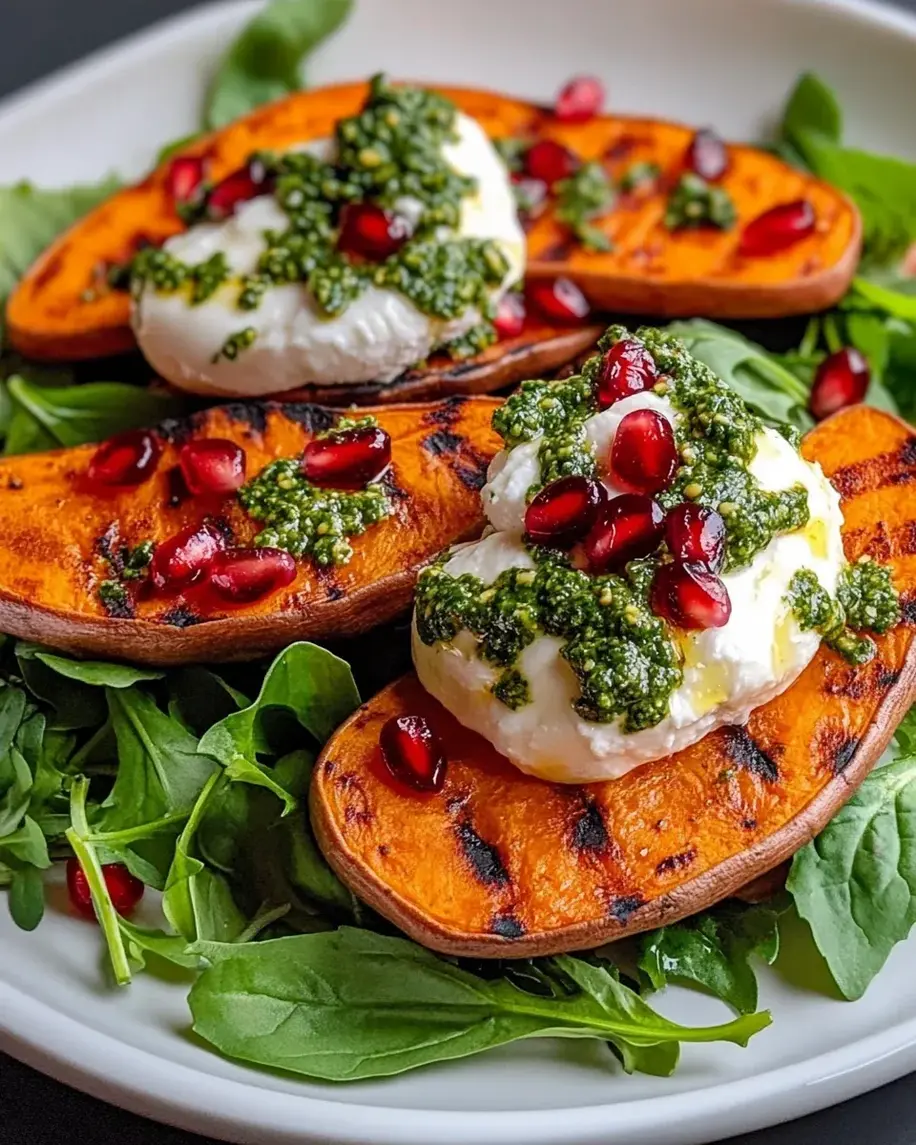
Grilled Sweet Potato and Burrata Salad with Pomegranate and Pumpkin Seed Pesto
Introduction
Are you looking for a salad that’s vibrant, satisfying, and bursting with unique flavors? Many salads can feel like an afterthought, a plate of soggy greens. But what if your salad could be the star of the show? The Grilled Sweet Potato and Burrata Salad with Pomegranate and Pumpkin Seed Pesto is an absolute showstopper. This isn’t just any salad; it’s a symphony of textures and tastes: sweet, smoky grilled sweet potatoes, incredibly creamy burrata, juicy, jewel-like pomegranate seeds, and a vibrant, nutty pumpkin seed pesto. It’s perfect for a light lunch that feels luxurious, a stunning side dish for your next dinner party, or even a memorable holiday offering that will have your guests raving.
Ingredients
This recipe balances sweet, savory, and creamy elements beautifully. Here’s what you’ll need:
- For the Grilled Sweet Potatoes:
- 2 medium sweet potatoes, washed and scrubbed (about 1.5 lbs) – choose firm, unblemished ones for the best texture.
- 2 tablespoons olive oil – extra virgin for a fruity note.
- 1/2 teaspoon smoked paprika – for that irresistible smoky aroma and flavor.
- Salt and freshly ground black pepper, to taste.
- For the Pumpkin Seed Pesto:
- 1 cup raw pumpkin seeds (pepitas), toasted – toasting brings out their rich, nutty flavor. (Substitution: You can use toasted sunflower seeds or even pine nuts if pumpkin seeds are unavailable.)
- 1 cup fresh basil leaves, packed – vibrant and aromatic. (Substitution: A mix of basil and spinach works well for a milder flavor.)
- 1/4 cup grated Parmesan cheese – for a salty, umami kick. (Substitution: Nutritional yeast for a dairy-free option.)
- 2 cloves garlic, roughly chopped – adjust to your preference for garlic intensity.
- 1/4 cup olive oil, plus more as needed – start with this and add more for a smoother consistency.
- 1-2 tablespoons lemon juice – for brightness and tang.
- Salt and freshly ground black pepper, to taste.
- For the Salad Assembly:
- 1 ball (8 oz) fresh burrata cheese – its creamy center is key! (Substitution: Fresh mozzarella balls, though less creamy, can be used.)
- 1/2 cup pomegranate seeds – for bursts of sweet-tart juiciness. (Substitution: Dried cranberries or chopped fresh figs for a different kind of sweetness.)
- Optional: A handful of arugula or mixed greens for an extra peppery bite.
- Optional: A sprinkle of flaky sea salt for finishing.
Timing
Compared to many complex salads that can take over an hour, this dish is remarkably efficient. The average salad might take 15-20 minutes total, but the grilling and pesto-making add a bit more time here, resulting in a significantly more rewarding flavor profile. This recipe is perfect when you want something special without spending your whole afternoon in the kitchen.
Step-by-Step Instructions
Step 1: Prep the Sweet Potatoes
First things first, let’s get those sweet potatoes ready to work their magic. Wash and scrub your sweet potatoes thoroughly to remove any dirt. You can peel them if you prefer, but the skin crisps up beautifully on the grill and adds extra nutrients and flavor. Slice the sweet potatoes into uniform rounds, about 1/2 inch thick. In a medium bowl, toss the sweet potato slices with olive oil, smoked paprika, salt, and pepper. Make sure each slice is evenly coated – this is where the smoky, savory base of our salad begins!
Step 2: Make the Pumpkin Seed Pesto
While the grill heats up, let’s whip up this vibrant pesto. If your pumpkin seeds aren’t already toasted, give them a quick toast in a dry skillet over medium heat until fragrant and lightly golden. This step is crucial for unlocking their full, nutty flavor. In a food processor, combine the toasted pumpkin seeds, fresh basil leaves, grated Parmesan cheese, and chopped garlic. Pulse a few times until everything is roughly chopped. With the food processor running, slowly drizzle in the olive oil until the pesto reaches your desired consistency. You might need a little more or less oil depending on how thick you like your pesto. Stir in the lemon juice and season with salt and pepper to taste. Taste and adjust seasonings as needed – you want a bright, flavorful punch!
Step 3: Grill the Sweet Potatoes
Now it’s time for the star of the show – grilling! Preheat your grill to medium-high heat. Lightly oil the grill grates to prevent sticking. Carefully place the seasoned sweet potato slices onto the hot grill. Grill for about 8-12 minutes per side, or until they are tender and have lovely char marks. The exact time will depend on the thickness of your slices and the heat of your grill. You want them cooked through but not mushy. Once grilled, remove them from the grill and let them cool slightly on a plate or cutting board.
Step 4: Assemble the Salad
The final, glorious step: bringing it all together! Arrange the slightly cooled grilled sweet potato slices on a serving platter or individual plates. If you’re using greens, scatter a handful of arugula or mixed greens over the sweet potatoes. Next, tear the burrata ball into pieces and artfully place them amongst the sweet potatoes. Drizzle generously with the freshly made pumpkin seed pesto. Scatter the bright, jewel-like pomegranate seeds over the entire salad for pops of color and juicy sweetness. For an extra touch of elegance and flavor, sprinkle with a little flaky sea salt. Serve immediately and watch your guests’ eyes light up!
Nutritional Information
Please note that nutritional information is an estimate and can vary based on ingredients and portion sizes.
- Calories: Approximately 450-550 kcal per serving (can vary significantly based on burrata cheese and olive oil usage).
- Protein: 15-20g
- Fat: 30-40g (mostly healthy fats from olive oil, pumpkin seeds, and burrata)
- Carbohydrates: 30-40g (primarily from sweet potatoes)
- Fiber: 5-8g
Healthier Alternatives
This salad is already quite healthy, but here are a few swaps to make it even lighter without sacrificing flavor:
- Less Cheese: Use a smaller amount of burrata, or opt for fresh mozzarella for a slightly lighter, less creamy cheese.
- Reduced Oil: Slightly decrease the olive oil in both the pesto and for dressing the sweet potatoes. You can also use a spray oil for the grill.
- Dairy-Free Pesto: Omit the Parmesan cheese and add a tablespoon of nutritional yeast for a cheesy flavor.
- Lower Carb Sweet Potato: While sweet potatoes are nutrient-dense, if you’re watching carbs closely, you could halve the amount of sweet potato and increase the greens.
Serving Suggestions
This salad is incredibly versatile! Serve it as:
- A light and elegant lunch with a slice of crusty bread.
- A sophisticated side dish for grilled chicken, fish, or pork.
- A beautiful starter for a holiday meal, showcasing seasonal flavors.
- Part of a larger mezze or appetizer spread.
Common Mistakes to Avoid
To ensure your salad turns out perfectly:
- Overcooking Sweet Potatoes: Grilled sweet potatoes should be tender-crisp, not mushy. Keep an eye on them during grilling.
- Under-toasting Pumpkin Seeds: Toasting is key to flavor. Don’t skip this step or rush it.
- Using Stale Ingredients: Fresh basil and vibrant pomegranate seeds make a huge difference. Burrata should be fresh and creamy.
- Uneven Slicing: Uniform sweet potato slices ensure even cooking.
- Over-processing Pesto: You want a slightly rustic pesto, not a smooth paste.
Storing Tips
This salad is best enjoyed fresh. However, if you have leftovers:
- Sweet Potatoes & Pesto: Store grilled sweet potato slices and the pesto separately in airtight containers in the refrigerator for up to 3 days.
- Assembly: It’s not recommended to assemble the full salad and store it, as the burrata will become rubbery and the pesto can make greens wilt. Reassemble with fresh ingredients when ready to serve.
- Pomegranate Seeds: Store pomegranate seeds in an airtight container in the fridge for up to 5 days.
Conclusion
The Grilled Sweet Potato and Burrata Salad with Pomegranate and Pumpkin Seed Pesto is more than just a meal; it’s an experience. It’s proof that salads can be incredibly exciting, packed with flavor, texture, and visual appeal. The combination of sweet, smoky, creamy, and tart is simply divine. This dish is sure to impress, whether you’re making it for a special occasion or just want to elevate your weeknight dinner. Don’t miss out on this culinary delight! Give this recipe a try and I guarantee it will become a favorite in your rotation. Let me know in the comments how it turns out for you!
Frequently Asked Questions
***Can I make this salad ahead of time?***
While the components like grilled sweet potatoes and pesto can be made a day in advance and stored separately in the refrigerator, it’s best to assemble the salad just before serving. This keeps the burrata creamy and the greens fresh.
***What if I don’t have a grill?***
No problem! You can roast the sweet potato slices in the oven at 400°F (200°C) for about 20-25 minutes, flipping halfway through, until tender and slightly caramelized. You can also use a grill pan on the stovetop.
***How can I make this vegan?***
To make this vegan, omit the burrata cheese. You could replace it with a dairy-free mozzarella alternative, or simply increase the portion of sweet potatoes and greens. For the pesto, replace the Parmesan with nutritional yeast for a cheesy flavor.
***What other nuts or seeds can I use in the pesto?***
Besides pumpkin seeds, toasted sunflower seeds, pine nuts, or even almonds would work well in the pesto. Just ensure they are toasted for the best flavor.

Grilled Sweet Potato and Burrata Salad with Pomegranate and Pumpkin Seed Pesto
Description
ThisGrilled Sweet Potato and Burrata Saladis an absolute showstopper! Sweet, smokygrilled sweet potatoes, creamyburrata, juicypomegranate seeds, and a vibrantpumpkin seed pestocome together for a salad that’s anything but boring. Perfect for a light lunch, a fancy dinner side, or even a stunning holiday dish!
Ingredients
- 2large sweet potatoes, peeled and cut into½-inch thick rounds
- 1 tbspolive oil
- 1 tspsmoked paprika
- Salt and pepper, to taste
- 2balls of burrata cheese
- ½ cuppomegranate seeds
- 2 cupsmixed greens(arugula, spinach, or kale work well)
- ¼ cupfresh basil leaves, roughly chopped
- 2 tbsptoasted pumpkin seeds
- ½ cupraw pumpkin seeds (pepitas)
- 1 cupfresh basil leaves
- ¼ cupfresh parsley
- 1garlic clove, minced
- ¼ cupgrated Parmesan cheese
- ⅓ cupolive oil
- 1 tbsplemon juice
- Salt and pepper, to taste
Instructions
- Preheat your grill tomedium-high heat.
- In a large bowl, toss the sweet potato rounds witholive oil, smoked paprika, salt, and pepperuntil evenly coated.
- Place the sweet potato slices on the grill and cook for4-5 minutes on each side, until tender with nice grill marks. Remove from the grill and let them cool slightly.
- In a dry skillet, toast the raw pumpkin seeds overmedium heatfor3-5 minutes, stirring frequently until they are lightly browned and fragrant. Let them cool.
- In a food processor, combine thetoasted pumpkin seeds, basil leaves, parsley, minced garlic, and Parmesan cheese.
- Pulse the mixture until finely chopped. While the processor is running, slowly drizzle in theolive oil and lemon juiceuntil a thick pesto forms.
- Taste and season withsalt and pepperas needed.
- On a large serving platter, arrange a bed ofmixed greens.
- Scatter thegrilled sweet potato roundsevenly over the greens.
- Gently tear theburrata ballsinto halves or quarters and arrange them over the salad.
- Sprinkle thepomegranate seedsgenerously over the entire salad for a burst of color and freshness.
- Drizzle thepumpkin seed pestogenerously over the salad.
- Garnish with freshbasil leavesand a handful oftoasted pumpkin seedsfor added texture and crunch.
Notes
✅Grilling Sweet Potatoes:Enhances their natural sweetness while adding a slight smoky depth.✅Burrata Texture:Serve atroom temperaturefor maximum creaminess.✅Make-Ahead Pesto:Store in an airtight container in therefrigerator for up to a weekor freeze for longer storage.
“`