Table of Contents
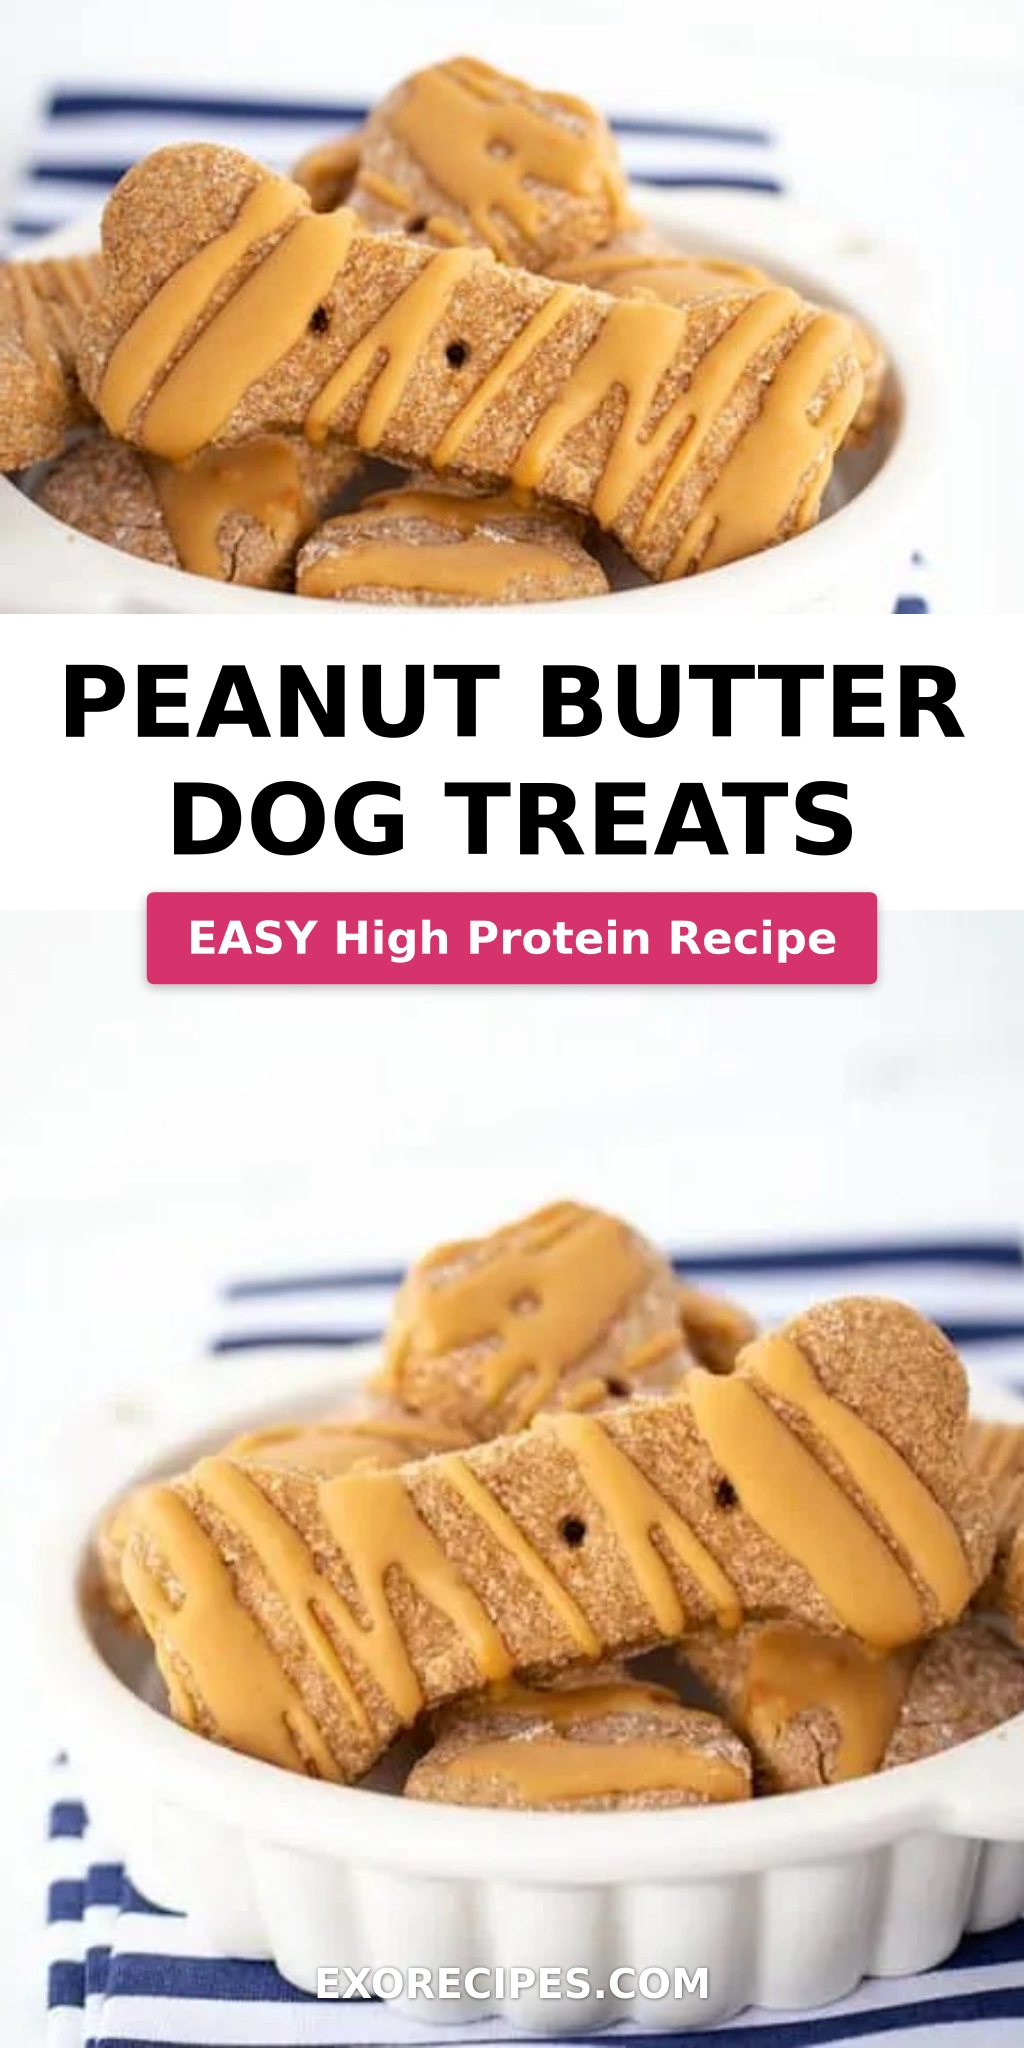
Homemade Peanut Butter Dog Treats Recipe with a Drizzle: Irresistible for Your Pup
There’s something incredibly satisfying about making your own dog treats, especially when they’re as simple and wholesome as this homemade peanut butter dog treats recipe. Growing up in my mother’s bustling kitchen in Morocco, we always had simple, delicious baked goods on hand. While those were for humans, the sentiment of love baked into food is universal. When I moved to New York City and started my culinary journey, I always sought ways to bring that home-style goodness to everything I create. This recipe, with its simple ingredients and delightful peanut butter swirl on top, is my way of sharing a little bit of that love with my furry friends, and yours too. It’s an easy peanut butter dog biscuit that promises to make any pup wag their tail with joy!
Imagine the aroma of warm, peanut-buttery goodness filling your kitchen as these treats bake – it’s irresistible to dogs and delightful for us humans too! The texture of these biscuits is perfectly balanced: slightly crisp on the outside, with a satisfying chew that’s just right for dogs of all sizes. The crowning glory is the adorable peanut butter and coconut oil drizzle, which hardens slightly to add an extra layer of canine-approved deliciousness. It’s a small detail that makes these healthy dog treats peanut butter-packed and visually charming, turning a simple biscuit into a special snack. This recipe uses foundational baking techniques, similar to the pastry work I honed in Paris, focusing on creating predictable, delicious results every time.
What sets this recipe apart are the simple yet effective techniques that ensure perfect results, even for beginners. We’re talking about achieving that ideal dough consistency and ensuring your biscuits hold their shape beautifully. I’ll share a special tip on getting that drizzle just right – a common pitfall for many, but easily avoided with my guidance. Plus, I’ll point out a subtle but crucial mistake many people make when rolling out the dough that can affect the final texture. Get ready for some truly happy barks and tail wags with this straightforward and utterly delightful dog treat recipe!
Why This Homemade Peanut Butter Dog Treats Recipe Is the Best
The true secret behind these incredible homemade peanut butter dog treats lies in its simplicity, elevated by my culinary background. While many recipes rely on just peanut butter and flour, I’ve found that the perfect balance of eggs and water creates a dough that’s easy to work with and results in a consistently well-baked, palatable biscuit. My training in French pastry, where precision is key, has taught me the importance of ingredient ratios for texture, and this recipe is a testament to that. It’s all about creating that satisfying crunch your dog will adore. This isn’t just another dog treat recipe; it’s a carefully crafted recipe that delivers superior taste and texture.
Achieving the perfect texture, one that is neither too hard nor too soft, is crucial for dog treats. In this recipe, the exact amount of water and flour is key. I learned in Paris that controlling hydration levels is paramount, and it applies here too. The dough should be firm enough to roll and cut without sticking excessively, yet tender enough to bake into a delightful biscuit. The combination of whole wheat flour and just enough water ensures a sturdy yet yielding structure, giving you beautiful results every time. This attention to detail ensures your easy peanut butter dog biscuits have a superior bite.
For any home cook, especially those new to baking or making pet treats, this recipe is a dream. It’s remarkably forgiving and incredibly straightforward. There are no complex techniques, just straightforward mixing, rolling, and baking. The ingredients are readily available at any local grocery store here in NYC, making it a convenient option for a quick, homemade snack. You can whip these up in under 30 minutes of active time, ensuring your pup gets healthy, delicious treats without you spending hours in the kitchen. It’s a truly foolproof peanut butter dog snack idea.
Homemade Peanut Butter Dog Treats Recipe Ingredients
I love sourcing ingredients from the bustling farmers’ markets here in New York City, especially for simple recipes like this. Fresh eggs, good quality peanut butter, and wholesome flour are staples I always have on hand. My mother in Morocco taught me the value of using high-quality, simple ingredients, and that philosophy guides me even when making treats for my dog. This recipe calls for pantry staples, ensuring you can whip up a fresh batch anytime your furry friend deserves a little something special.
Ingredients List
- 1 cup creamy peanut butter (ensure it contains **no xylitol**!)
- 2 large eggs
- 2 1/2 cups whole wheat flour
- 3/4 cup water
- 1/4 cup creamy peanut butter
- 1 1/2 tablespoons coconut oil
Ingredient Spotlight
Creamy Peanut Butter: This is the star ingredient, offering a flavor that dogs adore and healthy fats. When shopping in the US, always opt for natural peanut butter made with just peanuts and maybe salt. Critically, ensure it does NOT contain xylitol, an artificial sweetener that is highly toxic to dogs. I find the creamy variety blends best and is most palatable for most dogs.
Whole Wheat Flour: I prefer whole wheat flour for its fiber content and slightly nutty flavor, which complements the peanut butter beautifully. It’s a safe and common grain for most dogs. If you’re concerned about grains, you can substitute with other whole grain flours like oat flour or even a gluten-free all-purpose blend, though the texture might change slightly.
Coconut Oil: Used in the drizzle, coconut oil is known for its potential health benefits for dogs, including digestion and skin health. It also helps create a smooth, pourable consistency when melted with peanut butter. Make sure to use unrefined coconut oil for the best flavor and quality. Ensure it’s fully cooled before drizzling onto the treats.
| Original Ingredient | Best Substitution | Flavor / Texture Impact |
|---|---|---|
| Whole Wheat Flour | Oat flour or a Gluten-Free All-Purpose blend | Slightly different texture, oat flour is softer, GF blends might be denser. Flavor remains similar. |
| Creamy Peanut Butter | Sunflower seed butter (xylitol-free!) | A slightly different nutty flavor, but equally appealing to most dogs. Texture is similar. |
| Coconut Oil | Unsalted butter or vegetable shortening | A slightly less rich flavor for the drizzle, but binds well with peanut butter. |
How to Make Peanut Butter Dog Treats — Step-by-Step
Let’s get baking! These steps are designed to be straightforward, ensuring a delightful outcome for your canine companion.
Step 1: Preheat and Prepare
Preheat your oven to 350°F (175°C). Line a baking sheet with parchment paper. This simple step prevents sticking and makes cleanup a breeze, saving you precious time after you’ve made your dog’s day with these homemade peanut butter dog treats.
💡 mia’s Pro Tip: Using parchment paper ensures that your delicate dog treats won’t stick to the baking sheet, and you won’t have to scrub at baked-on bits later – a lifesaver for busy pet parents!
Step 2: Mix Wet Ingredients
In a large mixing bowl, combine 1 cup of creamy peanut butter and 2 large eggs. Beat them together with a hand mixer until they are well combined and slightly fluffy. This forms the creamy base of our easy peanut butter dog biscuits.
Step 3: Form the Dough
Add the 2 1/2 cups of whole wheat flour and 3/4 cup of water to the mixing bowl. Beat until a cohesive dough forms into a ball. It should be firm enough to handle but not overly dry or sticky.
⚠️ Common Mistake to Avoid: If your dough is too sticky, resist the urge to add a lot more flour, as this can make the treats tough. Instead, try chilling the dough for about 15 minutes. If it still feels too wet, add flour just half a tablespoon at a time until it’s manageable.
Step 4: Roll and Cut
Dust your work surface lightly with whole wheat flour. Roll the dough out to a thickness of about 1/4 inch. Use your favorite dog-themed cookie cutters (like bones or paws!) to cut out the shapes. Place the cut-outs about an inch apart on the prepared baking sheet. They will not spread much during baking.
Step 5: Add Texture Details
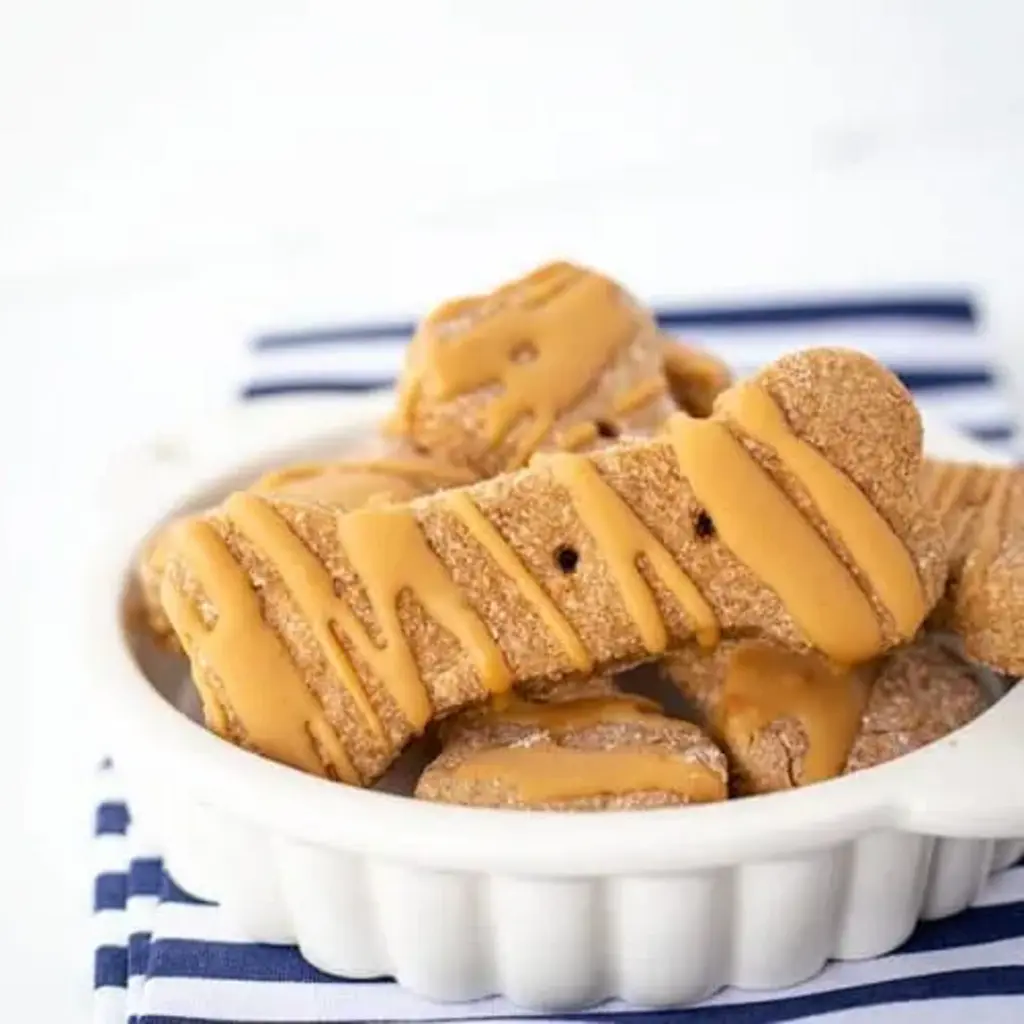
Using a fork or a skewer, gently press holes into each cookie. This not only adds a decorative touch but also helps the treats cook more evenly. It’s a small detail, but it elevates the look of your homemade peanut butter dog treats.
Step 6: Bake to Golden Perfection
Bake for approximately 18 minutes, or until the edges are golden brown. The exact baking time will depend on the size and thickness of your cut-out cookies. My 3 1/4-inch long bone cutters usually take about this long.
Step 7: Prepare the Drizzle
While the cookies are cooling, prepare the peanut butter drizzle. In a small microwave-safe bowl, combine the remaining 1/4 cup of creamy peanut butter and 1 1/2 tablespoons of coconut oil. Microwave for about 30 seconds, stirring until thoroughly combined. The consistency should be runny but thick enough to coat the treat without running off completely.
💡 mia’s Pro Tip: For the perfect drizzle consistency, microwave in 15-second intervals if needed, stirring in between. You want it smooth and pourable, but not watery. This ensures it coats the treats nicely and hardens to a lovely finish.
Step 8: Decorate the Treats
Lay the cooled dog treats out on wax paper. Spoon the peanut butter mixture into a piping bag (or a zip-top bag with a small corner snipped off) and drizzle it over the top of each dog treat. Let them set completely.
| Step | Action | Duration | Key Visual Cue |
|---|---|---|---|
| 1 | Preheat oven & prep sheet | 5 mins | Oven at 350°F, sheet lined |
| 2 | Mix wet ingredients | 3 mins | Combined, slightly fluffy |
| 3 | Form dough | 2 mins | Cohesive ball, manageable |
| 4 | Roll & cut shapes | 5 mins | Uniform shapes, spaced apart |
| 5 | Add texture details | 1 min | Fork indentations on cookies |
| 6 | Bake | 18 mins | Golden brown edges |
| 7 | Prepare drizzle | 1 min | Smooth, pourable mixture |
| 8 | Decorate | 5 mins | Drizzled cookies on wax paper |
Serving & Presentation
These delightful homemade peanut butter dog treats are best served after they’ve cooled completely and the drizzle has set. They make a wonderful surprise for your dog any time of day. For a special occasion, like a dog’s birthday or a holiday, you can arrange them in a cute dog-themed bowl or on a small platter. This recipe is designed for canine enjoyment, so human tasting is strictly limited to ensuring no xylitol!
While these are designed solely for your furry friends, the presentation can still be fun for you and your dog! Presentation for dog treats is all about what makes your dog happy. The drizzle adds a festive touch that’s extra appealing. Imagine laying these out after a long walk through Central Park or as a reward for good behavior during your busy NYC day. My Parisian patisserie training always emphasized making things beautiful, and while this is for dogs, a little visual cheer never hurts!
| Pairing Type | Suggestions | Why It Works |
|---|---|---|
| Treat Time | After training sessions, good behavior rewards. | Dogs love the peanut butter flavor; it’s a high-value reward. |
| Special Occasion | Dog’s birthday, holidays, homecoming surprise. | The drizzle makes them look extra special and celebratory. |
| Daily Fun | A small treat to break up the day. | Simple, wholesome ingredients are good for regular indulgence. |
Make-Ahead, Storage & Reheating
In my busy life here in NYC, being able to make things ahead of time is key! These homemade peanut butter dog treats are perfect for meal prepping for your pup. I often whip up a big batch on Sunday to have on hand for training throughout the week. They are incredibly stable and don’t require any complicated storage, making them a convenient option for any pet owner.
| Method | Container | Duration | Reheating Tip |
|---|---|---|---|
| Refrigerator | Airtight container | Up to 1 week | Serve at room temperature; no reheating needed. |
| Freezer | Airtight container or freezer bag | Up to 3 months | Thaw at room temperature for a few hours. |
| Make-Ahead | Airtight container | Up to 3 days in advance (bake and cool fully) | Cool completely before storing to prevent moisture buildup. |
These treats are naturally preserved by the low moisture content and the peanut butter itself. When stored properly in an airtight container at room temperature, they should last for about a week. For longer storage, the freezer is your best friend; they freeze beautifully and maintain their quality for up to three months. Just ensure they are completely cooled before sealing them away to avoid any condensation, which can lead to staleness. No reheating is necessary, making them a convenient grab-and-go option from the freezer.
Variations & Easy Swaps
| Variation | Key Change | Best For | Difficulty Impact |
|---|---|---|---|
| Nutty Variations | Add other dog-safe nut butters (e.g., sunflower seed butter) to the main dough or drizzle. | Exploring new flavors for picky pups. | No change. |
| Gluten-Free / Grain-Free Swaps | Replace whole wheat flour with oat flour, almond flour (in moderation), or a grain-free blend. | Dogs with grain sensitivities or allergies. | May require slight adjustment of liquid; texture might be softer. |
| Seasonal Treats | Add a tiny pinch of dog-safe spice like cinnamon to the dough. For fall, try a small amount of pumpkin puree. | Festive occasions or unique flavor profiles. | No change. |
Nutty Variations
Just like in my Moroccan cooking, where we layer flavors, you can easily enhance these treats. For a fun twist, consider adding a tablespoon of my homemade Moroccan spice blend (ensure it’s dog-safe, with no onion or garlic powder) into the dough. Alternatively, you could try substituting half of the peanut butter in the main dough with a dog-safe alternative like sunflower seed butter. Always double-check that any nut or seed butter used is free from xylitol!
Gluten-Free or Grain-Free Swaps
For dogs with sensitive tummies or grain allergies, I recommend swapping the whole wheat flour for oat flour or a good quality gluten-free all-purpose baking blend. While almond flour is also an option, use it sparingly, as it can be rich. If you use a grain-free blend, you might need to adjust the water slightly, as these flours can absorb liquid differently. I tested this with an oat flour substitution, and the texture was wonderfully tender, a bit softer than the whole wheat version, but still held its shape.
Seasonal Treats
To make these treats suitable for different seasons or holidays, think about adding a hint of cinnamon or a small amount of unsweetened pumpkin puree (about 1/4 cup) to the dough. Pumpkin adds moisture, so you might need slightly less water. For a fall treat, these pumpkin-peanut butter biscuits are a hit! Remember to always introduce new ingredients slowly to your dog’s diet.
Can I use natural peanut butter for homemade dog treats?
Absolutely, you can use natural peanut butter, and I highly recommend it for these homemade peanut butter dog treats! Just be sure that the natural peanut butter you select is pure, containing only peanuts and possibly a bit of salt. The most critical thing to check is that it does NOT contain xylitol, which is a sugar substitute highly toxic to dogs. Xylitol can cause a rapid drop in blood sugar and liver failure. Always read the ingredients list carefully to ensure your dog’s safety.
How long do homemade peanut butter dog treats last?
These delicious homemade peanut butter dog treats, when stored properly, have a good shelf life. At room temperature in an airtight container, they typically last for about 1 week. For longer storage, they freeze exceptionally well and can be kept in the freezer for up to 3 months. Freezing is a fantastic option, especially if you make a large batch, ensuring you always have healthy dog treats peanut butter flavor on hand for your furry friend whenever they need a reward.
What ingredients can I substitute for flour in peanut butter dog treats?
You have several great options for substituting flour in these easy peanut butter dog biscuits! For a slightly softer texture and added fiber, whole oat flour is an excellent choice. Make sure it’s certified gluten-free if your dog has sensitivities. A good quality all-purpose gluten-free baking blend also works well. While almond flour can be used, it’s more calorie-dense and may change the texture significantly, so I’d use it in moderation or a blend. Always ensure your chosen flour is safe for canine consumption.
How do I store peanut butter dog treats to keep them fresh?
To keep your homemade peanut butter dog treats fresh, the best method is to store them in an airtight container. Once the treats have completely cooled after baking, place them into a container that seals well. This prevents them from drying out or becoming stale. If you live in a humid climate or want them to last even longer, storing them in the refrigerator or freezer within an airtight container is highly recommended. This method ensures maximum freshness and is crucial for maintaining their quality for up to a week at room temp, or even longer if refrigerated or frozen.
Are these peanut butter dog treats healthy for my dog?
Yes, this homemade peanut butter dog treats recipe is designed to be healthy and wholesome for your canine companion, provided you use the right ingredients. The core components — peanut butter (xylitol-free, of course!), eggs, and whole wheat flour — are generally safe and provide protein and fiber. The coconut oil in the drizzle adds beneficial fats. By controlling the ingredients and avoiding artificial additives, you’re offering a nutritious snack far superior to many commercial options. Moderation is always key with any treat.
Can I make these treats without a cookie cutter?
Absolutely! If you don’t have dog-themed cookie cutters, you can still make these easy peanut butter dog biscuits. Simply roll out the dough to the specified thickness and use a knife or a pizza cutter to slice it into squares or rectangles. You can also use the rim of a glass to cut out circles. For a more rustic look, you can even shape small portions of dough into logs or balls by hand. The important part is that your dog will love the peanut butter flavor regardless of the shape!
What if my dog is allergic to peanuts?
If your dog has a peanut allergy, switching to a different “butter” is essential for these dog treat recipe peanut butter variations. Sunflower seed butter is a popular and generally safe alternative, but always confirm it’s xylitol-free. Other options include tahini (sesame seed paste) or carob powder, though these will significantly change the flavor and texture. It is always best to consult with your veterinarian about safe alternatives if your dog has known allergies to specific ingredients.
Can I add other flavors or ingredients to the dough?
Yes, you can certainly get creative with these peanut butter dog snack ideas! A small amount of unsweetened, plain applesauce or pureed pumpkin (about 1/4 cup) can be added to the dough for extra moisture and flavor. A tiny pinch of dog-safe spices like cinnamon can also be nice, especially around the holidays. Just be sure to avoid ingredients like garlic, onion, chocolate, and xylitol, which are toxic to dogs. When in doubt, always check with your veterinarian before introducing new ingredients.
Share Your Version!
I truly hope you and your furry friend adore these homemade peanut butter dog treats! Seeing your creations brings me so much joy. If you try this recipe, please consider leaving a star rating and a comment below – your feedback helps other home cooks and pet parents immensely. And if you snap a photo of your delighted pup enjoying these, I’d be thrilled if you shared it on Instagram or Pinterest and tagged me at @exorecipes!
From my NYC kitchen to yours — I hope this recipe brings as much warmth to your table as it does to mine. — mia 🧡
Love This Recipe? Save It to Pinterest!
If you enjoyed this Homemade Peanut Butter Dog Treats recipe, don’t let it get lost in your browser tabs! 😄 Pin it now so you can find it again anytime — and explore hundreds more tried-and-tested recipes waiting for you on my Pinterest boards.
👉 Follow mia on Pinterest @chefrecipes2
📌 Pin this recipe · 🔁 Re-pin your favorites · 💬 Tag me when you make it — I love seeing your creations!

Peanut Butter Dog Treats
Description
These Homemade Peanut Butter Dog Treats will make your peanut butter loving dogs go crazy! Theyre not only filled with peanut butter, but they have a cute peanut butter drizzle on them.
Ingredients
- 1 cup creamy peanut butter
- 2 large eggs
- 2 1/2 cups whole wheat flour
- 3/4 cup water
- 1/4 cup creamy peanut butter
- 1 1/2 tablespoons coconut oil
Instructions
- Preheat oven to 350 degrees F. Line a cookie sheet with parchment paper.
- In a large mixing bowl, add in the1 cup creamy peanut butter and 2 large eggs. Beat with hand mixer until combined.
- Add in the 2 1/2 cups whole wheat flour and 3/4 cup waterBeat until the dough forms a ball.
- Dust your work surface with whole wheat flour.
- Roll the dough out to a 1/4-inch thickness.
- Cut out with the cookie cutter and place an inch apart on the prepared cookie sheet. They won't spread.
- Press holes into the cookie using a fork or a skewer.
- Bake for 18 minutes or until the edges are golden brown. This will depend on the size of your cookie cutter. Mine was 3 1/4-inch long.
- Store in an airtight container. The cookies freeze well after being baked and will last up to 3 months in the freezer.
- In a small microwave-safe bowl, add in the 1/4 cup creamy peanut butter and 1 1/2 tablespoons coconut oil Microwave for 30 seconds and stir to combine. It should be a runny consistency but be thick enough that it doesn't thin out and not hold its shape.
- Lay the dog bones out on wax paper.
- Use a spoon or add the drizzle to the sandwich bag and cut a small hole in the corner, drizzle the glaze over top of each dog treat.
Nutrition
- Calories: 107 kcal
- Sugar: 1 g
- Fat: 7 g
- Carbohydrates: 9 g
- Protein: 4 g
Tried This Recipe? Leave a Comment!
Did you make this recipe? I’d love to hear how it turned out! Please leave a comment and a rating below. Your feedback helps other home cooks and supports cheerychop.com!
For more delicious inspiration, follow me on Pinterest!