Easy Short Rib Soup Recipe with Tender Beef

“`html

Easy Short Rib Soup Recipe with Tender Beef

Craving a Hug in a Bowl? Discover the Ultimate Easy Short Rib Soup.

Are you looking for a deeply satisfying, flavorful soup that feels both luxurious and surprisingly simple to make? If you’re like many home cooks, you’ve probably searched for “easy short rib soup” hoping to find a recipe that delivers tender, fall-off-the-bone beef without hours of complicated prep. You’re in luck! This easy short rib soup recipe is designed to give you all the rich, comforting flavors you crave with minimal fuss. Imagine succulent beef, infused with savory herbs and vegetables, swimming in a deeply flavored broth. This recipe is perfect for a cozy weeknight dinner, a special weekend meal, or even for meal prepping to have hearty goodness ready whenever hunger strikes. Let’s dive into creating a soup that will become a staple in your recipe collection.

Hearty Short Rib Soup Ingredients

The secret to an incredible short rib soup lies in quality ingredients and a little patience. Here’s what you’ll need:

The Stars of the Show

  • Bone-in Beef Short Ribs: About 2-3 pounds. Look for meaty ones with good marbling. The bones add incredible depth and gelatin to the broth as they cook. (Substitution: Boneless short ribs work too, but may cook slightly faster and yield a less gelatinous broth).
  • Olive Oil or other high-heat oil: For searing the ribs and sautéing the vegetables.
  • All-Purpose Flour: About 1/4 cup, for dredging the ribs to help them brown and thicken the stew. (Gluten-Free Option: Use a GF flour blend or omit for a thinner broth).

Aromatic Foundation and Veggies

  • Yellow Onion: 1 large, chopped. Provides a sweet, savory base.
  • Carrots: 2-3 medium, peeled and chopped. Adds sweetness and a vibrant color.
  • Celery Stalks: 2-3, chopped. Contributes fresh, slightly peppery notes.
  • Garlic: 4-6 cloves, minced. Essential for deep flavor.
  • Optional “Soup Veggies”: 1 cup of diced potatoes (Yukon Gold or Russet), parsnips, or sweet potatoes, added in the last hour of cooking for extra heartiness.

Rich Liquids and Essential Seasoning

  • Beef Broth: 6-8 cups, low-sodium. Use good quality broth for the best flavor.
  • Red Wine: 1 cup (optional, but highly recommended). A dry red like Cabernet Sauvignon or Merlot adds significant depth and complexity. (Substitution: If avoiding alcohol, use an extra cup of beef broth or a splash of balsamic vinegar).
  • Tomato Paste: 2 tablespoons. Deepens the savory umami and adds a touch of acidity.
  • Worcestershire Sauce: 1 tablespoon. Another umami booster that complements beef beautifully.
  • Bay Leaves: 2. Fragrant and essential for slow-cooked depth.
  • Fresh Thyme: A few sprigs (or 1 teaspoon dried). Its earthy notes pair wonderfully with beef.
  • Salt and freshly ground Black Pepper: To taste.

Optional Garnishes

  • Fresh Parsley, chopped (for freshness and color)
  • Crusty Bread (for dipping!)
  • A dollop of sour cream or plain Greek yogurt (for creaminess)

Short Rib Soup: Perfectly Timed

Prep time: 25 minutes
Cook time: 3 to 4 hours
Total time: 3.5 to 4.5 hours
Yields: 6-8 servings

This recipe requires a longer simmering time to ensure the short ribs become incredibly tender. While the active preparation is quick (around 25 minutes), the magic happens slowly on the stovetop or in the oven. Compared to many other hearty soups that might take an hour or less, this short rib soup prioritizes flavor development through slow cooking, making it worth the wait.

A steaming bowl of short rib soup with tender beef and vegetables.

Easy Short Rib Soup: Step-by-Step

Step 1: Sear the Short Ribs to Perfection

Pat the short ribs thoroughly dry with paper towels. This is crucial for achieving a good sear. Lightly season them with salt and pepper, then dredge them in the flour, shaking off any excess. Heat 2-3 tablespoons of olive oil in a large Dutch oven or heavy-bottomed pot over medium-high heat. Sear the short ribs on all sides until deeply browned and caramelized. This step builds a foundational layer of flavor. Don’t overcrowd the pot; do this in batches if necessary. Remove the seared ribs and set them aside on a plate.

Step 2: Sauté the Aromatics

Reduce the heat to medium. Add the chopped onion, carrots, and celery to the pot. Cook, stirring occasionally, until the vegetables have softened and the onion is translucent, about 8-10 minutes. This process, called building the mirepoix, releases their natural sweetness and forms a savory base for the soup.

Step 3: Deglaze and Build the Flavor Base

Add the minced garlic and tomato paste to the pot. Cook for another minute until fragrant, stirring constantly. If using, pour in the red wine and scrape the bottom of the pot to release all the browned bits (fond) that have accumulated. Let the wine simmer and reduce by about half, about 3-5 minutes. Stir in the Worcestershire sauce.

Step 4: Slow Cook the Tender Short Ribs

Return the seared short ribs to the pot. Pour in enough beef broth to mostly cover the ribs (start with 6 cups, add more if needed). Add the bay leaves and thyme sprigs. Bring the liquid to a gentle simmer. Cover the pot tightly, then transfer it to a preheated oven at 325°F (160°C) or reduce the stovetop heat to low. Let it simmer gently for 3 to 3.5 hours, or until the short ribs are fork-tender and easily pull away from the bone.

Step 5: Shred the Beef and Return to Pot

Carefully remove the tender short ribs from the pot and place them on a cutting board. Once cool enough to handle, shred the meat using two forks, discarding any large pieces of fat or bone. Skim off any excess fat from the surface of the broth if desired. Return the shredded beef back to the pot.

Step 6: Add Vegetables and Finishing Touches

If you’re adding potatoes or other hearty vegetables, now is the time. Add them to the simmering broth and cook for another 30-45 minutes, or until tender. Taste the soup and adjust seasoning with salt and freshly ground black pepper as needed. Remove the bay leaves and thyme stems before serving. Stir in fresh chopped parsley for a burst of color and freshness.

Nutritional Highlights

A typical serving (about 1.5 cups without additional vegetables) of this hearty short rib soup contains approximately:

  • Calories: 450-550 (can vary based on fat content of ribs and amount of broth/oil)
  • Protein: 30-40g
  • Fat: 25-35g
  • Carbohydrates: 10-15g (will increase if adding starchy vegetables)
  • Fiber: 2-4g

Note: These are estimates and can vary significantly based on specific ingredients used and portion sizes.

Healthier Swaps for Your Short Rib Soup

While this soup is already packed with protein and nutrients, you can make it even lighter without sacrificing flavor:

  • Leaner Beef Cuts: If possible, opt for short ribs with less visible marbling.
  • Skim the Fat: After simmering, thoroughly skim any excess fat from the surface of the broth.
  • Load up on Veggies: Instead of flour to thicken, rely on the natural starches from added vegetables like potatoes, parsnips, or even pureed cauliflower. You can also increase the amount of carrots, celery, and onions.
  • Lower Sodium Broth: Use unsalted or low-sodium beef broth to control sodium intake.
  • Skip the Wine: If you’re avoiding alcohol entirely, simply replace the wine with extra beef broth and a tiny splash of balsamic vinegar for acidity.

Serving This Cozy Bowl

This robust soup is a meal in itself. For a complete dining experience, consider serving it with:

  • Crusty Bread: Perfect for soaking up every last drop of that rich broth.
  • A Simple Salad: A light green salad with a vinaigrette can offer a fresh contrast.
  • Garnishes: Fresh chopped parsley adds a pop of color and freshness. A dollop of sour cream or plain Greek yogurt can add a creamy tang.

Avoid These Common Soup Mistakes

* Skipping the Sear: This is where deep flavor is built! Don’t rush this step.

* Overcrowding the Pot: When searing, give the ribs space to brown properly. Sear in batches if needed.

* Using Water Instead of Broth: Broth is essential for flavor depth. Use good quality beef broth.

* Not Skimming Fat: Short ribs can be fatty. Skimming the fat after cooking yields a cleaner, more pleasant broth.

* Under-seasoning: Always taste and adjust salt and pepper towards the end of cooking.

Storing and Reheating Your Masterpiece

This short rib soup is fantastic for meal prep! Once completely cooled, store it in an airtight container in the refrigerator for up to 3-4 days. The flavors actually meld and deepen overnight, making it even tastier the next day.

To reheat, gently warm it on the stovetop over medium-low heat, stirring occasionally, or reheat individual portions in the microwave. If the soup has thickened too much, you can add a splash of beef broth or water to loosen it up.

Enjoy Your Delicious Easy Short Rib Soup!

Making rich, tender short rib soup doesn’t have to be complicated. This easy recipe proves that with a few smart steps and a little patience, you can achieve restaurant-quality flavor right in your own kitchen. The result is a deeply satisfying, hearty bowl of comfort that’s perfect for any occasion. Gather your ingredients, take your time, and get ready to wow your family and friends (or just treat yourself!).

Frequently Asked Questions

***What is the best way to cut short ribs for soup?***

Bone-in short ribs are generally preferred for their flavor and gelatin contribution. They are typically cut about 2-3 inches thick. Boneless short ribs can also be used, but you might get a less rich broth.

***Can I make this soup in a slow cooker or Instant Pot?***

Yes! For a slow cooker, sear the ribs and sauté the aromatics as directed, then transfer everything to the slow cooker with the liquids and seasonings. Cook on low for 6-8 hours or high for 3-4 hours. For an Instant Pot, sear the ribs under pressure, sauté the aromatics, then add liquids and seasonings. Cook on high pressure for 45-60 minutes, followed by a natural release of about 15 minutes.

***Why is my short rib soup not flavorful enough?***

Ensure you’re using good quality beef broth, searing the ribs well, and not skipping the aromatics (onion, carrot, celery, garlic). Deglazing the pot with wine or a splash of broth also helps incorporate those flavorful browned bits.

***How do I get the beef truly tender?***

Low and slow is the key! Beef short ribs need time for their connective tissues to break down. Simmering them gently for 3-4 hours (or even longer) is essential for achieving that melt-in-your-mouth tenderness.

***Can I make this soup ahead of time?***

Absolutely! In fact, this soup often tastes even better the next day as the flavors have more time to meld. Store cooled soup in an airtight container in the refrigerator for up to 3-4 days and reheat gently.

Print

clock clock iconcutlery cutlery iconflag flag iconfolder folder iconinstagram instagram iconpinterest pinterest iconfacebook facebook iconprint print iconsquares squares iconheart heart iconheart solid heart solid icon

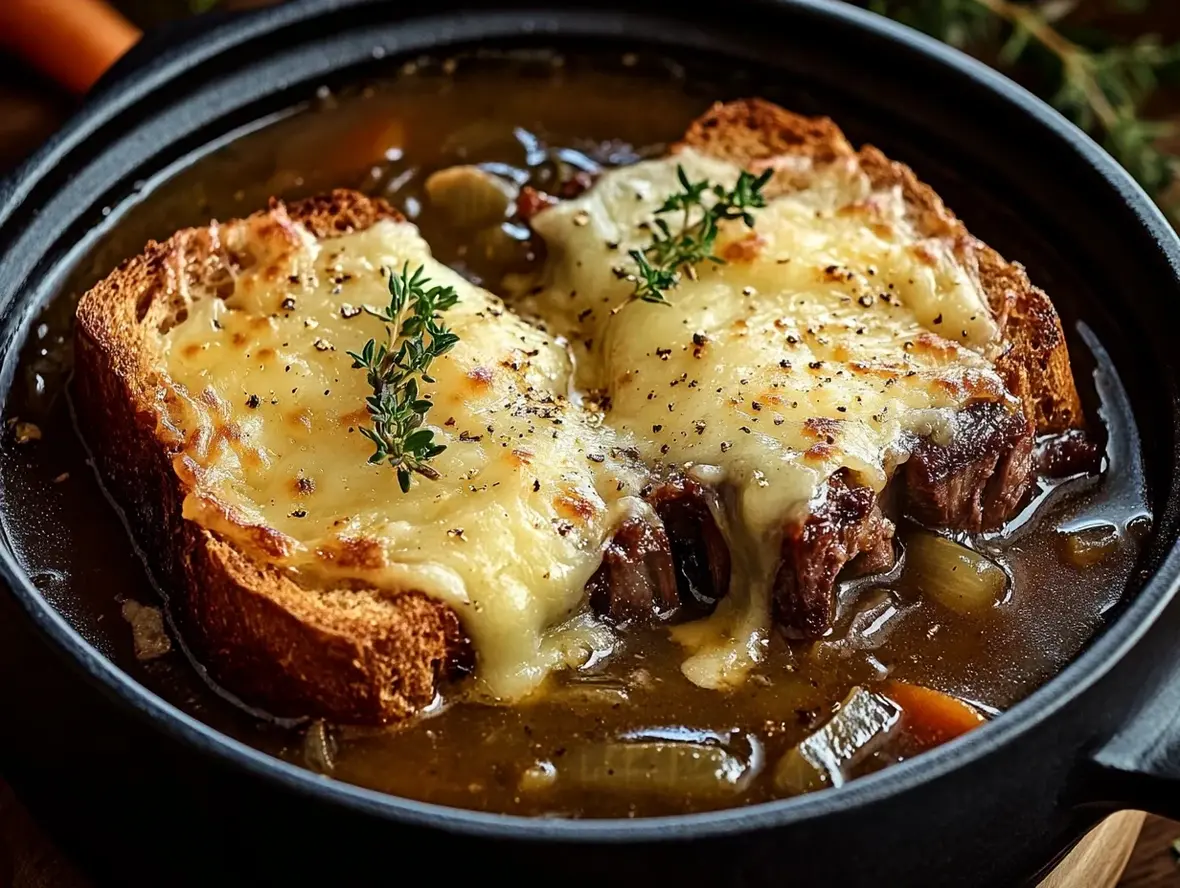
French Onion Short Rib Soup with Gruyère Toast

  • Author: Chef Sara

Description

A luxurious twist on classic French onion soup, this hearty dish features tender short ribs simmered with sweet caramelized onions and aromatic herbs. Topped with bubbly Gruyère cheese toast, it’s a cozy, indulgent meal perfect for cold evenings.


Ingredients

Scale
  • 6 tbspsalted butter4medium yellow onions, thinly slicedBlack pepper, to taste2shallots, sliced4garlic cloves, chopped2 tbspfresh thyme leaves2 tbspchopped fresh sageRed chili flakes, to taste6–8cups low-sodium chicken broth½ cuptamari or low-sodium soy sauce4lbs bone-in beef short ribs2bay leaves1star anise (optional)2 cupsbaby carrots
  • 4medium yellow onions, thinly slicedBlack pepper, to taste2shallots, sliced4garlic cloves, chopped2 tbspfresh thyme leaves2 tbspchopped fresh sageRed chili flakes, to taste6–8cups low-sodium chicken broth½ cuptamari or low-sodium soy sauce4lbs bone-in beef short ribs2bay leaves1star anise (optional)2 cupsbaby carrots
  • Black pepper, to taste2shallots, sliced4garlic cloves, chopped2 tbspfresh thyme leaves2 tbspchopped fresh sageRed chili flakes, to taste6–8cups low-sodium chicken broth½ cuptamari or low-sodium soy sauce4lbs bone-in beef short ribs2bay leaves1star anise (optional)2 cupsbaby carrots
  • 2shallots, sliced4garlic cloves, chopped2 tbspfresh thyme leaves2 tbspchopped fresh sageRed chili flakes, to taste6–8cups low-sodium chicken broth½ cuptamari or low-sodium soy sauce4lbs bone-in beef short ribs2bay leaves1star anise (optional)2 cupsbaby carrots
  • 4garlic cloves, chopped2 tbspfresh thyme leaves2 tbspchopped fresh sageRed chili flakes, to taste6–8cups low-sodium chicken broth½ cuptamari or low-sodium soy sauce4lbs bone-in beef short ribs2bay leaves1star anise (optional)2 cupsbaby carrots
  • 2 tbspfresh thyme leaves2 tbspchopped fresh sageRed chili flakes, to taste6–8cups low-sodium chicken broth½ cuptamari or low-sodium soy sauce4lbs bone-in beef short ribs2bay leaves1star anise (optional)2 cupsbaby carrots
  • 2 tbspchopped fresh sageRed chili flakes, to taste6–8cups low-sodium chicken broth½ cuptamari or low-sodium soy sauce4lbs bone-in beef short ribs2bay leaves1star anise (optional)2 cupsbaby carrots
  • Red chili flakes, to taste6–8cups low-sodium chicken broth½ cuptamari or low-sodium soy sauce4lbs bone-in beef short ribs2bay leaves1star anise (optional)2 cupsbaby carrots
  • 68cups low-sodium chicken broth½ cuptamari or low-sodium soy sauce4lbs bone-in beef short ribs2bay leaves1star anise (optional)2 cupsbaby carrots
  • ½ cuptamari or low-sodium soy sauce4lbs bone-in beef short ribs2bay leaves1star anise (optional)2 cupsbaby carrots
  • 4lbs bone-in beef short ribs2bay leaves1star anise (optional)2 cupsbaby carrots
  • 2bay leaves1star anise (optional)2 cupsbaby carrots
  • 1star anise (optional)2 cupsbaby carrots
  • 2 cupsbaby carrots
  • 6slices French bread2 cupsshredded Gruyère cheese
  • 2 cupsshredded Gruyère cheese

Instructions

  1. 1️⃣Preheat the oven:Set your oven to 325°F (165°C).
  2. 2️⃣Caramelize the onions:In a large, oven-safe Dutch oven, melt the butter over medium-high heat. Add the thinly sliced onions and cook for 10 minutes, stirring frequently, until softened and lightly caramelized. Season with black pepper.3️⃣Add aromatics:Stir in the shallots, garlic, thyme, sage, and a pinch of red chili flakes. Cook for an additional 2 minutes until fragrant.4️⃣Sear the short ribs:Add the short ribs to the pot, nestling them among the onions. Pour in 6 cups of chicken broth, followed by the tamari, bay leaves, and star anise (if using).5️⃣Roast the soup:Cover the Dutch oven and transfer it to the oven. Roast for 2 ½ to 3 hours, or until the short ribs are tender and the meat easily falls off the bone.6️⃣Add carrots:During the last 1-2 hours of cooking, stir in the baby carrots to allow them to soften.7️⃣Shred the meat:Remove the pot from the oven. Discard the bay leaves and star anise. Pull the bones from the short ribs and lightly shred the meat. Return the pot to the stove over low heat. Taste the soup and adjust seasoning with salt, if needed.8️⃣Prepare the toast:Preheat the oven to 425°F (220°C). Arrange the French bread slices on a baking sheet and toast for 10 minutes, or until dry and slightly crisp.9️⃣Add the cheese:Switch the oven to broil. Top each slice of bread with shredded Gruyère cheese and broil for 2-3 minutes, until the cheese is melted and bubbly.🔟Serve:Ladle the rich soup into bowls. Top each serving with a slice of Gruyère toast. Garnish with black pepper and fresh thyme. Serve hot and enjoy!
  3. 3️⃣Add aromatics:Stir in the shallots, garlic, thyme, sage, and a pinch of red chili flakes. Cook for an additional 2 minutes until fragrant.4️⃣Sear the short ribs:Add the short ribs to the pot, nestling them among the onions. Pour in 6 cups of chicken broth, followed by the tamari, bay leaves, and star anise (if using).5️⃣Roast the soup:Cover the Dutch oven and transfer it to the oven. Roast for 2 ½ to 3 hours, or until the short ribs are tender and the meat easily falls off the bone.6️⃣Add carrots:During the last 1-2 hours of cooking, stir in the baby carrots to allow them to soften.7️⃣Shred the meat:Remove the pot from the oven. Discard the bay leaves and star anise. Pull the bones from the short ribs and lightly shred the meat. Return the pot to the stove over low heat. Taste the soup and adjust seasoning with salt, if needed.8️⃣Prepare the toast:Preheat the oven to 425°F (220°C). Arrange the French bread slices on a baking sheet and toast for 10 minutes, or until dry and slightly crisp.9️⃣Add the cheese:Switch the oven to broil. Top each slice of bread with shredded Gruyère cheese and broil for 2-3 minutes, until the cheese is melted and bubbly.🔟Serve:Ladle the rich soup into bowls. Top each serving with a slice of Gruyère toast. Garnish with black pepper and fresh thyme. Serve hot and enjoy!
  4. 4️⃣Sear the short ribs:Add the short ribs to the pot, nestling them among the onions. Pour in 6 cups of chicken broth, followed by the tamari, bay leaves, and star anise (if using).
  5. 5️⃣Roast the soup:Cover the Dutch oven and transfer it to the oven. Roast for 2 ½ to 3 hours, or until the short ribs are tender and the meat easily falls off the bone.6️⃣Add carrots:During the last 1-2 hours of cooking, stir in the baby carrots to allow them to soften.7️⃣Shred the meat:Remove the pot from the oven. Discard the bay leaves and star anise. Pull the bones from the short ribs and lightly shred the meat. Return the pot to the stove over low heat. Taste the soup and adjust seasoning with salt, if needed.8️⃣Prepare the toast:Preheat the oven to 425°F (220°C). Arrange the French bread slices on a baking sheet and toast for 10 minutes, or until dry and slightly crisp.9️⃣Add the cheese:Switch the oven to broil. Top each slice of bread with shredded Gruyère cheese and broil for 2-3 minutes, until the cheese is melted and bubbly.🔟Serve:Ladle the rich soup into bowls. Top each serving with a slice of Gruyère toast. Garnish with black pepper and fresh thyme. Serve hot and enjoy!
  6. 6️⃣Add carrots:During the last 1-2 hours of cooking, stir in the baby carrots to allow them to soften.7️⃣Shred the meat:Remove the pot from the oven. Discard the bay leaves and star anise. Pull the bones from the short ribs and lightly shred the meat. Return the pot to the stove over low heat. Taste the soup and adjust seasoning with salt, if needed.8️⃣Prepare the toast:Preheat the oven to 425°F (220°C). Arrange the French bread slices on a baking sheet and toast for 10 minutes, or until dry and slightly crisp.9️⃣Add the cheese:Switch the oven to broil. Top each slice of bread with shredded Gruyère cheese and broil for 2-3 minutes, until the cheese is melted and bubbly.🔟Serve:Ladle the rich soup into bowls. Top each serving with a slice of Gruyère toast. Garnish with black pepper and fresh thyme. Serve hot and enjoy!
  7. 7️⃣Shred the meat:Remove the pot from the oven. Discard the bay leaves and star anise. Pull the bones from the short ribs and lightly shred the meat. Return the pot to the stove over low heat. Taste the soup and adjust seasoning with salt, if needed.
  8. 8️⃣Prepare the toast:Preheat the oven to 425°F (220°C). Arrange the French bread slices on a baking sheet and toast for 10 minutes, or until dry and slightly crisp.9️⃣Add the cheese:Switch the oven to broil. Top each slice of bread with shredded Gruyère cheese and broil for 2-3 minutes, until the cheese is melted and bubbly.🔟Serve:Ladle the rich soup into bowls. Top each serving with a slice of Gruyère toast. Garnish with black pepper and fresh thyme. Serve hot and enjoy!
  9. 9️⃣Add the cheese:Switch the oven to broil. Top each slice of bread with shredded Gruyère cheese and broil for 2-3 minutes, until the cheese is melted and bubbly.🔟Serve:Ladle the rich soup into bowls. Top each serving with a slice of Gruyère toast. Garnish with black pepper and fresh thyme. Serve hot and enjoy!
  10. 🔟Serve:Ladle the rich soup into bowls. Top each serving with a slice of Gruyère toast. Garnish with black pepper and fresh thyme. Serve hot and enjoy!

Notes

Make it ahead:The soup can be prepared a day in advance for deeper flavor. Reheat gently on the stove before serving.Star anise:This optional ingredient adds a subtle, sweet-spicy depth to the broth, enhancing the flavor complexity.Cheese options:If Gruyère isn’t available, try using Swiss or Comté cheese as a substitute.
Star anise:This optional ingredient adds a subtle, sweet-spicy depth to the broth, enhancing the flavor complexity.Cheese options:If Gruyère isn’t available, try using Swiss or Comté cheese as a substitute.
Cheese options:If Gruyère isn’t available, try using Swiss or Comté cheese as a substitute.


“`

How to Make Tender Crockpot Cube Steak

“`html

How to Make Tender Crockpot Cube Steak

Tired of Tough Cube Steak?

Are you struggling to achieve that elusive tender, melt-in-your-mouth texture with cube steak, particularly when using your slow cooker? You’re not alone. Many home cooks believe cube steak is destined for a chewy fate, but the truth is, with the right technique, it can transform into a succulent star of your dinner table. This recipe is your key to unlocking that potential. We’ve all had those busy weeknights where a comforting, easy meal is a must. Imagine coming home to the savory aroma of perfectly slow-cooked cube steak, a dish that requires minimal effort but delivers maximum flavor and tenderness. This isn’t just another recipe; it’s your blueprint for an effortless, crowd-pleasing meal that will make you rethink everything you thought you knew about cube steak. Ready to banish tough meat forever?

Key Ingredients for Tender Cube Steak

The magic of truly tender crockpot cube steak lies in a thoughtful selection of ingredients that work together to break down the meat and build layers of savory flavor. Here’s a breakdown of what you’ll need:

The Star: Cube Steak

You’ll need about 1.5 to 2 pounds of cube steak. Look for pieces that are relatively uniform in thickness, around 1/2 inch. The tenderizing process (the “cubing”) makes it leaner and more prone to drying out if overcooked, which is why slow cooking is so ideal. The visible “cubes” are actually indentations from a meat tenderizer, designed to help marinades and cooking juices penetrate.

The Flavorful Coating

This is crucial for both flavor and creating a slight crust that thickens the sauce later.

  • 1/2 cup all-purpose flour
  • 1 teaspoon salt
  • 1/2 teaspoon black pepper
  • 1/4 teaspoon garlic powder
  • 1/4 teaspoon onion powder

Substitutions: For gluten-free, use a gluten-free all-purpose flour blend. You can also forgo the seasoned flour and opt for a simple sear before adding to the crockpot if you prefer a lighter coating or are watching carbs.

The Tenderizing Embrace

This liquid is where the slow cooker truly works its magic, keeping the steak moist and breaking down its connective tissues.

  • 1.5 cups beef broth (low sodium is preferred so you can control saltiness better)
  • 1/2 cup water
  • 1/4 cup Worcestershire sauce
  • 2 tablespoons soy sauce (or tamari for gluten-free)

Substitutions: For a richer flavor, you can use half beef broth and half red wine. If you don’t have Worcestershire sauce, a touch of balsamic vinegar can provide a similar tangy depth, though the flavor profile will be slightly different.

Aromatic Boosters

These additions provide foundational savory notes.

  • 1 large onion, sliced
  • 2-3 cloves garlic, minced
  • 1 tablespoon olive oil (for searing, optional but recommended)
  • Fresh herbs like thyme or rosemary (optional, for added fragrance)

Substitutions: If onion powder alone isn’t enough, consider adding a teaspoon of dried onion flakes to the flour mixture. For a punchier garlic flavor, you can add an extra clove or two.

Mastering the Clock: Prep, Cook, and Total Time

Prep Time: 15 minutes
Cook Time: 4-6 hours (on Low) or 3-4 hours (on High)
Total Time: Approximately 4.5 – 6.75 hours

On average, slow cooker recipes take around 4-8 hours in total. This cube steak recipe falls right within that sweet spot, especially when you consider the minimal active preparation time. The 15 minutes of prep work (chopping, mixing, and optional searing) leads to hours of hands-off cooking, making it perfect for busy schedules. You get that comforting, slow-cooked meal without spending your entire day in the kitchen.

Tender Crockpot Cube Steak ready to serve

Step-by-Step to Melt-in-Your-Mouth Perfection

Step 1: Patting Down the Palate

First things first, let’s get the cube steak ready. Take your cube steak out of its packaging and pat it thoroughly dry with paper towels. This step is super important because it helps the flour coating adhere better and promotes a more even sear if you choose that route. Don’t skip this!

Step 2: The Flavor Wash

In a shallow dish or a large zip-top bag, whisk together the flour, salt, pepper, garlic powder, and onion powder. Take each piece of cube steak and dredge it well in this seasoned flour mixture, ensuring it’s coated on all sides. Shake off any excess flour. This coating will not only add flavor but will also help to thicken the delicious sauce created in the slow cooker.

Step 3: Building the Aromatic Bed

Now, let’s lay the foundation for flavor in your slow cooker. Spread the sliced onion evenly across the bottom of your slow cooker insert. If you’re opting for the optional sear, this is where you’d heat 1 tablespoon of olive oil in a skillet over medium-high heat. Sear each floured cube steak for about 1-2 minutes per side until lightly golden brown. This step adds an incredible depth of flavor, caramelizing the exterior. Don’t overcrowd the pan; work in batches if necessary. Once seared, place the steak pieces on top of the onions.

Step 4: The Slow Cooker’s Magic

In a separate bowl or measuring cup, whisk together the beef broth, water, Worcestershire sauce, and soy sauce. Pour this liquid mixture evenly over the cube steak in the slow cooker. If you’re using fresh herbs like thyme or rosemary, tuck them in around the steak now. Cover the slow cooker and set it to cook on LOW for 4-6 hours or on HIGH for 3-4 hours. The goal is for the steak to be incredibly tender and easily fall apart with a fork. Low and slow is generally preferred for maximum tenderness.

Step 5: Finalizing the Flavor

Once the cooking time is up and the steak is fork-tender, carefully remove the cube steak from the slow cooker and place it on a serving platter. If you want a thicker, more cohesive sauce, you can mix 1 tablespoon of cornstarch with 2 tablespoons of cold water to create a slurry. Stir this slurry into the liquid remaining in the slow cooker, turn the heat to high (if your slow cooker has this setting), and let it thicken for about 15-20 minutes, stirring occasionally. Taste the sauce and adjust seasonings if needed. Discard the herb sprigs, if used. Spoon the thickened sauce over the tender cube steak.

Nutritional Snapshot

While exact nutritional values can vary based on specific ingredients and portion sizes, a typical serving of this Crockpot Cube Steak recipe (without a side of gravy, for example) provides:

  • Calories: Approximately 350-450 kcal per serving (depending on steak cut and sauce thickness)
  • Protein: 30-40g
  • Fat: 15-25g (varies with cut of meat and amount of oil used)
  • Carbohydrates: 10-15g (from flour coating and onions)
  • Sodium: Varies significantly based on broth and soy sauce used. Opting for low-sodium versions is recommended.

(Please note: This is an estimate and can be calculated more precisely using a nutritional calculator with your exact ingredients.)

Lighter Twists for Guilt-Free Indulgence

Looking to lighten up this comforting classic? Here are a few swaps that won’t compromise on flavor or tenderness:

  • Leaner Broth: Use low-sodium, fat-free beef broth.
  • Reduced Flour: Lightly dust the steak with flour instead of a heavy coating, or skip it altogether and rely on the vegetables and liquid to thicken the sauce (perhaps by mashing some of the onion).
  • Veggies Galore: Add more vegetables to the slow cooker, like carrots, celery, or mushrooms, for added nutrients and fiber.
  • Portion Control: Serve with a generous portion of steamed greens or a large salad instead of starchy sides.

Serving Up Success

This tender cube steak is incredibly versatile. Here are some favorite ways to serve it:

  • Classic Comfort: Serve over mashed potatoes (regular or cauliflower for a lighter option) with the savory gravy ladled generously over the top.
  • Hearty Meal: Pair with a side of buttered noodles, rice, or polenta.
  • Vegetable Focus: Enjoy with steamed green beans, roasted broccoli, or a fresh side salad.
  • Sandwich Star: Shred the tender steak and mix it with the sauce for flavorful steak sandwiches.

Avoiding Cube Steak Pitfalls

To ensure your cube steak turns out perfectly tender every time, steer clear of these common mistakes:

  • Overcooking: While slow cooking is forgiving, excessively long cook times (especially on high) can still dry out even tenderized meat. Aim for “fork-tender,” not “falling apart into dust.”
  • Not Enough Liquid: The braising liquid is essential for keeping the meat moist and breaking down fibers. Don’t skimp on it!
  • Skipping the Sear (When Desired): If you love that deep, caramelized flavor, don’t skip the initial sear. It makes a noticeable difference.
  • Not Seasoning Adequately: Cube steak can be bland. Ensure your flour coating and braising liquid are well-seasoned to infuse flavor throughout.

Savoring Leftovers

Leftovers are a delicious bonus!

  • Refrigeration: Store any leftover cube steak and sauce in an airtight container in the refrigerator for up to 3-4 days.
  • Reheating: Gently reheat in a saucepan over low heat with a splash of broth or water to keep it moist, or microwave for short intervals until heated through. The sauce might thicken further upon cooling, so a little extra liquid helps.
  • Freezing: This dish freezes well. Allow it to cool completely, then store in freezer-safe containers for up to 2-3 months. Thaw overnight in the refrigerator before reheating.

Your New Go-To Crockpot Favorite

Making tender, flavorful crockpot cube steak doesn’t have to be a culinary mystery. With this simple yet effective recipe, you can consistently achieve fork-tender results that will impress your family and friends. It’s proof that humble ingredients, coupled with the magic of slow cooking, can create truly exceptional comfort food. So, dust off your slow cooker, gather your ingredients, and prepare to fall in love with cube steak all over again. Give this recipe a try this week and let us know how it turns out in the comments below!

Frequently Asked Questions

***What cut of meat is cube steak?***

Cube steak, also known as minute steak or steak-ums, is typically a cut from the round (like top round or bottom round), which is naturally lean. It’s mechanically tenderized by pounding it with a tenderizing mallet, creating the characteristic “cube” indentations. This process breaks down tough muscle fibers.

***Can I make this recipe without a slow cooker?***

Yes! You can adapt this recipe for the stovetop or oven. On the stovetop, sear the floured cube steak, then add the onions and braising liquid to a Dutch oven or heavy-bottomed pot, cover, and simmer on low for about 45-60 minutes, or until tender. In the oven, follow the stovetop method, but place the covered Dutch oven in a preheated oven at 300°F (150°C) for 1-1.5 hours.

***Why is my cube steak still tough?***

Toughness can result from a few things: overcooking (ironically, even in a slow cooker, extended high-heat cooking can make it tough), not enough braising liquid leading to drying out, or using a cut of meat that wasn’t properly tenderized or is inherently very tough. Ensure you’re cooking until fork-tender, not mushy, and that there’s ample liquid.

***Can I freeze the finished dish?***

Absolutely! It freezes quite well. Make sure to cool it completely before transferring to freezer-safe containers. It’s best to store the meat and sauce together. When reheating, you might need to add a splash of liquid to restore moisture.

***What’s the best way to thicken the sauce if it’s too thin?***

The easiest method is to make a cornstarch slurry: whisk together 1 tablespoon of cornstarch with 2 tablespoons of cold water until smooth. Stir this mixture into the simmering liquid in the slow cooker (if it has a high/simmer setting) or in a saucepan, and cook until thickened. You can also mash some of the softened onions into the sauce to help thicken it naturally.

Print

clock clock iconcutlery cutlery iconflag flag iconfolder folder iconinstagram instagram iconpinterest pinterest iconfacebook facebook iconprint print iconsquares squares iconheart heart iconheart solid heart solid icon

How to Make Tender Crockpot Cube Steak

  • Author: Chef Sara

Description

Make tender Crockpot Cube Steak with a rich, savory sauce. Perfect for busy nights, this easy slow-cooker recipe is pure comfort food!”


Instructions


    “`

    Delicious Cream of Mushroom Chicken Recipes You Must Try

    “`html

    Delicious Cream of Mushroom Chicken Recipes You Must Try

    Are you searching for a dinner recipe that’s both quick to prepare and guaranteed to please the whole family? If so, you’ve come to the right place! Cream of mushroom chicken is a classic comfort food that, when done right, delivers incredibly rich flavor with minimal effort. This versatile dish can be adapted to fit a weeknight rush or a festive gathering, making it a true kitchen hero. Let’s dive into how you can create this crowd-pleasing meal with ease and confidence.

    Irresistible Ingredients

    The magic of cream of mushroom chicken lies in its simplicity, allowing high-quality ingredients to shine. Here’s what you’ll need:

    • Chicken: 1.5 lbs boneless, skinless chicken breasts or thighs, cut into bite-sized pieces. (Thighs offer more moisture and flavor, while breasts are leaner.)
    • Mushrooms: 8 oz cremini mushrooms (baby bellas), sliced. (Their earthy flavor is superior, but white button mushrooms work in a pinch.)
    • Onion: 1 medium yellow onion, finely chopped. (Adds a foundational sweetness and aroma.)
    • Garlic: 3-4 cloves garlic, minced. (Essential for that pungent, savory depth.)
    • Cream of Mushroom Soup: 1 (10.5 oz) can condensed cream of mushroom soup. (The backbone of the sauce. Look for a good quality brand.)
    • Milk: 1.5 cups milk (whole milk for richness, 2% for a lighter option).
    • Chicken Broth: 1 cup low-sodium chicken broth. (Adds liquid and enhances chicken flavor.)
    • Butter/Oil: 1 tbsp butter and 1 tbsp olive oil. (Butter for flavor, oil for a higher smoke point.)
    • Seasoning: Salt and freshly ground black pepper to taste. (Don’t underestimate the power of good seasoning!)
    • Optional Garnish: Fresh parsley, chopped. (For a pop of color and freshness.)

    Timing Your Culinary Success

    Prep Time: 15 minutes
    Cook Time: 25 minutes
    Total Time: 40 minutes

    This recipe is significantly quicker than many traditional cream-based chicken dishes, which often require longer simmering times or more complex sauce preparations. With about 40 minutes from start to finish, it’s perfect for busy weekdays.

    Creamy Mushroom Chicken Dish

    Step-by-Step Creamy Goodness

    Step 1: Sear the Chicken

    Pat your chicken pieces dry with paper towels. This is a crucial step for achieving a beautiful sear. Season generously with salt and pepper. Heat the butter and olive oil in a large skillet or Dutch oven over medium-high heat until shimmering. Add the chicken in a single layer, being careful not to overcrowd the pan (work in batches if necessary). Sear for 2-3 minutes per side until golden brown. The chicken doesn’t need to be cooked through at this stage; we’re just building flavor and color. Remove the chicken from the skillet and set aside on a plate.

    Step 2: Sauté the Aromatics

    Reduce the heat to medium. Add the chopped onion to the same skillet, scraping up any browned bits from the bottom of the pan. Cook the onion for about 5-7 minutes, stirring occasionally, until softened and translucent. Add the minced garlic and cook for another minute until fragrant, being careful not to burn it.

    Step 3: Create the Creamy Sauce

    Add the sliced mushrooms to the skillet with the onions and garlic. Cook, stirring occasionally, until the mushrooms have released their moisture and started to brown, about 5-7 minutes. Now, pour in the condensed cream of mushroom soup and the chicken broth. Stir well to combine everything, ensuring there are no lumps from the soup. Bring the mixture to a gentle simmer.

    Step 4: Combine and Simmer

    Return the seared chicken pieces (and any accumulated juices) to the skillet with the sauce. Stir in the milk. Season with additional salt and pepper if needed. Bring the mixture back to a gentle simmer, then reduce the heat to low, cover the skillet, and let it cook for 10-15 minutes, or until the chicken is cooked through and tender, and the sauce has thickened to your desired consistency. Stir occasionally to prevent sticking.

    Step 5: Finish and Serve

    Once the chicken is cooked and the sauce is rich and creamy, remove the skillet from the heat. Taste and adjust seasonings one last time. Garnish with fresh chopped parsley for a burst of color and freshness. Serve hot and enjoy the comforting flavors!

    Nutritional Snapshot

    While exact nutritional values can vary based on specific ingredients and portion sizes, a typical serving of cream of mushroom chicken (prepared as above) is roughly:

    • Calories: 350-450 kcal
    • Protein: 30-40g
    • Fat: 15-25g
    • Carbohydrates: 10-15g

    Healthier Swaps for Lighter Indulgence

    Looking to lighten up this classic dish without sacrificing flavor? Here are some simple substitutions:

    • Lighter Soup Base: Instead of condensed soup, create a sauce from scratch using sautéed mushrooms, onions, garlic, low-sodium chicken broth, and a roux made with whole wheat flour and a touch of olive oil, finished with a lighter milk or half-and-half.
    • Leaner Protein: Opt for chicken breast and ensure it’s not overcooked.
    • Reduced Fat Dairy: Use skim or 1% milk instead of whole milk. For a milder richness reduction, low-fat half-and-half can be used sparingly.
    • More Veggies: Bulk up the dish with extra mushrooms, or add in spinach, peas, or broccoli florets during the last 5-10 minutes of cooking.
    • Lower Sodium Broth: Always choose low-sodium chicken broth to manage salt intake.

    Perfect Pairings for Your Creamy Chicken

    Cream of mushroom chicken is wonderfully versatile. Here are some ideas:

    • Over Rice: Fluffy white or brown rice is a classic choice to soak up the delicious sauce.
    • With Pasta: Serve it over fettuccine, egg noodles, or penne for a hearty pasta dish.
    • Mashed Potatoes: A true comfort food combination.
    • Crusty Bread: Perfect for dipping into that luscious sauce.
    • Steamed Vegetables: Broccoli, green beans, or asparagus provide a fresh contrast.

    Common Mistakes to Avoid

    To ensure your cream of mushroom chicken is always a success:

    • Don’t skip searing the chicken: This step is crucial for developing flavor and a pleasant texture.
    • Avoid overcrowding the pan: If you cook too much chicken at once, it will steam rather than sear, leading to a pale and less flavorful result.
    • Don’t overcook the chicken: Chicken breast can become dry easily. Cook it until just done.
    • Burn the garlic: Add garlic towards the end of sautéing aromatics and cook briefly until fragrant.
    • Use a watery sauce: Ensure the condensed soup is fully incorporated and the sauce simmers gently to thicken.

    Storing and Reheating Leftovers

    Leftovers can be stored in an airtight container in the refrigerator for up to 3-4 days. Reheat gently on the stovetop over low heat, or in the microwave, stirring occasionally. You might need to add a splash of milk or broth to loosen the sauce if it has thickened too much.

    A Creamy Dream Come True

    Cream of mushroom chicken is more than just a recipe; it’s a testament to how simple ingredients can create profoundly satisfying meals. Whether you’re a seasoned cook or just starting, this dish is achievable and adaptable. It’s the kind of meal that brings warmth to your table and smiles to your family’s faces. So, gather your ingredients and get ready to whip up a batch of this creamy, dreamy chicken – your taste buds will thank you!

    Frequently Asked Questions

    ***Can I use fresh mushrooms instead of condensed soup?***

    Absolutely! If you prefer a fully homemade sauce, sauté finely chopped fresh mushrooms with your onions and garlic, then whisk in broth and a thickening agent like a roux (flour and butter) or a cornstarch slurry. Finish with milk or cream for richness. You’ll need to adjust seasoning accordingly.

    ***Can I make this ahead of time?***

    While it’s best served fresh, you can prepare the sauce and cook the chicken separately. Store them individually and combine and reheat when ready to serve. The sauce might thicken considerably upon cooling, so be prepared to add a little liquid when reheating.

    ***What kind of chicken is best?***

    Both chicken thighs and breasts work well. Thighs are more forgiving and tend to remain more moist due to their higher fat content, offering a richer flavor. Breasts are leaner and cook faster but can dry out if overcooked.

    ***Can I use different types of mushrooms?***

    Yes! While cremini mushrooms are recommended for their robust flavor, you can use white button mushrooms, shiitake, or even a mix for a more complex mushroom profile.

    Print
    clock clock iconcutlery cutlery iconflag flag iconfolder folder iconinstagram instagram iconpinterest pinterest iconfacebook facebook iconprint print iconsquares squares iconheart heart iconheart solid heart solid icon

    Chicken Wings with Mushrooms

    • Author: Chef Sara

    Description

    This delicious and savory dish combines juicy chicken wings with earthy mushrooms, creating a flavorful meal perfect for any occasion. The umami-packed marinade enhances the taste, while the mushrooms provide a hearty complement. Serve with rice or noodles for a complete meal.


    Ingredients

    Scale
    • 10chicken wings, cut in half6mushrooms, sliced3–4slices of fresh ginger2green onions, chopped2 tbspsoy sauce1 tbspoyster sauce1 tbspcornstarch½ tbspdark soy sauceSalt to tasteBlack pepper to taste
    • 6mushrooms, sliced3–4slices of fresh ginger2green onions, chopped2 tbspsoy sauce1 tbspoyster sauce1 tbspcornstarch½ tbspdark soy sauceSalt to tasteBlack pepper to taste
    • 34slices of fresh ginger2green onions, chopped2 tbspsoy sauce1 tbspoyster sauce1 tbspcornstarch½ tbspdark soy sauceSalt to tasteBlack pepper to taste
    • 2green onions, chopped2 tbspsoy sauce1 tbspoyster sauce1 tbspcornstarch½ tbspdark soy sauceSalt to tasteBlack pepper to taste
    • 2 tbspsoy sauce1 tbspoyster sauce1 tbspcornstarch½ tbspdark soy sauceSalt to tasteBlack pepper to taste
    • 1 tbspoyster sauce1 tbspcornstarch½ tbspdark soy sauceSalt to tasteBlack pepper to taste
    • 1 tbspcornstarch½ tbspdark soy sauceSalt to tasteBlack pepper to taste
    • ½ tbspdark soy sauceSalt to tasteBlack pepper to taste
    • Salt to tasteBlack pepper to taste
    • Black pepper to taste

    Instructions

    1. 1️⃣Marinate the chicken wings:In a bowl, combine the chicken wings with ginger slices, soy sauce, oyster sauce, cornstarch, dark soy sauce, and a pinch of salt. Mix well and let it marinate for at least 20 minutes.2️⃣Prepare the skillet:Heat a tablespoon of oil in a large skillet or wok over medium heat. Place the marinated chicken wings skin-side down in the skillet.3️⃣Cook the chicken:Fry the chicken wings for about 5-7 minutes on each side, or until they are golden brown and cooked through.4️⃣Add the mushrooms:Add the sliced mushrooms to the skillet. Stir and cook for an additional 3-5 minutes, or until the mushrooms have softened and released their juices.5️⃣Season the dish:Adjust the flavor with a little more salt and black pepper if needed. Stir everything well to coat evenly with the sauce.6️⃣Garnish and serve:Sprinkle the chopped green onions over the dish. Give it a quick stir and serve immediately.
    2. 2️⃣Prepare the skillet:Heat a tablespoon of oil in a large skillet or wok over medium heat. Place the marinated chicken wings skin-side down in the skillet.3️⃣Cook the chicken:Fry the chicken wings for about 5-7 minutes on each side, or until they are golden brown and cooked through.4️⃣Add the mushrooms:Add the sliced mushrooms to the skillet. Stir and cook for an additional 3-5 minutes, or until the mushrooms have softened and released their juices.5️⃣Season the dish:Adjust the flavor with a little more salt and black pepper if needed. Stir everything well to coat evenly with the sauce.6️⃣Garnish and serve:Sprinkle the chopped green onions over the dish. Give it a quick stir and serve immediately.
    3. 3️⃣Cook the chicken:Fry the chicken wings for about 5-7 minutes on each side, or until they are golden brown and cooked through.
    4. 4️⃣Add the mushrooms:Add the sliced mushrooms to the skillet. Stir and cook for an additional 3-5 minutes, or until the mushrooms have softened and released their juices.5️⃣Season the dish:Adjust the flavor with a little more salt and black pepper if needed. Stir everything well to coat evenly with the sauce.6️⃣Garnish and serve:Sprinkle the chopped green onions over the dish. Give it a quick stir and serve immediately.
    5. 5️⃣Season the dish:Adjust the flavor with a little more salt and black pepper if needed. Stir everything well to coat evenly with the sauce.6️⃣Garnish and serve:Sprinkle the chopped green onions over the dish. Give it a quick stir and serve immediately.
    6. 6️⃣Garnish and serve:Sprinkle the chopped green onions over the dish. Give it a quick stir and serve immediately.

    Notes

    Mushroom variety:Button mushrooms work great, but you can also use shiitake or oyster mushrooms for a different flavor profile.Spice it up:Add a pinch of red pepper flakes or chili oil for a spicy kick.Serving suggestions:Pair with steamed white rice, fried rice, or noodles to complete the meal.
    Spice it up:Add a pinch of red pepper flakes or chili oil for a spicy kick.Serving suggestions:Pair with steamed white rice, fried rice, or noodles to complete the meal.
    Serving suggestions:Pair with steamed white rice, fried rice, or noodles to complete the meal.

    “`

    Easy Cheeseburger Pasta Recipe You’ll Love

    “`html

    Easy Cheeseburger Pasta Recipe You’ll Love

    Are You Craving a One-Pan Dinner?

    When the weeknight rush hits, do you find yourself staring into the abyss of your pantry, desperately searching for a meal that’s both satisfying and quick? If you’re nodding along, chances are you’ve Googled “easy dinner recipes” or “quick family meals” more times than you can count. The good news is, you’ve landed on a winner! This Easy Cheeseburger Pasta recipe is designed to be your new weeknight hero. It combines the comforting flavors of a classic cheeseburger with the effortless joy of a pasta dish, all in one glorious pot. Imagine tender pasta coated in a rich, savory sauce, loaded with seasoned ground beef and gooey melted cheese. Sounds like a dream, right? Well, it’s a delicious reality that’s surprisingly simple to make, proving that you don’t need hours in the kitchen to create a meal that your whole family will adore. Get ready to ditch the takeout menus and embrace this incredibly flavorful, speedy pasta that’s destined to become a regular in your dinner rotation.

    The Delicious Components

    The magic of this cheeseburger pasta lies in its simple yet effective combination of classic homestyle flavors. Each ingredient plays a crucial role in building that familiar, comforting taste we all love.

    The Star of the Show: Ground Beef

    We’ll start with a pound of ground beef. The fat content is up to you; 80/20 offers great flavor without being overly greasy, while leaner options are available if that’s your preference. This forms the savory, hearty base of our dish.

    Substitution: For a leaner option, use 90% lean ground turkey or chicken. For a plant-based version, crumbled firm tofu or plant-based ground “meat” works wonderfully.

    Aromatic Foundations

    Finely diced yellow onion and minced garlic are essential for building depth of flavor. They soften and sweeten as they cook, providing a fragrant foundation that complements the beef beautifully.

    Substitution: Shallots can be used instead of yellow onion for a milder, sweeter flavor. Garlic powder can substitute fresh minced garlic in a pinch, but use about 1 teaspoon.

    The Creamy, Dreamy Sauce

    Tomato paste provides a rich, concentrated tomato flavor. We’ll use beef broth for our liquid base, adding savory depth. A touch of Worcestershire sauce brings a delightful umami kick, and a splash of milk or heavy cream towards the end creates that signature creamy texture. Ketchup adds a hint of sweetness and tang, bridging the gap between pasta and burger.

    Substitution: Vegetable broth can be used instead of beef broth. For a dairy-free creaminess, use full-fat coconut milk or a dairy-free cream alternative.

    The Perfect Pasta Pair

    Elbow macaroni or rotini are fantastic choices, as their nooks and crannies are perfect for catching the luscious sauce. You’ll need about 8 ounces, cooked al dente.

    Substitution: Almost any short pasta shape will work beautifully – farfalle (bowties), penne, or even a fun shape like cavatappi.

    The Irresistible Cheese

    A generous amount of shredded cheddar cheese is non-negotiable for that classic cheeseburger experience. Sharp cheddar offers the most robust flavor, but a mild or medium blend works too.

    Substitution: Monterey Jack, Colby, or a Mexican blend of cheeses can be used for a slightly different cheesy profile.

    Seasonings and Spices

    Salt, black pepper, and a pinch of paprika will season the beef and sauce, enhancing all the delicious flavors without overpowering them.

    Substitution: A dash of onion powder and garlic powder can boost the aromatic notes if you prefer.

    Speedy Preparation & Cooking

    Prep time: 15 minutes
    Cook time: 30 minutes
    Total time: 45 minutes
    Servings: 4-6

    Compared to many traditional pasta dishes that can take an hour or more, this cheeseburger pasta is a champion of efficiency. Its 45-minute total time makes it significantly faster than many comparable family meals, perfect for when time is of the essence.

    Cheeseburger pasta in a skillet, with macaroni, ground beef, and melted cheddar cheese.

    Crafting Your Cheeseburger Pasta

    Brown the Beef

    Grab a large skillet or Dutch oven and set it over medium-high heat. Add your ground beef and break it up with a spoon. Cook, stirring occasionally, until it’s beautifully browned all over. Drain off any excess grease, leaving just a bit for flavor.

    Sauté Aromatics

    Push the browned beef to one side of the skillet (or momentarily remove it if your pan is crowded). Add your diced onion to the clear space and sauté for about 3-4 minutes until it begins to soften and look translucent. Then, add the minced garlic and cook for another minute until fragrant, stirring it into the beef.

    Deglaze and Simmer

    Stir in the tomato paste, Worcestershire sauce, ketchup, paprika, salt, and pepper. Cook for a minute, stirring constantly, to toast the tomato paste slightly and help release its flavor. Pour in the beef broth and milk (or cream). Bring the mixture to a simmer, scraping up any browned bits from the bottom of the pan – that’s where the flavor lives!

    Cook the Pasta

    While the sauce simmers, cook your chosen pasta according to package directions until it’s perfectly al dente. You want it to have a slight bite. Drain the pasta, reserving about a cup of the starchy pasta water.

    Combine and Melt

    Add the drained pasta directly into the skillet with the simmering sauce and beef mixture. Stir everything together until the pasta is well coated. Gradually stir in about half of the shredded cheddar cheese, allowing it to melt into the sauce and create a wonderfully gooey consistency. If the sauce seems too thick, add a splash of the reserved pasta water to loosen it up.

    Add the Finishing Touches

    Once the cheese is melted and the sauce is perfectly creamy, sprinkle the remaining cheddar cheese over the top. Cover the skillet for a minute or two, just to melt the final layer of cheese. You can garnish with fresh chopped parsley or chives for a pop of color and freshness, if desired.

    Nutritional Snapshot

    Please note that nutritional information can vary based on ingredients used, portion sizes, and specific brands. This is an approximate breakdown per serving (assuming 6 servings):

    • Calories: Approximately 550-650 kcal
    • Protein: 25-35g
    • Fat: 25-35g
    • Carbohydrates: 40-50g
    • Fiber: 3-5g
    • Sodium: Varies greatly based on broth and cheese used.

    Healthier Takes on a Classic

    While this recipe is already a weeknight miracle, you can easily lighten it up further without sacrificing flavor:

    • Swap the Pasta: Use whole wheat pasta for added fiber, or even spiralized zucchini noodles for a low-carb twist.
    • Leaner Protein: Opt for lean ground turkey or chicken as mentioned earlier.
    • Reduced Fat Cheese: Use a reduced-fat cheddar, or simply use a bit less cheese overall.
    • Add Veggies: Sneak in extra vegetables like finely chopped bell peppers, mushrooms, or spinach when you sauté the onions. They add nutrients and volume.
    • Lower Sodium Broth: Choose low-sodium beef broth and be mindful of added salt.

    Serving Your Masterpiece

    This cheeseburger pasta is a hearty, complete meal on its own. However, for a more balanced plate, consider serving it with:

    • A simple side salad with a light vinaigrette.
    • Steamed broccoli or green beans.
    • Corn on the cob in the summer.
    • Pickle spears on the side, just like a real burger!

    Avoiding Common Pitfalls

    Let’s ensure your cheeseburger pasta is a smash hit every time:

    • Overcooked Pasta: Always cook pasta al dente, as it will continue to cook slightly in the sauce. Mushy pasta is a no-go!
    • Not Draining Grease: Excess grease can make the dish heavy and oily. Be sure to drain thoroughly after browning the beef.
    • Lack of Seasoning: Don’t be shy with salt and pepper! Taste and adjust seasoning before serving.
    • Sauce Too Thick: Remember that reserved pasta water is your best friend for achieving the perfect sauce consistency.

    Storing Your Leftovers

    Cool any leftovers completely. Store them in an airtight container in the refrigerator for up to 3-4 days. Reheat gently on the stovetop or in the microwave, adding a splash of milk or water if the pasta seems a bit dry.

    Your New Go-To Dinner

    This Easy Cheeseburger Pasta recipe is more than just a meal; it’s a solution. It’s proof that you can achieve incredible flavor and comfort food satisfaction without spending hours in the kitchen. Perfect for busy families, picky eaters, and anyone who loves the classic taste of a cheeseburger, this dish is sure to become a beloved staple. Give it a try tonight and get ready for the requests to make it again and again!

    Frequently Asked Questions

    Can I make this cheeseburger pasta ahead of time?

    While it’s best enjoyed fresh, you can prepare the beef and sauce mixture ahead of time and refrigerate it. Cook the pasta just before serving and combine everything. This will reduce your active cooking time even further.

    What kind of cheese is best for cheeseburger pasta?

    Sharp cheddar is a classic choice for its robust flavor. Monterey Jack, Colby, or a mild cheddar will also work well and melt beautifully.

    Can I use a different type of meat?

    Absolutely! Ground turkey, chicken, or even a plant-based ground substitute can be used. Adjust seasonings as needed.

    My sauce is too thick/thin, what should I do?

    If it’s too thick, thin it out with a tablespoon or two of reserved pasta water or milk. If it’s too thin, let it simmer uncovered for a few extra minutes to thicken, or stir in a little more cheese.

    Print
    clock clock iconcutlery cutlery iconflag flag iconfolder folder iconinstagram instagram iconpinterest pinterest iconfacebook facebook iconprint print iconsquares squares iconheart heart iconheart solid heart solid icon

    Turkey Bacon Cheeseburger Noodle Bake

    • Author: Chef Sara

    Description

    This hearty, cheesy casserole combines all the flavors of a classic bacon cheeseburger with comforting pasta. Made lighter with turkey bacon, it’s a family-friendly dish perfect for weeknight dinners or potlucks!


    Ingredients

    Scale
    • 8 ozelbow macaroni1lb ground beef (or ground turkey for a leaner option)1/2 cuponion, chopped4strips turkey bacon, cooked and crumbled1 cupshredded cheddar cheese1/2 cupshredded mozzarella cheese1/2 cupketchup1 tbspmustard1/4 tspgarlic powder1/4 tsponion powder1/2 cupmilkSalt and pepper, to taste
    • 1lb ground beef (or ground turkey for a leaner option)1/2 cuponion, chopped4strips turkey bacon, cooked and crumbled1 cupshredded cheddar cheese1/2 cupshredded mozzarella cheese1/2 cupketchup1 tbspmustard1/4 tspgarlic powder1/4 tsponion powder1/2 cupmilkSalt and pepper, to taste
    • 1/2 cuponion, chopped4strips turkey bacon, cooked and crumbled1 cupshredded cheddar cheese1/2 cupshredded mozzarella cheese1/2 cupketchup1 tbspmustard1/4 tspgarlic powder1/4 tsponion powder1/2 cupmilkSalt and pepper, to taste
    • 4strips turkey bacon, cooked and crumbled1 cupshredded cheddar cheese1/2 cupshredded mozzarella cheese1/2 cupketchup1 tbspmustard1/4 tspgarlic powder1/4 tsponion powder1/2 cupmilkSalt and pepper, to taste
    • 1 cupshredded cheddar cheese1/2 cupshredded mozzarella cheese1/2 cupketchup1 tbspmustard1/4 tspgarlic powder1/4 tsponion powder1/2 cupmilkSalt and pepper, to taste
    • 1/2 cupshredded mozzarella cheese1/2 cupketchup1 tbspmustard1/4 tspgarlic powder1/4 tsponion powder1/2 cupmilkSalt and pepper, to taste
    • 1/2 cupketchup1 tbspmustard1/4 tspgarlic powder1/4 tsponion powder1/2 cupmilkSalt and pepper, to taste
    • 1 tbspmustard1/4 tspgarlic powder1/4 tsponion powder1/2 cupmilkSalt and pepper, to taste
    • 1/4 tspgarlic powder1/4 tsponion powder1/2 cupmilkSalt and pepper, to taste
    • 1/4 tsponion powder1/2 cupmilkSalt and pepper, to taste
    • 1/2 cupmilkSalt and pepper, to taste
    • Salt and pepper, to taste

    Instructions

    1. 1️⃣Preheat the ovenPreheat your oven to375°F (190°C). Grease a9×13-inchbaking dish and set aside.2️⃣Cook the pastaBoil the elbow macaroni in salted water according to package instructions until al dente. Drain and set aside.3️⃣Prepare the meat mixtureHeat a large skillet over medium heat. Brown the ground beef, breaking it up into crumbles as it cooks.Add the chopped onion and cook for3–4 minutesor until softened. Drain any excess fat from the skillet.4️⃣Add the seasoningsStir in the cooked, crumbled turkey bacon, ketchup, mustard, garlic powder, onion powder, salt, and pepper. Let the mixture simmer for5 minutesto blend the flavors.5️⃣Combine with pastaIn a large mixing bowl, combine the cooked macaroni with the beef mixture. Pour in the milk and stir well to coat everything evenly.6️⃣Assemble the casseroleTransfer the mixture into the prepared baking dish, spreading it out evenly. Sprinkle the shredded cheddar and mozzarella cheeses evenly over the top.7️⃣BakeBake in the preheated oven for20–25 minutes, or until the cheese is melted and bubbling.8️⃣Cool and serveLet the casserole cool for a few minutes before serving. Enjoy the cheesy, hearty goodness!
    2. Preheat your oven to375°F (190°C). Grease a9×13-inchbaking dish and set aside.2️⃣Cook the pastaBoil the elbow macaroni in salted water according to package instructions until al dente. Drain and set aside.3️⃣Prepare the meat mixtureHeat a large skillet over medium heat. Brown the ground beef, breaking it up into crumbles as it cooks.Add the chopped onion and cook for3–4 minutesor until softened. Drain any excess fat from the skillet.4️⃣Add the seasoningsStir in the cooked, crumbled turkey bacon, ketchup, mustard, garlic powder, onion powder, salt, and pepper. Let the mixture simmer for5 minutesto blend the flavors.5️⃣Combine with pastaIn a large mixing bowl, combine the cooked macaroni with the beef mixture. Pour in the milk and stir well to coat everything evenly.6️⃣Assemble the casseroleTransfer the mixture into the prepared baking dish, spreading it out evenly. Sprinkle the shredded cheddar and mozzarella cheeses evenly over the top.7️⃣BakeBake in the preheated oven for20–25 minutes, or until the cheese is melted and bubbling.8️⃣Cool and serveLet the casserole cool for a few minutes before serving. Enjoy the cheesy, hearty goodness!
    3. 2️⃣Cook the pasta
    4. Boil the elbow macaroni in salted water according to package instructions until al dente. Drain and set aside.3️⃣Prepare the meat mixtureHeat a large skillet over medium heat. Brown the ground beef, breaking it up into crumbles as it cooks.Add the chopped onion and cook for3–4 minutesor until softened. Drain any excess fat from the skillet.4️⃣Add the seasoningsStir in the cooked, crumbled turkey bacon, ketchup, mustard, garlic powder, onion powder, salt, and pepper. Let the mixture simmer for5 minutesto blend the flavors.5️⃣Combine with pastaIn a large mixing bowl, combine the cooked macaroni with the beef mixture. Pour in the milk and stir well to coat everything evenly.6️⃣Assemble the casseroleTransfer the mixture into the prepared baking dish, spreading it out evenly. Sprinkle the shredded cheddar and mozzarella cheeses evenly over the top.7️⃣BakeBake in the preheated oven for20–25 minutes, or until the cheese is melted and bubbling.8️⃣Cool and serveLet the casserole cool for a few minutes before serving. Enjoy the cheesy, hearty goodness!
    5. 3️⃣Prepare the meat mixtureHeat a large skillet over medium heat. Brown the ground beef, breaking it up into crumbles as it cooks.Add the chopped onion and cook for3–4 minutesor until softened. Drain any excess fat from the skillet.4️⃣Add the seasoningsStir in the cooked, crumbled turkey bacon, ketchup, mustard, garlic powder, onion powder, salt, and pepper. Let the mixture simmer for5 minutesto blend the flavors.5️⃣Combine with pastaIn a large mixing bowl, combine the cooked macaroni with the beef mixture. Pour in the milk and stir well to coat everything evenly.6️⃣Assemble the casseroleTransfer the mixture into the prepared baking dish, spreading it out evenly. Sprinkle the shredded cheddar and mozzarella cheeses evenly over the top.7️⃣BakeBake in the preheated oven for20–25 minutes, or until the cheese is melted and bubbling.8️⃣Cool and serveLet the casserole cool for a few minutes before serving. Enjoy the cheesy, hearty goodness!
    6. Heat a large skillet over medium heat. Brown the ground beef, breaking it up into crumbles as it cooks.
    7. Add the chopped onion and cook for3–4 minutesor until softened. Drain any excess fat from the skillet.4️⃣Add the seasoningsStir in the cooked, crumbled turkey bacon, ketchup, mustard, garlic powder, onion powder, salt, and pepper. Let the mixture simmer for5 minutesto blend the flavors.5️⃣Combine with pastaIn a large mixing bowl, combine the cooked macaroni with the beef mixture. Pour in the milk and stir well to coat everything evenly.6️⃣Assemble the casseroleTransfer the mixture into the prepared baking dish, spreading it out evenly. Sprinkle the shredded cheddar and mozzarella cheeses evenly over the top.7️⃣BakeBake in the preheated oven for20–25 minutes, or until the cheese is melted and bubbling.8️⃣Cool and serveLet the casserole cool for a few minutes before serving. Enjoy the cheesy, hearty goodness!
    8. 4️⃣Add the seasoningsStir in the cooked, crumbled turkey bacon, ketchup, mustard, garlic powder, onion powder, salt, and pepper. Let the mixture simmer for5 minutesto blend the flavors.5️⃣Combine with pastaIn a large mixing bowl, combine the cooked macaroni with the beef mixture. Pour in the milk and stir well to coat everything evenly.6️⃣Assemble the casseroleTransfer the mixture into the prepared baking dish, spreading it out evenly. Sprinkle the shredded cheddar and mozzarella cheeses evenly over the top.7️⃣BakeBake in the preheated oven for20–25 minutes, or until the cheese is melted and bubbling.8️⃣Cool and serveLet the casserole cool for a few minutes before serving. Enjoy the cheesy, hearty goodness!
    9. Stir in the cooked, crumbled turkey bacon, ketchup, mustard, garlic powder, onion powder, salt, and pepper. Let the mixture simmer for5 minutesto blend the flavors.
    10. 5️⃣Combine with pastaIn a large mixing bowl, combine the cooked macaroni with the beef mixture. Pour in the milk and stir well to coat everything evenly.6️⃣Assemble the casseroleTransfer the mixture into the prepared baking dish, spreading it out evenly. Sprinkle the shredded cheddar and mozzarella cheeses evenly over the top.7️⃣BakeBake in the preheated oven for20–25 minutes, or until the cheese is melted and bubbling.8️⃣Cool and serveLet the casserole cool for a few minutes before serving. Enjoy the cheesy, hearty goodness!
    11. In a large mixing bowl, combine the cooked macaroni with the beef mixture. Pour in the milk and stir well to coat everything evenly.6️⃣Assemble the casseroleTransfer the mixture into the prepared baking dish, spreading it out evenly. Sprinkle the shredded cheddar and mozzarella cheeses evenly over the top.7️⃣BakeBake in the preheated oven for20–25 minutes, or until the cheese is melted and bubbling.8️⃣Cool and serveLet the casserole cool for a few minutes before serving. Enjoy the cheesy, hearty goodness!
    12. 6️⃣Assemble the casserole
    13. Transfer the mixture into the prepared baking dish, spreading it out evenly. Sprinkle the shredded cheddar and mozzarella cheeses evenly over the top.7️⃣BakeBake in the preheated oven for20–25 minutes, or until the cheese is melted and bubbling.8️⃣Cool and serveLet the casserole cool for a few minutes before serving. Enjoy the cheesy, hearty goodness!
    14. 7️⃣BakeBake in the preheated oven for20–25 minutes, or until the cheese is melted and bubbling.8️⃣Cool and serveLet the casserole cool for a few minutes before serving. Enjoy the cheesy, hearty goodness!
    15. Bake in the preheated oven for20–25 minutes, or until the cheese is melted and bubbling.
    16. 8️⃣Cool and serveLet the casserole cool for a few minutes before serving. Enjoy the cheesy, hearty goodness!
    17. Let the casserole cool for a few minutes before serving. Enjoy the cheesy, hearty goodness!

    Notes

    Turkey bacon: Cooking the turkey bacon until crisp adds great texture and flavor.Cheese variations: Swap out the cheddar or mozzarella for Monterey Jack or a smoked Gouda for a unique twist.Storage: Store leftovers in an airtight container in the refrigerator for up to3 days. Reheat in the oven or microwave.Customization: Add chopped pickles or diced tomatoes on top before serving for a true burger-inspired experience!
    Cheese variations: Swap out the cheddar or mozzarella for Monterey Jack or a smoked Gouda for a unique twist.Storage: Store leftovers in an airtight container in the refrigerator for up to3 days. Reheat in the oven or microwave.Customization: Add chopped pickles or diced tomatoes on top before serving for a true burger-inspired experience!
    Storage: Store leftovers in an airtight container in the refrigerator for up to3 days. Reheat in the oven or microwave.Customization: Add chopped pickles or diced tomatoes on top before serving for a true burger-inspired experience!
    Customization: Add chopped pickles or diced tomatoes on top before serving for a true burger-inspired experience!

    “`

    Easy Peanut Butter Balls Recipe with Cream Cheese

    “`html

    Easy Peanut Butter Balls Recipe with Cream Cheese

    Craving a Quick & Delicious Treat?

    Are you looking for a dessert that’s incredibly easy to make, requires minimal ingredients, and delivers maximum flavor satisfaction? When that sweet craving hits, often only a rich, creamy, and satisfying treat will do. If you’re like many home bakers, you might be searching for a recipe that bypasses complicated steps and delivers immediate gratification. Consider this: “How can I make delicious, no-bake peanut butter treats that are both decadent and incredibly simple?” The answer lies in this fantastic Easy Peanut Butter Balls Recipe with Cream Cheese. This isn’t just any sweet; it’s a gateway to pure, unadulterated joy, perfect for parties, holiday baking, or just a simple moment of indulgence. With just a few pantry staples, you can whip up a batch of these creamy delights that are sure to become a new favorite. Get ready to impress yourself and your loved ones with this foolproof recipe designed for ultimate ease and taste!

    Simple Yet Irresistible Ingredients

    The beauty of these peanut butter balls lies in their simplicity. You likely have most, if not all, of these ingredients in your kitchen right now. Let’s break down what makes them so special:

    Creamy Peanut Butter: The Heart of the Ball

    For this recipe, we’re reaching for smooth, creamy peanut butter. Its rich, nutty flavor is the star of the show. When combined with the other ingredients, it creates that irresistible, melt-in-your-mouth texture. Aim for a standard commercial creamy peanut butter (like Jif, Skippy, or Peter Pan). While natural peanut butter is great for some things, it can be a bit too oily and less consistent for no-bake recipes like this, potentially leading to a softer, less stable ball.

    Cream Cheese: The Secret to Super Smoothness

    This is where the magic happens! Full-fat, brick-style cream cheese is key here. It adds a wonderful tangy richness and an incredibly smooth, almost cheesecake-like consistency to the peanut butter mixture, making the balls effortlessly decadent and easy to handle. Make sure it’s softened to room temperature so it blends seamlessly without lumps.

    Powdered Sugar: For Sweetness and Structure

    Also known as confectioners’ sugar or icing sugar, this fine sugar dissolves easily, providing the perfect sweetness and helping to bind the ingredients together, giving the peanut butter balls their structure. Sift it if you notice any clumps for an even smoother dough.

    Optional: Dipping Chocolate for Extra Indulgence

    While these peanut butter balls are delicious on their own, a coating of melted chocolate takes them to a whole new level of indulgence! Semisweet or dark chocolate chips work wonderfully, or you can use a melting chocolate for a smoother finish. A little bit of coconut oil or vegetable shortening can help thin the chocolate for easier dipping and a crispier shell.

    Ingredient Substitutions

    • Peanut Butter: If you don’t have creamy peanut butter, crunchy will work, but it will change the texture slightly. For a different flavor profile, you could try almond butter or cashew butter, though the taste will be distinctly different.
    • Cream Cheese: While full-fat brick cream cheese is recommended for texture, you could technically use the spreadable kind in a tub in a pinch. However, you’ll want to use less of it and potentially add a bit more powdered sugar, as it’s softer. The texture might be slightly less firm.
    • Powdered Sugar: If you absolutely have no powdered sugar, you could try very finely ground granulated sugar, but the texture will be noticeably grittier. It’s best to stick with powdered sugar for this recipe.
    • Chocolate: Milk chocolate, white chocolate, or even butterscotch chips can be used for dipping instead of semisweet or dark chocolate.
    Platter of easy peanut butter balls with cream cheese, some dipped in chocolate and some plain.

    Perfectly Timed Perfection

    Prep time: 15 minutes
    Chill time: 30 minutes
    Total time: 45 minutes (+ optional chocolate setting time)

    This recipe is incredibly fast! Most recipes for similar treats can take anywhere from 1 to 2 hours, including chilling and setting times. Our Easy Peanut Butter Balls with Cream Cheese recipe truly shines with its minimal active time. You can have these ready to be enjoyed in under an hour, making it perfect for last-minute dessert needs.

    Crafting Your Creamy Peanut Butter Balls

    Let’s get down to business and create these delightful treats. It’s so simple, you’ll wonder why you haven’t made them sooner!

    Step 1: Soften the Cream Cheese

    Ensure your block of cream cheese is at room temperature. This usually takes about 30-60 minutes on the counter. Softened cream cheese will blend much more easily, preventing a lumpy mixture and ensuring a smooth final texture for your peanut butter balls.

    Step 2: Combine Peanut Butter and Cream Cheese

    In a medium mixing bowl, add the softened cream cheese and the creamy peanut butter. Using an electric mixer (handheld or stand mixer with the paddle attachment), beat them together on medium speed until they are completely smooth and well combined. Scrape down the sides of the bowl as needed.

    Step 3: Mix in Powdered Sugar

    Gradually add the powdered sugar to the peanut butter and cream cheese mixture. Start by adding about half of the sugar and mix on low speed until combined. Then, add the remaining powdered sugar and continue mixing until the dough is thick, well-incorporated, and holds its shape. The mixture should feel firm enough to roll into balls.

    Step 4: Form the Balls

    Using a small cookie scoop or a tablespoon, scoop out portions of the dough. Roll each portion between your palms to form smooth, uniform balls, about 1-inch in diameter. If the mixture is too sticky, you can lightly dust your hands with a bit of powdered sugar, but try to avoid adding too much extra as it can make the balls too sweet or crumbly.

    Step 5: Chill the Balls

    Arrange the rolled balls on a baking sheet lined with parchment paper or wax paper. This prevents sticking. Place the baking sheet in the refrigerator for at least 30 minutes. This chilling step is crucial as it firms up the balls, making them easier to handle, especially if you plan to dip them in chocolate.

    Step 6: Optional Chocolate Dipping

    Once the balls are firm, you can proceed with dipping them in chocolate. Melt your chosen chocolate chips (semisweet, dark, or milk) with about 1 teaspoon of coconut oil or vegetable shortening in a microwave-safe bowl in 30-second intervals, stirring in between, until smooth. Alternatively, melt using a double boiler. Dip each chilled peanut butter ball into the melted chocolate, coating it completely. A toothpick or a small fork can help with dipping. Place the dipped balls back onto the parchment-lined baking sheet. You can drizzle extra chocolate over the tops for a decorative effect. Let the chocolate set completely at room temperature or speed up the process by placing them back in the refrigerator for another 10-15 minutes.

    Nutritional Snapshot

    While exact nutritional values can vary based on specific ingredients and portion sizes, here’s a general estimate per ball (without chocolate coating):

    • Calories: Approximately 80-120 kcal
    • Fat: Approximately 6-9g
    • Carbohydrates: Approximately 7-10g
    • Protein: Approximately 2-3g
    • Sugar: Approximately 5-8g

    (Note: Chocolate coating will significantly increase calorie and sugar content.)

    Healthier Twists on a Classic

    Looking to make these even lighter without sacrificing flavor? Try these simple swaps:

    • Use a Lighter Cream Cheese: Opt for reduced-fat cream cheese, though the texture might be slightly softer.
    • Reduce Powdered Sugar: You can try reducing the powdered sugar by ¼ cup, or sweeten with a natural alternative that dissolves well, like a small amount of maple syrup or agave nectar, though this will alter the texture and moisture content.
    • Dark Chocolate Coating: Use high-quality dark chocolate (70% cacao or higher) for dipping, which contains less sugar and more antioxidants.
    • Add Protein Powder: Mix in 1-2 tablespoons of vanilla or unflavored protein powder with the powdered sugar for an extra protein boost.

    Serving Suggestions for Maximum Delight

    These versatile treats are fantastic on their own, but here are a few ideas to elevate your serving experience:

    • Party Platters: Arrange them alongside other cookies and candies for a crowd-pleasing dessert spread.
    • Gift Giving: Package them in cute tins or boxes for homemade gifts during holidays or special occasions.
    • Coffee Companion: Their rich flavor makes them a perfect accompaniment to your morning coffee or afternoon tea.
    • Potluck Perfection: They’re easy to transport and always a hit at any gathering.

    Common Pitfalls to Avoid

    Even with simple recipes, a few common mistakes can happen. Here’s how to sidestep them:

    • Using cold cream cheese: This is the most common culprit for lumpy peanut butter balls. Always ensure your cream cheese is properly softened.
    • Overmixing after adding sugar: Once the powdered sugar is in, mix just until combined. Overmixing can make the dough tough or oily.
    • Not chilling the balls enough: If you try to dip soft balls in chocolate, they’ll fall apart. A good chill is essential for firming them up.
    • Using natural peanut butter: Unless you’re experienced with adjusting no-bake recipes for natural peanut butter’s oil separation, stick to conventional creamy peanut butter for best results.

    Mastering the Art of Storage

    These peanut butter balls are best stored in an airtight container in the refrigerator. Because they contain cream cheese, they should be kept chilled to maintain their texture and freshness. They will keep well for up to a week. If you’ve dipped them in chocolate, the chocolate might soften slightly at room temperature, so refrigeration is always recommended.

    Unleash Your Inner Confectioner!

    There you have it! An incredibly easy, ridiculously delicious recipe for Peanut Butter Balls with Cream Cheese that proves you don’t need a lot of fuss to create something truly special. The combination of smooth peanut butter, tangy cream cheese, and sweet powdered sugar, all brought together into bite-sized perfection, is simply irresistible. Whether you’re a seasoned baker or a complete beginner, this recipe is a guaranteed win. Whip up a batch today and get ready for the rave reviews!

    Frequently Asked Questions

    *** Can I make these balls ahead of time? ***

    Yes! You can make the peanut butter balls a day or two in advance and store them in an airtight container in the refrigerator. You can also dip them in chocolate ahead of time.

    *** How do I get smooth chocolate coating? ***

    Ensure your peanut butter balls are very cold and firm before dipping. When melting chocolate, use a low heat setting and stir frequently. Adding a teaspoon of coconut oil or vegetable shortening to the chocolate chips can help them melt smoothly and create a thinner, easier coating.

    *** Why are my peanut butter balls too soft? ***

    This is usually due to not enough powdered sugar, cream cheese that wasn’t softened enough to fully incorporate, or using a less dense type of cream cheese. Ensure your cream cheese is softened and at room temperature and that you’ve used the correct amount of powdered sugar to create a firm, rollable dough.

    *** Can I freeze these peanut butter balls? ***

    Yes, you can freeze un-dipped or chocolate-dipped peanut butter balls. Place them on a baking sheet to freeze individually until solid, then transfer them to an airtight container or freezer bag. They can be stored in the freezer for up to 2-3 months. Thaw them in the refrigerator.

    *** What kind of peanut butter is best? ***

    Standard creamy peanut butter (like Jif, Skippy, or Peter Pan) works best for its texture and consistency. Natural peanut butter can be too oily and may result in a softer, less stable ball.

    Print
    clock clock iconcutlery cutlery iconflag flag iconfolder folder iconinstagram instagram iconpinterest pinterest iconfacebook facebook iconprint print iconsquares squares iconheart heart iconheart solid heart solid icon

    3-Ingredient Peanut Butter Balls

    • Author: Chef Sara

    Description

    These creamy and indulgent peanut butter balls are incredibly easy to make with just three simple ingredients. Perfect as a no-bake treat for parties or snack time, they offer a delicious balance of nutty, sweet, and tangy flavors!


    Ingredients

    Scale
    • 8 ozcream cheese, softened1 cupcreamy peanut butter1 cuppowdered sugar
    • 1 cupcreamy peanut butter1 cuppowdered sugar
    • 1 cuppowdered sugar

    Instructions

    1. 1️⃣Mix the cream cheese and peanut butter
    2. In a medium mixing bowl, combine the softened cream cheese and peanut butter.Use a hand mixer or a sturdy spatula to blend until the mixture is smooth and creamy.2️⃣Incorporate the powdered sugarGradually add the powdered sugar to the mixture, stirring well after each addition.Continue mixing until the dough is thick and holds together. If the mixture feels too sticky, add a little more powdered sugar, one tablespoon at a time.3️⃣Shape and chillScoop out small portions of the dough and roll them into 1-inch balls using your hands or a small cookie scoop.Place the formed balls onto a baking sheet lined with parchment paper or wax paper.Refrigerate forat least 30 minutesto firm up before serving.
    3. Use a hand mixer or a sturdy spatula to blend until the mixture is smooth and creamy.2️⃣Incorporate the powdered sugarGradually add the powdered sugar to the mixture, stirring well after each addition.Continue mixing until the dough is thick and holds together. If the mixture feels too sticky, add a little more powdered sugar, one tablespoon at a time.3️⃣Shape and chillScoop out small portions of the dough and roll them into 1-inch balls using your hands or a small cookie scoop.Place the formed balls onto a baking sheet lined with parchment paper or wax paper.Refrigerate forat least 30 minutesto firm up before serving.
    4. 2️⃣Incorporate the powdered sugar
    5. Gradually add the powdered sugar to the mixture, stirring well after each addition.Continue mixing until the dough is thick and holds together. If the mixture feels too sticky, add a little more powdered sugar, one tablespoon at a time.3️⃣Shape and chillScoop out small portions of the dough and roll them into 1-inch balls using your hands or a small cookie scoop.Place the formed balls onto a baking sheet lined with parchment paper or wax paper.Refrigerate forat least 30 minutesto firm up before serving.
    6. Continue mixing until the dough is thick and holds together. If the mixture feels too sticky, add a little more powdered sugar, one tablespoon at a time.3️⃣Shape and chillScoop out small portions of the dough and roll them into 1-inch balls using your hands or a small cookie scoop.Place the formed balls onto a baking sheet lined with parchment paper or wax paper.Refrigerate forat least 30 minutesto firm up before serving.
    7. 3️⃣Shape and chill
    8. Scoop out small portions of the dough and roll them into 1-inch balls using your hands or a small cookie scoop.Place the formed balls onto a baking sheet lined with parchment paper or wax paper.Refrigerate forat least 30 minutesto firm up before serving.
    9. Place the formed balls onto a baking sheet lined with parchment paper or wax paper.Refrigerate forat least 30 minutesto firm up before serving.
    10. Refrigerate forat least 30 minutesto firm up before serving.

    Notes

    Storage: Store the peanut butter balls in an airtight container in the refrigerator for up to1 weekor in the freezer for up to3 months.Serving suggestion: Serve chilled for the best texture, but let them sit at room temperature for a few minutes if they’ve been in the freezer.
    Serving suggestion: Serve chilled for the best texture, but let them sit at room temperature for a few minutes if they’ve been in the freezer.

    “`