“`html
Table of Contents
Pasta Salad With Tortellini Easy and Delicious Recipe
Craving a Quick, Delicious, and Versatile Dish?
Are you tired of spending hours in the kitchen for meals that barely satisfy? If you’re looking for a show-stopping side or a satisfying main that’s brimming with flavor and requires minimal effort, you’re in the right place. This easy and delicious pasta salad with tortellini is the answer. It’s perfect for potlucks, BBQs, family dinners, or a quick, healthy lunch. Forget boring, bland salads; this recipe is a vibrant explosion of taste and texture that will have everyone asking for seconds. On average, most pasta salad recipes can take over 30 minutes to prepare, but this delightful tortellini variation is designed for speed and simplicity, ensuring a fantastic meal is always within reach.
Ingredients List: The Heart of Your Tortellini Pasta Salad
The beauty of this tortellini pasta salad lies in its flexibility and the freshness of its components. We’ve chosen a combination that offers a delightful balance of savory, tangy, and fresh flavors, with satisfying textures. Feel free to adapt based on what you have on hand!
- 1 (20-ounce) package fresh cheese tortellini: The star of our show! These little pasta pockets are tender and soak up the dressing beautifully. If fresh isn’t available, 16 oz of dried tortellini (cooked according to package directions) will also work, though the texture will be slightly firmer.
- 1 cup cherry tomatoes, halved: Bursting with sweet, juicy flavor, these add a delightful pop of color and acidity. Grape tomatoes are a good substitute.
- 1 cup cucumber, diced: For a crisp, refreshing crunch and a cool, watery element. A regular cucumber, seeded if preferred, works just as well as an English cucumber.
- 1/2 cup red onion, finely chopped: Adds a pungent, sharp bite that balances the sweetness of the other ingredients. If raw onion is too strong for you, soak it in ice water for 10 minutes before draining, or substitute with minced chives for a milder onion flavor.
- 1/2 cup bell pepper (any color), diced: We love the slight sweetness of red or yellow bell peppers, but green adds a pleasant earthy note.
- 1/4 cup Kalamata olives, pitted and halved: These briny, deep-purple olives provide a rich, savory depth that complements the other ingredients. Black olives can be used if Kalamata are unavailable, though they offer a milder flavor.
- 1/4 cup crumbled feta cheese (optional): For a salty, tangy kick that elevates the entire dish. Goat cheese or a mild cheddar could also be used.
- 1/4 cup fresh basil leaves, chopped: The aromatic, peppery notes of fresh basil are essential for that vibrant Mediterranean feel. Parsley or a mix of fresh herbs like oregano and thyme can be used as alternatives.
- For the Dressing:
- 1/2 cup extra virgin olive oil: The foundation of our dressing, providing richness and a pleasant peppery note. A good quality olive oil makes a difference!
- 1/4 cup red wine vinegar: For that essential tangy, acidic punch. Apple cider vinegar or white wine vinegar are acceptable substitutes.
- 1 tablespoon Dijon mustard: Acts as an emulsifier, helping the dressing come together, and adds a delightful zesty kick. Honey mustard can be used for a sweeter profile.
- 1 clove garlic, minced: Adds a pungent, savory aroma and flavor. A garlic powder substitute can be used, but fresh is always best for that punchy flavor.
- 1/2 teaspoon dried oregano: Enhances the herbaceous notes.
- Salt and freshly ground black pepper to taste: Essential for balancing and enhancing all the flavors.
Perfect Timing for Your Perfect Pasta Salad
Compared to other pasta salad recipes that can easily take 30-45 minutes of active prep and cooking, this dish is incredibly quick. The cooking time is primarily for the tortellini, which is minimal, making it an ideal choice for busy weeknights or when you need a last-minute dish.

Step-by-Step Instructions: Crafting Your Culinary Masterpiece
1. Boil the Tortellini
Bring a large pot of generously salted water to a rolling boil. Add the fresh cheese tortellini and cook according to package directions – typically just 2-3 minutes until they float to the surface. Be careful not to overcook them, as they will continue to soften slightly as they cool and mix with other ingredients. Drain the tortellini thoroughly in a colander and rinse briefly with cool water to stop the cooking process and prevent them from sticking together. Set aside to drain completely.
2. Prep Your Fresh Produce
While the tortellini is cooking, prepare all your fresh ingredients. Halve the cherry tomatoes, dice the cucumber and bell pepper, finely chop the red onion, and halve the pitted olives. If you’re using fresh basil, give it a good chop. Having everything prepped and ready makes assembling the salad a breeze.
3. Whisk Up the Zesty Dressing
In a small bowl or a jar with a tight-fitting lid, combine the extra virgin olive oil, red wine vinegar, Dijon mustard, minced garlic, dried oregano, salt, and freshly ground black pepper. Whisk vigorously or shake the jar until the dressing is well emulsified and all the ingredients are thoroughly combined. Taste and adjust seasoning as needed – a little more salt, pepper, or vinegar can make a big difference!
4. Assemble Your Masterpiece
In a large mixing bowl, combine the drained tortellini, halved cherry tomatoes, diced cucumber, chopped red onion, diced bell pepper, and halved olives. If you’re using feta cheese, add it now. Drizzle about half of the prepared dressing over the salad and gently toss to coat all the ingredients. Add more dressing as needed, until everything is lightly coated. You want enough dressing to bring the flavors together without drowning the salad.
5. Chill and Serve
Gently fold in the chopped fresh basil. For the best flavor, cover the bowl and refrigerate the pasta salad for at least 30 minutes to allow the flavors to meld. This chilling time is crucial for a truly delicious pasta salad. Serve chilled, garnished with a few extra basil leaves if desired. Enjoy your easy, delicious creation!
Nutritional Insights (Approximate Per Serving)
This information is approximate and can vary based on specific ingredients used and portion size. This recipe yields approximately 6-8 servings.
- Calories: 350-450 kcal
- Protein: 10-15g
- Fat: 20-30g (with a good portion of healthy fats from olive oil)
- Carbohydrates: 30-40g
- Fiber: 3-5g
- Sodium: Varies with added salt and olives.
Healthier Alternatives & Flavor-Preserving Swaps
Looking to lighten things up without sacrificing taste? Here are some smart swaps:
- Tortellini: Opt for whole wheat tortellini for added fiber. For a lower-carb option, use spiralized zucchini noodles or riced cauliflower instead of pasta, although this will change the character of the dish significantly.
- Dressing: Reduce the oil by half and replace the other half with a light vinaigrette or even Greek yogurt for a creamy, protein-boosted dressing. Use less vinegar if you’re sensitive to acidity. For a no-oil dressing, blend lemon juice, herbs, garlic, and a touch of honey.
- Add More Veggies: Bulk up the salad with extra non-starchy vegetables like broccoli florets (lightly blanched), chopped spinach, peas, or chopped artichoke hearts.
- Lean Protein: Add grilled chicken breast, shrimp, or chickpeas for a more substantial and protein-rich meal.
Serving Suggestions: Elevate Your Meal
This versatile tortellini pasta salad shines in many settings:
- Potluck & BBQ Star: It’s a guaranteed crowd-pleaser at any outdoor gathering.
- Light Lunch: Serve with a side of crusty bread or a simple green salad for a satisfying midday meal.
- Side Dish Delight: Pairs wonderfully with grilled meats, fish, or poultry.
- Picnic Perfect: Its sturdy nature makes it ideal for picnics.
Common Mistakes to Avoid
Prevent these pitfalls for the ultimate pasta salad:
- Overcooking Pasta: Mushy pasta is the enemy of good pasta salad. Cook tortellini until just al dente.
- Adding Dressing Immediately: Let the ingredients cool before dressing them, or the hot pasta can turn mushy and absorb too much dressing, making it oily.
- Skipping the Chill Time: Allowing the flavors to meld in the refrigerator is crucial for a cohesive and delicious taste.
- Over-Dressing: Too much dressing can make the salad heavy and greasy. Start with less and add more as needed.
Storing Your Delicious Creation
Store leftover pasta salad in an airtight container in the refrigerator for up to 3-4 days. The flavors often improve on the second day! If the salad seems a little dry after chilling, you can toss it with a splash of olive oil or a little more vinaigrette before serving.
Your Go-To Easy Tortellini Pasta Salad is Here!
This Pasta Salad with Tortellini is more than just a recipe; it’s a testament to how simple ingredients can create something truly spectacular. It’s quick, adaptable, and bursting with fresh, vibrant flavors. Whether you’re a seasoned cook or a beginner, this dish is sure to impress. Give it a try and discover your new favorite go-to salad!
We’d love to hear how your tortellini pasta salad turned out! Share your thoughts, tips, or modifications in the comments below. And don’t forget to share this recipe with your friends and family who love easy, delicious meals!
Frequently Asked Questions
***Can I make this pasta salad ahead of time?***
Yes! In fact, it’s best when made at least 30 minutes to an hour ahead of time to allow the flavors to meld. It can typically be made up to 2 days in advance.
***What kind of tortellini should I use?***
Fresh cheese tortellini is recommended for its tender texture, but dried tortellini can also be used (cook according to package directions). You can also experiment with other fillings like spinach or meat tortellini.
***Can I add other vegetables or proteins?***
Absolutely! This recipe is very versatile. Feel free to add chopped broccoli, peas, corn, shredded carrots, grilled chicken, shrimp, or chickpeas for added flavor and nutrition.
***How do I store leftovers?***
Store any leftover pasta salad in an airtight container in the refrigerator for up to 3-4 days. If it seems a bit dry, toss with a little extra dressing or olive oil before serving.
***What if I don’t have red wine vinegar?***
You can substitute it with white wine vinegar, apple cider vinegar, or even lemon juice for a brighter flavor profile. Adjust the quantity to your taste.
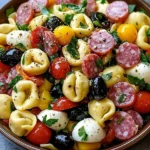
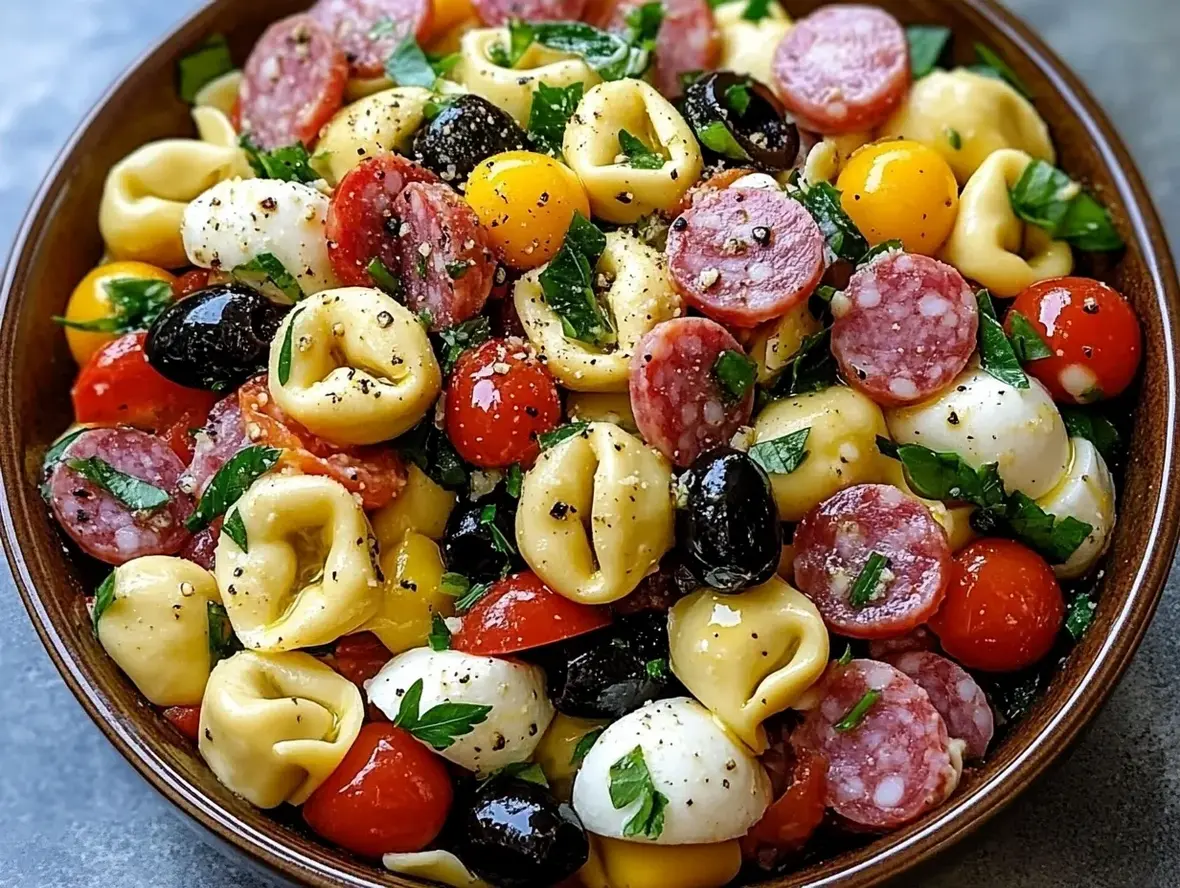
Salami-Mozzarella Tortellini Pasta Salad
Description
ThisSalami-Mozzarella Tortellini Pasta Saladis a delightful medley of flavors and textures, perfect for picnics, potlucks, or as a refreshing meal on a warm day. The tender tortellini pairs beautifully with the savory salami, creamy mozzarella, and crisp veggies, all tossed in a tangy Italian dressing.
Ingredients
- For the salad:1(16 oz) package tortellini pasta1 cupsalami, diced1 cupmozzarella cheese, cubed or pearl-sized1 cupcherry tomatoes, halved1 cupcucumber, dicedFor the dressing:3 tbspolive oil2 tbspvinegar1 tspItalian seasoningSalt, to tastePepper, to taste
- 1(16 oz) package tortellini pasta1 cupsalami, diced1 cupmozzarella cheese, cubed or pearl-sized1 cupcherry tomatoes, halved1 cupcucumber, dicedFor the dressing:3 tbspolive oil2 tbspvinegar1 tspItalian seasoningSalt, to tastePepper, to taste
- 1 cupsalami, diced
- 1 cupmozzarella cheese, cubed or pearl-sized1 cupcherry tomatoes, halved1 cupcucumber, dicedFor the dressing:3 tbspolive oil2 tbspvinegar1 tspItalian seasoningSalt, to tastePepper, to taste
- 1 cupcherry tomatoes, halved1 cupcucumber, dicedFor the dressing:3 tbspolive oil2 tbspvinegar1 tspItalian seasoningSalt, to tastePepper, to taste
- 1 cupcucumber, diced
- For the dressing:3 tbspolive oil2 tbspvinegar1 tspItalian seasoningSalt, to tastePepper, to taste
- 3 tbspolive oil2 tbspvinegar1 tspItalian seasoningSalt, to tastePepper, to taste
- 2 tbspvinegar
- 1 tspItalian seasoningSalt, to tastePepper, to taste
- Salt, to tastePepper, to taste
- Pepper, to taste
Instructions
- 1️⃣Cook the Tortellini:Prepare the tortellini according to the package instructions. Once cooked, drain and allow it to cool completely.2️⃣Combine Salad Ingredients:In a large mixing bowl, combine the cooled tortellini, diced salami, chopped mozzarella, halved cherry tomatoes, and diced cucumber.3️⃣Make the Dressing:In a small bowl, whisk together olive oil, vinegar, Italian seasoning, salt, and pepper until well blended.4️⃣Dress the Salad:Drizzle the dressing over the tortellini mixture. Toss until all the ingredients are evenly coated.5️⃣Refrigerate:Cover the salad and refrigerate for at least 30 minutes before serving to let the flavors meld.
- 2️⃣Combine Salad Ingredients:In a large mixing bowl, combine the cooled tortellini, diced salami, chopped mozzarella, halved cherry tomatoes, and diced cucumber.3️⃣Make the Dressing:In a small bowl, whisk together olive oil, vinegar, Italian seasoning, salt, and pepper until well blended.4️⃣Dress the Salad:Drizzle the dressing over the tortellini mixture. Toss until all the ingredients are evenly coated.5️⃣Refrigerate:Cover the salad and refrigerate for at least 30 minutes before serving to let the flavors meld.
- 3️⃣Make the Dressing:In a small bowl, whisk together olive oil, vinegar, Italian seasoning, salt, and pepper until well blended.
- 4️⃣Dress the Salad:Drizzle the dressing over the tortellini mixture. Toss until all the ingredients are evenly coated.5️⃣Refrigerate:Cover the salad and refrigerate for at least 30 minutes before serving to let the flavors meld.
- 5️⃣Refrigerate:Cover the salad and refrigerate for at least 30 minutes before serving to let the flavors meld.
Notes
Customize the veggies by adding bell peppers, red onions, or olives for added variety.This salad can be made a day ahead, making it a convenient choice for gatherings.
This salad can be made a day ahead, making it a convenient choice for gatherings.
“`