“`html
Table of Contents
- What are Huevos Rancheros?
- Authentic Huevos Rancheros Ingredients
- Timing is Everything
- Crafting Your Authentic Huevos Rancheros
- Nutritional Snapshot
- Healthier Twists on Huevos Rancheros
- Serving Suggestions for Huevos Rancheros
- Common Huevos Rancheros Pitfalls to Avoid
- Storing Your Huevos Rancheros Leftovers
- Your New Favorite Mexican Breakfast Awaits!
- Frequently Asked Questions About Huevos Rancheros
Authentic Huevos Rancheros: A Mexican Breakfast Must-Try!
What are Huevos Rancheros?
Are you searching for a breakfast that’s bursting with vibrant flavors and leaves you feeling completely satisfied? If the answer is a resounding yes, then Huevos Rancheros is your culinary destiny! This classic Mexican dish, translating literally to ‘ranch-style eggs,’ is a fiesta on a plate, usually featuring fried eggs, tortillas, and a hearty salsa. On average, most breakfast recipes can be a bit bland, but Huevos Rancheros offers a delightful complexity, balancing crispy textures with rich, smoky, and slightly spicy notes. It’s more than just breakfast; it’s an experience, bringing the heart of Mexican cuisine straight to your kitchen.
Authentic Huevos Rancheros Ingredients
The magic of Huevos Rancheros lies in its thoughtful combination of fresh, flavorful ingredients. While there are many regional variations, this recipe focuses on a classic profile with smoky chipotle salsa and creamy black beans, ensuring a truly authentic taste that will transport you south of the border. We’ve also included some common substitutions to make it work with what you have on hand.
For the Smoky Chipotle Salsa:
- Tomatoes (2 large, ripe): The plump, juicy bounty of the vine provides a sweet and acidic base. Roma tomatoes are excellent for their meaty texture.
- Onion (1/2 medium, white or yellow): Adds a pungent sharpness that mellows when cooked.
- Garlic (3-4 cloves): The aromatic soul of many a Mexican dish, providing depth.
- Chipotle Peppers in Adobo Sauce (1-2, depending on heat preference): These smoky, fiery jewels are the star. Adjust quantity for your spice tolerance! You can find them in most international aisles.
- Cilantro (1/4 cup, fresh, chopped): For that bright, herbaceous counterpoint. Don’t skip it if you can help it!
- Lime Juice (1 tablespoon, fresh): A zesty zing that brightens all the flavors.
- Salt (to taste): Essential for enhancing all the individual flavors.
- Optional: A pinch of cumin for an extra layer of earthy warmth.
For the Creamy Black Beans:
- Canned Black Beans (1 can, 15 oz): Quick, convenient, and perfectly tender. Rinse and drain them well.
- Olive Oil or Vegetable Oil (1 tablespoon): For sautéing.
- Garlic (1 clove, minced): Adds a savory undertone.
- Cumin (1/2 teaspoon): Complements the beans beautifully.
- Salt and Pepper (to taste): For basic seasoning.
- Optional: A splash of water or vegetable broth if beans are too thick.
For the Tortillas and Eggs:
- Corn Tortillas (4-6): The quintessential base. Look for good quality ones that aren’t too brittle.
- Vegetable Oil or other high-heat oil (about 1/4 cup): For frying the tortillas and eggs.
- Eggs (4 large): The golden crown of your Huevos Rancheros.
- Optional Garnishes: Queso fresco or cotija cheese, avocado slices, sour cream or crema mexicana, chopped fresh cilantro, sliced jalapeños.
Timing is Everything
20 minutes
25 minutes
45 minutes
Compared to the average breakfast dish that might take 15-30 minutes, Huevos Rancheros offers a slightly more involved but incredibly rewarding cooking experience. The preparation time is dedicated to building layers of flavor in the salsa and beans, while the cook time focuses on perfectly crisped tortillas and eggs. This recipe is designed for a relaxed weekend brunch rather than a weekday dash.
Crafting Your Authentic Huevos Rancheros
Let’s dive into creating this Mexican breakfast masterpiece, step by step. The aroma alone will have you excited!
Step 1: Craft the Smoky Chipotle Salsa
First, we build the soul of our dish: the salsa. In a blender or food processor, combine the roughly chopped tomatoes, onion, garlic cloves, chipotle peppers (start with one and add more if you like it spicy!), cilantro, lime juice, and a pinch of salt. If using, add the cumin. Blend until you achieve a slightly chunky, rustic salsa texture. You don’t want it perfectly smooth – a bit of texture is key! Taste and adjust seasoning. If it’s too thick, add a tablespoon of water. Set aside.
Step 2: Warm and Flavor the Black Beans
While the salsa rests, let’s give those beans some love. Heat the olive oil in a small saucepan or skillet over medium heat. Add the minced garlic and sauté for about 30 seconds until fragrant (don’t let it burn!). Stir in the rinsed and drained black beans, cumin, salt, and pepper. Cook for 3-5 minutes, mashing some of the beans with the back of your spoon to create a creamier consistency. If the mixture seems too dry, add a splash of water or vegetable broth. Keep warm over low heat.
Step 3: Achieve Perfectly Crispy Tortillas
For that essential textural contrast, we’re lightly frying the corn tortillas. Heat about 1/8 inch of vegetable oil in a skillet over medium-high heat until shimmering. Carefully place one or two tortillas in the hot oil (don’t overcrowd the pan). Fry for about 30-60 seconds per side, until they are lightly golden and slightly crisp, but still pliable enough to hold their shape. They should not be brittle. Remove with tongs and place on a plate lined with paper towels to drain excess oil. Repeat with remaining tortillas.
Step 4: Fry the Eggs to Perfection
Now for the crowning glory: the eggs! Use the same skillet (add a little more oil if needed) or a clean one. Reduce the heat to medium. Crack your eggs into the pan, being careful not to break the yolks. Cook until the whites are set and the yolks are still runny – this is the classic Huevos Rancheros way! If you prefer more cooked yolks, cook a little longer. Season lightly with salt and pepper.
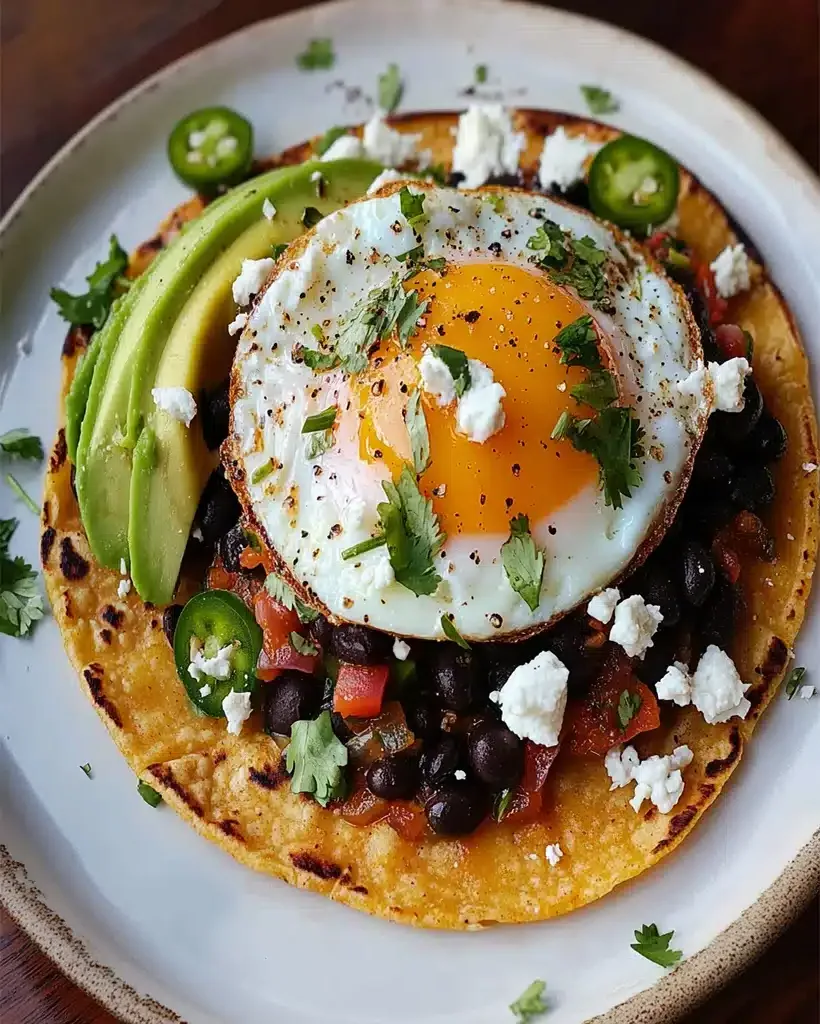
Step 5: Assemble Your Huevos Rancheros Masterpiece
The grand finale! On each plate, place one or two crispy tortillas. Spoon a generous portion of the warm black beans over the tortillas. Next, ladle the flavorful chipotle salsa over the beans. Finally, carefully place a perfectly fried egg on top of the salsa. Now, for the fun part: garnish! Add your favorite toppings like crumbled queso fresco, creamy avocado slices, a dollop of sour cream or crema, a sprinkle of fresh cilantro, or thinly sliced jalapeños for an extra kick. Serve immediately and savor every bite!
Nutritional Snapshot
While nutritional values can vary based on specific ingredients and portion sizes, a typical serving of Huevos Rancheros (per serving, approximately 2 eggs, 2 tortillas, with beans and salsa) contains:
- Calories: Approximately 350-500 kcal
- Protein: Around 15-20g
- Fat: Approximately 20-30g (largely from frying oil and optional cheese/avocado)
- Carbohydrates: Around 25-35g
- Fiber: About 8-12g (thanks to the black beans and corn tortillas)
This provides a hearty balance of macronutrients to start your day.
Healthier Twists on Huevos Rancheros
Want to lighten things up without sacrificing flavor? Here are some swaps:
- Bake or Air Fry Tortillas: Lightly brush tortillas with oil and bake at 400°F (200°C) or air fry until crisp instead of pan-frying.
- Poached or Baked Eggs: Opt for poached or baked eggs to reduce added oil.
- Lean Protein: Add lean shredded chicken or turkey to the beans.
- Increased Veggies: Mix sautéed bell peppers and onions into the beans or salsa.
- Lighter Toppings: Focus on fresh cilantro, pico de gallo, and a squeeze of lime instead of heavy cheeses or sour cream.
Serving Suggestions for Huevos Rancheros
Huevos Rancheros is a complete meal on its own, but it pairs wonderfully with:
- A side of fresh fruit salad.
- A small portion of Mexican rice.
- A refreshing glass of agua fresca.
- Avocado toast is surprisingly a good companion if you want to add another grain.
Common Huevos Rancheros Pitfalls to Avoid
To ensure your Huevos Rancheros is perfect every time, watch out for these common errors:
- Soggy Tortillas: Ensure your frying oil is hot enough and don’t overcrowd the pan.
- Burnt Garlic: Keep a close eye on the garlic when sautéing; it burns quickly.
- Bland Salsa: Don’t skimp on the chipotle, lime, and salt. Taste and adjust!
- Overcooked Yolks: The runny yolk is crucial for creating a rich sauce with the salsa.
- Using Flour Tortillas: While possible, corn tortillas provide the classic texture and flavor profile.
Storing Your Huevos Rancheros Leftovers
Huevos Rancheros is best enjoyed fresh, as the eggs and crispy tortillas lose their ideal texture when stored. However, if you have components left over:
- Salsa: Store in an airtight container in the refrigerator for up to 4-5 days.
- Black Beans: Store in an airtight container in the refrigerator for up to 4 days. Reheat gently on the stovetop.
- Fried Tortillas: It’s best to make these fresh. Reheating will make them soft.
- Cooked Eggs: These do not store well. It’s advisable to cook eggs fresh when assembling.
Your New Favorite Mexican Breakfast Awaits!
There you have it – a guide to creating truly authentic and utterly delicious Huevos Rancheros. This dish is a testament to how simple ingredients can come together to create something extraordinary. The combination of smoky salsa, creamy beans, perfectly fried eggs, and crisp tortillas is a symphony of textures and flavors that will elevate your breakfast or brunch game. Don’t be intimidated by the steps; each one is designed to build towards that perfect plate. Now, gather your ingredients, put on some lively music, and get ready to enjoy a taste of Mexico!
Frequently Asked Questions About Huevos Rancheros
***What is the difference between Huevos Rancheros and Migas?***
Both are popular Mexican breakfast dishes. Huevos Rancheros typically features whole fried eggs served over tortillas with salsa, while Migas involves scrambled eggs mixed with fried tortilla strips, often with other ingredients like cheese and vegetables.
***Can I make the salsa ahead of time?***
Absolutely! The flavors in the salsa actually meld and deepen when made a few hours or even a day in advance. Store it in an airtight container in the refrigerator.
***What if I don’t have chipotle peppers?***
If you can’t find chipotle peppers in adobo sauce, you can use a pinch of smoked paprika and a dash of cayenne pepper for a similar smoky and spicy flavor, though it won’t be quite the same. You could also use a mild to medium red chili like guajillo if you have access to dried chilies and know how to rehydrate and process them.
***Can I use flour tortillas instead of corn?***
While corn tortillas are traditional and provide the best texture, you can use flour tortillas. They will fry up differently and may not get as crisp. Warm them in the pan or oven until pliable, or lightly fry them until golden.
***What kind of cheese is traditionally used?***
Traditionally, a crumbly, salty cheese like queso fresco or cotija is used as a garnish. These cheeses add a pleasant texture and savory note without melting into an overwhelming sauce.

Huevos Rancheros Recipe – Authentic Mexican Breakfast Delight
Description
Welcome to our delicious journey of makingHuevos Rancheros with Black Beans and Chipotle Salsa! This recipe brings the rich, smoky flavors of Mexican cuisine straight to your breakfast or brunch table. If you’re a fan of hearty and flavorful dishes, thenHuevos Rancheroswill surely become a favorite. Combining crispy corn tortillas, creamy black beans, and a spicy chipotle salsa topped with perfectly fried eggs, it’s an irresistible dish that’s not only satisfying but also visually stunning.
Ingredients
- Optional Substitutions:
Instructions
- Pour the olive oil into a skillet and place over medium-high heat.
- Add the finely diced onion and garlic, and sauté for 2-3 minutes until fragrant.
- Stir in the drained tomatoes and minced chipotle chiles, and continue to sauté for another 2-3 minutes.
- Season the mixture with salt and pepper, then remove from heat.
- Add the minced cilantro and lime juice, stir well, and set aside to cool.
- Place the warmed corn tortillas onto a serving platter.
- Spread a spoonful of chipotle salsa over each tortilla.
- Top each with a generous portion of the warmed black beans.
- Add a fried egg on top of each tortilla.
- Drizzle more salsa over the eggs, and season with salt and pepper.
- Sprinkle crumbled queso fresco over the top.
- Add thin slices of iceberg lettuce and a few sprigs of fresh cilantro.
- Serve with a drizzle of hot sauce and a wedge of lime on the side.
Notes
Fresh Ingredients Make All the Difference: Use fresh cilantro and lime for the best flavor. Pre-packaged or dried ingredients may dull the vibrancy of the dish.
Adjust the Heat: If you’re not a fan of spicy food, reduce the number of chipotle chiles in the salsa.
Get Creative: Feel free to add toppings like avocado slices, pickled jalapeños, or even a dollop of sour cream for an extra layer of creaminess.
“`