Table of Contents
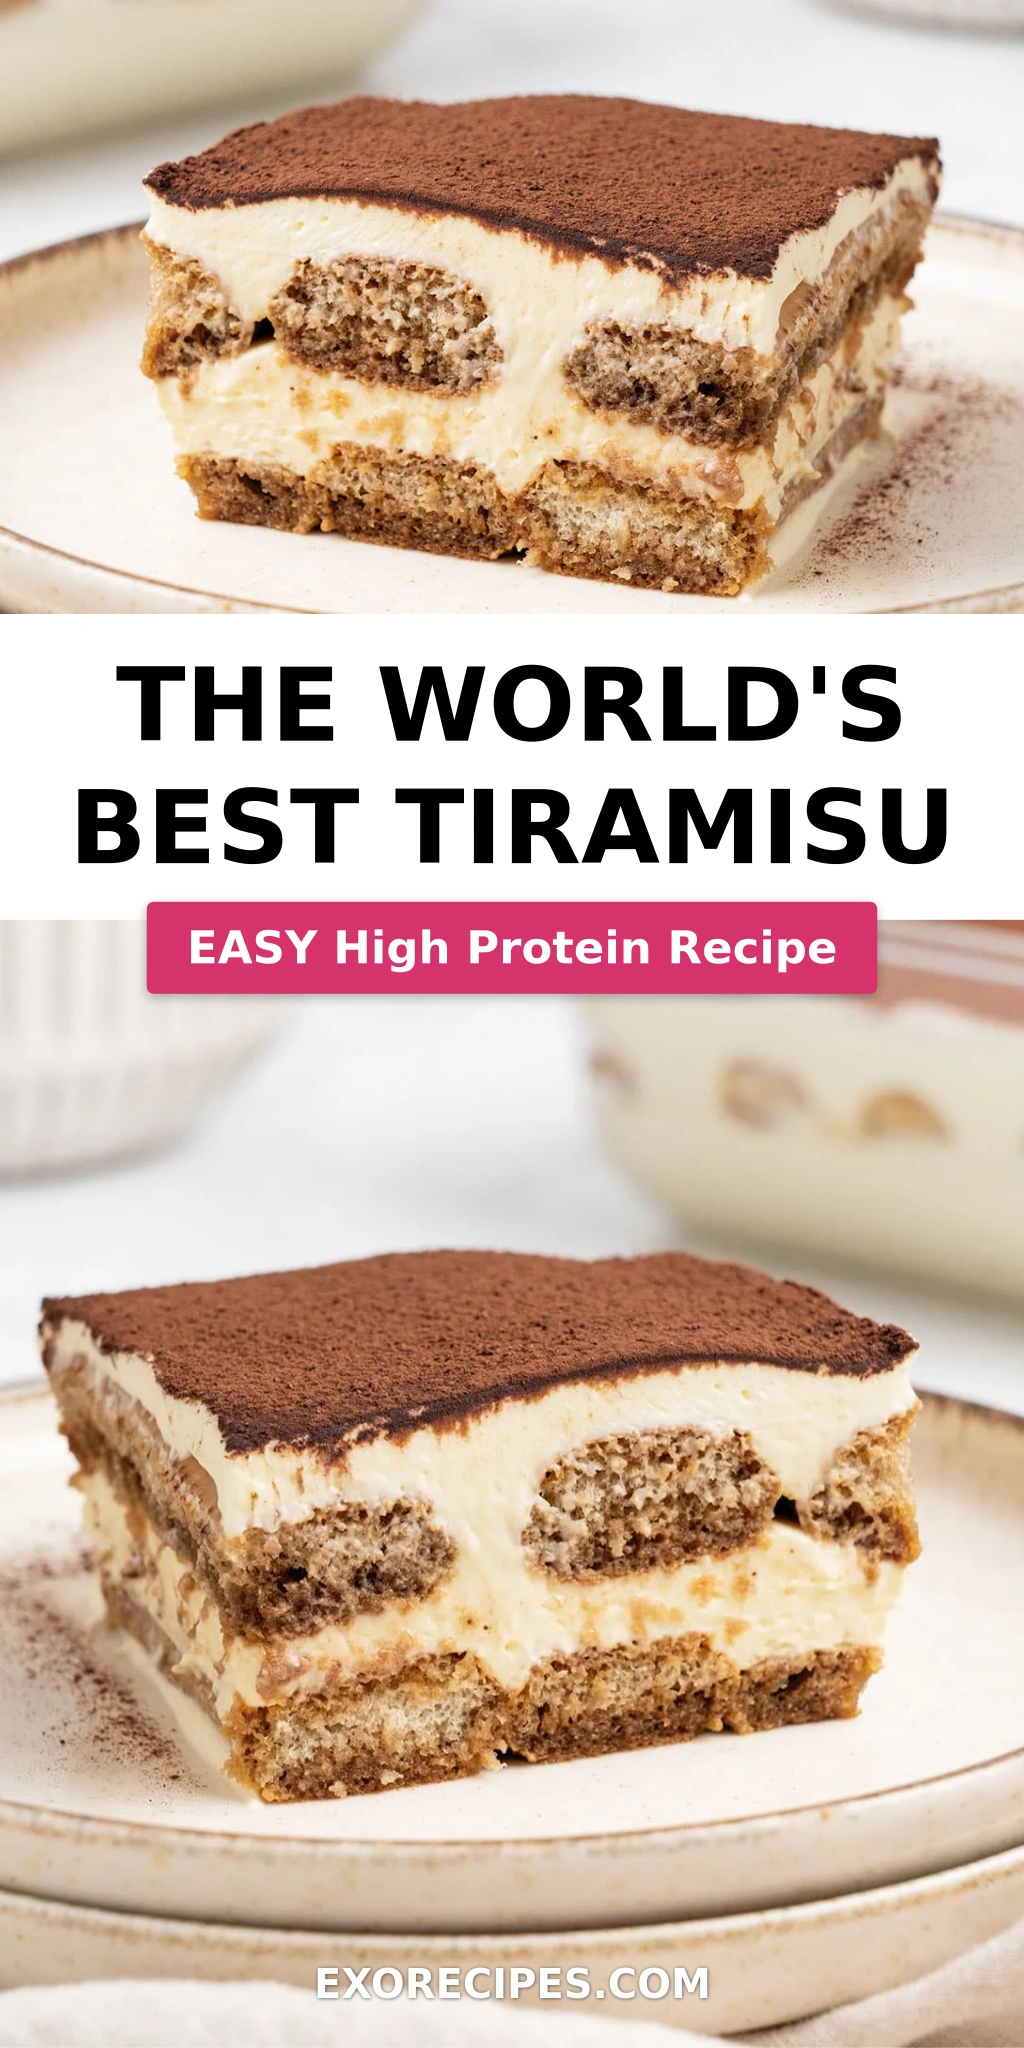
The World’s Best Tiramisu with Silky Mascarpone Cream – A Classic Italian Dessert Perfected
Growing up in Morocco, desserts were often steeped in honey and fragrant spices, but it was during my culinary training in Paris that I first encountered the magic of a truly classic Italian tiramisu. It was a revelation! The delicate balance of bitter coffee, rich mascarpone, and sweet lightness captivated me. I’ve spent years perfecting my own rendition, ensuring each bite is pure bliss. This recipe isn’t just about assembling ingredients; it’s about mastering the technique to achieve that light-as-air, silky mascarpone cream that truly makes it the world’s best tiramisu. Forget heavy, dense versions; we’re aiming for elegance and flavor harmony.
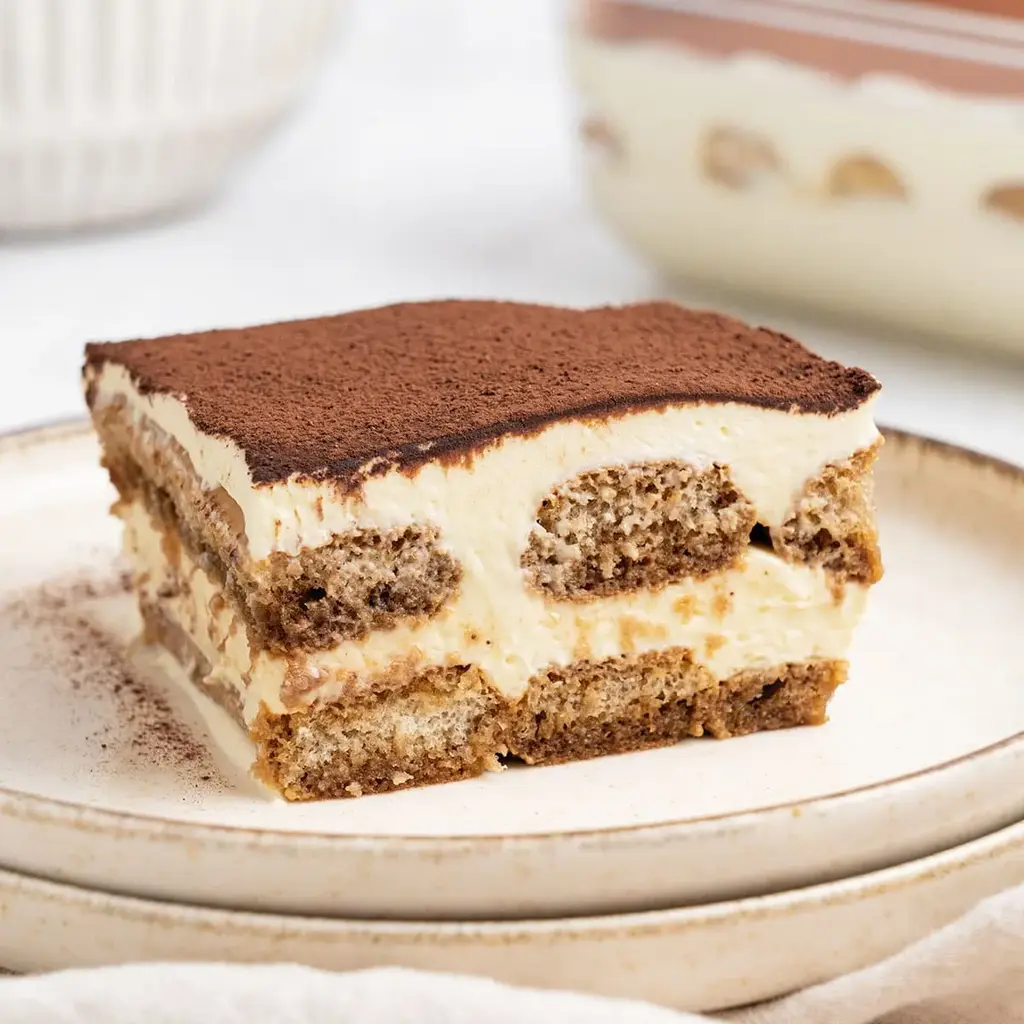
Imagine biting into a cloud. That’s the texture we’re going for with this easy tiramisu recipe. Each ladyfinger, briefly kissed by strong espresso, provides just the right foundation without becoming soggy. Then, the star: my signature silky, enriched mascarpone cream filling, subtly sweet and utterly luxurious. A dusting of unsweetened cocoa powder over the top adds a beautiful contrast, both visually and to the palate. It’s a symphony of rich, creamy, and coffee-infused notes that dance on your tongue, reminiscent of a perfect ending to a meal in a quaint Roman trattoria.
What sets my classic tiramisu apart is a technique I refined in my NYC kitchen, marrying a traditional Italian base with a French pastry sensibility to achieve an incredibly stable yet airy cream. I’ll guide you through each step, making sure your mascarpone achieves that elusive silky texture and doesn’t turn runny. You’ll learn the secret to a perfectly emulsified egg yolk mixture, a pro tip that ensures this authentic tiramisu is not only delicious but also completely foolproof, even if it’s your first time. Let’s create something truly special together!
Why This Tiramisu Recipe Is the Best
The secret to my award-winning tiramisu recipe lies in the meticulous balance of flavors and textures. Unlike many recipes that cut corners, I insist on properly tempering the egg yolks with sugar over a double boiler, a technique that not only pasteurizes them but also creates a stable, incredibly rich base for the mascarpone cream. This step is crucial for achieving that authentic, sophisticated depth of flavor and ensures a safe, delicious dessert. It truly makes for the best tiramisu you’ll ever taste, echoing the quality you’d find in a fine Parisian patisserie.
Texture is paramount in baking, and for tiramisu, it’s all about the contrast between the coffee-soaked ladyfingers and the ethereal cream. My method for whipping together the mascarpone and heavy cream separately, then carefully folding them into the cooled egg yolk mixture, guarantees a luxurious, airy, and utterly silky consistency. Too often, homemade tiramisu can be heavy or runny, but with my precise instructions, your cream will hold its form beautifully while still melting in your mouth. This attention to detail elevates a simple dessert to something spectacular.
Don’t let the double boiler intimidate you; this easy tiramisu recipe is surprisingly foolproof, even for beginner bakers. I’ve broken down each step, minimizing the chances of common mistakes. By carefully integrating these chef-tested techniques, you’ll produce a classic tiramisu that looks as good as it tastes, impressing everyone at your table. The result is a dessert that balances tradition with modern culinary precision, making it accessible and utterly delicious for home cooks in any kitchen.
Classic Tiramisu Ingredients
When I visit the bustling markets here in NYC, I’m always looking for the freshest ingredients, just like my mother taught me in Morocco. For this classic Italian tiramisu, quality truly makes all the difference! Here’s what you’ll need to create this dreamy dessert.
Ingredients List
- 6 large Egg yolks
- 150 g (about ¾ cup) Granulated sugar
- 500 g (about 2 cups) Mascarpone (high fat content, and crucially, use it cold!)
- 350 g (about 1 ½ cups) Heavy Cream (36% fat, use it very cold – can be substituted with an equal amount of mascarpone for an even richer cream)
- 20 pieces Ladyfinger cookies (Savoiardi)
- 1 cup strong Coffee (mildly sweetened, preferably espresso, for soaking your ladyfingers)
- Marsala wine (Optional. If using, mix 2-3 tablespoons into the coffee for an authentic kick.)
- 1-2 tablespoons Unsweetened Dutch-processed Cocoa powder (to decorate the top)
Ingredient Spotlight
Egg Yolks: These form the rich, custardy base of our mascarpone cream. Always use fresh, large eggs. The double boiler method in this easy tiramisu recipe ensures they are cooked to a safe temperature while thickening the cream. If you’re concerned about raw eggs, this thermal treatment is key. Whole eggs can be used but will result in a lighter, less rich cream, impacting the authentic tiramisu flavor.
Mascarpone: This Italian cream cheese is the heart of our silky mascarpone cream. Look for high-fat, full-fat mascarpone in specialty cheese sections. Keep it very cold until just before whipping to ensure it gets airy. For a slightly lighter but still rich texture, you could try substituting part of it with full-fat cream cheese, but the unique sweet tang will be altered.
Heavy Cream (36% fat): Along with mascarpone, heavy cream provides the luxurious, airy texture of the best tiramisu. Ensure it’s very cold for optimal whipping. If you don’t have heavy cream, you can use additional mascarpone for an extra-rich filling, though it will be denser and less airy. You can also whip coconut cream for a dairy-free option, but the flavor profile will significantly change.
Ladyfingers: These are the classic Italian cookies designed to absorb liquids without falling apart. Look for “Savoiardi” ladyfingers in the international aisle of your grocery store. Regular sponge cake or even graham crackers can be a substitute in a pinch, but they won’t absorb the coffee as elegantly and will alter the traditional texture of this easy tiramisu.
Coffee: A strong, good-quality espresso is preferred for authentic tiramisu. It provides the essential bitter backbone that balances the sweet cream. Brewed coffee or even instant coffee can work, but for the best tiramisu recipe, aim for a robust, freshly brewed cup. Chicory coffee might offer an interesting flavor twist, reminiscing about some North African coffee traditions.
| Original Ingredient | Best Substitution | Flavor / Texture Impact |
|---|---|---|
| Mascarpone | Cream Cheese (full-fat) | Slightly tangier flavor, firmer texture. |
| Heavy Cream | More Mascarpone | Richer, denser cream, less airy. |
| Ladyfingers | Sponge Cake or Pound Cake | Softer, less defined layers; absorbs less liquid. |
| Espresso | Strong Brewed Coffee | Less intense coffee flavor, still good. |
| Marsala Wine | Dark Rum or Brandy | Different alcoholic notes; can omit completely. |

How to Make The World’s Best Tiramisu — Step-by-Step
Creating this easy tiramisu is a delightful process, and with these detailed steps, you’ll achieve perfect results every time. Follow along, and soon you’ll be enjoying your very own classic tiramisu.
Step 1: Prepare the Egg Yolk Mixture
Begin by setting up a double boiler. This is crucial: the steam from simmering water in the bottom pot gently heats the contents of the top pot, which should not touch the water. In the top pot, whisk your 6 egg yolks with 150g (¾ cup) of granulated sugar continuously. Keep the heat low to prevent scrambling the eggs. Whisk until the sugar is fully dissolved and the mixture reaches 185°F (85°C), which takes approximately 5 minutes. Immediately transfer this mixture to a stand mixer fitted with a whisk attachment and whip until it cools to about 75°F (24°C) — it should be pale yellow and significantly thickened.
💡 mia’s Pro Tip: Overheating can lead to scrambled eggs. Use a candy thermometer to monitor the temperature precisely. This step not only pasteurizes the eggs but also creates a stable, airy base for your silky mascarpone cream.
Step 2: Whip Mascarpone and Heavy Cream
While the egg mixture is cooling, in a separate bowl, combine the very cold 500g (2 cups) mascarpone and 350g (1 ½ cups) cold heavy cream. Using an electric hand mixer, whip the mixture until it forms early stiff peaks. This usually takes about 3 minutes. The cream should be airy and fluffy but still soft enough to fold. Be careful not to overwhip, as mascarpone can become grainy or separate if over-agitated.
⚠️ Common Mistake to Avoid: Overwhipping the mascarpone and cream can make it runny or curdled. Stop whipping as soon as early stiff peaks form, meaning it holds its shape but is still light.
Step 3: Fold the Cream Mixtures
Once your egg yolk mixture is cooled and fluffy, gently switch to a rubber spatula. Carefully fold the whipped mascarpone and heavy cream mixture into the egg yolk mixture. The key here is to be very gentle to maintain the air you’ve incorporated into both components. Continue folding just until no streaks of yolk or mascarpone remain. The cream should be uniformly airy and fluffy. It will continue to set further as it chills in the refrigerator.
Step 4: Prepare Your Container
Choose your serving dish. I typically use an 18×24 cm (about 7×9 inches) rectangular container, but an 8×8-inch pan works equally well. Ensure it’s clean and ready to assemble your beautiful easy tiramisu.
Step 5: Dip and Layer Ladyfingers
Take your 1 cup of mildly sweetened, strong coffee (add Marsala wine if desired). Quickly dip each ladyfinger into the coffee, ensuring it’s moistened but not soggy. This takes just a second or two per cookie. Arrange the soaked ladyfingers in a single layer at the bottom of your chosen container. My pan fits about 10 ladyfingers per layer.
💡 mia’s Pro Tip: Don’t soak the ladyfingers for too long! A quick dip is all they need to absorb enough coffee to be flavorful without becoming mushy. This is essential for the perfect texture in your classic tiramisu.
Step 6: Spread Mascarpone Cream
Evenly spread half of the silky mascarpone cream over the first layer of ladyfingers. Repeat with another layer of coffee-dipped ladyfingers, followed by the remaining mascarpone cream. Use an offset spatula to smooth the top for a polished look.
Step 7: Refrigerate and Serve
Cover your tiramisu and refrigerate it for at least 4 hours. This chilling time is vital for the dessert to set properly and for the flavors to meld beautifully. Before serving, dust generously with 1-2 tablespoons of unsweetened Dutch-processed cocoa powder. Slice and enjoy your authentic tiramisu!
⚠️ Common Mistake to Avoid: Don’t skimp on the chilling time! A minimum of 4 hours, and ideally overnight, allows the tiramisu to firm up and the flavors to fully develop, preventing a messy serving experience.
| Step | Action | Duration | Key Visual Cue |
|---|---|---|---|
| 1 | Prepare egg yolk mixture (double boiler) | ~5 mins (cook), ~10 mins (whip/cool) | Pale yellow, thickened, 75°F (24°C) |
| 2 | Whip mascarpone & heavy cream | ~3 mins | Early stiff peaks, airy & fluffy |
| 3 | Fold cream mixtures | ~2 mins | Uniformly airy, no streaks |
| 4 | Prepare container | ~1 min | Chosen dish ready |
| 5 | Dip and layer ladyfingers | ~5 mins | Moistened, not soggy; single layer |
| 6 | Spread mascarpone cream | ~2 mins | Even layers, smoothed top |
| 7 | Refrigerate & serve | At least 4 hours | Firm, set, dusted with cocoa |
Serving & Presentation
Serving the world’s best tiramisu is an art in itself! After it’s had plenty of time to chill and for those glorious flavors to meld, it’s ready for its grand debut. The final touch is always a generous dusting of high-quality unsweetened cocoa powder just before serving. This not only adds a beautiful, rich contrast to the pale cream layers but also a delightful hint of bitterness that truly awakens the palate. For an extra flourish, you could shave a thin curl of dark chocolate over each slice, a trick I picked up during my days in Paris.
When plating, I love to cut neat squares or rectangles and transfer them gently to individual dessert plates. The distinct layers of coffee-soaked ladyfingers and silky mascarpone cream should be visible, creating a stunning presentation. Pair this classic tiramisu with a small, strong espresso – it’s the traditional Italian way and provides a perfect counterpoint to the dessert’s sweetness.
For something a little different, especially if you’re hosting, consider serving smaller portions in elegant martini glasses or small clear tumblers. This individual serving style adds a touch of chic sophistication, very much in line with the NYC dining scene. A fresh mint leaf or a single espresso bean can be a simple yet elegant garnish. Remember, this easy tiramisu is a crowd-pleaser on its own, but thoughtful presentation elevates the experience from a simple dessert to a memorable culinary event.
| Pairing Type | Suggestions | Why It Works |
|---|---|---|
| Side Dish | Fresh Berries (strawberries, raspberries), Biscotti | Lightens the richness, adds fresh tartness or complementary crunch. |
| Sauce / Dip | Chocolate ganache drizzle | Adds another layer of complementary chocolate richness. |
| Beverage | Espresso, Vin Santo (sweet wine), Amaretto Liqueur | Classic Italian pairings that enhance the coffee and creamy notes. |
| Garnish | Dark chocolate shavings, Espresso beans, Mint sprig | Adds visual appeal and reinforces flavor hints. |
Make-Ahead, Storage & Reheating
Living in NYC means a busy schedule, so meal prepping and make-ahead recipes are my best friends! This easy tiramisu is fantastic because it actually tastes better the next day, making it an ideal dessert for entertaining or for a luxurious treat throughout the week. You can completely assemble it up to 24-48 hours in advance, allowing all those beautiful flavors to truly meld and deepen without any loss of quality. Just hold off on the cocoa dusting until right before serving to keep it looking fresh.
| Method | Container | Duration | Reheating Tip |
|---|---|---|---|
| Refrigerator | Airtight container, tightly wrapped with plastic wrap | 3-4 days | Serve directly from fridge, dust with cocoa. |
| Freezer | Not recommended for entire dessert | Not recommended | Mascarpone cream can separate and become watery. |
| Make-Ahead | Assemble, cover tightly with plastic wrap | Up to 48 hours in advance | Dust with cocoa just before serving. |
While you can store this authentic tiramisu in the refrigerator, I don’t recommend freezing the entire dessert. The delicate structure of the silky mascarpone cream tends to break down when frozen and thawed, leading to a watery, grainy texture that just doesn’t live up to the “world’s best” standard. It’s truly a dessert best enjoyed fresh and chilled. If you have leftovers, store them in a tightly sealed container to prevent any outside odors from affecting the delicate flavors. Just pull it out of the fridge, give it a quick dust of cocoa, and it’s ready to transport you to Italy!
Variations & Easy Swaps
Part of the joy of cooking, discovered both in my mother’s Moroccan kitchen and during my French culinary training, is adapting recipes to new tastes and dietary needs. This easy tiramisu recipe is wonderfully versatile!
| Variation | Key Change | Best For | Difficulty Impact |
|---|---|---|---|
| Alcohol-Free/Nutty Tiramisu | Omit Marsala, add almond extract or ground nuts to cream | Families, nut lovers | No change |
| Gluten-Free Tiramisu | Use gluten-free ladyfingers or GF sponge cake | Gluten-sensitive guests | Slight texture change |
| Mocha/Citrus Tiramisu | Add chocolate to coffee/cream, or citrus zest | Flavor adventurers | Minor, adds a step |
Alcohol-Free or Nutty Tiramisu
If you prefer to skip the Marsala wine, simply omit it from the coffee soak. For an interesting twist, you could infuse the coffee with a vanilla bean or a touch of almond extract for a subtle nutty note. In Morocco, we love our almonds, so sometimes I’ll even fold finely ground toasted almonds into the mascarpone cream for an added layer of flavor and texture, making the best tiramisu even more unique.
Gluten-Free Tiramisu
Making this classic tiramisu gluten-free is quite simple. Many brands now offer excellent gluten-free ladyfingers. Alternatively, you can bake a thin layer of gluten-free sponge cake and cut it into strips. Just ensure your gluten-free option can absorb the coffee without disintegrating. I’ve tested this on many clients, and it works beautifully, retaining the quintessential texture of the world’s best tiramisu.
Mocha or Citrus Tiramisu
For chocolate lovers, consider a mocha tiramisu. Add 2 tablespoons of unsweetened cocoa powder to the coffee soak, or gently fold 1/4 cup of melted and cooled dark chocolate into the mascarpone cream. Another delightful option is a citrus tiramisu, perfect for spring! Fold 1-2 teaspoons of finely grated orange or lemon zest into the mascarpone cream. This brightly flavored version reminds me of the fresh produce I find at the NYC farmers markets, offering a zesty contrast to the rich cream.
What makes this tiramisu recipe the “world’s best” compared to others?
My tiramisu stands out due to a blend of traditional Italian methods and precise French pastry techniques. The key is in the double boiler method for the egg yolk and sugar mixture, which creates an incredibly stable and rich base. This prevents the cream from being watery and ensures a smooth, silky texture that truly melts in your mouth. Additionally, the careful, separate whipping of cold mascarpone and heavy cream, followed by gentle folding, maintains maximum airiness. It’s about achieving that perfect balance of coffee, sweetness, and ethereal creaminess that many other recipes miss, elevating it to what I truly believe is the best tiramisu.
Can I make tiramisu without alcohol like Marsala wine or rum?
Absolutely! While Marsala wine adds a classic depth to authentic tiramisu, it’s completely optional. You can simply omit it, and your tiramisu will still be incredibly delicious. If you want to add another layer of flavor without alcohol, try infusing your strong coffee with a splash of vanilla extract, a hint of almond extract, or a small amount of an alcohol-free coffee liqueur. The recipe is designed to be flexible enough to accommodate various preferences without compromising the overall quality of this easy tiramisu.
How far in advance can I make tiramisu, and how should I store it?
This classic tiramisu is actually one of those rare desserts that improves with age! You can — and I highly recommend — making it at least 24 hours in advance. This allows all the beautiful coffee and cream flavors to meld and deepen, and the different layers to truly set. Store it covered tightly with plastic wrap in the refrigerator for up to 3-4 days. Just make sure to dust it with cocoa powder right before serving, not beforehand, to prevent the cocoa from getting soggy.
What’s the secret to getting the perfect creamy mascarpone filling without it becoming runny?
The secret to that incredibly silky mascarpone cream is threefold. First, ensure both your mascarpone and heavy cream are *very cold* when you start whipping them. Cold ingredients whip up thicker and more stable. Second, whip them together only until early stiff peaks form—stop before it looks too firm, as overwhipping can break the emulsion. Third, and critically, properly tempering the egg yolks over a double boiler as instructed creates a robust, stable base. When gently folded together, these components yield a perfectly airy, rich, and non-runny cream. Don’t rush these steps!
Can I substitute ladyfingers with another type of cookie or cake for this easy tiramisu?
While traditional ladyfingers (Savoiardi) are ideal for an authentic tiramisu due to their unique ability to absorb liquid without becoming mushy, you can use alternatives. If you’re in a pinch, a light sponge cake or even pound cake can work, cut into appropriate shapes. Just be mindful that these substitutes might absorb more liquid, so dip them very quickly. The texture will be slightly different from the world’s best tiramisu, but it will still be a delicious dessert. I find that a good quality vanilla sponge cake comes closest in terms of texture.
Share Your Version!
I truly hope you adore this classic tiramisu recipe as much as I do. There’s nothing more rewarding than seeing my recipes come to life in your kitchens! If you try this recipe, please consider leaving a star rating and a comment below. Your feedback means the world to me and helps other home cooks discover this deliciousness.
And please, don’t keep your culinary masterpieces a secret! Share a photo of your beautiful, silky mascarpone cream tiramisu on Instagram or Pinterest and tag @exorecipes. It makes my day to see your creations. What’s your favorite way to serve this authentic tiramisu – with a shot of espresso, or perhaps a sprinkle of dark chocolate? Let me know!
From my NYC kitchen to yours — I hope this recipe brings as much warmth to your table as it does to mine. — mia 🧡
Love This Recipe? Save It to Pinterest!
If you enjoyed this The world’s best tiramisu recipe, don’t let it get lost in your browser tabs! 😄 Pin it now so you can find it again anytime — and explore hundreds more tried-and-tested recipes waiting for you on my Pinterest boards.
👉 Follow mia on Pinterest @chefrecipes2
📌 Pin this recipe · 🔁 Re-pin your favorites · 💬 Tag me when you make it — I love seeing your creations!
My Favorite Classic Italian Tiramisu
Description
This authentic Italian Tiramisu features airy ladyfingers soaked in coffee, layered between a silky, enriched mascarpone cream filling and a touch of cocoa on top. Buon Appetito!
Ingredients
- 6 Egg yolk
- 150 g Granulated sugar
- 500 g Mascarpone (high fat, use it cold)
- 350 g Heavy Cream (36% fat, use it very cold – can be substituted with equal amount of mascarpone)
- 20 pieces Ladyfinger cookies
- 1 cup Coffee (mildly sweetened strong espresso to soak the ladyfingers in)
- Marsala wine (Optional. If using, mix into the coffee.)
- 1–2 tablespoons Cocoa powder (Unsweetened Dutch processed to decorate the top)
Instructions
- Prepare the egg yolk mixture: Start by setting up a double boiler. A double boiler consists of two stacked pots: the bottom pot holds simmering water, while the top pot sits above the water without touching it. The steam from the simmering water gently heats the contents of the top pot.Once your double boiler is ready, whisk the egg yolks and sugar together in the top pot over the simmering water. Whisk continuously until the sugar has fully dissolved, which will take about 5 minutes, though the time may vary depending on your bowl size and the water temperature. Keep the heat low to prevent the egg yolks from cooking. The egg yolk mixture is ready when it reaches 85C / 185F.Then, move the egg yolk mixture into a stand mixer fitted with a whisk attachment and whip it until its temperature cools to about 24C / 75F.
- In the meantime, whip together the cold mascarpone and heavy cream with the help of an electric hand mixer until early stiff peaks while the mixture is still airy and fluffy. This will take about 3 minutes. Do not overwhip as it can become runny.
- Then, switch to a rubber spatula and carefully fold the whipped mascarpone into the egg yolk mixture making sure that you don´t break the air we just incorporated into both mixtures. At this point, the cream should be airy and fluffy and it will further set in the fridge.
- Prepare a container (Im using one that measures 18×24 cm / 7×9 inches, but an 8×8-inch pan will work too).
- Dip the ladyfingers into the coffee, then arrange them in a single layer at the bottom of the pan. For my pan, I can fit 10 ladyfingers in the first layer and another 10 in the second layer.
- Spread half of the mascarpone cream on top. Repeat with the next layer, then smooth the top with an offset spatula.
- Refrigerate the tiramisu for at least 4 hours to allow it to set. Before serving, dust with cocoa powder.
- Store any leftovers in an airtight container in the refrigerator for 2-3 days. I dont recommend freezing the tiramisu, as the mascarpone cream doesn't freeze well.
Nutrition
- Calories: 742 kcal
- Sugar: 27 g
- Fat: 64 g
- Carbohydrates: 31 g
- Protein: 11 g
Tried This Recipe? Leave a Comment!
Did you make this recipe? I’d love to hear how it turned out! Please leave a comment and a rating below. Your feedback helps other home cooks and supports cheerychop.com!
