Table of Contents
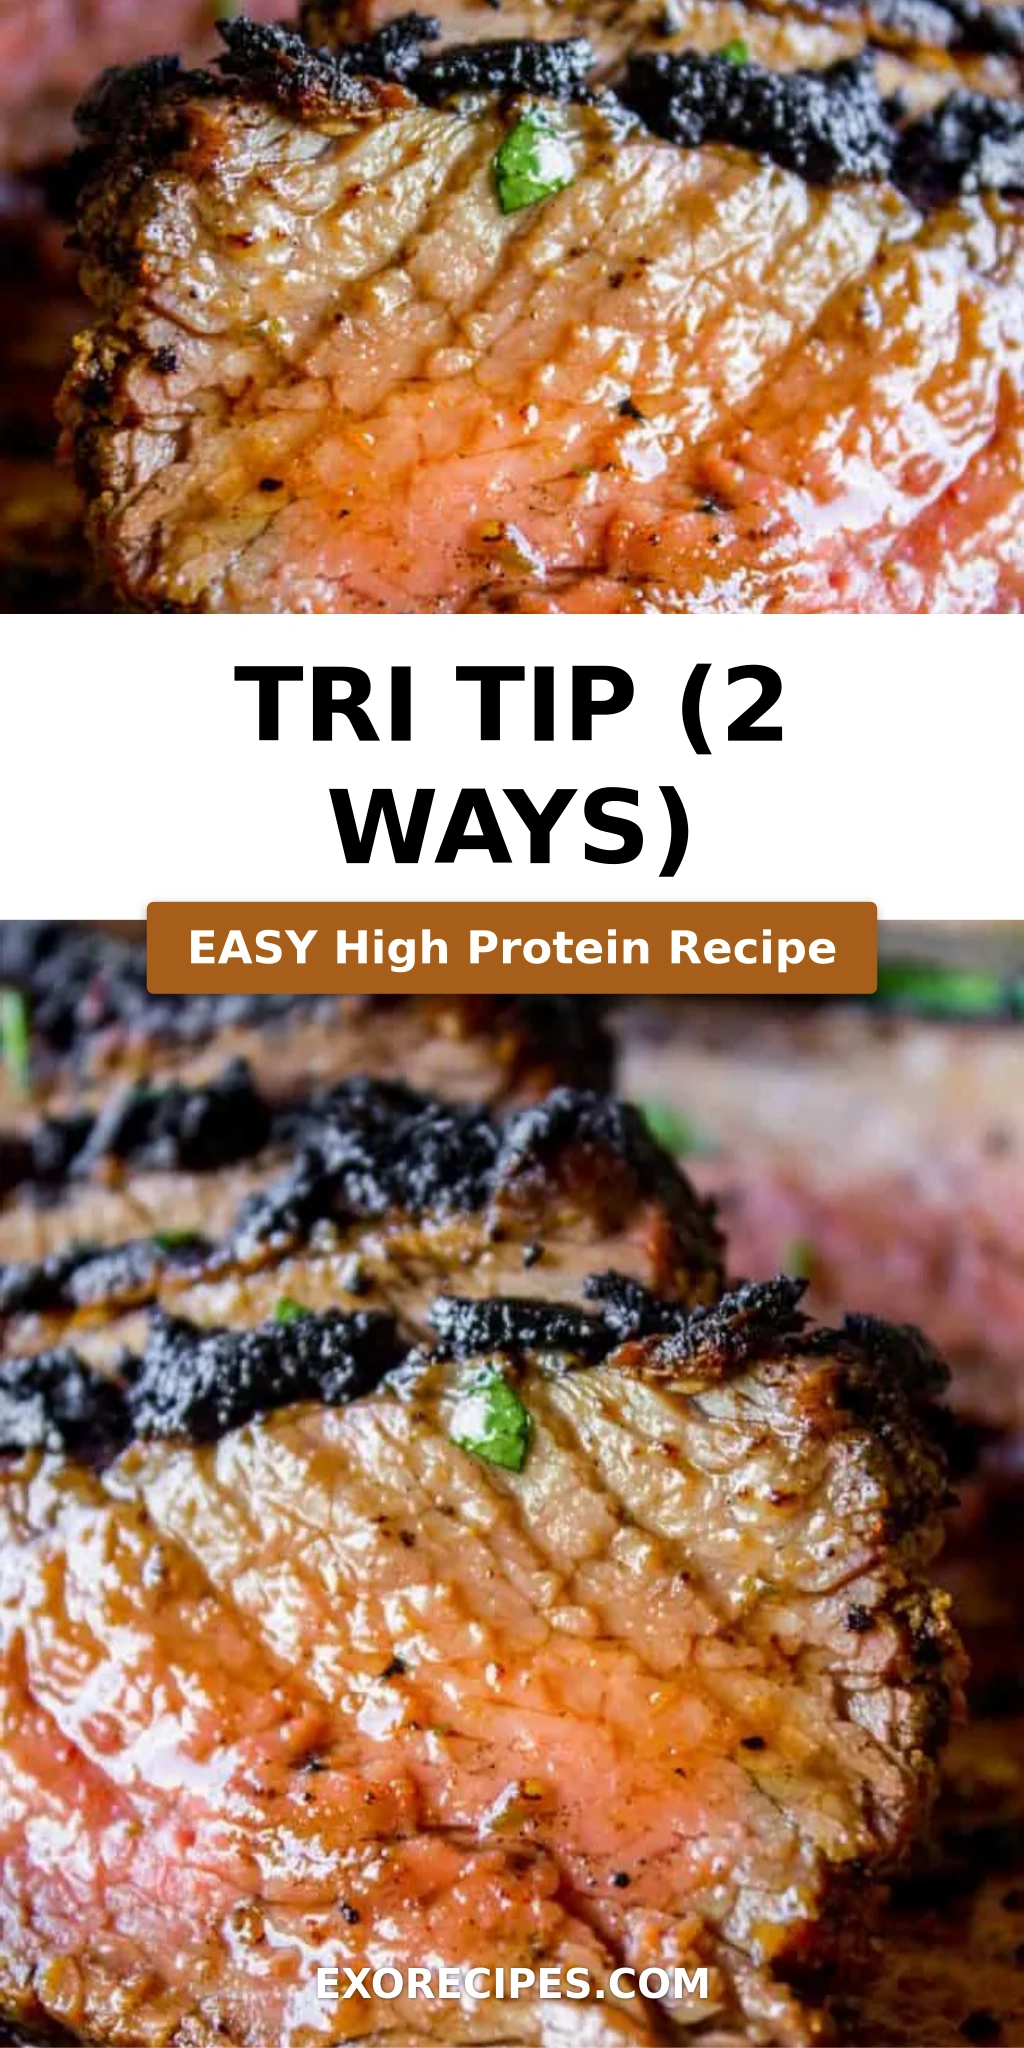
Tri Tip (2 Ways) – The Best Tri Tip Recipe You’ll Ever Make
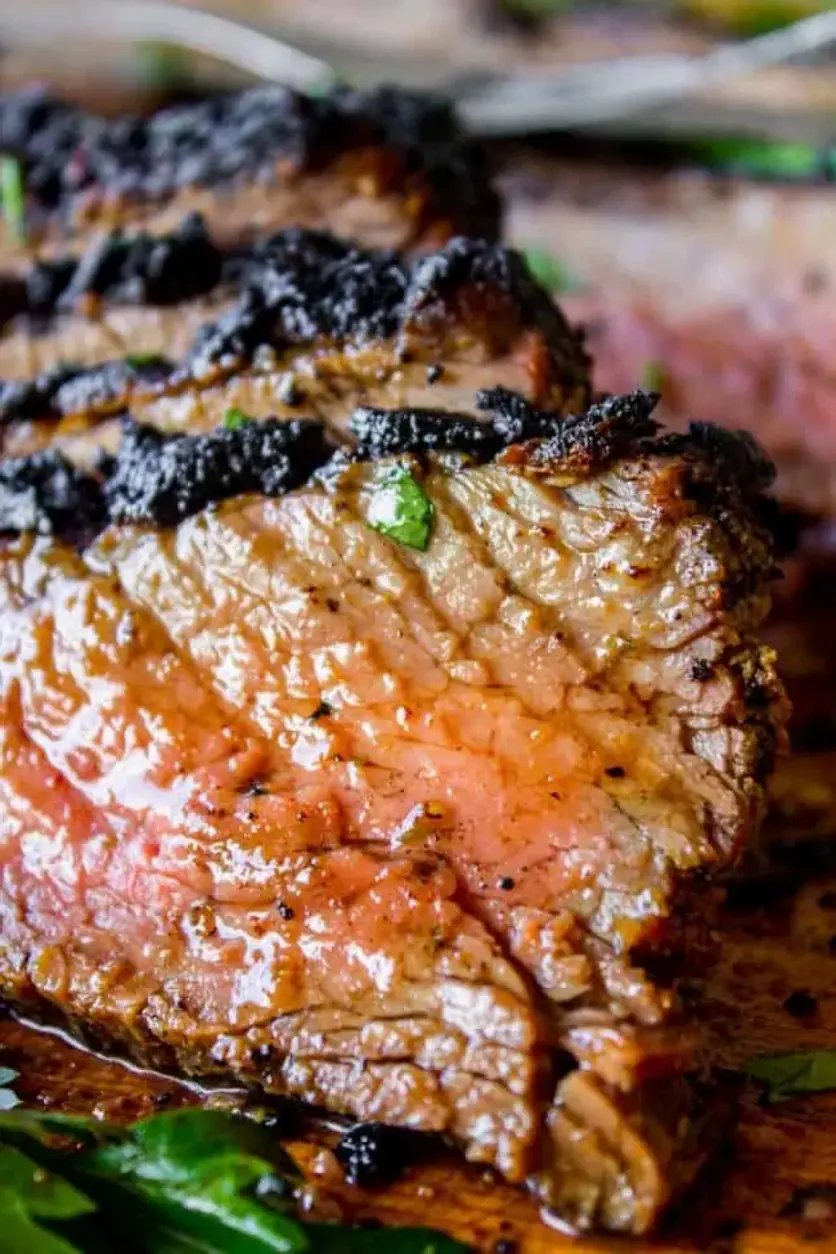
If you have never had tri tip, you haven’t lived! I’m going to show you how to cook tri tip on the grill or in the oven, and trust me — it’s SO easy and the flavor is unbeatable. Growing up in Morocco, my mother always taught me that the best meat dishes start with a great sear and a generous hand with seasoning. This tri tip recipe brings together everything I love about bold, simple cooking: a beautiful crust, a juicy center, and that deep beefy flavor that makes everyone at the table go quiet. Whether you choose the grill method or the oven method, you are getting a showstopper of a main dish.
The aroma of tri tip roasting or grilling is something else — that smoky, peppery, garlicky scent that fills your kitchen (or backyard) and makes people wander in asking, “What’s for dinner?” The outside develops a gorgeous deep brown crust from the spice rub and the sear, while the inside stays perfectly pink and tender. When you slice into it against the grain, the juices run out just enough to pool on the cutting board, and each bite is rich, savory, and satisfying. It’s the kind of meal that feels special — like Christmas dinner, which is exactly when we always had it growing up.
My version of this best tri tip recipe gives you two foolproof cooking methods: a high-heat grill sear followed by indirect grilling, and a hot-oven roast after a stovetop sear. Both deliver that perfect medium-rare finish with a fantastic crust. I learned the reverse sear principle during my training in Paris, and I’ve adapted it here for the home cook. Whether you’re a grilling enthusiast or an oven-roasting loyalist, I’ve got you covered. 💡 mia’s Pro Tip: The key to tenderness is letting the meat rest after cooking — and slicing against the grain. More on that below!
Why This Tri Tip Recipe Is the Best
The Flavor Secret. The spice rub is simple but perfectly balanced — garlic salt, Lawry’s seasoning salt, kosher salt, black pepper, a touch of sugar, garlic powder, and parsley. Each ingredient plays a role: the sugar helps the crust caramelize, the parsley adds a fresh herbal note, and the Lawry’s brings that classic savory depth. I learned the importance of a good rub from my mother’s kitchen in Morocco, where spice blends are an art form. This rub works beautifully on both the grill and oven versions.
Perfected Texture. The key is the two-zone cooking method — sear first over high heat to build that crust, then finish over gentle indirect heat (or in a moderate oven) so the interior cooks evenly without drying out. This is the same principle I use for prime rib and thick steaks. The result? A tri tip that is fork-tender, juicy, and perfectly pink from edge to center. No dry, overcooked ends — just beautiful, even doneness.
Foolproof & Fast. Unlike a brisket that needs hours and hours, tri tip cooks in about 25–30 minutes total. It’s forgiving, affordable, and feeds a crowd. Whether you’re hosting a backyard barbecue or a holiday dinner, this recipe delivers restaurant-quality results with home-cook effort. Plus, I give you both methods so you can choose based on your setup and mood.
Tri Tip Recipe Ingredients
I buy my tri tip from a local butcher here in NYC — the good marbling makes all the difference. If you can’t get to a butcher, a high-end grocery store will have mid-range cuts that work well. The spice blend is built from pantry staples, and I always use Diamond Crystal kosher salt (never table salt — it’s too harsh and salty). Let’s look at what you’ll need.
Ingredients List
- 2 & 1/2 pound tri tip roast
- 1 & 1/2 teaspoons garlic salt
- 1 tablespoon Lawry’s seasoning salt
- 1 & 1/2 teaspoons kosher salt (Diamond Crystal preferred)
- 1 teaspoon black pepper
- 1/2 teaspoon sugar
- 2 teaspoons garlic powder
- 1 tablespoon dried or fresh parsley
- 1/4 cup olive oil (plus extra for searing in oven method)
- Optional: 2 cups beef broth, 3 tablespoons flour, 2 tablespoons butter for pan sauce
Ingredient Spotlight
Tri Tip Roast. Also called a California cut or triangle roast, this cut comes from the bottom sirloin. It has great beef flavor but can be tough if overcooked. Look for good marbling — the little streaks of fat within the meat keep it moist and tender. Prime grade from a butcher is ideal, but Choice grade from a good grocery store works beautifully. The roast usually weighs 2–3 pounds and feeds 6–8 people with leftovers.
Lawry’s Seasoning Salt. This is a classic American seasoning blend that adds a savory, herbal, slightly garlicky flavor with a hint of sugar and paprika. It’s a pantry staple in many US kitchens and gives the rub a familiar, comforting taste. If you don’t have it, you can substitute with a mix of 2 teaspoons salt, 1/2 teaspoon paprika, 1/2 teaspoon onion powder, and a pinch of sugar.
Diamond Crystal Kosher Salt. I specify Diamond Crystal because its flaky, porous texture dissolves evenly and sticks to the meat better than Morton’s or table salt. It’s less salty by volume than other salts, so if you use Morton’s kosher salt, reduce the amount by about half. This small detail matters — it’s one of the first things I learned in Paris: salt carefully and choose your salt wisely.
| Original Ingredient | Best Substitution | Flavor / Texture Impact |
|---|---|---|
| Lawry’s Seasoning Salt | 2 tsp salt + 1/2 tsp paprika + 1/2 tsp onion powder + pinch sugar | Slightly less sweet, more direct salt + paprika flavor |
| Diamond Crystal Kosher Salt | Morton’s kosher salt (use half the volume) | More intense saltiness per teaspoon; adjust carefully |
| Garlic Powder | 2 tsp granulated garlic or 4 tsp fresh minced garlic (in oil) | Fresh garlic adds sharper, more pungent flavor; use within 1 hr |
| Dried Parsley | 2–3 tbsp fresh parsley, finely chopped | Brighter, fresher herb flavor; add fresh parsley after cooking if desired |
| Olive Oil | Avocado oil or grapeseed oil | Neutral flavor, similar fat content; avocado oil has higher smoke point |
How to Make Tri Tip (2 Ways) — Step-by-Step
I’ve broken both the grill method and the oven method into clear, achievable steps. Choose your path — or read both and decide which suits your kitchen and your mood today.
Step 1: Choose and Prepare Your Meat
If you can, get your tri tip from a local butcher. They will have what is called “prime” cuts, which has more fat and marbling than you can find at the grocery store. It will take longer to cook because of all the fat, and that fat means flavor. If you buy your tri tip at the grocery store, go to a high-end store — they carry mid-range cuts. A discount store will have discount meat that isn’t marbled well and will shrink a lot more. Ask for a well marbled tri tip roast, or “California cut” or “triangle roast.” If they still don’t know, ask for the bottom sirloin butt (subprimal cut).
💡 mia’s Pro Tip: If you are grilling, trim the fat cap from the roast. If you are oven roasting, leave it on. The fat cap protects the meat in the dry oven heat and adds moisture.
Step 2: Make the Spice Rub and Marinate
In a small bowl, combine all the spices: garlic salt, seasoning salt, kosher salt (Diamond Crystal only — never table salt!), pepper, sugar, garlic powder, and parsley. Rub the spice mixture all over the roast with your hands. Place in a large ziplock bag, add 1/4 cup olive oil, seal the bag, and massage the oil into the meat. Refrigerate, turning a couple times, for about 8 hours. (If you only have an hour or even 15 minutes, you’ll still get a great roast — but longer marinating builds deeper flavor. You can leave it in the fridge for up to 3 days.)
⚠️ Common Mistake to Avoid: Don’t skip the marinating time entirely. Even 15 minutes helps the salt penetrate the surface. But if you can give it a few hours, the flavor really develops. Set a timer so you don’t forget it in the fridge for 4 days!
Step 3: Bring to Room Temperature
Remove the meat from the fridge 30 minutes before you plan to cook it. It should start cooking at room temperature. This ensures even cooking — a cold roast will sear on the outside but stay raw in the center.
💡 mia’s Pro Tip: Place the roast on a plate and discard the marinade (or save it to add to a pan sauce if you plan to make one). Pat the meat dry with paper towels before searing — a dry surface gives you a better crust.
Step 4 — Grill Method: Sear Over High Heat
Preheat your grill to high heat — give it a good 15–20 minutes to heat up. Grease the grill grates (or brush oil directly on the meat). Sear the roast over high heat for 2–3 minutes per side, until nicely browned. Keep the lid shut as much as you can. Turn off the heat on the side of the grill where the meat is — you’re cooking over INDIRECT heat now. Lower the other side of the grill to low heat. If cooking over charcoal, arrange the meat off to the side, not directly above the coals.
⚠️ Common Mistake to Avoid: Don’t move the meat around while searing. Let it sit undisturbed for the full 2–3 minutes so the crust can develop. If you try to flip too early, the meat will stick and tear.
Step 5 — Grill Method: Indirect Heat Finish
Grill without opening the lid for about 20–25 minutes, or about 10–15 minutes per pound, depending on how rare you want it. Rare is 135°F, medium-rare is 145°F. Use a meat thermometer inserted in the center of the roast to check the temperature.
💡 mia’s Pro Tip: For the most accurate reading, use an instant-read thermometer and insert it into the thickest part of the roast. Pull the meat off the heat about 3–5°F below your target temperature — it will continue to rise during resting.
Step 6 — Oven Method: Sear Then Roast
Preheat your oven to 400°F. Line a rimmed baking sheet with foil and place an oven-safe cooling rack on top. Heat a large skillet over medium-high heat with 2 tablespoons olive oil. When the oil shimmers, place the roast in the pan, fat side down. Sear for 3–4 minutes until a brown crust develops, then flip and sear the other side. Transfer the roast to the cooling rack on the baking sheet. Save the drippings and oil from searing for a pan sauce if you like.
⚠️ Common Mistake to Avoid: Don’t crowd the pan — the roast should have direct contact with the hot surface. If your skillet is too small, the meat will steam instead of sear, and you won’t get that deep brown crust.
Step 7 — Oven Method: Roast to Perfection
Put the roast in the oven and bake at 400°F for 20–30 minutes, or about 10–15 minutes per pound. Rare is 130–135°F, medium-rare is 135–145°F. Don’t cook it past 145°F — the meat doesn’t have enough fat for medium-well or well. Use a meat thermometer inserted into the center to check.
💡 mia’s Pro Tip: Every oven runs a little differently. Start checking the temperature at 18 minutes for a 2.5-pound roast. If you like your meat more on the rare side, pull it at 130°F and let it rest — it will coast up to about 135°F.
Step 8: Rest and Slice
Remove the roast from the grill or oven and place it on a rimmed serving platter. Cover well with foil and let rest for 10–15 minutes. This is non-negotiable! The juices need time to redistribute throughout the meat. Slice against the grain — look at the direction of the muscle fibers and cut perpendicular to them. This ensures every slice is tender, not chewy.
⚠️ Common Mistake to Avoid: Slicing with the grain is the #1 mistake people make with tri tip. The muscle fibers run in two different directions on a tri tip — find the grain, turn the roast, and slice across it. If you’re unsure, make a small cut to see the fiber direction before slicing the whole roast.
| Step | Action | Duration | Key Visual Cue |
|---|---|---|---|
| 1 | Choose & prepare meat (butcher or grocery) | 10 mins | Well-marbled roast, even shape |
| 2 | Mix rub, coat meat, marinate | 8 hrs preferred (min 15 min) | Meat fully coated, bag sealed |
| 3 | Bring to room temperature | 30 mins | No longer cold to the touch |
| 4 | Sear (grill or stovetop) | 2–4 mins per side | Deep brown crust, not burnt |
| 5 | Cook via indirect heat (grill) or oven (400°F) | 20–30 mins | Internal temp 130–145°F |
| 6 | Rest under foil | 10–15 mins | Juices pool on platter, temp rises 3–5°F |
| 7 | Slice against the grain | 2 mins | Clean slices, visible muscle fibers cut crosswise |
Serving & Presentation
I love serving tri tip on a large wooden cutting board or a rimmed platter so the juices can pool without running all over the table. Slice the entire roast against the grain and fan the slices out slightly for a gorgeous presentation. Sprinkle a little flaky sea salt and a few fresh parsley leaves on top for color and freshness. The traditional side dish for tri tip is Santa Maria Pinquito Beans — small pink beans cooked with bacon, garlic, and tomato — but any hearty side works beautifully.
In my NYC kitchen, I often pair this with a simple arugula salad dressed with lemon and olive oil, or roasted potatoes with garlic and rosemary. The rich, beefy flavor of the tri tip stands up beautifully to bold sides. If you made the pan sauce (from the drippings, beef broth, flour, and butter), drizzle a little over each slice — it takes the dish to another level. I learned sauce-making in Paris, and this quick pan sauce is one of my favorite tricks for elevating a weeknight meal.
💡 mia’s Pro Tip: For the pan sauce, save all the meat drippings and excess marinade. Add to a small saucepan with 2 cups beef broth. Bring to a boil. In a small bowl, combine 1/3 cup cold water and 3 tablespoons flour. Whisk until smooth, then slowly pour into the boiling broth. Simmer for 5–10 minutes until thickened. Stir in 2 tablespoons butter, season with salt and pepper, and serve over the sliced meat. It’s incredible.
| Pairing Type | Suggestions | Why It Works |
|---|---|---|
| Side Dish | Santa Maria Pinquito Beans, roasted potatoes, garlic bread, grilled vegetables | Hearty sides balance the rich beef; beans are traditional, potatoes add crunch |
| Sauce / Dip | Pan sauce (from drippings), chimichurri, horseradish cream, salsa verde | Adds moisture and brightness; chimichurri cuts richness, horseradish adds heat |
| Beverage | Zinfandel, Syrah, Malbec, or a dark lager / amber ale | Bold red wines complement the beef’s richness; dark beers echo the smoky char |
| Garnish | Fresh parsley, flaky sea salt, lemon wedges, grilled lemon halves | Fresh herbs and citrus brighten the dish and add visual appeal |
Make-Ahead, Storage & Reheating
Tri tip is wonderful for meal prep — I often cook two roasts at once and save one for quick lunches during the week. Since I’m always juggling recipe development and teaching here in NYC, having pre-cooked tri tip in the fridge is a lifesaver. The key is storing it properly so it stays moist and flavorful.
| Method | Container | Duration | Reheating Tip |
|---|---|---|---|
| Refrigerator | Airtight container or wrap tightly in foil | 3–4 days | Reheat gently in a low oven (300°F) with a splash of broth, covered, for 10–15 mins |
| Freezer | Wrap tightly in plastic wrap + foil, or vacuum seal | 2–3 months | Thaw overnight in fridge, then reheat in oven at 300°F with broth, covered |
| Make-Ahead | Marinate in ziplock bag in fridge | Up to 3 days in advance | Remove from fridge 30 mins before cooking; pat dry before searing |
For reheating, the goal is to warm the meat without drying it out. I prefer the oven method — place the sliced meat in a baking dish, add a few tablespoons of beef broth or water, cover tightly with foil, and warm at 300°F for 10–15 minutes. Avoid the microwave if you can — it tends to toughen the meat and make it chewy. If you’re in a hurry, a hot skillet with a splash of broth works too, but watch it closely.
💡 mia’s Pro Tip: Leftover tri tip makes the best sandwiches! Slice it thin, pile it on a crusty roll with a smear of horseradish cream or chimichurri, and add some arugula. It’s my favorite lunch the next day.
Variations & Easy Swaps
| Variation | Key Change | Best For | Difficulty Impact |
|---|---|---|---|
| Moroccan Spice Rub | Add 1 tsp cumin, 1 tsp paprika, 1/2 tsp cinnamon, and 1/2 tsp ginger to the rub | A warm, aromatic twist — perfect for fall or holiday dinners | Easy (same method, different spices) |
| Smoked Tri Tip | Smoke at 225°F for 45–60 mins until internal temp reaches 130°F, then sear hot | Deep smoky flavor — ideal for backyard cooking enthusiasts | Medium (requires smoker and temperature monitoring) |
| Reverse Sear (Oven + Cast Iron) | Roast at 250°F for 30–40 mins to 125°F internal, then sear in hot cast iron 1 min per side | Maximum crust, perfectly even doneness — a chef’s favorite method | Medium (two-step process, careful temp monitoring) |
Moroccan Spice Rub Variation
This is my personal favorite — a nod to my Moroccan roots. Add 1 teaspoon cumin, 1 teaspoon paprika, 1/2 teaspoon cinnamon, and 1/2 teaspoon ground ginger to the spice rub. The warmth of the cinnamon and cumin pairs beautifully with the beef, and the paprika adds a lovely color. It’s not traditional for tri tip, but it works wonderfully — especially in the oven method where the spices have time to meld. Serve it with couscous and roasted carrots for a full North African-inspired meal.
Smoked Tri Tip Variation
If you own a smoker, this is a game-changer. Set your smoker to 225°F with your favorite wood (hickory or oak work beautifully). Smoke the tri tip until the internal temperature reaches 125–130°F, which takes about 45–60 minutes. Then sear it over high heat on a grill or in a cast-iron skillet for 1–2 minutes per side to develop the crust. The result is a tri tip with a deep, smoky flavor throughout, a beautiful pink center, and a crackling crust. This is a fantastic option for weekend gatherings.
Reverse Sear Variation
The reverse sear is the technique I learned in Paris, and it’s perfect for tri tip. Instead of searing first and then roasting, you slow-roast the meat at a low temperature (250°F) until it’s about 10–15°F below your target, then sear it in a screaming-hot cast-iron skillet. This method gives you an incredibly even doneness from edge to center — no gray band around the outside. The crust is also superior because the surface is dry when it hits the hot pan. It takes a little more time, but the result is absolutely worth it.
What is the best way to cook tri tip to make it tender?
The best way to cook tri tip for tenderness is to use a two-zone cooking method: sear it over high heat first to develop a flavorful crust, then finish it over indirect heat (or in a moderate oven) until it reaches your desired internal temperature. For tri tip, medium-rare (135–145°F) is ideal — cooking it past 145°F will make it tough because the meat doesn’t have enough fat for well-done. Letting the meat rest for 10–15 minutes after cooking is also essential — it allows the juices to redistribute throughout the roast. And always slice against the grain! The muscle fibers in tri tip run in two directions, so take a moment to find the grain and cut perpendicular to it. This single step makes a huge difference in tenderness.
Can you cook tri tip in the oven instead of on a grill?
Absolutely! Cooking tri tip in the oven is not only possible, it’s one of my favorite methods — especially when the weather doesn’t cooperate for grilling. The oven method starts with a stovetop sear in a hot skillet to develop that beautiful brown crust, then the roast finishes in a 400°F oven for about 20–30 minutes (10–15 minutes per pound). For the best results, place the roast on a cooling rack set over a baking sheet so air circulates evenly around the meat. Use a meat thermometer to check doneness — rare is 130–135°F, medium-rare is 135–145°F. Don’t cook it past 145°F. The oven method produces a beautifully cooked tri tip with a lovely crust and a juicy, tender interior.
What are the two most popular ways to season a tri tip?
The two most popular ways to season tri tip are a simple salt-and-pepper dry rub and a more complex spice blend. The classic Santa Maria-style seasoning uses just salt, pepper, and garlic — it’s straightforward and lets the beef flavor shine. The second popular approach is a robust spice rub like the one in this recipe: garlic salt, Lawry’s seasoning salt, kosher salt, black pepper, sugar, garlic powder, and parsley. This blend adds layers of savory, herbal, and slightly sweet notes that create a beautiful crust when seared. Both approaches are delicious — the choice depends on whether you want the beef to be the star or you prefer a more seasoned, crust-forward experience. In my NYC kitchen, I often make both and let my guests decide which they prefer.
How long should you let tri tip rest after cooking?
You should let tri tip rest for at least 10–15 minutes after cooking. This resting period is crucial — it allows the juices that have been pushed to the center of the roast during cooking to redistribute evenly throughout the meat. If you slice into it too soon, all those flavorful juices will run out onto the cutting board, leaving you with dry, tough meat. To rest the meat properly, place it on a rimmed platter or cutting board, tent it loosely with aluminum foil, and let it sit undisturbed. During this time, the internal temperature will continue to rise by about 3–5°F — this is called carryover cooking. So if you pull the roast at 130°F for medium-rare, it will coast up to about 135°F while resting.
Should I trim the fat cap off tri tip before cooking?
It depends on your cooking method. If you are grilling the tri tip, I recommend trimming the fat cap — the direct high heat of the grill can cause the fat to flare up and burn, which gives the meat a bitter, acrid flavor. If you are oven roasting, leave the fat cap on. The fat protects the meat from the dry heat of the oven and slowly renders during cooking, basting the roast from the outside and adding moisture and flavor. In both cases, any remaining fat can be trimmed after cooking when you slice the meat. My advice: let the cooking method guide your decision — trim for the grill, leave it on for the oven.
What temperature should tri tip be for medium-rare?
For medium-rare tri tip, aim for an internal temperature of 135–145°F when measured with a meat thermometer inserted into the thickest part of the roast. Keep in mind that the temperature will rise by about 3–5°F during resting (carryover cooking), so I recommend pulling the roast off the heat at 130–135°F if you want it to land perfectly in the medium-rare zone. Rare tri tip is 130–135°F, medium-rare is 135–145°F, and I don’t recommend cooking it past 145°F — the meat doesn’t have enough internal fat to stay moist at medium-well or well-done levels. Use an instant-read thermometer for the most accurate reading, and check in a couple of spots to be sure.
Can I marinate tri tip for too long?
Yes, you can marinate tri tip for too long — but the window is generous. With this salt-based dry rub (which includes kosher salt, garlic salt, and seasoning salt), marinating for up to 3 days in the refrigerator is fine. Beyond that, the salt can begin to break down the meat’s protein structure too much, leading to a texture that is mushy or mealy rather than tender. The ideal marinating time is about 8 hours — this allows the salt and spices to penetrate the surface and flavor the meat without over-tenderizing. If you only have 15–30 minutes, you’ll still get a good result, but 8 hours is the sweet spot for maximum flavor development while preserving the meat’s natural texture.
What is the difference between tri tip and brisket?
Tri tip and brisket are both beef cuts, but they come from different parts of the animal and have very different cooking requirements. Tri tip comes from the bottom sirloin (the rear of the cow) and is a relatively tender, lean cut that cooks quickly — about 25–30 minutes for a whole roast. Brisket comes from the chest area and is a tough, heavily exercised muscle with lots of connective tissue that requires low-and-slow cooking for hours (often 8–12 hours) to break down the collagen and become tender. Tri tip is best cooked to medium-rare and sliced against the grain, while brisket is typically cooked to an internal temperature of around 200–205°F and shredded or sliced. They’re both delicious, but they require very different approaches in the kitchen.
Can I use a different cut of meat if I can’t find tri tip?
If you can’t find tri tip, the best substitute is a thick-cut sirloin steak or a petite sirloin roast. These cuts come from the same region of the cow and have a similar beefy flavor and texture. You can also use a top sirloin roast, though it will be slightly leaner and may cook a little faster. Another option is a flank steak or skirt steak, but these are much thinner and will cook in a fraction of the time — adjust your cooking time dramatically downward. If you’re committed to the full-roast experience, ask your butcher if they can order a tri tip for you — most butchers can get one, especially if you give them a couple of days’ notice. The unique shape and marbling of tri tip are worth seeking out.
How do I slice tri tip correctly?
Slicing tri tip correctly is one of the most important steps for a tender result. Tri tip has muscle fibers that run in two different directions — the roast is shaped like a triangle, and the grain changes direction partway through. Here’s the trick: look at the roast and identify the direction of the muscle fibers (they look like long lines running through the meat). Slice perpendicular to those fibers — that’s “against the grain.” Start slicing from the thin end, and when you notice the grain direction change (about halfway through the roast), rotate the roast and continue slicing against the new direction. The slices should be about 1/4 to 1/2 inch thick. Slicing against the grain shortens the muscle fibers, making each bite tender rather than chewy. This is the technique I use every time in my NYC kitchen, and it makes all the difference.
Share Your Version!
I’d love to hear how your tri tip turned out! Did you go with the grill method or the oven method? Did you try the Moroccan spice variation or keep it classic? Drop a comment below and let me know — your feedback helps other home cooks decide which path to take. And if you snapped a photo of your beautifully sliced roast, tag me on Instagram or Pinterest @exorecipes — I love seeing your creations and sharing them with our community.
From my NYC kitchen to yours — I hope this recipe brings as much warmth to your table as it does to mine. — mia 🧡
Love This Recipe? Save It to Pinterest!
If you enjoyed this Tri Tip (2 Ways) recipe, don’t let it get lost in your browser tabs! 😄 Pin it now so you can find it again anytime — and explore hundreds more tried-and-tested recipes waiting for you on my Pinterest boards.
👉 Follow mia on Pinterest @exorecipe
📌 Pin this recipe · 🔁 Re-pin your favorites · 💬 Tag me when you make it — I love seeing your creations!
Tri Tip (2 Ways)
Description
If you have never had tri tip, you haven’t lived! I will show you how to cook tri tip on the grill or in the oven, it’s SO easy and the flavor is unbeatable! We always had tri tip for Christmas dinner growing up, it’s an impressive main dish!
Ingredients
- 2 & 1/2 pound tri tip roast
- 1 & 1/2 teaspoons garlic salt
- 1 tablespoon Lawry's seasoning salt
- 1 & 1/2 teaspoons kosher salt (Diamond Crystal)
- 1 teaspoon black pepper
- 1/2 teaspoon sugar
- 2 teaspoons garlic powder
- 1 tablespoon dried or fresh parsley
- 1/4 cup olive oil
Instructions
- If you can, get your tri tip from a local butcher. They will have what is called "prime" cuts, which has more fat and marbling than you can find at the grocery store. It will take longer to cook because of all the fat. (Fat=flavor)
- If you buy your tri tip at the grocery store, make sure that you go to a high-end grocery store. High-end grocery stores are going to have mid-range cuts of meat. A discount store is going to have discount meat, and it will not be marbled well. Your roast will shrink a lot more and it will take a shorter time to cook.
- Ask the butcher or grocery clerk for a well marbled tri tip roast, or "California cut" or a "triangle roast." If they still don't know what you mean, ask for the bottom sirloin butt (subprimal cut).
- In a small bowl, combine all the spices: garlic salt, seasoning salt, kosher salt (only kosher salt, never table salt, and preferably Diamond Crystal!), pepper, sugar, garlic powder, and parsley. 1 tablespoon of dried parsley is fine, you can use 2-3 tablespoons if you are using fresh parsley.
- If you are grilling, trim the fat cap from the roast. If you are oven roasting, leave it on.
- Rub the spice mixture all over the roast with your hands. Place in a large ziplock bag and add 1/4 cup olive oil. Seal the bag and massage the oil into the meat. Place in the fridge and marinate, turning a couple times, for about 8 hours. (This is ideal. If you only have an hour or even 15 minutes, guess what, you're still going to get a great roast. But the longer you marinate, the more flavor there will be. You can leave it in the fridge for up to 3 days.)
- Remove the meat from the fridge 30 minutes before you plan to cook it. It should start cooking at room temperature.
- Preheat your grill to high heat. Make sure you give it a good 15-20 minutes to heat up.
- Place the roast on a plate and discard the marinade (or save it to add to a pan sauce if you plan to make one).
- Grease the grill (or brush oil directly on the meat).
- Sear the roast over high heat for about 2-3 minutes, until it is nicely browned. Flip over (grease again if necessary) and sear the other side for 2-3 minutes. Keep the lid shut as much as you can.
- Turn off the heat on the side of the grill that your meat is on. We are cooking it over INDIRECT heat. Lower the other side of the grill to low heat. If you are cooking over charcoals, arrange the meat and charcoals so that the meat is off to the side, not cooking directly above the charcoal.
- Grill without opening the lid for about 20-25 minutes, or about 10-15 minutes per pound, depending on how rare you want it. Rare is 135 degrees F. Medium rare is 145 degrees F. Use a meat thermometer inserted in the center of the roast to check the temperature.
- Remove the roast from the grill, and place on a rimmed serving platter. Cover well with foil and let rest for 10-15 minutes.
- Slice against the grain and serve (see photos). Try this tri tip with its traditional side dish, Santa Maria Pinquito Beans!
- Remove the meat from the fridge 30 minutes before you plan to cook it. It should start cooking at room temperature.
- Preheat your oven to 400 degrees F.
- Line a rimmed baking sheet with foil and place an oven-safe cooling rack on top, and set aside.
- Heat a large skillet over medium high heat. Add 2 tablespoons olive oil. When the oil shimmers, place the roast in the pan, fat side down. Sear the roast for about 3-4 minutes, until a brown crust has developed. Flip and sear the other side.
- Place the roast on the cooling rack. Save the marinade and oil from searing for a pan sauce, if you choose to make one.
- Put the roast in the oven and bake at 400 degrees for about 20-30 minutes, or about 10-15 minutes per pound, depending on how rare you want it. Rare is 130-135 degrees F. Medium rare is 135-145 degrees F. Don't cook it past 145; the meat doesn't have enough fat for medium well or well. Use a meat thermometer inserted in the center of the roast to check the temperature.
- Remove the roast from the oven, and cover well with foil. Let rest for 10-15 minutes.
- Slice against the grain and serve (see photos). Try this tri tip with its traditional side dish, Santa Maria Pinquito Beans!
- Save all meat drippings* and excess marinade. Add to a small saucepan with 2 cups beef broth.* Bring to a boil. In a small bowl, combine 1/3 cup cold water and 3 tablespoons flour. Whisk until smooth, and then slowly pour into the boiling broth. Continue simmering for 5-10 minutes until thickened. Add 2 tablespoons butter, season with salt and pepper, and serve with meat.
Nutrition
- Calories: 458 kcal
- Sugar: 1 g
- Fat: 28 g
- Carbohydrates: 2 g
- Protein: 47 g
Tried This Recipe? Leave a Comment!
Did you make this recipe? I’d love to hear how it turned out! Please leave a comment and a rating below. Your feedback helps other home cooks and supports cheerychop.com!
For more delicious inspiration, follow me on Pinterest!
