Table of Contents
Tiramisu Cake Recipe with No Raw Eggs – A Creamy Delight for All
Growing up in Morocco, the aromas of orange blossom and warm spices filled my mother’s kitchen. But when I moved to Paris for culinary school, I discovered a whole new world of pastry, and that’s where my love affair with classic French technique and Italian desserts like tiramisu began. This tiramisu cake recipe is a beautiful blend of those influences, transforming the timeless Italian dessert into a spectacular layered cake. What sets this apart, and something I’m very proud of, is my special method for a no-raw-egg mascarpone cream, making it safe and delightful for everyone at your table, even expectant mothers or those with immune concerns. It’s truly the best tiramisu cake I’ve ever made, a perfect elegant dessert with all the classic flavors without any of the worry.
Imagine biting into a slice: the delicate genoise cake layers, subtly infused with strong espresso, yield to an impossibly light and creamy coffee mascarpone frosting. The whisper of cocoa powder on top provides a gentle bitterness that perfectly balances the sweetness. The texture is a dream – moist, airy, and utterly luxurious, reminiscent of the best patisseries I’ve visited in Paris and the vibrant coffee shops right here in NYC. Every element, from the airy sponge to the velvety cream, speaks of careful attention and a passion for flavor. It’s a sophisticated dessert, yet one that evokes comfort and joy, much like the warmth of my mother’s kitchen.
I’ve spent countless hours in my New York City kitchen perfecting this easy tiramisu cake. My secret? It’s all about the balance of coffee and cream, and ensuring the genoise remains light and airy without drying out. This recipe offers a unique spin by eliminating raw eggs from the frosting while still achieving that iconic tiramisu richness. I’ll guide you through each step, share a pro tip on folding the batter to keep it light, and even point out a common mistake home bakers often make when whipping mascarpone, ensuring your no-bake tiramisu cake creation is nothing short of perfection.
Why This Tiramisu Cake Recipe Is the Best
My tiramisu cake recipe truly captures the essence of classic tiramisu in cake form, but with a unique twist honed from my culinary journey. The flavor secret lies in using real espresso for both the cake brush and the mascarpone cream, giving it a deep, authentic coffee flavor. My French pastry training taught me the importance of quality ingredients, so I insist on full-fat mascarpone for that rich, decadent mouthfeel that distinguishes this from simpler versions. This careful sourcing, combined with a precise balance of sweetness, ensures every bite sings with true Italian spirit.
Achieving the perfect, harmonious texture is key, and this recipe delivers on all fronts. The genoise sponge, a classic French cake, is delightfully light and absorbent, soaking up the espresso beautifully without becoming soggy. This delicate crumb provides a wonderful contrast to the incredibly smooth and stable mascarpone cream. Unlike traditional tiramisu with raw eggs, my version uses a clever technique to create a thick, airy, and safe cream frosting that holds its shape and melts in your mouth, a testament to perfected technique.
Despite its sophisticated taste and appearance, this is an easy tiramisu cake to make, designed to be foolproof for home bakers. While the steps are clear and precise, the overall process is straightforward, meaning you don’t need years of culinary school experience to achieve stunning results. My instructions are designed to prevent common mishaps, ensuring that even if you’re new to making layered cakes, you’ll feel confident creating this spectacular dessert. It’s a rewarding baking project that yields impressive results every time.
Tiramisu Cake Ingredients
When I shop for ingredients for this tiramisu cake recipe, I always seek out the best quality. In NYC, I love browsing specialty Italian delis for the mascarpone, or finding freshly roasted coffee beans in a local Greenwich Village coffee shop. It reminds me of the care my mother took in selecting the finest ingredients for her Moroccan dishes, ensuring every flavor shone through.
Ingredients List
- 6 large eggs
- 1 cup granulated white sugar
- 1 cup all-purpose flour, spooned and leveled, then sifted
- 1 tbsp cornstarch
- ½ tsp baking powder
- ½ cup strong brewed coffee, espresso preferred – for brushing
- 4 ½ cups full-fat mascarpone, cold
- 2 ½ cups unpacked powdered sugar, sifted
- ½ cup strong brewed coffee – espresso preferred, chilled
- 1 ½ cups heavy whipping cream, cold
- unsweetened cocoa powder (for dusting)
- whipped cream (for piping, optional)
Ingredient Spotlight
Mascarpone: This Italian cream cheese is the heart of our no-raw-egg tiramisu cake frosting. Its high fat content gives it an incredibly rich, buttery taste and a smooth, thick consistency that’s crucial for the creamy texture. When selecting mascarpone in your grocery store, always opt for full-fat and ensure it’s well-chilled before whipping to prevent it from splitting. If you absolutely can’t find it, a mixture of cream cheese and heavy cream (2 parts cream cheese to 1 part heavy cream) can be a distant substitute, but know that the flavor and texture will be tangier and less rich.
Espresso (Strong Brewed Coffee): The coffee flavor is paramount in any tiramisu cake. Freshly brewed, strong espresso provides that authentic, deep coffee note that balances the sweetness of the mascarpone cream. If you don’t have an espresso machine, a very strong brew of dark roast coffee will work beautifully. Avoid instant coffee if possible, as the flavor isn’t as robust or nuanced. Chicory coffee, popular in some parts of the world and reminiscent of North African flavors, could even add an interesting depth.
Genoise Cake Base: While some tiramisu uses ladyfingers, I’ve chosen a genoise cake for this layered tiramisu cake recipe to make it truly feel like a substantial cake. Genoise is a classic French sponge cake known for its lightness and ability to absorb liquids without becoming waterlogged. The key is whipping the eggs and sugar to a pale, foamy ribbon stage. If you’re looking for a shortcut, a good quality plain sponge cake mix prepared according to package directions could be used, but you’ll miss the superior texture and flavor of a homemade genoise.
Heavy Whipping Cream: This ingredient plays a critical role alongside the mascarpone in achieving that perfectly stable and fluffy no-bake tiramisu cake frosting. It provides lightness and volume when whipped, ensuring the cream doesn’t become too dense. Always use cold heavy whipping cream (at least 36% fat) directly from the fridge, as it whips much more effectively than warmer cream. If you need a dairy-free option, coconut cream (the thick part from a can of full-fat coconut milk, chilled overnight) can be whipped, but it will impart a subtle coconut flavor.
| Original Ingredient | Best Substitution | Flavor / Texture Impact |
|---|---|---|
| Mascarpone | Cream cheese + heavy cream (2:1 ratio) | Tangier, less rich, slightly denser. |
| Espresso | Strong dark roast coffee | Slightly less intense coffee flavor. Avoid instant coffee. |
| Genoise Cake | Good quality plain sponge cake mix | Texture not as light and airy, will absorb liquid differently. |
| Heavy Whipping Cream | Chilled full-fat coconut cream (dairy-free) | Subtle coconut flavor, still good for whipping volume. |

How to Make Tiramisu Cake — Step-by-Step
Making this easy tiramisu cake is a truly rewarding experience. Just follow these detailed steps, and you’ll have a stunning dessert that tastes like it came from a Parisian patisserie.
Step 1: Prepare Your Pans
Preheat your oven to 350°F / 175°C. Line the bottom and sides of three 8-inch (20cm) baking pans with parchment paper. This step is crucial for easy removal of your delicate genoise layers. Set them aside while you prepare your batter.
💡 mia’s Pro Tip: For perfectly flat cake layers, you can use baking strips soaked in water and wrapped around your pans. This insulates the sides and helps the cakes bake more evenly, preventing doming.
Step 2: Make the Genoise Cake Batter
In a large mixing bowl, using a handheld or stand mixer fitted with a whisk attachment, whisk the 6 large eggs on medium speed just until combined. Add the 1 cup granulated white sugar and continue whisking on medium-high speed for about 10-12 minutes until the mixture is white pale, foamy, and has tripled in size. The ribbon stage is key here: when you lift the whisk, the batter should fall in a thick ribbon that holds its shape on the surface for about 10 seconds before slowly sinking. If it sinks earlier, keep whisking!
⚠️ Common Mistake to Avoid: Not whisking the egg and sugar mixture enough. This is the aeration step that gives genoise its signature light texture. If it’s not thick and pale, your cake will be dense.
Step 3: Fold in Dry Ingredients and Bake
With a wooden spoon or spatula, carefully fold in the 1 cup all-purpose flour (spooned, leveled, and sifted), 1 tbsp cornstarch, and ½ tsp baking powder. Fold gently but efficiently, being careful not to overwork the batter or deflate the air you’ve whipped in. Divide the batter evenly among your three prepared baking pans and bake for 20-22 minutes, or until a toothpick inserted into the center of a cake comes out clean. Let cool in the pans for 5 minutes, then remove from pans, peel off the parchment paper immediately, and transfer to a wire rack to cool completely.
💡 mia’s Pro Tip: Sifting your dry ingredients not only prevents lumps but also further aerates them, contributing to a lighter genoise. The cornstarch adds a touch of tenderness to the crumb.
Step 4: Prepare the Mascarpone Frosting
In a clean mixing bowl, whisk the 4 ½ cups cold full-fat mascarpone on medium speed for about 2 minutes until it’s creamy. Add the 2 ½ cups sifted powdered sugar and whisk for another 1-2 minutes until beautifully combined and smooth. Next, add the ½ cup chilled strong brewed coffee (espresso preferred) and whisk for 2-3 minutes until well combined and creamy. Finally, stir in the 1 ½ cups cold heavy whipping cream and whisk until the mixture is fully combined, creamy, and holds soft peaks, about 2-3 minutes. This method ensures a stable, no-raw-egg frosting.
⚠️ Common Mistake to Avoid: Over-whipping mascarpone can cause it to curdle or split. Whip until just creamy and combined, stopping as soon as it reaches the desired consistency. Keep all dairy cold!
Step 5: Assemble Your Tiramisu Cake
Place your first cooled cake layer on a cake board or desired cake stand. Evenly brush it with about a third of the ½ cup coffee. Then, spread 1/3 of your luscious mascarpone cream over the cake layer using an offset spatula. Repeat this process with the second cake layer, brushing with coffee and adding another layer of cream. Place the final cake layer on top, brush with the remaining coffee, and lightly frost the top and sides of the cake with the remaining mascarpone frosting. Level the top and sides for a smooth finish. Chill the cake in the fridge for at least 4 hours, or ideally overnight, allowing the flavors to meld beautifully. Just before serving, pipe with whipped cream if desired and generously dust with unsweetened cocoa powder.
💡 mia’s Pro Tip: For a truly elegant finish on your best tiramisu cake, use a fine-mesh sieve to dust the cocoa powder. This creates a delicate and even layer that looks professional and prevents clumps.
| Step | Action | Duration | Key Visual Cue |
|---|---|---|---|
| 1 | Prepare Pans | 5 mins | Pans lined with parchment. |
| 2 | Make Genoise Batter | 10-12 mins | Egg/sugar mixture pale, foamy, ribbons. |
| 3 | Fold & Bake | 20-22 mins | Toothpick comes out clean. |
| 4 | Prepare Mascarpone Frosting | ~9 mins | Creamy, combined, holds soft peaks. |
| 5 | Assemble Cake | 15 mins | Layers even, lightly frosted. |
Serving & Presentation
Serving this tiramisu cake is almost as delightful as making it. For a truly elegant presentation, I love to dust the very top with unsweetened cocoa powder just before slicing. You can use a stencil for a decorative pattern, or simply a fine mesh sieve for an even, ethereal layer. A few fresh coffee beans or chocolate shavings could add an extra touch of sophistication. This is the kind of dessert that graces the tables of Parisian cafes, and with a little care, you can recreate that experience at home.
In my NYC kitchen, I often pair this rich, easy tiramisu cake with a simple side of fresh berries – raspberries or strawberries provide a lovely tart contrast to the creamy sweetness. For drinks, a strong espresso or a rich Moroccan mint tea would be perfect, echoing the coffee notes in the cake and tying back to my heritage. Sometimes, I’ll serve it with a small glass of Vin Santo, a sweet Italian dessert wine, which is a classic pairing that just screams indulgence.
Plating is simple perfection for this delicious dessert: a generous slice on a minimalist white plate, perhaps with a delicate sprig of mint for color. The layers of light genoise and creamy mascarpone are beautiful on their own, a testament to the careful assembly. It’s a dessert that speaks of celebration and comfort, a perfect ending to any meal, whether a casual gathering or a festive dinner.
| Pairing Type | Suggestions | Why It Works |
|---|---|---|
| Side Dish | Fresh raspberries, sliced strawberries | Provides a tart, refreshing contrast to the rich cream. |
| Sauce / Dip | Simple chocolate ganache drizzle, espresso syrup | Enhances chocolate or coffee flavor notes. |
| Beverage | Espresso, Moroccan mint tea, Vin Santo (sweet wine) | Echoes coffee, offers a rich herbal contrast, or classic Italian sweetness. |
| Garnish | Cocoa powder, chocolate shavings, fresh coffee beans | Adds visual appeal and a complementary bitter note. |
Make-Ahead, Storage & Reheating
As a busy cook in New York City, I’m always looking for ways to streamline my kitchen work without compromising on flavor or presentation. This tiramisu cake recipe is a dream for make-ahead convenience, fitting perfectly into my schedule for entertaining. It actually tastes better the next day, once all those gorgeous coffee and mascarpone flavors have had time to fully meld together. It’s a true host’s secret weapon!
| Method | Container | Duration | Reheating Tip |
|---|---|---|---|
| Refrigerator | Airtight cake dome or container | Up to 3 days | Serve chilled directly from the fridge. |
| Freezer | Wrap individual slices tightly, then in airtight container | Up to 1 month | Thaw overnight in the fridge before serving. |
| Make-Ahead | Assemble completely, without cocoa dust | 1-2 days in advance | Dust with cocoa just before serving for best appearance. |
For best results, always store your easy tiramisu cake in an airtight container in the refrigerator. This not only keeps it fresh but also allows the genoise layers to fully absorb the coffee and the mascarpone cream to firm up, making for cleaner slices. If you’re freezing, I recommend slicing the cake first, then wrapping individual pieces tightly in plastic wrap and placing them in a freezer-safe container. This way, you can pull out just what you need without thawing the whole cake.
When ready to serve a frozen slice, let it thaw slowly in the refrigerator for several hours or overnight. Tiramisu cake is never “reheated” in the traditional sense; it’s always enjoyed chilled. The only consideration is adding your final dusting of cocoa powder and any optional whipped cream garnishes right before serving, as moisture in the fridge can affect their texture and appearance.
Variations & Easy Swaps
One of the joys of cooking is experimenting with variations, and this tiramisu cake recipe is a wonderful canvas for creativity. Just as I might add a touch of argan oil to a traditional Moroccan tajine for a nutty depth, or a unique herb blend discovered at a NYC farmers market, you can put your own spin on this classic.
| Variation | Key Change | Best For | Difficulty Impact |
|---|---|---|---|
| Spiced Tiramisu Cake | Add cinnamon, cardamom, hint of orange zest to coffee/cream. | Those who enjoy warm, aromatic desserts. | Minimal. |
| Gluten-Free Tiramisu Cake | Use gluten-free all-purpose flour for genoise. | Dietary restrictions. | Moderate (GF baking can be tricky). |
| Seasonal Berry Tiramisu Cake | Layer fresh berries between cake layers; berry coulis. | Fruit lovers, summer desserts. | Minimal. |
Spiced Tiramisu Cake
For a warm, inviting twist on this best tiramisu cake, try a spiced version. I often find inspiration from the spice markets of Morocco. Add a pinch of ground cinnamon, a whisper of cardamom, and a tiny grating of fresh orange zest to your coffee for brushing the genoise, and a touch more to the mascarpone cream. This infuses the whole cake with a subtle, aromatic depth that complements the coffee and cream beautifully, creating a cozy and unique flavor profile.
Gluten-Free Tiramisu Cake
Making this easy tiramisu cake gluten-free is quite straightforward if you select the right flour blend. Simply substitute the all-purpose flour in the genoise cake recipe with a high-quality 1:1 gluten-free all-purpose flour blend that contains xanthan gum. I’ve tested several in my kitchen, and ensuring the egg mixture is perfectly whipped is even more critical here to maintain that light, airy texture. The outcome is a delicious gluten-free tiramisu cake that everyone can enjoy without compromising on flavor.
Seasonal Berry Tiramisu Cake
Embrace the seasons with a berry twist on this tiramisu cake recipe. During summer, when the farmers’ markets in NYC are bursting with fresh produce, I love to add layers of fresh, ripe strawberries or raspberries between the genoise and mascarpone cream. Instead of plain coffee, you could brush the cakes with a light berry syrup or even a coffee-berry infusion. The tartness and freshness of the berries cut through the richness of the mascarpone, creating a vibrant and delightful dessert perfect for warmer weather.
What is the difference between tiramisu cake and traditional tiramisu?
Traditional tiramisu typically consists of coffee-soaked ladyfingers layered with a cream made from mascarpone, eggs (often raw or lightly cooked yolks), and sugar, then dusted with cocoa. My tiramisu cake recipe takes those classic flavors and translates them into a layered cake format. Instead of ladyfingers, it uses delicate genoise cake layers, offering a more substantial, yet equally airy, dessert experience. A key difference in my recipe is also the absence of raw eggs in the mascarpone cream, making it a safer option for all to enjoy while maintaining that luxurious texture.
Can I make tiramisu cake without alcohol like rum or marsala?
Absolutely yes! My tiramisu cake recipe is designed to be alcohol-free, focusing purely on the rich coffee and creamy mascarpone flavors. Traditional tiramisu often calls for Marsala wine or rum in the coffee soak or cream, but I’ve found that a strong, high-quality espresso is more than enough to carry the signature taste. If you still want a bit of that subtle warmth, a dash of vanilla extract or a tiny hint of almond extract (be careful, a little goes a long way!) can be added to the coffee soak or mascarpone cream to deepen the flavor profile without any alcohol.
How do you keep a tiramisu cake from getting soggy?
Preventing a soggy tiramisu cake is all about balancing the moisture. The key lies in the genoise cake layers and how you brush them with coffee. First, ensure your genoise is fully cooled before brushing, as warm cake absorbs liquid excessively. Second, don’t drench the cake layers; a light, even brushing is sufficient to infuse the coffee flavor without making them waterlogged. The genoise, unlike ladyfingers, is structured to hold up well to moisture when done correctly. Chilling the assembled cake for at least 4 hours also helps the cake layers set and absorb the coffee without becoming overly soft.
Can tiramisu cake be made ahead of time and how should it be stored?
This easy tiramisu cake is an excellent make-ahead dessert! In fact, it often tastes even better on day two as the flavors have more time to marry and deepen. You can assemble the entire cake, minus the final cocoa dusting and whipped cream garnish, 1-2 days in advance. Store it in an airtight cake dome or container in the refrigerator. This ensures the cake layers remain moist and the cream retains its perfect consistency. Always dust with cocoa powder just before serving for the freshest appearance and flavor.
What makes this tiramisu cake recipe ‘no raw eggs’?
My tiramisu cake recipe eliminates raw eggs from the mascarpone cream for safety and peace of mind, especially for pregnant individuals, children, or those with compromised immune systems. Traditional tiramisu often uses raw egg yolks. Instead, my recipe achieves that rich, creamy texture by expertly combining cold mascarpone with powdered sugar and heavy whipping cream. The key is to whip the mascarpone and sugar until creamy, then incorporate the chilled coffee and heavy cream until it’s perfectly blended and holds its shape, creating a luscious frosting without any heat treatment.
Why use genoise cake instead of ladyfingers for tiramisu?
While ladyfingers are traditional for classic tiramisu, using genoise cake layers elevates this to a true “tiramisu cake.” Genoise is a French sponge cake known for its lightness and ability to absorb moisture without becoming overly soggy, providing a more structured and elegant base for a layered cake. It offers a more refined texture and a richer mouthfeel than ladyfingers, which can sometimes be too dry or too soft. My culinary training in Paris instilled in me a love for genoise as a versatile and sophisticated cake base.
Can I use decaffeinated coffee for this recipe?
Absolutely! If you’re sensitive to caffeine or prefer to enjoy this no-bake tiramisu cake later in the day, feel free to use strong brewed decaffeinated coffee. The important thing is that the coffee is strong and flavorful, providing that crucial coffee note that defines tiramisu. Just make sure it’s good quality, freshly brewed decaf, as weak coffee can result in a bland cake. The depth of flavor is what we’re after, regardless of the caffeine content.
What’s the best way to handle the mascarpone cream to prevent it from splitting?
The secret to perfect, un-split mascarpone cream in your easy tiramisu cake lies primarily in its temperature and how it’s whipped. Always start with very cold mascarpone, straight from the refrigerator. Whip it on medium speed only until it becomes creamy and smooth – typically no more than 2 minutes before adding other ingredients. The moment you see it thickening, stop. Over-whipping can cause the fat to separate from the liquid, leading to a grainy, split texture. My recipe’s order of adding ingredients ensures the heavy cream helps stabilize the mascarpone, making splitting much less likely.
Share Your Version!
I poured my heart into perfecting this no-raw-egg tiramisu cake recipe, and I truly hope it brings a touch of joy and elegance to your table. If you make this best tiramisu cake, please don’t be shy! I would absolutely love to hear about your experience.
Leave a star rating and comment below to let me, and other bakers, know how it turned out for you. Did you try a variation? Did it become a new favorite? Share your photos on Instagram or Pinterest and tag @exorecipes – I love seeing your beautiful creations! And tell me, what’s your go-to strong coffee for brushing the genoise?
From my NYC kitchen to yours — I hope this recipe brings as much warmth to your table as it does to mine. — mia 🧡
Love This Recipe? Save It to Pinterest!
If you enjoyed this Tiramisu Cake Recipe recipe, don’t let it get lost in your browser tabs! 😄 Pin it now so you can find it again anytime — and explore hundreds more tried-and-tested recipes waiting for you on my Pinterest boards.
👉 Follow mia on Pinterest @chefrecipes2
📌 Pin this recipe · 🔁 Re-pin your favorites · 💬 Tag me when you make it — I love seeing your creations!

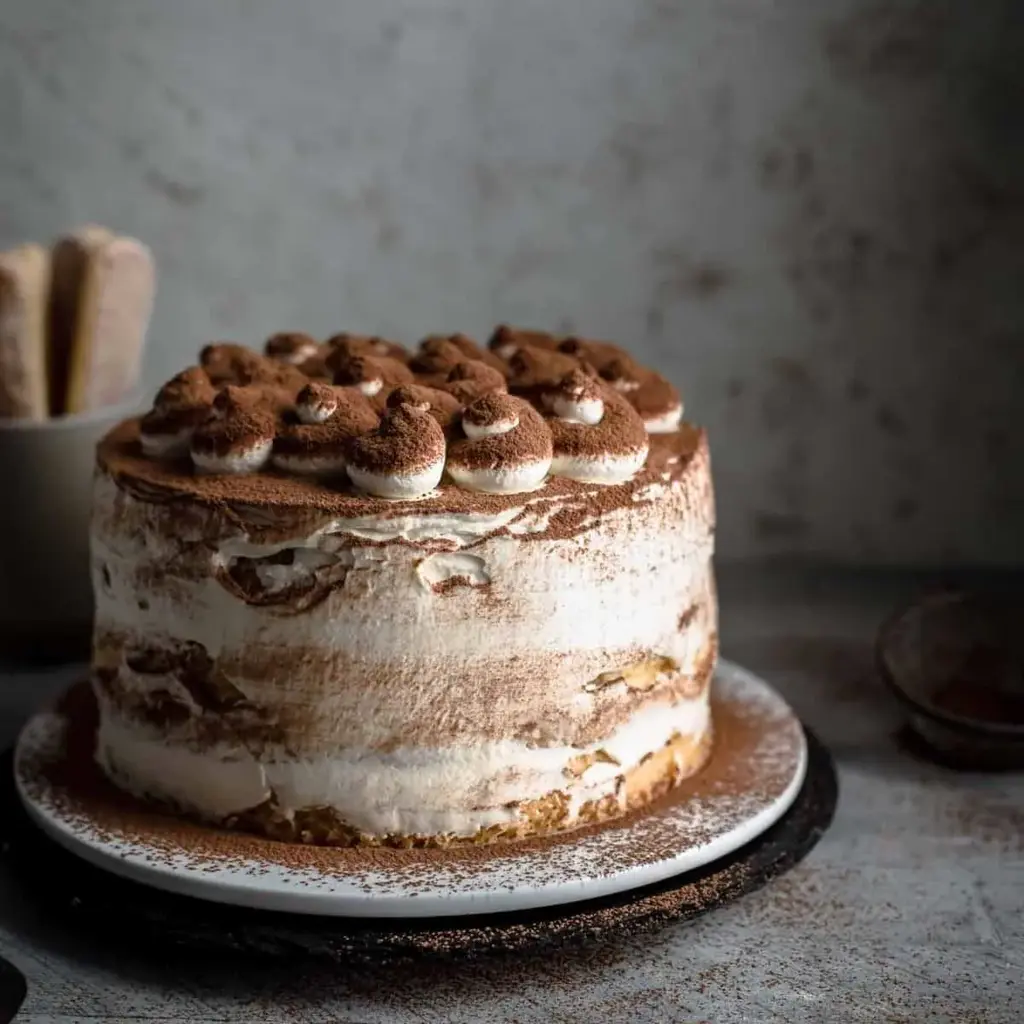
Tiramisu Cake
Description
This Tiramisu Cake is made of genoise cake layers brushed with espresso and filled with irresistibly creamy coffee mascarpone cream. There are no raw eggs in the frosting and is therefore safe to eat. All you need are just 10 ingredients!
Ingredients
- 6 large eggs
- 1 cup granulated white sugar
- 1 cup all-purpose flour, spooned and leveled, then sifted
- 1 tbsp cornstarch
- ½ tsp baking powder
- ½ cup strong brewed coffee, espresso preferred – for brushing
- 4 ½ cups full-fat mascarpone, cold
- 2 ½ cups unpacked powdered sugar, sifted
- ½ cup strong brewed coffee – espresso preferred, chilled
- 1 ½ cups heavy whipping cream, cold
- unsweetened cocoa powder
- whipped cream
Instructions
- Preheat oven to 350°F / 175°C. Line the bottom and the sides of three 8" (20cm) baking pans with parchment paper. Set aside.
- Make the genoise cake: In a large mixing bowl, using a handheld or stand mixer fitted with a whisk attachment, whisk eggs on medium speed just until combined. Add sugar and whisk on medium-high speed for about 10-12 minutes until white pale, foamy and tripled in size. (It takes 3-5 minutes longer with a handheld mixer compared to a stand mixer). To know if you have the right consistency, let a bit of batter drip off the whisk attachment on top of the mixed batter. The dripped batter should be visible for 10 seconds before it sinks into the batter. If it sinks earlier, you need to whisk longer.
- With a wooden spoon, fold in flour, cornstarch baking powder carefully. Don't overwork the batter and don't work too fast otherwise, it will lose too much air. Divide in prepared baking pans and bake for 20-22 minutes until a toothpick centered in the middle comes out clean. Let cool in the pans for 5 minutes. Then remove from pans and remove the paper immediately. Transfer to a wire rack and let cool completely.
- Make the mascarpone frosting: Whisk mascarpone on medium speed until creamy for about 2 minutes. Add powdered sugar and whisk until creamy and combined another 1-2 minutes. Add coffee and whisk until well combined and creamy for about 2-3 minutes. Stir in heavy cream and whisk until fully combined and creamy for another 2-3 minutes.
- Assemble the cake: Place the first cake layer on a cake board or cake stand. Brush with a third of the 1/2 cup coffee.* Then spread 1/3 of the mascarpone cream with an offset spatula on top. Repeat one more time. Place last cake layer on top and lightly frost the outside and the sides of the cake with the remaining frosting. Level the top and sides with the offset spatula. Chill at least 4 hours in the fridge.
- Pipe whipped cream on top if desired. Then dust with cocoa just before serving. Store leftovers in an airtight container in the fridge up to 3 days.
Nutrition
- Calories: 540 kcal
- Sugar: 32 g
- Fat: 38 g
- Carbohydrates: 40 g
- Protein: 8 g

k">
Tried This Recipe? Leave a Comment!
Did you make this recipe? I’d love to hear how it turned out! Please leave a comment and a rating below. Your feedback helps other home cooks and supports cheerychop.com!
For more delicious inspiration, follow me on Pinterest!
