Table of Contents
Stuffed Taco Peppers Low Carb – A Weeknight Dinner Game-Changer
Why This Stuffed Taco Peppers Recipe Is the Best
The flavor secret here is that I don’t just rely on taco seasoning — I build layers. After years training in Paris, I learned that depth comes from patience: browning the beef until it’s deeply caramelized, then blooming the spices in the rendered fat before adding liquid. It’s a small French technique that makes a huge difference in these stuffed taco peppers low carb.
Perfected texture is everything. The peppers are pre-cooked just until they began to soften, so they finish in the oven tender but never mushy. The filling is rich and creamy from sour cream and melted cheddar, creating a luxurious contrast to the pepper’s slight crunch. No dry, sad peppers here.
Foolproof and fast: this recipe works every time, even for beginners. The microwave step for the peppers is a game-changer — it cuts the bake time in half. No complicated techniques, just smart shortcuts from my NYC kitchen. It’s the kind of dinner I turn to after a long day at the farmers market or when I need something satisfying that the whole family will love.
Stuffed Taco Peppers Low Carb Ingredients
I love picking up bell peppers at the Union Square Greenmarket — they’re at their sweetest in late summer. In Morocco, my mother would stuff peppers with ground lamb and preserved lemon, so this recipe feels like a beautiful, modern cousin to that tradition. Here’s what you need for these high protein stuffed peppers.
Ingredients List
- 4 medium bell peppers, any color (seeded and halved)
- 1½ pounds lean ground beef
- 1 recipe or packet taco seasoning mix (use gluten free if needed)
- ¾ cup water
- 1½ cup cheddar cheese, shredded
- 1 cup sour cream
- ½ cup salsa
Ingredient Spotlight
Bell Peppers: Choose firm, glossy peppers with deep color — they’re sweeter and hold their shape better. Red and orange peppers are highest in vitamin C and have a natural sweetness that balances the savory beef. If you prefer a milder flavor, yellow or green work too; green peppers are slightly more bitter and firmer.
Ground Beef: Lean (85/15) is ideal — enough fat for flavor, but not so much that the filling becomes greasy. For a leaner option, use ground turkey (93/7) but add a tablespoon of olive oil to the pan to prevent dryness.
Cheddar Cheese: Sharp cheddar provides the most flavor punch per ounce, which is great for low carb eating. Pre-shredded cheese contains anti-caking agents that can affect melt — I recommend shredding a block yourself for the smoothest, creamiest results.
Sour Cream: Full-fat sour cream adds richness and tang. For a dairy-free version, use full-fat coconut cream or a plant-based sour cream alternative, but note that the consistency will be slightly thinner.
| Original Ingredient | Best Substitution | Flavor / Texture Impact |
|---|---|---|
| Ground Beef | Ground Turkey or Chicken | Leaner, slightly milder flavor; add 1 tbsp olive oil |
| Sour Cream | Greek yogurt (full fat) | Tangier, slightly thinner; still creamy |
| Cheddar Cheese | Monterey Jack or Pepper Jack | Milder, creamier melt; pepper jack adds heat |
| Taco Seasoning | Homemade blend (see notes) | Control salt and spice; fresher flavor |
How to Make Stuffed Taco Peppers — Step-by-Step
Making these keto stuffed peppers recipe is easier than you think. Just follow my steps, and you’ll have a gorgeous, satisfying dinner on the table.
Step 1: Prep the Peppers
Wash the bell peppers, slice them lengthwise in half, and carefully remove the seeds and white membranes. Place them cut-side up in a microwave-safe casserole dish with ¼ cup water. Cover and microwave for 5 to 6 minutes, until they’re just starting to soften. Drain any excess water carefully — this step ensures they bake up tender without turning mushy.
💡 mia’s Pro Tip: Don’t skip the microwave step — it’s my secret for perfectly cooked peppers every time. If you’re prepping ahead, you can do this step a day in advance and store the blanched peppers in the fridge.
Step 2: Brown the Beef
While the peppers cook, heat a large skillet over medium heat. Add the ground beef and cook, breaking it up with a wooden spoon, until it’s nicely browned and cooked through — about 6 to 8 minutes. Drain off any excess grease if needed, leaving about 1 tablespoon in the pan for flavor.
⚠️ Common Mistake to Avoid: Don’t crowd the pan — if you add too much beef at once, it will steam instead of brown. Work in batches if needed for a deep, caramelized crust.
Step 3: Season and Simmer
Add the taco seasoning and ¾ cup water to the skillet with the beef. Stir everything together, scraping up any browned bits from the bottom of the pan — that’s flavor! Let it simmer for 3 to 4 minutes, or until the mixture thickens slightly and looks glossy.
💡 mia’s Pro Tip: If you’re using a homemade taco seasoning, bloom the spices in the hot pan for 30 seconds before adding water. It wakes up the cumin, chili, and garlic — a trick I learned in Paris.
Step 4: Assemble the Filling
Remove the skillet from the heat. Stir in the sour cream, salsa, and 1 cup of the shredded cheddar cheese until everything is fully combined and creamy. The mixture will look rich and a little glossy — that’s exactly what you want.
⚠️ Common Mistake to Avoid: Don’t add the sour cream over high heat or it will curdle. Always take the pan off the stove first, then stir it in gently.
Step 5: Fill and Bake
Arrange the pre-cooked pepper halves in a 9×13-inch baking dish. Generously fill each half with the beef mixture, mounding it slightly. Sprinkle with the remaining ½ cup cheddar cheese. Bake at 350°F for 20 to 30 minutes, until the peppers are soft, the filling is hot and bubbly, and the cheese is melted and golden.
💡 mia’s Pro Tip: For a golden, bubbly top, switch the oven to broil for the last 2 minutes — watch it closely so the cheese doesn’t burn.
Step 6: Rest and Serve
Let the stuffed peppers rest in the dish for 5 minutes before serving. This helps the filling set slightly and makes them easier to handle. Serve warm with your favorite taco toppings like fresh cilantro, diced avocado, or a squeeze of lime.
| Step | Action | Duration | Key Visual Cue |
|---|---|---|---|
| 1 | Microwave peppers | 5–6 mins | Peppers just starting to soften |
| 2 | Brown ground beef | 6–8 mins | No pink remaining, browned bits on pan |
| 3 | Season and simmer | 3–4 mins | Thickened, glossy sauce |
| 4 | Assemble filling | 2 mins | Creamy, fully combined |
| 5 | Fill and bake | 20–30 mins | Cheese melted, peppers tender |
| 6 | Rest and serve | 5 mins | Filling has set slightly |
Serving & Presentation
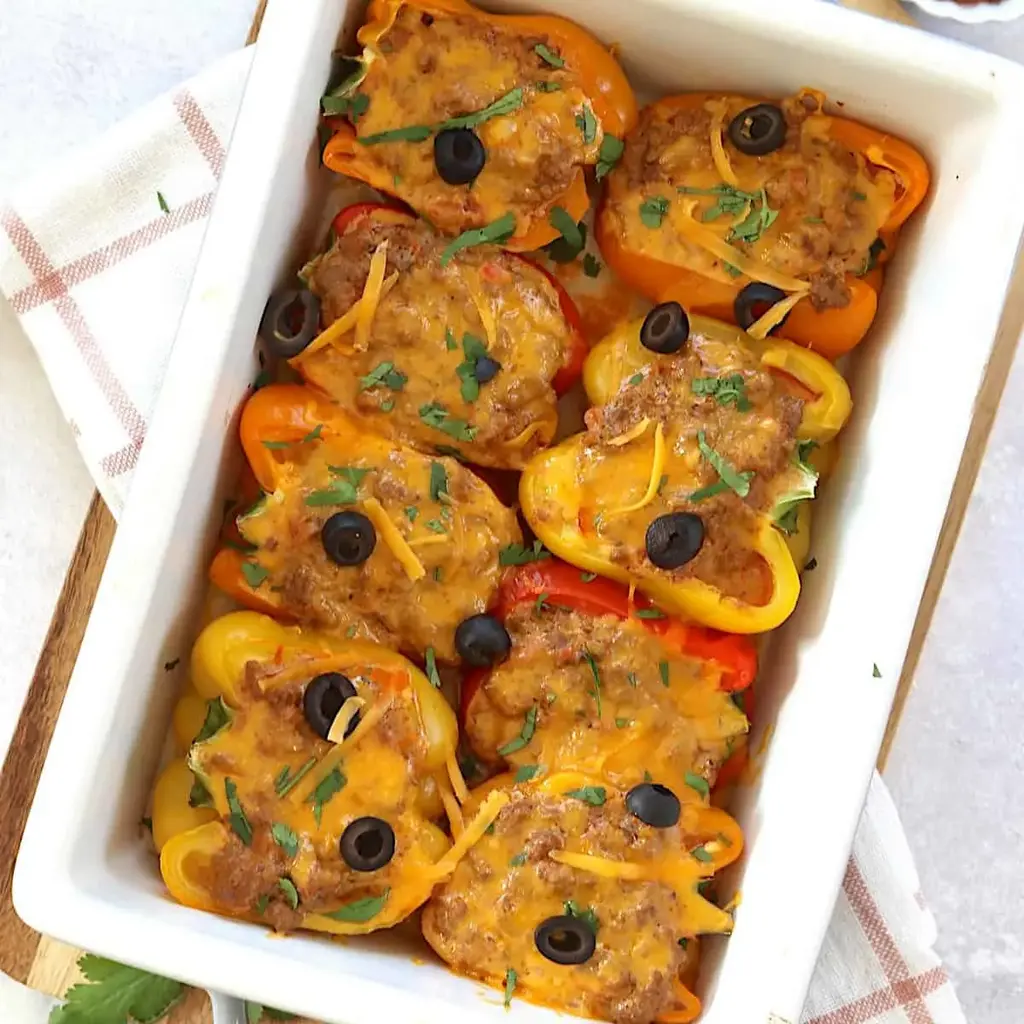
I love serving these stuffed taco peppers low carb on a big platter, garnished with a sprinkle of fresh cilantro and a drizzle of crema or sour cream. The contrast of bright green herbs against the golden, bubbly cheese is beautiful — it’s the kind of presentation that works for a casual family dinner or a taco night with friends.
For a complete meal, I like to pair these peppers with a simple side salad of shredded romaine, avocado, and a lime vinaigrette. It adds crunch and freshness that cuts through the richness of the cheese and beef. Sometimes I’ll also serve warm black beans or cauliflower rice on the side for extra heartiness.
| Pairing Type | Suggestions | Why It Works |
|---|---|---|
| Side Dish | Shredded romaine salad, cauliflower rice, black beans | Adds freshness, crunch, and fiber |
| Sauce / Dip | Crema, avocado crema, hot sauce | Adds creaminess and heat |
| Beverage | Margarita, sparkling lime water, light beer | Cuts richness, refreshes the palate |
| Garnish | Fresh cilantro, diced avocado, lime wedges, pickled jalapeños | Brightens flavor, adds color and texture |
Make-Ahead, Storage & Reheating
These stuffed taco peppers low carb are a lifesaver for busy weeks. I often make a double batch on Sunday so I have ready-to-eat lunches or effortless dinners. Here’s how to store and reheat them properly so they taste as good as the first time.
| Method | Container | Duration | Reheating Tip |
|---|---|---|---|
| Refrigerator | Airtight container | Up to 4 days | Reheat in oven at 350°F for 10-15 mins, or microwave 2 mins |
| Freezer | Freezer-safe container or bag | Up to 3 months | Thaw overnight in fridge, then bake at 350°F for 20 mins |
| Make-Ahead | Baking dish (covered) | Up to 2 days in advance |
 Tried This Recipe? Leave a Comment!Did you make this recipe? I’d love to hear how it turned out! Please leave a comment and a rating below. Your feedback helps other home cooks and supports cheerychop.com! For more delicious inspiration, follow me on Pinterest!  Hi, I’m Ema! Let’s make every bite unforgettable! ABOUT MELet's connect |