
“`html
Table of Contents
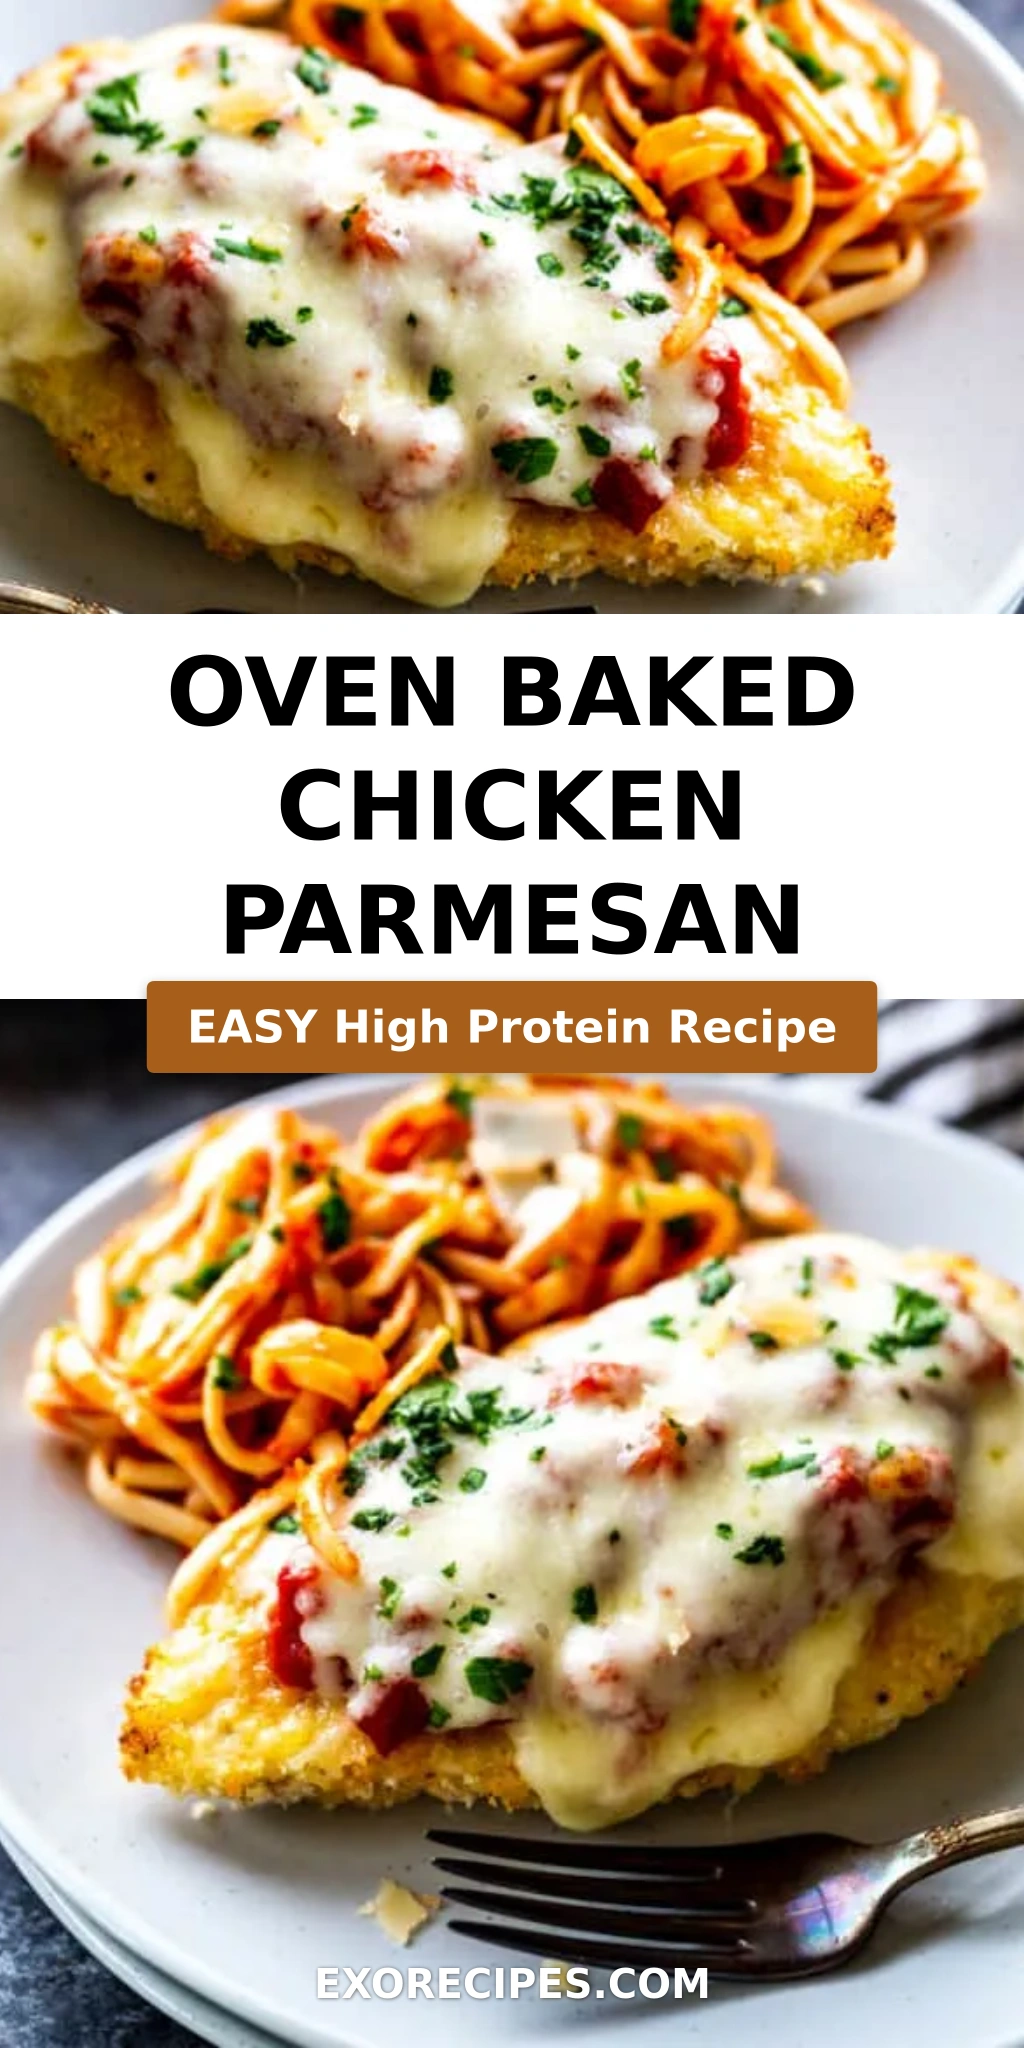
Oven Baked Chicken Parmesan – The Crispy No-Fry Dinner You Need Tonight
I still remember the first time I made Chicken Parmesan in my tiny Parisian apartment during culinary school. I had just learned a classic Milanese technique from my chef instructor, and I called my mother in Morocco that evening, bubbling with excitement. “Mama, I made something that tastes like home but feels like France!” She laughed and said, “That’s what happens when you grow up eating my tagines and then go study sauce work in Paris.” This Oven Baked Chicken Parmesan recipe is the best of both worlds — it has the soulful comfort of my mother’s cooking and the precise technique I learned in France. And the best part? There is zero frying involved. This easy Chicken Parmesan recipe gives you that golden, crunchy, Parmesan crusted chicken without a single drop of oil beyond a brush on the pan. It’s weeknight-friendly, family-approved, and ready in about half an hour.
When you pull this dish out of the oven, the aroma hits you first: warm marinara, melted mozzarella pulling into glossy golden strands, and the toasty scent of Parmesan and oregano mingling together. The chicken breasts come out tender and juicy on the inside, while the panko-Parmesan crust shatters slightly with each bite. There’s a whisper of garlic in the background, a pop of brightness from the parsley if you add it, and the sauce keeps everything saucy without making the breading soggy. That contrast — crispy on the outside, tender on the inside, with gooey cheese pulling across every forkful — is what makes this baked chicken Parmesan absolutely irresistible. It’s the kind of meal that makes you close your eyes on the first bite, even if you’re sitting at your own kitchen table in New York City.
What sets my version apart from other recipes is the technique I developed after testing this dish more than a dozen times in my own kitchen. I wanted to capture the crunch of pan-fried Chicken Parmesan but without the mess and heaviness of oil. The secret lies in three things: pounding the chicken to an even thickness for quick, even cooking; using panko breadcrumbs mixed with freshly grated Parmesan for that dual-textured crust; and finishing under the broiler to get the cheese bubbly and the edges crisped to perfection. I’ll walk you through each step, share my best pro tips (including how to keep the breading from getting soggy — a common struggle!), and point out the one mistake I see home cooks make most often. By the end, you’ll be making the best Oven Baked Chicken Parmesan of your life.
Why This Oven Baked Chicken Parmesan Recipe Is the Best
The Flavor Secret. I spent years perfecting the coating for this dish. In my mother’s kitchen in Morocco, she taught me that spice blends should be aromatic but never overwhelming. For this Parmesan crusted chicken, I use a precise ratio of freshly grated Parmesan (never the pre-shredded stuff from a bag — it contains anti-caking agents that prevent melting) to panko breadcrumbs. The Parmesan adds nutty, salty depth while the panko delivers that signature crunch. A touch of dried oregano and garlic powder ties it back to my French training in herb blends, and a whisper of black pepper gives it a gentle warmth. Every ingredient has a job, and together they create a crust that’s deeply flavorful, not just crunchy for the sake of being crunchy.
Perfected Texture. One of the biggest challenges with baked chicken Parmesan is keeping the breading crisp after the sauce and cheese go on. I solved this by arranging the oven rack in the second-from-top position and using a combination of direct heat and a quick broil at the end. The chicken bakes undisturbed for 15 minutes on that high rack, allowing the crust to set and turn golden before the sauce touches it. Then I flip each piece, spoon the marinara over the top (just a quarter cup per piece — enough to cover without drowning), pile on the mozzarella, and broil until bubbly and browned. That technique keeps the bottom and sides of each chicken breast crisp while the top gets gloriously cheesy. It’s a simple shift in method that makes all the difference.
Foolproof & Fast. This Oven Baked Chicken Parmesan is designed for real life. Whether you’re a busy parent in need of a quick dinner or a beginner cook making Chicken Parmesan for the first time, this recipe works. The ingredients are all available at any US grocery store — I buy my chicken at the Union Square farmers market when I can, and my marinara from a little Italian shop in Chelsea. The steps are straightforward: pound, bread, bake, sauce, cheese, broil. No deep frying, no messy cleanup, no special equipment. I’ve taught this exact recipe to friends, neighbors, and readers, and the response is always the same: “I can’t believe this came out of my oven.” That’s the kind of confidence I want you to feel every time you cook.
Chicken Parmesan Recipe Ingredients
Every Saturday morning, I walk through the Union Square Greenmarket in Manhattan, picking up fresh herbs, local eggs, and the best seasonal produce. But when I’m making this easy Chicken Parmesan recipe in the middle of a busy week, I rely on pantry staples that I keep stocked at all times. These ingredients are simple, honest, and available at any grocery store. Let me walk you through what you’ll need and why each one matters.
Ingredients List
- 2 tablespoons olive oil (for brushing the pan)
- 2 chicken breasts (about 1 pound total)
- 1 large egg
- 1 cup panko bread crumbs
- ½ cup fresh grated Parmesan cheese
- 1 teaspoon dried oregano
- ½ teaspoon garlic powder
- 1 teaspoon kosher salt
- ½ teaspoon black pepper
- 1 cup marinara sauce (your favorite jarred or homemade)
- 1½ cups shredded mozzarella cheese
- 2 tablespoons minced fresh parsley (optional, for garnish)
Ingredient Spotlight
Chicken Breasts. The foundation of this dish. I always use boneless, skinless chicken breasts and cut them in half horizontally to create two thin cutlets from each breast. This ensures fast, even cooking — no dry thick parts or undercooked centers. Look for breasts that are similar in size so they cook at the same rate. If you can find air-chilled chicken, it has better texture and less water content, which means your breading will stick better. At my local Whole Foods, I look for organic, free-range chicken when my budget allows, but any good-quality supermarket chicken works beautifully here.
Panko Bread Crumbs. Panko is the secret to that light, airy, shatteringly crisp crust. Unlike regular breadcrumbs, which are dense and fine, panko flakes create a textured coating that stays crunchy even after baking. I’ve tested this recipe with regular breadcrumbs and with crushed cornflakes, and while both work in a pinch, panko gives the most authentic “fried” texture without any oil. You’ll find panko in the baking aisle of any US grocery store. If you need a gluten-free option, look for gluten-free panko made from rice flour — it works almost identically.
Parmesan Cheese. This is non-negotiable: buy a block of Parmesan and grate it yourself. The pre-grated stuff in the green can is coated with anti-caking agents that prevent it from melting smoothly into the crust. Freshly grated Parmesan has a nutty, salty complexity that defines the flavor of this dish. I grate mine on the fine side of a box grater so it blends evenly with the panko. If you’re feeling fancy, use Parmigiano-Reggiano from Italy — it’s more expensive, but the flavor is unmatched. For a budget-friendly option, Grana Padano works beautifully too.
Marinara Sauce. Since the sauce isn’t the star of the cooking process (it goes on at the end), you don’t need to make it from scratch unless you want to. I keep a jar of Rao’s or my own homemade sauce in the fridge. Look for a marinara that’s thick and flavorful, not watery — the consistency matters because you don’t want it making your breading soggy. If you’re using a thinner sauce, simmer it on the stovetop for 5-10 minutes to reduce it before spooning it over the chicken. That small step makes a noticeable difference.
| Original Ingredient | Best Substitution | Flavor / Texture Impact |
|---|---|---|
| Chicken breasts | Chicken thighs (boneless, skinless) | Juicier, slightly richer flavor; may need 2-3 extra minutes baking |
| Panko bread crumbs | Gluten-free panko or crushed pork rinds (low-carb) | Gluten-free panko works nearly identically; pork rinds add crispness with no carbs |
| Fresh grated Parmesan | Pecorino Romano or Grana Padano | Pecorino is saltier and sharper; Grana Padano is milder and creamier |
| Mozzarella (shredded) | Fresh mozzarella (sliced), or provolone | Fresh mozzarella is more creamy but watery; provolone adds a smoky tang |
| Marinara sauce | Crushed tomatoes with Italian seasoning | Thicker, less sweet; needs salt adjustment |
How to Make Oven Baked Chicken Parmesan — Step-by-Step
Making this Oven Baked Chicken Parmesan is easier than you think. I’ve broken it down into clear, doable steps with visual cues so you know exactly what to look for. Trust yourself, follow these steps, and you’ll have a dinner that tastes like it came from a cozy Italian trattoria — made entirely in your own oven.
Step 1: Prepare the Pan and Oven
Line a baking sheet with aluminum foil and brush the foil generously with olive oil. Adjust your oven rack so it’s in the second-from-top position — this is crucial for getting the crust golden without burning. Preheat your oven to 400°F. The foil makes cleanup effortless, and the oil ensures the chicken won’t stick.
💡 mia’s Pro Tip: Use a heavy-duty baking sheet, not a thin cookie sheet. A sturdy pan holds heat better and helps the crust crisp evenly. If you have a wire rack that fits inside the pan, place it on the foil and brush that with oil too — it lets air circulate underneath for even crispier chicken.
Step 2: Cut and Pound the Chicken
Place one chicken breast on a cutting board and hold it flat with your palm. Using a sharp chef’s knife, slice horizontally through the middle as if you were butterflying it, but cut all the way through to create two equal pieces. Repeat with the second breast. Now, place each piece in a gallon-sized zip-top bag in a single layer, seal it, and pound to an even thickness — about ½ inch — using a meat pounder or a rolling pin. If you don’t have a zip-top bag, use two layers of plastic wrap.
⚠️ Common Mistake to Avoid: Do not skip the pounding step or do it unevenly. Chicken that varies in thickness will cook unevenly — the thin parts will dry out before the thick parts are done. Take 30 seconds to pound each piece to a uniform ½ inch. Your future self will thank you.
Step 3: Season and Set Up the Breading Station
Pat the pounded chicken pieces dry with paper towels. Season both sides with salt and pepper. In a shallow dish, mix together the panko bread crumbs, grated Parmesan, dried oregano, garlic powder, and a pinch of extra salt and pepper. In another shallow dish, whisk one egg until frothy. Arrange your station: chicken → egg → panko mixture → prepared baking sheet.
💡 mia’s Pro Tip: Use one hand for dipping in the egg and the other for the breadcrumb mixture. This keeps the dry mixture from getting clumpy and ensures a smooth, mess-free workflow. I learned this trick from a chef in Paris who could bread an entire tray of veal cutlets in under two minutes.
Step 4: Bread the Chicken
Take one piece of chicken, dip it into the egg, letting any excess drip off, then transfer to the panko mixture. Press the breadcrumbs firmly onto both sides, making sure the entire surface is coated. Gently shake off any loose crumbs and place the chicken on the prepared baking sheet. Repeat with all four pieces. Don’t overcrowd the pan — leave a little space between each piece so the heat circulates and the crust crisps.
⚠️ Common Mistake to Avoid: Pressing too gently with the breading. The panko-and-Parmesan coating needs to be firmly adhered to the chicken so it doesn’t slide off during baking. Use the palm of your hand and press with intention — not so hard that you flatten the chicken further, but enough that the crumbs feel embedded.
Step 5: Bake the Chicken
Place the baking sheet on the second-from-top rack in your preheated 400°F oven. Bake for 15 minutes, or until the chicken is cooked through and the crust is golden brown. You can check for doneness by inserting an instant-read thermometer into the thickest part — it should register 165°F. The crust should look dry and golden, not pale or oily.
💡 mia’s Pro Tip: At the 12-minute mark, peek through the oven door. If the crust is browning too quickly on one side, rotate the pan. Every oven has hot spots, and this quick check ensures even cooking. My NYC apartment oven runs hot on the left side — I’ve learned to always rotate halfway through.
Step 6: Add Sauce and Cheese, Then Broil
Remove the baking sheet from the oven. Carefully flip each piece of chicken over using a spatula — the underside will be paler but crisping nicely. Spoon ¼ cup of marinara sauce over each piece, spreading it to cover the surface. Top each with a generous pile of shredded mozzarella, about ⅓ cup per piece. Return the pan to the oven and turn on the broiler. Broil for 2 to 4 minutes, watching closely, until the cheese is melted, bubbly, and starting to brown in spots. The edges of the chicken should look caramelized and extra crispy.
⚠️ Common Mistake to Avoid: Walking away during the broiling step. Broilers can go from perfect to burnt in 30 seconds. Stay by the oven, keep the door slightly ajar if your broiler runs hot, and pull the pan out as soon as the cheese is bubbly and golden. If you want deeper color, give it 30 more seconds — but don’t take your eyes off it.
| Step | Action | Duration | Key Visual Cue |
|---|---|---|---|
| 1 | Prepare pan and preheat oven | 5 minutes | Foil is brushed with oil, rack is second from top |
| 2 | Cut and pound chicken breasts | 5 minutes | Four thin cutlets, all ½ inch thick |
| 3 | Season and set up breading station | 3 minutes | Egg in one dish, panko mixture in another |
| 4 | Bread the chicken | 3 minutes | Each cutlet is fully coated, pressed firmly |
| 5 | Bake chicken at 400°F | 15 minutes | Crust is golden, internal temp reaches 165°F |
| 6 | Add sauce, cheese, and broil | 2–4 minutes | Cheese is bubbly and browned, edges are crispy |
Serving & Presentation
When this Oven Baked Chicken Parmesan comes out of the oven, let it rest on the pan for just 2 minutes — this allows the cheese to set slightly so it doesn’t slide off when you plate it. I like to serve each piece over a small bed of al dente spaghetti or a simple arugula salad tossed with lemon and olive oil. The peppery arugula cuts through the richness of the cheese and sauce beautifully. Sprinkle fresh minced parsley over the top for color and a hint of freshness. If you’re feeling like I do on a cold NYC evening, add a side of garlic bread to soak up every drop of sauce.
Growing up in Morocco, my mother always served her tagines with crusty bread and a simple salad. I think that same spirit applies here — let the chicken be the star, but give it simple companions that don’t compete. In Paris, I learned the art of plating with intention: a clean plate, the chicken placed slightly off-center, a drizzle of extra sauce around the edges, and a sprinkle of parsley that looks intentional, not haphazard. It takes five extra seconds and makes the meal feel special, even on a Tuesday night.
In my New York City kitchen, I often serve this with a glass of Barbera d’Alba or a Sangiovese — Italian reds with enough acidity to balance the richness of the cheese and the brightness of the tomato sauce. If you’re not drinking wine, a sparkling water with lemon is just as refreshing. This is the kind of meal that makes everyone at the table slow down, take a breath, and actually enjoy the moment.
| Pairing Type | Suggestions | Why It Works |
|---|---|---|
| Side Dish | Arugula salad, spaghetti aglio e olio, roasted broccoli | Light, vibrant sides balance the rich, cheesy chicken |
| Sauce / Dip | Extra marinara, pesto drizzle, balsamic glaze | Adds moisture and another layer of flavor |
| Beverage | Barbera d’Alba, Sangiovese, sparkling water with lemon | Acidity cuts through richness, cleanses the palate |
| Garnish | Fresh parsley, basil leaves, red pepper flakes | Adds color, freshness, and a pop of heat if desired |
Make-Ahead, Storage & Reheating
Living in New York City means my schedule is always full — meetings, subway rides, farmers market runs, and the occasional last-minute dinner guest. I’ve designed this recipe to be as flexible as my lifestyle. You can prep the breaded chicken in advance, store it in the fridge, and bake it when you’re ready. Or you can make the full dish, eat half tonight, and save the rest for a busy Wednesday. Here’s exactly how to store and reheat so everything stays delicious.
| Method | Container | Duration | Reheating Tip |
|---|---|---|---|
| Refrigerator | Airtight container, layered with parchment between pieces | Up to 4 days | Reheat in a 375°F oven for 8-10 minutes to restore crispness. Avoid the microwave — it makes the breading soggy. |
| Freezer | Freezer-safe container or zip-top bag, wrapped individually in plastic wrap | Up to 3 months | Thaw overnight in the fridge, then reheat in a 375°F oven for 12-15 minutes. Add fresh cheese before reheating if you froze it without. |
| Make-Ahead | Breaded chicken on a tray, covered with plastic wrap | Up to 24 hours in advance | Bread the chicken, arrange on the baking sheet, cover, and refrigerate. Add 2-3 minutes to the initial bake time if starting from cold. |
If you’re reheating leftovers, the oven is your best friend. Place the chicken on a foil-lined baking sheet and warm it at 375°F until the cheese is bubbly again and the chicken is heated through. The microwave will work in a pinch, but the breading will lose its crunch. I’ve also been known to reheat a piece in a skillet with a splash of water and a lid — the steam helps melt the cheese while the bottom stays crisp. It’s a little trick I picked up from a friend who runs a trattoria in Brooklyn, and it works beautifully.
Variations & Easy Swaps
One of the things I love most about this easy Chicken Parmesan recipe is how adaptable it is. Over the years, I’ve experimented with different flavors, dietary needs, and seasonal ingredients. Whether you’re cooking for someone with gluten sensitivity, looking for a low-carb option, or just wanting to try something new, here are my favorite variations.
| Variation | Key Change | Best For | Difficulty Impact |
|---|---|---|---|
| Moroccan Spice Chicken Parmesan | Add 1 tsp ras el hanout and ½ tsp cumin to the breadcrumb mixture | Adventurous eaters, fans of warm spices | No additional difficulty |
| Gluten-Free Chicken Parmesan | Use gluten-free panko (rice flour based) | Gluten-sensitive diets | No additional difficulty |
| Low-Carb / Keto Chicken Parmesan | Replace panko with crushed pork rinds + extra Parmesan | Low-carb lifestyles | No additional difficulty |
Moroccan Spice Chicken Parmesan
This variation is very close to my heart. I add 1 teaspoon of ras el hanout — a North African spice blend that typically includes cumin, coriander, cinnamon, ginger, and cardamom — to the panko mixture. The warm, aromatic spices pair beautifully with the tomato sauce and cheese, creating a flavor that’s familiar yet unexpected. If you don’t have ras el hanout, you can make a quick version by mixing ½ teaspoon each of cumin, paprika, and a pinch of cinnamon. Serve this with a side of couscous instead of pasta for a meal that bridges my two worlds: Morocco and Italy, right there on one plate.
Gluten-Free Chicken Parmesan
I’ve tested this version more times than I can count, and I’m happy to report that gluten-free panko (made from rice flour) works beautifully in this recipe. The texture is nearly identical to regular panko — light, crunchy, and golden. Look for brands like Ian’s or Aleia’s at your local grocery store. Follow the recipe exactly as written, and no one at your table will know the difference. If you can’t find gluten-free panko, crushed gluten-free crackers or even cornflakes (check labels) make an excellent substitute. Just crush them to a panko-like consistency in a zip-top bag.
Low-Carb / Keto Chicken Parmesan
For a low-carb version, replace the panko with finely crushed pork rinds mixed with an equal amount of freshly grated Parmesan. The pork rinds add incredible crispness with zero carbohydrates. I also recommend using a low-carb marinara sauce (look for one with no added sugar) and full-fat mozzarella. This version is just as satisfying as the original, and it’s become a favorite among my readers who follow keto or low-carb lifestyles. The texture is slightly different — more crackling — but in the best possible way.
FAQ
Should I cover the chicken parmesan with foil while baking?
No, you should not cover this Oven Baked Chicken Parmesan with foil while baking. Covering it would trap steam, which would make the breading soggy instead of crisp. The goal is to get that golden, crunchy crust that mimics fried chicken Parmesan without the oil. If you find that the cheese is browning too quickly during the broiling step, you can loosely tent a piece of foil over the top for the last minute of broiling — but keep it off during the main bake time. If you’re worried about the chicken drying out, rest assured that the 15-minute bake time at 400°F is short enough to keep the meat juicy, especially since you’ve pounded the breasts to an even thickness.
What is the best way to keep the breading from getting soggy in the oven?
The best way to keep the breading crisp is a combination of techniques that I’ve perfected through testing. First, pat the chicken very dry with paper towels before breading — excess moisture is the enemy of crispness. Second, use panko breadcrumbs instead of regular breadcrumbs; panko’s larger, flakier texture stays crunchy even in the oven. Third, bake the chicken on the second-from-top rack, which exposes it to more direct heat and helps the crust set before the sauce goes on. Fourth, flip the chicken after the initial bake before adding the sauce — this ensures both sides are crisp. Finally, don’t drown the chicken in sauce; just ¼ cup per piece is enough to cover the top without making the crust soggy underneath. The broiler finish also helps keep the edges crunchy.
Can I use pre-cooked chicken or rotisserie chicken for oven baked chicken parmesan?
I don’t recommend using pre-cooked or rotisserie chicken for this Oven Baked Chicken Parmesan recipe. The recipe is designed around raw chicken breasts that are pounded thin, breaded, and baked — this ensures the crust develops properly and the chicken stays juicy. Pre-cooked chicken would dry out during the baking time, and the breading wouldn’t adhere well to already-cooked meat. If you have leftover rotisserie chicken, I suggest using it in a different dish, like chicken salad or a quick skillet casserole. For this recipe, starting with raw chicken breasts gives you the best texture, flavor, and safety. If you’re short on time, you can pound the chicken in advance and bread it up to 24 hours ahead, then bake when you’re ready.
What temperature should I bake chicken parmesan at and how long does it take?
Bake this Oven Baked Chicken Parmesan at 400°F for 15 minutes initially, then add the sauce and cheese and broil for 2 to 4 minutes. The total oven time is about 17 to 19 minutes. The 400°F temperature is hot enough to crisp the panko-Parmesan crust without burning it, and the 15-minute bake time is sufficient to cook the pounded chicken breasts through (they should reach an internal temperature of 165°F). The broiler step at the end melts the mozzarella and gives the edges of the chicken that beautiful caramelized finish. If your chicken pieces are thicker than ½ inch after pounding, you may need to add 2 to 3 minutes to the initial bake time. Always use an instant-read thermometer to be sure.
Can I make this chicken parmesan ahead of time for a party?
Absolutely, and I have a specific method that works beautifully for entertaining. You can bread the chicken up to 24 hours in advance and keep it covered in the refrigerator on the prepared baking sheet. When your guests arrive, simply pop it in the oven as directed — no last-minute fuss. If you want to bake it fully ahead, bake the chicken through the initial 15-minute step, let it cool, and refrigerate without the sauce and cheese. When you’re ready to serve, add the sauce and cheese and broil until bubbly. This way, the crust stays crisp and the cheese gets that fresh, melted texture. I’ve done this for dinner parties in my NYC apartment many times, and it always works.
Can I use chicken thighs instead of chicken breasts for this recipe?
Yes, you can substitute boneless, skinless chicken thighs for the breasts. Thighs are naturally juicier and more forgiving, which makes them a great option if you’re worried about dry chicken. Use about 1¼ pounds of thighs (4 to 5 thighs) and pound them to an even ½-inch thickness, just as you would with breasts. Thighs may need 2 to 3 minutes longer in the initial bake stage because they have a slightly higher fat content. The flavor will be richer and more robust, and the texture will be incredibly tender. I sometimes make this version when I find good pasture-raised thighs at my local butcher in Brooklyn. They take the Parmesan crust beautifully.
How do I get the cheese perfectly melted without burning the breading?
The key is the two-stage cooking process. First, you bake the breaded chicken at 400°F for 15 minutes to set the crust and cook the chicken through. Then you flip the chicken, add the sauce and cheese, and switch to the broiler. The broiler heats from above, melting the cheese quickly and browning the top while the already-crisped crust on the sides and bottom stays protected. Keep the oven rack in the second-from-top position — not directly under the broiler — and watch closely. Most broilers take just 2 to 4 minutes. If you see the cheese browning faster on one side, rotate the pan. If the cheese is melting but not browning enough, give it 30 more seconds. The trick is to stay by the oven.
Can I freeze chicken parmesan after it’s fully baked?
Yes, you can freeze fully baked Chicken Parmesan, and it’s a great meal-prep option. Let the baked chicken cool completely, then wrap each piece individually in plastic wrap and place them in a freezer-safe container or zip-top bag. Freeze for up to 3 months. When you’re ready to eat, thaw overnight in the refrigerator, then reheat in a 375°F oven for 12 to 15 minutes until heated through and the cheese is bubbly again. For best results, I recommend freezing the chicken after the initial bake (without the sauce and cheese) and adding the sauce and cheese when you reheat — this keeps the crust crisper. But if you’ve already added the toppings, freezing works too; just expect the crust to be slightly softer after reheating.
What type of mozzarella is best for baked chicken parmesan?
For this recipe, I recommend using low-moisture, part-skim shredded mozzarella. It melts beautifully, browns nicely under the broiler, and doesn’t release excess water that could make the breading soggy. Fresh mozzarella (the kind packed in water) is delicious but contains more moisture — if you use it, pat it very dry with paper towels and slice it instead of shredding. Fresh mozzarella will be creamier but may not brown as evenly. I usually buy a block of low-moisture mozzarella and shred it myself on the large holes of a box grater; pre-shredded cheese from a bag works in a pinch but often contains anti-caking agents that can affect melting. For the best flavor and texture, shred your own.
Can I use a different type of cheese instead of mozzarella?
Absolutely. While mozzarella is the classic choice for its meltability and mild flavor, you can experiment with other cheeses. Provolone adds a slightly smoky, sharp flavor that pairs beautifully with tomato sauce. Fontina melts exceptionally well and has a nutty, buttery taste. For a bolder flavor, try a mix of provolone and Parmesan on top. If you want a dairy-free option, use a high-quality vegan mozzarella shred that melts well — I’ve tested a few brands, and Violife and Miyoko’s both work decently, though the browning won’t be as deep. Just keep in mind that different cheeses have different moisture contents and melting points, so watch the broiler carefully and adjust the time as needed.
Share Your Version!
I love hearing from you — it’s the best part of being a food blogger in this vibrant community. If you make this Oven Baked Chicken Parmesan, please leave a star rating and a comment below telling me how it turned out. Did you try one of the variations? Did you add your own twist? Every time someone tells me they made this for their family and everyone went back for seconds, it makes my day.
Snap a photo of your creation and share it on Instagram or Pinterest — tag @exorecipes so I can see it! I want to know: what did you serve on the side? Did you try the Moroccan spice version? Or maybe you discovered a new trick for keeping the breading extra crisp? Drop your questions and tips in the comments — this is how we learn from each other, one delicious meal at a time.
From my NYC kitchen to yours — I hope this recipe brings as much warmth to your table as it does to mine. — mia 🧡
Love This Recipe? Save It to Pinterest!
If you enjoyed this Oven Baked Chicken Parmesan recipe, don’t let it get lost in your browser tabs! 😄 Pin it now so you can find it again anytime — and explore hundreds more tried-and-tested recipes waiting for you on my Pinterest boards.
👉 Follow mia on Pinterest @exorecipe
📌 Pin this recipe · 🔁 Re-pin your favorites · 💬 Tag me when you make it — I love seeing your creations!
I’d love to hear from you!
Which version are you most excited to try? Drop a comment below or tag me on Instagram @exorecipes. Your feedback, questions, and photos make this community so special. Let’s cook together! 🧡
“`
Print

Oven Baked Chicken Parmesan
Description
This delicious Oven Baked Chicken Parmesan recipe is easy and doesn’t require any frying. Because this chicken Parmesan is baked, it is healthy, quick and easy! Make this crispy baked Parmesan crusted chicken for dinner tonight in about thirty minutes!
Ingredients
- 2 tablespoons olive oil
- 2 chicken breasts (About 1 pound of chicken total)
- 1 egg
- 1 cup panko bread crumbs
- 1/2 cup parmesan cheese (fresh grated)
- 1 teaspoon dried oregano
- 1/2 teaspoon garlic powder
- 1 teaspoon kosher salt
- 1/2 teaspoon black pepper
- 1 cup marinara sauce
- 1 ½ cups shredded mozzarella
- 2 tablespoon minced parsley (optional, for garnish)
Instructions
- Line a baking sheet with foil, brush foil with olive oil. Adjust oven rack so that is in the second from the top space. Preheat the oven to 400°F.
- Cut the chicken breasts in half and pound to even thickness: Cut through the middle of the chicken breast as if you are going to butterfly it (cutting it open like a book), but cut all the way through to make two equal sized pieces.
- After cutting the chicken breasts in half, place them in a gallon sized zip top bag in an even layer, seal it, then pound them to an even thickness using a meat pounder or a rolling pin. You can also place the chicken breasts between two layers of cling wrap instead of a zip top bag if you prefer.
- Pat the chicken breasts dry with a paper towel, then season with salt and pepper.
- In one shallow dish, mix together panko bread crumbs, grated parmesan cheese, salt, pepper, garlic powder, oregano, and black pepper.
- In another shallow dish, whisk one egg.
- Dip one chicken breast into the egg, then into the bread crumb mixture. Ensure chicken breast is fully coated in the crumb mixture, and gently press with your hand do help the crumbs stick to the chicken. Place chicken breast on prepared baking sheet, repeat with remaining pieces of chicken.
- Place baking sheet in oven on the second from the top rack. Bake for 15 minutes, or until cooked through.
- Flip chicken, pour 1/4 cup of marinara sauce over each piece of chicken, then top with cheese. Place back in the oven. Turn on the broiler. Broil for 2-4 minutes, until cheese is melted and bubbly and edges of chicken are browning.
Nutrition
- Calories: 459 kcal
- Sugar: 4 g
- Fat: 25 g
- Carbohydrates: 16 g
- Protein: 42 g
Tried This Recipe? Leave a Comment!
Did you make this recipe? I’d love to hear how it turned out! Please leave a comment and a rating below. Your feedback helps other home cooks and supports cheerychop.com!
