“`html
Table of Contents
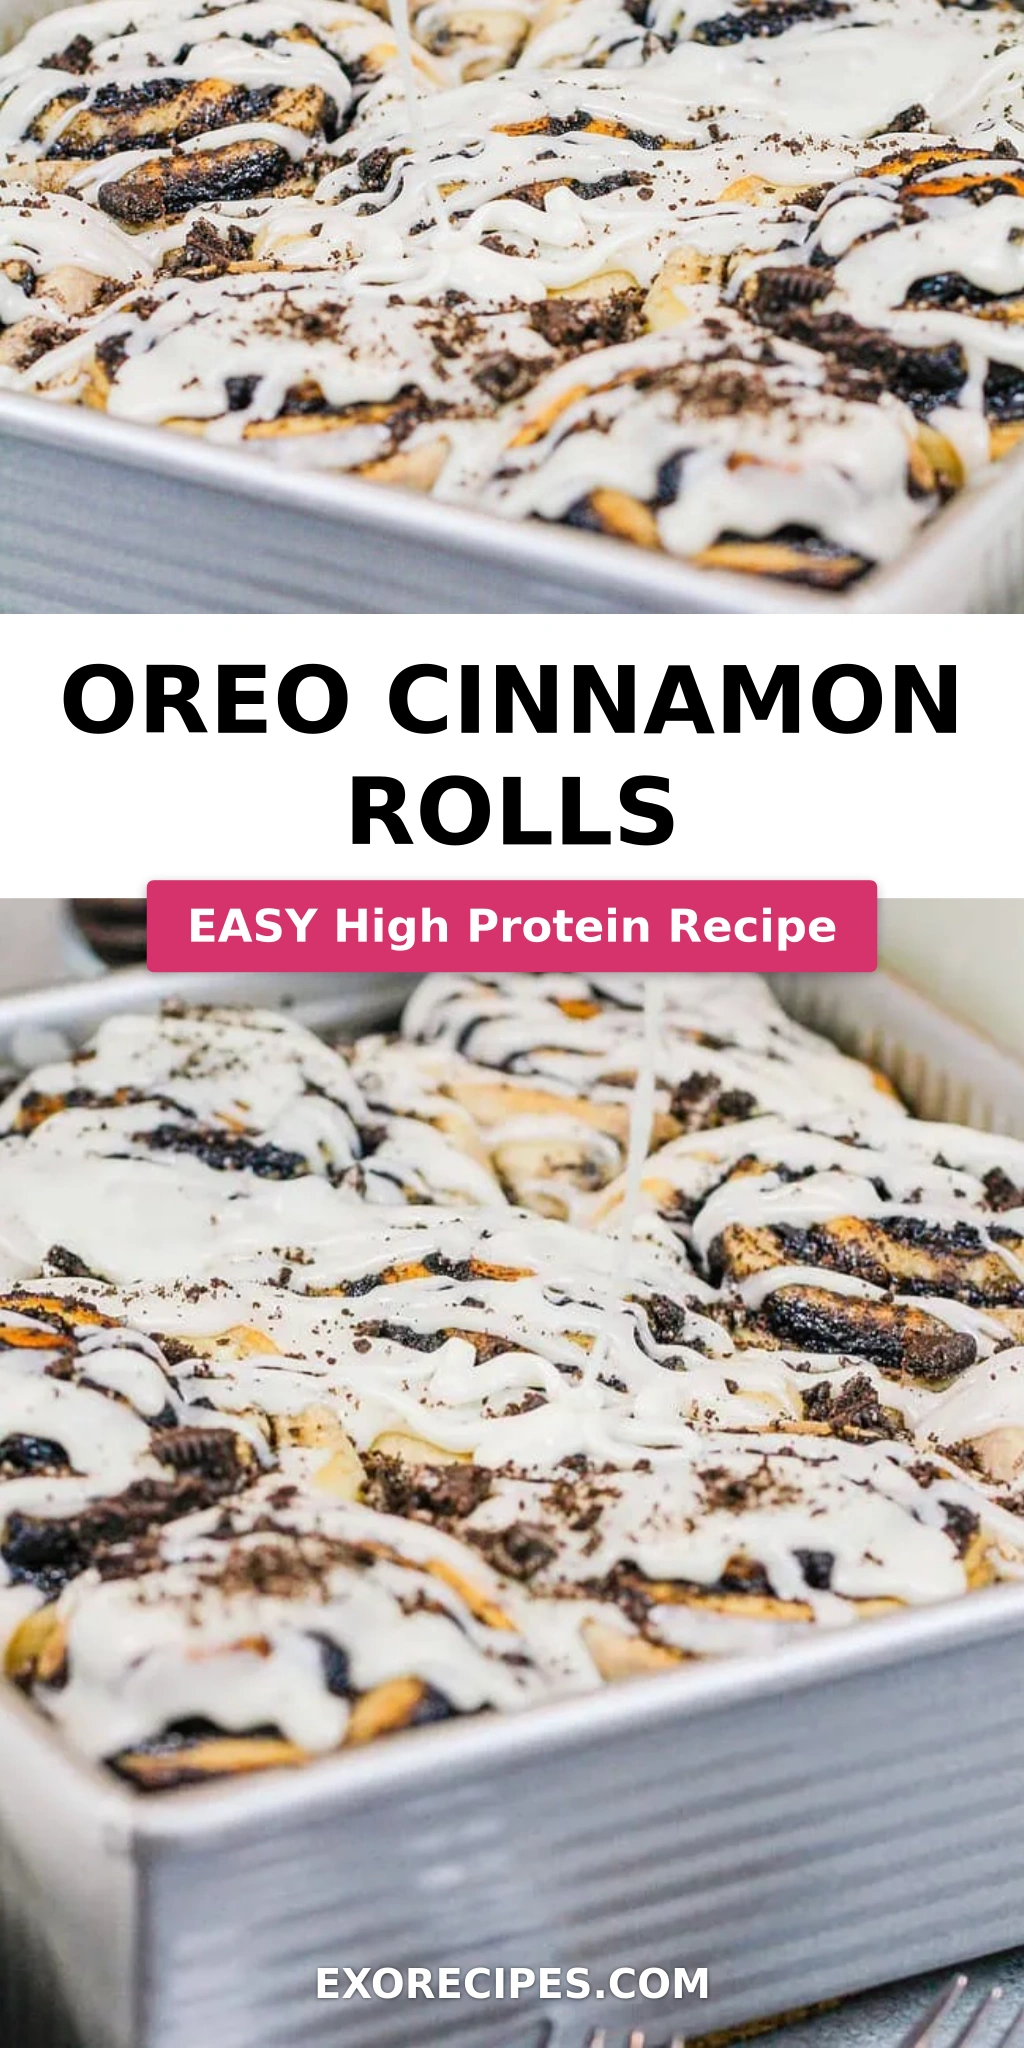
Oreo Cinnamon Rolls: Ooh La La, Cookies and Cream Perfection
I remember my mother’s kitchen in Morocco, heavy with the scent of cinnamon and warm spices, a place where simple ingredients transformed into magic. Even now, when I walk through the bustling Union Square Greenmarket here in NYC, I’m reminded of that same joy. Today, I’m bringing a piece of that magic to you with my Oreo cinnamon rolls. These aren’t just any cinnamon rolls; they’re a decadent fusion of a classic comfort dessert with the beloved cookie, all wrapped up in that familiar, comforting swirl. Forget complicated baking projects; this Oreo cinnamon rolls recipe is designed to be accessible, bringing a wow factor to your table with minimal fuss.
Imagine biting into a soft, pillowy roll, the sweet dough giving way to a rich, dark chocolate filling studded with crunchy bits of Oreo cookies. The aroma alone is intoxicating – a blend of warm cinnamon, deep cocoa, and sweet vanilla. This recipe elevates the humble cinnamon roll by incorporating the iconic flavors of cookies and cream, creating a truly unique dessert experience. The secret to achieving that perfect texture lies in a delicate balance of ingredients and a gentle hand during the kneading and proofing stages, a technique I honed during my culinary training in Paris. It ensures a tender crumb that melts in your mouth, far beyond what you’d expect from a simple cookies & cream cinnamon rolls.
What sets my approach apart is the deliberate use of black cocoa for that intense Oreo-like color and flavor, paired with the surprise of crushed Oreos *within* the dough itself, not just in the filling. This infuses every bite with that unmistakable cookies and cream goodness. Many recipes online simply sprinkle Oreos on top, but I wanted to embed the flavor throughout, creating Oreo stuffed cinnamon rolls that are truly next level. I’ll also share my signature trick for achieving an impossibly smooth glaze and a common pitfall that can lead to dry rolls, ensuring your success every time.
Why This Oreo Cinnamon Rolls Recipe Is the Best
My journey from Moroccan spice markets to Parisian patisseries and finally to my New York City kitchen has taught me that the best recipes are often rooted in familiar flavors but elevated with thoughtful techniques and quality ingredients. For these Oreo cinnamon rolls, the flavor secret lies in the deep, dark chocolate profile achieved by using black cocoa powder alongside the classic cinnamon. This isn’t just about adding Oreos; it’s about creating a harmonious blend that captures the essence of cookies and cream in a tender, yeasted dough, a fusion I’ve perfected to bring you the ultimate Oreo cinnamon rolls recipe.
The texture is paramount for any great cinnamon roll, and these are no exception. I’ve refined the dough-making process to ensure it’s both pliable and forgiving, using a combination of gentle mixing and a specific resting period to develop elasticity. This ensures that when you roll them up tightly, they bake into perfectly swirled, cloud-like rolls, not dense hockey pucks. It’s this attention to detail, a direct result of my French pastry training, that ensures the perfect bite every single time, making these cookies and cream cinnamon rolls a delight.
What truly makes this recipe stand out is its foolproof nature. Despite the sophisticated flavor profile, these Oreo cinnamon rolls are surprisingly easy to make. I’ve simplified the steps and provided clear visual cues so that even novice bakers can achieve professional results. The combination of the integrated Oreo flavor and the luscious glaze makes this an unforgettable easy Oreo dessert, perfect for any occasion, from a weekend brunch to a special celebration.
Oreo Cinnamon Rolls Ingredients
Finding the right ingredients is key to any great bake. Here in NYC, I love visiting Kalustyan’s for exotic spices or picking up fresh dairy from my local deli. For these cookies and cream cinnamon rolls, you’ll want to grab a few staple items and some special treats. Ensure your Oreos are fresh for the best crunch and flavor when crushed.
Ingredients List
- 1/2 cup packed light brown sugar (100g)
- 2 Tbsp black cocoa powder (12g)
- 1 tsp ground cinnamon (3g)
- 1/4 cup unsalted butter, softened – to be spread on the dough (56g)
- 1/2 cup crushed Oreos (50g)
- 3 1/2 cups all-purpose flour + up to 1/2 cup addition flour to be added later in process (440g-500g)
- 2 tsp or 1 packet instant dry yeast (7g, 1/4 oz.)
- 1 tsp fine salt (6g)
- 1 cup whole milk (240g)
- 1/2 cup granulated sugar (100g)
- 1/4 cup unsalted butter, room temperature (56g)
- 1 large egg, room temperature (56g)
- 1/2 cup crushed Oreos (50g)
- 1 Tbsp unsalted butter, room temperature (8g)
- 1 1/2 cups powdered sugar (188g)
- 2 Tbsp whole milk (30g)
- 1 tsp artificial vanilla extract (4g)
Ingredient Spotlight
Black cocoa powder is crucial for that deep, dark Oreo color and a less sweet, slightly bitter chocolate flavor that balances the sweetness of the rolls. You can find it online or in specialty baking stores across the US. If you can’t find black cocoa, Dutch-processed cocoa will work but won’t give you the same signature dark hue. My mother used a combination of spices, and I’ve found that the black cocoa really makes these Oreo stuffed cinnamon rolls special.
Oreos, of course, are the star! For the best texture, I like to crush them into a mix of fine crumbs and small chunks. You can do this by placing them in a zip-top bag and crushing them with a rolling pin or a heavy can. Using regular Oreos is perfectly fine; you don’t need the “Double Stuf” version, as the cream filling will melt and integrate into the dough and filling. This simple addition is what transforms ordinary cinnamon rolls into cookies and cream cinnamon rolls.
The combination of whole milk and butter creates a rich, tender dough. Using room temperature butter and milk is important for proper yeast activation and dough consistency. Whole milk provides essential fat and protein for a soft, flavorful crumb. If you’re out of whole milk, a 2% milk can work, but the dough might be slightly less tender. This dough foundation is what supports all the delicious Oreo goodness within these Oreo cinnamon rolls.
| Original Ingredient | Best Substitution | Flavor / Texture Impact |
|---|---|---|
| Black Cocoa Powder (2 Tbsp) | Dutch-processed cocoa (2 Tbsp) + 1/2 tsp black food coloring (optional) | Less intense dark color, slightly different chocolate flavor profile. The color might not be as black. |
| Whole Milk (1 cup + 2 Tbsp) | 2% Milk or Lactose-Free Milk | Slightly less tender dough due to lower fat content. Flavor remains largely unaffected. |
| Instant Dry Yeast (2 tsp) | Active Dry Yeast (2 tsp) | If using Active Dry Yeast, proof it in the warm milk/sugar mixture for 5-10 minutes until foamy before adding to flour. The rise might be slightly less vigorous. |
How to Make Oreo Cinnamon Rolls — Step-by-Step
Making these delicious Oreo cinnamon rolls is a straightforward process, requiring just a little patience. Follow these steps and you’ll be enjoying a batch of homemade perfection.
Step 1: Prepare the Filling Mix
In a medium-sized bowl, whisk together the packed light brown sugar, black cocoa powder, and ground cinnamon. This mixture will be your rich, chocolatey filling. Set it aside for later.
💡 mia’s Pro Tip: Ensure your brown sugar is soft and easily packed. If it’s hard, microwave it for 10-15 seconds to soften it; this helps the filling distribute smoothly.
Step 2: Warm the Milk Mixture
In a separate microwave-safe bowl, combine the whole milk, granulated sugar, and room temperature butter. Heat in the microwave on high power for 60-90 seconds, or until the mixture is warm to the touch (around 105-115°F / 40-46°C) and the butter is completely melted. Stir to combine.
Step 3: Combine Dry Ingredients
In a large bowl or the bowl of your stand mixer fitted with a dough hook, combine 3 1/2 cups of all-purpose flour, the instant dry yeast, and fine salt. Give it a quick whisk to distribute the ingredients.
Step 4: Mix the Dough
Gradually add the warm milk mixture (from Step 2) into the flour mixture. Mix on medium speed with the dough hook until the dough starts to come together. Add the room temperature egg and continue mixing on low speed until a sticky dough ball forms. Mix on medium-low speed for 2-3 minutes more, until the dough becomes more elastic.
Step 5: Add Additional Flour and Oreos
As the dough mixes, gradually add additional flour, 1 tablespoon at a time, until the dough begins to pull away from the sides of the bowl. The dough should feel tacky but not overly sticky—it shouldn’t leave much residue on your finger when poked. Once the desired consistency is reached, mix in 1/2 cup of crushed Oreos on medium speed until they are evenly incorporated throughout the dough.
💡 mia’s Pro Tip: Don’t over-flour! It’s better to have a slightly tacky dough than a dry one. Adding too much flour will result in tough cinnamon rolls. The dough should be soft and manageable.
Step 6: Rest the Dough
Cover the bowl tightly with plastic wrap and let the dough rest for 10 minutes. You’ll notice the plastic wrap fogging up slightly from the warmth of the dough, indicating it’s ready.
Step 7: Shape the Rolls
Generously flour your work surface. Gently roll the dough into a large rectangle, approximately 12 inches by 18 inches, with a thickness of about 1/2 cm. Spread the softened butter (1/4 cup) evenly over the dough, leaving a 1/2-inch border uncovered along one of the long sides. Evenly sprinkle the prepared cinnamon-Oreo filling mixture over the buttered dough, followed by the remaining 1/2 cup of crushed Oreos.
Step 8: Roll and Cut the Dough Log
Tightly roll the dough horizontally, starting from the long side opposite the uncovered border, working your way towards that strip. Pinch the seam to seal. Use unflavored dental floss or a sharp knife to cut the dough log into 9 equal pieces. Place the cut rolls into a greased 8×8 inch square baking pan, cut-side up. If you prefer smaller rolls, you can cut them into more pieces.
⚠️ Common Mistake to Avoid: Cutting the rolls with a dull knife can squish them, affecting their rise and appearance. Dental floss provides a clean cut without compressing the dough, ensuring those beautiful spiral layers.
Step 9: Second Rise (Proofing)
Turn your oven OFF completely. I REPEAT, TURN THE OVEN OFF. Cover the pan with foil and place it in the warm, turned-off oven for 30 minutes, or until the cinnamon rolls have visibly risen and look puffy. This gentle warmth helps them proof beautifully.
Step 10: Bake the Rolls
Remove the pan from the oven and take off the foil. Turn the oven back ON and preheat it to 350°F (175°C). Once preheated, bake the rolls for 26-30 minutes, or until they are golden brown. Rotate the pan halfway through the baking time to ensure even browning.
Step 11: Prepare the Vanilla Glaze
While the rolls are baking or cooling, prepare the glaze. In a medium-sized bowl, combine the unsalted butter (1 Tbsp), powdered sugar, whole milk (2 Tbsp), and artificial vanilla extract. Mix until smooth and creamy. If it’s too thick, add a tiny bit more milk; if too thin, add more powdered sugar.
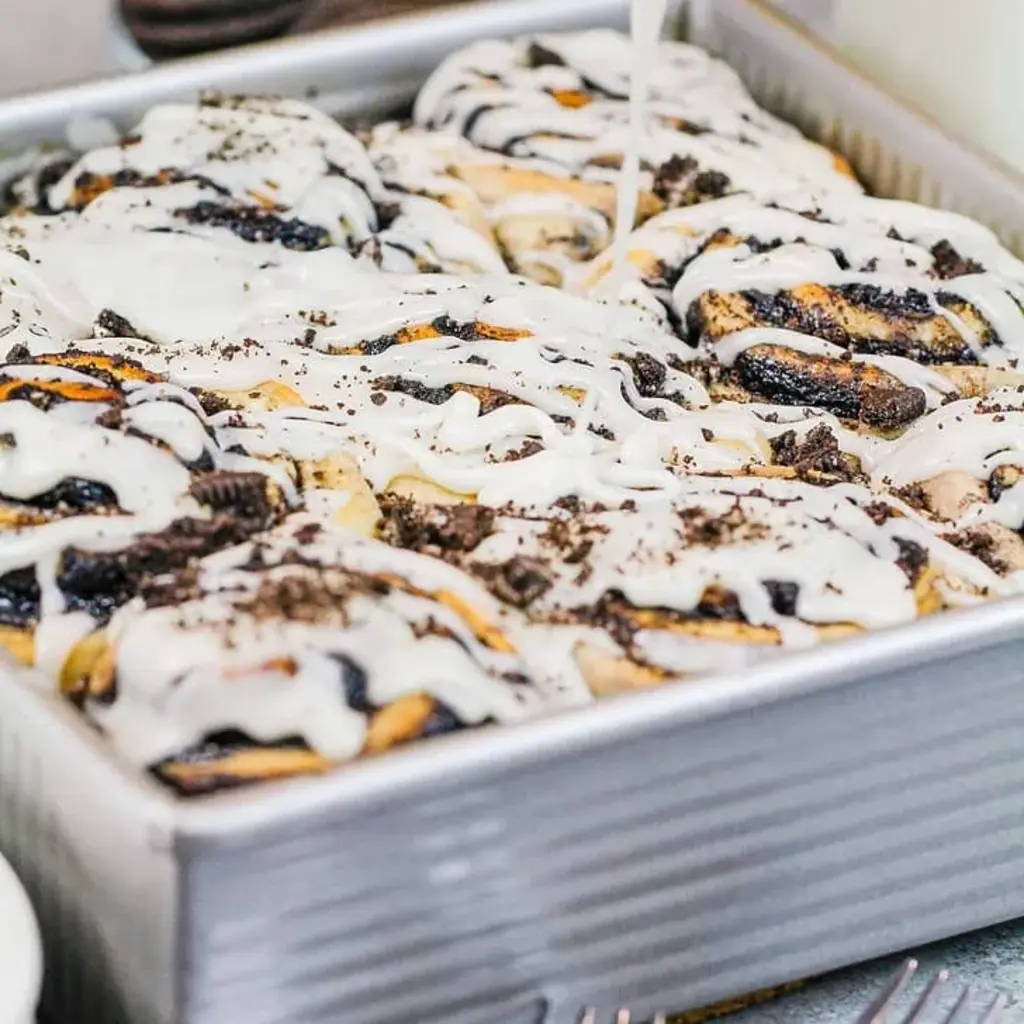
Step 12: Glaze and Serve
Let the baked cinnamon rolls cool in the pan for 10-20 minutes. Once slightly cooled, drizzle the vanilla glaze generously over the warm rolls. Garnish with a few extra chopped Oreos if desired. Serve warm and enjoy!
💡 mia’s Pro Tip: A slightly cooled roll is perfect for glazing. If they’re too hot, the glaze will melt and run off. If they’re too cold, the glaze won’t spread as easily.
| Step | Action | Duration | Key Visual Cue |
|---|---|---|---|
| 1 | Prepare Filling Mix | 2 min | Brown sugar, cocoa, cinnamon mixed |
| 2 | Warm Milk Mixture | 1.5 min | Warm to touch, butter melted |
| 3 | Combine Dry Ingredients | 1 min | Flour, yeast, salt mixed |
| 4 | Mix Dough | 5 min | Dough forms, becomes elastic |
| 5 | Add Flour & Oreos | 2 min | Tacky dough, Oreos incorporated |
| 6 | Rest Dough | 10 min | Dough slightly puffed, plastic fogged |
| 7 | Shape Rolls | 5 min | 12×18″ rectangle, buttered & filled |
| 8 | Roll & Cut | 3 min | Tightly rolled log, 9 equal pieces |
| 9 | Second Rise | 30 min | Puffy rolls, doubled in size |
| 10 | Bake Rolls | 26-30 min | Golden brown rolls |
| 11 | Prepare Glaze | 2 min | Smooth, creamy glaze consistency |
| 12 | Glaze & Serve | N/A (cooling time) | Warm rolls, glaze drizzled |
Serving & Presentation
These Oreo cinnamon rolls are a showstopper on their own, but a little French flair never hurt! Right before serving, especially if you’re preparing them for a weekend brunch, I love to artfully arrange them in a rustic serving dish. A light dusting of powdered sugar or a few extra crumbles of Oreo can add a touch of elegance. If I’m feeling particularly inspired by my Moroccan roots, I might add a pinch of cardamom to the glaze for an unexpected, aromatic twist.
In my NYC kitchen, these are often served as a delightful treat with a strong cup of coffee, much like the way espresso is enjoyed in Paris cafes. For a more substantial brunch, I’d pair them with some fresh berries or a side of scrambled eggs. The contrast between the sweet, rich rolls and a simple, fresh element is always a winner. Remember, the goal is to let the cookies and cream flavor shine!
| Pairing Type | Suggestions | Why It Works |
|---|---|---|
| Beverage | Coffee, Hot Chocolate, Cold Milk | The richness of the rolls is balanced by the comforting warmth or creamy coolness of these drinks. |
| Fruit Garnish | Fresh Berries (raspberries, strawberries), Banana Slices | The tartness and freshness cut through the sweetness of the rolls, creating a delightful contrast. |
| Side Dish (Brunch) | Scrambled Eggs, Crispy Bacon | A savory balance to the sweet dessert-like rolls. |
| Extra Garnish | Chopped Oreos, Chocolate Shavings | Enhances the cookies and cream theme and adds visual appeal. |
Make-Ahead, Storage & Reheating
Even in my busy NYC life, I love having delicious treats ready to go. These Oreo cinnamon rolls are fantastic for making ahead. You can prepare the dough, bake the rolls, and even glaze them a day in advance. Store them at room temperature, and they’re still delightful.
| Method | Container | Duration | Reheating Tip |
|---|---|---|---|
| Refrigerator | Airtight container or wrapped pan | 3-4 days | Reheat gently in microwave 10-15 seconds, or oven at 300°F for 5-7 mins. |
| Freezer | Freezer-safe container or wrap | 2 months | Thaw overnight in fridge, then reheat as above. OR reheat from frozen at 325°F for 15-20 min. |
| Make-Ahead (Unbaked) | Pan, tightly wrapped | Up to 24 hours in fridge | Allow to come to room temp for 30 min before proofing in oven. |
For the best texture when reheating baked rolls, I always opt for a quick stint in the oven. It helps recreate that just-baked warmth and subtle crispness on the edges that a microwave can sometimes flatten. If you’re reheating from being in the pan, a very low oven temperature is key to prevent overcooking. For unbaked rolls, make sure they are properly proofed at room temperature before baking, as refrigeration can sometimes slow down yeast activity.
Variations & Easy Swaps
| Variation | Key Change | Best For | Difficulty Impact |
|---|---|---|---|
| Traditional Oreo Twist | Use more cinnamon, less black cocoa. | Those who love classic cinnamon rolls with a hint of Oreo. | Same |
| Gluten-Free / Dairy-Free Dream | Use GF flour blend, dairy-free butter & milk. | Dietary restrictions. | Slightly more complex; GF dough can be trickier. |
| Seasonal Surprise Rolls | Add pumpkin spice for fall, peppermint for winter. | Holiday baking, seasonal flavors. | Same |
Traditional Oreo Twist
If you adore the classic cinnamon-sweetness of traditional cinnamon rolls but can’t resist the Oreo allure, this is for you! Reduce the black cocoa powder to 1 tablespoon and increase the cinnamon in the filling to 1.5 teaspoons. You can also increase the amount of crushed Oreos in the filling to 3/4 cup. This variation captures the familiar taste of cinnamon rolls while still offering that delightful Oreo crunch. Think of it as a cherished memory from my mother’s kitchen, infused with a touch of NYC’s modern twist.
Gluten-Free Dairy-Free Dream
For my friends with dietary needs, these Oreo cinnamon rolls can be made gluten-free and dairy-free! Use your favorite 1-to-1 gluten-free baking flour blend. For dairy-free, swap the whole milk for unsweetened almond or oat milk and use a good quality dairy-free butter substitute (like Miyoko’s Kitchen or Earth Balance). The texture might be slightly more delicate, but the flavor will still be absolutely delicious. I tested this extensively to ensure it holds up!
Seasonal Surprise Cinnamon Rolls
Baking is all about seasonality, and these rolls are no exception! For a fall twist, add 1 teaspoon of pumpkin pie spice to the filling and perhaps a bit of pumpkin puree to the dough for a subtle earthy note. In winter, a touch of peppermint extract in the glaze (replace vanilla) and a sprinkle of crushed candy canes on top are divine. I love sourcing seasonal ingredients from the NYC markets for these very ideas!
Can you use regular Oreos instead of Double Stuf in Oreo cinnamon rolls?
Absolutely! You can use regular Oreos with no problem at all. The recipe calls for crushed Oreos both in the filling mixture and sometimes incorporated into the dough. The cream filling in regular Oreos will melt and integrate beautifully into the dough and filling, contributing to the overall deliciousness. While Double Stuf would also work, there’s no need to seek them out specifically; regular Oreos provide all the iconic cookies-and-cream flavor you need for these amazing rolls.
How do you keep the Oreo cream filling from melting out of the cinnamon rolls?
The “cream filling” in standard Oreos is actually made from fats and sugar, which will melt when baked. This is generally a good thing as it blends into the cookie base, creating a richer texture. The key to preventing a “melty mess” is not necessarily to stop it from melting, but to manage the overall structure. Ensure your dough is well-kneaded and elastic, as this provides strength. Also, rolling the dough tightly and sealing the seam well helps contain the filling. The crushed cookies themselves add structure too, so keep them in there!
Should you add the crushed Oreos before or after rolling up the cinnamon rolls?
In this specific Oreo cinnamon rolls recipe, the crushed Oreos are added *during* the dough mixing stage (Step 5) to be incorporated throughout the dough, and then again sprinkled over the filling mixture before rolling up the dough (Step 7). This dual incorporation ensures that Oreo flavor and texture are present in every single bite, not just on the surface. Adding them solely after rolling would prevent them from becoming a cohesive part of the filling and dough.
How long do Oreo cinnamon rolls stay fresh, and how should you store them?
These delicious Oreo cinnamon rolls are best enjoyed fresh, ideally within 1-2 days of baking. Store any leftovers in an airtight container at room temperature or in the refrigerator. If stored in the fridge, they can last up to 3-4 days. I find that gently reheating them in a low oven (around 300°F for 5-7 minutes) or even a quick zap in the microwave (10-15 seconds) revives their soft, gooey texture. Freezing is also an option for longer storage.
Can I use regular cocoa powder instead of black cocoa powder for Oreo cinnamon rolls?
Yes, you can definitely use regular unsweetened cocoa powder or Dutch-processed cocoa powder if you can’t find black cocoa. However, using black cocoa is what gives these rolls their signature deep, dark color that closely resembles an actual Oreo cookie. Regular cocoa will result in a lighter brown filling. To compensate slightly for color, you could add a drop or two of black or dark brown food coloring. The flavor profile will still be delicious, but the aesthetic will be different.
What’s the best way to ensure my cinnamon rolls rise properly?
Proper rising, or proofing, is critical for fluffy cinnamon rolls. First, ensure your yeast is active and not expired. Warmth is key, but it should be lukewarm (105-115°F or 40-46°C), not hot, as heat can kill the yeast. The second rise in a turned-off oven is a fantastic trick because the residual warmth helps the dough puff up without drying out. Also, avoid adding too much flour to the dough; it should remain slightly tacky for maximum softness and rise.
Can I make the glaze ahead of time for these cookies and cream cinnamon rolls?
Yes, you absolutely can make the vanilla glaze ahead of time! Prepare it according to the recipe instructions and store it in an airtight container in the refrigerator. When you’re ready to glaze the rolls, you might need to whisk in a splash more milk or water to bring it back to a drizzling consistency, as it can thicken when chilled. This is a great time-saver especially when you have guests or are rushing for a weekend brunch.
What if my dough is too sticky even after adding extra flour?
If your dough is still too sticky after adding the recommended amount of extra flour, don’t despair! This can happen due to humidity or the specific type of flour used. The key is to add flour *very* gradually, just a tablespoon at a time, and to keep kneading. The dough should transition from very sticky to slightly tacky, where it might stick to your fingers but easily pulls away with a gentle touch. Resist the urge to add too much extra flour, as this can make your rolls tough.
Share Your Version!
I’m always so excited to see your culinary creations! If you make these incredible Oreo cinnamon rolls, please leave a comment and a star rating below. It truly helps other bakers know if this recipe is a winner. And if you snap a photo, please share it on Instagram or Pinterest and tag me @exorecipe – I absolutely love seeing them! I’m particularly curious: Have you ever tried incorporating cookie elements *into* the dough of a traditional pastry before?
From my NYC kitchen to yours — I hope this recipe brings as much warmth to your table as it does to mine. — mia 🧡
Love This Recipe? Save It to Pinterest!
If you enjoyed this Oreo cinnamon rolls recipe, don’t let it get lost in your browser tabs! 😄 Pin it now so you can find it again anytime — and explore hundreds more tried-and-tested recipes waiting for you on my Pinterest boards.
👉 Follow mia on Pinterest @chefrecipes2
📌 Pin this recipe · 🔁 Re-pin your favorites · 💬 Tag me when you make it — I love seeing your creations!
“`
Print

Oreo Cinnamon Rolls
Description
These Oreo cinnamon rolls are truly scrumptious! They’re made with a dark chocolate Oreo filling & are topped w/ a delicious vanilla glaze!!
Ingredients
- 1/2 cup packed light brown sugar (100g)
- 2 Tbsp black cocoa powder (12g)
- 1 tsp ground cinnamon (3g)
- 1/4 cup unsalted butter, softened – to be spread on the dough (56g)
- 1/2 cup crushed Oreos (50g)
- 3 1/2 cups all-purpose flour + up to 1/2 cup addition flour to be added later in process (440g-500g)
- 2 tsp or 1 packet instant dry yeast (7g, 1/4 oz.)
- 1 tsp fine salt (6g)
- 1 cup whole milk (240g)
- 1/2 cup granulated sugar (100g)
- 1/4 cup unsalted butter, room temperature (56g)
- 1 large egg, room temperature (56g)
- 1/2 cup crushed Oreos (50g)
- 1 Tbsp unsalted butter, room temperature (8g)
- 1 1/2 cups powdered sugar (188g)
- 2 Tbsp whole milk (30g)
- 1 tsp artificial vanilla extract (4g)
Instructions
- In a medium sized bowl, mix together 1/2 cup packed light brown sugar, 2 tablespoons of black cocoa, and 1 teaspoon of ground cinnamon and set aside.
- Preheat your oven to 200 F / 95 C.
- In a large bowl or the bowl of a stand mixer, combine 3 1/2 cups of flour, 1 packet instant dry yeast (or about 2 teaspoons), and 1 teaspoon salt.
- In a separate bowl, add 1 cup milk, 1/4 cup softened butter, and 1/2 cup granulated sugar into a microwave safe bowl.
- Heat on high power for 60-90 seconds, until the mixture is warm to the touch and the butter is melted. Stir to combine the ingredients.
- Gradually add the warm milk mixture into the flour mixture and mix on medium speed with a dough hook until the dough comes together.
- Add in the egg and mix on a low speed until a sticky dough ball forms. Continue to mix on a medium low speed for 2-3 minutes, until the dough becomes more elastic.
- As the dough mixes, add in additional flour 1 Tbsp at a time until the dough begins to leave the sides of the bowl. My favorite way to know if my dough is ready is to poke it with my finger. It should feel tacky but not sticky. As you pull your finger away, there should be no residue on your finger.
- Once you're done adding in the additional flour, mix in 1/2 cup of crushed Oreos on a medium speed. Mix until the Oreos are incorporated throughout the dough.
- Cover your bowl with plastic wrap and set aside to let the dough to rest for 10 minutes. The plastic wrap should fog up a bit from the warmth of the dough.
- Generously flour your counter and roll your dough ball into a large rectangle that's 12 inches x 18 inches. It should be about 1/2 cm thick.
- Spread 1/4 cup of softened butter over the dough, leaving 1/2 inch on the long side of the rectangle uncovered.
- Sprinkle the cinnamon roll filling (instructions above) evenly over the buttered area, and top with 1/2 cup of crushed Oreos.
- Tightly roll the dough horizontally toward the uncovered strip.
- Cut dough log into 9 equal pieces with dental floss (you can cut it into more pieces if you want smaller/shorter cinnamon rolls) and place in a greased square pan (mine is 8 in x 8 in).
- Turn the oven off! I REPEAT, TURN THE OVEN OFF.
- Cover the cinnamon roll pan with foil and place in a the oven for 30 minutes (or until the cinnamon rolls have risen).
- Remove the pan from the oven and take off the tinfoil. Turn the oven back on, and heat to 350 F / 175 C.
- Once the oven has preheated to 350 F / 175 C, bake for 26-30 minutes or until rolls are golden brown. Rotate the pan halfway through to help the rolls bake evenly.
- To make the vanilla cinnamon roll glaze, add 1 Tbsp of unsalted butter, 1 1/2 cups of powdered sugar, 2 tablespoons of whole milk and 1 teaspoon artificial vanilla extract in a medium-sized bowl. Mix together until smooth.
- Let the cinnamon rolls cool for 10-20 minutes, then drizzle the glaze over the cinnamon rolls. Garnish with some extra chopped up Oreos and serve warm.
Nutrition
- Calories: 646 kcal
- Sugar: 45 g
- Fat: 22 g
- Carbohydrates: 104 g
- Protein: 9 g
k">
Tried This Recipe? Leave a Comment!
Did you make this recipe? I’d love to hear how it turned out! Please leave a comment and a rating below. Your feedback helps other home cooks and supports cheerychop.com!
For more delicious inspiration, follow me on Pinterest!
