Table of Contents
Marshmallow Brownies with Swirled Fluff: The Ultimate Fudgy Treat
When I first started cooking in my mother’s bustling kitchen in Marrakech, the magic was always in transforming simple ingredients into something extraordinary. That love for alchemy followed me to Paris, where I honed my pastry skills, learning precision and finesse. Now, in the vibrant heart of New York City, I bring back those early lessons, blending the warmth of Moroccan spices with French technique and the city’s bold flavors. These fudgy marshmallow brownies recipe are a testament to that journey – a rich, chocolatey base crowned with a dreamy, gooey marshmallow swirl that evokes pure comfort and joy, proving that even the simplest desserts can be truly magical.
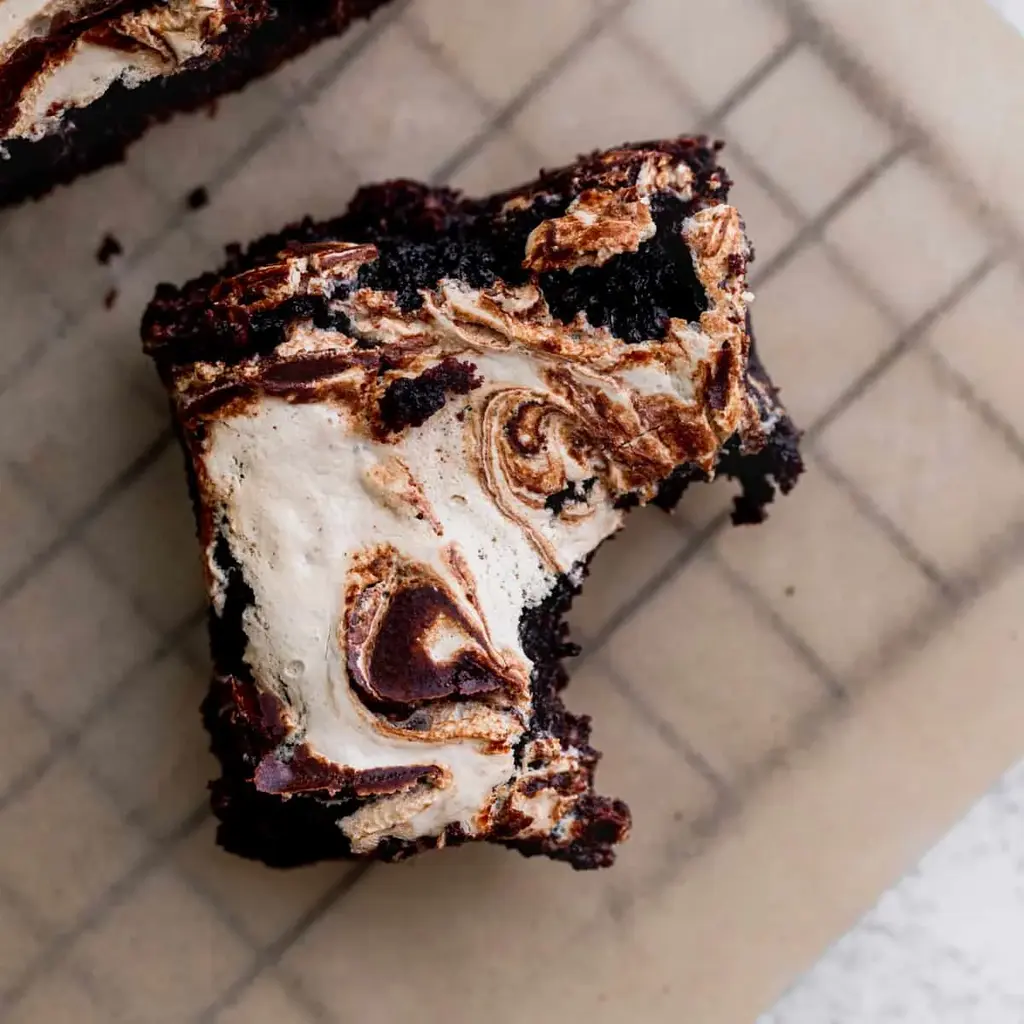
Imagine sinking your fork into a dense, intensely chocolate brownie, so fudgy it practically melts in your mouth. Then, your senses encounter ribbons of sweet, pillowy marshmallow, slightly toasted from the oven’s warmth, creating a delightful contrast in texture and flavor. The aroma is pure decadence: deep cocoa mingling with sweet vanilla. This isn’t just a brownie; it’s an experience. It reminds me of nights by bonfires, but elevated with the sophisticated touch I learned in Paris. The secret ingredient isn’t just the marshmallow, but the careful balance of rich cocoa and melted butter that creates that signature chew.
What sets my marshmallow swirl brownies apart is a culmination of years of testing and tasting. I’ve refined the ratio of dry to wet ingredients to achieve an unparalleled fudgy texture without any greasiness. My pro tip involves a specific ingredient combination that guarantees that perfect texture every single time. While many see these as a simple treat, I approach them with a chef’s precision, ensuring every bite is an explosion of flavor. One common mistake I see is overheating the marshmallow fluff, which can lead to a tough, overly browned topping, something we’ll expertly avoid here.
Why This Marshmallow Brownies Recipe Is the Best
My North African heritage instilled in me a deep appreciation for the power of spices and aromatic elements. For these brownies, I lean into that, ensuring the quality of the cocoa powder is paramount. I specifically recommend using a Dutch-process cocoa for its deep, rich, less acidic flavor, which forms the perfect foundation for the sweet marshmallow. This careful selection, coupled with my French training in balancing sweetness, ensures these brownies are intensely chocolatey and wonderfully complex, not just sugary.
Achieving that perfect fudgy texture is an art form I perfected in Parisian patisseries. It’s all about the science behind the bake. My method involves beating the eggs and sugar for an extended period to create a stable emulsion, which contributes to the brownie’s structure and fudgy density. Using a combination of melted butter and oil also plays a crucial role, providing both richness and moisture that ensures each bite is perfectly chewy and satisfying, avoiding that cakey texture some brownies fall victim to.
This recipe is designed to be incredibly approachable, even for novice bakers. The ingredient list is straightforward, and the steps are clearly outlined. I’ve specifically chosen techniques that minimize the chance of error. Plus, the quick swirl of marshmallow fluff is more forgiving than intricate frosting. It’s the kind of easy marshmallow brownies recipe that makes you feel like a professional chef in your own kitchen, delivering impressive results with minimal fuss, perfect for a last-minute craving or a special occasion.
Fudgy Marshmallow Brownies Ingredients
Living in NYC means I have access to the most incredible ingredients, but I designed this recipe to be made with everyday pantry staples you can find at any supermarket. When I’m back home in Morocco, my grandmother would use local honey and clarified butter, but for this classic take, I’m using what’s readily available. The key is the quality of your chocolate and cocoa powder – make them count!
Ingredients List
- 2 cups White granulated sugar
- 3 Large eggs
- 1 Egg yolk
- 1/2 cup Unsalted butter (melted)
- 2 tsp Pure vanilla extract
- 1/2 cup Oil (canola or vegetable)
- 3/4 cup All-purpose flour
- 1 cup Unsweetened cocoa powder (Use dutch process cocoa powder)
- 1 1/2 TBSP Cornstarch
- 1/2 tsp Salt
- 1 cup Semi-sweet chocolate chips
- 1 cup Marshmallow creme
Ingredient Spotlight
The unsweetened cocoa powder is the backbone of our fudgy marshmallow brownies. I specifically recommend Dutch-process cocoa powder because it’s treated to neutralize acidity, resulting in a smoother, richer, and less bitter chocolate flavor that truly shines. You can find excellent quality Dutch-process cocoa at most well-stocked grocery stores in the US, often in the baking aisle. If you can’t find Dutch-process, a good quality natural unsweetened cocoa powder will still work, but the chocolate flavor won’t be quite as deep.
Marshmallow creme, or marshmallow fluff, is what gives these brownies their signature swirl. It’s essential for achieving that gooey, melt-in-your-mouth layer. It’s widely available in the baking or marshmallow aisle of most supermarkets. While whole marshmallows can be used as a substitute, they tend to melt too quickly and can create a sticky, more uneven layer. Marshmallow fluff provides a consistent, creamy texture that integrates beautifully, offering that perfect balance of sweet chewiness.
Semi-sweet chocolate chips are folded into the batter for an extra burst of chocolatey goodness. These chips maintain their shape better than chopped chocolate during baking, providing delightful pockets of melted chocolate throughout the brownie. Look for good quality semi-sweet chips – Ghirardelli or Guittard are fantastic options readily available. You can also use dark chocolate chips for a more intense flavor, or milk chocolate chips for a sweeter profile, but semi-sweet offers the perfect balance.
| Original Ingredient | Best Substitution | Flavor / Texture Impact |
|---|---|---|
| Dutch-process Cocoa Powder | Natural Unsweetened Cocoa Powder | Slightly more acidic, less deep chocolate flavor. |
| Marshmallow Creme | Melted Marshmallows | Less consistent texture, can be very sticky and uneven. |
| Semi-sweet Chocolate Chips | Dark or Milk Chocolate Chips | Dark: More intense chocolate. Milk: Sweeter, creamier. |
How to Make Marshmallow Brownies — Step-by-Step
Follow these steps carefully, and you’ll have some of the most delicious, fudgy marshmallow brownies with a perfect swirl in no time!
Step 1: Preheat & Prep Pan
Begin by preheating your oven to 325°F (160°C). This moderate temperature is key to achieving that perfect fudgy interior without overbaking the edges. Next, thoroughly spray a 9×9-inch baking pan with a non-stick baking spray. Line the bottom and two sides of the pan with parchment paper, leaving an overhang. This overhang acts as handles, making it easy to lift the baked brownies out of the pan later. Spray the parchment paper again; this ensures the brownies won’t stick.
💡 mia’s Pro Tip: Don’t skip the second spray on the parchment paper! It ensures a super clean release every time, especially important for delicate baked goods like brownies.
Step 2: Combine Dry Ingredients
In a medium bowl, sift together the all-purpose flour, unsweetened cocoa powder, and cornstarch. Sifting is crucial here; it removes any lumps and aerates the ingredients, preventing dense pockets in your brownies. Add the salt to this dry mixture and whisk it all together. Set this bowl aside. This ensures that all the dry components are evenly distributed before they meet the wet ingredients, guaranteeing consistent flavor and texture throughout the batch.
Step 3: Beat Sugar & Eggs
In a separate, larger bowl, combine the granulated sugar, large eggs, and the extra egg yolk. Using an electric mixer with a whisk attachment, beat these ingredients on high speed for a full 5 minutes. You’re looking for the mixture to become pale yellow and significantly increase in volume. This process, known as ‘ribbon stage,’ incorporates air, which is vital for the brownie’s structure and fudgy texture. While this is mixing, melt your butter in the microwave and allow it to cool slightly so it doesn’t cook the eggs.
Step 4: Incorporate Wet & Dry
Reduce your mixer speed to low. Add the oil, the slightly cooled melted butter, and the pure vanilla extract to the beaten egg mixture. Mix until just combined. Now, gradually add the sifted dry ingredients from Step 2 to the wet ingredients. Continue mixing on low speed only until the dry ingredients are just incorporated and no streaks of flour remain. Be careful not to overmix at this stage, as it can lead to tough brownies. Finally, pour in the semi-sweet chocolate chips and gently fold them into the batter using a rubber spatula.
⚠️ Common Mistake to Avoid: Overmixing after adding the flour. Overdeveloping the gluten will result in tough, cakey brownies instead of the desired fudgy texture. Mix only until the flour streaks disappear.
Step 5: Swirl in the Marshmallow Fluff
Pour the rich brownie batter into your prepared 9×9-inch pan, spreading it evenly. Now, for the magic! Gently melt the marshmallow creme in the microwave for about 20-30 seconds until it’s slightly more fluid – don’t overheat it, or it can become gummy. Use a teaspoon to dollop spoonfuls of the warmed marshmallow creme over the brownie batter. Grab a butter knife or a skewer and very lightly swirl the marshmallow into the batter, creating beautiful, marbled patterns. Aim for light, sweeping motions to avoid mixing it in completely.
Step 6: Bake to Perfection
Place the pan in your preheated 325°F (160°C) oven. Bake for 45 to 55 minutes. The brownies are done when a toothpick inserted into the center comes out with moist crumbs attached. If a lot of wet batter comes out, bake for another 5 minutes. It’s crucial not to overbake these brownies, as they continue to set as they cool. The marshmallow topping should be lightly golden and gooey, not dried out or burnt.
Step 7: Cool and Cut
Once baked, remove the pan from the oven and place it on a wire cooling rack. This step is non-negotiable for achieving the best texture. Let the brownies cool completely in the pan for at least 2-3 hours. Resist the urge to cut them while warm; they will be too soft and messy. Once fully cooled, use the parchment paper overhangs to lift the entire brownie slab from the pan. Transfer it to a cutting board and use a sharp knife to cut into squares. For exceptionally clean cuts, wipe the knife between each slice.
| Step | Action | Duration | Key Visual Cue |
|---|---|---|---|
| 1 | Preheat & Prep Pan | 5 mins | Oven at 325°F, pan lined & sprayed |
| 2 | Combine Dry Ingredients | 2 mins | Sifted flour, cocoa, cornstarch mixed |
| 3 | Beat Sugar & Eggs | 5 mins | Pale, thick, ribbon stage |
| 4 | Incorporate Wet & Dry | 2 mins | Just combined, chips folded in |
| 5 | Swirl Marshmallow Creme | 2 mins | Dollops on top, light swirl |
| 6 | Bake | 45-55 mins | Moist crumbs on toothpick |
| 7 | Cool & Cut | 2-3 hours | Completely cooled, clean slices |
Serving & Presentation
These marshmallow brownies are showstoppers on their own, but I love to elevate them simply. In my NYC apartment, we often pair them with a strong, dark coffee or a glass of cold milk, much like I enjoyed as a child. For a more refined touch, a tiny dusting of cocoa powder or a few flakes of sea salt on top right before serving can truly enhance the chocolate flavor. If serving guests, a small dollop of whipped cream or a scoop of vanilla bean ice cream makes them feel extra special, transforming them into a decadent dessert.
The beauty of these brownies lies in their rich texture and intense chocolate flavor, making them a perfect end to any meal. I often bring them to potlucks or share them with neighbors in my New York building; they are always a massive hit! The gooey marshmallow swirl adds a visual appeal that’s irresistible. You can also get creative with presentation – cutting them into smaller, bite-sized pieces for a dessert platter, or even framing them with fresh berries like raspberries which offer a lovely tart contrast to the sweetness.
| Pairing Type | Suggestions | Why It Works |
|---|---|---|
| Beverage | Strong Coffee, Cold Milk, Espresso | Complements the rich chocolate without overpowering it. |
| Dessert Accompaniment | Vanilla Bean Ice Cream, Whipped Cream | Adds creaminess and balances the dense brownie. |
| Garnish | Sea Salt Flakes, Cocoa Powder Dusting, Fresh Raspberries | Enhances chocolate flavor, adds visual appeal and a touch of fresh tartness. |
Make-Ahead, Storage & Reheating
As a busy New Yorker, I rely on smart make-ahead strategies. These brownies are perfect for that! I often bake them a day or two in advance, allowing them to cool completely. This not only makes them easier to cut but also allows the flavors to meld beautifully. They store exceptionally well, making them a reliable treat for unexpected guests or a pre-portioned snack for the week.
| Method | Container | Duration | Reheating Tip |
|---|---|---|---|
| Refrigerator | Airtight container | 3-4 days | Let sit at room temp for 30 mins for best texture. |
| Freezer | Wrapped tightly in plastic wrap, then foil | 2-3 months | Thaw overnight in the refrigerator, then bring to room temperature. |
| Make-Ahead | Airtight container (cooled) | 1-2 days in advance | Let them cool completely before storing. |
If you find your brownies have become a bit too firm from refrigeration or freezing, a quick way to revive them is to warm a single serving in the microwave for 10-15 seconds. This gently melts the marshmallow swirl and softens the brownie, bringing back that fresh-baked gooeyness. For the best experience, I always recommend letting them come to room temperature before serving, especially if they’ve been stored for more than a day.
Variations & Easy Swaps
| Variation | Key Change | Best For | Difficulty Impact |
|---|---|---|---|
| S’mores Brownies | Add graham cracker crumbs to batter & top with mini marshmallows before baking. | Campfire lovers, nostalgic treats | Slightly more prep, same ease |
| Gluten-Free / Dairy-Free | Use GF flour blend & dairy-free butter/chocolate chips. | Dietary needs, inclusive baking | Requires specific ingredient swaps |
| Sea Salt Caramel Swirl | Drizzle caramel sauce & sprinkle sea salt instead of marshmallow swirl. | Salted caramel fans, sophisticated twist | Easy swap, added flavor dimension |
S’mores Brownies Magic
To transform these into ultimate s’mores brownies, I like to channel the camping trips of my youth. Before baking, after swirling the marshmallow, sprinkle a layer of crushed graham cracker crumbs over the top. Then, dot the surface generously with mini marshmallows. Bake as directed, keeping an eye out as the mini marshmallows will toast beautifully, creating that irresistible s’mores experience reminiscent of a campfire’s glow.
Gluten-Free or Dairy-Free Dream
Making these accessible is one of my passions. For a gluten-free version, I recommend a good quality gluten-free all-purpose flour blend that contains xanthan gum. For dairy-free, swap the unsalted butter for a plant-based butter substitute and use dairy-free semi-sweet chocolate chips. The texture might be slightly different, but the rich chocolate and gooey marshmallow experience will still be absolutely delightful. I’ve tested this swap many times for friends in NYC!
Seasonal Chocolate Chip Twist
Inspired by the vibrant farmers’ markets here in New York, you can easily add seasonal twists. For a fall harvest feel, consider adding a hint of cinnamon or a touch of pumpkin spice to the dry ingredients. In the summer, I love to fold in fresh or dried cranberries for a tart counterpoint. For an extra chocolate punch, swap half the semi-sweet chips for toffee bits or even chopped candy bars reminiscent of holidays.
How do I keep marshmallows from sinking to the bottom of the brownie batter?
The key to preventing marshmallows from sinking is to use marshmallow creme or fluff and warm it slightly before swirling. When you warm it, it becomes more pliable and less dense, allowing it to sit on top of the batter. Additionally, never fully incorporate it; a light swirl is all that’s needed. Over-mixing will push them down. Ensure your brownie batter isn’t too thin; a thicker batter will also help support the marshmallow layer.
Can I use marshmallow creme or fluff instead of whole marshmallows in brownies?
Absolutely! Marshmallow creme or fluff is actually my preferred method for achieving that signature swirl in brownies. Unlike whole marshmallows, which can melt unevenly and create a very sticky mess, marshmallow creme is easier to swirl and provides a more consistent, gooey texture. It’s designed to be spreadable and gives a beautiful marbled effect without sinking completely. Just remember to warm it slightly before swirling for optimal results.
Should I add the marshmallows before or after baking the brownies?
For this recipe, the marshmallow creme is added before baking, swirled onto the top of the brownie batter. This allows the marshmallow to cook slightly and become wonderfully gooey and toasted in spots during the baking process. If you were to add marshmallows after baking, they would likely just melt into a sticky puddle and wouldn’t achieve that lovely marbled effect or slightly caramelized top. Swirling it on beforehand is key for the visual and textural appeal.
How do I make marshmallow brownies without them getting too sticky or gooey?
The trick to achieving that perfect gooeyness without excessive stickiness lies in both the ingredients and the baking time. Using marshmallow creme, as opposed to whole marshmallows, helps. Secondly, be careful not to overbake the brownies; they should be slightly underbaked in the center when tested with a toothpick (moist crumbs are okay). Allowing them to cool completely is crucial; this firms them up enough to cut cleanly while still retaining their wonderful chewiness and gooey marshmallow center.
Can I use different types of chocolate chips in marshmallow brownies?
Yes, you absolutely can! While semi-sweet chocolate chips are my go-to for a balanced flavor that complements the sweet marshmallow, feel free to experiment. If you prefer a more intense chocolate flavor, dark chocolate chips are a fantastic choice. For a sweeter, creamier brownie, milk chocolate chips work wonderfully. Some people even like to use a mix of different chips or add white chocolate chips for an extra dimension of flavor, which also holds up well.
How do I get a good swirl on my marshmallow brownies?
Achieving a beautiful swirl is easier than you think! First, gently warm your marshmallow creme (about 20-30 seconds in the microwave) to make it more fluid. Dollop spoonfuls evenly over the brownie batter. Then, take a butter knife, toothpick, or a skewer and make light, decorative swirls. Don’t overdo it! You want distinct ribbons of marshmallow, not a fully blended mixture. Think of it as painting with chocolate and marshmallow. A few quick, fluid motions are all you need.
What kind of cocoa powder is best for fudgy marshmallow brownies?
For the deepest, richest chocolate flavor that stands up beautifully to the sweet marshmallow swirl, I highly recommend using Dutch-process cocoa powder. It has been treated to reduce its acidity, resulting in a smoother, milder, and more intense chocolate taste. Natural unsweetened cocoa powder can also work, but it will yield a slightly more acidic and less profound chocolate flavor. Look for a good quality brand in the baking aisle of your local grocery store.
Can I make marshmallow brownies ahead of time?
Yes, these fudgy marshmallow brownies are excellent make-ahead treats! For the best texture and flavor, I advise baking them a day in advance and letting them cool completely. This allows the flavors to meld and the texture to set perfectly. Store them in an airtight container at room temperature or in the refrigerator. If refrigerated, allow them to come to room temperature for about 30 minutes before serving to enjoy their optimal gooeyness.
Share Your Version!
I poured my heart into creating this fudgy marshmallow brownies recipe, blending my Moroccan roots with my French training and NYC experiences. I truly hope you love making and devouring these as much as I do! If you try them, please consider leaving a star rating and a comment below – it genuinely helps me and other bakers. I’d also be thrilled if you’d share a photo of your creations on Instagram or Pinterest and tag me @exorecipes. I’m always so inspired by your kitchen adventures!
From my NYC kitchen to yours — I hope this recipe brings as much warmth to your table as it does to mine. — mia 🧡
Love This Recipe? Save It to Pinterest!
If you enjoyed this Marshmallow Brownies recipe, don’t let it get lost in your browser tabs! 😄 Pin it now so you can find it again anytime — and explore hundreds more tried-and-tested recipes waiting for you on my Pinterest boards.
👉 Follow mia on Pinterest @chefrecipes2
📌 Pin this recipe · 🔁 Re-pin your favorites · 💬 Tag me when you make it — I love seeing your creations!

Marshmallow Brownies
Description
These marshmallow brownies are super fudgy chocolate brownie with chocolate chips. It has marshmallow fluff swirled on top.
Ingredients
- 2 cups White granulated sugar
- 3 Large eggs
- 1 Egg yolk
- 1/2 cup Unsalted butter (melted)
- 2 tsp Pure vanilla extract
- 1/2 cup Oil (canola or vegetable)
- 3/4 cup All-purpose flour
- 1 cup Unsweetened cocoa powder (Use dutch process cocoa powder)
- 1 1/2 TBSP Cornstarch
- 1/2 tsp Salt
- 1 cup Semi-sweet chocolate chips
- 1 cup Marshmallow creme
Instructions
- Preheat the oven to 325°F. Spray a 9X9-inch baking pan with baking nonstick spray. Line the bottom and 2 sides of the pan with parchment paper and spray again.
- In a medium bowl, sift the flour, cocoa powder, and cornstarch together. Add in the salt and set aside.
- Using a mixer with a whisk attachment, beat the sugar, eggs, and egg yolk on high speed for 5 minutes. It will become pale in color. While that mixes, melt the butter in the microwave and let it cool.
- Add the oil, melted butter, and vanilla and mix on low until combined. Add in the dry ingredients and mix on low until just combined. Pour in the chocolate chips and use a rubber spatula to fold it in.
- Pour the brownie batter into the pan. Melt the marshmallow fluff in the microwave for 20-30 seconds and mix. Use a 1 teaspoon to dollop the marshmallow fluff on top of the brownie batter. Use a butter knife to very light swirl the marshmallow fluff.
- Bake for 45-55 minutes. It is done baking when you stick in a toothpick, and it is slightly wet. If a lot of batter comes out, then bake for another 5 minutes.
- Cool on a cooling rack completely before cutting into them and serving.
Nutrition
- Calories: 336 kcal
- Sugar: 34 g
- Fat: 18 g
- Carbohydrates: 46 g
- Protein: 2 g

Tried This Recipe? Leave a Comment!
Did you make this recipe? I’d love to hear how it turned out! Please leave a comment and a rating below. Your feedback helps other home cooks and supports cheerychop.com!
