Lemon Cream Pie Bars with Graham Crust: A Zesty, No-Fuss Dessert
There’s something magical about the combination of tangy lemon and sweet cream, especially when it’s nestled in a buttery graham cracker crust. These Lemon Cream Pie Bars with Graham Crust are the kind of dessert that makes you close your eyes and sigh after the first bite—bright, creamy, and just the right amount of indulgence. Whether you’re hosting a summer picnic, need a potluck showstopper, or simply want to treat yourself, these bars deliver without the fuss of a traditional pie.
I first made these for a friend’s baby shower, and let’s just say they disappeared faster than the diaper raffle prizes. The best part? They’re easy. No rolling out dough or wrestling with a pie crust—just press, pour, and chill. If you love the vibrancy of lemon desserts but crave the simplicity of a bar cookie, this recipe is your new best friend. Plus, that graham cracker crust? It’s like a cozy hug for the luscious lemon filling. Trust me, you’ll want to bookmark this one.
Why You’ll Love These Lemon Cream Pie Bars
Here’s why this recipe deserves a permanent spot in your dessert rotation:
- No-bake filling: Perfect for hot summer days when turning on the oven feels like a crime.
- Make-ahead magic: These bars taste even better after chilling overnight.
- Crowd-pleaser: Balances tangy and sweet for wide appeal (even for picky eaters!).
- Versatile: Swap the graham crust for shortbread or add berries for a twist.
How to Make Lemon Cream Pie Bars with Graham Crust
Ingredients You’ll Need
- For the crust: Graham cracker crumbs, melted butter, sugar, and a pinch of salt.
- For the filling: Cream cheese, sweetened condensed milk, lemon juice + zest, and vanilla.
- Optional: Whipped cream or fresh berries for garnish.
Step-by-Step Instructions
- Prep the crust: Mix graham crumbs, melted butter, sugar, and salt. Press into a lined 9×9 pan and chill.
- Make the filling: Beat cream cheese until smooth, then blend in condensed milk, lemon juice, zest, and vanilla.
- Assemble: Pour filling over the crust and spread evenly. Chill for 4+ hours (overnight is ideal).
- Serve: Cut into squares and top with whipped cream or berries if desired.
Pro Tips for Success
- Use fresh lemon juice for the brightest flavor—bottled just isn’t the same.
- For a firmer crust, bake it at 350°F for 8 minutes before adding the filling.
- Love coconut? Add ½ cup toasted coconut to the crust mixture for a tropical twist.
Variations to Try
These bars are endlessly adaptable! Here are a few fun spins:
- Berry Swirl: Swirl raspberry jam into the filling before chilling.
- Key Lime: Substitute lime juice and zest for a Florida-inspired treat.
- Meyer Lemon: Use sweeter Meyer lemons for a milder citrus kick.
For more lemon dessert inspiration, check out our Lemon Blueberry Cheesecake Bars or these Lemon Curd Thumbprint Cookies.
Frequently Asked Questions
Can I use bottled lemon juice?
Fresh lemon juice is highly recommended for the best flavor, but bottled works in a pinch.
How long do these bars last in the fridge?
Up to 5 days if stored in an airtight container—if they last that long!
Can I freeze lemon cream pie bars?
Yes! Freeze for up to 2 months. Thaw in the fridge before serving.
What can I substitute for graham crackers?
Try digestive biscuits, vanilla wafers, or pretzels for a salty-sweet twist.
Why is my filling too soft?
Undermixing the cream cheese or not chilling long enough can cause this. Ensure proper chilling time.
Can I make these gluten-free?
Absolutely! Use gluten-free graham crackers or homemade GF graham crumbs.
Whether you’re a lemon dessert devotee or just craving a little sunshine in your baking, these Lemon Cream Pie Bars with Graham Crust are guaranteed to delight. They’re proof that the simplest recipes often steal the show—no fancy techniques required, just big, bright flavor. Whip up a batch, share them (or don’t!), and savor every creamy, tangy bite. For more easy dessert ideas, explore our No-Bake Desserts collection—because sometimes, the oven deserves a day off.
Print
Lemon Cream Pie Bars with Graham Crust
Description
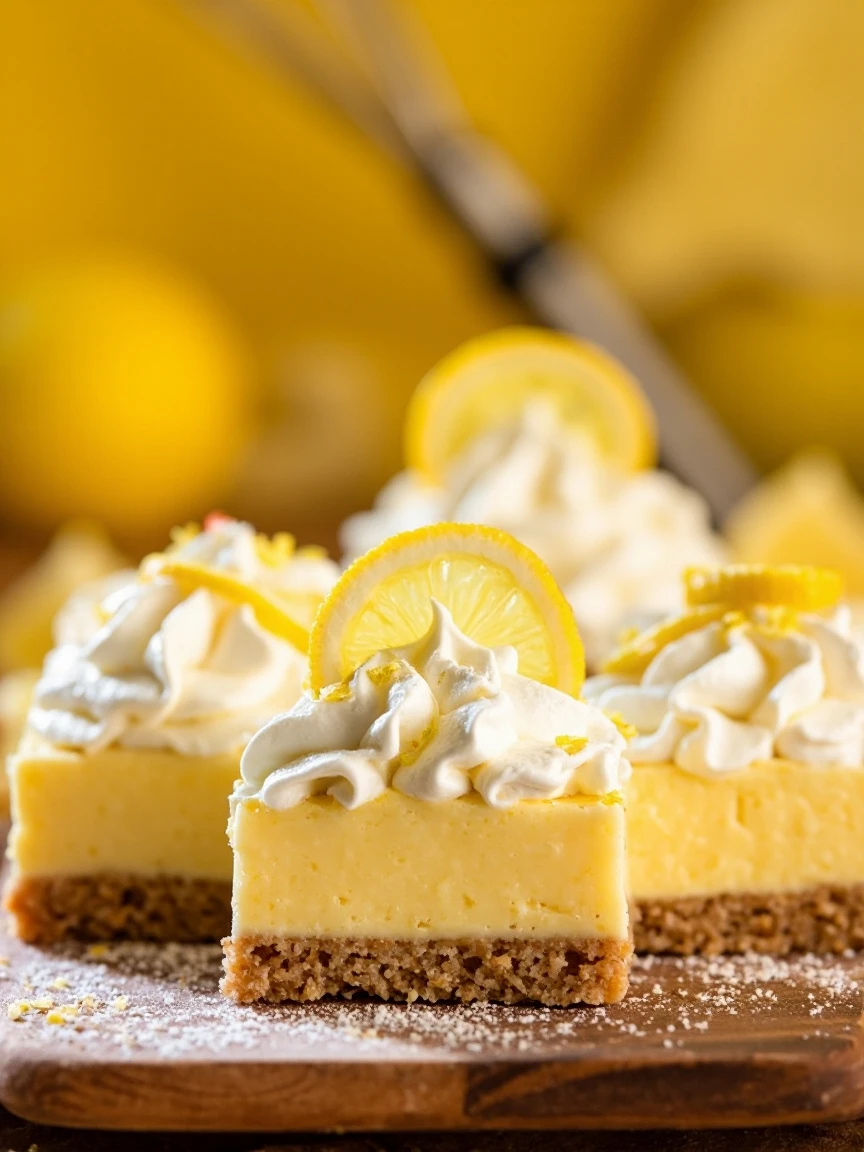
These Lemon Cream Pie Bars feature a buttery graham cracker crust topped with a luscious lemon cream filling, finished with a light dusting of powdered sugar. Perfect for summer gatherings or anytime you crave a tangy-sweet treat!
Ingredients
For the Crust:
- For the Graham Cracker Crust:
- 1 1/2 cups graham cracker crumbs
- 1/3 cup granulated sugar
- 6 tablespoons unsalted butter, melted
- For the Lemon Cream Filling:
- 1 (14 oz) can sweetened condensed milk
- 3 large egg yolks
- 1/2 cup freshly squeezed lemon juice
- 2 teaspoons lemon zest
- 1/4 teaspoon salt
- For Garnish:
- Powdered sugar, for dusting
Instructions
1. Prepare the Crust:
- Preheat oven to 350°F (175°C). Line an 8×8-inch baking pan with parchment paper, leaving an overhang for easy removal.
- Make the crust: In a bowl, mix graham cracker crumbs, sugar, and melted butter until combined. Press firmly into the bottom of the prepared pan. Bake for 10 minutes, then let cool slightly.
- Prepare the filling: In a separate bowl, whisk together sweetened condensed milk, egg yolks, lemon juice, lemon zest, and salt until smooth.
- Pour the filling over the warm crust and spread evenly. Bake for 15-18 minutes or until the filling is set (edges may puff slightly).
- Cool completely at room temperature, then refrigerate for at least 2 hours (preferably overnight).
- Lift bars out using parchment overhang, dust with powdered sugar, and slice into squares. Serve chilled.
Notes
For a stronger lemon flavor, increase zest to 1 tablespoon. Store leftovers covered in the refrigerator for up to 5 days. Bars freeze well for up to 1 month—thaw in fridge before serving.
