How To Make Perfect, Extra Crispy Homemade Onion Rings From Scratch
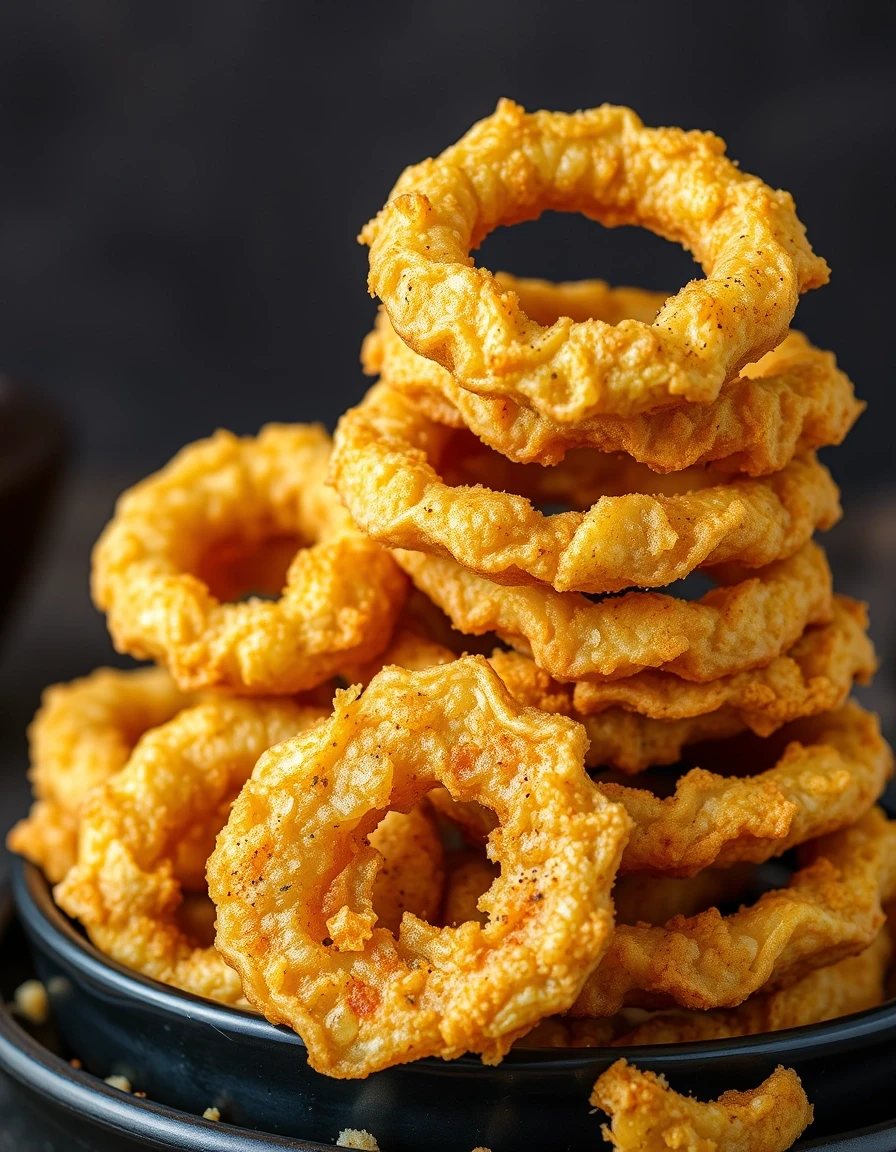
There’s something undeniably magical about biting into a golden, extra crispy onion ring—the kind that shatters with the perfect crunch, revealing a sweet, tender onion inside. Whether you’re serving them as a side for burgers, stacking them high for game day, or just treating yourself to a little indulgence, homemade onion rings are a game-changer. And here’s the best part: you don’t need a deep fryer or any fancy equipment to make them restaurant-worthy at home.
I’ll admit, my first attempt at onion rings was… well, let’s just say they were more “soggy” than “snappy.” But after years of tweaking (and maybe a few stubborn kitchen meltdowns), I’ve cracked the code for the crispiest, most irresistible rings. The secret? A double-dredge technique, the right oil temperature, and one unexpected pantry staple that guarantees crunch. Trust me, once you try this method, you’ll never go back to the freezer aisle again.
Why You’ll Love These Homemade Onion Rings
These aren’t just any onion rings—they’re the kind that’ll have everyone asking for your recipe. Here’s why they’re a must-make:
- Unbeatable crunch: Thanks to a crispy panko breadcrumb coating.
- Sweet & tender onions: No raw, overpowering bites here.
- Easy to customize: Add smoked paprika, cayenne, or grated Parmesan to the breading.
- Better than takeout: Fresh, hot, and free of mystery ingredients.
How To Make Extra Crispy Onion Rings (Step-by-Step)
Ingredients You’ll Need
- 2 large sweet onions (like Vidalia)
- 1 cup buttermilk (or milk + 1 tbsp vinegar)
- 1 cup all-purpose flour
- 1 cup panko breadcrumbs
- 1 tsp garlic powder
- 1 tsp smoked paprika (optional)
- Oil for frying (vegetable or peanut oil works best)
The Secret to Crispy Success
The key is the double-dredge method: dip rings in flour, then buttermilk, then flour again, and finally panko. This creates layers that crisp up beautifully. For extra insurance, let the coated rings rest on a wire rack for 10 minutes before frying—this helps the coating adhere.
Another pro tip? Use a thermometer to monitor oil temperature (ideal is 375°F). Too cool, and your rings will be greasy; too hot, and they’ll burn before cooking through.
Serving Suggestions
Pair these onion rings with a zesty burger sauce or cool ranch dip. They’re also fantastic alongside homemade burgers or piled atop a crunchy salad for contrast.
Frequently Asked Questions
Can I bake onion rings instead of frying?
Yes! Arrange breaded rings on a parchment-lined sheet, spray with oil, and bake at 425°F for 15–20 minutes, flipping halfway. They’ll be lighter but still crispy.
What’s the best onion for onion rings?
Sweet onions (Vidalia, Walla Walla) are ideal—they caramelize beautifully and aren’t too pungent.
How do I keep onion rings crispy after frying?
Place them on a wire rack (not paper towels) to prevent steaming. For large batches, keep them warm in a 200°F oven.
Can I make onion rings gluten-free?
Swap flour for GF flour blend and use gluten-free panko breadcrumbs.
Why do my onion rings fall apart when frying?
The coating may be too thin. Ensure each ring is fully coated in each layer, and let them rest before frying.
How long do homemade onion rings last?
They’re best eaten immediately, but leftovers can be reheated in an air fryer for 3–4 minutes.
There you have it—the ultimate guide to onion rings that’ll rival your favorite diner’s. Whether it’s a summer cookout or a cozy night in with a movie, these crispy golden rings are always a good idea. And if you’re craving more crunchy favorites, try my oven-baked zucchini fries next. Happy frying!

Perfect, Extra Crispy Homemade Onion Rings From Scratch
Description
Learn how to make irresistibly crispy homemade onion rings with this foolproof recipe. These golden rings feature a light, crunchy coating that stays crisp for hours, paired with sweet onion slices for the ultimate snack or side dish.
Ingredients
For the Crust:
- For the Onions:
- 2 large sweet onions (Vidalia or Walla Walla preferred)
- 1 cup buttermilk
- 1 tbsp hot sauce (optional)
- For the Dry Coating:
- 1.5 cups all-purpose flour
- 1/2 cup cornstarch
- 2 tsp paprika
- 1 tsp garlic powder
- 1 tsp onion powder
- 1.5 tsp salt
- 1/2 tsp black pepper
- For the Wet Batter:
- 1 cup buttermilk
- 1 large egg
- 1 tbsp hot sauce
- For Frying:
- 4 cups neutral oil (vegetable, canola, or peanut)
Instructions
1. Prepare the Crust:
- 1. Prep Onions: Peel onions and slice into 1/2-inch thick rings. Separate rings and discard small center pieces.
- 2. First Soak: In a bowl, mix 1 cup buttermilk with hot sauce. Add onion rings, ensuring all are submerged. Let soak 30 minutes at room temperature.
- 3. Make Dry Mix: Whisk together flour, cornstarch, paprika, garlic powder, onion powder, salt, and pepper in a shallow dish.
- 4. Make Wet Batter: In another bowl, whisk 1 cup buttermilk, egg, and hot sauce until smooth.
- 5. Double Coat: Remove onion rings from buttermilk soak. First dredge in dry mix, shaking off excess. Then dip in wet batter, letting excess drip off. Finally, coat again in dry mix, pressing gently to adhere.
- 6. Heat Oil: In a heavy pot or Dutch oven, heat oil to 375°F (190°C). Use a thermometer for accuracy.
- 7. Fry: Working in batches, fry rings 2-3 minutes until golden brown, flipping once. Don’t overcrowd the pot.
- 8. Drain: Transfer to a wire rack set over a baking sheet. Sprinkle immediately with salt.
- 9. Serve hot with your favorite dipping sauce.
Notes
• For extra crispiness, let coated rings rest 5 minutes before frying.
• Maintain oil temperature between 365-375°F for best results.
• Leftovers can be reheated in a 400°F oven for 5 minutes to regain crispness.
