
Table of Contents
Best Homemade Red Velvet Brownies with Cream Cheese Frosting – An NYC Favorite
New York City is a melting pot of flavors, and my culinary journey, from my mother’s vibrant kitchen in Morocco to the precise techniques learned in Paris, has always been about blending traditions. Today, I’m bringing you a recipe that embodies that spirit: the Best Homemade Red Velvet Brownies. These aren’t just any brownies; they are a decadent fusion of rich chocolate, the subtle tang of red velvet, and a luscious cream cheese frosting that will transport you. I’ve spent years perfecting this red velvet brownies recipe from scratch, ensuring it’s both easy enough for a weeknight treat and impressive enough for a special occasion. Get ready to fall in love with these deeply flavored, incredibly fudgy squares, a true showstopper with that iconic red hue, enhanced by a touch of my signature culinary flair.
Imagine biting into a brownie that is intensely chocolatey, with a tender, fudgy crumb that practically melts in your mouth. The signature red velvet flavor is present but subtle, a whisper of cocoa and a hint of tang, allowing the deep chocolate notes to shine. Then comes the crowning glory: a smooth, slightly tart cream cheese frosting that balances the richness of the brownie perfectly. The aroma alone, a warm embrace of melted chocolate and vanilla, is enough to make your kitchen feel like a cozy haven. My training in pastry in Paris taught me the importance of balancing flavors and textures, and in this recipe, the combination of a dense, chewy brownie base and a luscious, velvety frosting is pure harmony. It’s this attention to detail and depth of flavor that makes these homemade red velvet brownies truly exceptional.
What sets these best red velvet brownies apart? It’s a combination of carefully selected ingredients and a simple yet effective technique that ensures a perfect texture every time. I’ll guide you through achieving that sought-after fudgy center, avoiding the common pitfall of dry, cakey brownies. We’ll also touch on a secret ingredient that elevates the red velvet flavor without overpowering the chocolate. I want to share with you my foolproof method for making these easy red velvet brownies, a recipe that will quickly become a go-to in your baking repertoire. Stick around, because I’ve got a pro tip and a common mistake to share that will guarantee stunning results!
Why This Best Homemade Red Velvet Brownies Recipe Is the Best
My culinary philosophy, forged in the bustling markets of Morocco and refined in the elegant patisseries of Paris, is all about coaxing the most profound flavors from each ingredient. For these red velvet brownies, the secret lies in using high-quality Ghirardelli chocolate and just the right balance of cocoa powder. The deep, complex notes of Ghirardelli milk chocolate create a richness that’s hard to beat, especially when combined with the subtle red velvet undertones. This isn’t just about sweetness; it’s about a layered chocolate experience that satisfies at a deeper level. My goal is always to create a dessert that feels both sophisticated and comforting, a reflection of the diverse culinary influences that shape my cooking.
Achieving that perfect fudgy texture in a brownie is an art I learned to master during my pastry training. It comes down to the fat-to-flour ratio and avoiding overmixing. By using melted chocolate and butter, we create a dense, moist base that’s incredibly chewy. Incorporating the eggs and sugars correctly also contributes significantly to that delightful texture. The key is to not overbake, which is a critical point I always emphasize. We aim for a center that is still slightly gooey when it comes out of the oven, as it will continue to set as it cools. This meticulous approach ensures that every bite of these homemade red velvet brownies from scratch is pure, unadulterated indulgence.
One of the things I love most about this recipe is its approachability. Despite the elegant flavors and beautiful appearance, these easy red velvet brownies are surprisingly simple to make, even for novice bakers. The steps are straightforward, and the use of melted chocolate eliminates the need for creaming butter and sugar, saving you time and effort. I’ve tested this recipe countless times, both in my busy city apartment kitchen and for serving friends, ensuring it’s reliable and delivers fantastic results every time. This recipe proves that you don’t need complex techniques or rare ingredients to bake something truly spectacular; you just need a recipe that’s been thoughtfully crafted with everyday bakers in mind.
Red Velvet Brownies from Scratch Ingredients
When I’m developing a recipe here in New York, I think about the ingredients that are readily available at our fantastic local markets and specialty stores. For these red velvet brownies from scratch, I’ve chosen ingredients that offer the best flavor and texture. You can find excellent quality chocolate, butter, and cream cheese at almost any grocery store, but I always recommend seeking out good quality unsalted butter for its superior flavor. My mother always emphasized the importance of starting with the best ingredients, a principle I carry with me from Marrakech to Manhattan. These staples ensure that our homemade red velvet brownies will have that signature depth of flavor and luxurious mouthfeel.
Ingredients List
- 2 1/4 sticks unsalted butter (cut into chunks)
- 3 1/2 cups Ghirardelli Milk Chocolate Chips
- 5 large eggs (room temp)
- 1/2 cup granulated sugar
- 1 1/4 cups packed brown sugar
- 1 teaspoon salt
- 1 1/4 teaspoons vanilla extract
- 2 tablespoons red food coloring
- 2 cups all purpose flour
- 1 teaspoon baking powder
- 3 tablespoons Ghirardelli unsweetened cocoa powder
- 4 ounces cream cheese (softened)
- 5 tablespoons unsalted butter (room temperature)
- 1/8 teaspoon salt
- 1 teaspoon vanilla extract
- 2 or 3 cups confectioners sugar
- 1-2 tablespoons heavy cream or milk of choice
Ingredient Spotlight
Ghirardelli Milk Chocolate Chips: These are the heart of our brownie, providing a smooth, creamy chocolate flavor that is intensely satisfying. I reach for Ghirardelli because they melt beautifully and have a premium taste that elevates the entire dessert. Look for them in the baking aisle of most major supermarkets in the US. If you can’t find Ghirardelli, any high-quality milk chocolate chips will work, but adjust sweetness if they are significantly sweeter.
Red Food Coloring: This is what gives our brownies their signature vibrant visual appeal. I recommend gel food coloring for a more concentrated color that disperses evenly without adding too much liquid. You can find this in most grocery stores or craft stores. For a more natural hue, you can experiment with beet powder, though the color will be much more muted and the flavor profile might slightly change.
Cream Cheese: Essential for the tangy, decadent frosting, cream cheese adds a lovely counterpoint to the rich chocolate brownie. Ensure it’s softened to room temperature for the smoothest frosting. Philadelphia is a reliable brand widely available in the US. If you’re looking for a dairy-free option, a good quality dairy-free cream cheese alternative can be used, though the tanginess might be less pronounced.
| Original Ingredient | Best Substitution | Flavor / Texture Impact |
|---|---|---|
| Ghirardelli Milk Chocolate Chips | High-quality dark chocolate chips (60-70% cacao) | Brownies will be less sweet and have a more intense, slightly bitter chocolate flavor. Texture might be slightly denser. |
| Red Food Coloring | 1-2 tsp Beet Powder (for color) | Color will be a muted pinkish-red, not as vibrant. Flavor profile might have a very subtle earthiness. |
| Cream Cheese | Dairy-free cream cheese alternative | Frosting might be slightly less tangy and the texture could be a touch softer. Ensure it’s a good quality one. |
How to Make Best Homemade Red Velvet Brownies – Step-by-Step
Making these brownies is a joy, and with these simple steps, you’ll achieve perfect results every time. Let’s get baking!
Step 1: Preheat and Prepare
Preheat your oven to 350°F (175°C). Line a 9×13 inch baking pan with foil or parchment paper, leaving an overhang on the sides. Lightly grease the liner to prevent sticking and ensure easy removal of your beautiful red velvet brownies.
💡 mia’s Pro Tip: Using parchment paper with an overhang makes lifting the brownies out of the pan a breeze, saving you from awkward digging and keeping your pan clean!
Step 2: Melt Chocolate and Butter
In a microwave-safe bowl or a small saucepan over low heat, gently melt the 2 1/4 sticks of unsalted butter. Once melted, add the Ghirardelli Milk Chocolate Chips. Stir constantly with a whisk until both are completely melted and smooth. Remove from heat and let it cool slightly to room temperature. This step is crucial to avoid scrambling the eggs.
Step 3: Combine Wet Ingredients
In a large mixing bowl, whisk together the 5 large eggs (make sure they’re at room temperature for better emulsification), 1/2 cup granulated sugar, and 1 1/4 cups packed brown sugar until well combined. Whisk in the 1 1/4 teaspoons vanilla extract and the 2 tablespoons of red food coloring until the mixture is a uniform, vibrant red. Add the slightly cooled melted chocolate mixture to the egg and sugar mixture and whisk until smooth and fully incorporated. Ensure the chocolate mixture is not hot to prevent curdling the eggs.
⚠️ Common Mistake to Avoid: Adding hot melted chocolate to the eggs can cook them, resulting in a less smooth brownie batter. Always let your chocolate mixture cool down for a few minutes before combining it with the eggs and sugar.
Step 4: Add Dry Ingredients
In a separate medium bowl, whisk together the 2 cups all-purpose flour, 1 teaspoon baking powder, 3 tablespoons Ghirardelli unsweetened cocoa powder, and 1 teaspoon salt. Gradually add the dry ingredients to the wet ingredients, stirring with a silicone spatula until just combined. Be careful not to overmix; stop as soon as you no longer see streaks of flour. Overmixing develops gluten and can lead to tough brownies.
Step 5: Bake the Brownies
Pour the batter evenly into the prepared 9×13 inch baking pan. Bake for 35-40 minutes, or until a toothpick inserted into the center comes out with moist crumbs attached, but not wet batter. Transfer the pan to a wire cooling rack and let the brownies cool in the pan for at least 15 minutes.
💡 mia’s Pro Tip: For that perfect fudgy texture, I always pull my brownies out when the toothpick has a few moist crumbs. They’ll continue to bake slightly as they cool in the pan, ensuring they don’t become dry and cakey.
Step 6: Prepare Cream Cheese Frosting
While the brownies cool, prepare the frosting. In a mixing bowl, combine the 4 ounces of softened cream cheese, 5 tablespoons of room-temperature unsalted butter, 1/8 teaspoon salt, and 1 teaspoon vanilla extract. Using an electric mixer, beat on medium-high speed until smooth and creamy. Gradually add 2 or 3 cups of confectioners’ sugar and 1-2 tablespoons of heavy cream or milk of choice, beating until well combined and the frosting reaches your desired consistency. Add more sugar for a thicker frosting or more cream/milk for a thinner, more spreadable one.
Step 7: Frost and Chill
Once the brownies have cooled significantly, you can frost them. For best results, I recommend either refrigerating them, covered, until they are completely cool to the touch, or letting them come to room temperature before frosting. Spread the cream cheese frosting evenly over the cooled brownies. For clean cuts, chill the frosted brownies in the refrigerator for at least 30 minutes before slicing.
| Step | Action | Duration | Key Visual Cue |
|---|---|---|---|
| 1 | Preheat & Prep Pan | 5 minutes | Oven at 350°F, pan lined & greased. |
| 2 | Melt Chocolate & Butter | 5-7 minutes | Smooth, glossy mixture. |
| 3 | Combine Wet Ingredients | 5 minutes | Uniform vibrant red batter with incorporated chocolate. |
| 4 | Add Dry Ingredients | 2 minutes | Just combined, no flour streaks visible. |
| 5 | Bake Brownies | 35-40 minutes | Toothpick with moist crumbs. |
| 6 | Make Frosting | 5-7 minutes | Smooth, creamy, spreadable consistency. |
| 7 | Frost & Chill | 30+ minutes | Evenly frosted, firm before cutting. |
Serving & Presentation
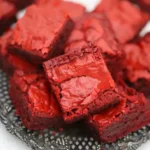
These gorgeous red velvet brownies are a treat for the eyes as much as they are for the palate. I love slicing them into neat squares, ensuring each piece gets a generous swirl of that dreamy cream cheese frosting. In NYC, we appreciate good presentation, so I often serve them on a simple white platter to let their vibrant color pop. For a bit of flair, a light dusting of cocoa powder or a few fresh raspberries can add a sophisticated touch. They are perfect as a standalone dessert, but pair wonderfully with a simple cup of coffee or a glass of milk.
From a culinary perspective, the contrast between the rich, dark red brownie and the bright white frosting is visually striking. It’s a classic combination that always impresses. Think of it like a beautiful Moroccan tile pattern, where contrasting colors create a harmonious design. This visual appeal makes them ideal for celebrations, especially Valentine’s Day, or any occasion where you want to add a festive touch. They have that certain je ne sais quoi that makes people smile before they even take a bite.
| Pairing Type | Suggestions | Why It Works |
|---|---|---|
| Side Dish | Not applicable | These are a decadent dessert, best served on their own. |
| Sauce / Dip | A raspberry coulis or a dollop of whipped cream | The tartness of raspberry cuts the richness, while cream adds extra indulgence. |
| Beverage | Espresso, strong coffee, or a rich hot chocolate | The bitterness of coffee or chocolate complements the sweetness and richness of the brownies. |
| Garnish | Fresh raspberries, white chocolate shavings, or a sprig of mint | Adds a pop of color and freshness, or a touch of elegance. |
Make-Ahead, Storage & Reheating
Life in New York can be hectic, so I always appreciate recipes that can be made ahead. These red velvet brownies are perfect for that! I often bake them a day in advance, let them cool completely, and then frost them. This allows the flavors to meld beautifully and makes them even more convenient for last-minute entertaining or satisfying a sudden craving. The firm texture when chilled also makes them easier to slice cleanly, just as I learned to do with delicate pastries in Paris.
| Method | Container | Duration | Reheating Tip |
|---|---|---|---|
| Refrigerator | Airtight container | 3-4 days | Let sit at room temperature for 15-20 minutes before serving for optimal texture. The cream cheese frosting will firm up in the fridge. |
| Freezer | Airtight container or freezer bag | Up to 2 months | Thaw overnight in the refrigerator. For the best texture, let them come to room temperature for at least an hour before enjoying. |
| Make-Ahead | Unfrosted brownies in airtight container | Up to 2 days | Frost just before serving or up to 24 hours in advance. The frosting will hold up well when refrigerated. |
When reheating, I find that a quick warm-up can bring back that lovely fudgy texture. If you prefer them warm, you can gently heat individual brownies in the microwave for about 10-15 seconds. Be cautious not to overheat, as this can change the texture. For a truly luxurious experience, especially if you’ve stored them in the fridge, letting them come to room temperature naturally is often the best approach. It allows the butter and chocolate to soften beautifully, recapturing that fresh-baked quality.
Variations & Easy Swaps
| Variation | Key Change | Best For | Difficulty Impact |
|---|---|---|---|
| Chocolate Lovers Dream | Add chocolate chips or chunks to batter | Intensifying the chocolate flavor | No impact; adds texture. |
| Gluten-Free / Dairy-Free | Use GF flour blend & dairy-free alternatives | Dietary needs | Minimal change, ensure good GF flour. |
| Spiced Winter Twist | Add cinnamon, nutmeg, or cardamom | Seasonal warmth and spice | Adds complexity, very subtle. |
Chocolate Lovers Dream
For those who believe you can never have too much chocolate, I suggest folding in an extra cup of Ghirardelli milk chocolate chips or dark chocolate chunks into the batter along with the dry ingredients. This adds pockets of molten chocolate throughout the brownie, making each bite even more decadent. It’s a simple addition, very much in the spirit of North African desserts where layers of flavor and texture are celebrated, and it ensures this recipe is the best red velvet brownies for any chocoholic.
Gluten-Free Dairy-Free Red Velvet Brownies
Adapting this recipe to be gluten-free and dairy-free is surprisingly simple. For the gluten-free version, I recommend a good quality 1:1 gluten-free baking flour blend that contains xanthan gum. For dairy-free, use a good quality dairy-free butter substitute and dairy-free milk or cream for the frosting. The texture will be very similar, potentially a touch softer, and the flavor remains wonderfully rich. These small adjustments mean everyone can enjoy these decadent easy red velvet brownies.
Spiced Winter Red Velvet Brownies
To add a touch of warmth and spice, especially during the cooler months, I like to incorporate warm spices. A quarter teaspoon each of cinnamon and a pinch of nutmeg, whisked in with the dry ingredients, adds a lovely depth that complements the chocolate and red velvet notes. This inspiration often comes from my Moroccan roots, where spices are central to creating aromatic and comforting dishes. It’s a subtle change, perfect for when you want your homemade red velvet brownies to feel extra cozy.
What is the difference between red velvet brownies and regular brownies?
The primary difference lies in flavor and color. Red velvet brownies typically incorporate cocoa powder (though less than traditional chocolate brownies), red food coloring for their signature vibrant hue, and often a touch of an acidic ingredient like vinegar or buttermilk, which reacts with baking soda to enhance the red color and add a subtle tang. Traditional brownies are usually richer in chocolate flavor and darker in color, relying solely on cocoa and chocolate for their taste. My recipe balances these elements for a unique red velvet chocolate experience.
Can I use a boxed red velvet cake mix to make homemade red velvet brownies?
While you *can* use a boxed red velvet cake mix as a shortcut, it won’t produce the same depth of flavor and fudgy texture as making them from scratch. Cake mixes are formulated for a lighter, cakier texture. To make brownies from a mix, you’d typically follow the package directions, but you can try substituting some of the liquid with melted butter or adding extra chocolate chips to achieve a denser result. However, for the truly best homemade red velvet brownies experience, I highly recommend using a scratch recipe like mine.
How do I keep red velvet brownies moist and fudgy instead of cakey?
Achieving a moist and fudgy texture is all about the ingredients and the baking process. First, ensure you’re using melted butter and chocolate, as this creates a denser base. Don’t overmix the batter once the flour is added, as this develops gluten and leads to a cakey texture. The most critical step is not to overbake them. Pull them out of the oven when a toothpick comes out with moist crumbs attached. The residual heat will continue to cook them as they cool, ensuring a perfectly fudgy center.
What is the best cream cheese frosting recipe to top red velvet brownies?
The best cream cheese frosting for red velvet brownies is one that is smooth, creamy, and has a perfect balance of tanginess and sweetness. My recipe uses softened cream cheese and butter, heavy cream for smoothness, and confectioners’ sugar for sweetness. Crucially, ensure your cream cheese and butter are at room temperature. This ensures the frosting emulsifies properly and doesn’t have lumps. A touch of salt and vanilla extract rounds out the flavor beautifully. For a thicker frosting, use more sugar; for a thinner, more spreadable consistency, add a little more cream or milk.
Can I make red velvet brownies without food coloring?
Yes, you can make red velvet brownies without traditional red food coloring, but they won’t have that signature vibrant red hue. The “red velvet” flavor comes from a combination of cocoa powder, an acidic ingredient (like vinegar or buttermilk), and sometimes a touch of baking soda. When these react, they can create a subtle reddish-brown color. If you want a more natural red color, you can experiment with beet powder, as mentioned in my ingredient spotlight. However, the color will be much less intense than using food coloring. The flavor profile will still be present, but the visual impact will differ significantly.
How much red food coloring should I use for the best color?
For the most vibrant and appealing red color in your brownies, I recommend using about 2 tablespoons of gel-based red food coloring. Gel food coloring is more concentrated than liquid versions, meaning you need less to achieve an intense hue without adding excess moisture to the batter. If you are using liquid food coloring, you might need to use more, and be mindful of how it affects the batter’s consistency. Always add it gradually until you reach your desired shade. The goal is a rich, deep red that stands out beautifully.
What kind of chocolate is best for red velvet brownies?
For the best red velvet brownies, a combination of good quality chocolate chips or chopped chocolate and unsweetened cocoa powder is ideal. I personally love using Ghirardelli milk chocolate chips for their creamy sweetness and smooth melting properties, as detailed in my recipe. This provides a luscious chocolate base. Unsweetened cocoa powder adds a deeper, more intense chocolate flavor. You can also opt for dark chocolate if you prefer a less sweet brownie with a more pronounced chocolate profile. The key is quality; even a good brand of semi-sweet chocolate chips will make a difference.
Can I make red velvet brownies in a different pan size?
Yes, you can adapt the pan size, but it will affect the baking time and thickness of your brownies. A 9×13 inch pan is standard for this recipe, yielding about 12-16 brownies that are perfectly thick. If you use a smaller pan, like an 8×8 inch, your brownies will be thicker and require a longer baking time. Conversely, a larger pan, like a 10×15 inch jelly roll pan, will result in thinner brownies that bake much faster. Always keep an eye on the brownies and test for doneness with a toothpick, as baking times will vary significantly with pan size.
Share Your Version!
I truly hope you adore making and eating these best homemade red velvet brownies as much as I do! When you whip up a batch, please consider leaving a star rating and a comment below to share your experience. I love hearing from you! If you share photos on social media, especially Instagram or Pinterest, please tag me @exorecipe — I’m always thrilled to see your beautiful creations!
I’m always curious to hear how you adapt recipes. Did you try any of the variations, or perhaps discover a new favorite pairing for these rich brownies? Let me know in the comments below! Your feedback helps me refine my recipes and inspires me to create new ones.
From my NYC kitchen to yours — I hope this recipe brings as much warmth to your table as it does to mine. — mia 🧡
Love This Recipe? Save It to Pinterest!
If you enjoyed this Best Homemade Red Velvet Brownies recipe, don’t let it get lost in your browser tabs! 😄 Pin it now so you can find it again anytime — and explore hundreds more tried-and-tested recipes waiting for you on my Pinterest boards.
👉 Follow mia on Pinterest @chefrecipes2
📌 Pin this recipe · 🔁 Re-pin your favorites · 💬 Tag me when you make it — I love seeing your creations!
Best Homemade Red Velvet Brownies
Description
Rich, cream cheese frosted decadent, homemade red velvet brownie! These are a Valentine’s Day sweet treat sure to get some attention!
Ingredients
- 2 1/4 sticks unsalted butter (cut into chunks)
- 3 1/2 cups Ghirardelli Milk Chocolate Chips
- 5 large eggs (room temp)
- 1/2 cup granulated sugar
- 1 1/4 cups packed brown sugar
- 1 teaspoon salt
- 1 1/4 teaspoons vanilla extract
- 2 tablespoons red food coloring
- 2 cups all purpose flour
- 1 teaspoon baking powder
- 3 tablespoons Ghirardelli unsweetened cocoa powder
- 4 ounces cream cheese (softened)
- 5 tablespoons unsalted butter (room temperature)
- 1/8 teaspoon salt
- 1 teaspoon vanilla extract
- 2 or 3 cups confectioners sugar
- 1–2 tablespoons heavy cream or milk of choice
Instructions
- Preheat oven to 350 degrees.
- Line a 9×13 baking pan with foil or parchment paper and very lightly grease.
- Melt milk chocolate and butter in microwave until melted or use a small saucepan, melt the butter over your lowest setting, then add the milk chocolate chips stirring constantly with a small whisk until melted and smooth. Turn off heat and let set to cool.
- In a large mixing bowl, add the eggs, vanilla and sugars together and whisk together. Then whisk in the red food coloring.
- Whisk in the cooled down melted chocolate mixture into the egg/sugar mixture until combined and smooth. Make sure the melted butter isn't hot, so it doesn't curdle the eggs when you add it.
- Add flour, baking powder, salt and cocoa powder together and stir together with a silicone spatula until mixture is completely combined.
- Bake 35-40 minutes, until toothpick comes out clean and transfer pan to cooling rack and let cool for 15 minutes.
- Refrigerate, covered until cooled to frost or let brownies come to room temperature before frosting.
- Place cream cheese, butter, vanilla, salt, confectioner's sugar and cream/milk in mixing bowl. Using a mixer, beat on medium high until well combined. Mix until smooth and creamy.

k">
Tried This Recipe? Leave a Comment!
Did you make this recipe? I’d love to hear how it turned out! Please leave a comment and a rating below. Your feedback helps other home cooks and supports cheerychop.com!
For more delicious inspiration, follow me on Pinterest!
