Table of Contents
Homemade Nutter Butters – Peanut Butter Sandwich Cookies Better Than the Original
I still remember the first time I bit into a Nutter Butter as a kid in Morocco—my mother had picked up a box from a American import store in Casablanca, and I was absolutely hooked by that perfect peanut crunch and creamy filling. Now, after years of training in Paris pastry kitchens and cooking in my New York City apartment, I’ve developed what I truly believe is the ultimate copycat Nutter Butter recipe. This easy Nutter Butter recipe captures everything you love about the classic but with real butter, no preservatives, and a depth of flavor that only homemade baking can deliver. Let me show you how to make these irresistible peanut butter sandwich cookies from scratch!
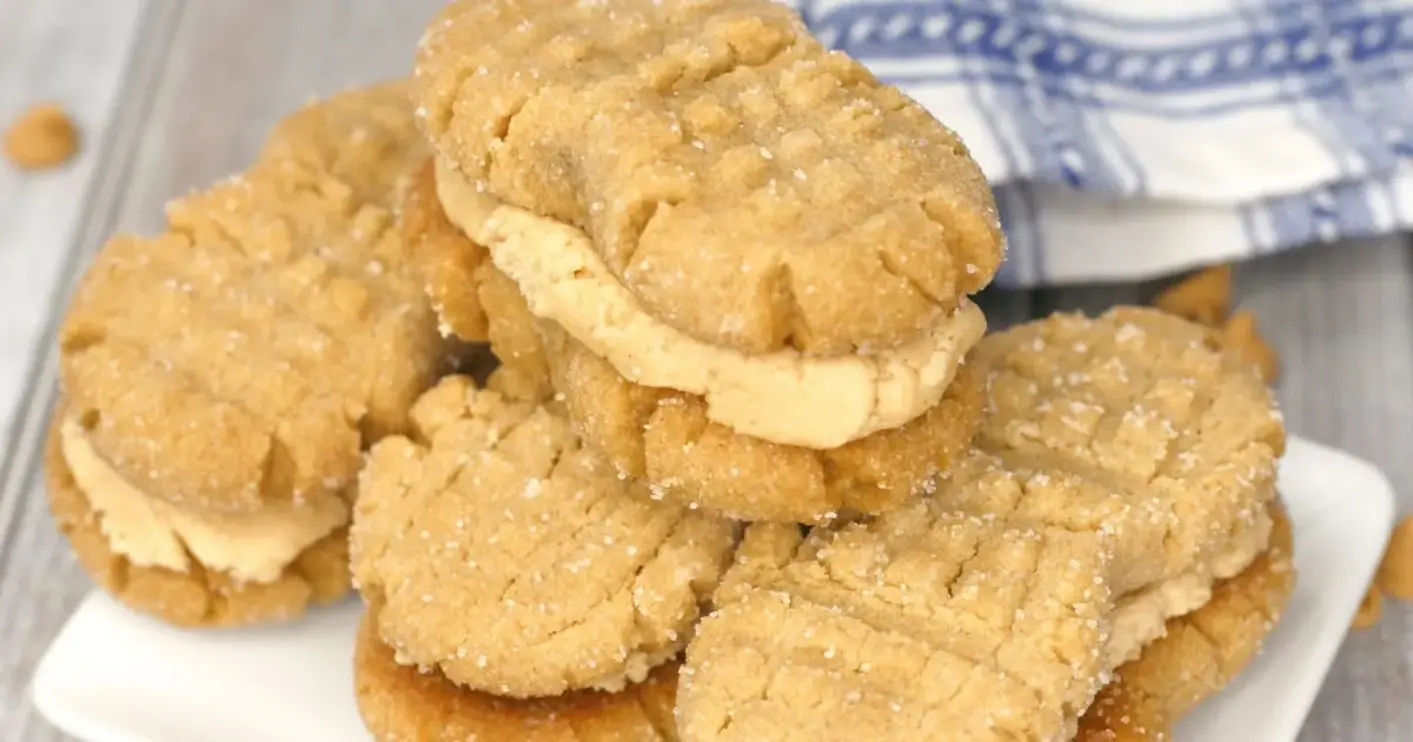
These homemade peanut butter cookies have a beautifully tender, melt-in-your-mouth texture that’s slightly crisp on the edges but soft in the center. The aroma of peanut butter and vanilla fills your kitchen as they bake. Each bite delivers that iconic peanut-shape cookie that’s perfectly sweet, with a luscious, creamy filling that’s far richer than the store-bought version. The subtle saltiness of the peanut butter balanced with the sweetness of brown sugar creates a cookie you simply can’t stop eating.
I’ve tested this homemade Nutter Butter cookies recipe countless times—using American all-purpose flour, supermarket peanut butter, and standard baking tools—so it’s truly foolproof for any home baker. My unique angle? A light brown sugar base that adds a touch of molasses complexity, paired with a no-chill dough that saves you time. Plus, I’ll share my secret for getting that perfect criss-cross pattern and peanut shape every time—without any special equipment. From my NYC kitchen to yours, let’s bake!
Why This Homemade Nutter Butters Recipe Is the Best
The Flavor Secret: Most copycat recipes use granulated sugar alone, but I incorporate light brown sugar for a subtle caramel note that mimics the original’s distinct sweetness. Growing up in Morocco, my mother taught me that the best sweets have layers—and here, the brown sugar adds a warm, almost butterscotch undertone that complements the peanut butter beautifully. The filling also gets a pinch of salt that cuts the sweetness perfectly.
Perfected Texture: After years of refining pastry techniques in Paris, I learned that the key to a soft, not dry, sandwich cookie is using room-temperature butter and not overmixing the dough. This method ensures a delicate crumb that holds up perfectly to the filling. The cookies bake in just 10 to 12 minutes, staying soft in the center—just like the original—but with a far superior, homemade taste.
Foolproof & Fast: This easy Nutter Butter recipe requires no chilling time for the dough, which means you can go from mixing bowl to oven in under 30 minutes. The ingredients are all pantry staples you probably already have on hand. I’ve designed the steps to be clear and forgiving, so even a beginner baker will achieve gorgeous, professional-looking peanut butter cookies every single time.
Copycat Nutter Butter Cookies Ingredients
I source my peanut butter from a local market in Brooklyn where they have a creamy, natural grind that works perfectly here. But in my early days in Paris, I learned to use creamy, commercial peanut butter for the most reliable texture—it’s what makes these cookies so addictive. The ingredients are simple and come together beautifully.
Ingredients List
- 1 1/2 cups all purpose flour
- 1 teaspoon baking soda
- 1/4 teaspoon kosher salt
- 1/2 cup unsalted butter (softened)
- 1 cup light brown sugar
- 1 cup creamy peanut butter
- 1 large egg
- 1/2 teaspoon pure vanilla extract
- 1/2 cup sugar to roll the cookie dough in
- For the Filling: 1/4 cup unsalted butter (softened)
- 1/2 cup creamy peanut butter
- 1 1/2 cups powdered sugar
- 2 Tablespoons milk
- 1/4 teaspoon vanilla extract
Ingredient Spotlight
Peanut Butter: The heart of this recipe. Use a creamy, commercial peanut butter like Skippy or Jif for the best texture—they have stabilizers that keep the cookies from spreading too much and the filling creamy. Natural peanut butter (the kind that separates) can work but may cause the dough to be a bit greasy and the cookies to spread more. Adjust by adding a tablespoon more flour if using natural.
Brown Sugar: I prefer light brown sugar here for its mild molasses flavor that doesn’t overpower the peanut butter. Dark brown sugar will make the cookies slightly darker and more caramel-like, which is also delicious but less like the original. Make sure to pack your brown sugar firmly into the measuring cup for accuracy.
Butter: Unsalted butter allows you to control the salt level. I use European-style butter when I can find it at the Union Square Greenmarket in NYC—it has a higher fat content, resulting in a richer cookie. If you only have salted butter, omit the added kosher salt in the recipe.
| Original Ingredient | Best Substitution | Flavor / Texture Impact |
|---|---|---|
| Creamy Peanut Butter (commercial) | Natural peanut butter (stir well, add 1 tbsp flour) | Slightly more oily dough; cookies may spread a little more |
| Light Brown Sugar | Dark brown sugar or 1 cup granulated sugar + 1 tbsp molasses | Darker cookie, richer caramel flavor |
| All-Purpose Flour | Gluten-free 1:1 baking flour (with xanthan gum) | Slightly more crumbly, but still delicious |
How to Make Homemade Nutter Butters — Step-by-Step
Ready to bake? Follow these simple steps, and I promise you’ll be sinking your teeth into the best copycat Nutter Butter cookies in no time. Each step includes my tested tips for perfect results.
Step 1: Prep the Oven and Dry Ingredients
Preheat your oven to 350°F. Line a cookie sheet with parchment paper or a silicone baking mat. Pour 1/2 cup of sugar into a small bowl and set aside. In a mixing bowl, whisk together the flour, baking soda, and salt until combined.
💡 mia’s Pro Tip: For evenly baked cookies, place your baking sheet on the middle rack. Avoid using dark, non-stick pans—they absorb more heat and can over-brown the bottoms.
Step 2: Cream the Wet Ingredients
Using a standing mixer with the paddle attachment or an electric hand mixer, cream together the softened butter, brown sugar, and peanut butter on medium speed until light and fluffy—about 2 minutes. Scrape down the sides of the bowl. Add the egg and vanilla extract, then continue mixing until fully incorporated.
⚠️ Common Mistake to Avoid: Don’t overcream! Once the egg is in, mix just until combined. Overmixing can cause the cookies to spread too much during baking.
Step 3: Combine and Form Dough
Gradually pour the dry ingredient mixture into the wet ingredients while mixing on low speed. Stop as soon as the flour disappears—do not overmix. The dough will be quite soft but not sticky. Divide the dough into small balls using about 1 1/2 tablespoons each (a small cookie scoop works great). Roll each ball into a log shape about 2 inches long, then roll in the sugar bowl to coat evenly.
💡 mia’s Pro Tip: For a more authentic peanut shape, roll the logs slightly thicker in the center and taper the ends just a bit. This helps the criss-cross pattern look more defined.
Step 4: Create the Peanut Pattern
Place the dough logs on the prepared cookie sheet, spacing them about 2 inches apart. Using the tines of a fork, gently press a criss-cross pattern into the top of each log. First press lengthwise, then crosswise. Then use your fingers to gently pinch the center of the cookie to create the classic peanut waist.
⚠️ Common Mistake to Avoid: Don’t press too hard with the fork or you’ll flatten the cookies too much. A gentle, even press is all you need for a beautiful pattern.
Step 5: Bake and Cool
Bake for 10 to 12 minutes, until the edges are lightly golden brown but the centers are still soft and pale. The cookies will look slightly underdone in the middle—that’s perfect! Allow them to cool on the baking sheet for exactly 5 minutes, then transfer to a wire rack to cool completely before filling.
💡 mia’s Pro Tip: The 5-minute rest on the hot baking sheet is critical—it allows the cookies to set without over-baking. Move them too soon and they can break.
Step 6: Make the Filling and Assemble
While the cookies cool, make the filling: In a clean mixing bowl, beat the softened butter and peanut butter on medium speed until fluffy—about 2 minutes. Gradually mix in the powdered sugar, milk, and vanilla extract until smooth and spreadable. Group your baked cookies into pairs by size and shape. Spoon about 1 tablespoon of filling onto the flat bottom of one cookie, then gently press the second cookie on top to create a sandwich.
⚠️ Common Mistake to Avoid: Don’t overfill! The cookies are delicate, and too much filling will squish out the sides. A generous tablespoon is all you need for that perfect ratio of cookie to cream.
| Step | Action | Duration | Key Visual Cue |
|---|---|---|---|
| 1 | Preheat oven, mix dry ingredients | 5 minutes | Flour mixture uniform |
| 2 | Cream butter, sugar, peanut butter | 2 minutes | Light and fluffy |
| 3 | Combine wet & dry, form logs | 5 minutes | Dough comes together; logs coated in sugar |
| 4 | Press criss-cross and pinch centers | 3 minutes | Defined peanut shape |
| 5 | Bake | 10-12 minutes | Golden edges, soft centers |
| 6 | Cool, make filling, assemble | 15 minutes | Cookies cool; filling creamy |
Serving & Presentation
These homemade Nutter Butters are wonderful served as an afternoon treat with a glass of cold milk or a warm mug of coffee. I love arranging them on a simple wooden board or a vintage plate I picked up at the Brooklyn Flea Market—their golden peanut shape is so charming. For gatherings, stack them in a small tower or present them in a glass jar tied with a ribbon.
In Morocco, we’d serve these alongside a strong mint tea for a delicious contrast of sweet and herbal, but they’re also perfect for bake sales, lunchboxes, or an after-school snack. If you’re feeling fancy, dust the tops with a little confectioners’ sugar or drizzle with melted dark chocolate—both pair beautifully with the peanut butter filling. Think of them as a playful, irresistible addition to any dessert table.
| Pairing Type | Suggestions | Why It Works |
|---|---|---|
| Side Dish | Fresh fruit (apple slices, strawberries) | Balances the richness with acidity and freshness |
| Sauce / Dip | Chocolate ganache, caramel sauce | Adds extra sweetness and decadence |
| Beverage | Cold milk, hot coffee, Moroccan mint tea | Creaminess complements the cookie; tea adds herbal note |
| Garnish | Confectioners’ sugar, melted chocolate | Enhances presentation and flavor |
Make-Ahead, Storage & Reheating
Living in NYC means I’m always on the go, so I love a recipe that fits into a busy schedule. These cookies store beautifully and can be prepped in advance. Here’s how I keep them fresh and delicious all week.
| Method | Container | Duration | Reheating Tip |
|---|---|---|---|
| Refrigerator | Airtight container | Up to 5 days |
 Tried This Recipe? Leave a Comment!Did you make this recipe? I’d love to hear how it turned out! Please leave a comment and a rating below. Your feedback helps other home cooks and supports cheerychop.com! For more delicious inspiration, follow me on Pinterest!  Hi, I’m Ema! Let’s make every bite unforgettable! ABOUT MELet's connect |