Table of Contents
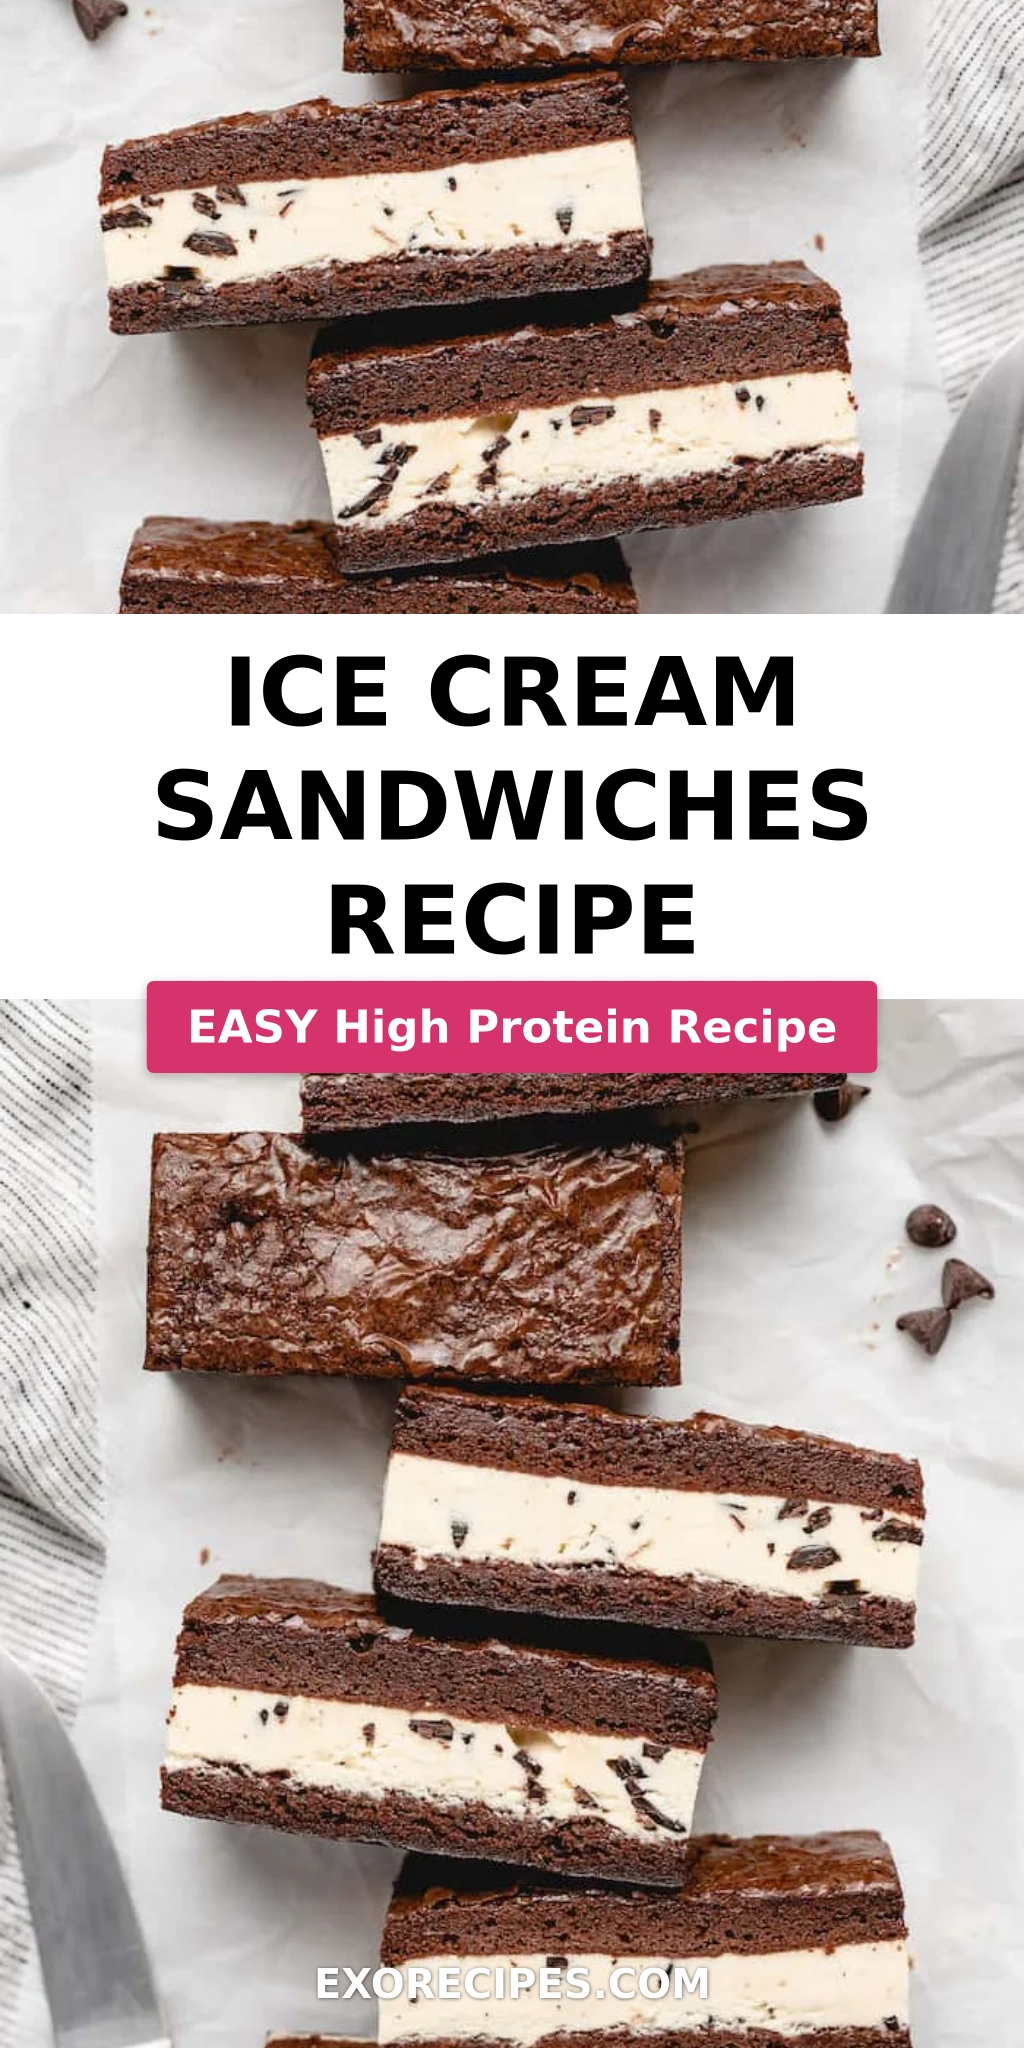
Ice Cream Sandwiches Recipe: The Ultimate Homemade Summer Treat with Fudge Brownie Layers
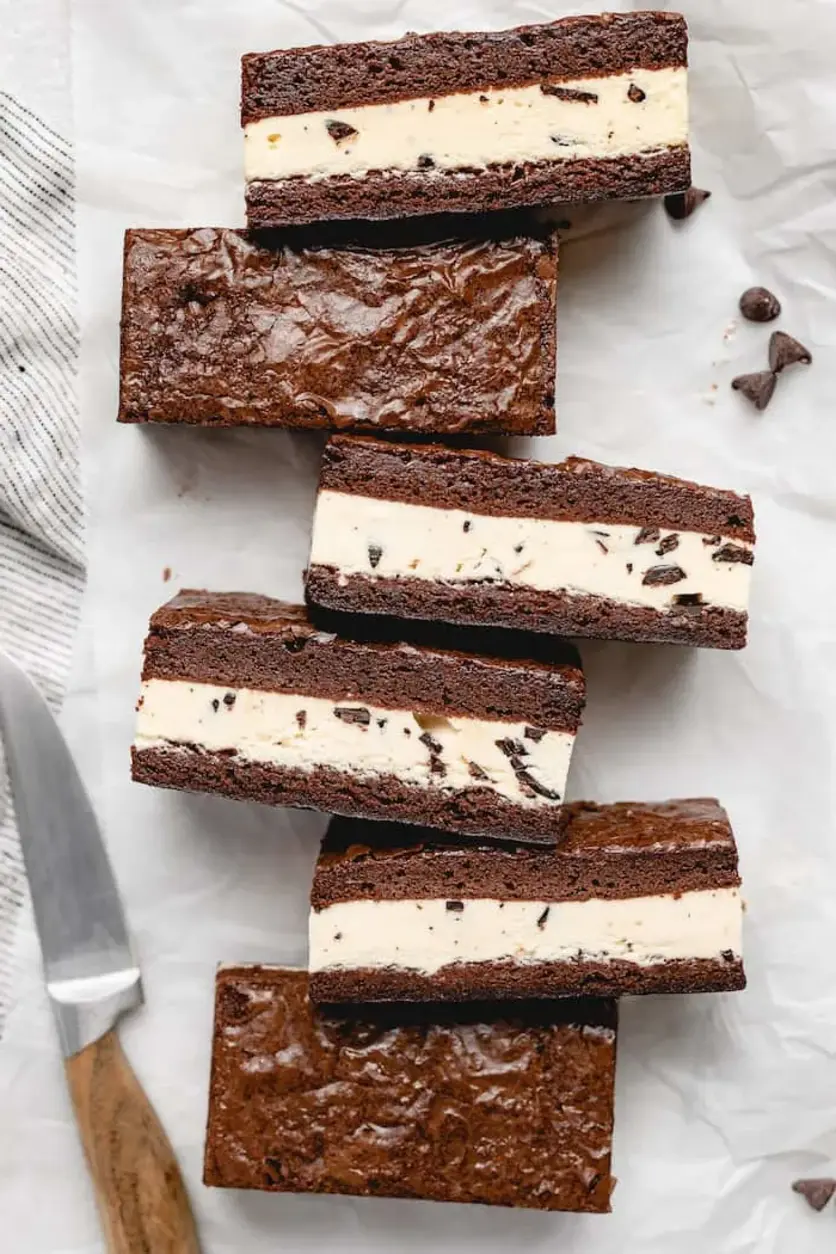
I still remember the first time I made these Ice Cream Sandwiches in my tiny New York City apartment, just after I returned from culinary school in Paris. My mother used to make simple cookies with ice cream in Morocco, but I dreamed of something richer, fudgier. That’s how this homemade ice cream sandwich recipe was born—a thick brownie base that holds its texture even when frozen, sandwiching your favorite ice cream in a perfect bite. Growing up, my mom’s kitchen in Marrakech was full of sweet treats, but this chocolate ice cream sandwich creation is pure NYC indulgence.
Imagine sinking your teeth into a soft, crackly brownie layer—deeply chocolate and fudgy—with a velvety core of cold, creamy ice cream. The contrast between the warm, rich cocoa notes and the refreshing chill is absolutely addictive. I always use a vanilla bean ice cream or a high-quality chocolate variety, but the beauty here is that the brownie is sturdy enough to support almost any flavor. The texture is everything: the brownies are slightly underbaked to stay soft, so after freezing they don’t turn into bricks but remain chewy and luscious.
My version of the Best Ice Cream Sandwiches is different because I use a special brownie recipe that yields a perfectly crackled top without overbaking—straight from my Paris pastry training. The trick is mixing the eggs thoroughly after each addition to create that signature sheen and crackle. I’m going to share my pro tip for getting clean cuts every time and the most common mistake people make when spreading the ice cream. Trust me, once you make these easy ice cream sandwiches from scratch, you’ll never go back to store-bought.
Why This Ice Cream Sandwiches Recipe Is the Best
The flavor secret here is twofold: first, I use both melted butter and vegetable oil to give the brownies a rich, moist crumb that stays tender even when frozen. Second, I add light brown sugar alongside granulated sugar, which brings a subtle molasses undertone that deepens the chocolate flavor. This is a technique I adapted from a French pâtissière in Paris who taught me how sugar types can change a dessert’s character entirely. For these chocolate ice cream sandwiches, you want a brownie that tastes like a premium fudge bar, not just a cookie.
Perfected texture comes from my refusal to overbake. As soon as a toothpick comes out with a few moist crumbs, I pull the pans out. The brownies continue to set as they cool, and once frozen, they land in that perfect sweet spot—soft enough to bite into without shattering the ice cream layer. I also insist on room temperature eggs, which blend more evenly into the batter, creating a smooth, uniform crumb. It’s a small step but makes a world of difference for homemade ice cream sandwiches.
Foolproof and fast? This recipe is designed for home cooks who want impressive results without complicated techniques. You don’t need a stand mixer—a hand mixer works beautifully. The most challenging part is waiting for the freezing time! And since the brownie batter is divided into two pans, you get an even layer every time. Even if you’re new to making Ice Cream Sandwich Dessert from scratch, the clear visual cues and easy steps will guide you to a perfect result.
Best Ice Cream Sandwiches Ingredients
Every Sunday morning, I walk down to the Union Square Greenmarket and pick up farm-fresh eggs and butter from a local dairy. That butter goes into this recipe, and I can almost taste the Moroccan countryside my mother described from her childhood. For these ice cream sandwiches, I use ingredients you already have in your pantry—nothing exotic—but each one plays a crucial role in building the ultimate fudge brownie base.
Ingredients List
- 1 1/2 cups unsalted butter, melted
- 2 1/4 cups granulated sugar
- 1 1/2 cups light brown sugar, packed
- 6 large eggs, room temperature
- 3 tablespoons vegetable oil
- 2 tablespoons pure vanilla extract
- 2 1/4 cups all purpose flour
- 1 1/2 cups cocoa powder
- 1 1/2 teaspoons salt
- 1.5 quarts your favorite ice cream flavor (you can use less if you want)
Ingredient Spotlight
Unsalted Butter – Butter provides richness and tenderness. I always use unsalted so I control the salt level. In a pinch, salted butter works, but reduce the added salt to 1 teaspoon. For an even deeper flavor, you can brown the butter first, but then let it cool completely before mixing.
Cocoa Powder – Use natural unsweetened cocoa powder, not Dutch-process, for a more intense chocolate flavor that pairs beautifully with the brown sugar. If you only have Dutch-process, the brownies will be darker and slightly milder in flavor. I buy my cocoa from a specialty shop near Chelsea Market, but any good brand works.
Ice Cream – The best ice cream for these sandwiches is one that holds its shape after softening—a premium brand with low overrun (less air whipped in) works perfectly. Avoid gelato or very soft artisan ice creams because they can make the brownie soggy. My personal favorites for chocolate ice cream sandwiches are vanilla bean, strawberry, or even a coffee flavor to contrast the cocoa.
| Original Ingredient | Best Substitution | Flavor / Texture Impact |
|---|---|---|
| Unsalted butter | Salted butter (reduce added salt to 1 tsp) | Slightly saltier overall, but still delicious |
| Granulated sugar | Coconut sugar (1:1 swap) | Slightly less sweet with a caramel undertone |
| All purpose flour | Gluten-free 1:1 blend (add 1 tsp xanthan gum if blend lacks it) | Slightly more delicate crumb; still holds well when frozen |
| Cocoa powder | Dutch-process cocoa powder | Darker color, milder chocolate taste |
| Large eggs | Flax eggs (3 tbsp ground flax + 9 tbsp water per egg) | Denser, less crackly; best for vegan version |
How to Make Homemade Ice Cream Sandwiches — Step-by-Step
Making these Easy Ice Cream Sandwiches is simpler than you think. I’ve broken it down into clear steps so you can follow along confidently.
Step 1: Prepare Pans
Preheat the oven to 350°F. Grease two 8×8 inch baking pans with butter or baking spray, then line the bottom with parchment paper, leaving about 4-6 inches of paper hanging over the sides. This overhang is your handle—it makes lifting the brownies out so much easier.
⚠️ Common Mistake to Avoid: Skipping the parchment paper. Without it, the brownies will stick and break when you try to lift them, ruining your beautiful layers.
Step 2: Mix Wet Ingredients
In a medium sized bowl, add melted butter, granulated sugar, and light brown sugar. Mix with a hand mixer on medium speed until smooth, about 1 minute. The mixture should look glossy. Add eggs one at a time, mixing well after each addition—this is crucial for creating that crackled top we all love in brownies.
💡 mia’s Pro Tip: Take your time with the eggs. Mix for about 30 seconds after each one until the batter is light and airy. This step is what gives your brownies that beautiful shiny crust.
Step 3: Add Oil and Vanilla
Mix in the vegetable oil and pure vanilla extract. Continue mixing on medium speed for another minute until everything is fully combined. The batter will be quite thin at this point—that’s perfect.
Step 4: Combine Dry Ingredients
In a separate bowl, whisk together the all purpose flour, cocoa powder, and salt. Reduce the mixer speed to low. In intervals, add the flour mixture to the wet mixture until just incorporated. Scrape down the sides as needed. Do not overmix here—stop as soon as no white streaks remain.
⚠️ Common Mistake to Avoid: Overmixing the flour. This develops gluten and makes the brownies tough instead of fudgy. A few gentle folds are all you need.
Step 5: Divide and Bake
Divide the brownie batter evenly between the two prepared pans. Use a rubber spatula to gently spread it into an even layer—don’t press too hard. Bake for 30-40 minutes or until a toothpick inserted into the center comes out just barely clean. Do not overbake!
Step 6: Cool and Lift
Remove the pans from the oven and let the brownies cool for 10 minutes in the pans. Use the parchment paper to carefully lift the brownies out onto a cooling rack. Only peel the parchment off one of the halves. Allow both to cool completely until they reach room temperature—about 1 hour.
💡 mia’s Pro Tip: Keep the parchment on one half to make lifting easier later. It acts as a sling when you reassemble the sandwich.
Step 7: Soften Ice Cream
Thaw your ice cream for 5-10 minutes at room temperature until it’s soft enough to spread but not melted. I usually set it on the counter while the brownies cool. For the best ice cream sandwiches, you want it to be spreadable like thick frosting.
Step 8: Assemble the Sandwich
Return the first half of the brownie (the one with the parchment paper still on) to the pan, parchment side down. Using a large spoon or rubber spatula, spread the softened ice cream over the top. Use as much or as little as you prefer—I typically add about 3/4 of the container first, then add more if I want an extra indulgent treat.
⚠️ Common Mistake to Avoid: Spreading ice cream that is too hard—it will tear the brownie. Always thaw it properly first.
Step 9: Top and Freeze
Invert the second half of the brownie (the one with parchment removed) and place it over the ice cream layer. Cover the entire pan with aluminum foil or plastic wrap and freeze for at least 6 hours. Overnight is best for a clean, firm sandwich.
Step 10: Cut and Serve
When ready to serve, remove from the freezer and let thaw for 5-10 minutes. Use the parchment paper to lift the entire block out of the pan. Use a sharp knife to cut into 8 even squares. For the cleanest cuts, run the knife under hot water and wipe dry between each cut. Serve immediately and enjoy!
| Step | Action | Duration | Key Visual Cue |
|---|---|---|---|
| 1 | Prepare pans | 10 mins | Parchment overhang on both sides |
| 2 | Mix wet ingredients | 5 mins | Glossy, ribbon-like batter |
| 3 | Add oil and vanilla | 1 min | Smooth and liquid |
| 4 | Combine dry ingredients | 2 mins | No streaks of flour remain |
| 5 | Divide and bake | 30-40 mins | Crackled top, toothpick with moist crumbs |
| 6 | Cool and lift | 1 hour | Room temperature, firm to touch |
| 7 | Soften ice cream | 5-10 mins | Spreadable like thick frosting |
| 8 | Assemble sandwich | 5 mins | Even layer of ice cream on base |
| 9 | Top and freeze | 6+ hours | Firm, holds shape when lifted |
| 10 | Cut and serve | 5 mins | Clean edges, layered brownie and ice cream |
Serving & Presentation
When I serve these Ice Cream Sandwiches in my NYC kitchen, I love to plate them with a drizzle of warm chocolate sauce and a sprinkle of flaky sea salt. The salt echoes the savory touch we use in Moroccan sweets and balances the sweetness beautifully. For a more casual gathering, I set them out on a wooden board with fresh berries and mint sprigs for a pop of color.
I also remember summers in Paris where we’d enjoy ice cream sandwiches with a side of fresh fruit—it’s the perfect pairing. For an over-the-top treat, you can roll the edges of the ice cream layer in mini chocolate chips, crushed nuts, or rainbow sprinkles before freezing. It adds a festive touch and extra texture that takes this ice cream sandwich dessert to the next level.
Tried This Recipe? Leave a Comment!
Did you make this recipe? I’d love to hear how it turned out! Please leave a comment and a rating below. Your feedback helps other home cooks and supports cheerychop.com!
For more delicious inspiration, follow me on Pinterest!

Hi, I’m Ema!
Welcome to my kitchen! I’m a food enthusiast with a passion for creating delicious, approachable recipes that bring people together.
Let’s make every bite unforgettable!
ABOUT MELet's connect