Table of Contents
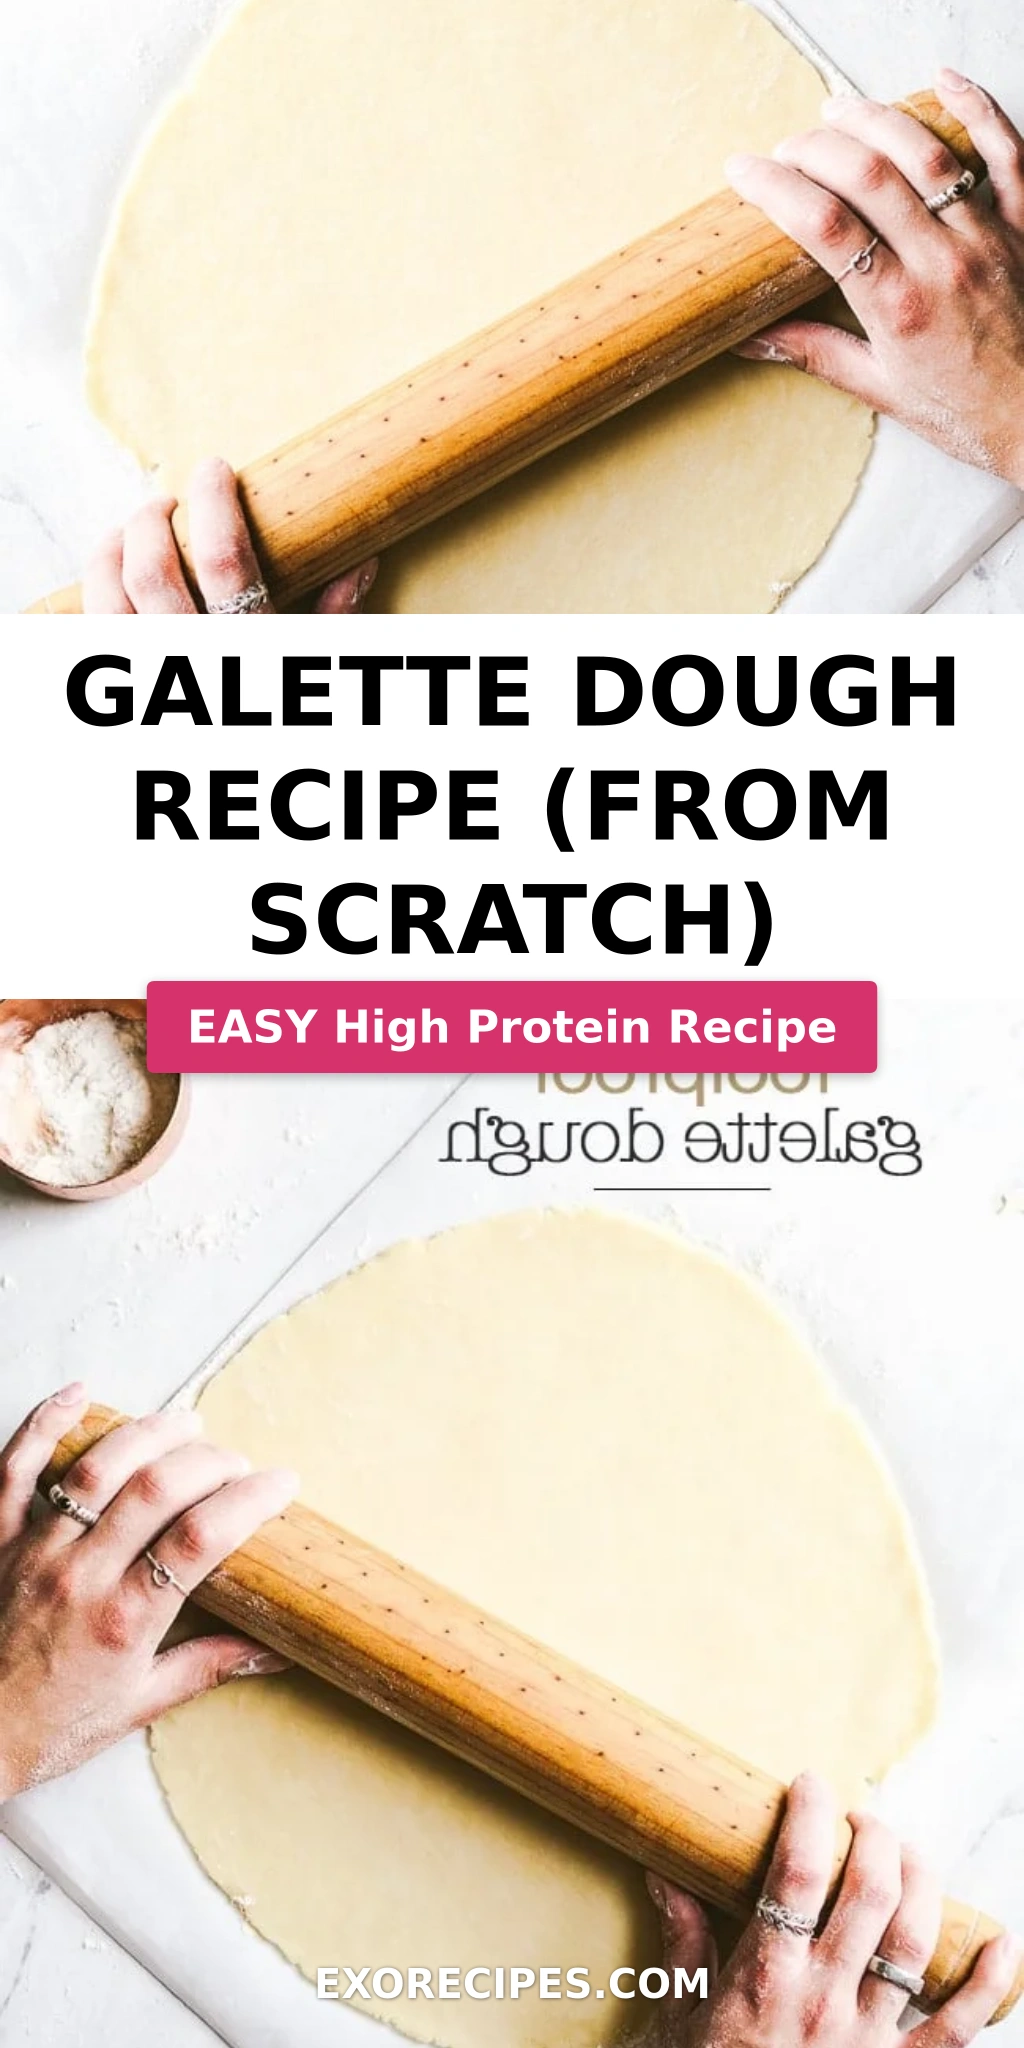
Galette Dough Recipe (From Scratch) – Simple Buttery Perfection
Growing up in Morocco, I learned the art of baking from my mother, who could conjure the most incredible pastries from simple ingredients. While galettes aren’t traditionally Moroccan, my culinary training in Paris taught me the elegance and rustic charm of French baking. And since moving to NYC, I’ve found endless inspiration in adapting these classic techniques to fit both my heritage and the vibrant flavors of the city. This galette dough recipe strikes that perfect balance — it’s a French-inspired, incredibly easy galette crust that yields a beautifully flaky and buttery base for any sweet or savory creation you can dream up.
Imagine the aroma filling your kitchen: rich, sweet butter mingling with subtle flour, promising a golden, crisp crust that shatters delicately with each bite. This from-scratch galette pastry isn’t just about the taste; it’s about the texture – that perfect marriage of tender inside and wonderfully crisp exterior. It’s the kind of rustic pie dough recipe that elevates even the simplest fruit filling or savory vegetable medley into something truly special. The secret lies in cold butter and minimal handling, techniques I truly perfected during my time in French pastry kitchens, which create those beautiful, flaky layers we all adore.
You might think making dough from scratch is daunting, but I promise you, this galette dough recipe is designed for success. My method, using a food processor for ease and speed, ensures consistent results every time. I’ll walk you through the key steps, share a pro tip for achieving maximum flakiness, and even help you avoid that common pitfall of overworking the dough. With this guide, you’ll be creating stunning, homemade galettes that taste like they came straight from a Parisian patisserie, but with all the warmth of a home kitchen. Let’s get baking!
Why This Galette Dough Recipe Is the Best
What makes this galette dough truly stand out? It’s all about the perfect blend of tradition and practicality. I’ve taken the classic French technique of cold butter and quick mixing, and adapted it for the modern home cook – even on a busy Tuesday evening in NYC. The resulting dough is incredibly forgiving, yet delivers that unmistakably rich, buttery flavor and delicate flakiness that forms the backbone of any exceptional galette. It’s the foundation for culinary magic, whether you’re crafting a sweet apple galette or a savory tomato and goat cheese masterpiece.
Throughout my years in professional kitchens and my culinary training in Paris, I’ve honed the art of pastry. This how to make galette dough recipe uses just the right amount of ice water to bind the flour and butter without developing too much gluten, which is crucial for a tender, not tough, crust. The food processor makes this step a breeze, creating small, pea-sized butter pieces quickly and efficiently. This ensures those distinct layers of butter and flour that puff up in the oven, giving your galette that coveted, rustic-chic texture.
Forget complicated folds or precise crimping! The beauty of a galette is its inherent rustic charm. This easy galette crust recipe embraces that simplicity, guiding you to a dough that’s both quick to prepare and incredibly versatile. It’s perfect for both beginners intimidated by pie making and seasoned bakers looking for a reliable, no-fuss dough. From my Moroccan roots of simple, wholesome ingredients to my French training in sophisticated flavor profiles, this recipe combines the best of both worlds, ensuring a foolproof and delicious result every single time.
Galette Dough Recipe Ingredients
The best recipes start with the best ingredients, and this holds true even for something as fundamental as dough. I love sourcing my flour from local markets here in NYC, and using high-quality butter is a non-negotiable for that authentic French patisserie taste. These simple components, when treated with care, transform into something truly magical for your from scratch galette pastry.
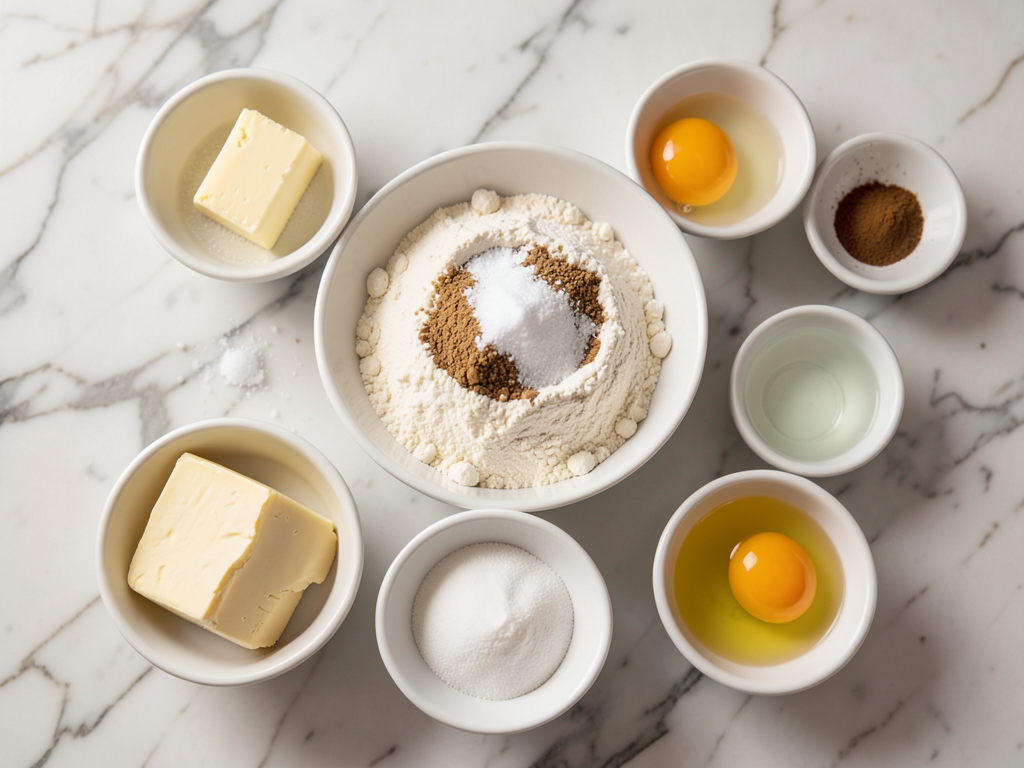
Ingredients List
- 1 ½ cups (213 gr.) of all-purpose flour, more to flour the surfaces
- ½ teaspoon kosher salt
- 10 tablespoons (142.5 gr.) cold unsalted butter, cut into small cubes
- 4-5 tablespoons ice-cold water
- 1 large egg yolk
Ingredient Spotlight
All-Purpose Flour: This is the backbone of our rustic pie dough recipe. All-purpose flour provides the necessary structure without being too strong. When selecting flour, ensure it’s fresh and check the expiration date. For a slightly nuttier flavor, you could experiment with a small portion of whole wheat pastry flour, but stick to all-purpose for the classic tender and flaky texture. If you’re out of AP flour, you can typically use bread flour, though it will result in a slightly chewier crust.
Cold Unsalted Butter: The star of any good pastry, cold butter is absolutely critical for a flaky galette. Make sure your butter is straight from the fridge and cut into small cubes (about ½-inch) so it mixes evenly without melting. Unsalted butter allows us to control the salt content precisely. If you only have salted butter, reduce the added kosher salt by a quarter teaspoon. Margarine or vegetable shortening can be used in a pinch, but the flavor and flakiness won’t be quite the same.
Ice-Cold Water: Just like the butter, the water needs to be as cold as possible. This helps to keep the butter firm and prevents the dough from becoming tough by inhibiting gluten development. I even like to add a few ice cubes to my water before measuring it. Regular cold tap water will work, but ice water yields superior flakiness. Milk can be substituted for a richer dough, but use it sparingly as it contains proteins that can also affect gluten development.
| Original Ingredient | Best Substitution | Flavor / Texture Impact |
|---|---|---|
| All-Purpose Flour | Pastry Flour or 1:1 Gluten-Free Blend for GF | Slightly more tender with pastry flour; GF blends alter texture, can be less pliable |
| Unsalted Butter | Salted Butter (reduce added salt by ¼ tsp) or vegetable shortening | Salted butter will work, but unsalted allows for better flavor control; shortening may result in less flavor. |
| Ice-Cold Water | Very Cold Tap Water | May slightly reduce flakiness as butter warms faster. |
How to Make Galette Dough — Step-by-Step
Don’t be intimidated by homemade dough! My method using a food processor makes this galette dough recipe incredibly straightforward, even for first-timers. Just follow these steps, and you’ll be rewarded with a beautiful, buttery crust.
Step 1: Combine Dry Ingredients
Place the 1 ½ cups (213 gr.) of all-purpose flour and ½ teaspoon of kosher salt into the bowl of your food processor. Pulse a few times, about 3-4 seconds, to ensure they are well combined. This simple step ensures even distribution of the salt throughout the dough, crucial for balanced flavor in your easy galette crust.
💡 mia’s Pro Tip: A well-mixed dry base makes all the difference! Ensure your flour and salt are thoroughly combined before adding any fat. This prevents pockets of undissolved salt and leads to a more uniform dough that bakes beautifully.
Step 2: Add Cold Butter
Add the 10 tablespoons (142.5 gr.) of very cold, cubed unsalted butter to the flour mixture in the food processor. Pulse 8-10 times, in short bursts, until the butter resembles small pea-sized clumps and some smaller, sandy pieces. The goal is to break down the butter into varying sizes, allowing for both flakiness and tender pockets in your from scratch galette pastry.
⚠️ Common Mistake to Avoid: Don’t overmix the butter in this stage! Over-processing will warm the butter and create a greasy, tough dough instead of a flaky one. Aim for visible butter pieces.
Step 3: Incorporate Ice Water
With the food processor running, gradually add 4 tablespoons of ice-cold water, one tablespoon at a time, through the feed tube. The dough should start to come together and form clumps. Stop the machine and pinch a small amount of dough between your fingers. If it holds together, you’ve added enough water. If it’s too dry and crumbly, add the remaining 1 tablespoon of ice-cold water, processing until just combined.
Step 4: Form and Chill
Transfer the dough mixture onto a lightly floured surface. Gently bring it together with your hands, forming it into a 4-inch disk. Avoid kneading or overworking the dough. Wrap it tightly in plastic wrap and refrigerate for at least 1 hour, or ideally overnight. Chilling allows the gluten to relax and the butter to firm up, making the dough easier to roll and ensuring a flaky final rustic pie dough recipe.
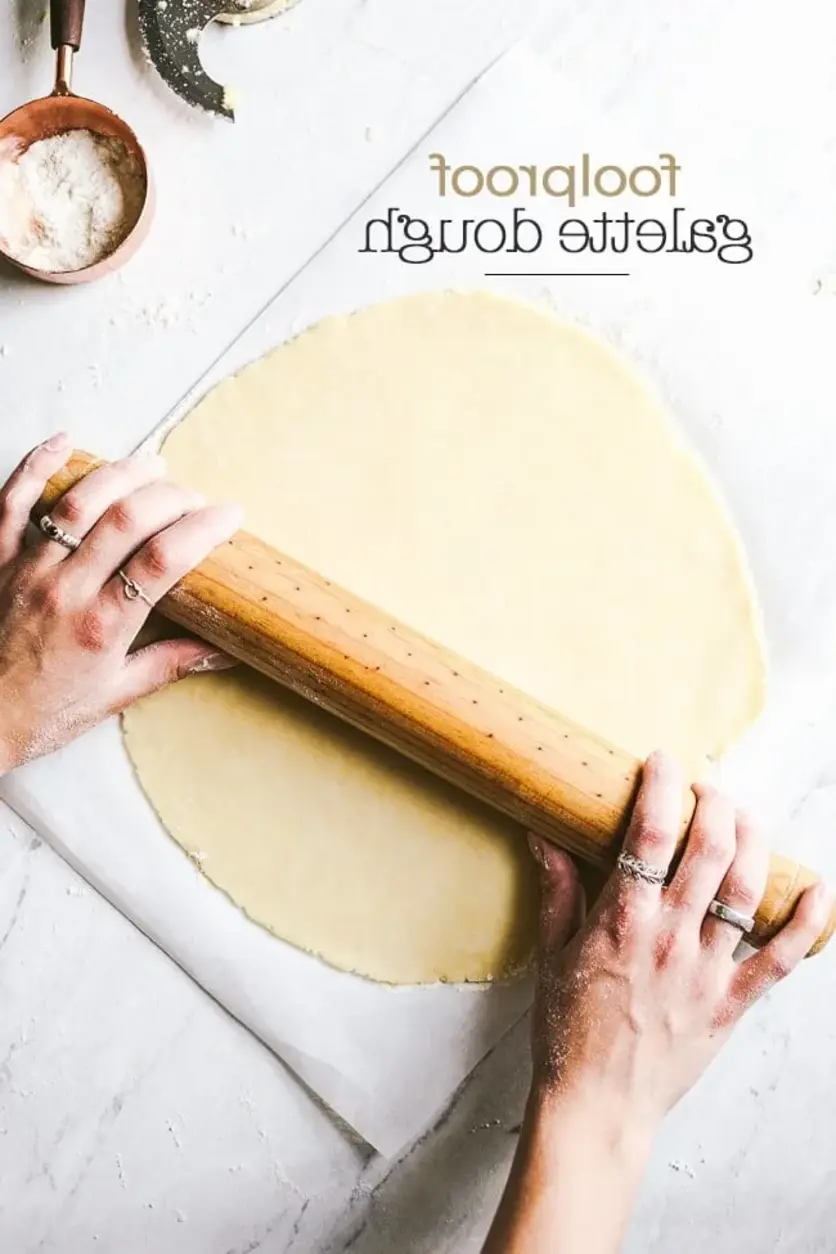
Step 5: Roll and Fill
Take the dough out of the fridge about 10 minutes before you’re ready to roll it, just to let it soften slightly. Lightly flour your working surface and roll the dough into a large 12-inch circle, aiming for about ⅛-inch thickness. Carefully transfer the rolled dough onto a piece of parchment paper and then onto a baking sheet. Now, add your chosen filling, leaving a generous 3-inch border around the edges.
💡 mia’s Pro Tip: Rolling out dough between two sheets of parchment paper can be a game-changer, especially for beginner bakers! It prevents sticking and makes transferring the delicate dough a breeze. When rolling, rotate the dough frequently to get an even circle, just like we did in Paris.
Step 6: Fold and Brush
Gently roll the edges of the dough over the filling, overlapping as you go around and creating rustic pleats. This forms the beautiful, free-form crust of your galette. Brush the exposed edges of the dough (the outer crust) with the large egg yolk. This egg wash will give your galette that gorgeous golden-brown, shiny finish when baked, much like the glossy patisseries of France.
Step 7: Bake as Directed
Bake your galette according to the instructions of the specific recipe you are using for the filling. Typically, galettes bake at a relatively high temperature (around 400°F / 200°C) until the crust is deeply golden brown and the filling is bubbly and cooked through. Keep an eye on it to prevent burning!
| Step | Action | Duration | Key Visual Cue |
|---|---|---|---|
| 1 | Combine dry ingredients | 5 seconds | Uniform flour/salt mixture |
| 2 | Add cold butter | 10-15 seconds | Butter resembles pea-sized clumps and smaller pieces |
| 3 | Incorporate ice water | 15-30 seconds | Dough forms clumps, holds together when pinched |
| 4 | Form and chill | 1 hour (minimum) | Firm, chilled disk of dough |
| 5 | Roll and fill | 5-10 minutes | 12-inch circular dough, even thickness, filled area |
| 6 | Fold and brush | 3-5 minutes | Pleated border, egg-washed crust |
| 7 | Bake as directed | Varies by recipe | Golden brown, bubbly filling |
Serving & Presentation
A galette is a feast for the eyes as much as it is for the palate! The beauty of this easy galette crust is its rustic charm—no need for perfect edges or intricate designs. Once your galette emerges from the oven, golden and fragrant, let it cool for a few minutes on the baking sheet before transferring it to a wire rack. This helps the crust set and prevents it from becoming soggy. For a sweet galette, a simple dusting of powdered sugar or a dollop of creme fraiche can elevate its appearance, while savory versions shine with a sprinkle of fresh herbs like thyme or parsley, perhaps a drizzle of good olive oil, or a scattering of flaky sea salt.
I love serving galettes because they’re naturally communal and inviting. Whether it’s a sweet peach galette with a scoop of vanilla bean ice cream or a savory tomato and basil galette, they always evoke a sense of home and comfort. When guests gather at my NYC apartment, a beautiful galette, straight from the oven, always sparks conversation. The free-form shape feels unfussy yet elegant, hinting at the delicious, buttery pastry within.
Think about pairings that complement your filling. For a sweet fruit galette made with this galette dough recipe, a scoop of homemade ice cream, a generous dollop of whipped cream, or a light custard sauce would be divine. For savory options, a crisp green salad with a bright vinaigrette, a side of roasted vegetables, or a warm cup of savory broth would create a complete and satisfying meal. In my Moroccan kitchen, we always emphasize balance – a touch of freshness to cut through the richness of the pastry. Enjoy the simplicity and elegance!
| Pairing Type | Suggestions | Why It Works |
|---|---|---|
| Side Dish (Sweet) | Vanilla Bean Ice Cream, Sweetened Whipped Cream, Crème Fraîche | Adds a creamy, cooling contrast to the warm, flaky crust and fruit. |
| Side Dish (Savory) | Arugula Salad with Lemon Vinaigrette, Roasted Asparagus, Tomato Soup | Cuts through the richness, adds freshness and acidity. |
| Beverage | Hot Tea, Coffee, Sparkling Cider (sweet); Dry White Wine, Iced Tea (savory) | Complements flavors without overpowering, offers a refreshing counterpart. |
| Garnish | Powdered Sugar, Fresh Berries (sweet); Fresh Thyme, Flaky Sea Salt, Balsamic Glaze (savory) | Enhances visual appeal and adds a final touch of flavor/texture. |
Make-Ahead, Storage & Reheating
Living in New York City often means I’m juggling a packed schedule, so I’ve mastered the art of efficiency in the kitchen. This galette dough recipe is fantastic for make-ahead prep, allowing you to enjoy fresh-baked goodness without the last-minute rush. Whether you’re making the dough in advance or storing a baked galette, these tips ensure your from scratch galette pastry remains just as delicious as when it was first made.
| Method | Container | Duration | Reheating Tip |
|---|---|---|---|
| Refrigerator (Dough) | Plastic wrap, airtight container | Up to 2-3 days | Let dough sit at room temp for 10-15 mins before rolling. |
| Freezer (Dough) | Double-wrapped in plastic, then foil/freezer bag | Up to 3 months | Thaw overnight in fridge, then proceed as usual. |
| Refrigerator (Baked Galette) | Airtight container | Up to 2 days | Warm in oven at 300°F (150°C) for 10-15 mins. |
| Freezer (Baked Galette) | Wrapped tightly in foil, freezer bag | Up to 1 month | Reheat from frozen at 350°F (175°C) for 20-30 mins or until heated through. |
For me, the key to truly embracing homemade baking is making it fit into life, not the other way around. This easy galette crust can be prepared days in advance, allowing you to simply pull it from the fridge, roll, fill, and bake when company arrives or a craving strikes. It’s a lifesaver when you want to impress without the stress!
When reheating a baked galette, avoid the microwave if possible, as it can make the crust soggy. A conventional oven or toaster oven is your best friend here, bringing back that lovely crispness that this galette dough recipe is known for. No matter how you store it, you’re always just minutes away from a delightful treat.
Variations & Easy Swaps
The beauty of a simple, reliable galette dough is its versatility. Just like in a bustling NYC farmers market, where seasonal produce dictates new creations, this basic galette dough recipe can be adapted to endless flavor profiles. Don’t be afraid to experiment!
| Variation | Key Change | Best For | Difficulty Impact |
|---|---|---|---|
| Whole Wheat Dough | Substitute ⅓ of AP flour with whole wheat flour | Heartier, nuttier savory galettes (e.g., mushroom, squash) | Minimal; may need slightly more water as whole wheat flour absorbs more. |
| Gluten-Free Crust | Use a 1:1 gluten-free baking flour blend with xanthan gum | Those with gluten sensitivities or dietary restrictions | Slightly more delicate to handle, may crack more easily. |
| Herbed Savory Dough | Add 1-2 tbsp finely chopped fresh herbs (rosemary, thyme, sage) to flour mix | Savory galettes with strong, earthy fillings (e.g., potato, caramelized onion) | Minimal; adds flavor complexity. |
Whole Wheat Galette Dough
For a more rustic, wholesome touch, or if you’re making a deeply savory galette like one with mushrooms and goat cheese, try substituting about a third of the all-purpose flour with whole wheat flour. This gives the rustic pie dough recipe a beautiful, nutty flavor and a slightly chewier texture, reminiscent of the hearty breads my mother would bake in Morocco. You might need a tiny bit more ice water, as whole wheat flour tends to absorb more liquid. The result is a more robust base that stands up wonderfully to rich fillings.
Gluten-Free Galette Crust
For those with dietary restrictions, a gluten-free easy galette crust is absolutely achievable! Simply swap the all-purpose flour for a good quality 1:1 gluten-free baking flour blend that contains xanthan gum. The dough might be a little more fragile to work with, so take extra care when rolling and transferring. I’ve personally tested several blends to ensure flakiness, and while the texture is slightly different, the buttery flavor remains, making delicious gluten-free galettes possible. My advice: keep the butter extra cold and don’t overwork it.
Herbed Savory Galette Dough
Elevate your savory galettes by incorporating fresh herbs directly into the dough for this galette dough recipe! Financial District in NYC has a great market where I find fresh herbs to incorporate. Add 1 to 2 tablespoons of finely chopped rosemary, thyme, or sage (or a blend!) to your flour mixture with the salt. This simple addition infuses every bite of the crust with aromatic notes that perfectly complement fillings like roasted vegetables, cheeses, or even a classic quiche-like custard. It’s a technique I learned in Paris that adds a subtle layer of sophistication, transforming a simple crust into an experience.
What is the difference between galette dough and pie crust?
While fundamentally similar, both relying on flour, cold butter, and ice water, galette dough is typically designed for a more rustic, free-form presentation than a traditional pie crust. The key difference often lies in the handling and intended use. Galette dough is usually rolled out into a circle and then the edges are simply folded over a filling, whereas pie crusts are meticulously fitted into pie plates and crimped. My galette dough recipe is formulated to be forgiving and easy to work with, perfect for that charming, imperfect look, making it a fantastic from scratch galette pastry option for beginners or busy cooks.
Can I make galette dough ahead of time and freeze it?
Absolutely, and I highly recommend it for convenient baking! You can make this galette dough recipe several days in advance and store it wrapped tightly in plastic wrap in the refrigerator for up to 2-3 days. For longer storage, you can freeze the dough. After forming it into a disk, double-wrap it in plastic wrap, then an additional layer of aluminum foil or place it in a freezer-safe bag. It will last in the freezer for up to 3 months. Just remember to thaw it overnight in the refrigerator before rolling, then let it sit at room temperature for about 10-15 minutes to make it more pliable.
Why is my galette dough tough or crumbly?
If your galette dough is tough, it’s usually a sign of overworking. Too much kneading or processing develops gluten excessively, leading to a firm and elastic texture rather than a tender, flaky one. If it’s crumbly, it typically means there wasn’t enough liquid. The flour and butter mixture didn’t have enough water to come together adequately. The trick is to add just enough ice water until the dough holds together when pinched, but isn’t sticky. Also, ensure your butter is very cold to achieve that beautiful flaky consistency in your easy galette crust.
Can I make a galette dough without a food processor?
Yes, you certainly can! While my galette dough recipe uses a food processor for speed and convenience, you can easily make it by hand. In a large bowl, combine the flour and salt. Add the cold, cubed butter and cut it into the flour using a pastry blender, two knives, or even your fingertips. Work quickly to prevent the butter from warming too much, aiming for those pea-sized pieces. Then, gradually add the ice-cold water, mixing with a fork until the dough just starts to come together. Form into a disk, wrap, and chill as directed. It might take a little more elbow grease, but the results will be just as flaky and delicious!
What’s the best way to handle galette dough sticky?
If your galette dough turns out a bit sticky, don’t fret! The first thing to do is ensure it’s properly chilled. Cold dough is always easier to handle. If it’s still sticky after chilling, lightly flour your work surface, your rolling pin, and even your hands. Use just enough flour to prevent sticking, but avoid adding too much, as this can make the dough tough. You can also try rolling the dough between two sheets of parchment paper. This method minimizes direct contact with your hands and the work surface, making it much easier to achieve a perfect, non-sticky roll.
How can I ensure my galette crust is extra flaky?
The secret to an extra flaky galette crust, a technique I honed in my French culinary training, lies in three main factors for this from scratch galette pastry: exceptionally cold butter, minimum water, and minimal handling. Keep your butter frozen and cut into diverse sizes. Use just enough ice-cold water to bring the dough together. And, perhaps most importantly, avoid overworking the dough. When you roll the dough, you’re essentially flattening those cold butter pieces into thin layers. As the galette bakes, the water in the butter turns to steam, creating pockets that separate the layers of flour, resulting in that incredible flakiness we all chase.
Can I make this galette dough recipe savory?
Absolutely! This galette dough recipe is incredibly versatile and works beautifully for both sweet and savory applications. To enhance its savory potential, you can add a pinch more salt (up to ¾ teaspoon total) or incorporate dried herbs like thyme, rosemary, or a blend of Italian herbs into the flour mixture before adding the butter. My favorite trick from my NYC kitchen is to add a tablespoon of grated Parmesan cheese to the dough for a delicious savory twist. These additions will complement fillings like roasted vegetables, cheeses, or even caramelized onions, making for a truly spectacular savory galette.
Share Your Version!
I poured my heart into perfecting this galette dough recipe, bringing together my Moroccan heritage, Parisian training, and the vibrant energy of New York City. Now it’s your turn to make it your own! I’d love to hear how this easy galette crust transformed your sweet or savory creations.
Did you use a clever substitution? What filling did you choose? Please leave a star rating and a comment below to share your experience. And don’t forget to snap a photo of your beautiful from scratch galette pastry and tag @exorecipes on Instagram or Pinterest. Did you try the whole wheat variation? I can’t wait to see your culinary artistry!
From my NYC kitchen to yours — I hope this recipe brings as much warmth to your table as it does to mine. — mia 🧡
Love This Recipe? Save It to Pinterest!
If you enjoyed this Galette Dough Recipe (From Scratch) recipe, don’t let it get lost in your browser tabs! 😄 Pin it now so you can find it again anytime — and explore hundreds more tried-and-tested recipes waiting for you on my Pinterest boards.
👉 Follow mia on Pinterest @chefrecipes2
📌 Pin this recipe · 🔁 Re-pin your favorites · 💬 Tag me when you make it — I love seeing your creations!
Galette Dough
Description
A delicious galette starts with a buttery galette crust. This is my go-to galette dough recipe that I use for both sweet and savory galette recipes.
Ingredients
- 1 ½ cups (213 gr.) of all-purpose flour, more to flour the surfaces
- ½ teaspoon kosher salt
- 10 tablespoons (142.5 gr.) cold unsalted butter, cut into small cubes
- 4–5 tablespoons ice-cold water
- 1 large egg yolk
Instructions
- To make the galette dough: Place flour and salt in the bowl of a food processor. Pulse for a few times to mix. Add in the cold butter cubes. Pulse 8-10 times until butter resembles small clumps.
- Turn the machine on and add in 4 tablespoons of ice-cold water in one tablespoon increments.
- At this point, it should start to come together and form into a ball. If not add in the rest of the water until it does.
- Transfer onto a lightly floured surface, form it into a 4-inch disk, and wrap with plastic. Place in the fridge for at least 1 hour or overnight.
- Take it out of the fridge 10 minutes before you are ready to roll it out.
- Lightly flour your working surface. Roll the dough into a large 12-inch circle. Transfer onto the parchment paper and then onto the baking sheet.
- Place your filling (depending on the recipe you are using) on top slightly mounting in the middle, leaving a 3-inch border around the edges.
- Roll the sides of the dough overlapping as you go around and pleating the dough.
- Brush the edges of the dough (the outer crust) with egg yolk.
- Bake according to the instructions of the recipe you are using.
Nutrition
- Calories: 1744 kcal
- Sugar: 1 g
- Fat: 120 g
- Carbohydrates: 144 g
- Protein: 23 g
Tried This Recipe? Leave a Comment!
Did you make this recipe? I’d love to hear how it turned out! Please leave a comment and a rating below. Your feedback helps other home cooks and supports cheerychop.com!
For more delicious inspiration, follow me on Pinterest!
