“`html
Table of Contents
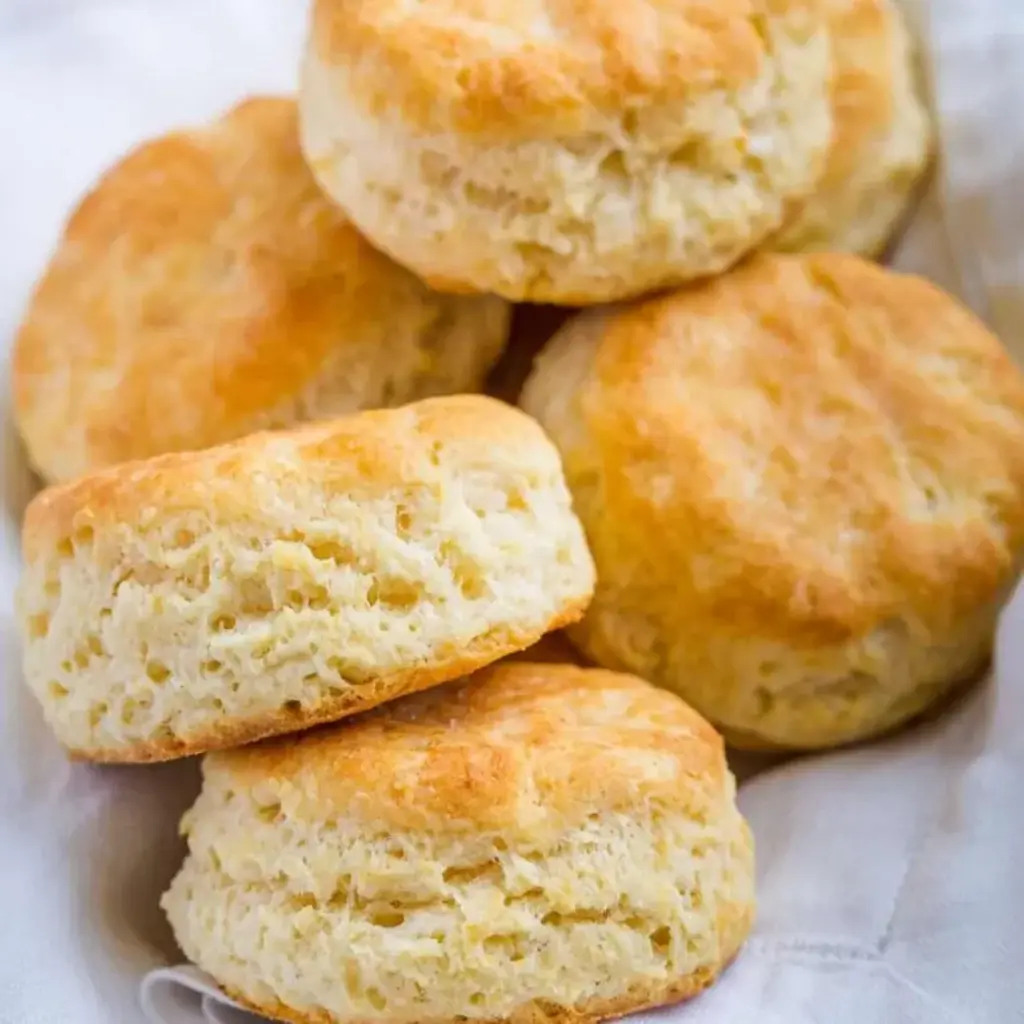
Easy Homemade Biscuits Recipe – The Half-and-Half Secret
I still remember the first time I made biscuits in my tiny Parisian kitchen — my roommate, a pastry chef from Lyon, watched over my shoulder as I cut cold butter into flour. “The secret,” she said, “is keeping everything ice-cold.” That moment changed how I approached this easy homemade biscuits recipe for good. Now, living in New York City and cooking out of my own kitchen in Brooklyn, I’ve perfected a version that marries that French precision with the warm, no-fuss soul of American baking. This easy homemade biscuits recipe uses half and half instead of buttermilk, and it creates the most tender, flaky layers with minimal effort. It’s the only homemade biscuits from scratch recipe you’ll ever need — I promise you that.
When these biscuits bake, your whole kitchen fills with the most glorious aroma — toasted butter, a hint of sweetness, and the toasty smell of golden-brown flour. The outside bakes up crisp and lightly browned, while the inside stays impossibly soft, almost cloud-like, with distinct flaky layers that pull apart with the gentlest tug. Each bite has a rich, buttery flavor that’s perfectly balanced by the subtle tang of half and half. It’s the kind of smell that makes your neighbors in your NYC walk-up pause outside your door and smile. I love serving these warm, straight from the oven, with a pat of butter melting into every crevice.
What sets my easy homemade biscuits recipe apart is my Paris-trained technique: I fold the dough twice, creating those signature flaky layers that bakery biscuits are famous for, and I use half and half — a trick I picked up from a pastry chef in the 11th arrondissement. The result is a quick biscuits recipe that delivers professional-quality texture without the fuss. I’m going to share my favorite pro tip for keeping the butter cold (it’s all about the dice), plus the most common mistake I see home cooks make when making flaky biscuits recipe. Trust me, once you make these homemade biscuits from scratch, you’ll never reach for a can again.
Why This Easy Homemade Biscuits Recipe Is the Best
The flavor secret here is using half and half instead of buttermilk or milk. Half and half has just the right fat content — around 10 to 18 percent — to create a tender crumb without making the biscuits heavy. Growing up in Morocco, my mother used full-fat yogurt in her breads for that same reason: a little extra richness goes a long way. In my NYC kitchen, half and half gives these biscuits a subtle sweetness and a velvety texture that milk alone can’t achieve. The cold butter does the rest, creating steam pockets as it melts in the hot oven, which lifts the dough into those iconic flaky layers.
The perfected texture comes from a technique I learned at culinary school in Paris: the double fold. Instead of just patting out the dough and cutting biscuits, I pat it into a rectangle, fold it in half, pat it out again, and fold a second time before the final roll. This simple step creates dozens of thin butter layers sandwiched between flour layers — exactly how puff pastry works, just faster. The result is a flaky biscuits recipe that has real, defined layers, not just a dense crumb. It’s the single most impactful technique for homemade biscuits from scratch, and it takes only an extra 30 seconds.
This quick biscuits recipe is truly foolproof for beginners because the ingredient list is short and the method forgiving. With just 6 ingredients and about 15 minutes of active prep, you can have warm, golden biscuits on the table in under half an hour. I’ve tested this recipe with dozens of home cooks — my neighbor in Brooklyn who had never baked before, my sister who lives on the Upper West Side, and even my dad back in Morocco over a video call. Every single person got perfect biscuits on the first try. The key is not over-mixing the dough, and I’ll show you exactly what to look for so you nail it every time.
Easy Homemade Biscuits Recipe Ingredients
I pick up my ingredients at the Union Square Greenmarket in Manhattan whenever I can — the butter from a local dairy farm in New York state is incredible, and the all-purpose flour from a mill in the Hudson Valley makes these biscuits sing. There’s something about using fresh, local ingredients that connects my cooking here in NYC to the markets I loved in Morocco and the fromageries I frequented in Paris. For this easy homemade biscuits recipe, quality matters most with the butter — it’s the star of the show.
Ingredients List
- 2 cups all-purpose flour
- 1 1/2 Tbsp baking powder (aluminum free)
- 1 tsp granulated sugar
- 3/4 tsp salt (we use fine sea salt)
- 1/2 cup unsalted butter, cold (8 Tbsp = 1/2 cup), diced into 1/2-inch cubes
- 1 cup half and half, minus 2 Tbsp
- 1/2 Tbsp melted butter, for brushing the baked biscuits
Ingredient Spotlight
Cold unsalted butter is non-negotiable here. It creates steam as it melts in the oven, which separates the dough into layers. I always use unsalted butter so I can control the salt level myself — fine sea salt dissolves evenly and gives a clean finish. Look for butter with at least 82% fat content for the flakiest results; European-style butters work beautifully.
Half and half is my secret weapon. It’s richer than milk but lighter than heavy cream, giving biscuits a tender crumb and a subtle sweetness without greasiness. If you don’t have half and half, you can substitute whole milk mixed with a tablespoon of melted butter, but the texture won’t be quite as luxe.
Aluminum-free baking powder makes a real difference — aluminum-based powders can leave a metallic aftertaste, especially in baked goods with a neutral flavor like these biscuits. I recommend brands like Rumford or Bob’s Red Mill. And always check the expiration date: fresh baking powder is essential for proper rise.
| Original Ingredient | Best Substitution | Flavor / Texture Impact |
|---|---|---|
| Unsalted butter | Salted butter (reduce added salt to 1/4 tsp) | Slightly saltier flavor; still flaky |
| Half and half | Whole milk + 1 Tbsp melted butter | Less tender; slightly less rich |
| All-purpose flour | Self-rising flour (omit baking powder and reduce salt) | Softer texture; less control over leavening |
| Baking powder | Baking soda + cream of tartar (1:2 ratio) | Slightly tangier; similar rise |
How to Make Easy Homemade Biscuits — Step-by-Step
I promise you — this is the most straightforward homemade biscuits from scratch method you’ll ever follow. I’ve broken it down into seven simple steps with my best pro tips and the mistakes I see most often. Let’s bake!
Step 1: Dice and Chill Butter
Dice your cold butter into 1/2-inch cubes and place them back in the refrigerator while you prepare the dry ingredients. This step is crucial: if the butter softens before it hits the oven, your biscuits will be dense rather than flaky. I like to dice the butter straight from the fridge, then pop it back in for at least 10 minutes.
💡 mia’s Pro Tip: If your kitchen is warm (above 72°F), freeze the diced butter for 5 minutes before adding it to the flour. This guarantees those butter pieces stay solid during mixing.
Step 2: Whisk Dry Ingredients
In a large mixing bowl, combine the flour, baking powder, sugar, and salt. Whisk thoroughly for about 20 seconds — this aerates the flour and evenly distributes the leavener and seasoning. I use a wire whisk, but a fork works too. Don’t skip the whisking; it makes a real difference in how evenly your biscuits rise.
⚠️ Common Mistake to Avoid: Scooping flour directly from the bag compacts it, leading to dry, heavy biscuits. Instead, spoon flour into your measuring cup, then level it off with a knife.
Step 3: Cut in the Butter
Add the cold diced butter to the flour mixture. Using a pastry blender, two knives, or your fingertips, cut the butter into the flour until the largest pieces are pea-sized. Some pieces will be smaller, some a bit larger — that’s perfect. You should still see visible bits of butter throughout. Work quickly to keep everything cold.
💡 mia’s Pro Tip: If you’re using your hands, work as quickly as possible and periodically dip your fingers in cold water to keep the butter from warming. The visible butter pieces are what create steam pockets for flaky layers.
Step 4: Add Half and Half
Pour the half and half (1 cup minus 2 tablespoons) all at once into the bowl. Stir with a wooden spoon or spatula just until the mixture comes together and is mostly moistened. There will be some dry bits at the bottom — that’s okay. Do not over-mix, or the gluten will develop and make the biscuits tough.
⚠️ Common Mistake to Avoid: Stirring until the dough is completely smooth activates gluten and creates tough biscuits. Stop as soon as the dough holds together, even if it looks a little shaggy.
Step 5: Fold and Pat the Dough
Turn the dough out onto a lightly floured surface. If it’s very sticky, sprinkle a little flour on top. Pat the dough into a rectangle about 1/2-inch thick, then fold it in half like a book. Pat it into another rectangle of the same thickness, then fold a second time. Finally, pat the dough into a 5×10-inch rectangle that’s about 3/4-inch thick. This double fold creates those gorgeous layers.
💡 mia’s Pro Tip: Use a bench scraper to help lift and fold the dough if it’s sticking. A light touch is key — press firmly but gently so you don’t squash the butter pieces.
Step 6: Cut the Biscuits
Dip a 2 1/2-inch round biscuit cutter into flour, then press straight down into the dough without twisting. Twisting seals the edges and prevents the biscuits from rising evenly. Cut out 8 biscuits, placing them 1 inch apart on a parchment-lined baking sheet. Gather the scraps, gently pat them into a rectangle, and cut 2 more biscuits — these won’t be quite as tall, but they’ll still be delicious.
⚠️ Common Mistake to Avoid: Twisting the biscuit cutter seals the edges of the dough, which hinders rising. Always press straight down and lift straight up.
Step 7: Bake and Brush
Bake the biscuits at 450°F for 12 to 15 minutes, or until the tops are golden brown and the biscuits are baked through. While they’re still hot, brush the tops with melted butter. Transfer to a wire rack to cool for 10 minutes, then serve warm. The butter soak creates a beautiful, glossy finish and adds that final touch of richness.
💡 mia’s Pro Tip: For extra-golden tops, brush the biscuits with melted butter halfway through baking as well as right after. This double-brush technique gives a deeper color and more buttery flavor.
| Step | Action | Duration | Key Visual Cue |
|---|---|---|---|
| 1 | Dice and chill butter | 5 mins | Butter cubes are firm, not soft |
| 2 | Whisk dry ingredients | 20 sec | Evenly combined, slightly aerated |
| 3 | Cut in butter | 2-3 mins | Pea-sized butter pieces throughout |
| 4 | Add half and half | 30 sec | Shaggy dough, mostly moistened |
| 5 | Fold and pat dough | 2 mins | Smooth rectangle, 3/4-inch thick |
| 6 | Cut biscuits | 2 mins | Clean edges, no twisting |
| 7 | Bake and brush | 12-15 mins | Golden brown tops, baked through |
Serving & Presentation
I love serving these biscuits warm, straight from the oven, with a generous pat of salted butter melting into the center of each one. In my NYC kitchen, I often split them in half and toast them lightly on a cast-iron skillet for extra crunch before serving. They’re perfect alongside a bowl of hearty soup, piled high with scrambled eggs and chives for brunch, or simply with a drizzle of honey and a sprinkle of flaky sea salt for a sweet-savory treat. The way the butter pools in the flaky crevices is pure comfort on a plate.
Growing up in Morocco, we served warm bread with every meal, and I carry that tradition into my home here in New York. These biscuits are my American-Moroccan hybrid — they fill the same role as khobz at our table, but with those flaky, buttery layers that feel distinctly Southern and French at the same time. I also love serving them with a side of Moroccan-preserved lemon butter or a dollop of harissa-spiced honey for a North African twist. However you serve them, make sure they’re warm — that’s when they’re at their absolute best.
| Pairing Type | Suggestions | Why It Works |
|---|---|---|
| Side Dish | Tomato soup, fried chicken, stewed greens | Biscuits soak up broth and complement savory dishes |
| Sauce / Dip | Honey butter, sausage gravy, fruit jam | Adds moisture and contrasting sweetness |
| Beverage | Iced tea, black coffee, cold milk | Refreshing balance to the richness |
| Garnish | Flaky sea salt, fresh chives, edible flowers | Adds color and a final flavor pop |
Make-Ahead, Storage & Reheating
Living in a bustling NYC apartment, I’m all about smart meal prep. These biscuits are wonderfully forgiving when it comes to storage — you can make the dough ahead, freeze unbaked biscuits, or store baked ones for quick weekday breakfasts. I often make a double batch on Sunday evening so I have homemade biscuits ready for the busy week ahead. Here’s exactly how to store and reheat them for the best results.
| Method | Container | Duration | Reheating Tip |
|---|---|---|---|
| Refrigerator | Airtight container | 3-4 days | Reheat in a 350°F oven for 5-7 minutes |
| Freezer | Freezer-safe bag or container | Up to 3 months | Bake from frozen at 375°F for 18-22 minutes |
| Make-Ahead | Covered bowl or wrapped dough | Up to 2 days in advance | Assemble dough, refrigerate, then cut and bake fresh |
For the very best texture, I recommend reheating biscuits in a 350°F oven rather than the microwave. Place them on a baking sheet and warm for 5 to 7 minutes — the outside crisps up again while the inside steams and softens. If you’re in a hurry, you can split the biscuit in half and toast it in a skillet with a little butter. That’s my go-to move on busy weekday mornings in my NYC kitchen when I need a quick, comforting breakfast before heading out the door.
For make-ahead prep, I like to prepare the dough through step 5 (the folding and patting), wrap it tightly in plastic wrap, and refrigerate for up to 2 days. When I’m ready to bake, I simply cut and bake as directed — adding about 2 minutes to the bake time since the dough is cold. This method gives you fresh, hot biscuits in under 20 minutes with almost no morning mess. It’s a game-changer for holiday mornings or brunch entertaining.
Variations & Easy Swaps
One of the things I love most about this quick biscuits recipe is how adaptable it is. Over the years, I’ve developed several variations that honor different dietary needs and flavor preferences — all tested right here in my Brooklyn kitchen. Whether you’re gluten-free, dairy-free, or just looking for a new twist, there’s a version here for you.
| Variation | Key Change | Best For | Difficulty Impact |
|---|---|---|---|
| Herb & Garlic | Add 2 Tbsp fresh herbs + 1 garlic clove | Savory dinners, soups | Same — Easy |
| Cheddar & Chive | Fold in 1/2 cup shredded cheddar + 2 Tbsp chives | Brunch, savory snacking | Same — Easy |
| Sweet Honey Butter | Add 2 Tbsp honey to half and half | Dessert, breakfast treat | Same — Easy |
Herb & Garlic Biscuits
This is my favorite savory variation, inspired by the herb-focused cooking I learned in Paris. Add 2 tablespoons of finely chopped fresh herbs — parsley, chives, and thyme work beautifully — along with 1 small garlic clove, minced to a paste. Mix the herbs and garlic into the flour mixture before adding the half and half. These are incredible alongside a bowl of tomato soup or served with roast chicken. The herbs add freshness, and the garlic gives a gentle warmth that doesn’t overpower.
Cheddar & Chive Biscuits
For an extra-rich, savory treat, fold 1/2 cup of shredded sharp cheddar cheese and 2 tablespoons of chopped fresh chives into the dough just before the final pat-out. Use a good-quality cheddar — I buy mine from a cheese shop in Chelsea Market — and shred it yourself for the best melt. These are perfect for brunch with scrambled eggs or as a side for chili. The cheese becomes golden and crispy on the edges while the chives add a mild oniony bite.
Sweet Honey Butter Biscuits
For a dessert-style biscuit, add 2 tablespoons of honey to the half and half before mixing it into the dry ingredients. After baking, brush the tops with a mixture of melted butter and an extra drizzle of honey. These are wonderful served warm with fresh berries and whipped cream, or simply on their own with a cup of tea. The honey adds a subtle floral sweetness that pairs beautifully with the buttery layers — a nod to the honey-drizzled pastries I loved at patisseries in Paris.
What is the secret to making easy homemade biscuits flaky and light?
The secret is keeping your butter extremely cold and not over-mixing the dough. When cold butter pieces melt in the hot oven, they release steam that creates pockets of air, forming those signature flaky layers. I recommend dicing the butter into 1/2-inch cubes and refrigerating them until you’re ready to mix. Additionally, using half and half instead of milk adds richness that keeps the crumb tender. The double-folding technique — patting the dough into a rectangle, folding it in half, and repeating — also creates thin layers of butter between flour layers, just like puff pastry. Finally, resist the urge to over-mix; stop as soon as the dough comes together for the lightest possible biscuits.
Can I use self-rising flour instead of all-purpose flour for easy homemade biscuits?
Yes, you can substitute self-rising flour for all-purpose flour. If you do, omit the baking powder and reduce the salt to 1/4 teaspoon, since self-rising flour already contains leavening and salt. Use 2 cups of self-rising flour in place of the all-purpose flour and the 1 1/2 tablespoons of baking powder. The texture will be slightly softer and more tender because self-rising flour has a lower protein content than all-purpose. I’ve tested this swap many times in my NYC kitchen, and it works beautifully — just be aware that you have less control over the exact leavening, so make sure your self-rising flour is fresh for the best rise.
How long do you bake easy homemade biscuits and at what temperature?
Bake these biscuits at 450°F for 12 to 15 minutes. I recommend checking them at the 12-minute mark — the tops should be golden brown and the biscuits should feel firm to the touch. If they’re not quite there, give them another 2 to 3 minutes. Every oven runs a little differently; mine in my Brooklyn apartment runs hot, so I start checking at 11 minutes. The high temperature is crucial because it creates immediate steam when the cold butter hits the heat, giving you those tall, flaky layers. For the most even baking, place your baking sheet on the middle rack and rotate it halfway through.
What can I use as a substitute for buttermilk in easy homemade biscuits?
This recipe uses half and half instead of buttermilk, and it’s my preferred substitute. The fat content in half and half creates a tender, rich crumb that’s hard to beat. If you don’t have half and half, you can mix 1 cup of whole milk with 1 tablespoon of lemon juice or white vinegar and let it sit for 5 minutes to create a DIY buttermilk. Another option is using plain yogurt thinned with a little milk — this adds tang and tenderness, similar to the yogurt breads I grew up eating in Morocco. Avoid using skim milk alone, as it will produce denser biscuits.
Can I freeze easy homemade biscuits before baking?
Absolutely — freezing unbaked biscuits is one of my favorite meal-prep tricks. After cutting the biscuits, place them on a parchment-lined baking sheet and freeze until solid, about 1 hour. Then transfer them to a freezer-safe bag or container. They’ll keep for up to 3 months. When you’re ready to bake, place the frozen biscuits on a baking sheet and bake at 375°F for 18 to 22 minutes, or until golden brown. No need to thaw first. The bake time is longer because the biscuits start from frozen, but they turn out just as flaky and tender as fresh. This is my go-to method for having homemade biscuits ready anytime.
Why did my easy homemade biscuits turn out dense and hard?
Dense, hard biscuits usually come down to one of three issues: over-mixing the dough, using butter that was too warm, or measuring the flour incorrectly. Over-mixing develops gluten, which makes biscuits tough rather than tender. Mix just until the dough comes together, even if it looks a bit shaggy. Warm butter won’t create the steam pockets needed for flaky layers — always use cold butter straight from the fridge. And for flour, use the spoon-and-level method: spoon flour into your measuring cup, then level it off with a knife. Scooping directly compacts the flour, leading to dry, dense dough. If your biscuits turned out hard, try these fixes and you’ll see a big improvement.
What is the best way to reheat leftover easy homemade biscuits?
The best way to reheat leftover biscuits is in a 350°F oven for 5 to 7 minutes. Place them on a baking sheet and warm them until they’re heated through and the outside is slightly crisp again. This method restores the flaky texture much better than a microwave, which can make biscuits rubbery. If you’re in a hurry, you can split the biscuit in half and toast it in a skillet with a little butter for 2 to 3 minutes per side. I do this on busy mornings in my NYC kitchen — it takes less than 5 minutes and gives you a crisp exterior with a soft, steamy center. Avoid microwaving for more than 15 seconds, as it will toughen the biscuit.
Can I make easy homemade biscuits without a biscuit cutter?
Yes, you can absolutely make biscuits without a biscuit cutter. Use a sharp knife to cut the dough into squares or rectangles — this is actually a traditional method in many Southern kitchens. Simply pat the dough into a rectangle about 3/4-inch thick and cut it into 2-inch squares with a sharp knife or a bench scraper. Square biscuits have the advantage of no dough scraps to re-roll, so every biscuit is as tender as the first. You can also use a clean, empty can — like a tuna can with both ends removed — as a makeshift round cutter. Just dip it in flour between cuts to prevent sticking.
How can I make easy homemade biscuits dairy-free?
To make dairy-free biscuits, substitute the unsalted butter with a solid vegan butter that has at least 80% fat content — I recommend brands like Miyoko’s or Earth Balance for the best results. Replace the half and half with canned full-fat coconut milk or a dairy-free creamer, keeping the same measurement of 1 cup minus 2 tablespoons. The coconut milk adds a slight tropical sweetness that’s lovely, especially with a little extra sugar. For the melted butter brush, use melted vegan butter or a light brushing of olive oil. The texture will be slightly less flaky than the original, but these still turn out tender and delicious — I’ve made them for dairy-free friends at many NYC brunch gatherings.
Should I twist the biscuit cutter when cutting biscuits?
No, never twist the biscuit cutter. Twisting seals the edges of the dough together, which prevents the biscuits from rising evenly. Instead, press the cutter straight down into the dough and lift it straight up. This clean cut allows the layers to separate and rise freely in the oven. I learned this technique at culinary school in Paris, and it’s one of the most important details for tall, flaky biscuits. Dip the cutter in flour between cuts to prevent sticking, and press firmly but without twisting. The edges of your biscuits should look clean and sharp — that’s how you know you did it right.
Share Your Version!
I absolutely love hearing from you — nothing makes my day like seeing your photos of these biscuits fresh from the oven, with butter melting down the sides. If you try this easy homemade biscuits recipe, please leave a star rating and a comment below telling me how it went. Did you try one of the variations? Did you invent your own twist? I read every single comment and I’m always here to help if you have questions.
Snap a photo of your homemade biscuits from scratch and share it on Instagram or Pinterest using the tag @exorecipes — I feature my favorite reader bakes on my stories every Friday! And if you’re curious about what I’m cooking in my NYC kitchen, follow along on Pinterest for more quick biscuits recipes, flaky biscuits recipes, and all my favorite buttermilk biscuits inspiration. Your support means the world to me, and I’m so grateful to be part of your cooking journey.
From my NYC kitchen to yours — I hope this recipe brings as much warmth to your table as it does to mine. — mia 🧡
Love This Recipe? Save It to Pinterest!
If you enjoyed this Easy Homemade Biscuits recipe, don’t let it get lost in your browser tabs! 😄 Pin it now so you can find it again anytime — and explore hundreds more tried-and-tested recipes waiting for you on my Pinterest boards.
👉 Follow mia on Pinterest @exorecipe
📌 Pin this recipe · 🔁 Re-pin your favorites · 💬 Tag me when you make it — I love seeing your creations!
💬 I’d love to hear from you!
Did you try this easy homemade biscuits recipe? What did you serve them with? Leave a comment and a star rating below — and don’t forget to tag @exorecipes in your photos!
⭐️⭐️⭐️⭐️⭐️ Tap the stars to rate this recipe!
“`
Print

Easy Homemade Biscuits
Description
This is the only Biscuit Recipe you will need. Homemade Biscuits are super soft and these are quick and easy to make with just 6 ingredients.
Ingredients
- 2 cups all-purpose flour
- 1 1/2 Tbsp baking powder ((aluminum free))
- 1 tsp granulated sugar
- 3/4 tsp salt ((we use fine sea salt))
- 1/2 cup unsalted butter (cold (8 Tbsp = 1/2 cup))
- 1 cup half and half (minus 2 Tbsp)*
- 1/2 Tbsp melted butter (to brush the baked biscuits)
Instructions
- Dice butter into 1/2" cubes and refrigerate until needed.
- In a large mixing bowl, combine flour, baking powder, sugar and salt. Whisk thoroughly.
- Add diced cold butter and cut it into the flour using a pastry blender (or two knives or a fork), until the largest butter pieces are pea-sized.
- Add 1 cup – minus 2 Tbsp of Half and Half all at once and stir until mixture comes together and is mostly moistened. Do not over-mix.
- Turn dough out onto a floured surface. If dough is very sticky, lightly sprinkle the top with flour.
- Pat dough into a rectangle then fold it in half and pat into another rectangle. Fold a second time and pat into a 5"x10" rectangle or 3/4" thickness. Dip a 2 1/2" round biscuit cutter into flour and cut out 8 biscults. Pull together scraps and form into a rectangle to cut an extra 2 biscuits.
- Place biscuits on a parchment-lined baking sheet 1-inch apart and bake at 450F for 12-15 minutes or until tops are golden brown and biscuits are baked through. While biscuits are hot, brush tops with 1/2 Tbsp melted butter. Transfer to a wire rack to cool 10 minutes then serve.
Nutrition
- Calories: 212 kcal
- Sugar: 1 g
- Fat: 13 g
- Carbohydrates: 21 g
- Protein: 3 g

k">
Tried This Recipe? Leave a Comment!
Did you make this recipe? I’d love to hear how it turned out! Please leave a comment and a rating below. Your feedback helps other home cooks and supports cheerychop.com!
For more delicious inspiration, follow me on Pinterest!
