Table of Contents
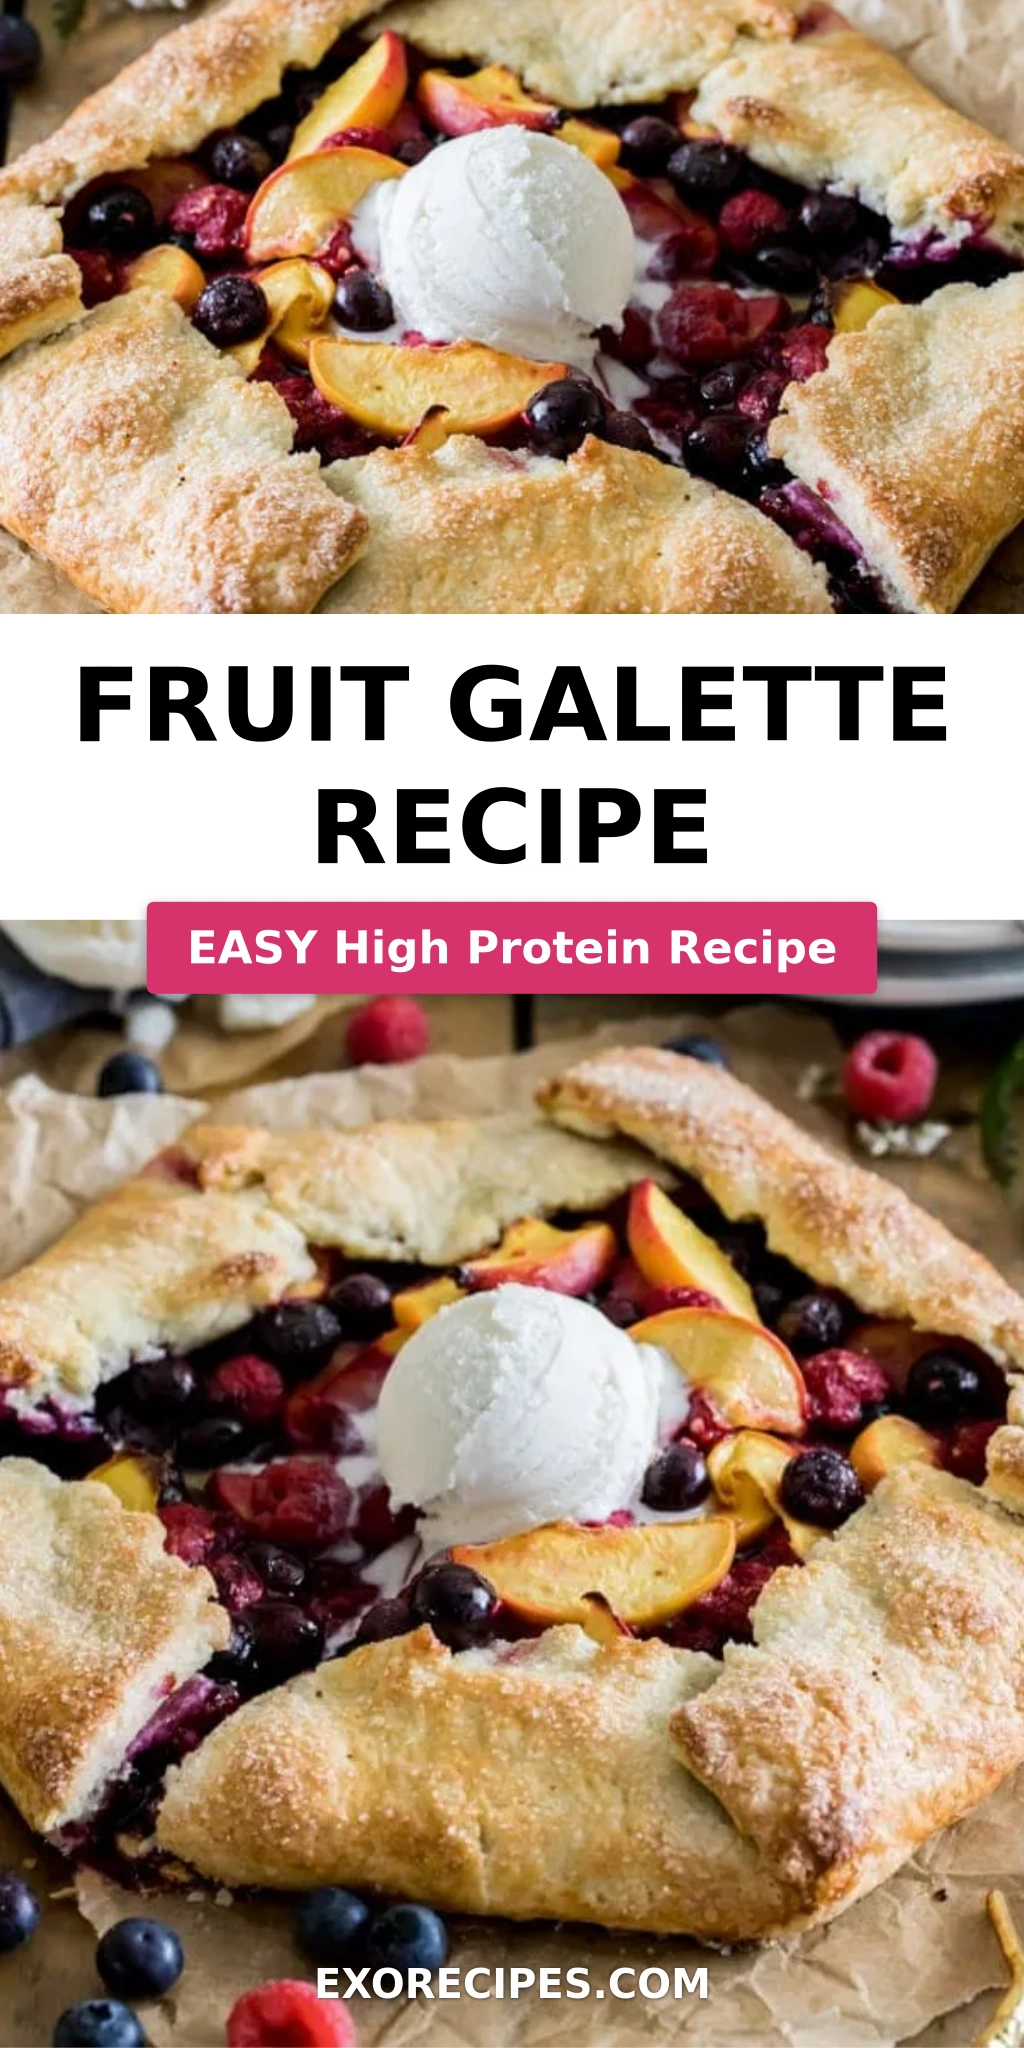
Fruit Galette Recipe: An Easy, Rustic Fruit Tart for Every Season
Growing up in Morocco, my mother’s kitchen was always filled with the scent of spices and fresh fruit. While we often made intricate pastries, sometimes the simplest desserts were the most cherished. This easy fruit galette recipe reminds me of that warmth and simplicity, but with a rustic, Parisian flair I picked up during my culinary training. Forget the fuss of a traditional pie crust; this homemade galette offers all the flavor with none of the intimidation. It’s truly a summer fruit dessert hero, a free-form tart that celebrates the natural beauty and taste of seasonal produce. The secret to its crisp, flaky crust and vibrant filling? Keep it simple, let the ingredients shine, and trust in a few chef-approved techniques.
Imagine biting into a perfectly tender, slightly tangy slice of baked fruit, cradled in a buttery, flaky crust. The fruit filling is bright and juicy, having caramelized beautifully in the oven, creating a burst of natural sweetness that’s perfectly balanced by a hint of lemon. The aroma that fills your kitchen as this rustic fruit tart bakes is intoxicating – a comforting blend of warm butter and sweet fruit. Whether it’s ripe berries in summer or crisp apples in fall, the galette adapts effortlessly, letting the fruit be the star. This isn’t just baking; it’s an experience, a moment of joy that transports you straight to a sun-drenched French country kitchen, or perhaps even a bustling New York farmers market, where I often find my inspiration!
What sets my fruit galette apart is the ingenious use of sour cream in the crust, a trick I learned that yields an incredibly tender, yet sturdy, pastry. Combined with ice-cold butter, it creates pockets of steam that result in unparalleled flakiness. I’ll share a pro tip on how to handle the dough so it’s a dream to work with, and we’ll tackle a common mistake that can lead to a soggy bottom. This recipe is designed to be foolproof, ensuring that even if you’re new to baking, you’ll achieve a spectacular homemade galette every time. It’s perfect for a weeknight treat or a casual gathering – stylish yet understated, just like some of my favorite bistros in Paris.
Why This Fruit Galette Recipe Is the Best
The Flavor Secret: Sour Cream Pastry My years spent mastering pastry in Paris taught me the importance of quality ingredients and subtle techniques. This particular easy fruit galette recipe shines because of the sour cream in the crust. It doesn’t just add a delicious tang, but the fat and acidity work wonders on the gluten in the flour, making the dough incredibly tender, pliable, and surprisingly effortless to roll out. It’s a trick I often rely on in my NYC kitchen when I want a pastry that’s both rich and light, perfect for elevating a simple fruit dessert.
Perfected Texture: Flaky & Crisp, Never Soggy A common pitfall with fruit tarts is a soggy bottom, but not with this homemade galette! I’ve incorporated steps to ensure the crust remains beautifully crisp, even with juicy fruit. The combination of cold butter, meticulous mixing, and a clever egg wash barrier acts as a shield against moisture. You’ll get that delightful crackle with every bite, a contrast to the soft, sweet fruit within, a texture balance I always strive for, reminiscent of the perfectly executed patisserie items from my days in France.
Foolproof & Fast: Rustic Charm, Effortless Execution This recipe truly lives up to its “easy fruit galette” title. It embraces the beauty of imperfection – no need for perfectly crimped edges or intricate lattice tops. The free-form nature is incredibly forgiving, making it a fantastic option for bakers of all skill levels. From quick prep to a relatively short bake time, this rustic fruit tart comes together far quicker than a traditional pie, allowing you to enjoy a stunning, handmade dessert without spending hours in the kitchen, a huge plus for my busy New York lifestyle!
Fruit Galette Ingredients
Whenever I whip up a fruit galette, I think of the vibrant fruit stalls at the Union Square Greenmarket here in NYC, or the bustling souks of Morocco where my mother would select the freshest, ripest produce. The beauty of this dessert lies in its simplicity, so choosing good quality ingredients truly makes all the difference.
Ingredients List
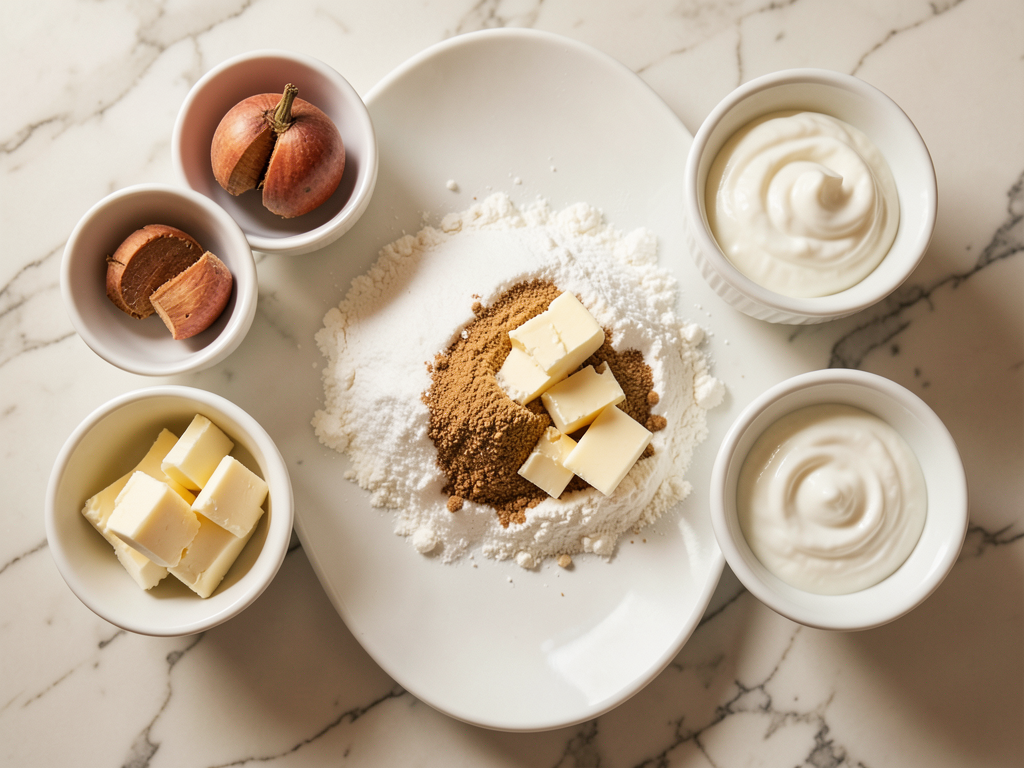
- 1 ½ cups all purpose flour
- 1 Tablespoon granulated sugar
- ½ teaspoon salt
- 9 Tablespoons unsalted butter (very cold and cut into 9 or more pieces)
- 6 Tablespoons of sour cream
- 1 ½ lbs various prepared fruit¹ (peeled, cored, and sliced if necessary)
- ¼ cup granulated sugar
- 2 teaspoons Lemon juice
- 1 ½ Tablespoons cornstarch²
- ⅛ teaspoon salt
- 1 large egg
- 2 teaspoons water
- Coarse or granulated sugar for sprinkling (optional)
- 1 ½ Tablespoons unsalted butter (cold and cut into small pieces, optional)
Ingredient Spotlight
Fresh Fruit: The star of your galette! For this easy fruit galette, you want ripe, firm fruit. Berries, sliced apples or pears, peaches, plums, and cherries all work beautifully. In my market expeditions in NYC, I always look for fruit that smells fragrant and yields slightly to pressure. The natural sugars and juices are key to a delicious summer fruit dessert. If you can’t find fresh, frozen fruit works, but be sure to thaw it thoroughly and drain any excess liquid to prevent a soggy crust.
Unsalted Butter: This is the foundation of a flaky crust in any French pastry. Using very cold, unsalted butter, cut into small pieces, ensures that it doesn’t fully incorporate into the dough. As it bakes, the butter melts and releases steam, creating those beautiful flaky layers crucial for a rustic fruit tart. I always have a good quality unsalted butter in my fridge – it makes such a difference.
Sour Cream: My trusted secret weapon for an exceptionally tender crust. The fat content in sour cream adds richness, while its acidity tenderizes the dough, making it supple and easy to roll. It contributes to a wonderfully moist yet flaky texture, surpassing what water alone can achieve. You can substitute with plain Greek yogurt or crème fraîche, but the tang of sour cream is truly distinctive.
Cornstarch: This is a key player in ensuring your fruit filling thickens beautifully without becoming watery, a common issue with juicy fresh fruit. It absorbs the fruit juices released during baking, preventing a soggy bottom and creating a glossy, spoonable filling. Sometimes I’ll use tapioca flour as a substitute – it works just as well to thicken the fruit filling.
| Original Ingredient | Best Substitution | Flavor / Texture Impact |
|---|---|---|
| Sour Cream | Plain Greek Yogurt or Crème Fraîche | Slightly different tang; Greek yogurt might be thicker, adjust consistency if needed. |
| Cornstarch | Tapioca Flour or All-Purpose Flour | Tapioca flour yields a similar clear, glossy finish. All-purpose flour will make the filling opaque and slightly paste-like. |
| Lemon Juice | Lime Juice or White Wine Vinegar | Lime juice offers a similar bright acidity. White wine vinegar provides acidity but with a slightly different flavor profile. |
| All-Purpose Flour | Gluten-Free All-Purpose Baking Blend (with xanthan gum) | Requires careful handling, might be slightly less elastic. Ensure the blend is suitable for pie crusts. |
How to Make Fruit Galette Recipe — Step-by-Step
Don’t be intimidated by homemade pastry – this easy fruit galette comes together beautifully with these clear steps. You’ve got this!
Step 1: Combine Dry Ingredients
In the basin of a food processor, combine 1 ½ cups all-purpose flour, 1 Tablespoon granulated sugar, and ½ teaspoon salt. Pulse a few times to ensure they are well mixed. This initial step creates a uniform base for our flaky crust.
💡 mia’s Pro Tip: Be sure your food processor blade is sharp! A dull blade can ‘bruise’ the butter instead of cutting it cleanly, resulting in a less flaky crust.
Step 2: Cut in Butter
Scatter the 9 Tablespoons of very cold, cut-up unsalted butter over the top of your dry ingredients. Pulse in short bursts until the butter is cut into the dry ingredients and the mixture resembles coarse crumbs, with some pea-sized pieces of butter remaining. This texture is essential for creating a rustic fruit tart with a tender, flaky crust.
⚠️ Common Mistake to Avoid: Over-processing the butter! If you blend too long, the butter will fully incorporate, resulting in a tough, dense crust instead of a light, flaky one. We want visible butter pieces.
Step 3: Add Sour Cream and Chill
Add the 6 Tablespoons of sour cream to the food processor and pulse again until the mixture just begins to clump together. It won’t form a perfect ball yet, that’s okay. Transfer the crumbly dough to a piece of plastic wrap or wax paper and form it into a ball. Lightly flatten it into a disc, wrap tightly, and chill for at least 30 minutes in the refrigerator. This chilling time helps hydrate the flour and firms up the butter, making the dough easier to roll.
Step 4: Preheat Oven and Prepare Fruit
While your galette crust is chilling, preheat your oven to 400°F (205°C). Now is also the time to prepare your 1 ½ lbs of various fruits. Ensure they are peeled, cored, and sliced to an even thickness – about ¼ inch for firm fruits like apples, or simply halved if using smaller berries.
💡 mia’s Pro Tip: Evenly sized fruit slices ensure consistent cooking, preventing some pieces from being too raw or mushy while others are perfect. This attention to detail is something I value from my French culinary training.
Step 5: Mix Fruit Filling
In a large bowl, combine your prepared fruit with ¼ cup granulated sugar, 2 teaspoons lemon juice, 1 ½ Tablespoons cornstarch, and ⅛ teaspoon salt. Stir gently until all the fruit is well-coated. The cornstarch is crucial here as it will thicken the juices released by the fruit, preventing a soggy bottom for your homemade galette.
Step 6: Roll Out Dough
Once the dough is chilled, remove it from the refrigerator and unwrap it. Transfer it to a clean, lightly floured surface. Dust with additional flour (as needed, but sparingly) and roll out the dough to a 12-13 inch circle, about ⅛ inch thick. Carefully transfer the rolled dough to a large baking sheet lined with parchment paper. I sometimes use a round pizza pan, but a standard cookie sheet works perfectly.
Step 7: Prepare Egg Wash
In a small bowl, whisk together 1 large egg and 2 teaspoons of water to create an egg wash. Use a pastry brush to lightly brush the center of your pie dough, leaving a 2-inch perimeter dry. This barrier will help keep the galette from getting soggy. Don’t discard the rest of the egg wash yet – we’ll use it later!
Step 8: Assemble Galette
Give your fruit one more stir in its bowl, then carefully transfer it to the center of your galette crust, mounding it slightly. Make sure to leave that 2-inch perimeter of fruit-free crust around the edge. This space is essential for forming the rustic, folded edges of your tart.
⚠️ Common Mistake to Avoid: Overfilling the galette. Too much fruit will make it harder to fold the edges and can lead to excessive juice seeping out, contributing to a soggy crust.
Step 9: Fold the Edges
Fold the perimeter/border of your crust carefully over the fruit filling, working your way around the circle. Pinch the folds together slightly to secure them. It will not completely cover the fruit; you should have a beautiful, exposed circle of fruit in the center. This is the charm of a rustic fruit tart!
Step 10: Dot with Butter
If using, dot the exposed fruit with the 1 ½ Tablespoons of cold, small pieces of unsalted butter. These little pats of butter will melt into the fruit, adding richness and a lovely sheen as it bakes.
Step 11: Brush and Sprinkle
Brush the folded-over pastry with the remaining egg wash. If desired, sprinkle the brushed pastry with coarse or granulated sugar. This adds a beautiful sparkle and a delightful crunch to the crust of your summer fruit dessert.
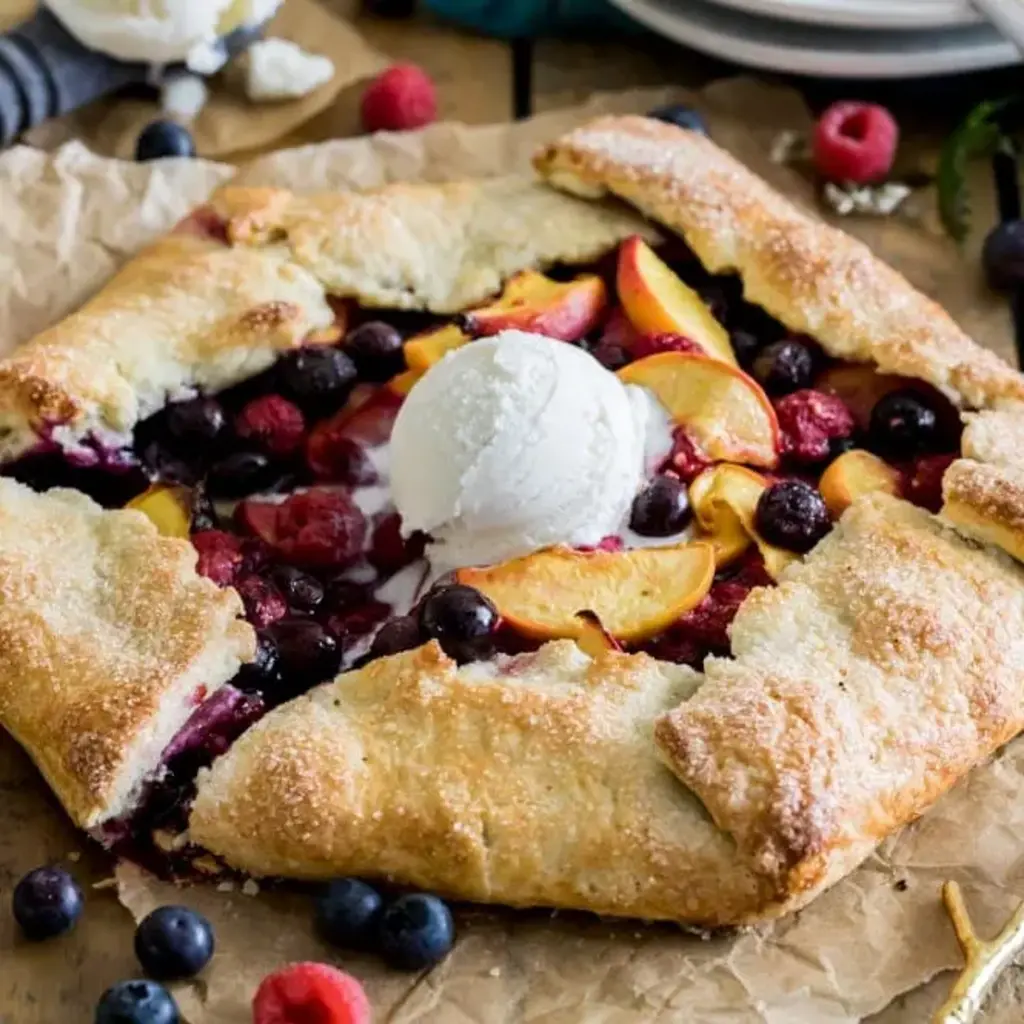
Step 12: Bake and Cool
Transfer the galette to your preheated 400°F (205°C) oven and bake for 30-35 minutes, or until the fruit is bubbling and the crust is a beautiful golden brown color. Once baked, allow the galette to cool on the baking sheet for at least 20-30 minutes before slicing and serving. This allows the filling to set properly.
| Step | Action | Duration | Key Visual Cue |
|---|---|---|---|
| 1-3 | Prepare and Chill Dough | ~40 min (30 min chill) | Dough formed into a disc, firm to the touch. |
| 4-5 | Preheat Oven & Prepare Fruit | ~15 min | Fruit coated evenly, oven at 400°F. |
| 6-7 | Roll Dough & Apply Egg Wash Base | ~10 min | Dough round, ~12-13 inches, egg wash brushed on center. |
| 8-11 | Assemble Galette | ~10 min | Fruit mounded in center, crust folded over, brushed with egg wash and sugared. |
| 12 | Bake & Cool | 30-35 min bake, 20-30 min cool | Crust golden, fruit bubbling. |
Serving & Presentation
A fruit galette, especially this gorgeous homemade galette, is a testament to rustic elegance. In my French culinary training, presentation was key, even for the most ‘country-style’ dishes. I love serving this warm, letting the natural beauty of the exposed fruit shine through. A simple dusting of powdered sugar just before serving adds a touch of sophistication, like freshly fallen snow contrasting with the vibrant fruit below. For a truly decadent experience, a scoop of good vanilla bean ice cream or a dollop of freshly whipped cream is non-negotiable. The warm galette and cold cream create a delightful temperature and textural contrast that’s pure joy.
To elevate it further, especially for a summer fruit dessert, consider a drizzle of a fruit reduction or a sprinkle of fresh mint or basil leaves (surprisingly delicious with berries!). The beauty of a rustic fruit tart like this is that it doesn’t need much fuss; its charm lies in its wholesome, slightly imperfect appearance. It’s a dessert that invites communal sharing, perfect for a casual dinner party on a rooftop in Brooklyn or a relaxed brunch in the Moroccan countryside.
The pairing possibilities are endless, but I often think about what complements the fruit’s natural sweetness and acidity. A simple espresso or a light, crisp dessert wine makes for a lovely accompaniment. If I’m feeling particularly nostalgic for my Moroccan roots, a strong mint tea would be a delightful, unexpected counterpoint to the buttery crust and sweet fruit.
| Pairing Type | Suggestions | Why It Works |
|---|---|---|
| Side Dish | Vanilla Bean Ice Cream, Crème Fraîche, Whipped Cream | Cool, creamy textures provide a delightful contrast to the warm, fruity galette. |
| Sauce / Dip | Raspberry Coulis, Light Caramel Sauce, Cardamom Crème Anglaise | Adds an extra layer of flavor and moisture without overwhelming the fruit. |
| Beverage | Sparkling Rosé, Earl Grey Tea (iced or hot), Fresh Mint Tea | The effervescence or subtle bitterness helps cut through the sweetness. |
| Garnish | Fresh Mint Leaves, Confectioners’ Sugar, Toasted Almond Slices | Enhances visual appeal and adds a fresh aroma or subtle crunch. |
Make-Ahead, Storage & Reheating
In my fast-paced NYC life, being able to prep dishes in advance is a lifesaver. This fruit galette recipe is wonderfully accommodating for make-ahead convenience, ensuring a fresh-baked dessert is never far away. Proper storage also means you can enjoy that rustic fruit tart goodness for days.
| Method | Container | Duration | Reheating Tip |
|---|---|---|---|
| Refrigerator (Baked) | Airtight container or covered loosely | 3-4 days | Rewarm slices in a 300°F (150°C) oven for 10-15 minutes until crust crisps up. |
| Freezer (Unbaked) | Wrap dough disc tightly in plastic wrap, then foil | Up to 1 month | Thaw overnight in the fridge, then roll out and assemble as directed. Add 5-10 min to bake time. |
| Freezer (Baked) | Wrap cooled galette tightly in plastic wrap, then foil | Up to 2 months | Thaw at room temp, then rewarm in 350°F (175°C) oven for 15-20 minutes. |
| Make-Ahead (Dough) | Wrapped disc in plastic wrap | Up to 2 days in advance | Simply remove from fridge 15-20 min before rolling to soften slightly. |
For slices of baked galette, I find that a quick stint in a toaster oven works wonders for bringing back that lovely crispness to the crust. Microwaving is generally a no-go, as it can make the pastry soft and mushy – and we worked too hard for that flaky perfection! If you’re planning a dinner party, consider preparing the dough the day before; it truly makes the assembly on the day of a breeze, leaving you more time to enjoy your guests, or perhaps a pre-dinner cocktail, as we often do in my Chelsea apartment.
When freezing an unbaked galette, ensure the fruit is properly drained if it’s very juicy – some fruits, like berries, benefit from being mixed with their sugar and cornstarch and allowed to sit for 15 minutes to release liquid before assembly and freezing. This simple step can prevent a watery mess upon baking. Always bake from thawed, never frozen, to ensure the crust cooks through evenly.
Variations & Easy Swaps
| Variation | Key Change | Best For | Difficulty Impact |
|---|---|---|---|
| Spiced Apple Galette | Add warm spices (cinnamon, nutmeg), a touch of brown sugar | Autumn desserts, cozy gatherings | Minimal (easy spice additions) |
| Gluten-Free Galette | Swap all-purpose flour for GF baking blend | Dietary restrictions, unique texture | Slight increase (dough can be more delicate) |
| Berry Almond Galette | Add almond flour to crust, almond extract to fruit, sprinkle with sliced almonds | Nutty flavor, summer fruit celebration | Minimal (simple additions) |
Spiced Apple Galette
For a warm, comforting twist on this easy fruit galette, embrace fall flavors with apples. Slice firm, tart apples like Granny Smith or Honeycrisp and toss them with cinnamon, a pinch of nutmeg, a whisper of cloves (a remnant from my Moroccan spice cabinet!), and perhaps a tablespoon of dark brown sugar along with the white sugar and cornstarch. The deep, aromatic spices perfectly complement the sweetness of the apples, creating a rustic fruit tart that’s perfect for a crisp evening.
Gluten-Free Galette
Making this homemade galette gluten-free is quite simple. Just swap out the all-purpose flour for a good quality 1:1 gluten-free baking blend that contains xanthan gum. I’ve tested several brands in my NYC kitchen, and many yield a wonderfully tender and flaky crust. You might find the dough a bit more delicate to work with, so handle it gently, but the end result is a delicious dessert that everyone can enjoy.
Berry Almond Galette
To add a sophisticated, nutty dimension to your summer fruit dessert, try making a berry almond galette. Incorporate 2 tablespoons of almond flour into the crust alongside the all-purpose flour. Then, when preparing your mixed berries (strawberries, raspberries, blueberries from my farmers market haul!), add a teaspoon of almond extract to the filling. Before baking, sprinkle the exposed fruit and folded crust with a handful of sliced almonds for an elegant crunch and toasted flavor.
What is the difference between a galette and a pie?
Ah, the classic question! The main difference between a fruit galette and a pie lies in their form and formality. A pie is typically baked in a pie dish, often with a top crust, and has a more structured, traditional appearance. A galette, on the other hand, is a free-form, rustic tart baked directly on a baking sheet. Its edges are simply folded over the filling without precision or a pie plate, giving it a charmingly imperfect, ‘country-style’ look. From a flavor perspective, my fruit galette often has a crisper crust due to the direct heat of the baking sheet, and embraces the natural beauty of the fruit more openly.
Can I use frozen fruit for a fruit galette?
Absolutely, you can! Frozen fruit works well for a fruit galette, especially when certain fresh fruits aren’t in season. The key is to thaw the frozen fruit completely before you mix it with the sugar and cornstarch. Once thawed, make sure to drain any excess liquid thoroughly. Frozen fruit tends to release more water than fresh, so draining is crucial to prevent your rustic fruit tart from becoming soggy. If it still looks very wet, you might even add an extra ½ teaspoon of cornstarch to the filling mixture for good measure to help absorb that moisture.
How do I keep the bottom of my galette from getting soggy?
A soggy bottom is every baker’s nemesis, but I have a few tricks to keep your easy fruit galette crust perfectly crisp! First, always use cornstarch (or tapioca flour) mixed with your fruit filling to absorb excess juices. Second, my recipe includes brushing the center of the dough with an egg wash before adding the fruit – this creates a protective barrier. Third, ensure your oven is preheated to the correct temperature, as a hot oven creates a quick crisp. Lastly, don’t overfill the galette; too much fruit leads to too much liquid. These layers of protection ensure your homemade galette stays flaky and delicious.
What’s the best way to fold the edges of a galette?
Folding the edges of a galette is where the rustic charm really comes to life, and it’s easier than you think! Once your fruit filling is mounded in the center, leaving a 2-inch border of dough, simply lift the edge of the dough and fold it up and over the fruit, forming pleats as you go. Overlap the dough slightly, pinching to secure each fold. There’s no need for perfection here; the uneven, natural folds are part of a rustic fruit tart’s beauty. Just make sure the folds are tight enough to contain the fruit but not so tight that they tear.
Can I make the galette dough ahead of time?
Absolutely, making the galette dough ahead of time is a fantastic idea, especially for busy folk like me here in New York! You can prepare the dough disc, wrap it tightly in plastic wrap, and store it in the refrigerator for up to 2 days. This chilling time actually enhances the flavor and makes the dough easier to work with. Just make sure to take it out of the fridge about 15-20 minutes before you plan to roll it out, allowing it to soften slightly so it doesn’t crack when you start. It’s a great meal prep hack for this easy fruit galette.
Share Your Version!
I poured my heart, and a little bit of Moroccan and Parisian influence, into perfecting this easy fruit galette recipe for you. Now it’s your turn to make it shine! I’d be absolutely thrilled if you tried this homemade galette and shared your experience. Please leave a star rating and comment below – your feedback means the world to me.
Did you use a unique fruit combination from your local market? Or perhaps you added a touch of spice that reminds you of your own culinary heritage? Share a photo of your beautiful rustic fruit tart on Instagram or Pinterest, and don’t forget to tag @exorecipes so I can see your wonderful creations! Tell me, what’s your favorite fruit to use in a summer fruit dessert like this?
From my NYC kitchen to yours — I hope this recipe brings as much warmth to your table as it does to mine. — mia 🧡
Love This Recipe? Save It to Pinterest!
If you enjoyed this Fruit Galette Recipe recipe, don’t let it get lost in your browser tabs! 😄 Pin it now so you can find it again anytime — and explore hundreds more tried-and-tested recipes waiting for you on my Pinterest boards.
👉 Follow mia on Pinterest @chefrecipes2
📌 Pin this recipe · 🔁 Re-pin your favorites · 💬 Tag me when you make it — I love seeing your creations!

Fruit Galette Recipe
Description
How to make a simple fruit galette! Galettes are easier to make than fruit pies, but every bit as tasty. Be sure to check out my how-to VIDEO!
Ingredients
- 1 ½ cups all purpose flour
- 1 Tablespoon granulated sugar
- ½ teaspoon salt
- 9 Tablespoons unsalted butter (very cold and cut into 9 or more pieces)
- 6 Tablespoons of sour cream
- 1 ½ lbs various prepared fruit¹
- ¼ cup granulated sugar
- 2 teaspoons Lemon juice
- 1 ½ Tablespoons cornstarch²
- teaspoon salt
- 1 large egg
- 2 teaspoons water
- Coarse or granulated sugar for sprinkling (optional)
- 1 ½ Tablespoons unsalted butter (cold and cut into small pieces, optional)
Instructions
- Combine flour, sugar, and salt in the basin of a food processor³ and pulse to combine.
- Scatter butter pieces over the top of your dry ingredients and pulse until butter is cut into the dry ingredients and the mixture resembles coarse crumbs.
- Add sour cream and pulse again until the mixture begins to clump together. Transfer to a piece of plastic wrap or wax paper and form into a ball. Lightly flatten into a disc and chill for at least 30 minutes in the refrigerator.
- While galette crust is chilling, preheat oven to 400F (205C) and prepare your fruit filling.
- Combine fruit, sugar, lemon juice, cornstarch, and salt in a large bowl and stir until well-combined. Set aside.
- Once dough has finished chilling, remove from refrigerator and transfer to a clean, lightly floured surface. Dust with additional flour and roll out to a 12-13 circle. Transfer to a baking sheet (sometimes I will use a round pizza pan, but a standard cookie sheet works, too).
- Prepare egg wash by whisking together egg and water in a small bowl. Use a pastry brush to lightly brush your pie dough with egg wash (this will help keep the galette from getting soggy). Dont discard egg wash yet.
- Give your fruit one more stir in the bowl and then carefully transfer to the center of your galette crust, leaving a 2 perimeter of fruit-free crust.
- Fold the perimeter/border of your crust carefully over the fruit filling and pinch together to secure (it will not completely cover it, you should have a nice circle of exposed fruit in the center!).
- Dot the fruit with butter pieces, if using.
- Brush the folded-over pastry with egg wash and sprinkle with sugar, if desired.
- Transfer to 400F (205C) oven and bake for 30-35 minutes or until the fruit is bubbling and the crust is a nice golden color. Allow to cool before slicing and serving.
Nutrition
- Calories: 395 kcal
- Sugar: 19 g
- Fat: 24 g
- Carbohydrates: 42 g
- Protein: 5 g
Tried This Recipe? Leave a Comment!
Did you make this recipe? I’d love to hear how it turned out! Please leave a comment and a rating below. Your feedback helps other home cooks and supports cheerychop.com!
