Table of Contents
Classic Red Velvet Cake Recipe with Cream Cheese Frosting – The Most Moist Classic Red Velvet Cake
I’ll never forget the first time I tasted a red velvet cake at a neighborhood bakery in Marrakech as a little girl. It was love at first bite — that deep red crumb, the faint cocoa whisper, and that tangy cream cheese frosting that somehow felt both decadent and comforting. Now, living in New York City, I’ve spent years perfecting my own red velvet cake recipe, blending my Moroccan roots with the precision I learned at Le Cordon Bleu in Paris. This classic red velvet cake is moist, tender, and has a subtle cocoa flavor. Topped with a rich and tangy cream cheese frosting, it’s a timeless dessert perfect for any celebration. Whether it’s for a birthday, a holiday, or just because you deserve something wonderful, this cake always delivers.
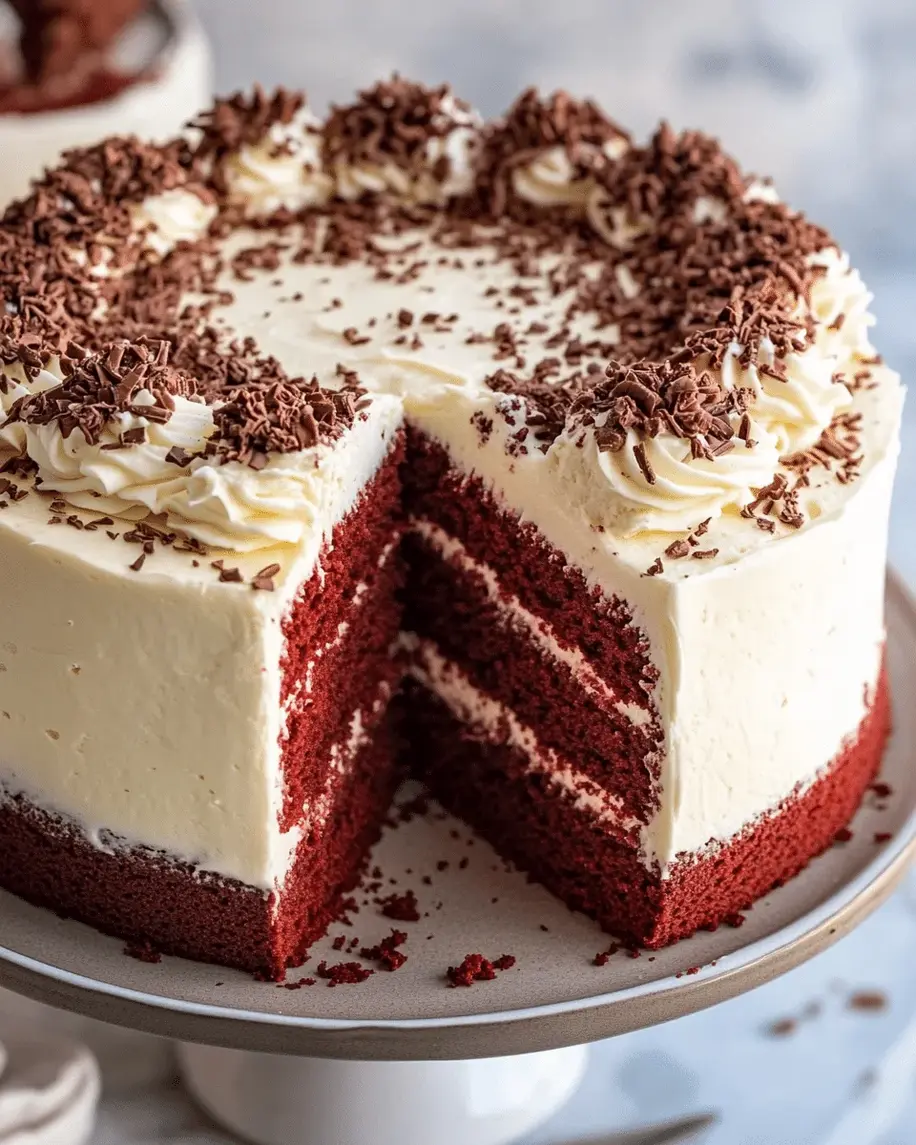
Imagine slicing into a tall, velvety layer cake — the knife glides through the lightest, most tender crumb you’ve ever encountered. The frosting is billowy and smooth, with just enough tang to cut through the sweetness. Each forkful melts on your tongue, leaving behind a hint of buttermilk tang and a whisper of cocoa. I always say the secret is in the balance: not too sweet, not too rich, just perfectly luscious. The addition of a touch of buttermilk and my go‑to technique of folding the dry ingredients into the wet mixture by hand ensures a delicate structure that stays moist for days.
After training in Paris and cooking professionally for many years, I’ve tested this recipe dozens of times to get it just right. My version uses a simple method that any home baker can master, yet it delivers bakery‑quality results. One common mistake I see is overmixing the batter, which leads to a dense, tough cake — I’ll show you exactly how to avoid that. Plus, I’ll let you in on a little trick I learned in a patisserie in the 10th arrondissement: letting the cake rest overnight before serving makes the flavor truly sing. This truly is the easiest, most foolproof red velvet cake recipe you’ll find.
Why This Classic Red Velvet Cake Recipe Is the Best
The flavor secret? It’s all about that perfect tang. Most red velvet cakes are too sweet, but I use a generous amount of buttermilk and a touch of white vinegar to create a subtle acidity that balances the cocoa and the frosting. Growing up, my mother always taught me that a good dessert should not just be sweet — it should surprise your palate. That principle guides every recipe I create.
Texture is everything in a classic red velvet cake. The key technique I learned in Paris — reverse creaming, where you blend the oil into the dry ingredients first — ensures an exceptionally tender crumb. Combined with the reaction between the buttermilk and baking soda, each layer rises evenly and stays pillowy‑soft. 💡 mia’s Pro Tip: Using room‑temperature eggs and buttermilk is non‑negotiable for a smooth, uniform batter. Cold ingredients can cause the batter to curdle and the cake to bake unevenly.
Foolproof and fast — this recipe is designed with busy home cooks in mind. You don’t need a stand mixer; a whisk and a spatula work perfectly. From start to finish, you’ll have two beautiful layers cooling in less than an hour. And because the frosting comes together in minutes, you can assemble and serve the same day. ⚠️ Common Mistake to Avoid: Don’t skip greasing and flouring the pans — even non‑stick pans need that extra layer of insurance to avoid a sticky disaster.
Red Velvet Cake Recipe Ingredients
I source most of my pantry staples from the Union Square Greenmarket or my local bodega in Hell’s Kitchen. Whenever I’m back in Morocco, I bring home a special vanilla extract that reminds me of the souks, but good‑quality American‑sized extracts work beautifully too. Let’s walk through what you’ll need.
Ingredients List
- 2 1/2 cups all-purpose flour
- 1 1/2 cups granulated sugar
- 1 teaspoon baking soda
- 1 teaspoon salt
- 1 teaspoon cocoa powder
- 1 1/2 cups vegetable oil
- 1 cup buttermilk, room temperature
- 2 large eggs, room temperature
- 2 tablespoons red food coloring (or 1 tablespoon gel food coloring)
- 1 teaspoon white vinegar
- 1 teaspoon vanilla extract
- For the Cream Cheese Frosting:
- 1 (8 oz) package cream cheese, softened
- 1/2 cup unsalted butter, softened
- 4 cups powdered sugar
- 1 teaspoon vanilla extract
- 1 cup chopped pecans (optional)
Ingredient Spotlight
Buttermilk is the heart of this cake — its acidity tenderizes the gluten and reacts with the baking soda to give the cake its lift. In US grocery stores you’ll find it near the dairy; if you’re out, you can make a quick substitute by adding 1 tablespoon of lemon juice or vinegar to 1 cup of milk and letting it sit for 5 minutes.
Cocoa powder gives the cake its subtle chocolate note and deepens the red color. I prefer natural unsweetened cocoa (not Dutch‑processed) because its acidity also helps with the rise. Good‑quality brands like Hershey’s or Ghirardelli work perfectly.
Red food coloring is what gives this cake its iconic visual. I use liquid gel coloring (like AmeriColor) for a vibrant hue without diluting the batter. If you want a natural alternative, beet powder works, but the color will be more of a deep burgundy — still beautiful, just not the classic bright red.
Cream cheese and butter for the frosting must be at room temperature. Cold cream cheese will leave lumps that no amount of beating can remove. I always soften mine on the counter for about an hour before starting.
| Original Ingredient | Best Substitution | Flavor / Texture Impact |
|---|---|---|
| Buttermilk | Milk + 1 tbsp lemon juice or vinegar | Slightly less tang; texture remains tender |
| Vegetable oil | Canola or light olive oil | Nearly identical; olive oil adds slight fruitiness |
| Red food coloring (liquid) | Gel food coloring (1 tbsp) | More concentrated; batter stays thicker |
| Cream cheese | Neufchâtel (lower fat) | Slightly less rich; frosting will be a bit softer |
How to Make Classic Red Velvet Cake — Step-by-Step
Making this cake is truly simple. Follow these steps, and you’ll have a showstopper that will have everyone asking for your secret. I’ll walk you through each one with the care I’d use in my own kitchen.
Step 1: Prepare Your Pans and Oven
Preheat the oven to 350°F (175°C). Grease and flour two 9‑inch round cake pans. 💡 mia’s Pro Tip: Use a pastry brush to coat the pans evenly with softened butter, then dust with flour and tap out the excess. This ensures a clean release every time.
Step 2: Whisk Dry Ingredients
In a large bowl, whisk together 2½ cups all‑purpose flour, 1½ cups sugar, 1 teaspoon baking soda, 1 teaspoon salt, and 1 teaspoon cocoa powder. This mixture ensures the cocoa is evenly distributed.
⚠️ Common Mistake to Avoid: Skipping the sifting or whisking can leave pockets of dry ingredients that won’t incorporate smoothly.
Step 3: Mix Wet Ingredients
In another bowl, combine 1½ cups vegetable oil, 1 cup buttermilk (room temp), 2 large eggs, 2 tablespoons red food coloring, 1 teaspoon white vinegar, and 1 teaspoon vanilla extract. Whisk until smooth and uniform.
Step 4: Combine Wet and Dry
Gradually add the dry ingredients to the wet mixture, stirring with a spatula just until combined. Do not overmix — a few streaks of flour are fine. Overworking the batter develops gluten and makes the cake tough.
💡 mia’s Pro Tip: A spatula is better than a mixer here — you want a light hand. Fold until you see a uniform, thick, glossy batter.
Step 5: Bake the Layers
Divide the batter evenly between the prepared pans. Bake for 30 to 35 minutes, or until a toothpick inserted into the center comes out clean. The tops should spring back lightly when touched.
⚠️ Common Mistake to Avoid: Opening the oven door too early — the cake can sink. Wait until at least 25 minutes have passed before checking.
Step 6: Cool the Cakes
Let the cakes cool in the pans for 10 minutes on a wire rack, then turn them out onto the rack to cool completely. This cooling step is crucial — frosting a warm cake will cause the frosting to slide right off.
Step 7: Make the Frosting
In a large bowl, beat the softened cream cheese and butter together until smooth and creamy. Gradually add the powdered sugar, beating on low speed, then increase to medium‑high until light and fluffy. Stir in vanilla extract.
💡 mia’s Pro Tip: If the frosting seems too thin, chill it for 15 minutes. If too thick, add a tablespoon of milk at a time.
Step 8: Assemble and Frost
Place one cooled cake layer on a serving plate. Spread about 1 cup of frosting evenly on top. Place the second layer on top, then frost the entire cake — sides and top — with the remaining frosting. Garnish with chopped pecans if desired.
| Step | Action | Duration | Key Visual Cue |
|---|---|---|---|
| 1 | Preheat & prep pans | 5 min | Oven at 350°F; pans greased & floured |
| 2 | Whisk dry ingredients | 3 min | Uniform color, no lumps |
| 3 | Mix wet ingredients | 5 min | Smooth, bright red liquid |
| 4 | Combine wet & dry | 2 min | Thick, even batter; just combined |
| 5 | Bake | 30–35 min | Toothpick clean; top springs back |
| 6 | Cool | 10 min in pan + 30 min on rack | Layers at room temp |
| 7 | Make frosting | 10 min | Fluffy, spreadable consistency |
| 8 | Assemble & frost | 15 min | Even layers, smooth sides |
Serving & Presentation
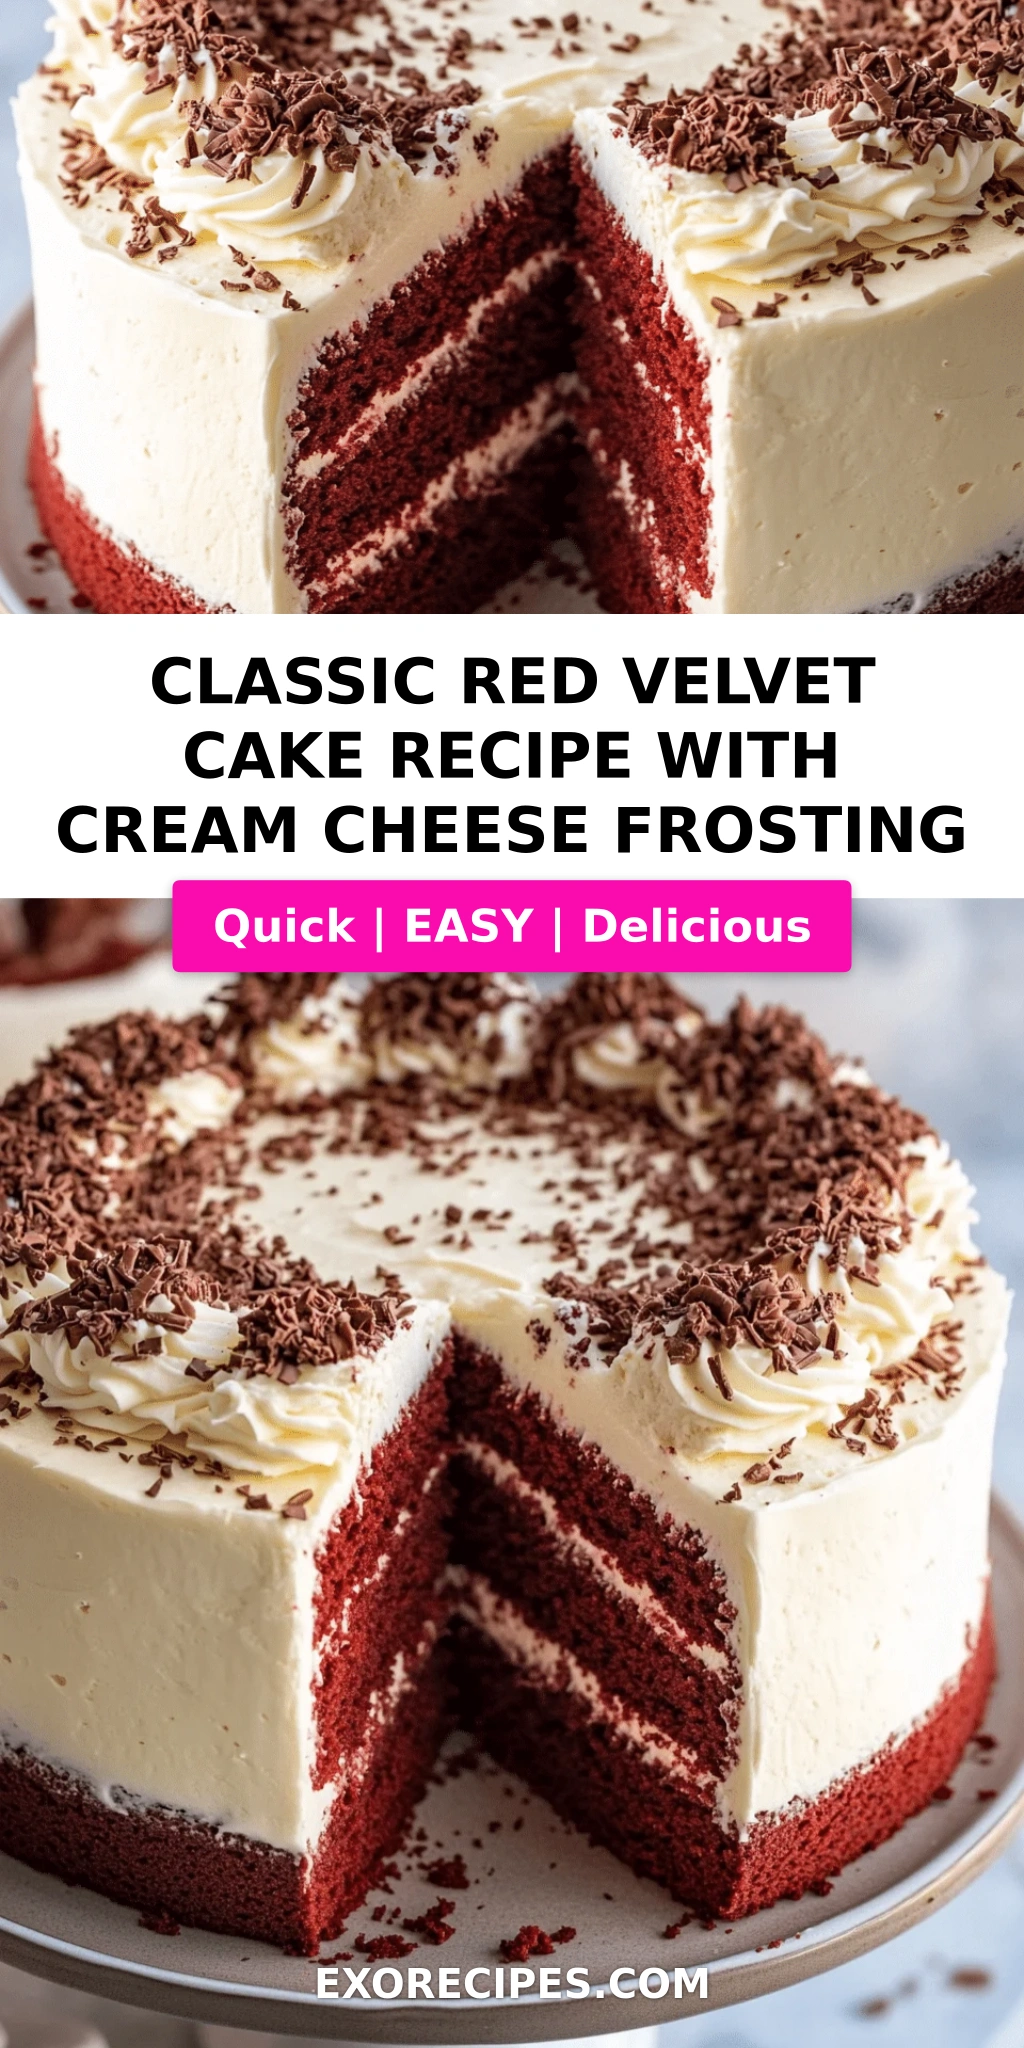
A classic red velvet cake deserves a beautiful presentation. I like to serve it on a simple white cake stand so the deep red layers pop against the creamy white frosting. For a festive touch, sprinkle the top with a few chopped pecans or a dusting of powdered sugar. In Morocco, we often serve cakes with a side of mint tea — but here in New York, a tall glass of cold milk or a strong coffee is my go‑to pairing.
If you’re bringing this cake to a gathering, slice it neatly with a long serrated knife, wiping the blade between cuts for clean lines. Each piece should show the beautiful striping of red cake and white frosting. I love seeing the “wow” faces when I set it on the table — it’s a guaranteed crowd‑pleaser.
| Pairing Type | Suggestions | Why It Works |
|---|---|---|
| Side Dish | Vanilla ice cream, fresh berries | Cold and tart contrasts the rich cake |
| Beverage | Coffee, cold milk, mint tea | Bitter or creamy notes balance sweetness |
| Garnish | Chopped pecans, red sprinkles, chocolate curls | Texture contrast and visual pop |
Make-Ahead, Storage & Reheating
This red velvet cake actually tastes even better the next day — the flavors meld together beautifully. Here’s how I store it in my busy NYC kitchen. If you’re planning ahead, you can bake the layers a day in advance and frost them the morning of your event.
| Method | Container | Duration | Reheating Tip |
|---|---|---|---|
| Refrigerator | Covered cake keeper or wrapped layers | Up to 4 days | Serve cold or let sit 20 min at room temp |
| Freezer | Wrap layers in plastic wrap + foil | Up to 3 months | Thaw in fridge overnight; frost after thawing |
| Make-Ahead | Bake layers, cool, wrap tightly | Up to 2 days before | Frost just before serving for best texture |
If you’re reheating a leftover slice, I recommend microwaving it for 10 seconds — just enough to take the chill off without melting the frosting. Or, if you prefer it cold, slice and enjoy straight from the fridge. The cream cheese frosting stays firm and delicious.
Variations & Easy Swaps
| Variation | Key Change | Best For | Difficulty Impact |
|---|---|---|---|
| Chocolate Red Velvet | Add ¼ cup melted dark chocolate to batter | Deep chocolate lovers | Easy – no extra steps |
| Gluten‑Free | Use a 1:1 gluten‑free flour blend | Celiac or GF diets | Easy – same method |
| Spiced Red Velvet | Add ½ tsp cinnamon + ¼ tsp cardamom | Holiday twist | Easy – just whisk in |
Chocolate Red Velvet
For an extra‑decadent version, melt ¼ cup of good dark chocolate (70% cocoa) and fold it into the batter after combining wet and dry. This adds a deeper chocolate flavor that pairs beautifully with the cream cheese frosting. I learned a similar trick in a Parisian patisserie for a “double chocolate” twist.
Gluten‑Free Red Velvet
Swap the all‑purpose flour for a high‑quality 1:1 gluten‑free baking blend (like Bob’s Red Mill). You may need to add an extra tablespoon of buttermilk if the batter seems too thick. The texture will be slightly more tender, but the flavor is spot‑on. I’ve tested this for friends with celiac, and they always rave.
Spiced Red Velvet
In the winter, I love adding a pinch of cinnamon and cardamom to the dry ingredients. This nods to my Moroccan heritage — those warm spices make the cake feel extra cozy. It’s still unmistakably red velvet, but with a subtle aromatic lift that surprises and delights.
What is the secret to keeping red velvet cake moist?
The secret lies in the combination of buttermilk and oil. Buttermilk’s acidity tenderizes the gluten, while oil (instead of butter) stays liquid at room temperature, ensuring a moist crumb that lasts for days. Also, don’t overbake — remove the layers as soon as a toothpick comes out clean. I always let my cakes cool completely before storing to avoid condensation, which can dry them out.
Can I substitute buttermilk in a classic red velvet cake recipe?
Absolutely. If you don’t have buttermilk, you can make a quick substitute by adding 1 tablespoon of lemon juice or white vinegar to 1 cup of whole milk. Let it sit for 5 minutes until it curdles slightly. This homemade version works perfectly — I’ve used it many times when I forgot to buy buttermilk at the Union Square market. The cake will still be tender and tangy, though the flavor may be slightly less pronounced.
How long should I cool red velvet cake layers before frosting with cream cheese frosting?
You should cool the layers completely — at least 30 to 40 minutes after turning them out onto a wire rack. The cakes must be at room temperature; if they’re even slightly warm, the cream cheese frosting will melt and slide off. I usually let mine sit for an hour to be safe. For best results, you can even refrigerate the layers for 15 minutes before frosting to ensure they’re firm.
Can I make red velvet cake without red food coloring?
Yes, you can! For a natural color, use beet powder or beet juice. Start with 2 tablespoons of beet powder mixed with a little warm water, or replace the buttermilk with an equal amount of beet juice. The color will be a deep burgundy rather than bright red, and the flavor will have a mild earthy note. I’ve used this method for a more natural take, and it’s always a conversation starter.
Why does my red velvet cake sometimes turn out dry?
Dryness is usually caused by overbaking or using too much flour. Make sure you measure your flour correctly — spoon it into the cup and level it off, rather than scooping directly. Also, keep an eye on the oven: all ovens run differently, so start checking at 28 minutes. If the cake is dry after baking, you can brush each layer with a little simple syrup before frosting to add moisture.
Can I use butter instead of oil in red velvet cake?
You can, but the texture will be denser and less moist. Oil ensures a tender crumb because it doesn’t solidify when cool. If you want to use butter, substitute 1½ cups melted unsalted butter for the oil, and reduce the buttermilk by 2 tablespoons to adjust the liquid balance. The cake will still taste wonderful, but I recommend sticking with oil for the classic moist results.
How do I store left over red velvet cake with cream cheese frosting?
Because cream cheese frosting is dairy‑based, you must store the cake in the refrigerator. Place it in an airtight cake keeper or wrap it loosely with plastic wrap (avoiding the frosting if possible). Let it come to room temperature for about 20 minutes before serving — this softens the frosting and brings back the cake’s tender texture. It will keep well for up to 4 days.
Can I make this red velvet cake as cupcakes?
Yes, this batter works beautifully for cupcakes. Line a 12‑cup muffin tin with paper liners and fill each cup about ⅔ full. Bake at 350°F for 18 to 22 minutes, until a toothpick comes out clean. Let them cool completely before frosting. You’ll get about 18 to 24 cupcakes depending on size. They’re perfect for parties and freeze well for up to 2 months.
What makes red velvet cake different from chocolate cake?
Red velvet cake is much lighter in cocoa flavor than chocolate cake — it uses only 1 to 2 tablespoons of cocoa powder versus a typical chocolate cake’s ½ cup or more. The signature tang from buttermilk and vinegar, plus the bright red color, also set it apart. The crumb is usually finer and more tender thanks to the chemical reaction between the buttermilk and baking soda.
Can I add nuts to the red velvet cake batter?
Absolutely. Fold in ½ cup of finely chopped pecans or walnuts to the batter after mixing. This adds a pleasant crunch that contrasts with the soft crumb. I often do this when I want a little extra texture. You can also sprinkle nuts on top of the frosting as a garnish. Just be sure to toast the nuts lightly first for deeper flavor.
Share Your Version!
I hope you fall in love with this classic red velvet cake as much as I have. It’s the kind of dessert that feels both nostalgic and elegant — perfect for making memories. When you bake it, please come back and leave a star rating and a comment below. I absolutely love hearing about your results!
Take a photo of your beautiful cake and tag me on Instagram or Pinterest @exorecipes — I can’t wait to see your creations. Got a question about the recipe or a twist you’d like to try? Ask away in the comments; I answer every single one. And if you have a special occasion coming up, let me know — I might just share a variation you’ll love.
From my NYC kitchen to yours — I hope this recipe brings as much warmth to your table as it does to mine. — mia 🧡
Love This Recipe? Save It to Pinterest!
If you enjoyed this Classic Red Velvet Cake Recipe with Cream Cheese Frosting, don’t let it get lost in your browser tabs! 😄 Pin it now so you can find it again anytime — and explore hundreds more tried-and-tested recipes waiting for you on my Pinterest boards.
👉 Follow mia on Pinterest @exorecipe
📌 Pin this recipe · 🔁 Re-pin your favorites · 💬 Tag me when you make it — I love seeing your creations!
Classic Red Velvet Cake Recipe with Cream Cheese Frosting
- Prep Time: 20 minutes
- Cook Time: 30 minutes
- Total Time: 50 minutes
- Yield: 12 servings 1x
- Method: Dessert
- Cuisine: American
Description
This classic red velvet cake is moist, tender, and has a subtle cocoa flavor. Topped with a rich and tangy cream cheese frosting, it’s a timeless dessert perfect for any celebration.
Ingredients
- 2 1/2 cups all-purpose flour
- 1 1/2 cups granulated sugar
- 1 teaspoon baking soda
- 1 teaspoon salt
- 1 teaspoon cocoa powder
- 1 1/2 cups vegetable oil
- 1 cup buttermilk, room temperature
- 2 large eggs, room temperature
- 2 tablespoons red food coloring (or 1 tablespoon gel food coloring)
- 1 teaspoon white vinegar
- 1 teaspoon vanilla extract
- For the Cream Cheese Frosting:
- 1 (8 oz) package cream cheese, softened
- 1/2 cup unsalted butter, softened
- 4 cups powdered sugar
- 1 teaspoon vanilla extract
- 1 cup chopped pecans (optional)
Instructions
- Preheat oven to 350°F (175°C). Grease and flour two 9-inch round cake pans.
- In a large bowl, whisk together flour, sugar, baking soda, salt, and cocoa powder.
- In another bowl, mix oil, buttermilk, eggs, food coloring, vinegar, and vanilla extract.
- Gradually add the dry ingredients to the wet ingredients, mixing until just combined. Do not overmix.
- Divide the batter evenly between the prepared pans.
- Bake for 30 to 35 minutes, or until a toothpick inserted into the center comes out clean.
- Let the cakes cool in the pans for 10 minutes, then turn out onto a wire rack to cool completely.
- For the frosting: In a large bowl, beat cream cheese and butter until smooth.
- Gradually add powdered sugar, beating until light and fluffy. Stir in vanilla extract.
- Once cakes are completely cool, spread frosting between layers and over the top and sides of the cake. Garnish with pecans if desired.
Notes
For best flavor, let the cake rest overnight before serving. Store covered in the refrigerator.
Nutrition
- Calories: 450
- Sugar: 42 g
- Fat: 23 g
- Carbohydrates: 58 g
- Protein: 5 g
k">
Tried This Recipe? Leave a Comment!
Did you make this recipe? I’d love to hear how it turned out! Please leave a comment and a rating below. Your feedback helps other home cooks and supports cheerychop.com!
For more delicious inspiration, follow me on Pinterest!
