Table of Contents
Classic Cheesecake with Biscuit Crust and Fresh Berries: The Ultimate Guide
I still remember the first time I made a classic cheesecake – I was eleven, standing on a stool in my mother’s tiny kitchen in Marrakech, watching her blend cream cheese and eggs by hand. The scent of vanilla and the promise of a silky, rich dessert filled the whole house. That moment sparked a love affair with this iconic American dessert that has only deepened over the years. Now, after training at Le Cordon Bleu in Paris and cooking my way through New York’s best pastry shops, I’m sharing my classic cheesecake recipe – the one I turn to again and again. This biscuit crust cheesecake with fresh berries is everything you want: creamy, tangy, perfectly sweet, and topped with vibrant fruit. It’s the ultimate guide to making a flawless homemade cheesecake that will impress every time.
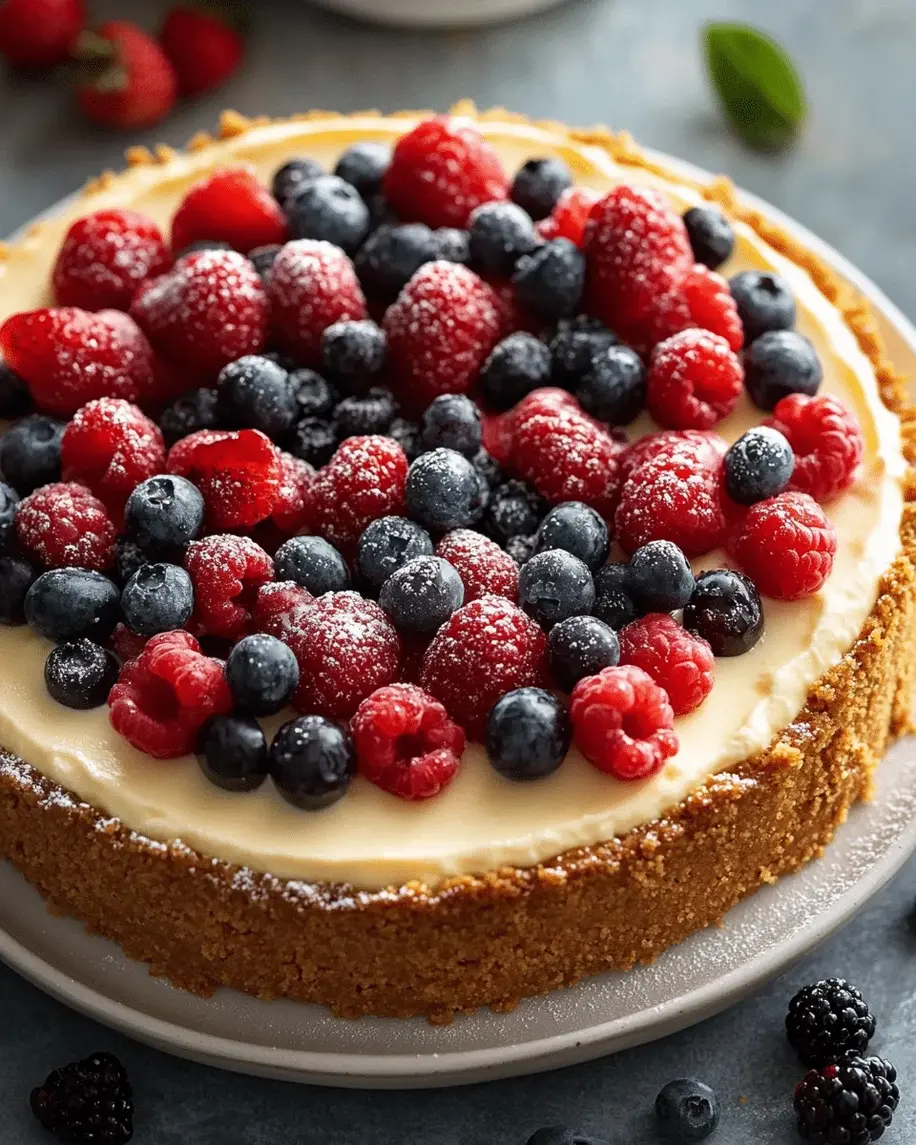
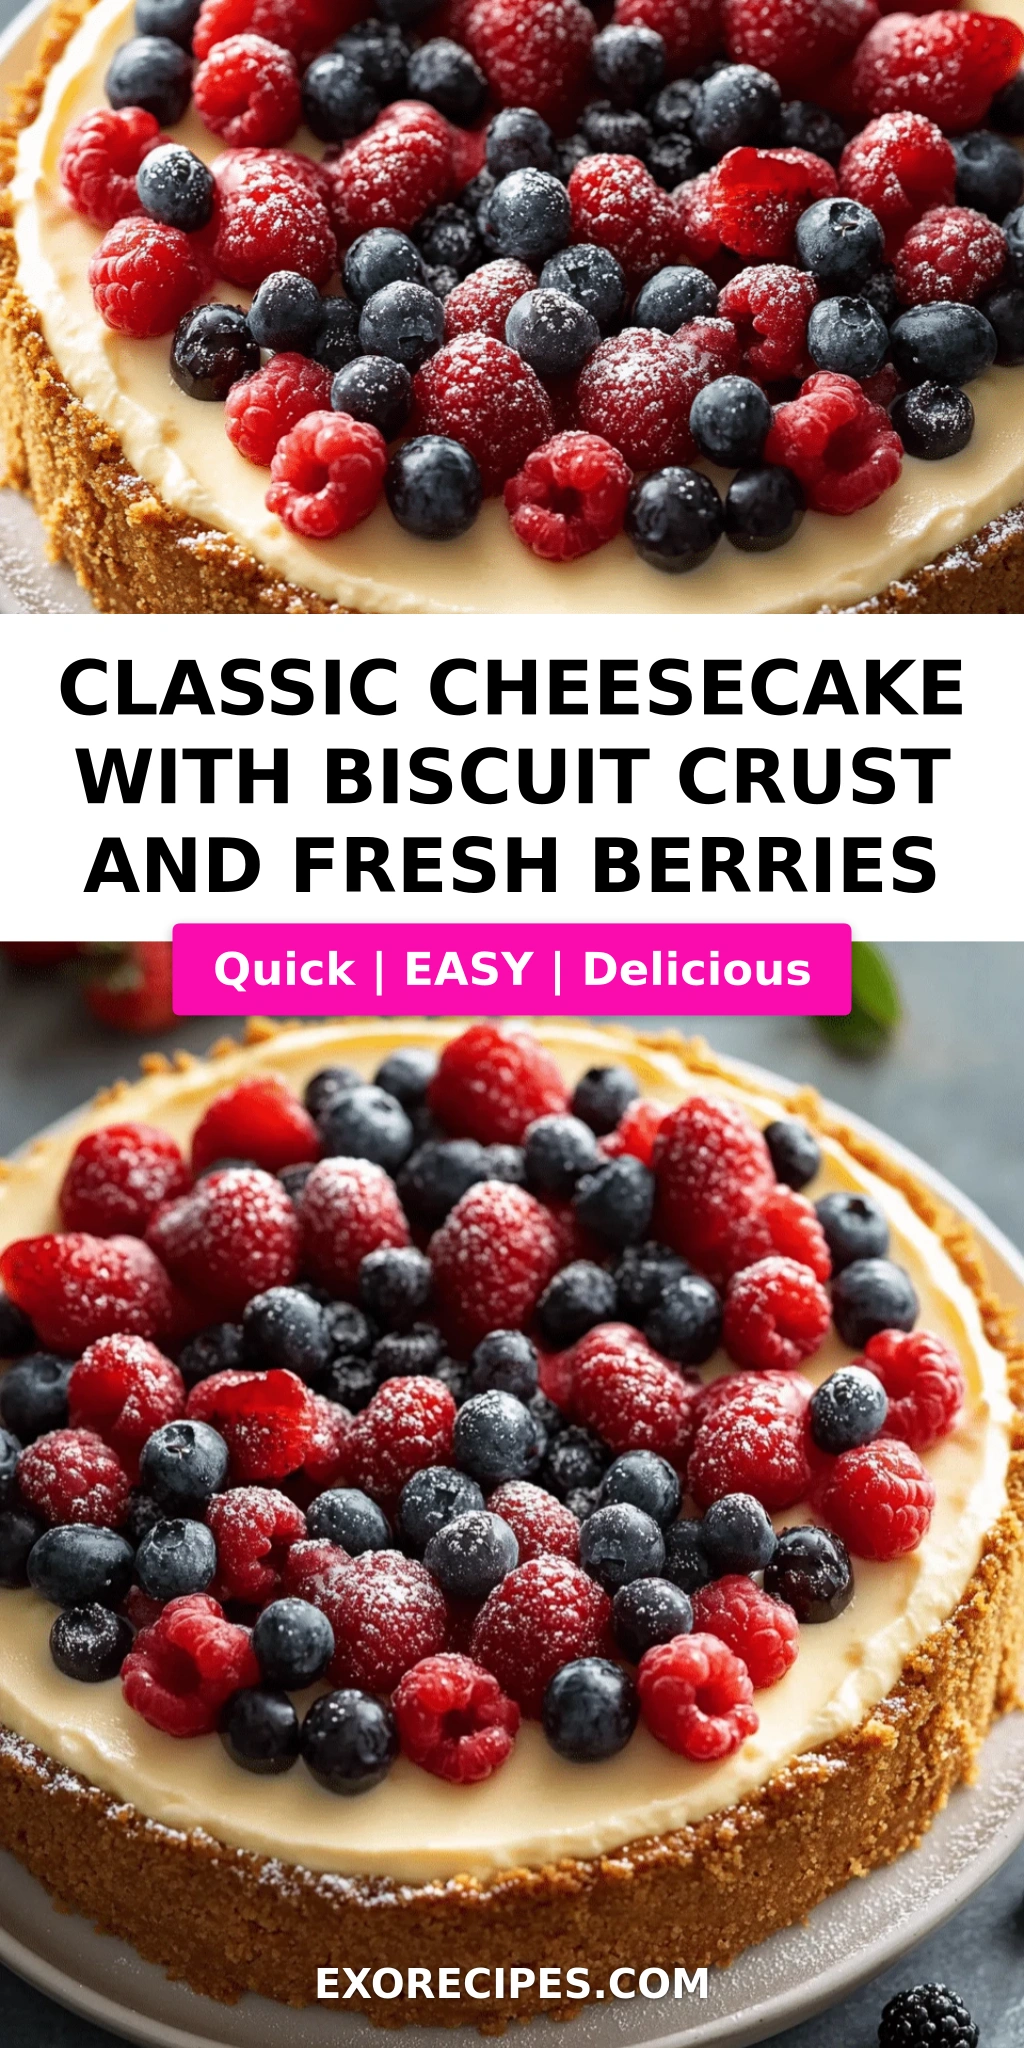
Imagine a slice of this beauty: a buttery, crumbly digestive biscuit crust that holds its shape but melts in your mouth. The filling is a cloud of silky cream cheese, rich and luscious with a subtle tang from sour cream. Each bite is balanced by the bright, juicy pop of fresh berries—strawberries, blueberries, raspberries—tossed in a touch of lemon and powdered sugar. There’s no artificial sweetness, no heavy aftertaste; just pure, honest flavor. The texture is dense yet velvety, with a beautiful pale golden top that gives way to a smooth interior. It’s the kind of dessert that makes you close your eyes and savor every forkful.
What sets this easy cheesecake recipe apart is the technique I learned in Paris: a gentle, slow-cooling method that prevents cracking and ensures a perfectly set center. I also insist on using full-fat cream cheese and room-temperature ingredients – no shortcuts. The result is a cheesecake with a dense, creamy texture and a crust that stays crisp. You’ll also get my best tip for avoiding that dreaded crack, and the one mistake home bakers make (hint: it’s overmixing). Whether you’re a beginner or a seasoned baker, this recipe is foolproof. From my NYC kitchen to yours – let’s make the best classic cheesecake of your life.
Why This Classic Cheesecake Recipe Is the Best
The Flavor Secret – My recipe uses a combination of cream cheese and sour cream, a trick I picked up from a patisserie in Paris. The sour cream lightens the texture without making it airy, and it adds a gentle tang that cuts through the richness. I also use a pinch of vanilla extract that whispers, not shouts. And the berries? They’re macerated in lemon juice and powdered sugar for just ten minutes, which releases their natural juices and creates a beautiful, glossy topping. This isn’t just a cheesecake; it’s a celebration of balance – sweet, tangy, creamy, and fresh.
Perfected Texture – The key to a silky, crack-free cheesecake is low heat and patience. I bake at 320°F (160°C) and then turn off the oven, leaving the door ajar for an hour. This gentle cooling prevents the sudden temperature change that causes cracks. I also bang the pan on the counter before baking to eliminate air bubbles. The result is a filling that’s dense but silky, with a melt-in-your-mouth feel. My French training taught me that great pastry is about technique, and this method delivers every time.
Foolproof & Fast – Despite its elegant appearance, this cheesecake is surprisingly easy. You don’t need a water bath or special equipment – just a springform pan and an oven. The crust comes together in five minutes, and the filling is a simple one-bowl affair. I’ve tested this recipe for years, and it works perfectly for beginners. The most important thing is to follow the steps: let ingredients come to room temperature, don’t overmix, and be patient with the cooling time. That’s it. You’ll have a stunning, professional-quality dessert that everyone will rave about.
Classic Cheesecake Recipe Ingredients
When I shop for these ingredients, I head straight to the Union Square farmers market or my local grocery store. For the cream cheese, I always choose Philadelphia full-fat – it’s the gold standard. And the berries? I watch for what’s in season: strawberries in spring, blueberries in summer, raspberries in autumn. If you can, buy organic berries – they’re sweeter and more aromatic. The digestive biscuits might be British in origin, but they’re easy to find in any US supermarket (McVitie’s is my go-to). Let’s talk about what you’ll need.
Ingredients List
- For the Crust:
- 200g (about 7 oz) digestive biscuits, crushed (or graham crackers as substitute – see notes)
- 100g (½ cup / 7 tbsp) unsalted butter, melted
- For the Filling:
- 900g (4 blocks, each 8 oz) full-fat cream cheese, softened to room temperature
- 200g (1 cup) granulated sugar
- 3 large eggs, at room temperature
- 1 teaspoon pure vanilla extract
- 200ml (¾ cup + 2 tbsp) sour cream, at room temperature
- 2 tablespoons all-purpose flour
- For the Topping:
- 300g (about 2 cups) mixed fresh berries (strawberries, blueberries, raspberries)
- 2 tablespoons powdered sugar
- 1 tablespoon fresh lemon juice
Ingredient Spotlight
Cream Cheese – This is the backbone of your cheesecake. Use full-fat bricks, not the spreadable tub variety. The higher fat content ensures a stable, creamy texture. Let it sit on the counter for 2 hours before mixing – cold cream cheese won’t blend smoothly and will leave lumps. I tested low-fat versions, and they produced a watery, grainy filling. Trust me, full-fat is non-negotiable for this classic cheesecake recipe.
Digestive Biscuits – They look like a sturdy cookie, but they’re less sweet than graham crackers and have a maltier flavor. If you can’t find them, graham crackers work well – just reduce the butter slightly (90g instead of 100g) because they’re more absorbent. I love the texture digestive biscuits give: they hold together firmly but shatter when you bite into them.
Fresh Berries – The topping is simple, so the quality of the berries matters. Look for fruit that’s fragrant and not mushy. Strawberries should be bright red all the way through. Blueberries should be plump and dusty-looking (that’s the natural bloom). If you’re using frozen berries (see FAQ), thaw and drain them first, then toss with the sugar and lemon – but fresh is always superior for that pop of flavor.
| Original Ingredient | Best Substitution | Flavor / Texture Impact |
|---|---|---|
| Cream cheese (full-fat) | Neufchâtel (33% less fat) | Slightly less rich, may be softer; reduce sugar by 10g |
| Digestive biscuits | Graham crackers | Sweeter, less malty; reduce butter to 90g |
| Sour cream | Greek yogurt (full-fat, plain) | Tangier, slightly less creamy; excellent swap |
| All-purpose flour | Cornstarch (1.5 tbsp) | Gluten-free option; texture slightly more tender |
How to Make Classic Cheesecake – Step-by-Step
Don’t be intimidated–I promise this is easier than it sounds. Follow these steps carefully, and you’ll have a stunning cheesecake that looks like it came from a bakery. I’ve broken down each stage with visual cues so you know exactly what to look for.
Step 1: Prepare the Crust
Preheat your oven to 320°F (160°C). In a mixing bowl, combine 200g (about 2 cups) of crushed digestive biscuits with 100g (½ cup) of melted unsalted butter. Stir until every crumb is moistened. Press the mixture firmly and evenly into the bottom of a 9-inch (23cm) springform pan. Use the bottom of a flat glass or measuring cup to pack it down. Bake for 10 minutes, then set aside to cool completely while you make the filling.
💡 mia’s Pro Tip: For an extra-crisp crust, brush the inside of the springform pan with a little melted butter before adding the crumbs. This prevents sticking and helps the crust brown evenly.
Step 2: Make the Filling
In a large bowl, beat the softened cream cheese and 200g (1 cup) granulated sugar on medium speed until completely smooth – about 2 minutes. Add the eggs one at a time, mixing on low after each addition until just combined. Then add the vanilla, room-temperature sour cream, and 2 tablespoons of flour. Mix on low until the flour disappears – do not overmix. Scrape the bowl and give it one final stir by hand.
⚠️ Common Mistake to Avoid: Overmixing incorporates too much air, which will cause your cheesecake to puff up and then sink, leading to cracks. Stop as soon as the batter is smooth.
Step 3: Bake and Cool
Pour the filling over the cooled crust. Gently tap the pan on the counter 5–6 times to release any air bubbles. Bake at 320°F for 55–60 minutes. The edges should be set and lightly golden, but the center will still jiggle like a soft custard when you gently shake the pan. Turn off the oven, crack the door open by about 6 inches, and leave the cheesecake inside for 1 full hour. This gradual cooling is the secret to a crack-free top.
💡 mia’s Pro Tip: Place a shallow pan of hot water on the lower oven rack while baking – it adds humidity and further reduces the risk of cracks. I learned this technique from my chef instructor in Paris; it works beautifully.
Step 4: Chill Overnight
Remove the cheesecake from the oven and run a thin knife around the edge (this prevents sticking as it shrinks). Cool completely on a wire rack – about 1 hour – then cover loosely with plastic wrap and refrigerate for at least 4 hours, preferably overnight. This chilling step is essential for the texture to fully set and the flavors to meld.
⚠️ Common Mistake to Avoid: Don’t skip the 1-hour oven-door cooling. Taking the cheesecake directly from hot oven to countertop will cause the sudden temperature change that almost guarantees a crack.
Step 5: Prepare Berry Topping
Just before serving, toss 300g (2 cups) mixed fresh berries with 2 tablespoons powdered sugar and 1 tablespoon lemon juice. Let them sit for 10 minutes – this maceration draws out their natural juices and creates a lovely syrup. Spoon the berries over the top of the chilled cheesecake. Slice with a thin, sharp knife dipped in hot water and wiped clean between cuts for picture-perfect slices.
💡 mia’s Pro Tip: If you want a glossy finish, warm 2 tablespoons of apricot jam with 1 teaspoon of water until runny, then brush it over the berries. It adds a beautiful shine and a hint of sweetness.
| Step | Action | Duration | Key Visual Cue |
|---|---|---|---|
| 1 – Crust | Mix crumbs & butter, press into pan, bake | 10 min | Golden edges, fragrant |
| 2 – Filling | Beat cream cheese & sugar, add eggs, then rest | 5 min | Smooth, no lumps |
| 3 – Bake | Bake at 320°F | 55–60 min | Edges set, center jiggly |
| 3b – Cool in oven | Leave in turned-off oven, door ajar | 1 hour | Oven cools gradually |
| 4 – Chill | Cool on rack, then refrigerate | ≥4 hrs | Fully firm, no warmth |
| 5 – Topping | Toss berries with sugar & lemon | 10 min | Juices release, glossy |
Serving & Presentation
This cheesecake is a showstopper. I like to serve it on a large white platter, letting the vibrant berries pop against the pale cream. For clean slices, dip a long, thin knife in very hot water, dry it, and slice straight down. Wipe the knife between each cut. You can also plate individual slices with an extra drizzle of the berry syrup and a fresh mint leaf – it looks elegant and tastes even better.
Growing up in Morocco, my mother would often serve a similar dessert with a side of mint tea. In New York, I love pairing this cheesecake with a lightly sweetened whipped cream (just cream, a touch of vanilla, and a dusting of powdered sugar). For a true NYC finale, serve alongside a small cup of strong espresso – the bitterness perfectly offsets the rich cream cheese. And if you’re feeling festive, a glass of chilled Moscato d’Asti or a berry coulis drizzled over top makes it extra special.
| Pairing Type | Suggestions | Why It Works |
|---|---|---|
| Side Dish | Whipped cream, berry coulis, candied nuts | Adds lightness, texture, and contrast |
| Sauce / Dip | Chocolate ganache, salted caramel, passion fruit sauce | Intensifies flavor profile; caramel adds warmth |
| Beverage | Espresso, black tea, Moscato d’Asti, bourbon | Cuts richness; complements sweetness |
| Garnish | Mint leaves, edible flowers, lemon zest, crushed pistachios | Adds color, freshness, and a hint of crunch |
Make-Ahead, Storage & Reheating
One of the best things about this cheesecake is that it’s a make-ahead dream. In my busy NYC life, I often prepare it two days before a party. The flavors deepen and the texture becomes even creamier after a night in the fridge. You can store leftovers, too – if there are any! Here’s my tested guide for keeping your cheesecake at its best.
| Method | Container | Duration | Reheating Tip |
|---|---|---|---|
| Refrigerator | Covered with plastic wrap or in an airtight cake container | Up to 5 days | Serve cold or let sit at room temp for 15 min |
| Freezer (un-topped) | Wrap tightly in plastic, then foil; place in freezer bag | Up to 3 months | Thaw in fridge overnight; add berries after thawing |
| Make-Ahead | Prepare completely through chilling; add topping day of serving | 2 days in advance | Berries stay fresh; crust stays crisp |
If you have leftover cheesecake with berries on top, eat it within 2 days – the fruit will start to release moisture and soften the top. To refresh, you can always add a quick dusting of powdered sugar or a fresh squeeze of lemon. Cheesecake never tastes better than the day after, so don’t be shy about making it ahead.
Variations & Easy Swaps
This classic cheesecake recipe is a beautiful blank canvas. I often play with flavors depending on the season or what I find at the market. Here are three of my favorite variations – each one tested in my own kitchen.
| Variation | Key Change | Best For | Difficulty Impact |
|---|---|---|---|
| Lemon Lavender | Add 1 tbsp lemon zest + 1 tsp dried lavender to filling | Spring & summer entertaining | Easy – stir into sugar before mixing |
| Chocolate Swirl | Swirl 100g melted dark chocolate into batter before baking | Chocolate lovers, holiday table | Easy – use gentle folds |
| Gluten-Free/Dairy-Free | Use gluten-free digestive biscuits; replace cream cheese with dairy-free alternative (see below) | Dietary restrictions | Moderate – texture may vary |
Lemon Lavender Cheesecake
This variation is inspired by the Moroccan gardens I loved as a child, where lavender grew wild and lemons perfumed the air. Zest two lemons directly into the sugar and rub them together with your fingers to release the oils before adding to the cream cheese. Then stir in 1 teaspoon of dried culinary lavender (grind it slightly first). The floral notes are delicate and utterly enchanting. Serve with fresh blueberries and a drizzle of honey – it’s a sensory trip to the Mediterranean.
Gluten-Free & Dairy-Free Cheesecake
I know how important inclusive desserts are, so I tested a version for my gluten- and dairy-intolerant friends. For the crust, use gluten-free digestive biscuits or crushed gluten-free shortbread cookies. For the filling, swap cream cheese with a high-quality vegan cream cheese (brands like Kite Hill or Violife work well). Replace sour cream with full-fat coconut yogurt. The texture is a bit softer, but the flavor is still wonderful. Let it chill for at least 6 hours to firm up properly. I also recommend adding a tablespoon of coconut flour to help absorb liquid.
Seasonal Berry Swap
Depending on what’s ripe at the Union Square farmers market, I change the topping throughout the year. In late summer, I use sliced nectarines and blackberries with a sprinkle of cardamom. In fall, roasted sliced pears with a pinch of cinnamon are incredible. And in winter, you can arrange pomegranate arils and sliced kiwis for a festive look. The options are endless – just let the fruit be the star.
What is the best type of biscuit to use for a classic cheesecake crust?
The classic choice is digestive biscuits – they have a slightly malty, not-too-sweet flavor that complements the rich filling perfectly. In the US, you can find them at most supermarkets (McVitie’s brand is widely available). If you can’t find digestive biscuits, graham crackers are an excellent substitute; they are sweeter and less dense, so reduce the melted butter to 90g (6 tablespoons) to avoid a greasy crust. Shortbread cookies also work but will make a much sweeter, more buttery base. For a gluten-free version, use gluten-free digestive biscuits or crushed gluten-free shortbread.
How do I prevent my cheesecake from cracking while baking?
Cracks happen when the cheesecake cools too quickly or is overbaked. My foolproof method: bake at a low temperature (320°F/160°C), and the most important step – after baking, turn off the oven, crack the door open about 6 inches, and let the cheesecake sit inside for 1 hour. This gradual cooling prevents the sudden temperature change that causes cracks. Also, be sure your cream cheese is at room temperature, don’t overmix the batter (which incorporates too much air), and always run a thin knife around the pan edge right after you take it out of the oven – this lets the cheesecake contract without pulling the top. If you’re still nervous, place a pan of hot water on the lower rack during baking to add moisture.
Can I use frozen berries instead of fresh berries for the topping?
Absolutely – but with a few adjustments. Frozen berries contain more water than fresh, so they will release much more juice when thawed. If using frozen berries, thaw them completely in a colander set over a bowl to catch the liquid (you can save the juice for a different use, like in a cocktail or over pancakes). Gently pat the thawed berries dry with a paper towel before tossing with powdered sugar and lemon juice. The texture won’t be quite as firm as fresh berries, but the flavor is still wonderful. For a more intense berry experience, you can cook the frozen berries with a little sugar and lemon juice into a quick compote, then spoon it over the cheesecake.
How long should I let the cheesecake cool before refrigerating it?
After the slow-cooling step in the oven (1 hour with the door ajar), you need to let the cheesecake cool completely on a wire rack at room temperature. This typically takes about 1 to 1½ hours depending on your kitchen temperature. The cheesecake should be cool to the touch – not warm at all – before you wrap it and move it to the refrigerator. Cooling on the counter gradually prevents condensation from forming on the surface (which can make it watery) and allows the internal temperature to drop slowly, which protects the texture. Once fully cooled, cover loosely and refrigerate for at least 4 hours, but overnight is best for perfect slicing.
Can I make this cheesecake without a springform pan?
While a springform pan is ideal because it allows you to easily remove the sides without damaging the cheesecake, you can use a deep 9-inch cake pan with at least 3-inch sides. Line the pan with two long strips of parchment paper that overhang on opposite sides – this creates handles to lift the cheesecake out after baking. Make sure the pan is not warped. The crust might be slightly harder to press evenly because you can’t remove the bottom ring, but it will work. Note that you may need to extend the baking time by 5–10 minutes since the sides are deeper.
Why does my cheesecake taste too eggy?
An eggy taste usually means the cheesecake is overbaked or the eggs were not fully incorporated. For this recipe, use three large eggs – that’s the perfect amount for the volume of cream cheese. Make sure your eggs are at room temperature so they emulsify smoothly into the batter. Also, avoid baking until the center is completely set; the cheesecake should still jiggle slightly when you shake the pan at the 55-60 minute mark. The residual heat will finish cooking it during the oven-off cooling time. If you have done all this and still taste egg, try adding an extra tablespoon of vanilla extract to mask it, but with proper technique, you shouldn’t have that issue.
How do I get a clean slice of cheesecake?
First, always chill your cheesecake for at least 4 hours, preferably overnight. Use a long, thin-bladed knife (a chef’s knife works well). Dip the knife in very hot water, then wipe it dry with a clean kitchen towel. Slice straight down in one clean motion – don’t saw. Lift the knife out and dip it in hot water again, then wipe dry before the next slice. Between each slice, clean the blade to prevent berry residue from smearing. For the cleanest slices, you can also slice the cheesecake before adding the berry topping and then spoon the fruit onto each individual piece.
Can I add chocolate to the cheesecake filling?
Yes! Chocolate cheesecake is a wonderful variation. The best way is to melt 100g (about 3.5 oz) of good-quality dark chocolate (70% cocoa) and let it cool slightly. After the filling batter is mixed, remove about one-third of the batter and swirl it into the remaining batter with a gentle figure-eight motion – this creates a marbled effect. Alternatively, you can mix the melted chocolate into the entire batter for a uniform chocolate cheesecake. Reduce the sugar by 2 tablespoons because chocolate adds sweetness. Bake as directed – chocolate cheesecakes tend to set a bit faster, so start checking at 50 minutes.
What should I do if my cheesecake still cracks despite all precautions?
Don’t worry – a cracked cheesecake is still delicious! You have several options: (1) Cover the cracks with your beautiful berry topping – no one will ever see them. (2) Make a quick sour cream topping: mix 1 cup sour cream with 2 tablespoons sugar and 1 teaspoon vanilla, gently spread it over the cooled cheesecake, and bake for another 10 minutes at 300°F. (3) Press the top gently to close the cracks, then chill – the cream cheese will seal itself together. (4) Turn it into cheesecake bars – cut away the cracked edges and slice into squares. Cracks are purely cosmetic; the flavor and texture are still perfect.
How do I know when my cheesecake is done baking?
The most reliable test is the jiggle test. After 55-60 minutes at 320°F, gently shake the springform pan. The cheesecake should be set around the edges – they will look firm and slightly puffed – but the center (about a 2- to 3-inch circle) should wobble like a bowl of Jell-O. It should not be liquidy; it should have a very slight, soft jiggle. Do not insert a toothpick or knife to test – that will create a crack. Also, the top should be a pale golden color, not browned. If the center sloshes like liquid, bake for 5–8 more minutes. If it barely moves, it may be overbaked – check earlier next time.
Share Your Version!
I absolutely love hearing from you! When you make this classic cheesecake with biscuit crust and fresh berries, please leave a ⭐ star rating and a comment below – tell me how it turned out, what berries you used, or any fun twist you added. Your feedback helps other readers and inspires me to keep testing new ideas.
Take a photo of your gorgeous cheesecake and share it on Instagram or Pinterest with the tag @exorecipes. I’ll feature my favorites on my stories! And if you have a question I didn’t answer, drop it in the comments – I read every single one. From my NYC kitchen to yours – I hope this recipe brings as much warmth to your table as it does to mine. — mia 🧡
Love This Recipe? Save It to Pinterest!
If you enjoyed this Classic Cheesecake with Biscuit Crust and Fresh Berries recipe, don’t let it get lost in your browser tabs! 😄 Pin it now so you can find it again anytime — and explore hundreds more tried-and-tested recipes waiting for you on my Pinterest boards.
👉 Follow mia on Pinterest @chefrecipes2
📌 Pin this recipe · 🔁 Re-pin your favorites · 💬 Tag me when you make it — I love seeing your creations!
Did you make this recipe? I’d love to know! ⭐ Rate it below, share your photos with #exorecipes, and subscribe for more homemade classics.
Classic Cheesecake with Biscuit Crust and Fresh Berries: The Ultimate Recipe Guide
- Prep Time: 30 minutes
- Cook Time: 1 hour 10 minutes
- Total Time: 5 hours 40 minutes (includes cooling and chilling time)
- Yield: 12 1x
- Method: Dessert
- Cuisine: American
Description
A rich and creamy classic cheesecake with a buttery biscuit crust, topped with fresh berries for a refreshing finish.
Ingredients
- For the Crust:
- 200g digestive biscuits, crushed
- 100g unsalted butter, melted
- For the Filling:
- 900g cream cheese, softened
- 200g granulated sugar
- 3 large eggs
- 1 teaspoon vanilla extract
- 200ml sour cream
- 2 tablespoons all-purpose flour
- For the Topping:
- 300g mixed fresh berries (strawberries, blueberries, raspberries)
- 2 tablespoons powdered sugar
- 1 tablespoon lemon juice
Instructions
- Prepare the crust: Preheat oven to 160°C (320°F). Mix crushed biscuits with melted butter. Press firmly into the bottom of a 23cm springform pan. Bake for 10 minutes, then cool.
- Make the filling: In a large bowl, beat cream cheese and sugar until smooth. Add eggs one at a time, then vanilla, sour cream, and flour. Mix until just combined.
- Pour filling over cooled crust. Bake for 55-60 minutes or until edges are set but center is slightly jiggly. Turn off oven, leave cheesecake inside with door ajar for 1 hour.
- Cool completely on a wire rack, then refrigerate for at least 4 hours or overnight.
- For the berries: Toss fresh berries with powdered sugar and lemon juice. Let sit for 10 minutes.
- Top cheesecake with berries just before serving. Slice and enjoy.
Notes
For best results, use full-fat cream cheese and let all ingredients come to room temperature before starting. The cheesecake can be stored in the refrigerator for up to 5 days.
Nutrition
- Calories: 452
- Sugar: 26g
- Fat: 30g
- Carbohydrates: 38g
- Protein: 8g
k">
Tried This Recipe? Leave a Comment!
Did you make this recipe? I’d love to hear how it turned out! Please leave a comment and a rating below. Your feedback helps other home cooks and supports cheerychop.com!
For more delicious inspiration, follow me on Pinterest!
