“`html
Table of Contents
Citrus Berry Burnt Cheesecake: A Luscious Twist with Zesty Berries
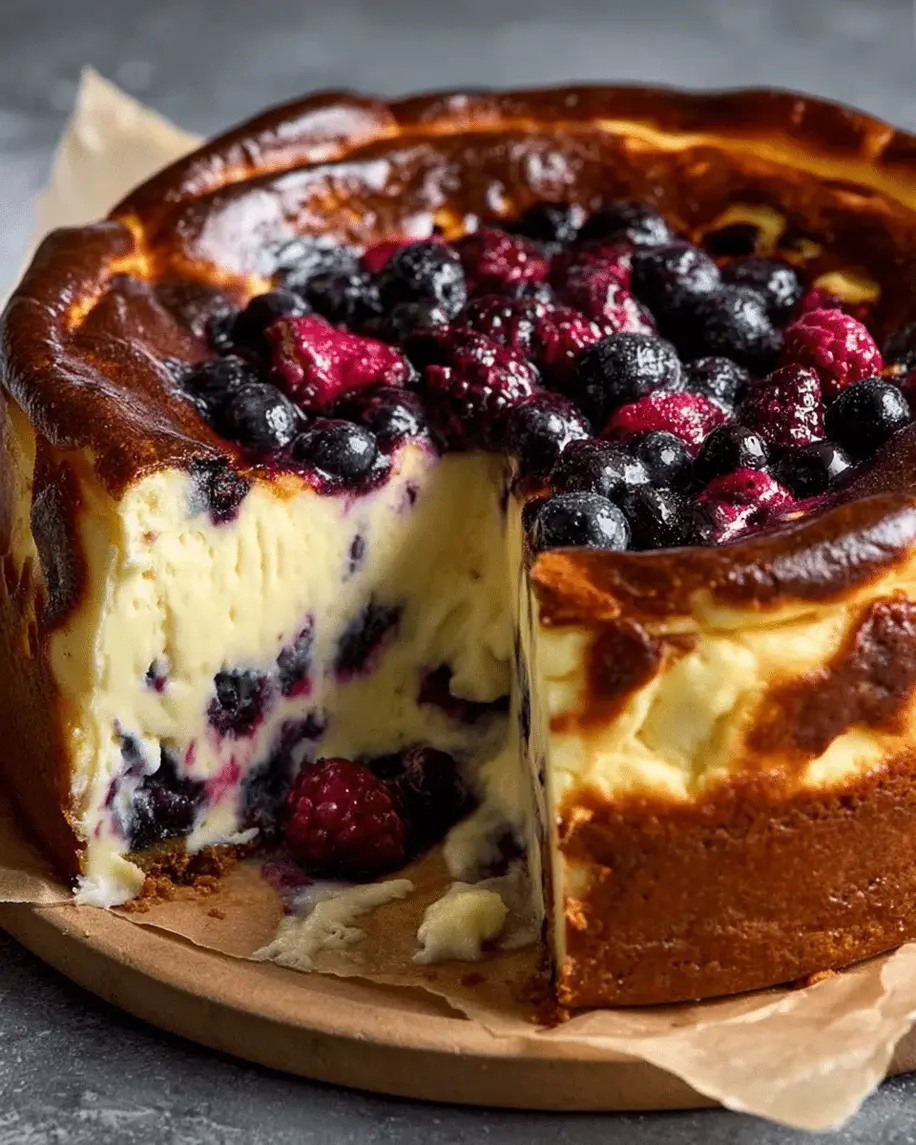
I still remember the first time I tasted a burnt Basque cheesecake — it was at a tiny patisserie in the 10th arrondissement of Paris, during my early days at culinary school. The deeply caramelized top, the jiggly, almost molten center, the way the vanilla and cream cheese sang together… I was hooked. But when I moved back to New York and started experimenting in my own kitchen, I knew I wanted to give that classic burnt cheesecake recipe a bright, sunny makeover. That’s how my citrus berry burnt cheesecake was born — a luscious twist on a classic favorite that combines the signature burnt Basque method with vibrant lemon, orange, and a medley of fresh berries. The very first bite took me right back to Morocco, where my mother would pile our plates high with citrus-drenched fruit salads and berry compotes sweetened with a touch of honey. This berry cheesecake is everything I love about my three worlds — Moroccan warmth, French technique, and New York boldness — all in one glorious, crack-topped slice.
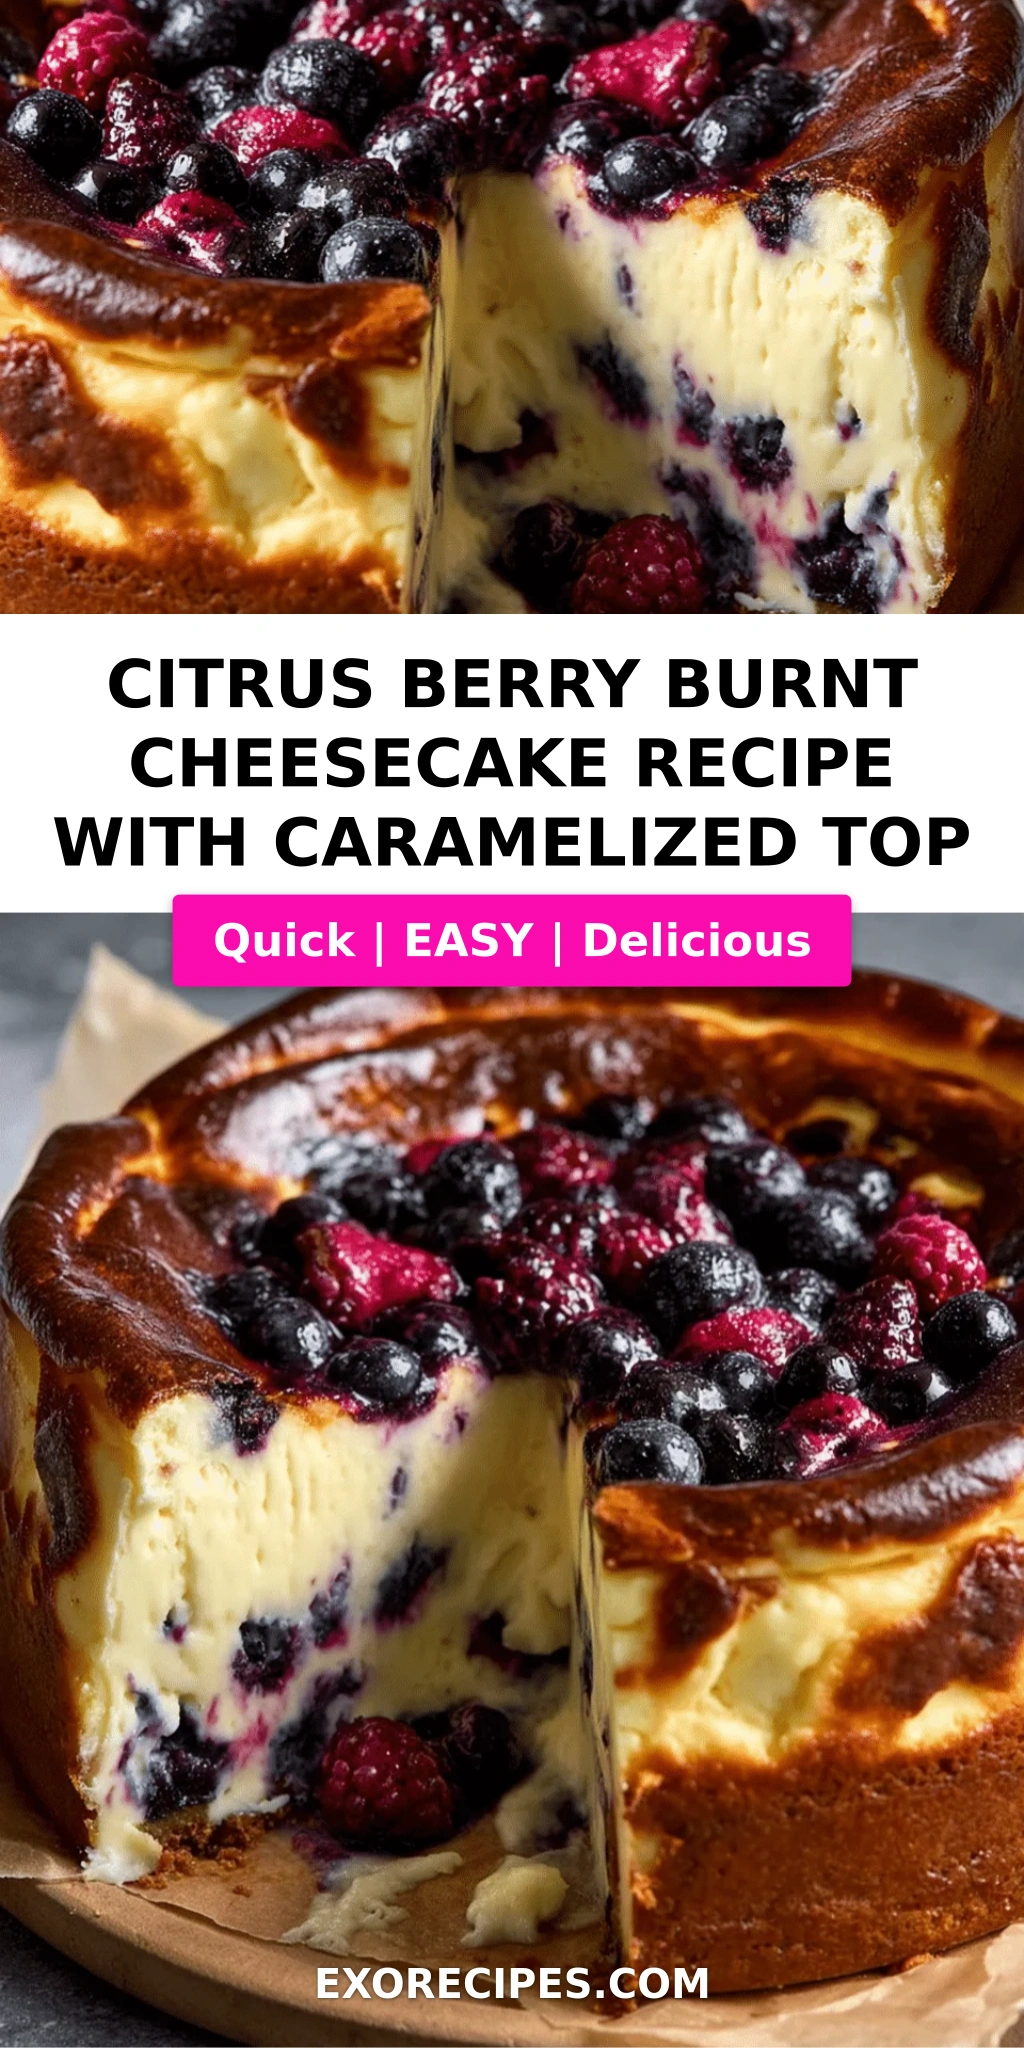
Imagine this: a graham cracker crust that’s buttery and just slightly sandy, giving way to a filling that’s luxuriously creamy yet light, punctuated by bursts of tart raspberry, sweet blueberry, and juicy strawberry. The lemon juice and orange zest cut through the richness with a clean, sunshiny brightness, while the burnt top — dark amber, almost bronzed — offers a faint bitterness that balances the sweetness perfectly. As the cheesecake bakes, your kitchen fills with the most intoxicating aroma: toasted sugar, vanilla, and the floral perfume of berries mingling with citrus. When you slice into it, the center should tremble ever so slightly, proof that you’ve nailed that signature Basque custard texture. It’s a dessert that feels both rustic and elegant — the kind you’d serve at a casual backyard barbecue or a holiday dinner table, and watch everyone reach for seconds.
What sets my version apart from other burnt cheesecake recipes is how I handle the fruit. Instead of simply stirring berries into the batter and hoping for the best, I toss them with a little flour first — a trick I learned from a pastry chef in Lyon — which prevents them from sinking to the bottom and keeps each bite evenly studded with fruit. I also use a combination of fresh lemon juice and orange zest rather than just one citrus, because the two together create a more complex, layered brightness that doesn’t overpower the berries. And here’s a 💡 mia’s Pro Tip I’ve learned the hard way: make sure your cream cheese is truly at room temperature — cold cream cheese will leave you with lumps no amount of beating can fix. One of the biggest mistakes I see home cooks make with any citrus cheesecake is adding too much liquid citrus and ending up with a runny batter. Not today! My method keeps the filling thick, creamy, and absolutely foolproof, even for first-timers.
Why This Citrus Berry Burnt Cheesecake Recipe Is the Best
The Flavor Secret: The magic of this burnt Basque cheesecake lies in that dramatic caramelized top. Baking at a high 400°F creates a deeply bronzed, almost crusty surface that tastes faintly of toasted marshmallow and browned butter — a flavor that pairs gorgeously with the tart-sweet berry filling and the bright citrus notes. I add a full tablespoon of orange zest and a quarter-cup of fresh lemon juice, which is more citrus than most recipes call for, but the key is balancing it with enough sugar and fat from the cream cheese and sour cream so the batter stays luscious and never curdles. This is the kind of flavor layering I learned in Paris: each ingredient should be distinct yet harmonious.
Perfected Texture: The texture of a great berry cheesecake should be velvety, almost like a panna cotta, with a slight resistance from the crust. My method of tossing the berries in flour before folding them in ensures they stay suspended throughout the batter rather than sinking into a soggy layer at the bottom. The sour cream adds a subtle tang and makes the crumb extra tender, while the eggs, added one at a time, build structure without making the filling tough. When you pull the cheesecake from the oven, the center should wobble like Jell-O — that’s your cue that it will set to a creamy, sliceable perfection after chilling.
Foolproof & Fast: Despite its impressive looks, this citrus berry burnt cheesecake is surprisingly beginner-friendly. There’s no water bath, no complicated folding, no finicky temperature control. You mix the filling in one bowl, pour it over a press-in crust, and bake until deeply golden. The hardest part is waiting for it to chill! I’ve tested this recipe with home cooks of all skill levels, and every single person has walked away with a stunning, Instagram-worthy cheesecake on their first try. The flour-tossed berry trick and the high-heat baking method take the guesswork out of the equation.
Citrus Berry Burnt Cheesecake Ingredients
Every Sunday morning, I wander through the Union Square Greenmarket, and the sight of those first flats of local raspberries and blueberries always makes my heart skip. There’s nothing like fresh-picked berries for this burnt cheesecake recipe — they’re sweeter, more aromatic, and they hold their shape better during baking. The citrus I source from a little Italian market in Chelsea, where the lemons and oranges are so fragrant you can smell them from the sidewalk. Here’s exactly what you’ll need to bring this citrus cheesecake to life.
Ingredients List
- For the crust:
- 1 1/2 cups graham cracker crumbs
- 1/4 cup granulated sugar
- 1/2 cup unsalted butter, melted
- For the filling:
- 24 oz (680 g) cream cheese, softened
- 1 cup granulated sugar
- 3 large eggs
- 1/2 cup sour cream
- 1/4 cup fresh lemon juice
- 1 tablespoon orange zest
- 1 teaspoon vanilla extract
- 1 cup mixed fresh berries (blueberries, raspberries, sliced strawberries)
- 2 tablespoons all-purpose flour
Ingredient Spotlight
Cream Cheese: This is the backbone of your citrus berry burnt cheesecake. Use full-fat blocks of cream cheese — not the spreadable kind in a tub — and let them sit on your counter for at least an hour before you start. Cold cream cheese will turn your batter lumpy, and no amount of mixing will smooth it out completely. If you’re dairy-sensitive, a high-quality vegan cream cheese works in a pinch, though the texture will be slightly less rich.
Fresh Berries: I call for a mix of blueberries, raspberries, and strawberries, but feel free to use whatever looks best at your market. The key is using fresh berries — frozen berries release too much liquid and can make your batter grayish and watery. If you absolutely can’t find fresh, use frozen but do not thaw them first, and toss them with an extra tablespoon of flour to absorb excess moisture.
Citrus (Lemon + Orange): Freshly squeezed lemon juice and freshly grated orange zest are non-negotiable here. Bottled lemon juice has a flat, metallic taste that will dull the whole dessert. Look for lemons that feel heavy for their size (more juice) and oranges with bright, unblemished skin. The orange zest adds a floral sweetness that lemon alone can’t provide.
Sour Cream: This adds tang and tenderness to the crumb. Full-fat sour cream is best, but Greek yogurt (plain, full-fat) makes an excellent substitute with a slightly tangier edge. Avoid low-fat or nonfat versions — they contain too much water and can make the filling loose.
| Original Ingredient | Best Substitution | Flavor / Texture Impact |
|---|---|---|
| Cream cheese (full-fat) | Vegan cream cheese (block-style) | Slightly less rich, marginally softer set |
| Fresh berries | Frozen berries (toss with extra flour) | May weep slightly; color slightly duller |
| Sour cream | Full-fat plain Greek yogurt | Tangier, still creamy; works beautifully |
| Graham cracker crumbs | Crushed digestive biscuits or speculoos | Slightly different sweetness; speculoos adds spice |
How to Make Citrus Berry Burnt Cheesecake — Step-by-Step
Trust me when I say this: if you can stir a bowl and press crumbs into a pan, you can absolutely nail this citrus berry burnt cheesecake. I’ve broken it down into simple steps with visual cues so you know exactly what to look for at every stage.
Step 1: Prep the Pan and Crust
Preheat your oven to 400°F (200°C). Line a 9-inch springform pan with a large sheet of parchment paper — press it into the corners and let the edges hang over the sides; this helps you lift the cheesecake out later. In a medium bowl, combine 1 1/2 cups graham cracker crumbs and 1/4 cup sugar. Pour in 1/2 cup melted butter and stir with a fork until every crumb is moistened. Press the mixture firmly into the bottom of the pan — use the flat bottom of a measuring cup for even pressure. Bake for 8-10 minutes until lightly golden and fragrant. Let it cool on a rack while you make the filling.
💡 mia’s Pro Tip: For a cleaner slice, line the pan’s sides with parchment too — it prevents the crust from sticking and makes for a picture-perfect edge.
Step 2: Make the Filling
In a large bowl, beat 24 oz of softened cream cheese and 1 cup sugar with an electric mixer on medium speed until smooth and creamy — about 2 minutes, scraping down the sides halfway through. Add the eggs one at a time, beating well after each addition until just incorporated. Don’t overbeat; you don’t want to whip too much air into the batter. Switch to a spatula and fold in the sour cream, lemon juice, orange zest, and vanilla until the mixture is silky and uniform.
⚠️ Common Mistake to Avoid: Overmixing the eggs incorporates too much air, which can cause the cheesecake to puff up excessively and then crack too deeply as it cools. Mix just until the yolk disappears into the batter.
Step 3: Prep the Berries
In a small bowl, toss 1 cup of mixed fresh berries with 2 tablespoons of all-purpose flour until each berry is lightly coated. This flour barrier is the secret to keeping your berries suspended throughout the filling instead of sinking to the bottom. Gently fold the floured berries into the cheesecake batter with a rubber spatula — take your time and be gentle to avoid crushing the fruit.
💡 mia’s Pro Tip: If you’re using particularly juicy berries (like ripe raspberries), freeze them for 15 minutes before tossing with flour. It helps them hold their shape during folding.
Step 4: Assemble and Bake
Pour the berry-studded batter over the cooled crust and spread it into an even layer. Bake for 45-50 minutes. The top should be deeply golden to dark amber — almost burnt in spots — and the center should jiggle like a custard when you gently shake the pan. It will look puffed and cracked; that’s exactly what you want. The smell alone will tell you it’s ready: toasted sugar, vanilla, and caramelized cream cheese.
⚠️ Common Mistake to Avoid: Don’t overbake! If the center looks completely firm and doesn’t wobble at all, you’ve gone too far. The residual heat will continue cooking the cheesecake as it cools, so err on the side of slightly jiggly.
Step 5: Cool and Chill
Let the cheesecake cool completely on a wire rack — about 2 hours at room temperature. Then transfer it to the refrigerator and chill for at least 4 hours, but overnight is ideal. This step is non-negotiable for that perfect, clean slice. The chilling allows the filling to set into a velvety, sliceable texture while the flavors meld and deepen.
💡 mia’s Pro Tip: After the cheesecake has chilled for at least 4 hours, run a thin knife around the edge before releasing the springform — it prevents the parchment from tearing and keeps your edges pristine.
| Step | Action | Duration | Key Visual Cue |
|---|---|---|---|
| 1 | Prep pan & press crust | 15 min | Crust is lightly golden, fragrant |
| 2 | Beat cream cheese & sugar | 3 min | Smooth, no lumps |
| 3 | Add eggs one at a time | 3 min | Batter is glossy, uniform |
| 4 | Fold in sour cream, citrus, vanilla | 2 min | Silky, pale yellow, fragrant |
| 5 | Toss berries with flour | 3 min | Berries lightly dusted, no clumps |
| 6 | Fold berries into batter | 2 min | Berries evenly distributed |
| 7 | Pour into pan & bake | 45-50 min | Deep golden top, center jiggly |
| 8 | Cool & chill | 4+ hrs | Filling is firm, sliceable |
Serving & Presentation
When I serve this citrus berry burnt cheesecake to friends in my Brooklyn apartment, I like to let it speak for itself — that bronzed top is a showstopper all on its own. I slice it with a long, thin knife dipped in hot water and wiped clean between cuts for the neatest edges. A few extra fresh berries scattered on top and a tiny pinch of flaky sea salt (trust me on this — it makes the caramelized notes sing) are all the garnish it needs. For an extra touch of elegance, I sometimes drizzle a quick lemon-verbena syrup or a dollop of lightly sweetened crème fraîche alongside each slice.
This burnt cheesecake recipe is incredibly versatile. I’ve served it as the grand finale to a Sunday dinner with roasted lamb and harissa carrots (a nod to my Moroccan roots), and I’ve also brought it to a casual July 4th barbecue where it disappeared in minutes. It pairs beautifully with a cup of strong black coffee or a crisp, off-dry Riesling. In the summer, I love serving it with a spoonful of macerated berries — just toss extra berries with a little sugar and lemon juice and let them sit for 20 minutes while the cheesecake comes to a slight chill.
My favorite way to enjoy it, though, is straight from the fridge on a hot afternoon, with a glass of iced mint tea — a combination that takes me straight back to my mother’s kitchen in Marrakech. The cool, creamy cheesecake against the bright, herbaceous tea is pure magic.
| Pairing Type | Suggestions | Why It Works |
|---|---|---|
| Side Dish | Fresh berry salad, citrus segments | Echoes the fruit flavors; adds freshness |
| Sauce / Dip | Lemon curd, berry coulis, crème fraîche | Adds tang or sweetness; complements richness |
| Beverage | Cold brew coffee, off-dry Riesling, mint tea | Coffee cuts sweetness; wine echoes fruit; tea refreshes |
| Garnish | Flaky sea salt, fresh mint, edible flowers | Salt enhances caramel; mint adds color; flowers impress |
Make-Ahead, Storage & Reheating
Between recipe development for exorecipes.com and juggling life in New York, I’m a huge fan of make-ahead desserts — and this citrus cheesecake is one of the best. It actually tastes better on day two or three, after the flavors have had time to meld in the fridge. I often bake it on a Thursday evening for a weekend dinner party, knowing it’ll be perfectly set and even more delicious by Saturday.
| Method | Container | Duration | Reheating Tip |
|---|---|---|---|
| Refrigerator | Airtight cake carrier or wrapped in plastic | Up to 5 days | Serve cold; no reheating needed |
| Freezer | Wrap whole cheesecake in plastic, then foil | Up to 3 months | Thaw overnight in fridge; do not microwave |
| Make-Ahead | Bake, cool, chill in pan | Up to 2 days in advance | Release from pan just before serving |
A few notes from my experience: if you’re freezing the cheesecake, freeze it whole on a baking sheet until firm, then wrap it tightly. Thaw it in the refrigerator overnight — never at room temperature, as condensation can make the top soggy. For a quick refresh, let slices sit at room temperature for about 15 minutes before serving; the texture softens just enough to taste incredibly creamy without losing its structure. I don’t recommend reheating this cheesecake — it’s meant to be enjoyed cold, like a classic Basque cheesecake.
Variations & Easy Swaps
| Variation | Key Change | Best For | Difficulty Impact |
|---|---|---|---|
| Tropical Citrus | Replace berries with mango & passion fruit | Summer parties, tropical themes | Same difficulty |
| Gluten-Free | Use gluten-free graham crackers; omit flour | Gluten-sensitive guests | Same difficulty |
| Chocolate-Citrus Swirl | Fold in 1/4 cup melted dark chocolate | Chocolate lovers, special occasions | Slightly more advanced (swirl technique) |
Tropical Citrus Variation
In the heat of a New York summer, I sometimes swap the berries for diced mango and passion fruit pulp. The tropical sweetness pairs beautifully with the lemon and orange, and the passion fruit seeds add a delightful pop of tartness. I toss the mango in flour just like the berries, but I fold the passion fruit in at the very end without flour — it’s juicy enough to disperse on its own. This version reminds me of the fruit markets in Marrakech, where the air smells of overripe mangoes and citrus blossoms.
Gluten-Free Version
Making this citrus berry burnt cheesecake gluten-free is surprisingly simple. Use gluten-free graham crackers for the crust — most brands work well, though I recommend one that’s made with a blend of rice and tapioca flour for the best texture. Omit the 2 tablespoons of flour used for tossing the berries; instead, toss them with 1 tablespoon of cornstarch, which absorbs moisture just as effectively. The filling itself contains no gluten, so the cheesecake remains every bit as creamy and luscious. I’ve tested this version with my gluten-sensitive friends and they couldn’t tell the difference.
Chocolate-Citrus Swirl
For a truly decadent twist, melt 1/4 cup of high-quality dark chocolate (70% cacao) and let it cool slightly. After folding the berries into the batter, pour the melted chocolate over the top and use a knife to swirl it into the filling in a figure-eight pattern. The chocolate adds a deep, roasted note that plays beautifully with the burnt top and the bright citrus. This variation takes me back to a pastry workshop in Lyon where we swirled chocolate into everything — the technique is simple but the result looks incredibly sophisticated. Be careful not to over-swirl or you’ll lose the distinct chocolate ribbons.
What is the best way to add citrus flavor to a burnt cheesecake without making it too runny?
The key is to use citrus zest and juice in the right balance. For this citrus berry burnt cheesecake, I use 1/4 cup of fresh lemon juice and 1 tablespoon of orange zest. The zest provides concentrated citrus oil without adding liquid, while the lemon juice is measured carefully to keep the batter thick. Avoid bottled juice, which is more watery and less flavorful. If you want even more citrus punch, add another teaspoon of zest — but don’t increase the juice, or the filling may become too loose to set properly. I also recommend letting the cream cheese and eggs come to room temperature so the batter emulsifies smoothly, which helps it hold its structure.
Can I use frozen berries instead of fresh for the citrus berry burnt cheesecake?
Yes, you can use frozen berries, but there’s a catch: frozen berries release more moisture during baking, which can make the cheesecake batter watery and cause the berries to bleed grayish streaks into the filling. To avoid this, do not thaw the berries first — add them directly from the freezer — and toss them with an extra tablespoon of flour (3 tablespoons total instead of 2) to help absorb the excess liquid. Expect a slightly softer texture and less vibrant color compared to fresh berries, but the flavor will still be delicious. For the best results, I always recommend fresh berries when they’re in season.
How do I know when a burnt cheesecake is perfectly done in the center?
The hallmark of a perfectly baked burnt cheesecake is a deeply caramelized top and a center that jiggles like firm Jell-O when you gently shake the pan. At 400°F, this takes about 45-50 minutes. Look for these cues: the top should be dark amber to deep bronze with some darker spots, the edges will be puffed and slightly cracked, and the center should wobble but not ripple like liquid. If you insert a toothpick near the edge, it should come out clean; the center will still look wet — that’s perfect. Don’t wait for the center to look set, because it will continue cooking from residual heat as it cools. Overbaking leads to a dry, crumbly texture instead of that luscious, creamy custard.
Should I serve citrus berry burnt cheesecake chilled or at room temperature?
This cheesecake is best served chilled, straight from the refrigerator, after at least 4 hours of setting time. The cold temperature firms up the filling so you can slice it cleanly, and the flavors are more focused and bright. That said, letting slices sit at room temperature for about 10-15 minutes before serving softens the texture slightly, making it even creamier — a nice compromise if you prefer a less firm bite. I personally love it straight from the fridge with a cup of hot coffee, but for a more indulgent dessert experience, a brief rest at room temperature is lovely. Never serve it warm, as it won’t have set properly.
Why did my burnt cheesecake crack too much on top?
Cracking is completely normal and even desirable for a burnt Basque cheesecake — the cracked, caramelized top is the signature look! However, if you feel the cracks are too deep or the cheesecake splits open too dramatically, it’s usually due to overmixing the batter (which incorporates too much air) or overbaking. To minimize excessive cracking, mix the eggs in on low speed and only until just combined. Also, make sure your oven temperature is accurate — an oven that runs hot can cause the top to set too quickly while the inside still expands, leading to large fissures. A little cracking is beautiful and rustic; if you want it more controlled, try reducing the oven temperature to 390°F and baking for 5 extra minutes.
Can I make this burnt cheesecake without a crust?
Yes, you can absolutely make this citrus berry burnt cheesecake without the graham cracker crust for a true Basque-style cheesecake. The traditional burnt Basque cheesecake is crustless — it’s baked in a parchment-lined pan with no bottom crust, and the edges caramelize directly against the paper. To make it crustless, simply skip the crust ingredients and steps. Line the springform pan with parchment that comes up the sides, pour the batter directly in, and bake as directed. The result will be even more rustic, with a caramelized exterior all around. Just note that the berries will settle slightly more toward the bottom without a crust to support them.
How do I get clean slices of burnt cheesecake without it sticking to the knife?
Getting clean, photogenic slices from a burnt cheesecake is all about the knife technique. Use a long, thin-bladed knife and dip it in hot water, then wipe it completely dry with a clean kitchen towel before each cut. The heat helps the blade glide through the cold cheesecake without dragging. Make each cut in one smooth, steady motion — don’t saw back and forth. Clean the knife between slices by wiping it with a damp cloth. For the very first slice, I like to cut a small wedge out first to create a clean edge, then slice the rest of the cheesecake from that starting point. Chilling the cheesecake for at least 4 hours (preferably overnight) is essential for clean slicing.
Can I use lime instead of lemon in this citrus berry burnt cheesecake?
Absolutely! Lime is a wonderful substitute for lemon in this recipe. Use the same amount — 1/4 cup of fresh lime juice — and swap the orange zest for lime zest if you want a more single-note citrus flavor, or keep the orange zest for a more complex citrus blend. Lime will give the cheesecake a slightly more floral, tart edge that pairs beautifully with berries, especially raspberries and blueberries. I’ve made a lime-berry version for summer cookouts and it was a huge hit. Just like with lemon, make sure to use fresh-squeezed lime juice — the bottled stuff has a bitter, artificial taste that will ruin the delicate balance of this burnt cheesecake recipe.
What’s the difference between burnt cheesecake and regular cheesecake?
Burnt cheesecake, also known as Basque cheesecake, originated in the Basque region of Spain and is fundamentally different from a classic New York-style cheesecake in several ways. First, it’s baked at a much higher temperature — around 400°F versus 325°F — which creates a deeply caramelized, almost burnt top that’s slightly bitter and intensely flavorful. Second, the filling is lighter and creamier because it uses less flour and no water bath, resulting in a custard-like texture with a jiggly center. Third, it’s meant to be served at room temperature or chilled, with a rustic, cracked appearance that’s celebrated rather than hidden. The crust is optional and often omitted, while the edges are browned from direct contact with the parchment. It’s a completely different eating experience — less dense, more eggy, and with that signature caramelized top that’s the star of the show.
How can I make this burnt cheesecake dairy-free?
Making a dairy-free version of this citrus berry burnt cheesecake is definitely possible with a few key substitutions. Use block-style vegan cream cheese (I recommend Miyoko’s or Violife for the best texture and tang) in place of regular cream cheese. Swap the sour cream with a full-fat coconut cream-based plain yogurt or a dairy-free sour cream alternative. Substitute the butter in the crust with melted coconut oil or a plant-based butter stick. The eggs remain the same, so the cheesecake will still set properly. Be aware that the texture will be slightly less rich and the flavor a bit different — coconut notes may come through — but it’s still delicious. Bake at the same temperature and look for the same visual cues: a deeply golden top and a jiggly center. Chill thoroughly before serving.
Share Your Version!
I truly believe that cooking is meant to be shared — and I’d love to see how your citrus berry burnt cheesecake turns out! Did you try a fun variation, like the chocolate-citrus swirl or the tropical version? Did your family go back for seconds before you could even snap a photo? Drop a comment below and let me know how it went — your questions and stories are what make this community so special. And if you found this burnt cheesecake recipe helpful, I’d be so grateful if you left a star rating. ⭐
Don’t forget to snap a photo of your masterpiece and tag me on Instagram or Pinterest @exorecipes — I truly love scrolling through your creations and sharing them with the exorecipes community. The best part about being a food blogger in New York is seeing how a recipe travels from my kitchen to yours, picking up little personal touches along the way. So tell me: what berry combination did you use, and did you add any extra citrus zest? I read every single comment and I can’t wait to hear from you.
From my NYC kitchen to yours — I hope this recipe brings as much warmth to your table as it does to mine. — mia 🧡
Love This Recipe? Save It to Pinterest!
If you enjoyed this Citrus Berry Burnt Cheesecake recipe, don’t let it get lost in your browser tabs! 😄 Pin it now so you can find it again anytime — and explore hundreds more tried-and-tested recipes waiting for you on my Pinterest boards.
👉 Follow mia on Pinterest @exorecipe
📌 Pin this recipe · 🔁 Re-pin your favorites · 💬 Tag me when you make it — I love seeing your creations!
💬 I’d love to hear from you!
Which berry combination are you most excited to try in this citrus berry burnt cheesecake? Drop a comment below or tag me @exorecipes — your photos and stories make my day! 🧡
⭐ If you loved this recipe, please leave a 5-star rating — it helps other home cooks find it too!
“`
Print
Citrus Berry Burnt Cheesecake: A Luscious Twist on a Classic Favorite
- Prep Time: 20 minutes
- Cook Time: 55 minutes
- Total Time: 5 hours 15 minutes (includes cooling and chilling)
- Yield: 12 1x
- Method: Dessert
- Cuisine: American
Description
A luscious twist on the classic burnt cheesecake, featuring vibrant citrus and berry flavors with a perfectly caramelized top.
Ingredients
- For the crust:
- 1 1/2 cups graham cracker crumbs
- 1/4 cup granulated sugar
- 1/2 cup unsalted butter, melted
- For the filling:
- 24 oz (680 g) cream cheese, softened
- 1 cup granulated sugar
- 3 large eggs
- 1/2 cup sour cream
- 1/4 cup fresh lemon juice
- 1 tablespoon orange zest
- 1 teaspoon vanilla extract
- 1 cup mixed fresh berries (blueberries, raspberries, sliced strawberries)
- 2 tablespoons all-purpose flour
Instructions
- Preheat oven to 400°F (200°C). Line a 9-inch springform pan with parchment paper.
- In a medium bowl, combine graham cracker crumbs and sugar. Pour in melted butter and mix until well combined.
- Press the crumb mixture firmly into the bottom of the prepared pan. Bake for 8-10 minutes until lightly golden. Let cool.
- In a large bowl, beat cream cheese and sugar until smooth and creamy.
- Add eggs one at a time, beating well after each addition.
- Mix in sour cream, lemon juice, orange zest, and vanilla until just combined.
- In a small bowl, toss berries with flour until coated. Gently fold berries into the cheesecake batter.
- Pour batter over the cooled crust and spread evenly.
- Bake for 45-50 minutes, until the top is deeply golden and the center is just slightly jiggly. The cheesecake will puff up and crack.
- Let cool completely at room temperature, then refrigerate for at least 4 hours or overnight before serving.
- Slice and serve chilled. Garnish with fresh berries if desired.
Notes
For best results, use full-fat cream cheese and let ingredients come to room temperature. The burnt top is intentional and adds a caramelized flavor. Store leftovers in the refrigerator for up to 5 days.
Nutrition
- Calories: 380 kcal
- Sugar: 24 g
- Fat: 26 g
- Carbohydrates: 34 g
- Protein: 7 g
k">
Tried This Recipe? Leave a Comment!
Did you make this recipe? I’d love to hear how it turned out! Please leave a comment and a rating below. Your feedback helps other home cooks and supports cheerychop.com!
For more delicious inspiration, follow me on Pinterest!
